

Although pint-sized, this kitchen features everything from a concealed dishwasher, pull-out corner cabinets, open shelving and deep storage. Let’s take a tour!
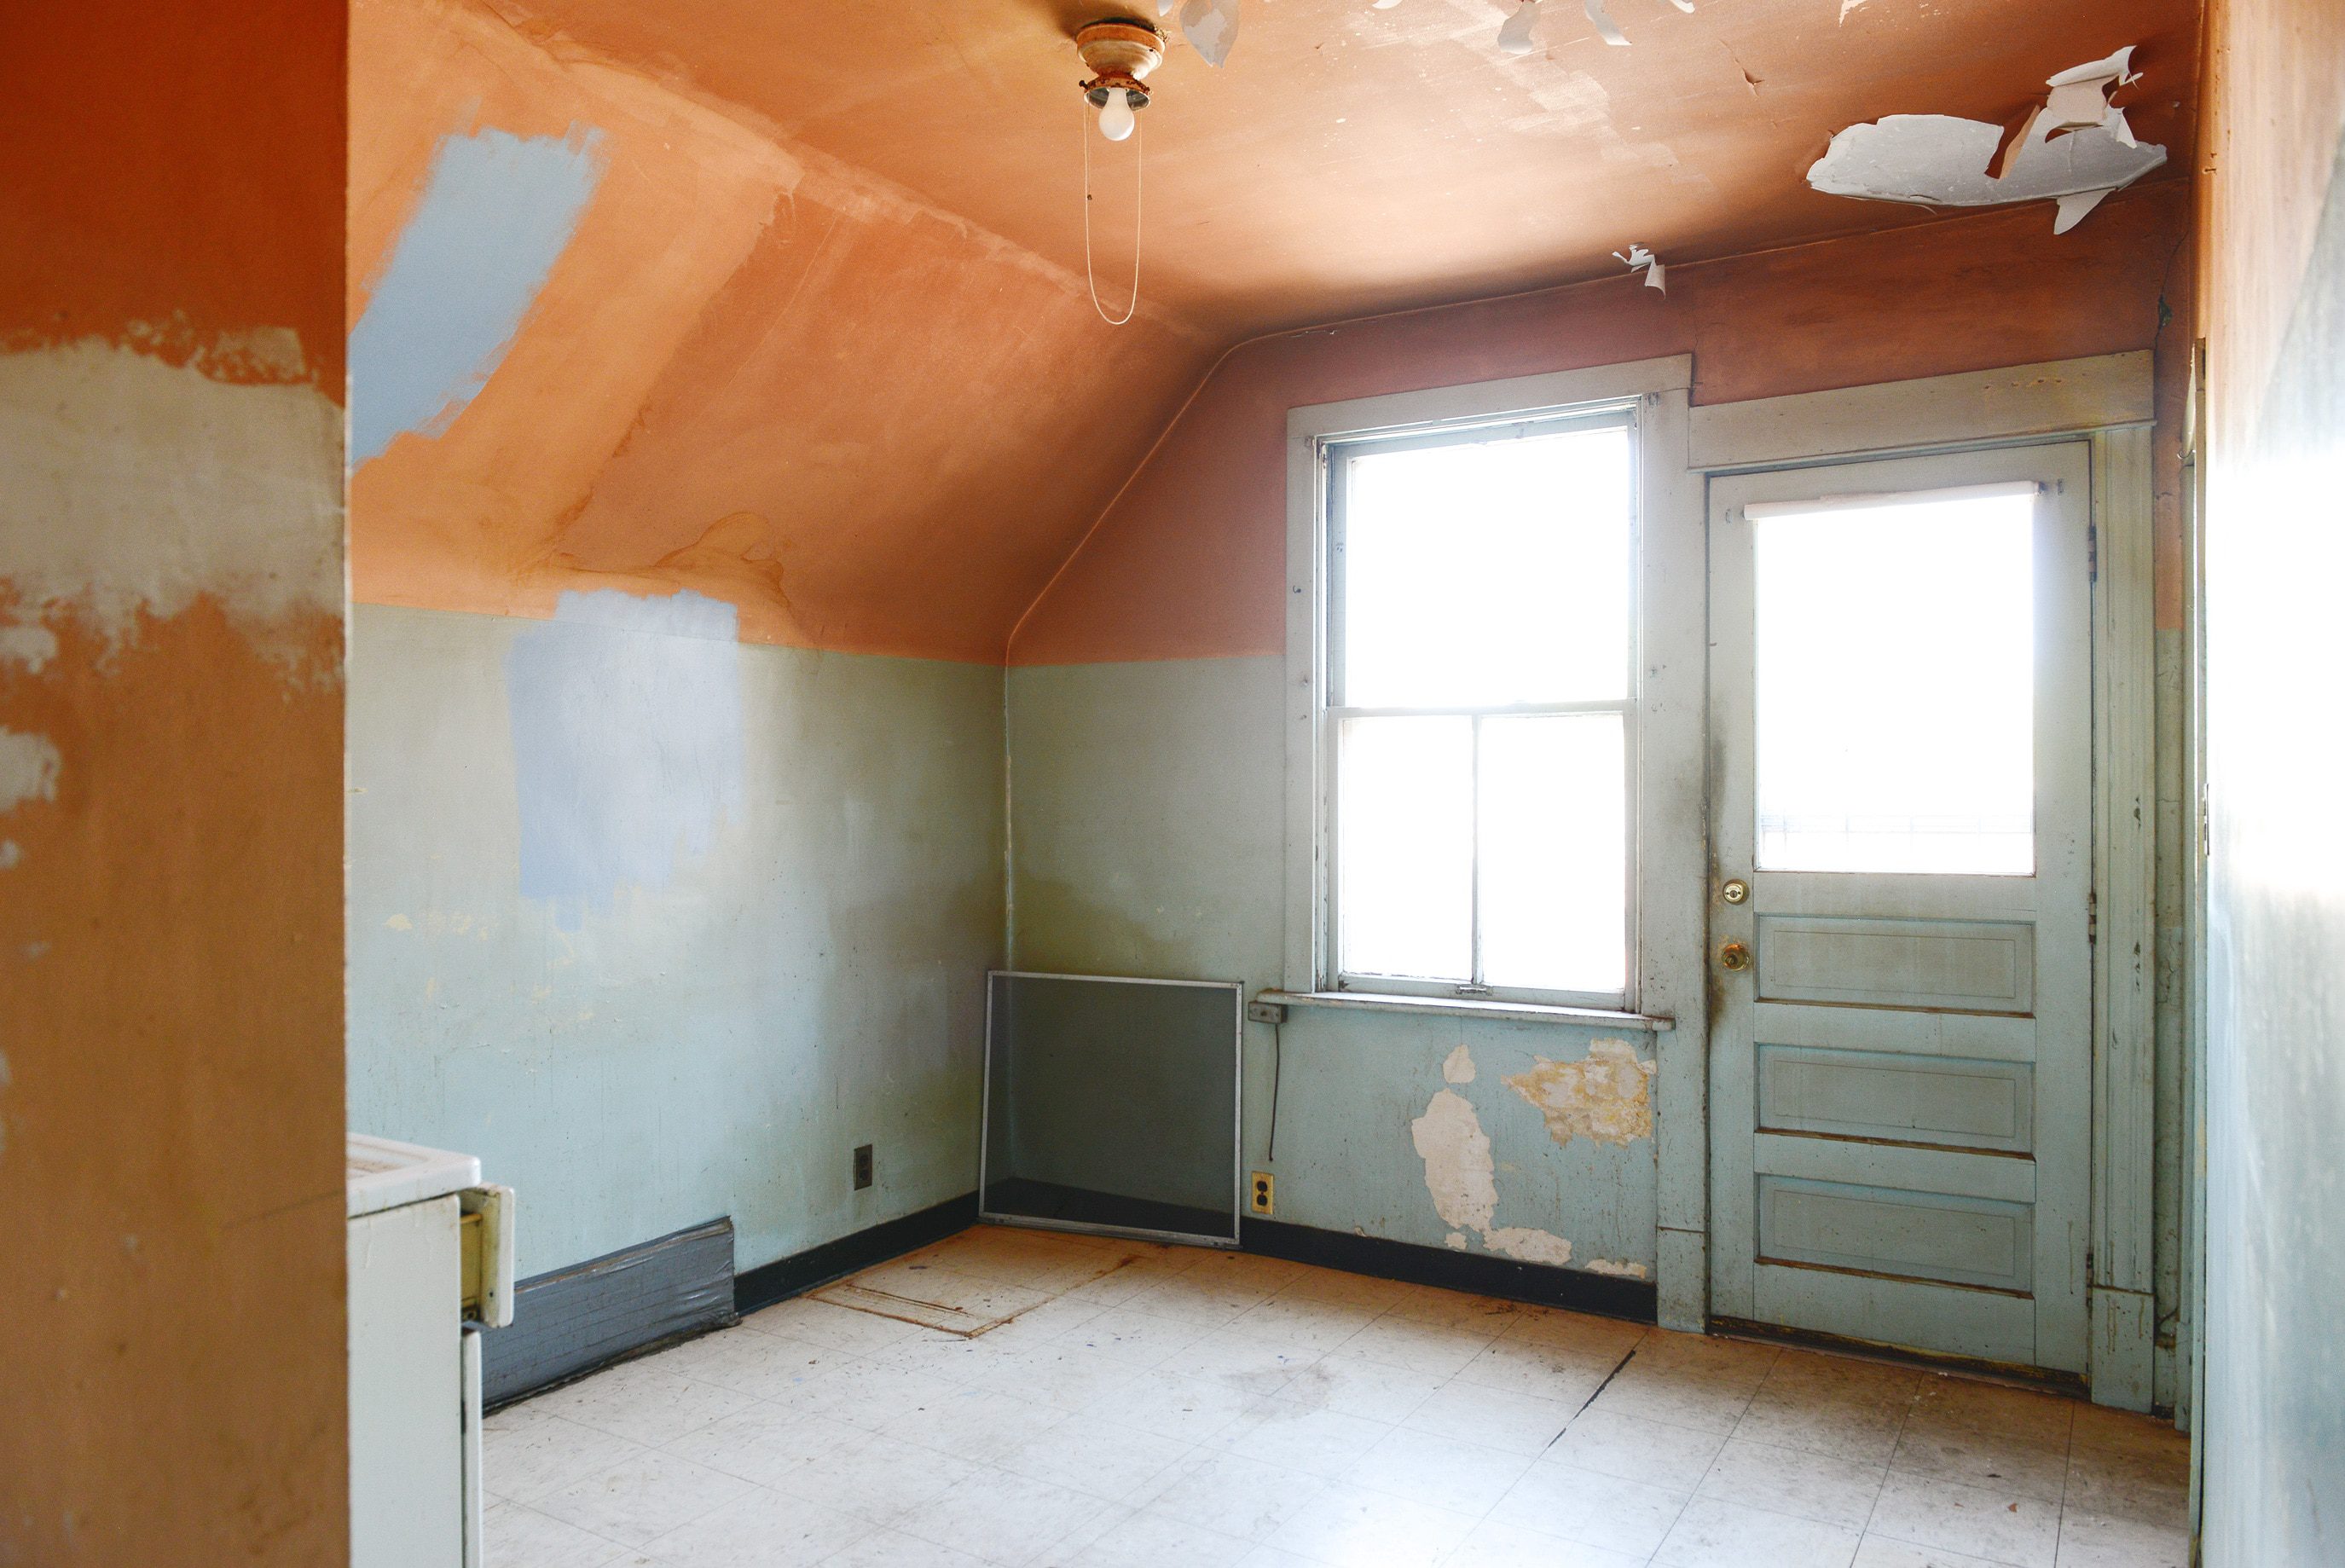
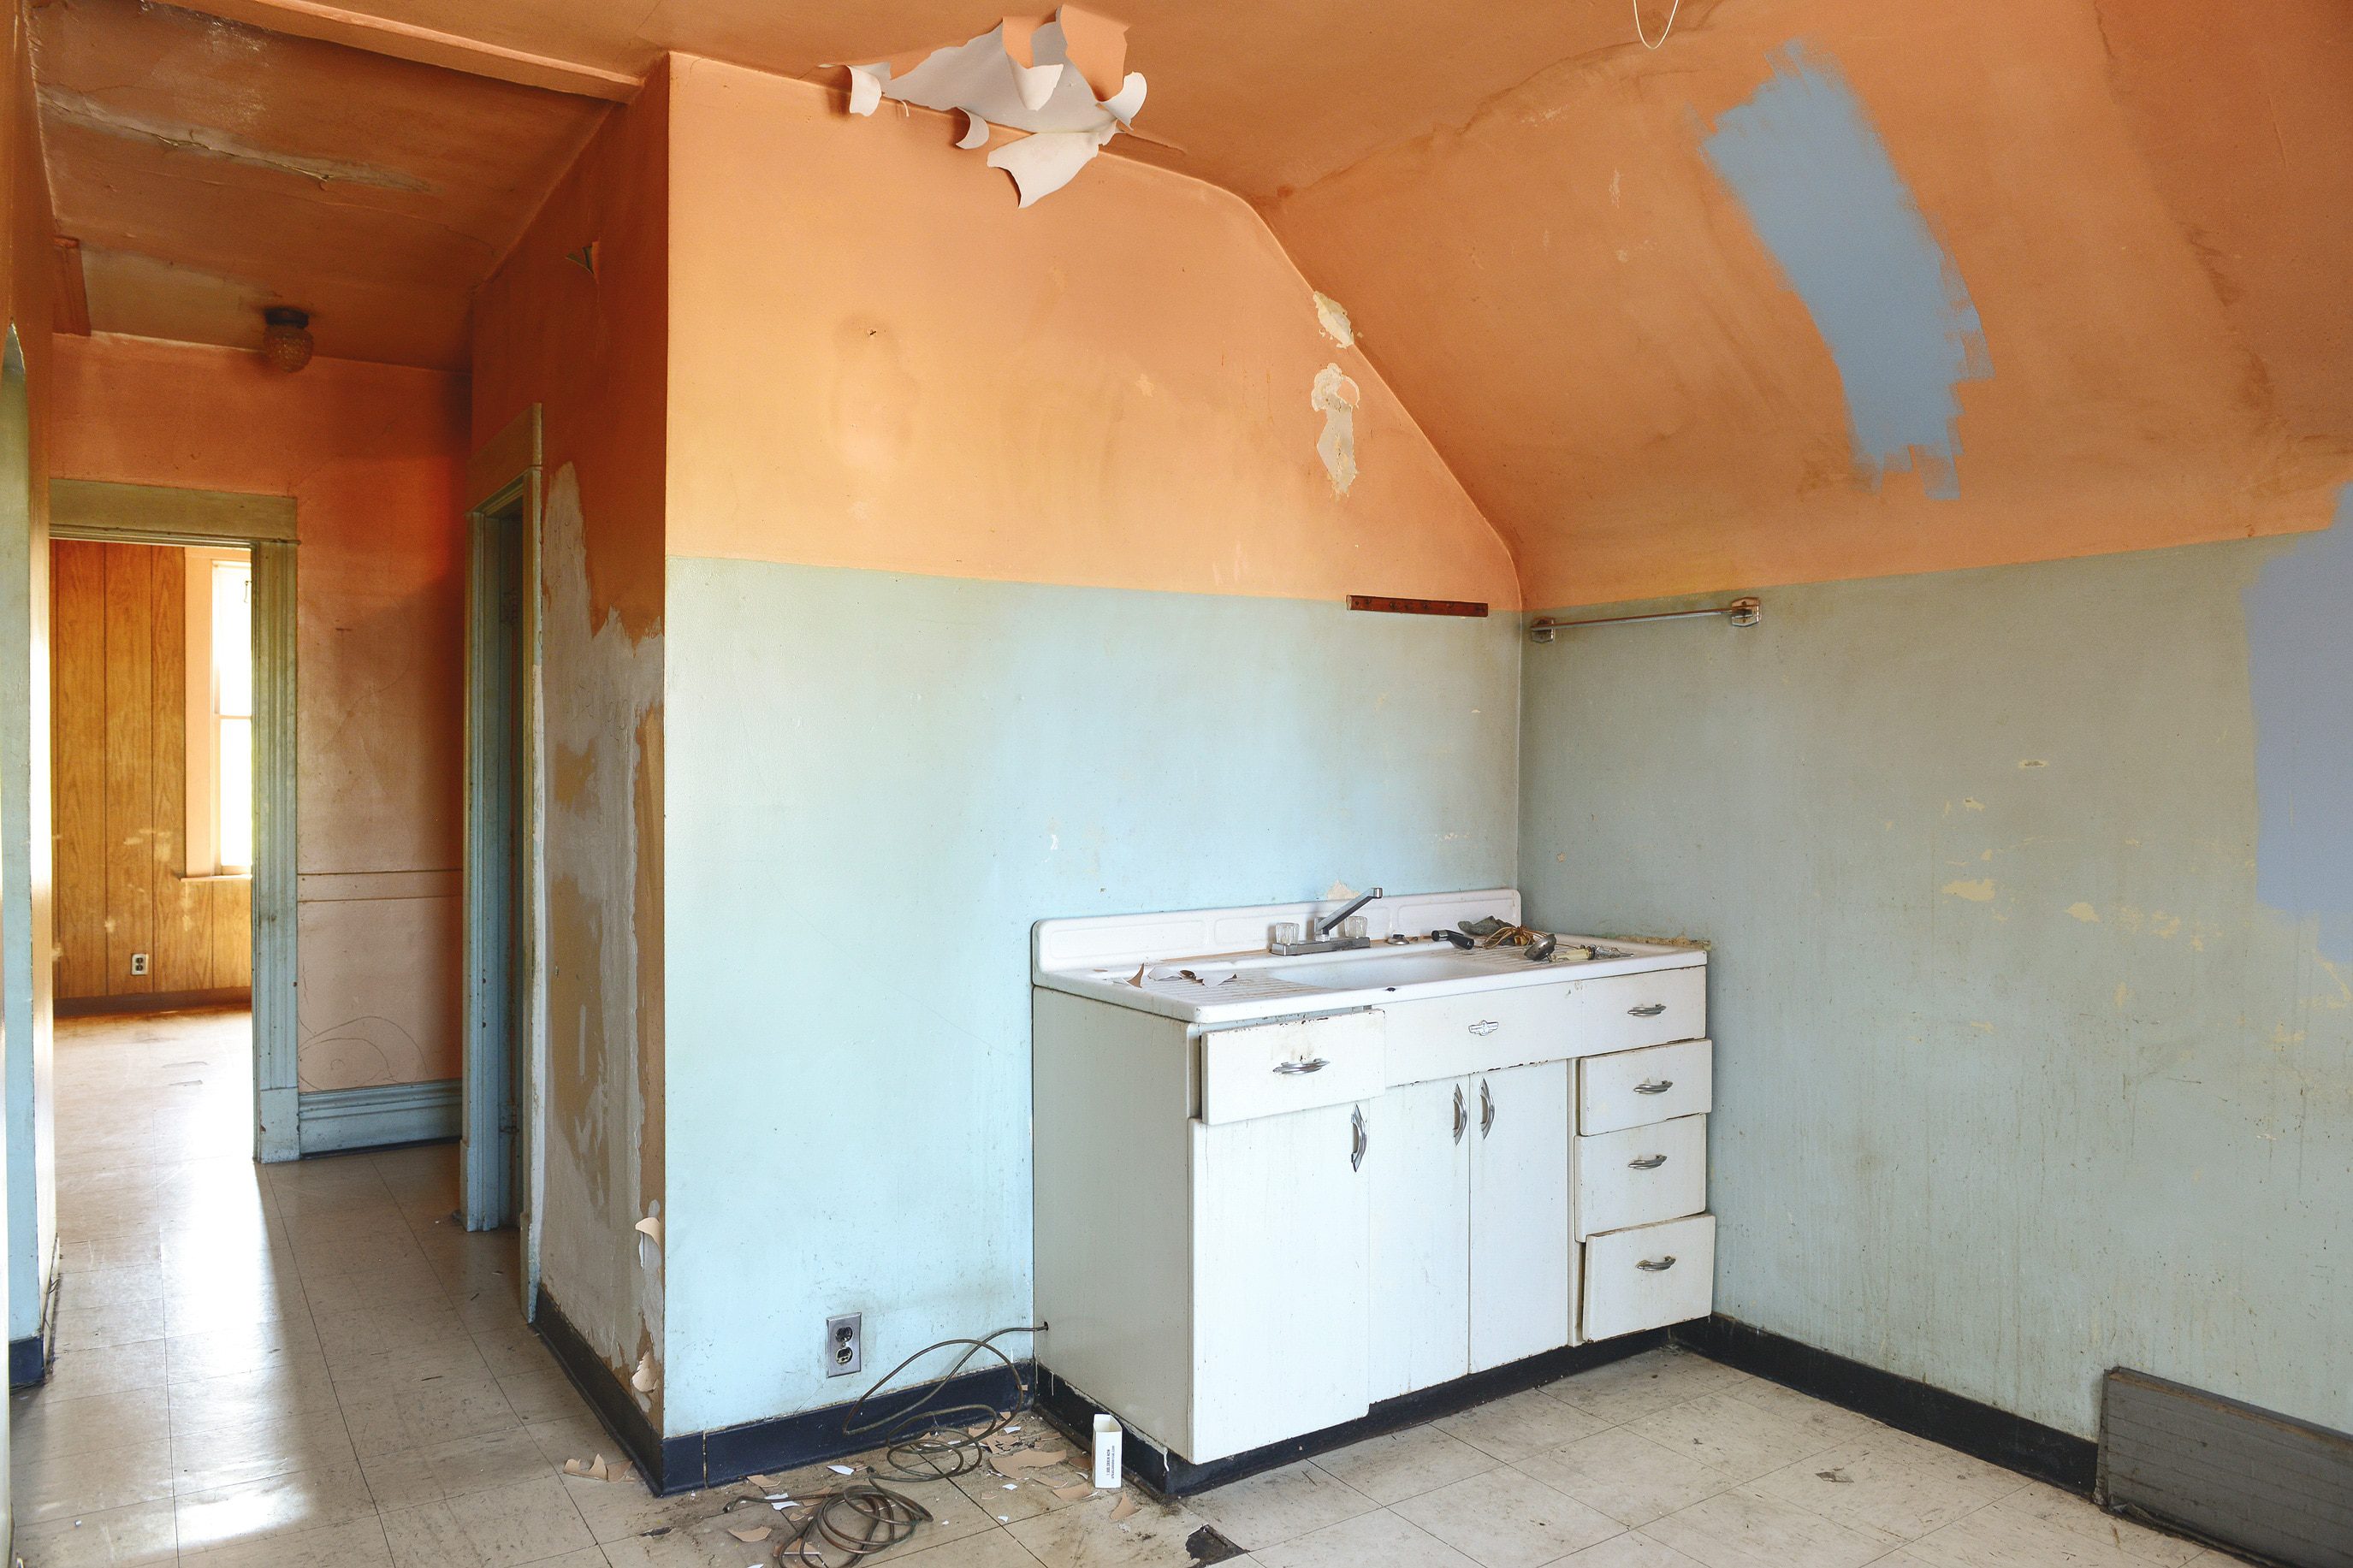
Who’s ready for the full reveal of the Two Flat’s Unit 2 kitchen? (Ooh, me!) The entirety of Unit 2 is nothing short of charming, with its sloped ceilings, pink + blue color scheme and sun-filled bedrooms. We knew that the kitchen would be a bit of a challenge because of those ceilings, but we thought of it as an opportunity to think outside the box. Plus, we love a good challenge. And the smaller the space, the better. Small spaces forever!
Note: A full source list can be found at the bottom of this post.
In This Post
Unit 2 Kitchen | Before
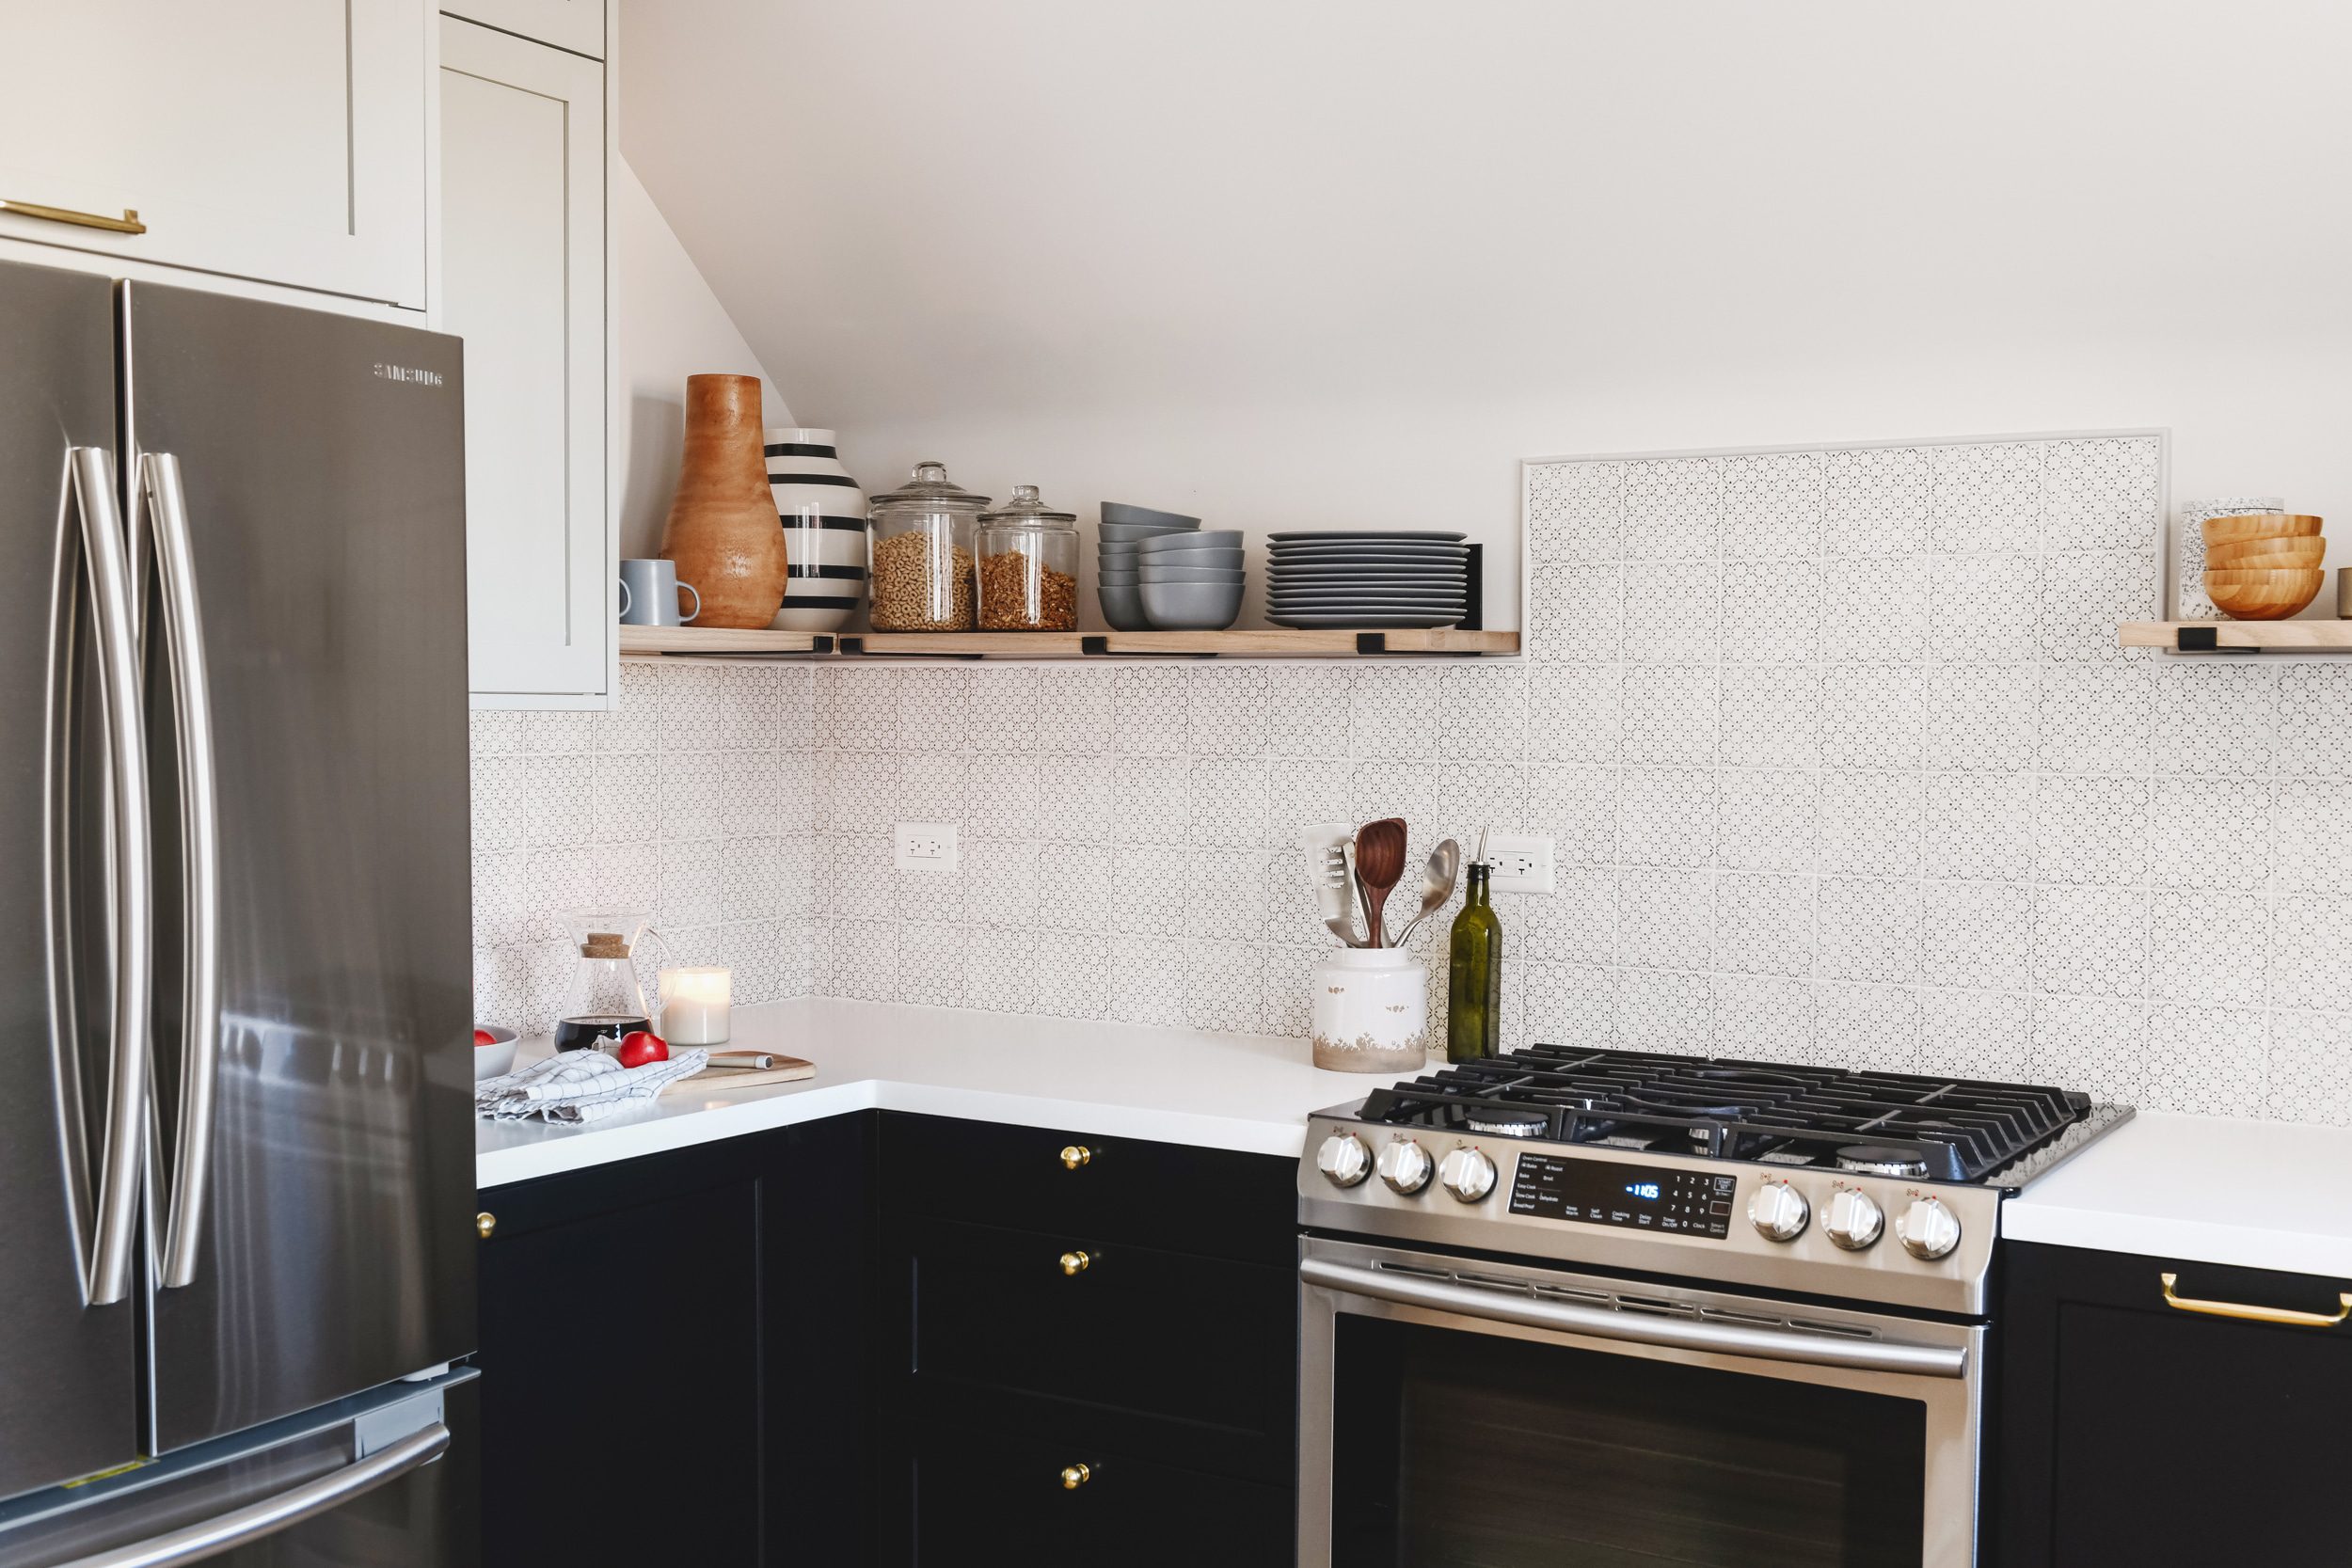
Unit 2 Kitchen | Today!
Remember This?
Here’s the Same View Today!
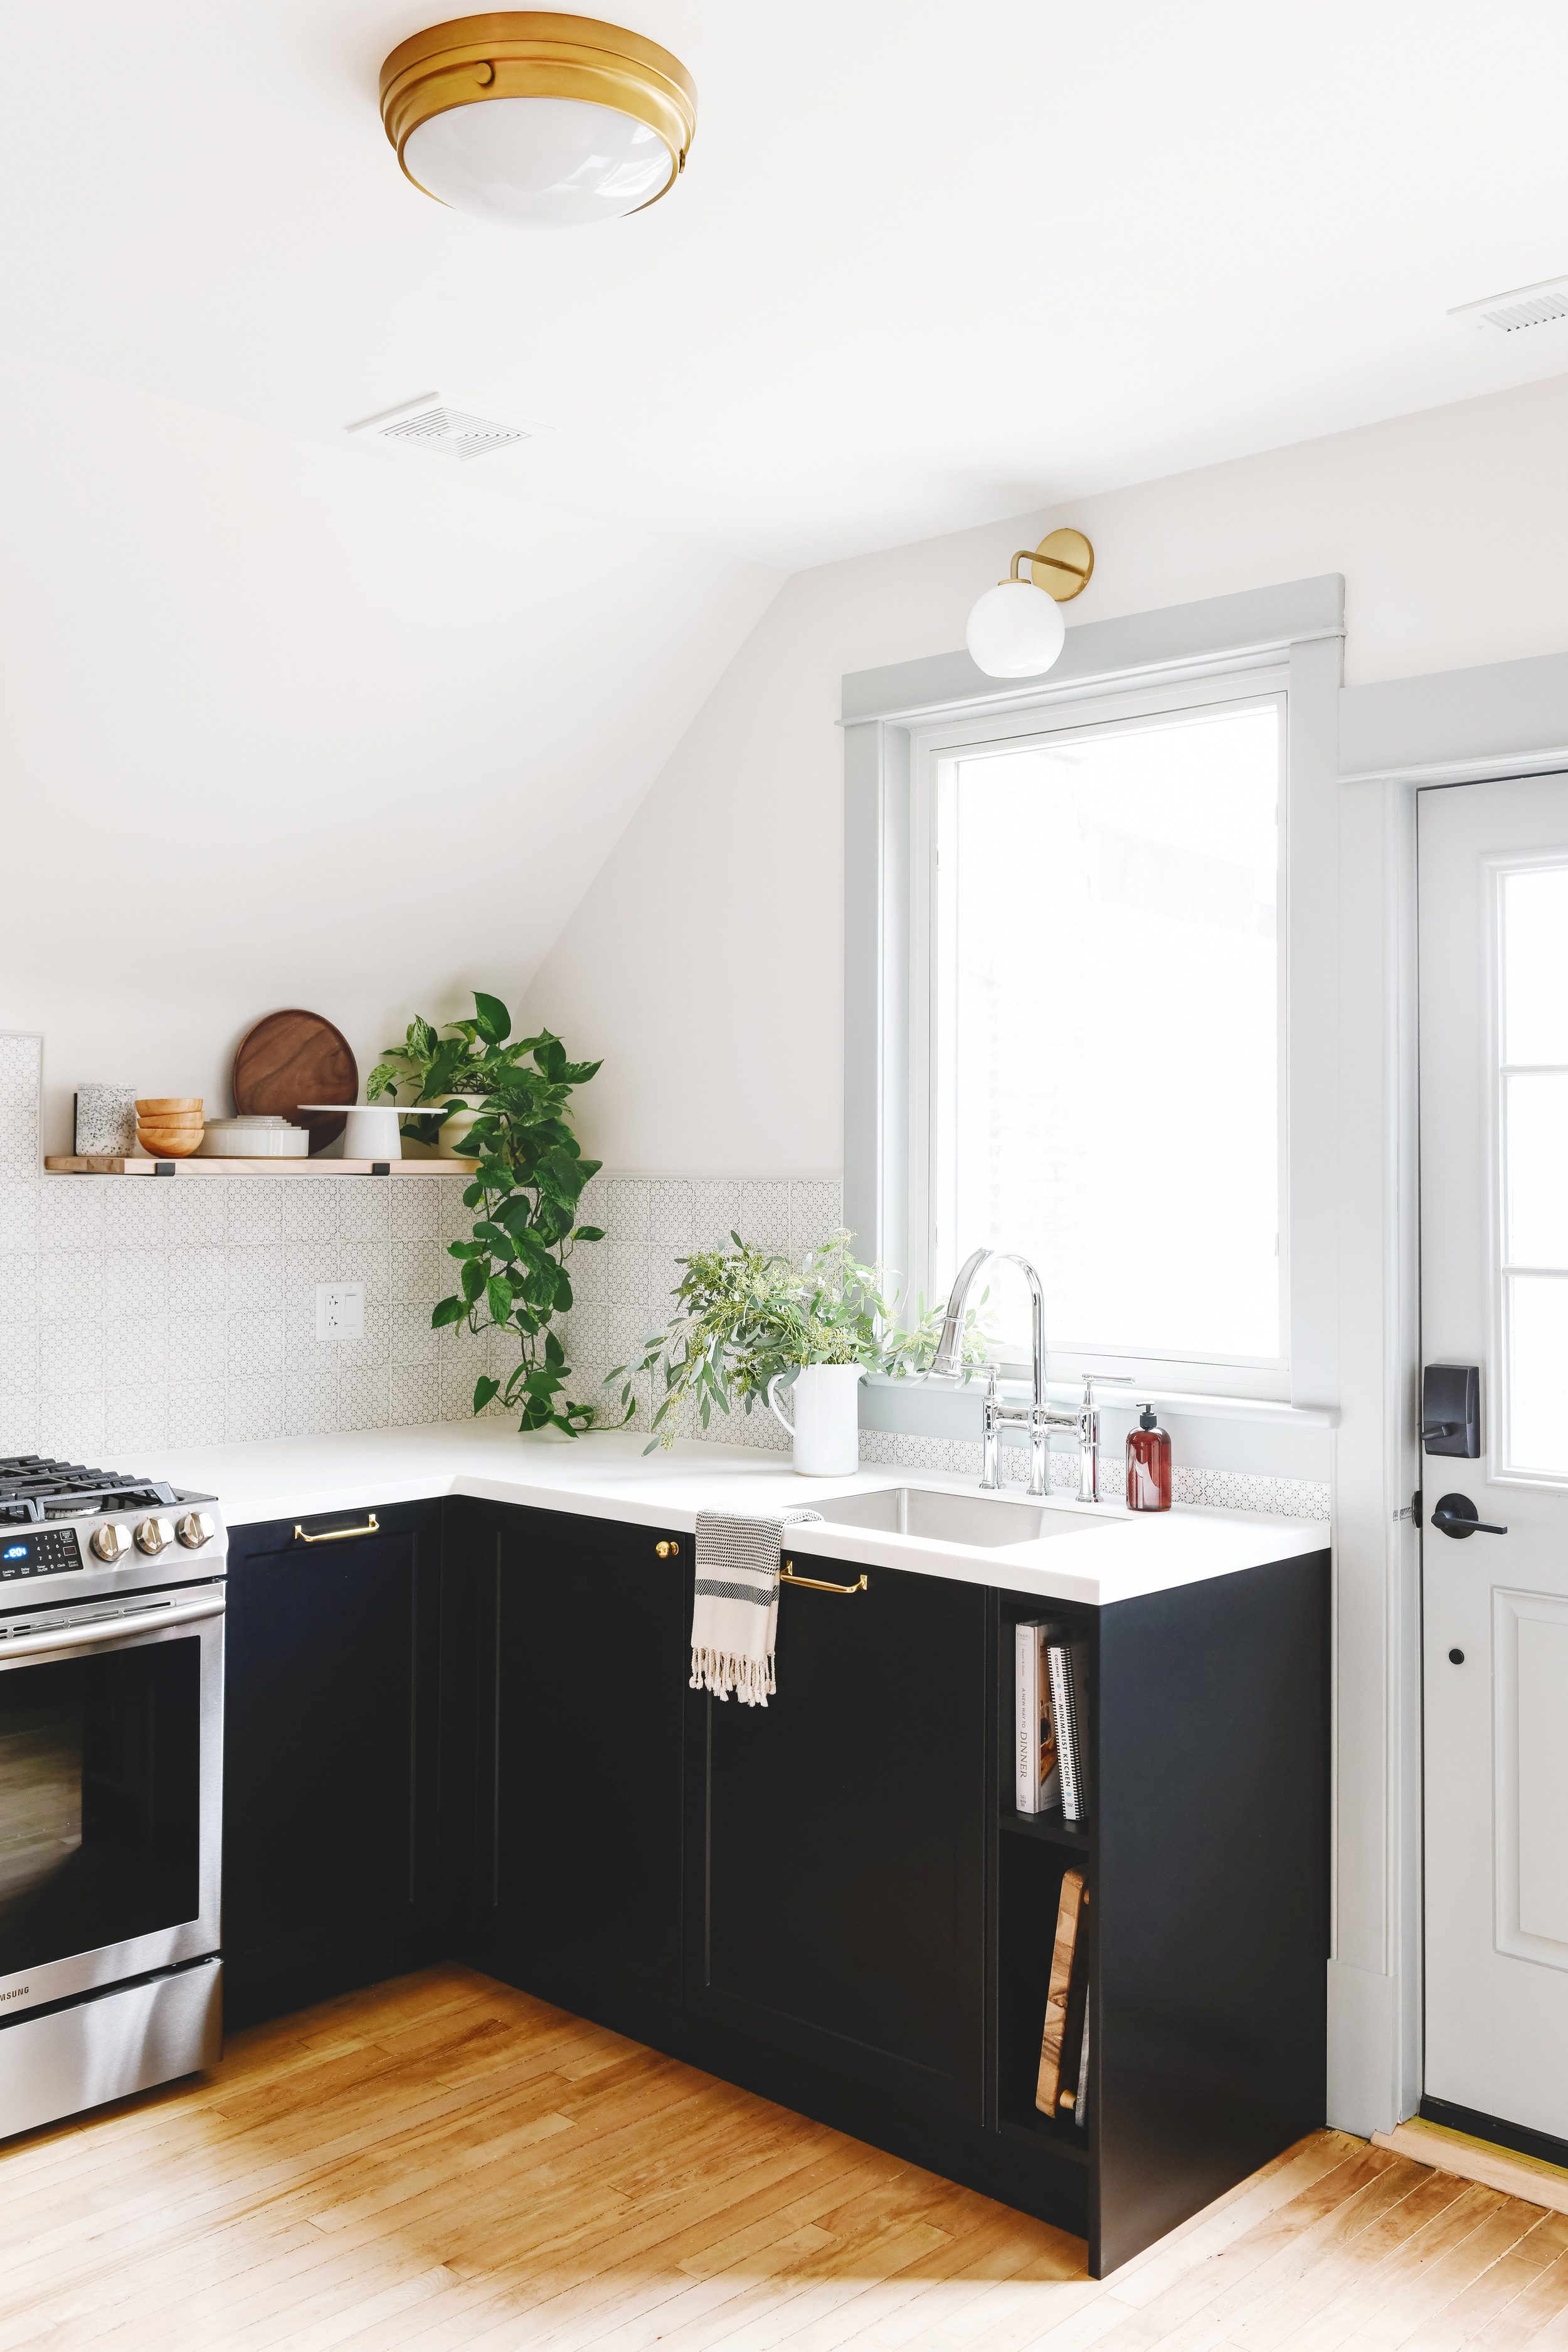
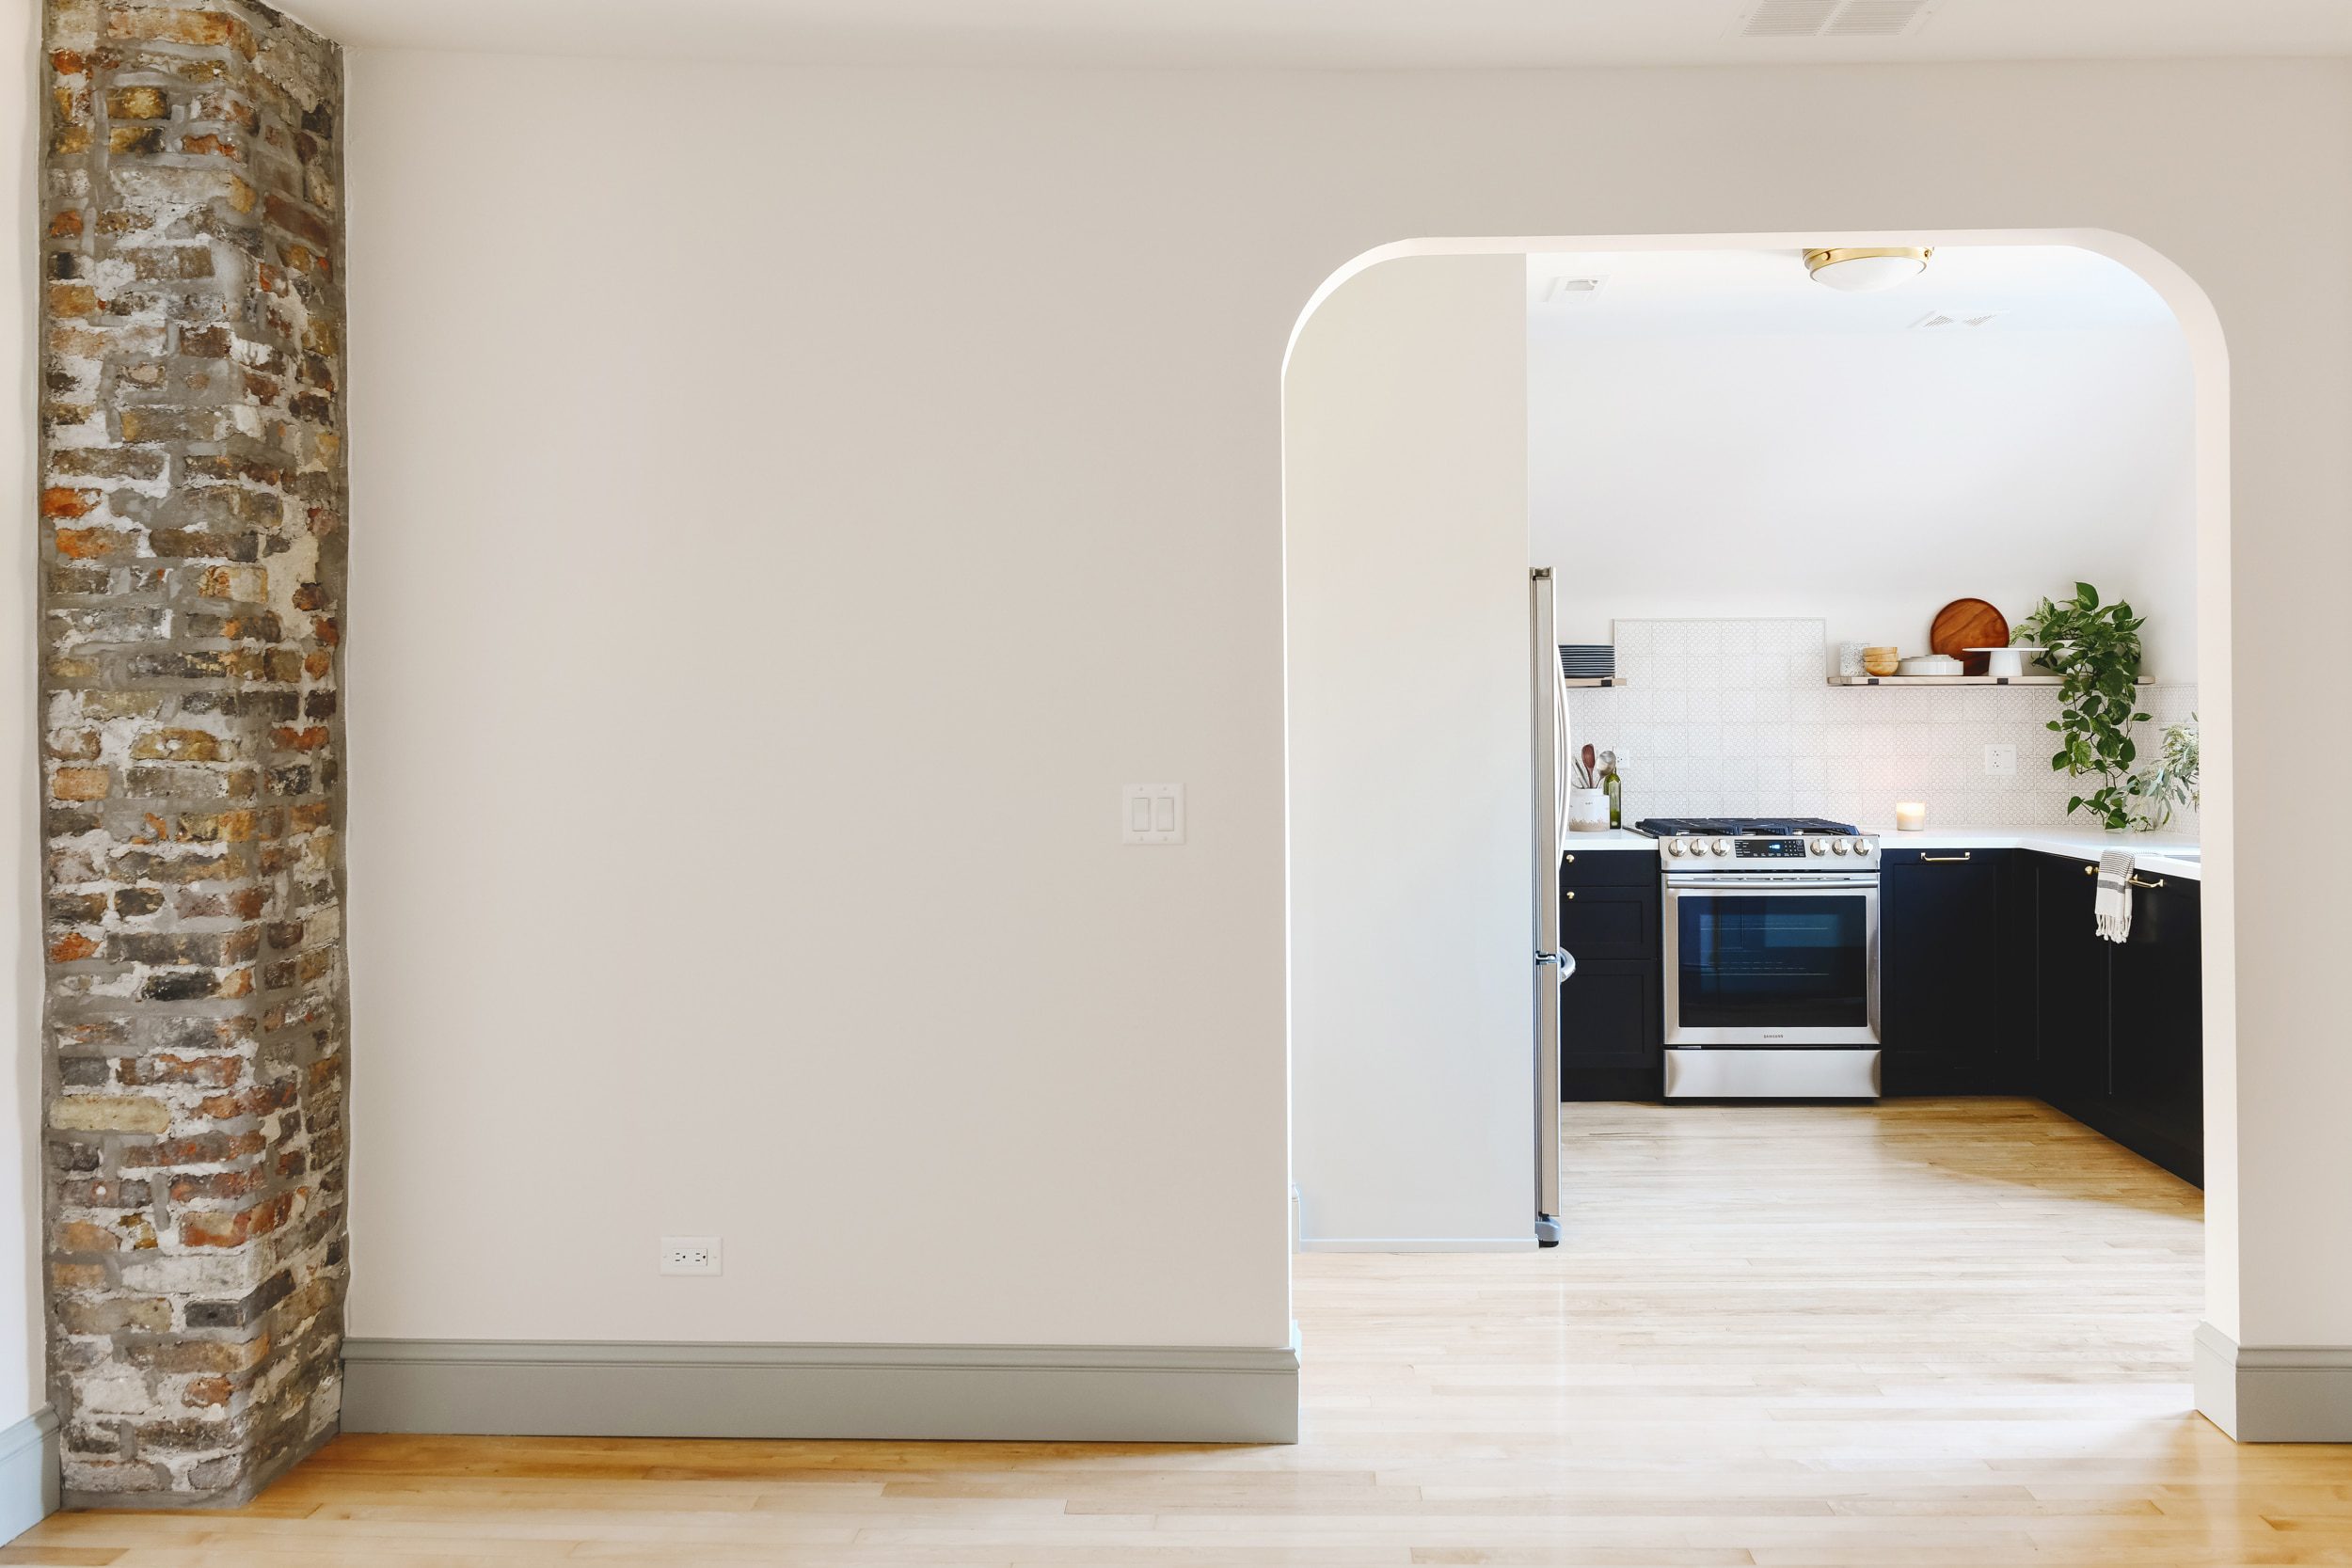
Below, I’m sharing a more unusual angle, taken from the adjacent living room. Before, the opening into the room was more narrow and faced the bathroom. When we opened the walls, we kept the chimney exposed and shifted the doorway all the way to the right, widening it to allow more light through. Now, the living room feels more connected to the kitchen without being ‘open-concept.’
Unit 2 Kitchen | Before
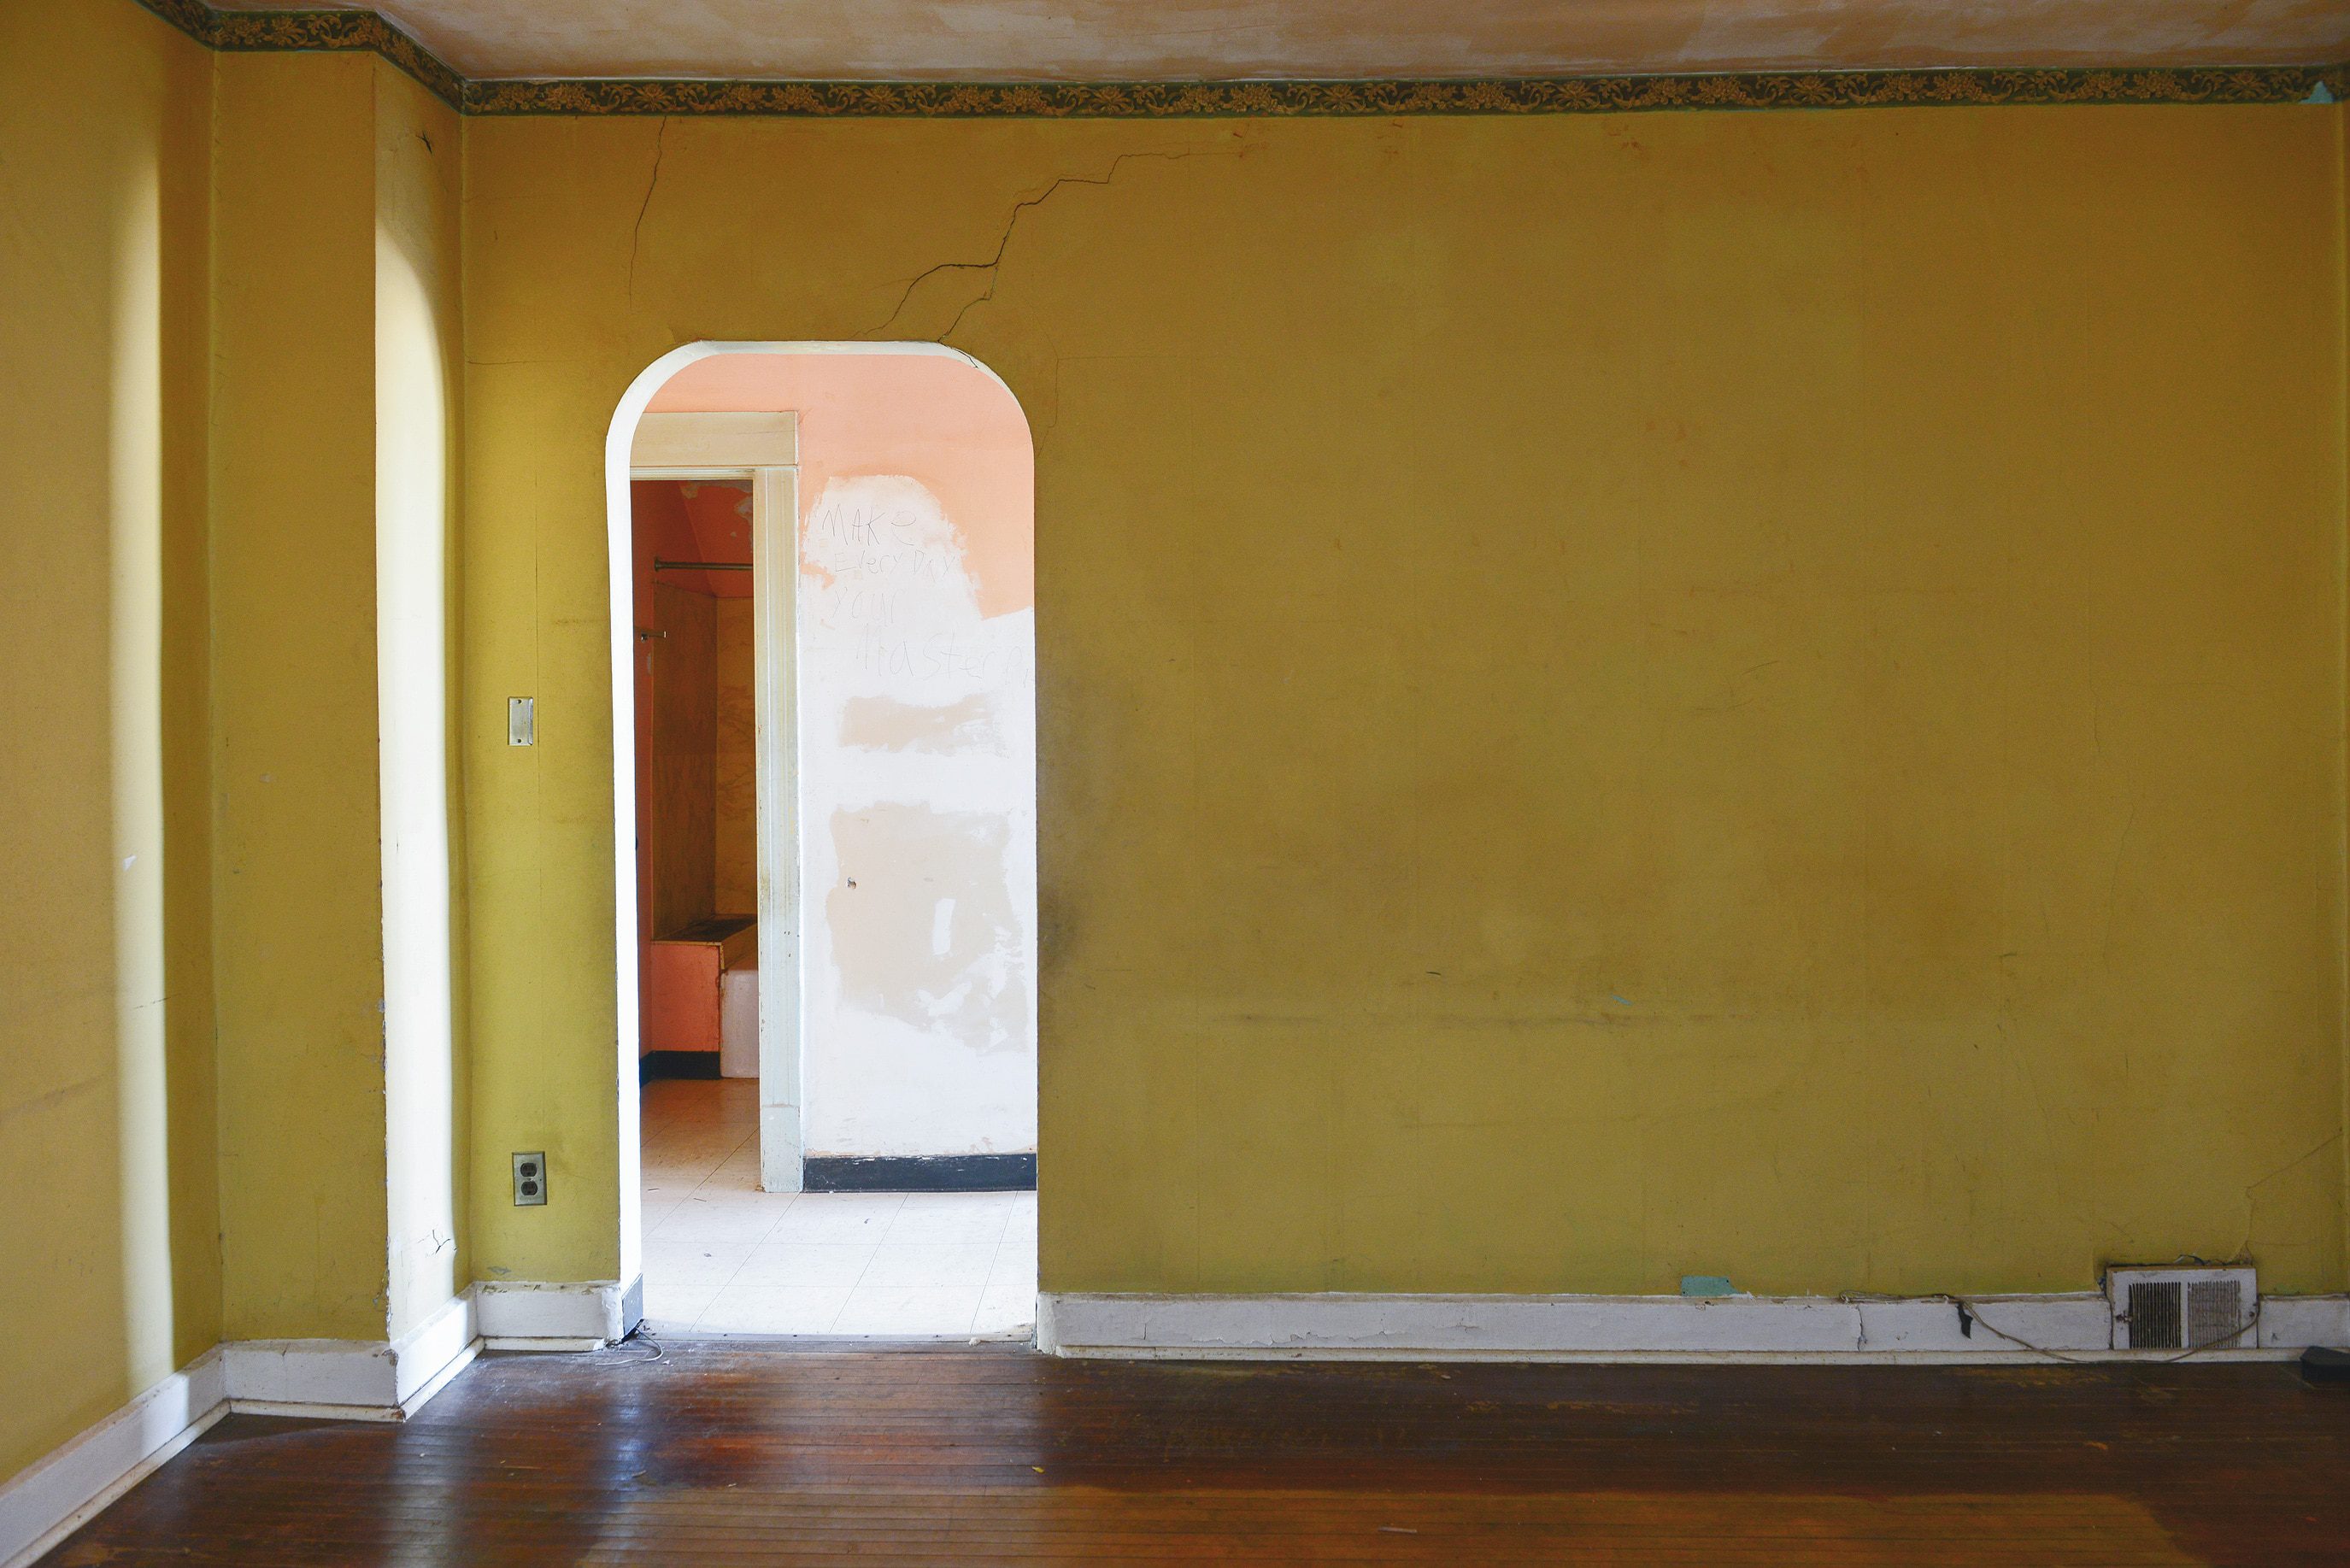
Unit 2 Kitchen | During

Unit 2 Kitchen | Today!
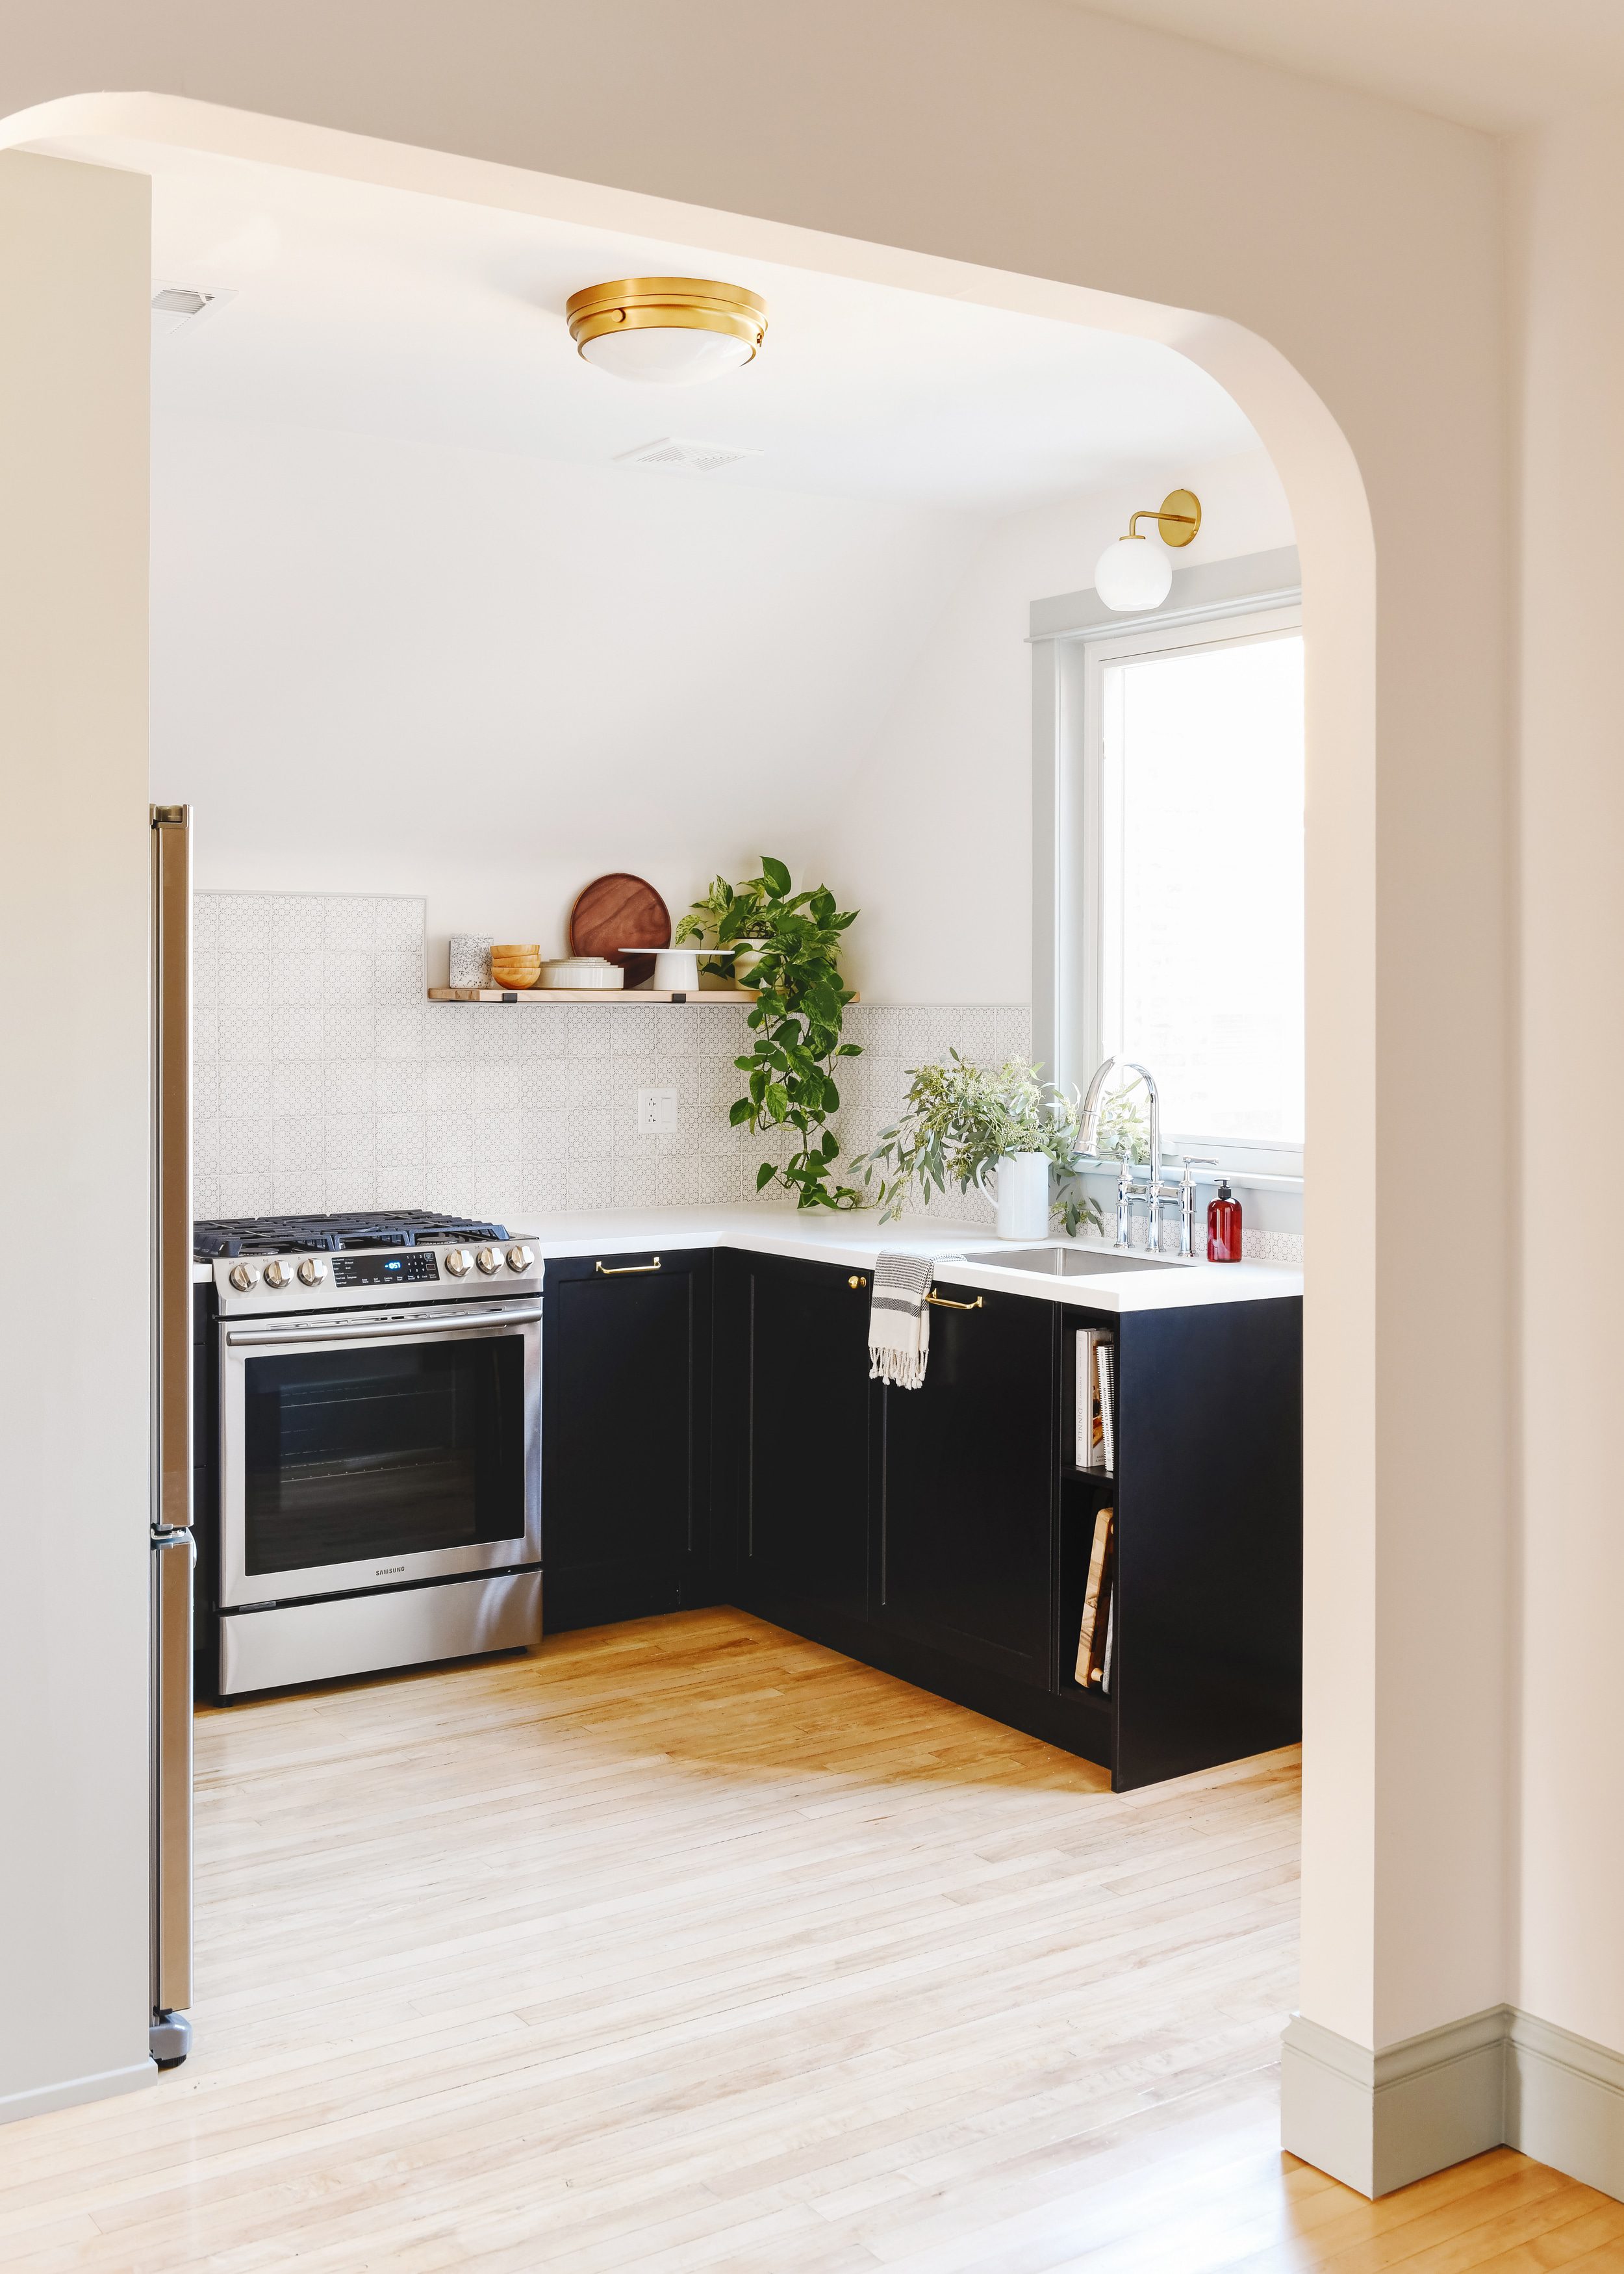
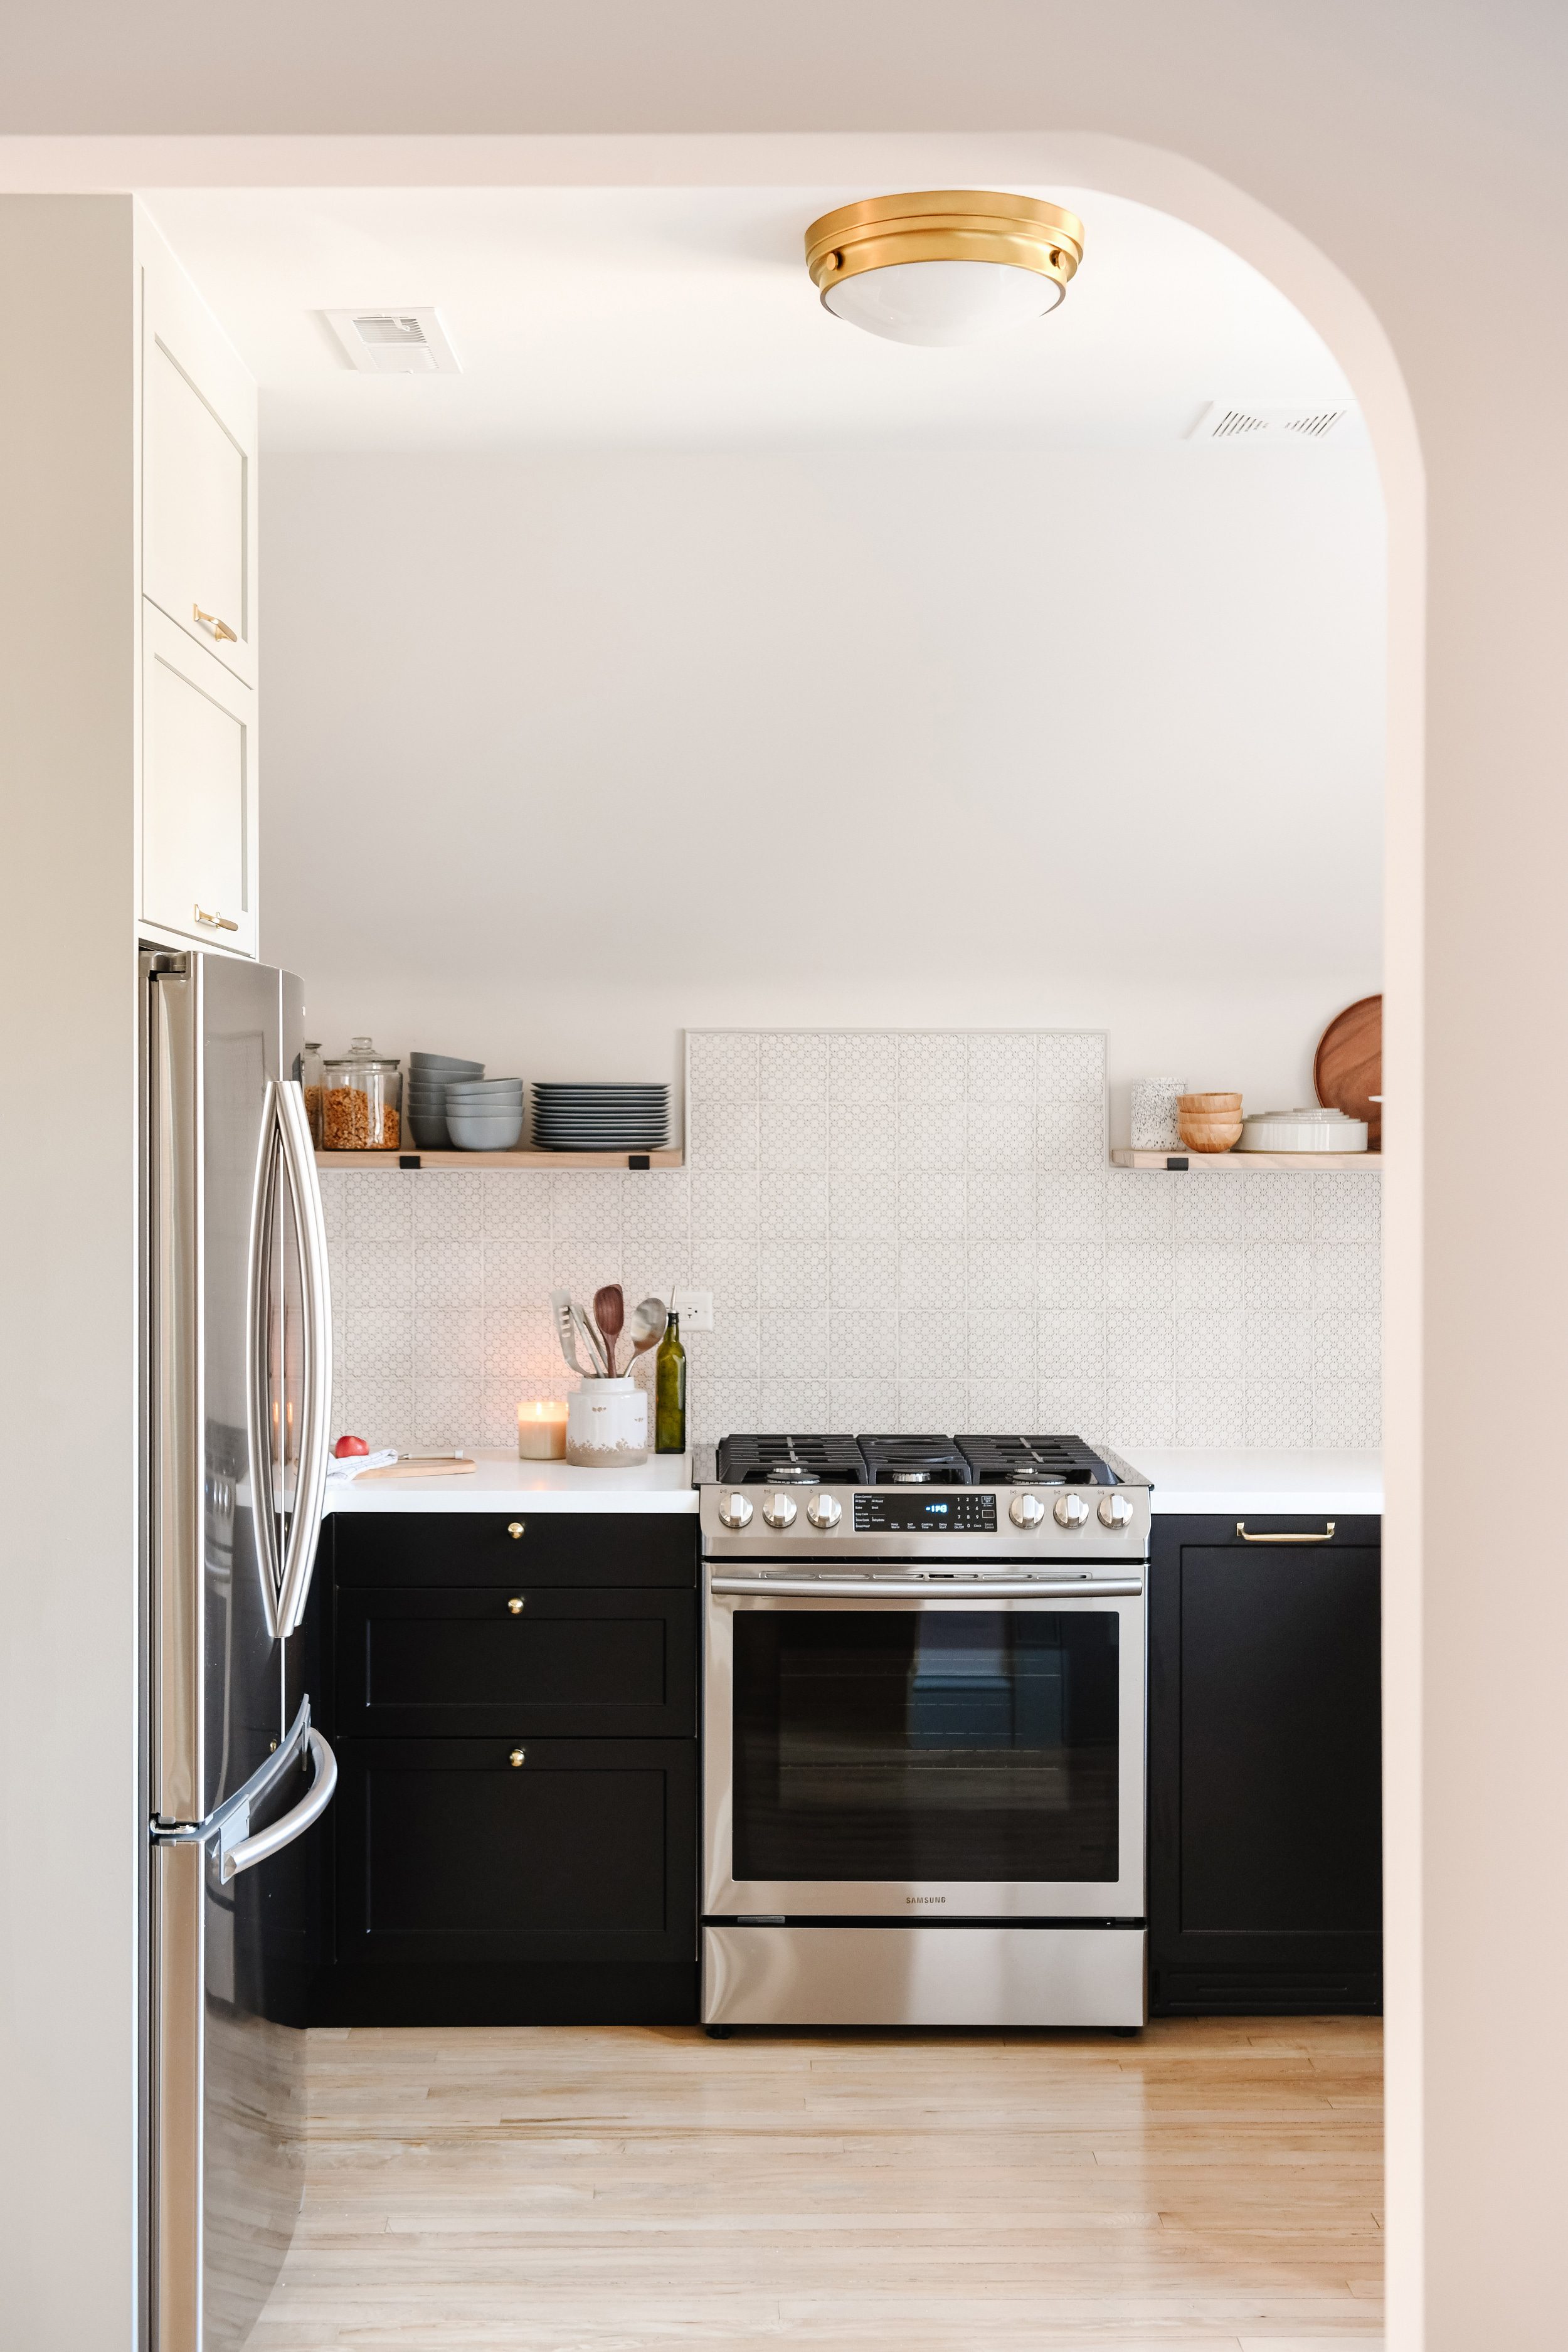
Kitchen With a View
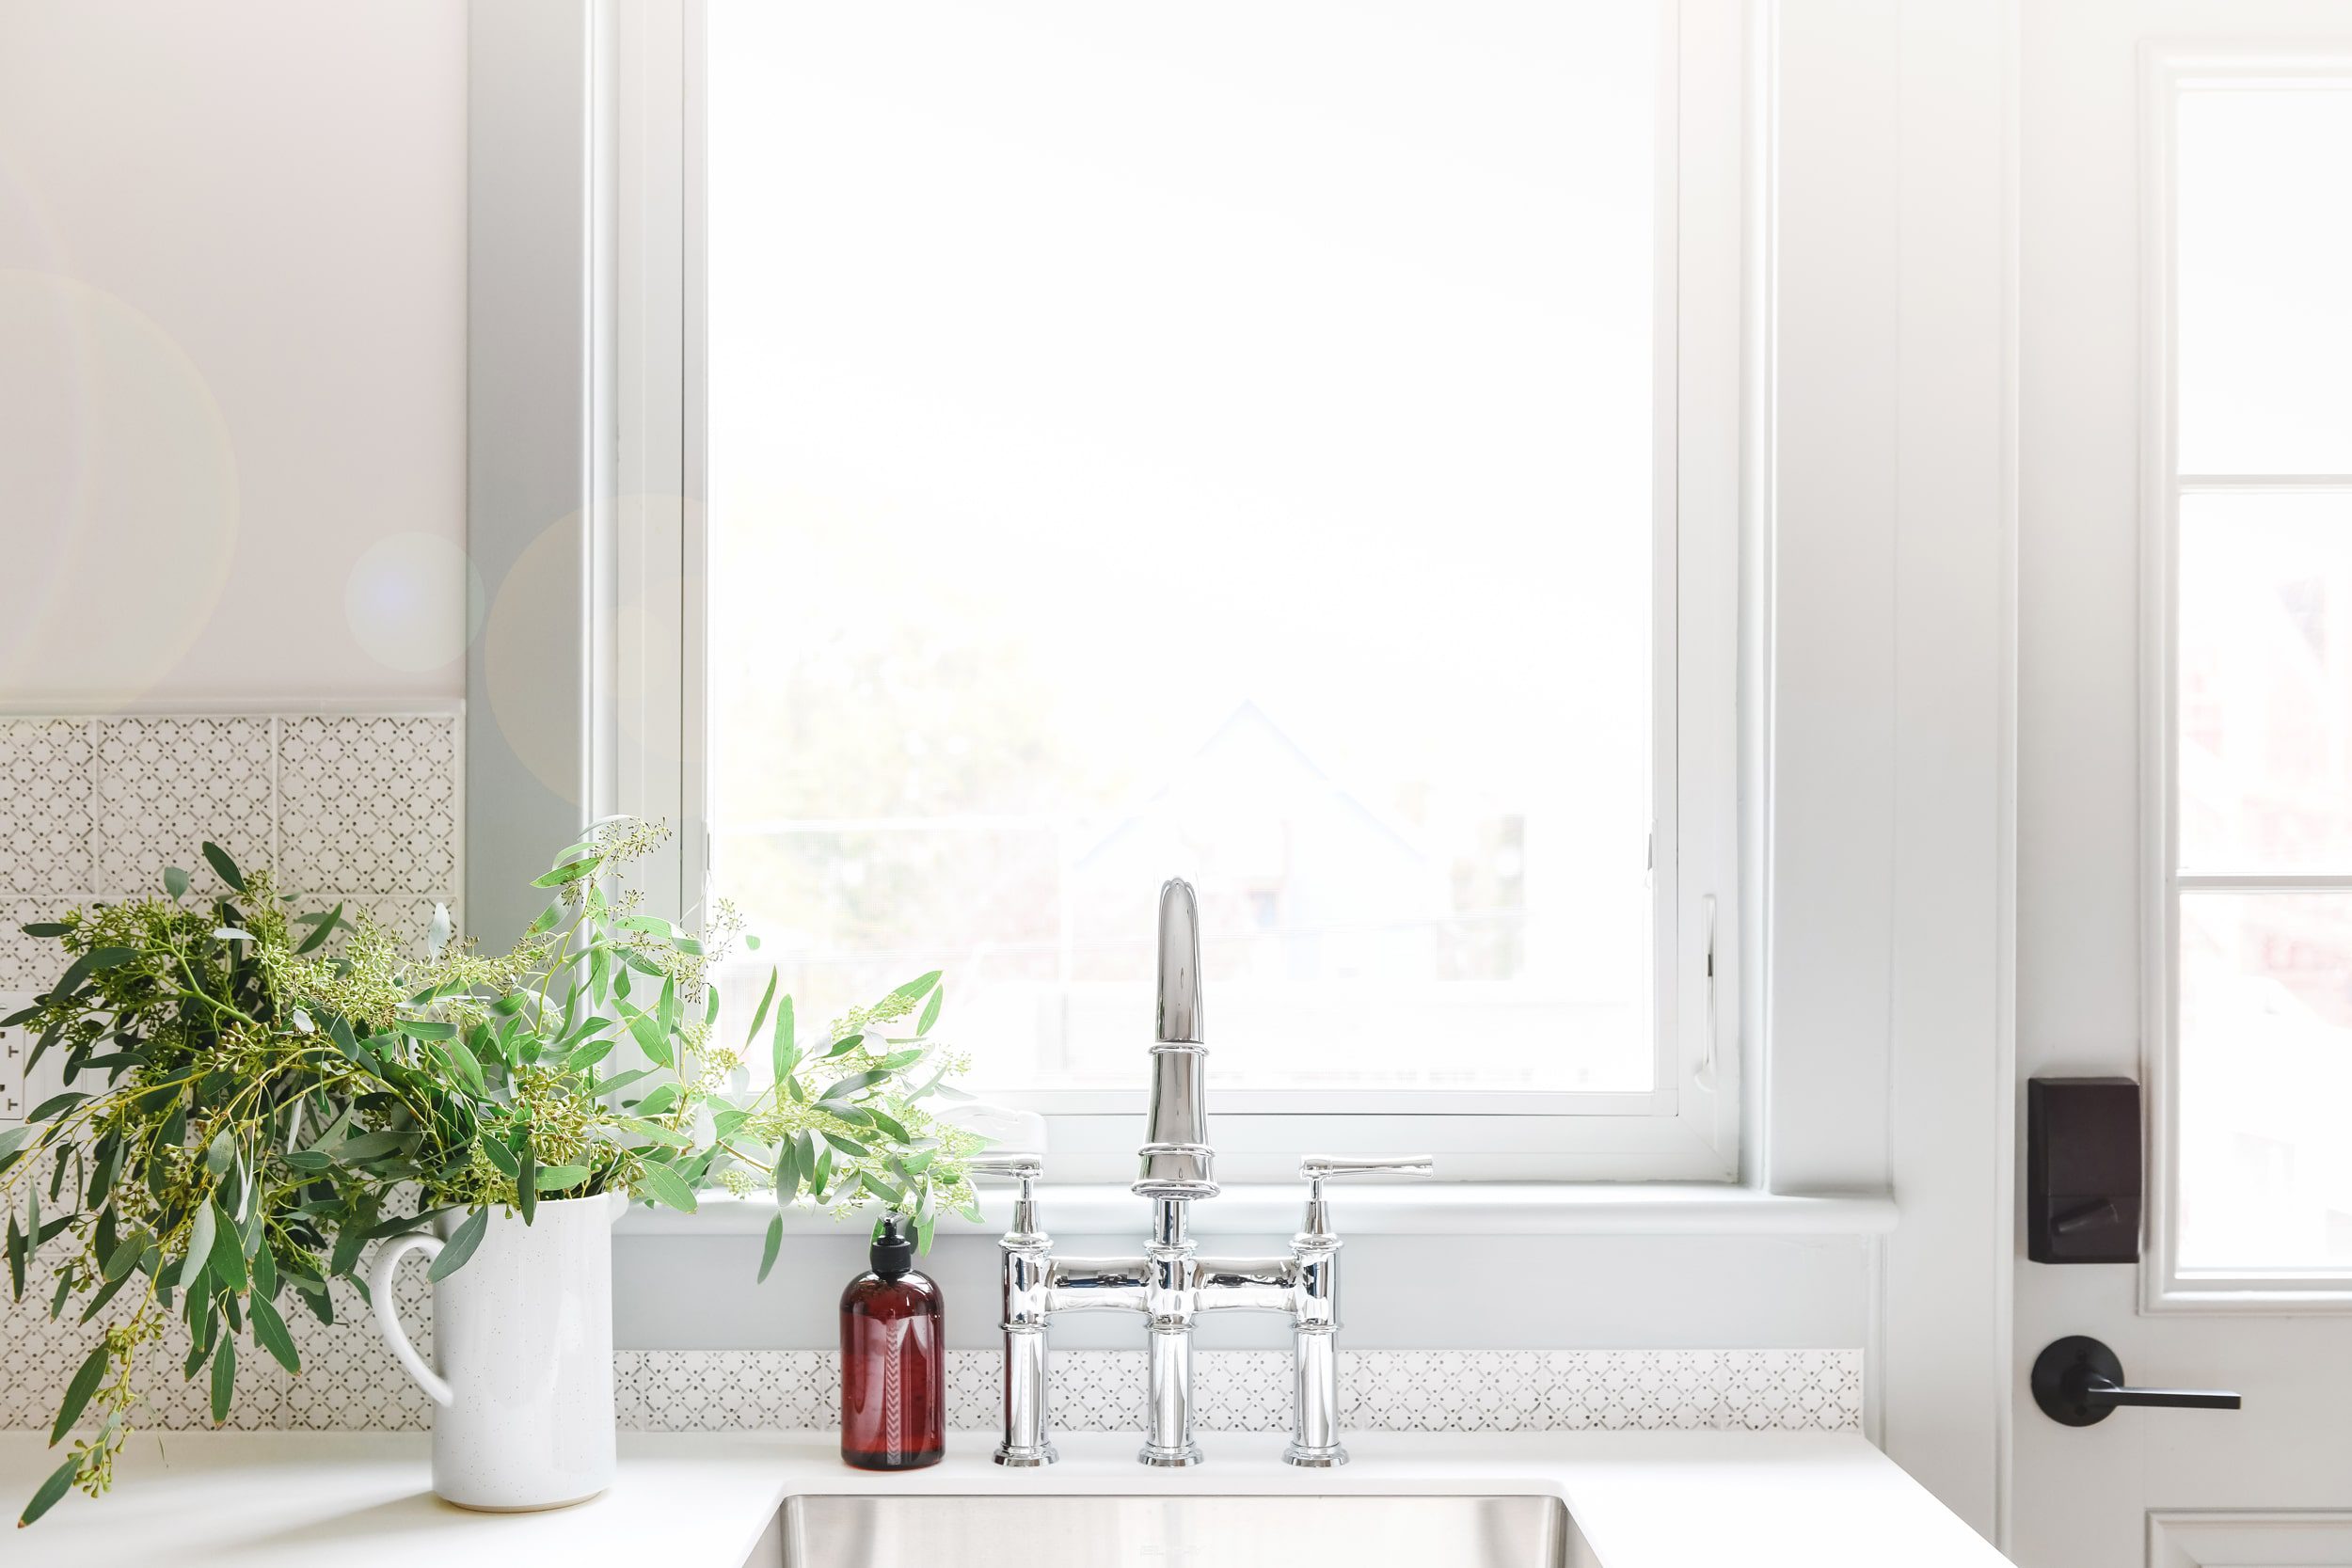
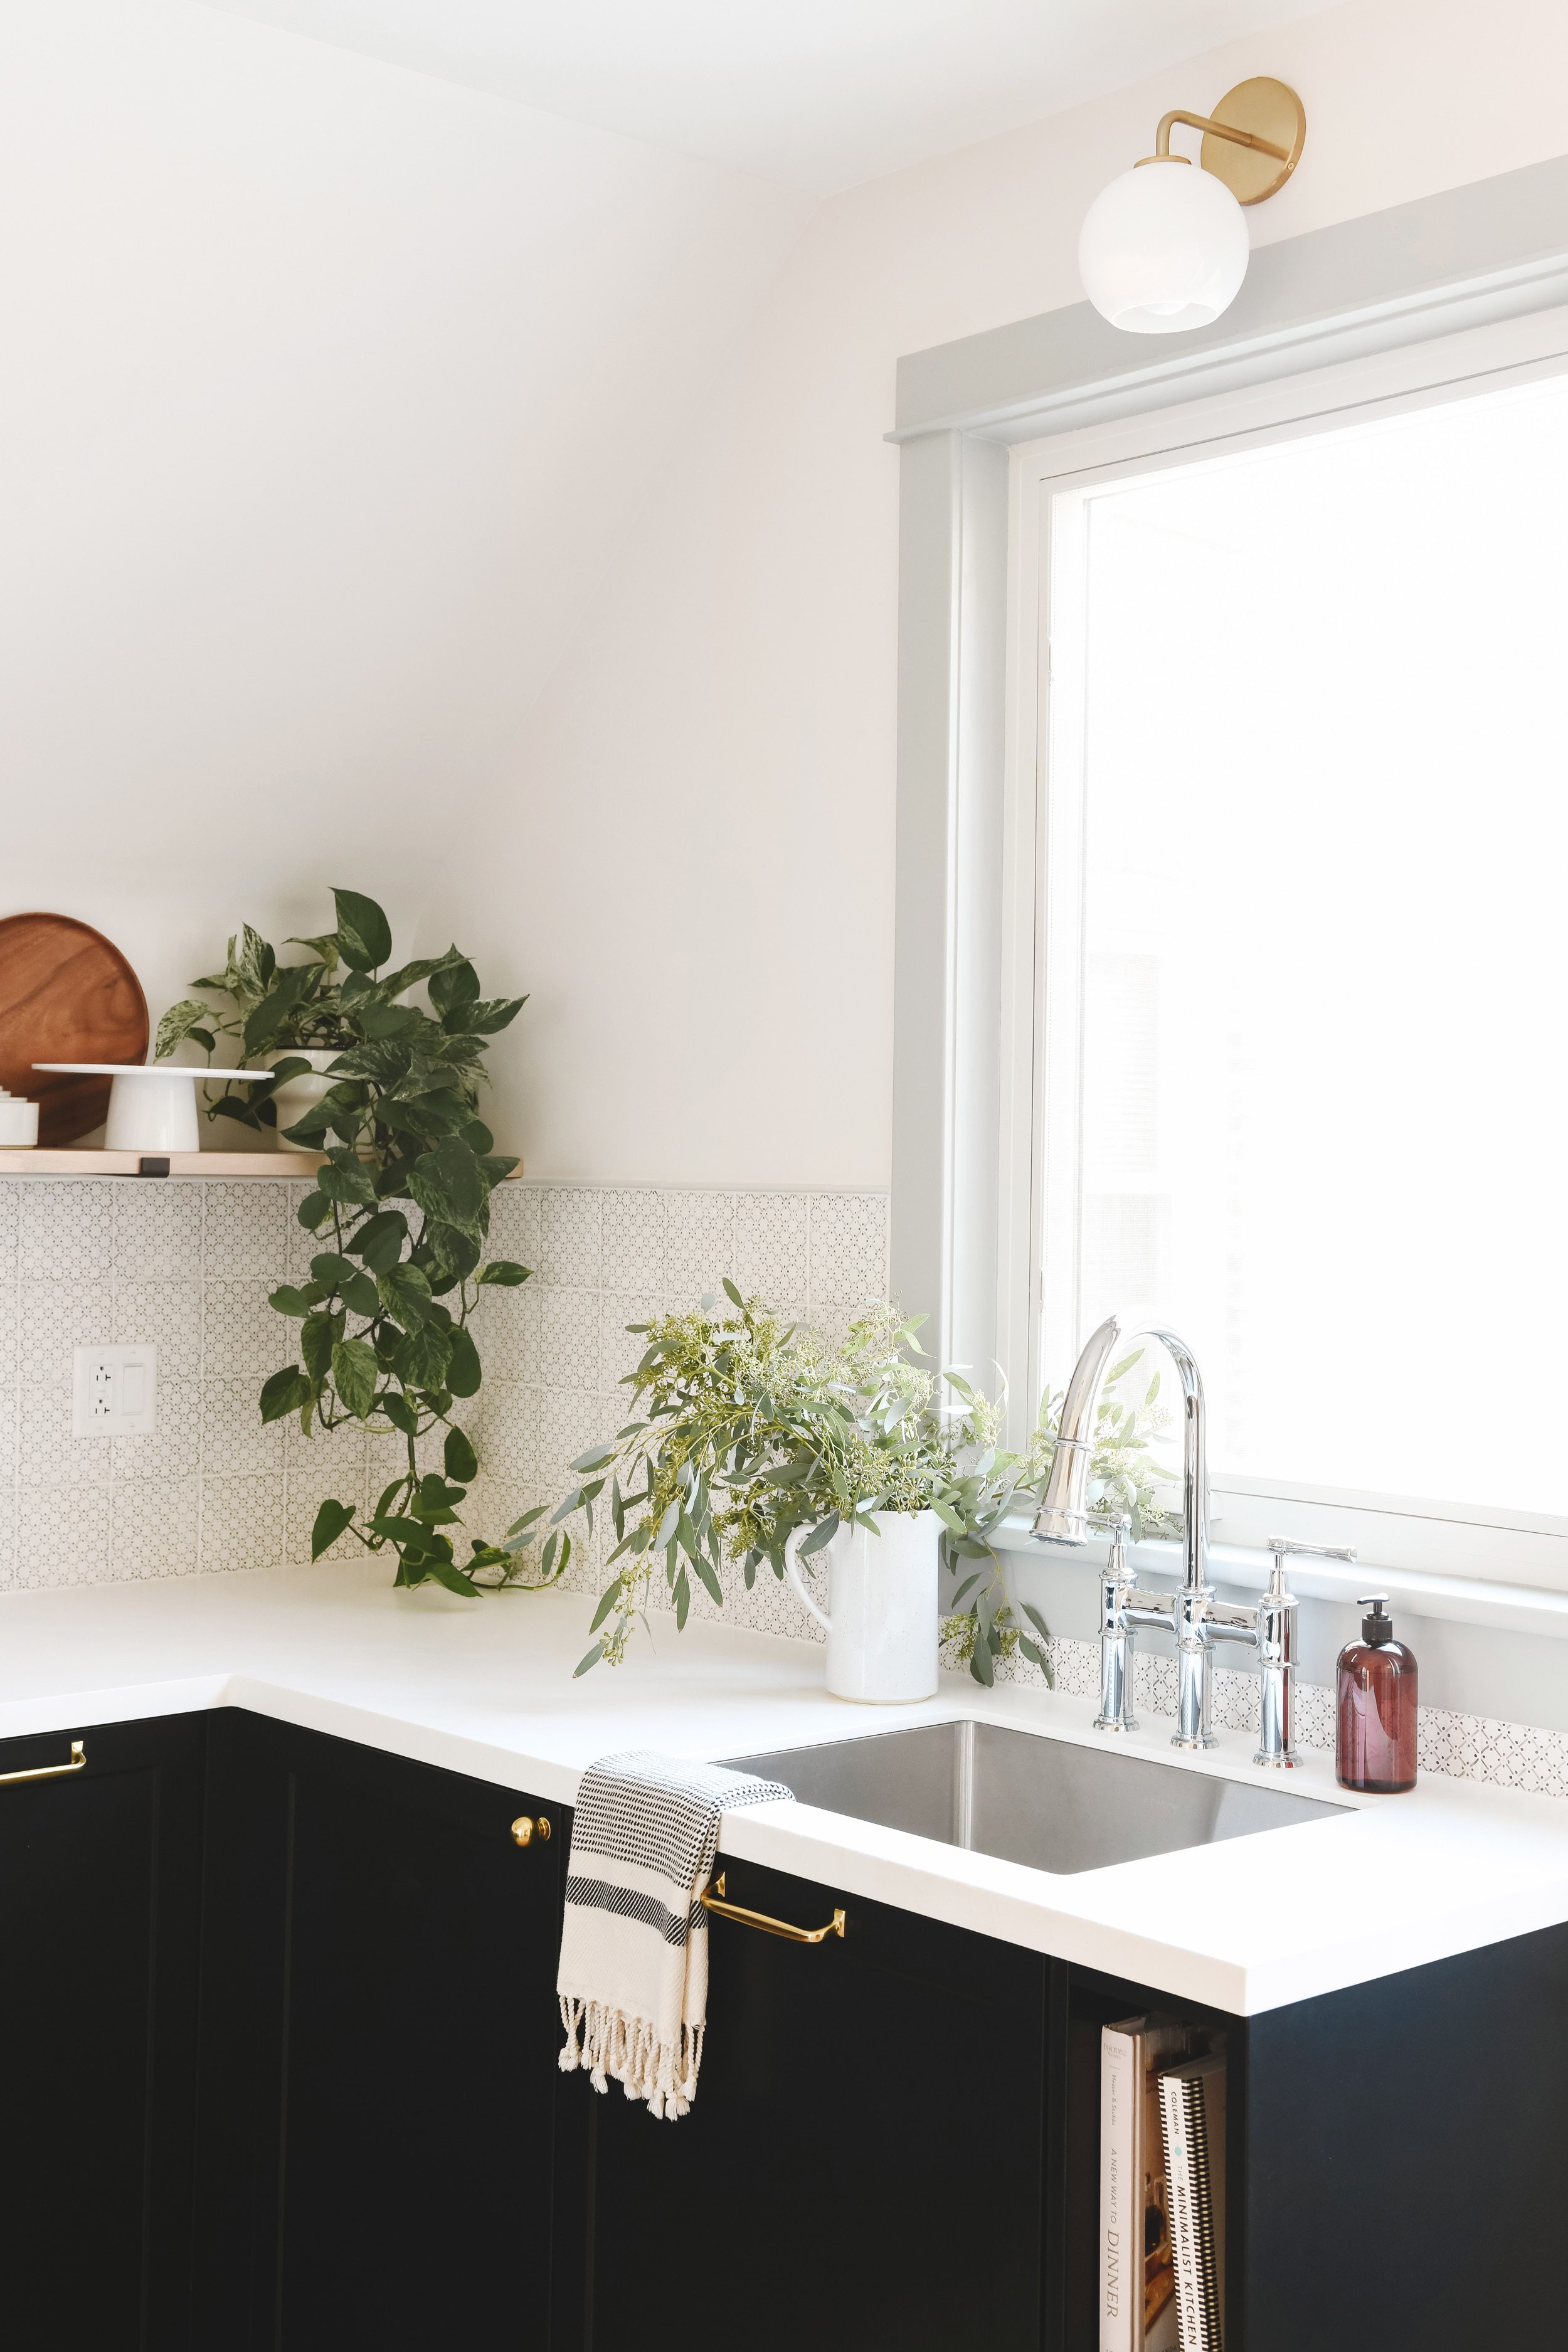
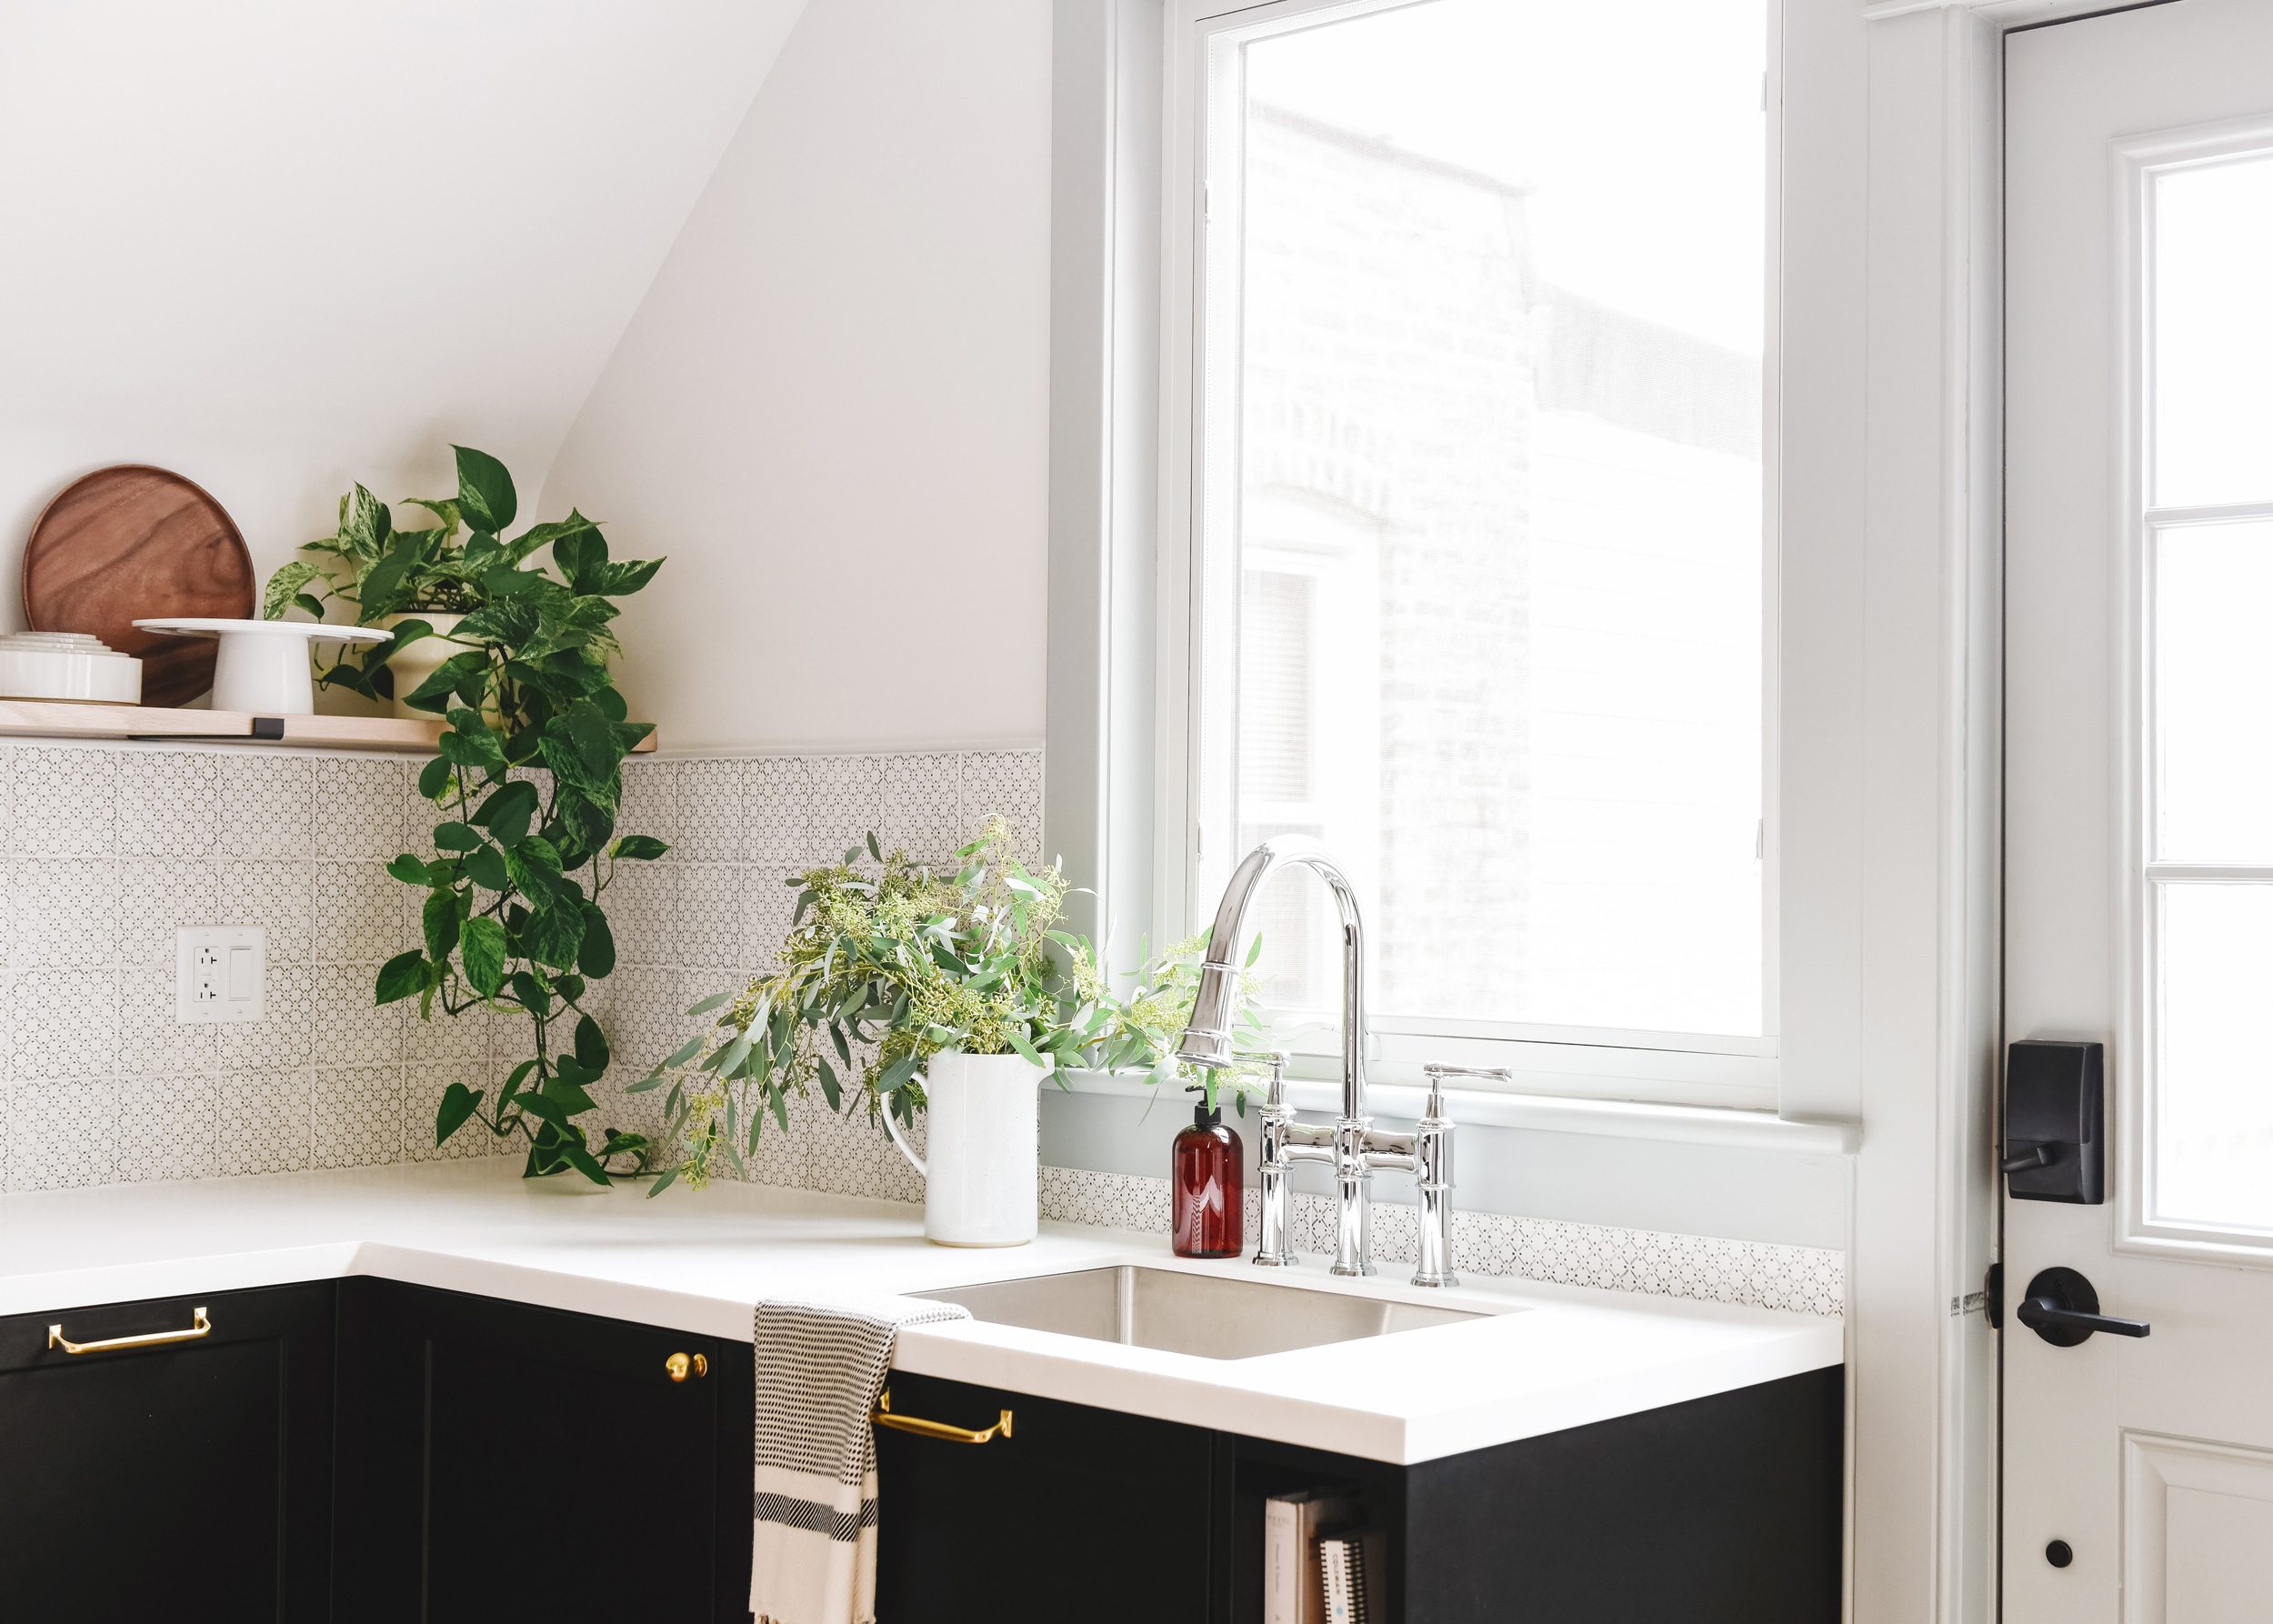
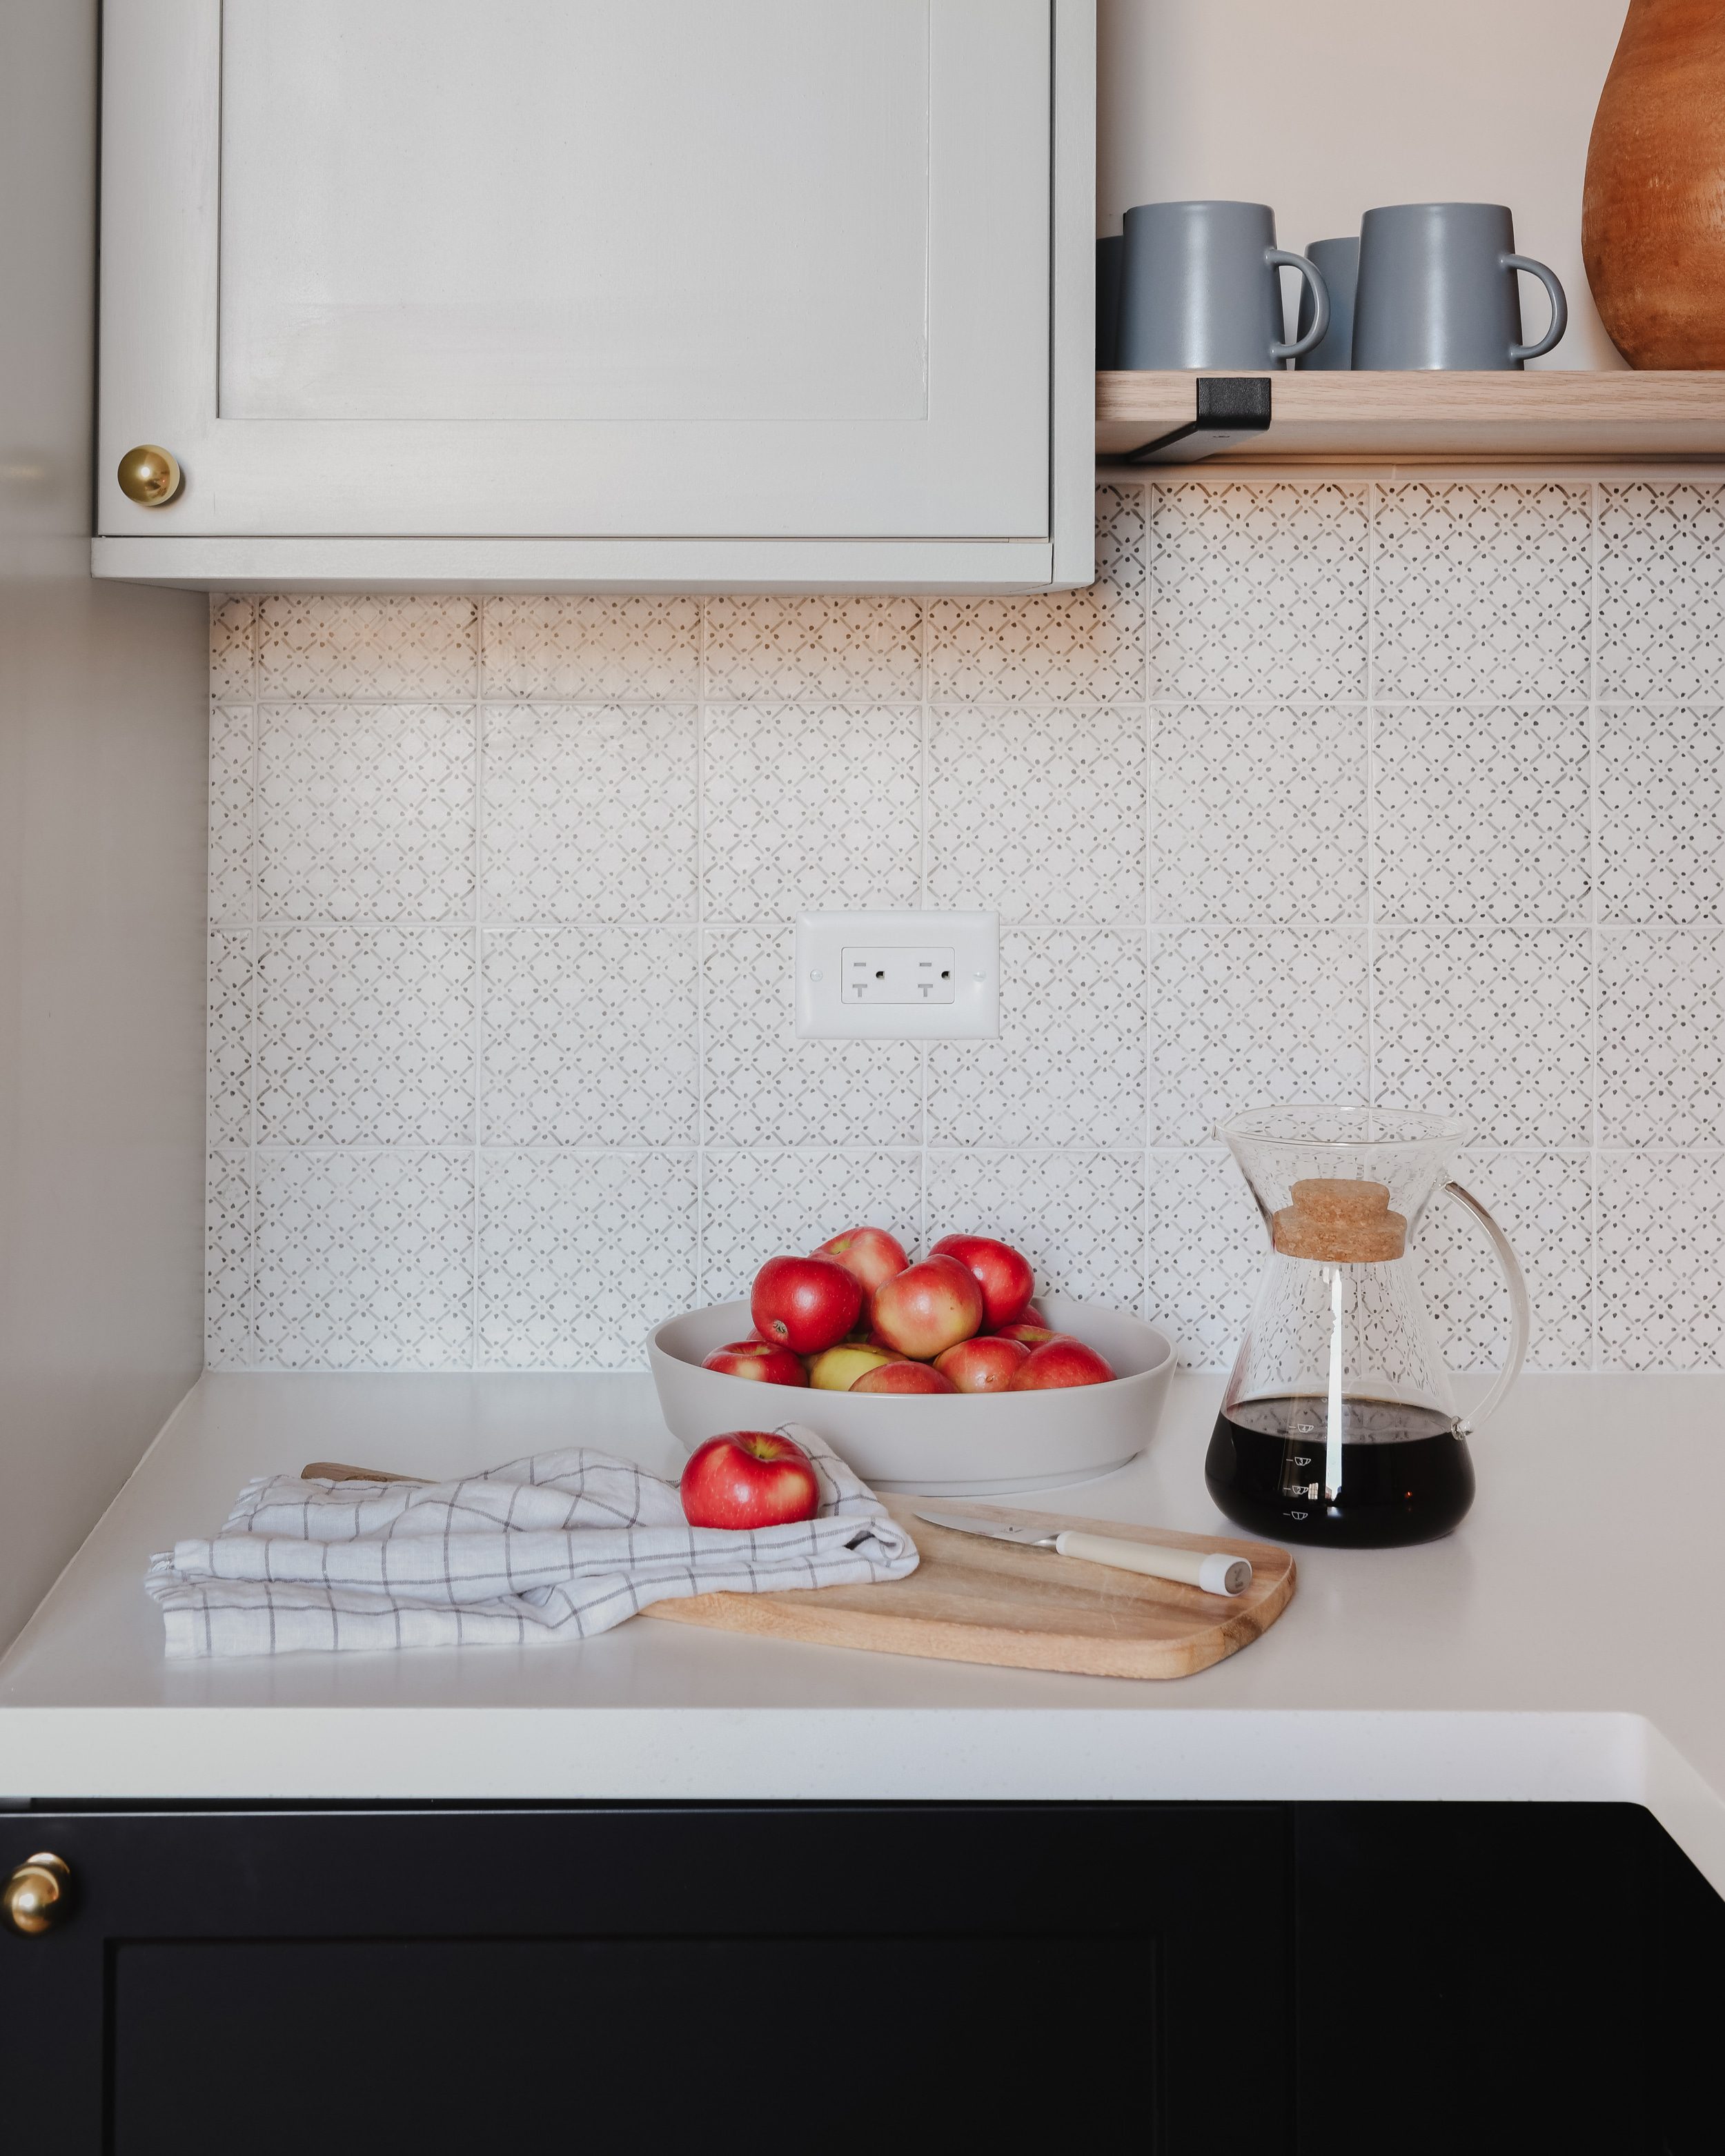
When we laid out the plans for this kitchen, we were adamant about having the sink centered beneath the window. There’s no awning on this side of the house, so the view is Chicago at its best – a big, blue sky, small patio and rows (and rows) of buildings.
We had to get creative and added this cookbook nook to fill some dead space, but don’t you think that’s what makes it?

Problem Solving the Sloped Ceiling
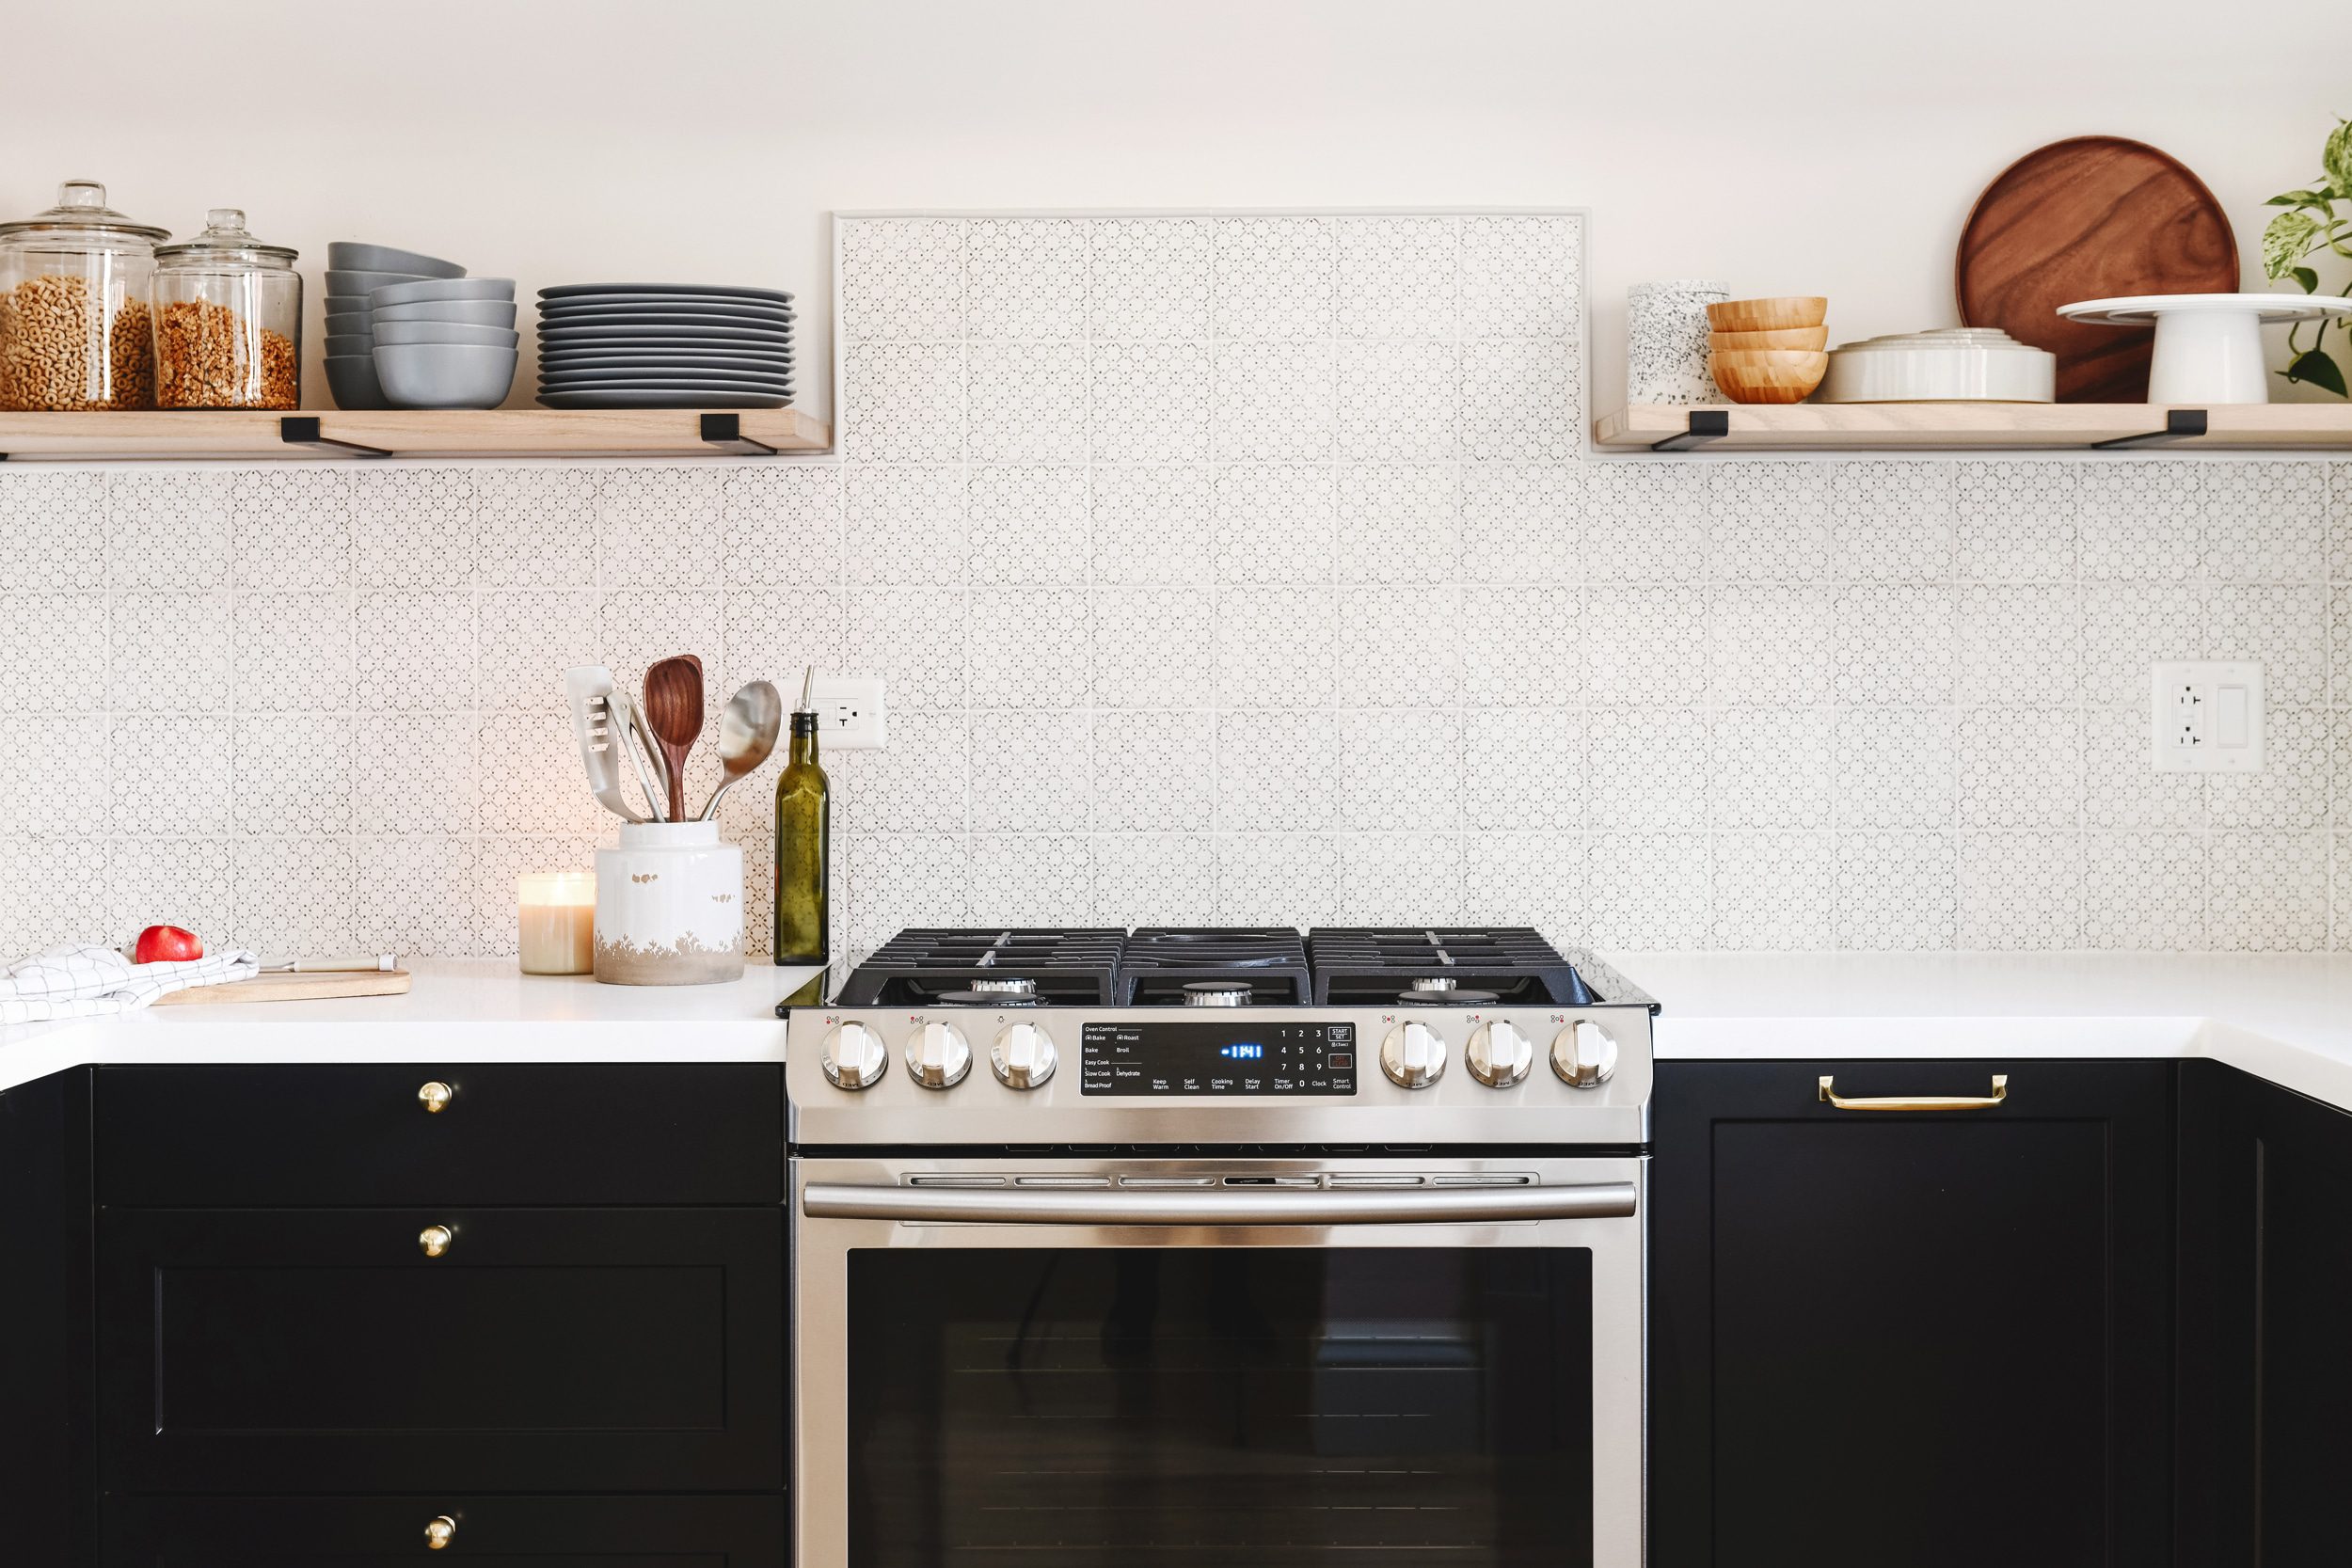
Let’s talk quickly about the elephant in the room – that sloped ceiling. Our first task to problem solve was the range hood. Could we add one? And if so, how? Our architect has run into this issue in the past, and he had an easy answer: an exhaust vent in the ceiling!
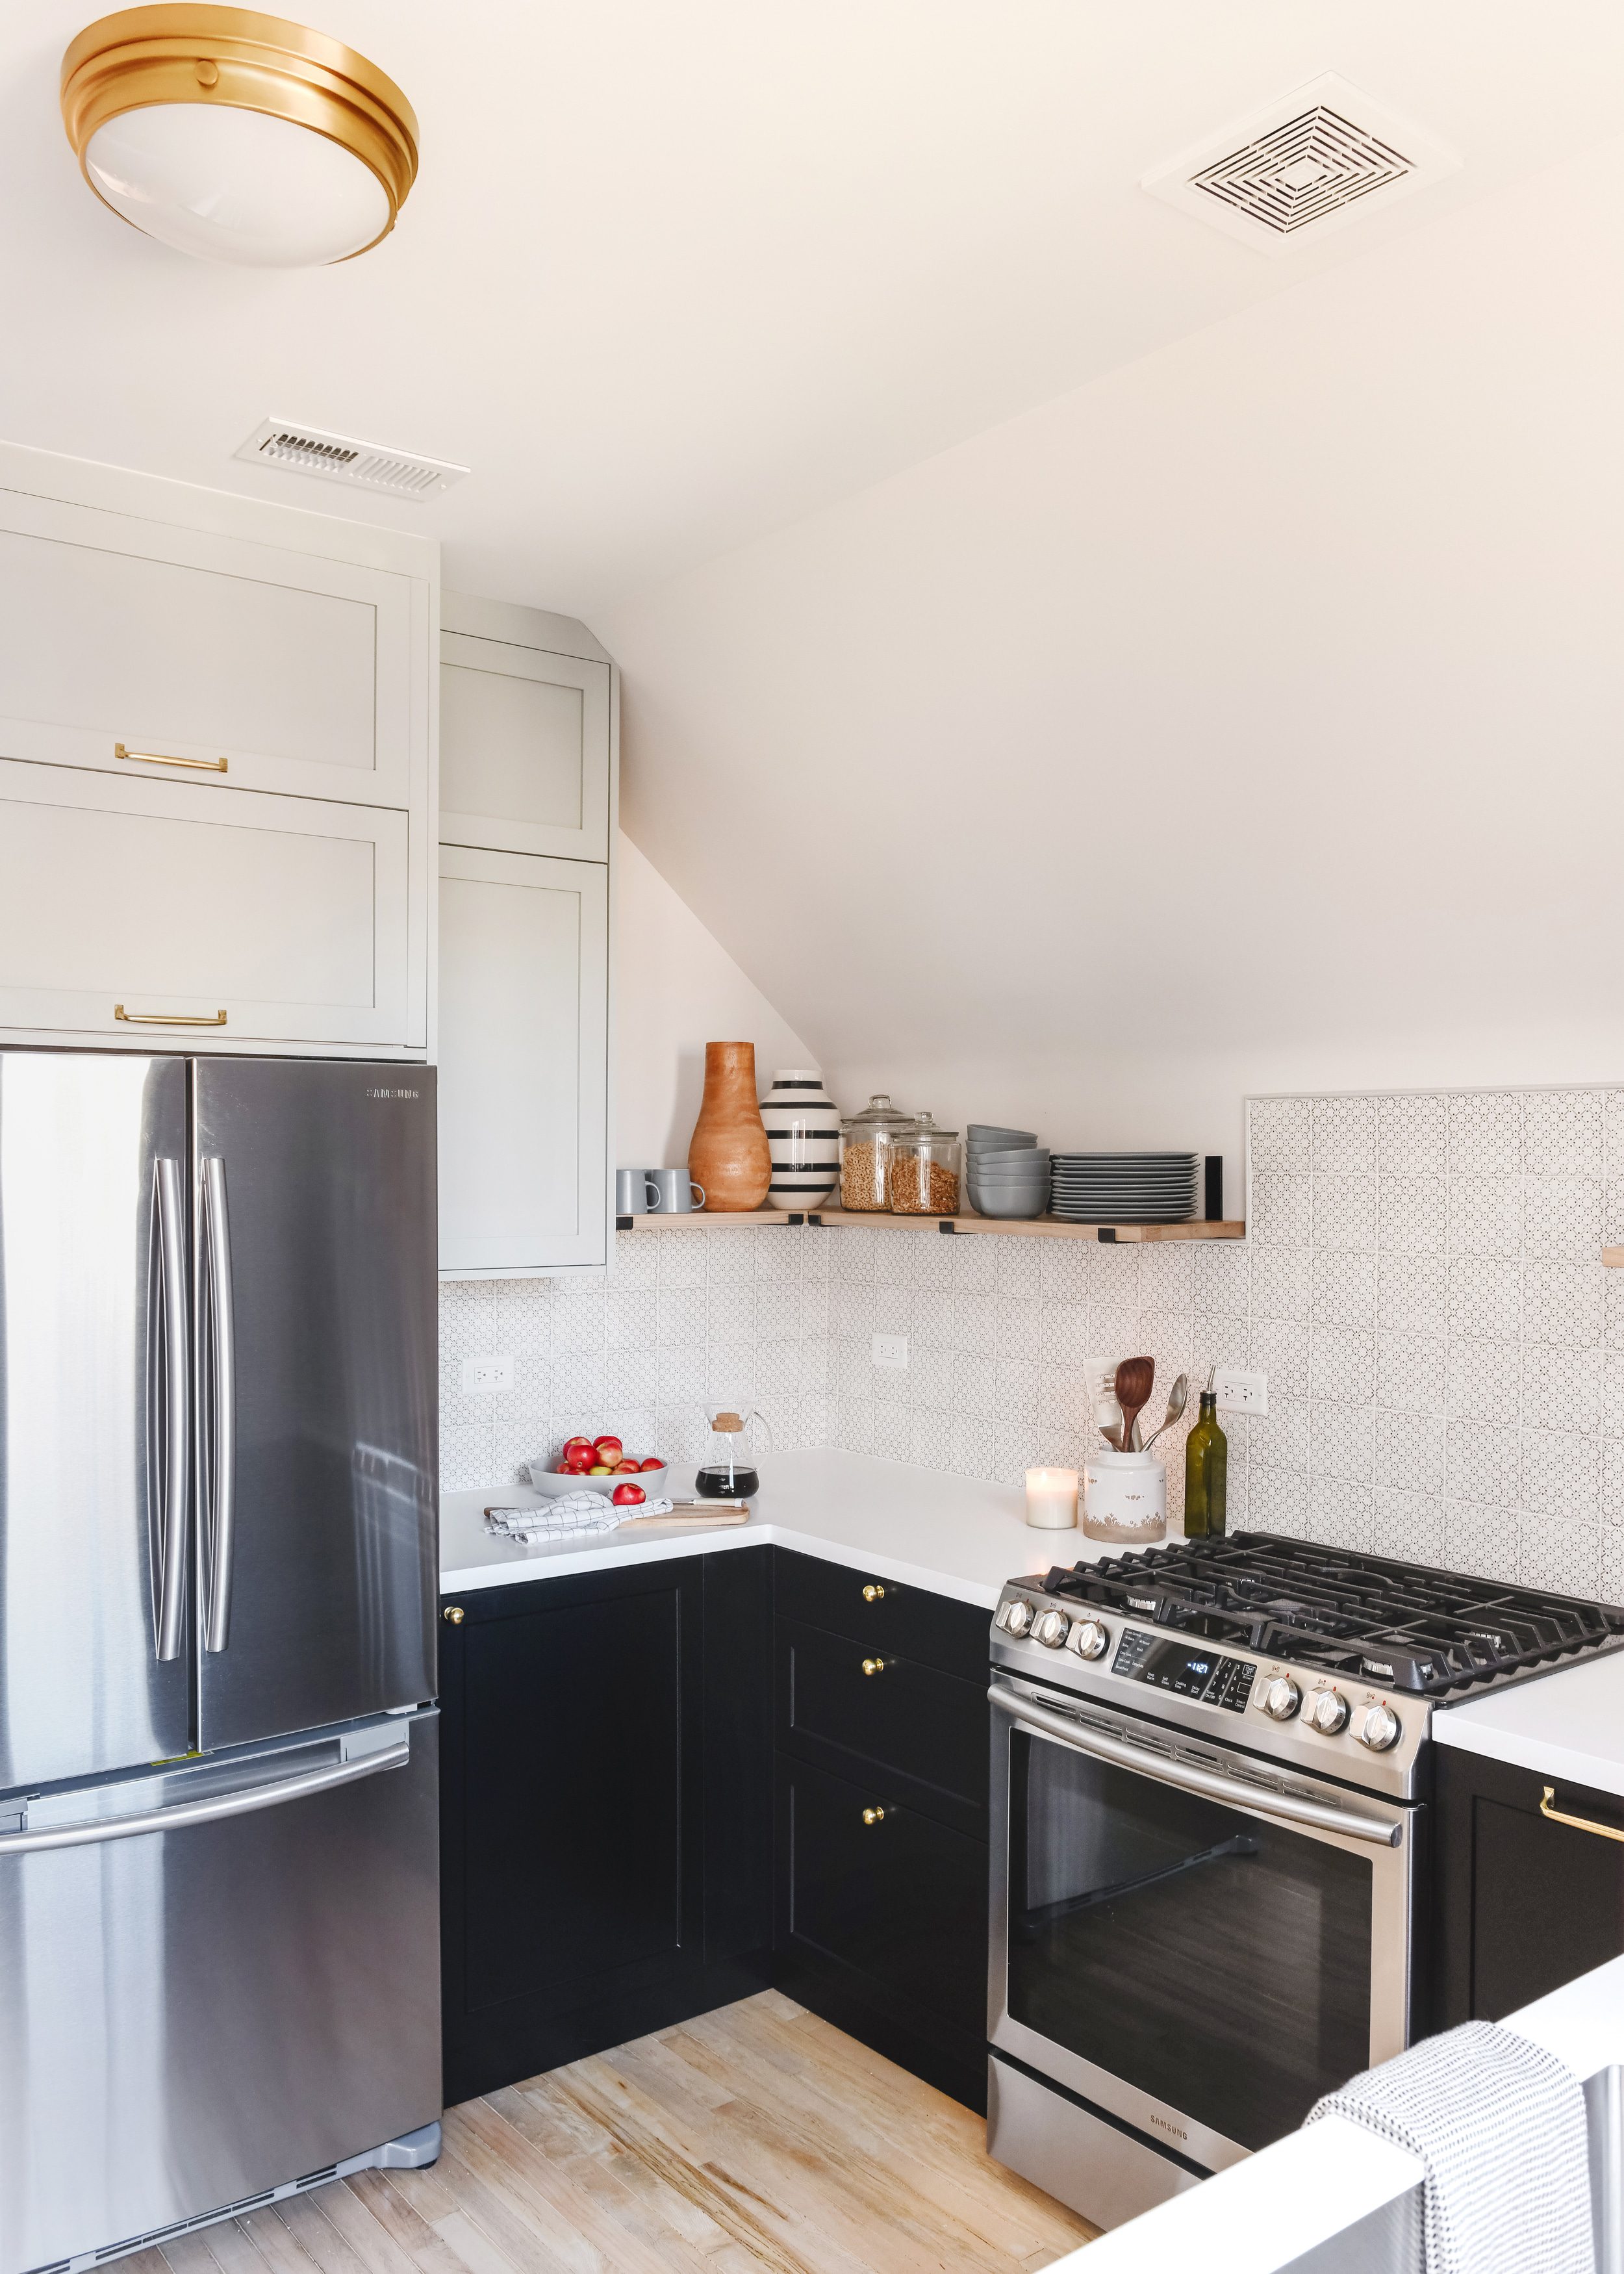
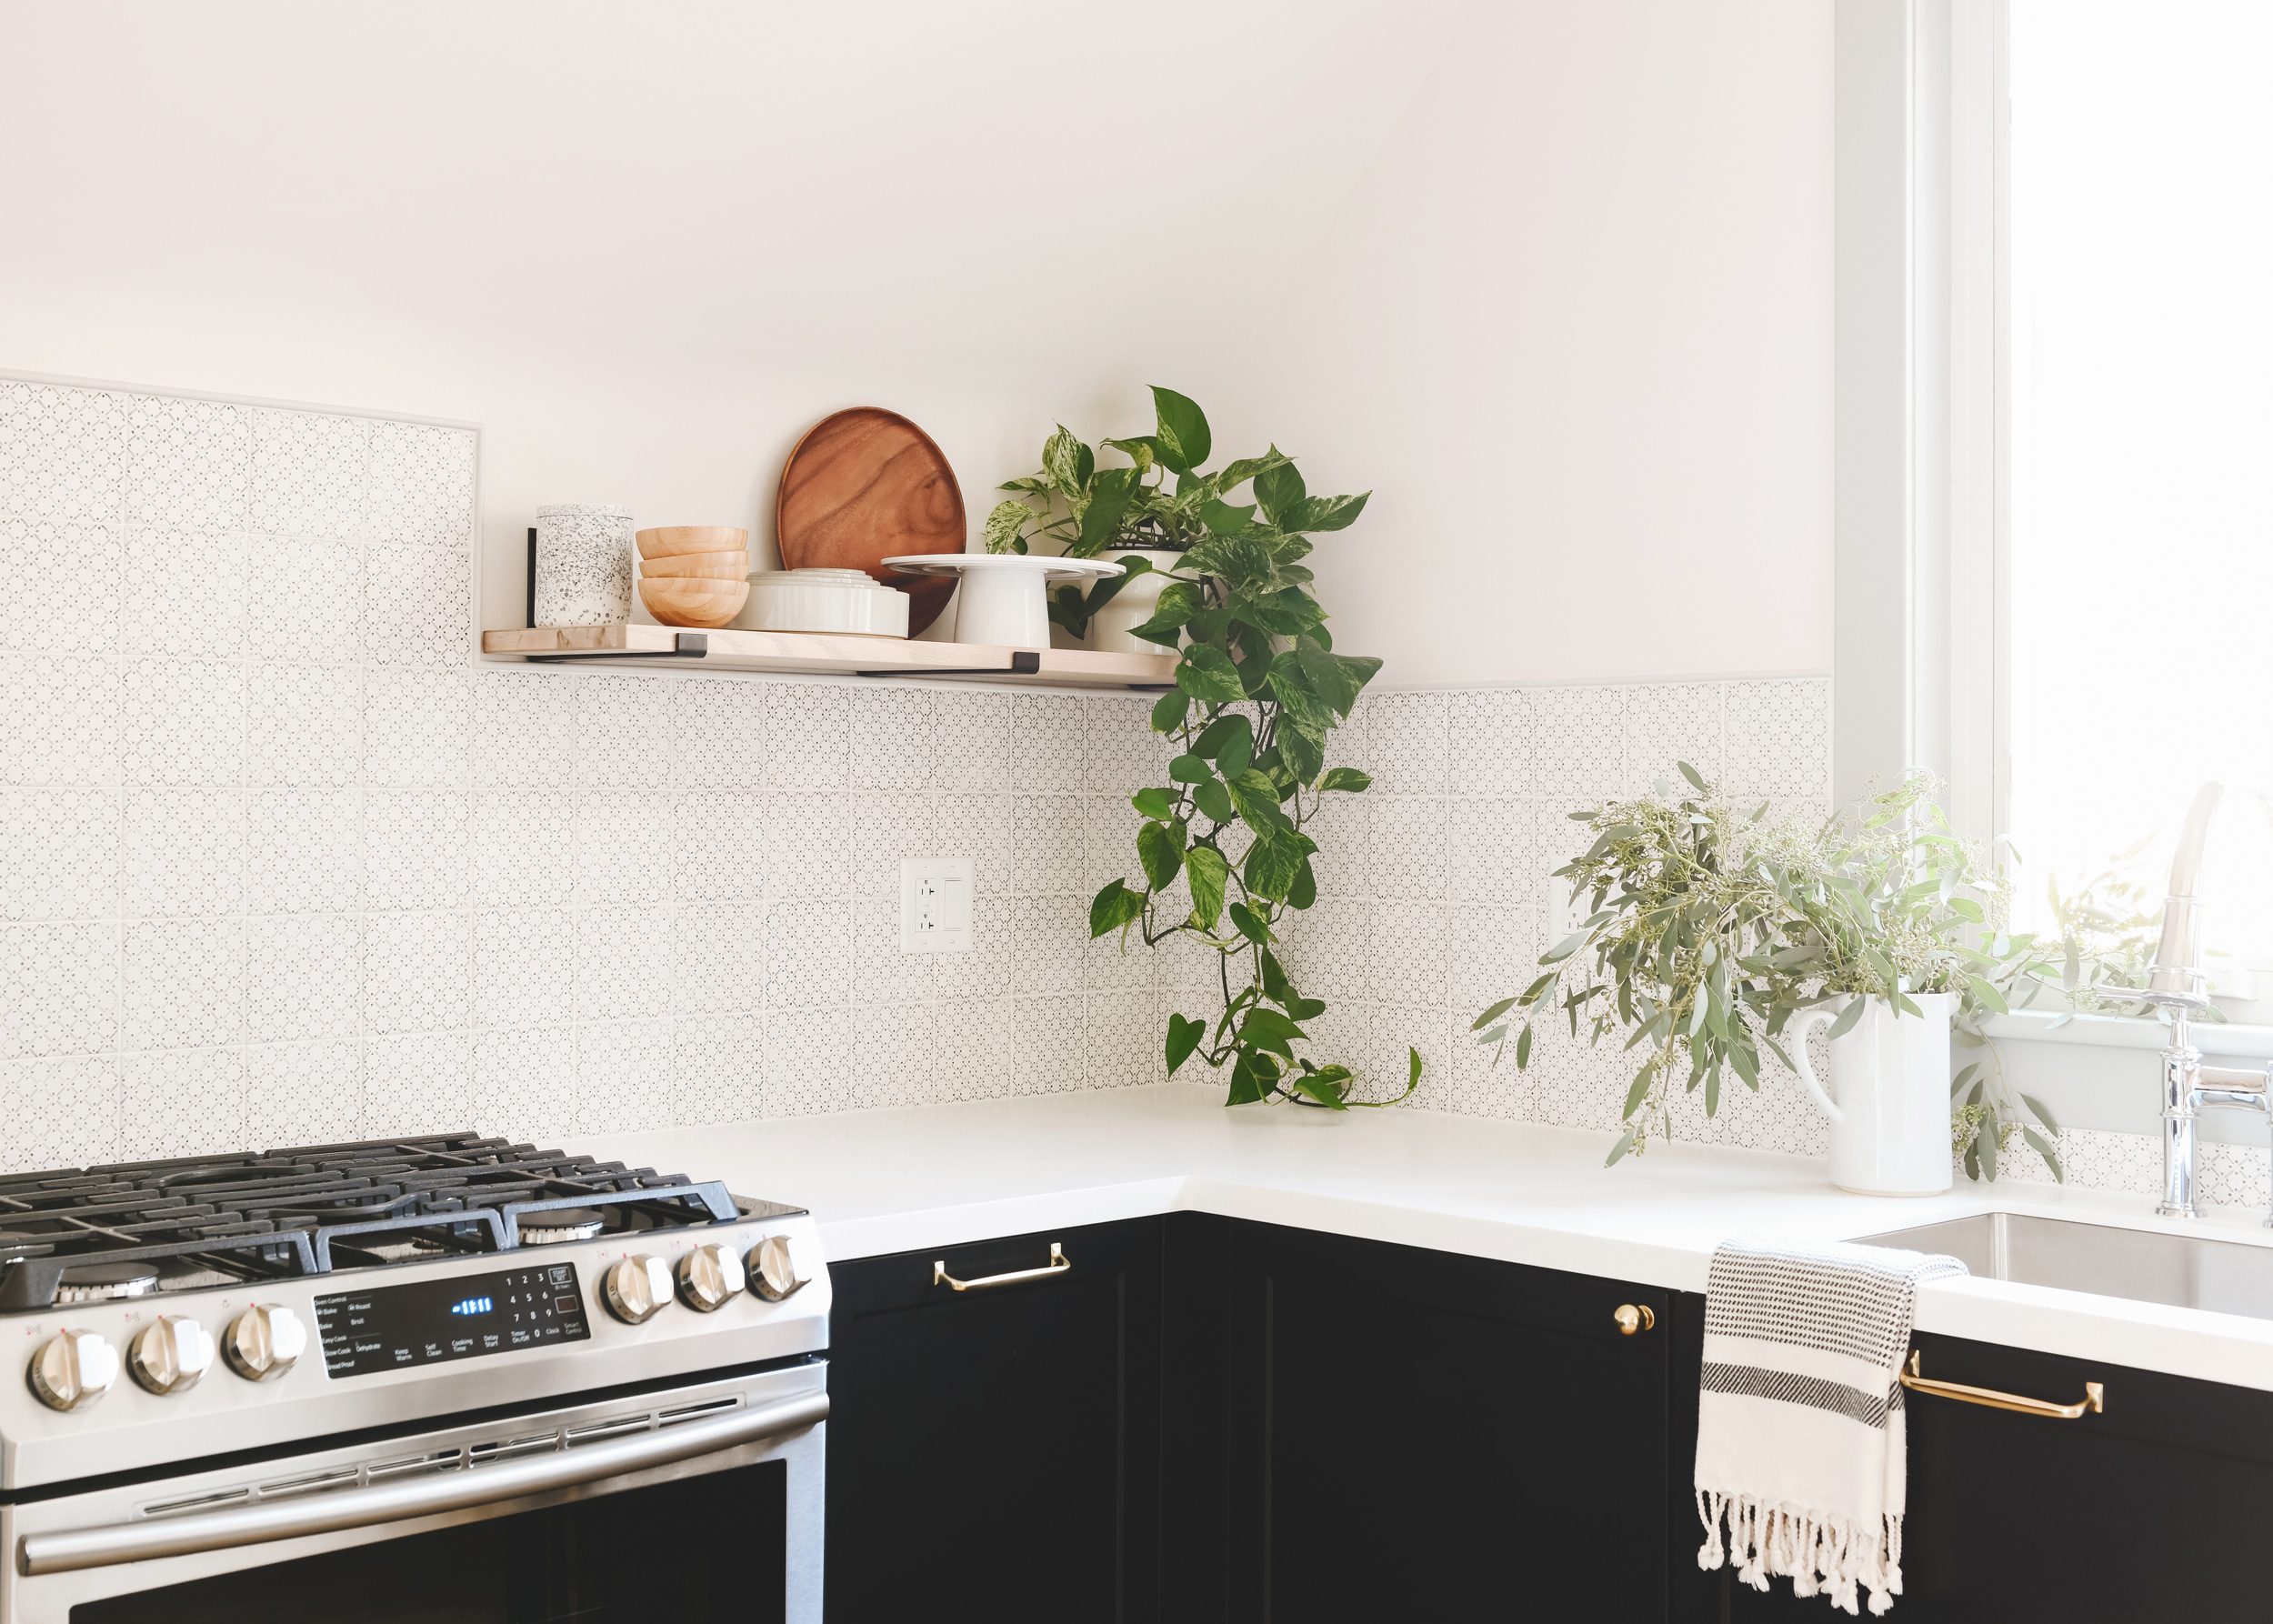
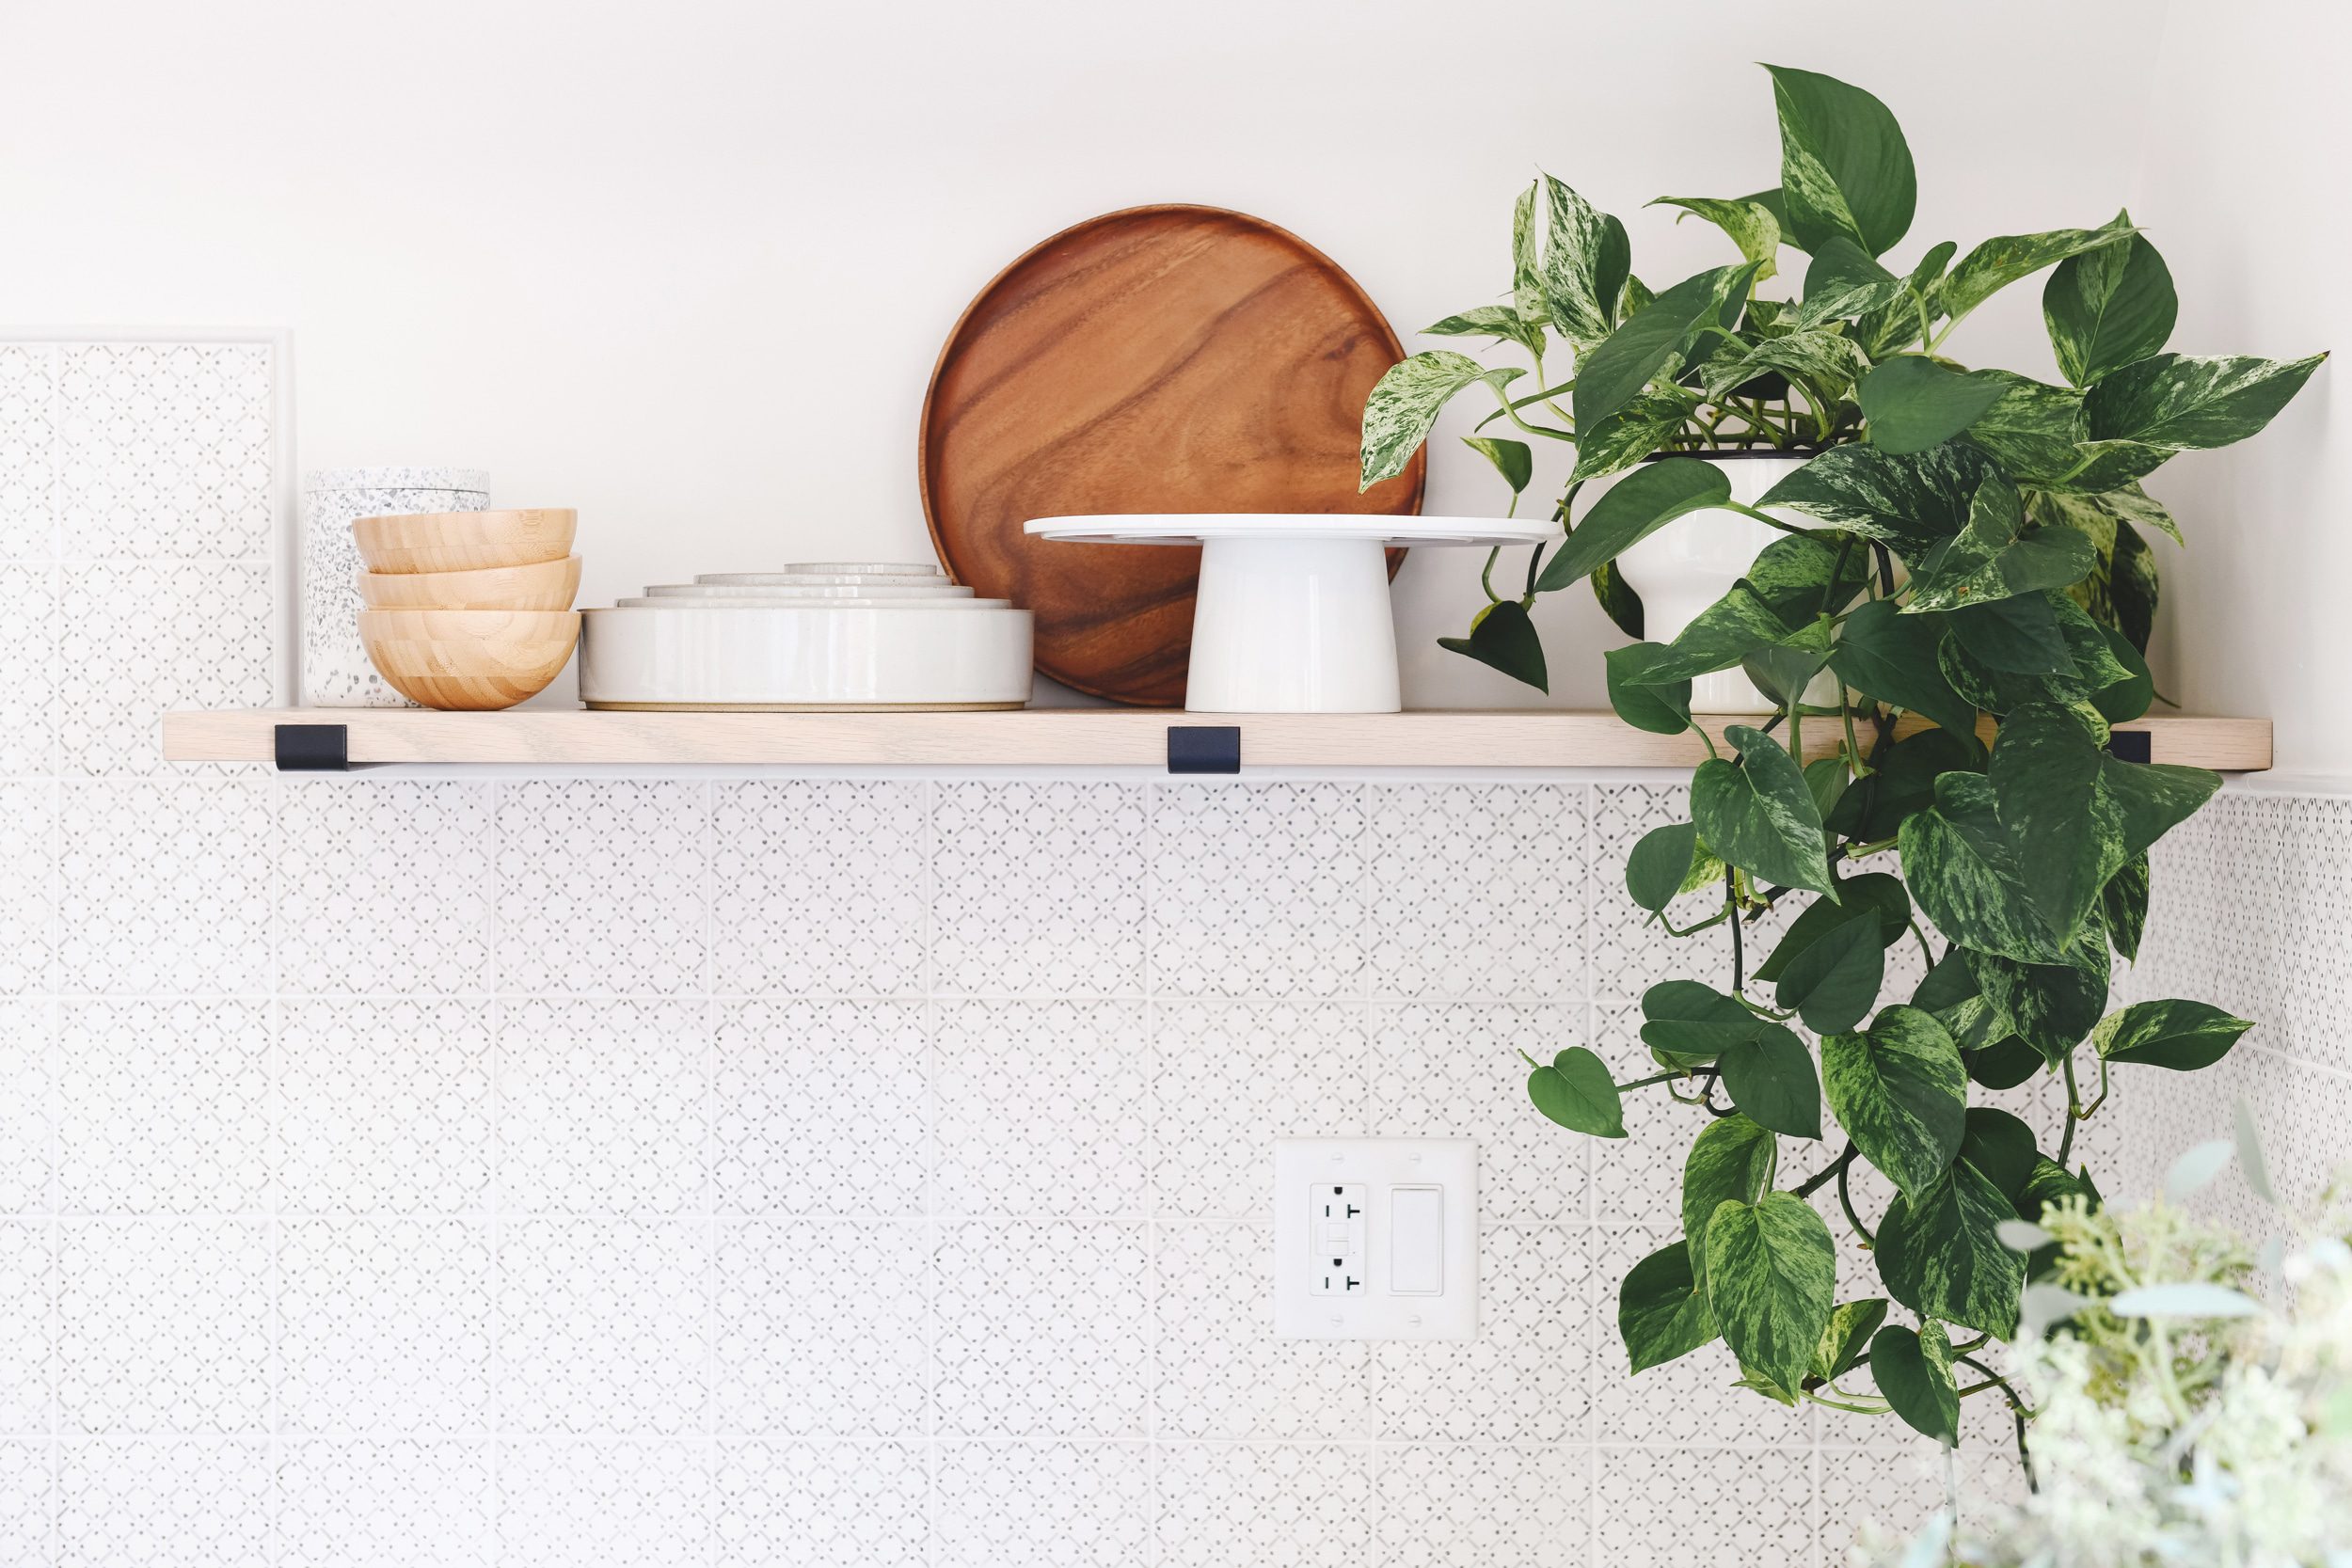
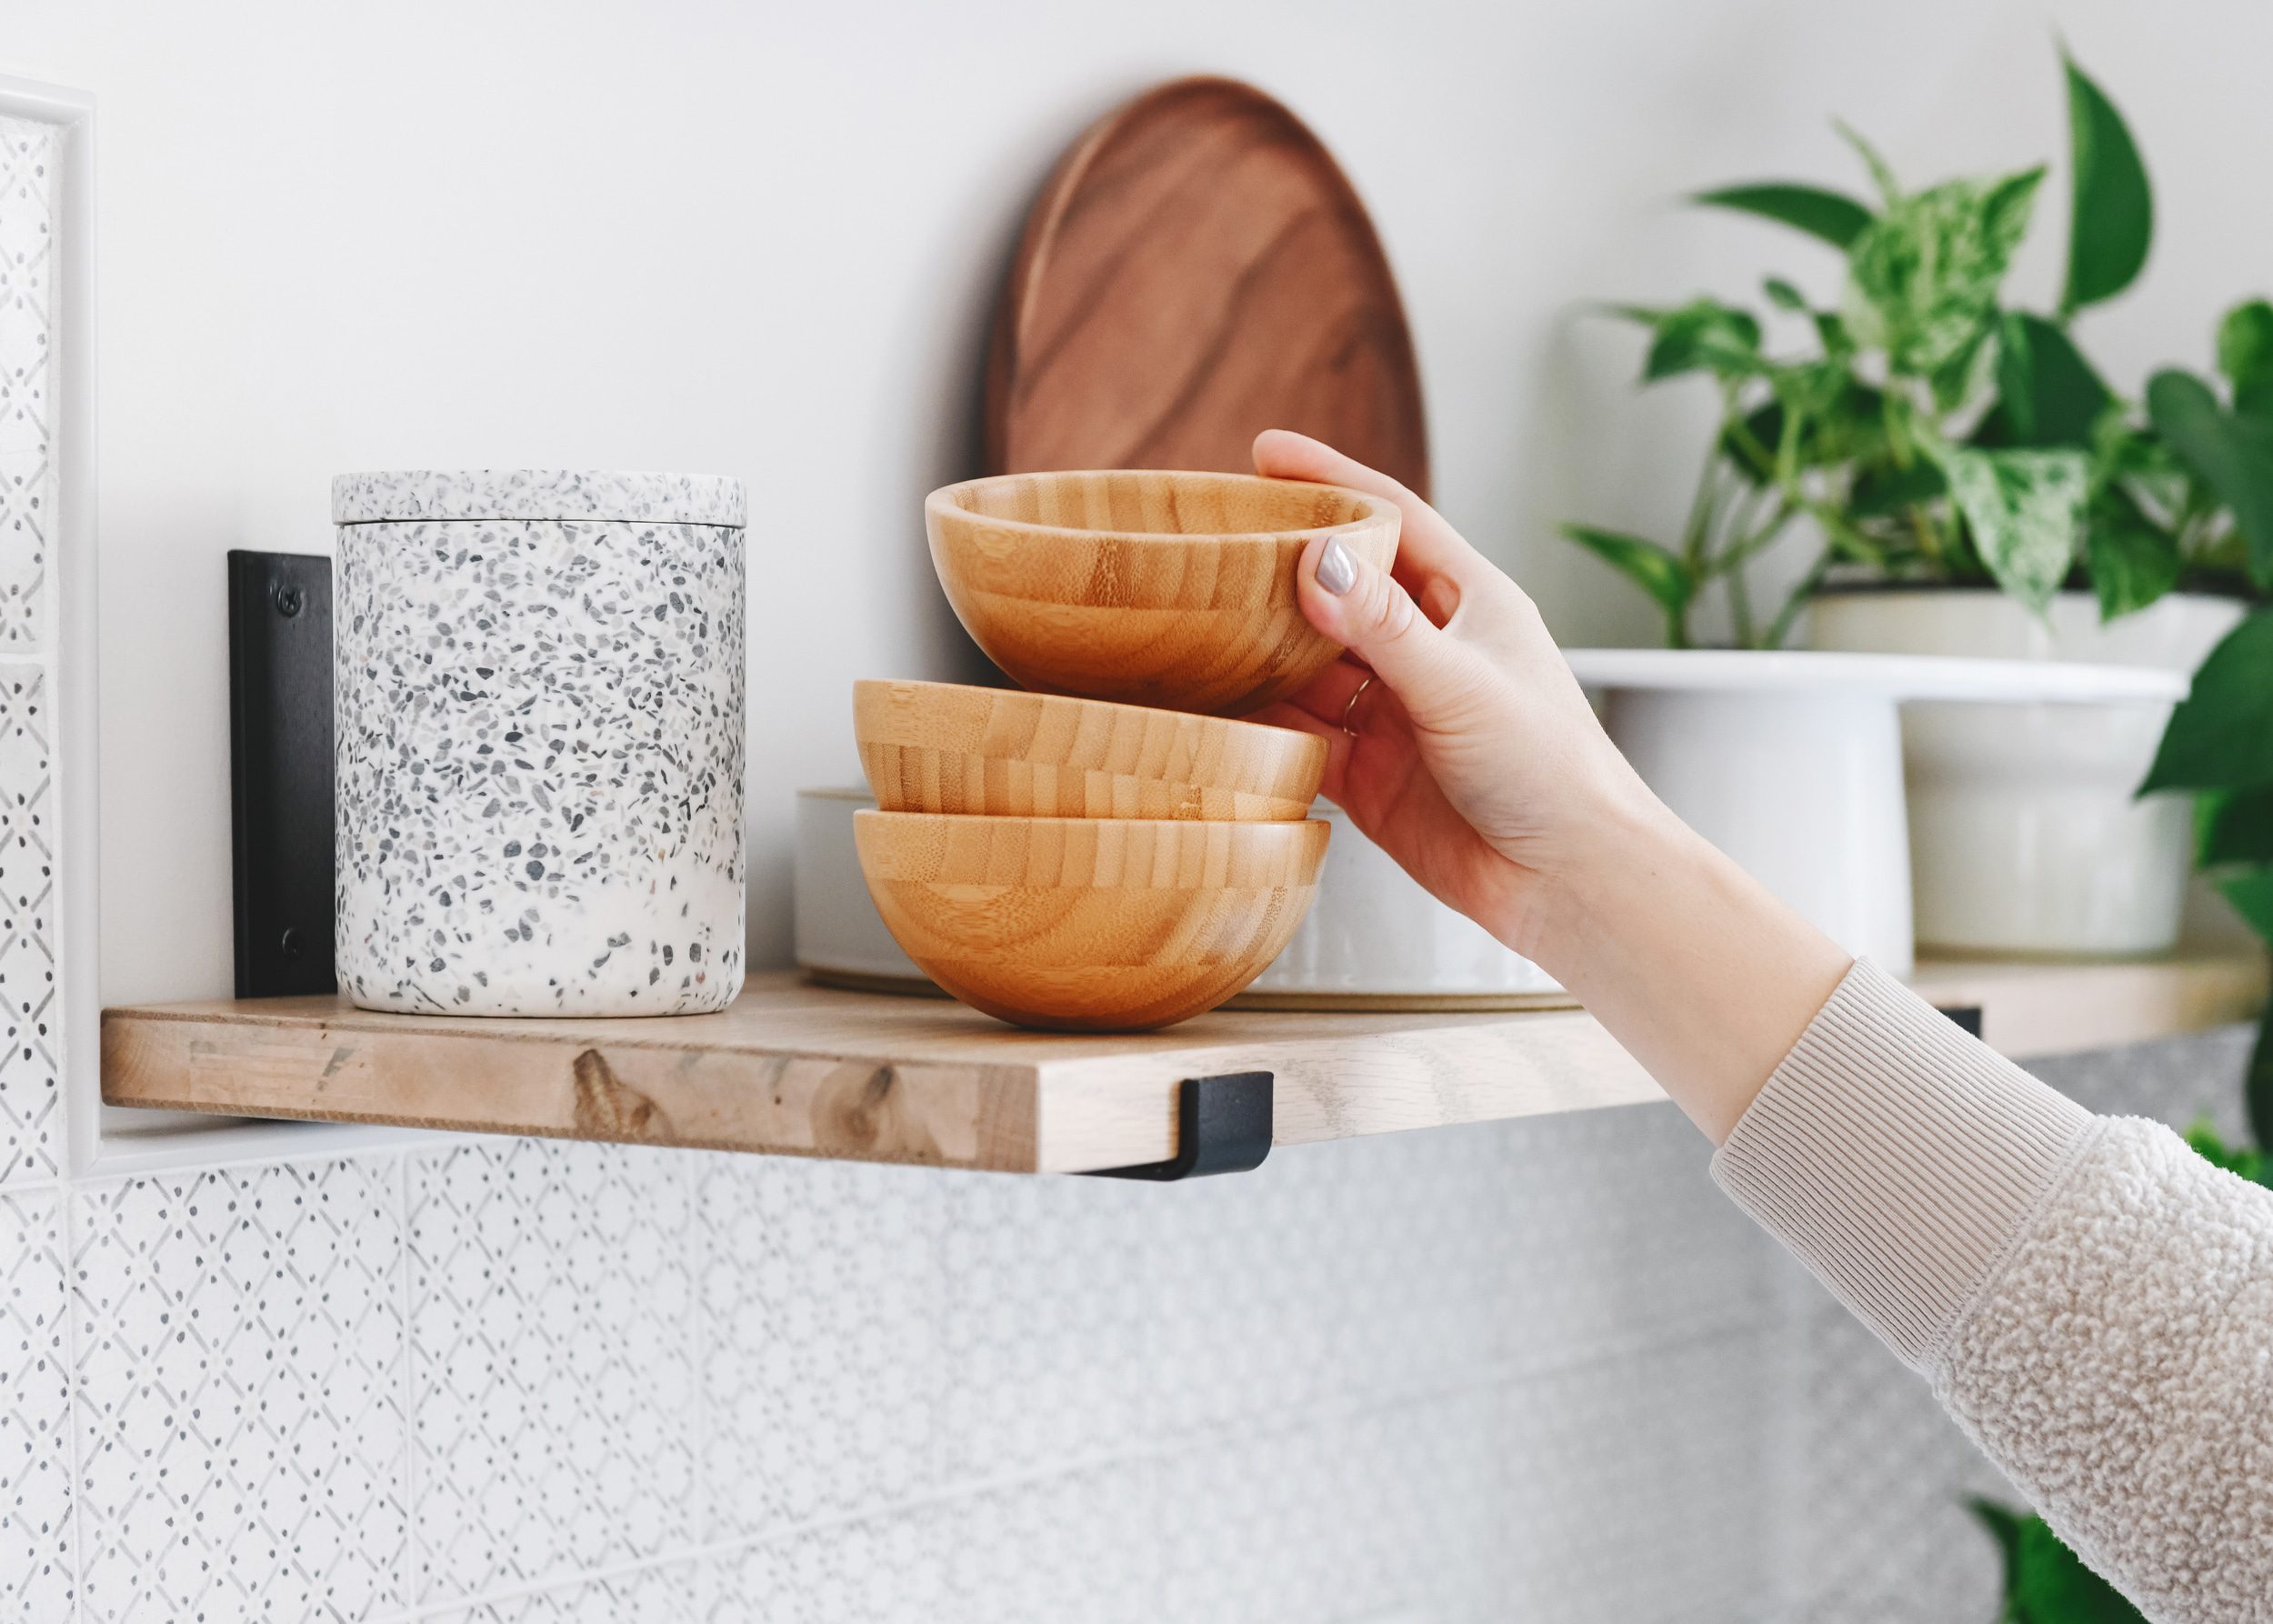
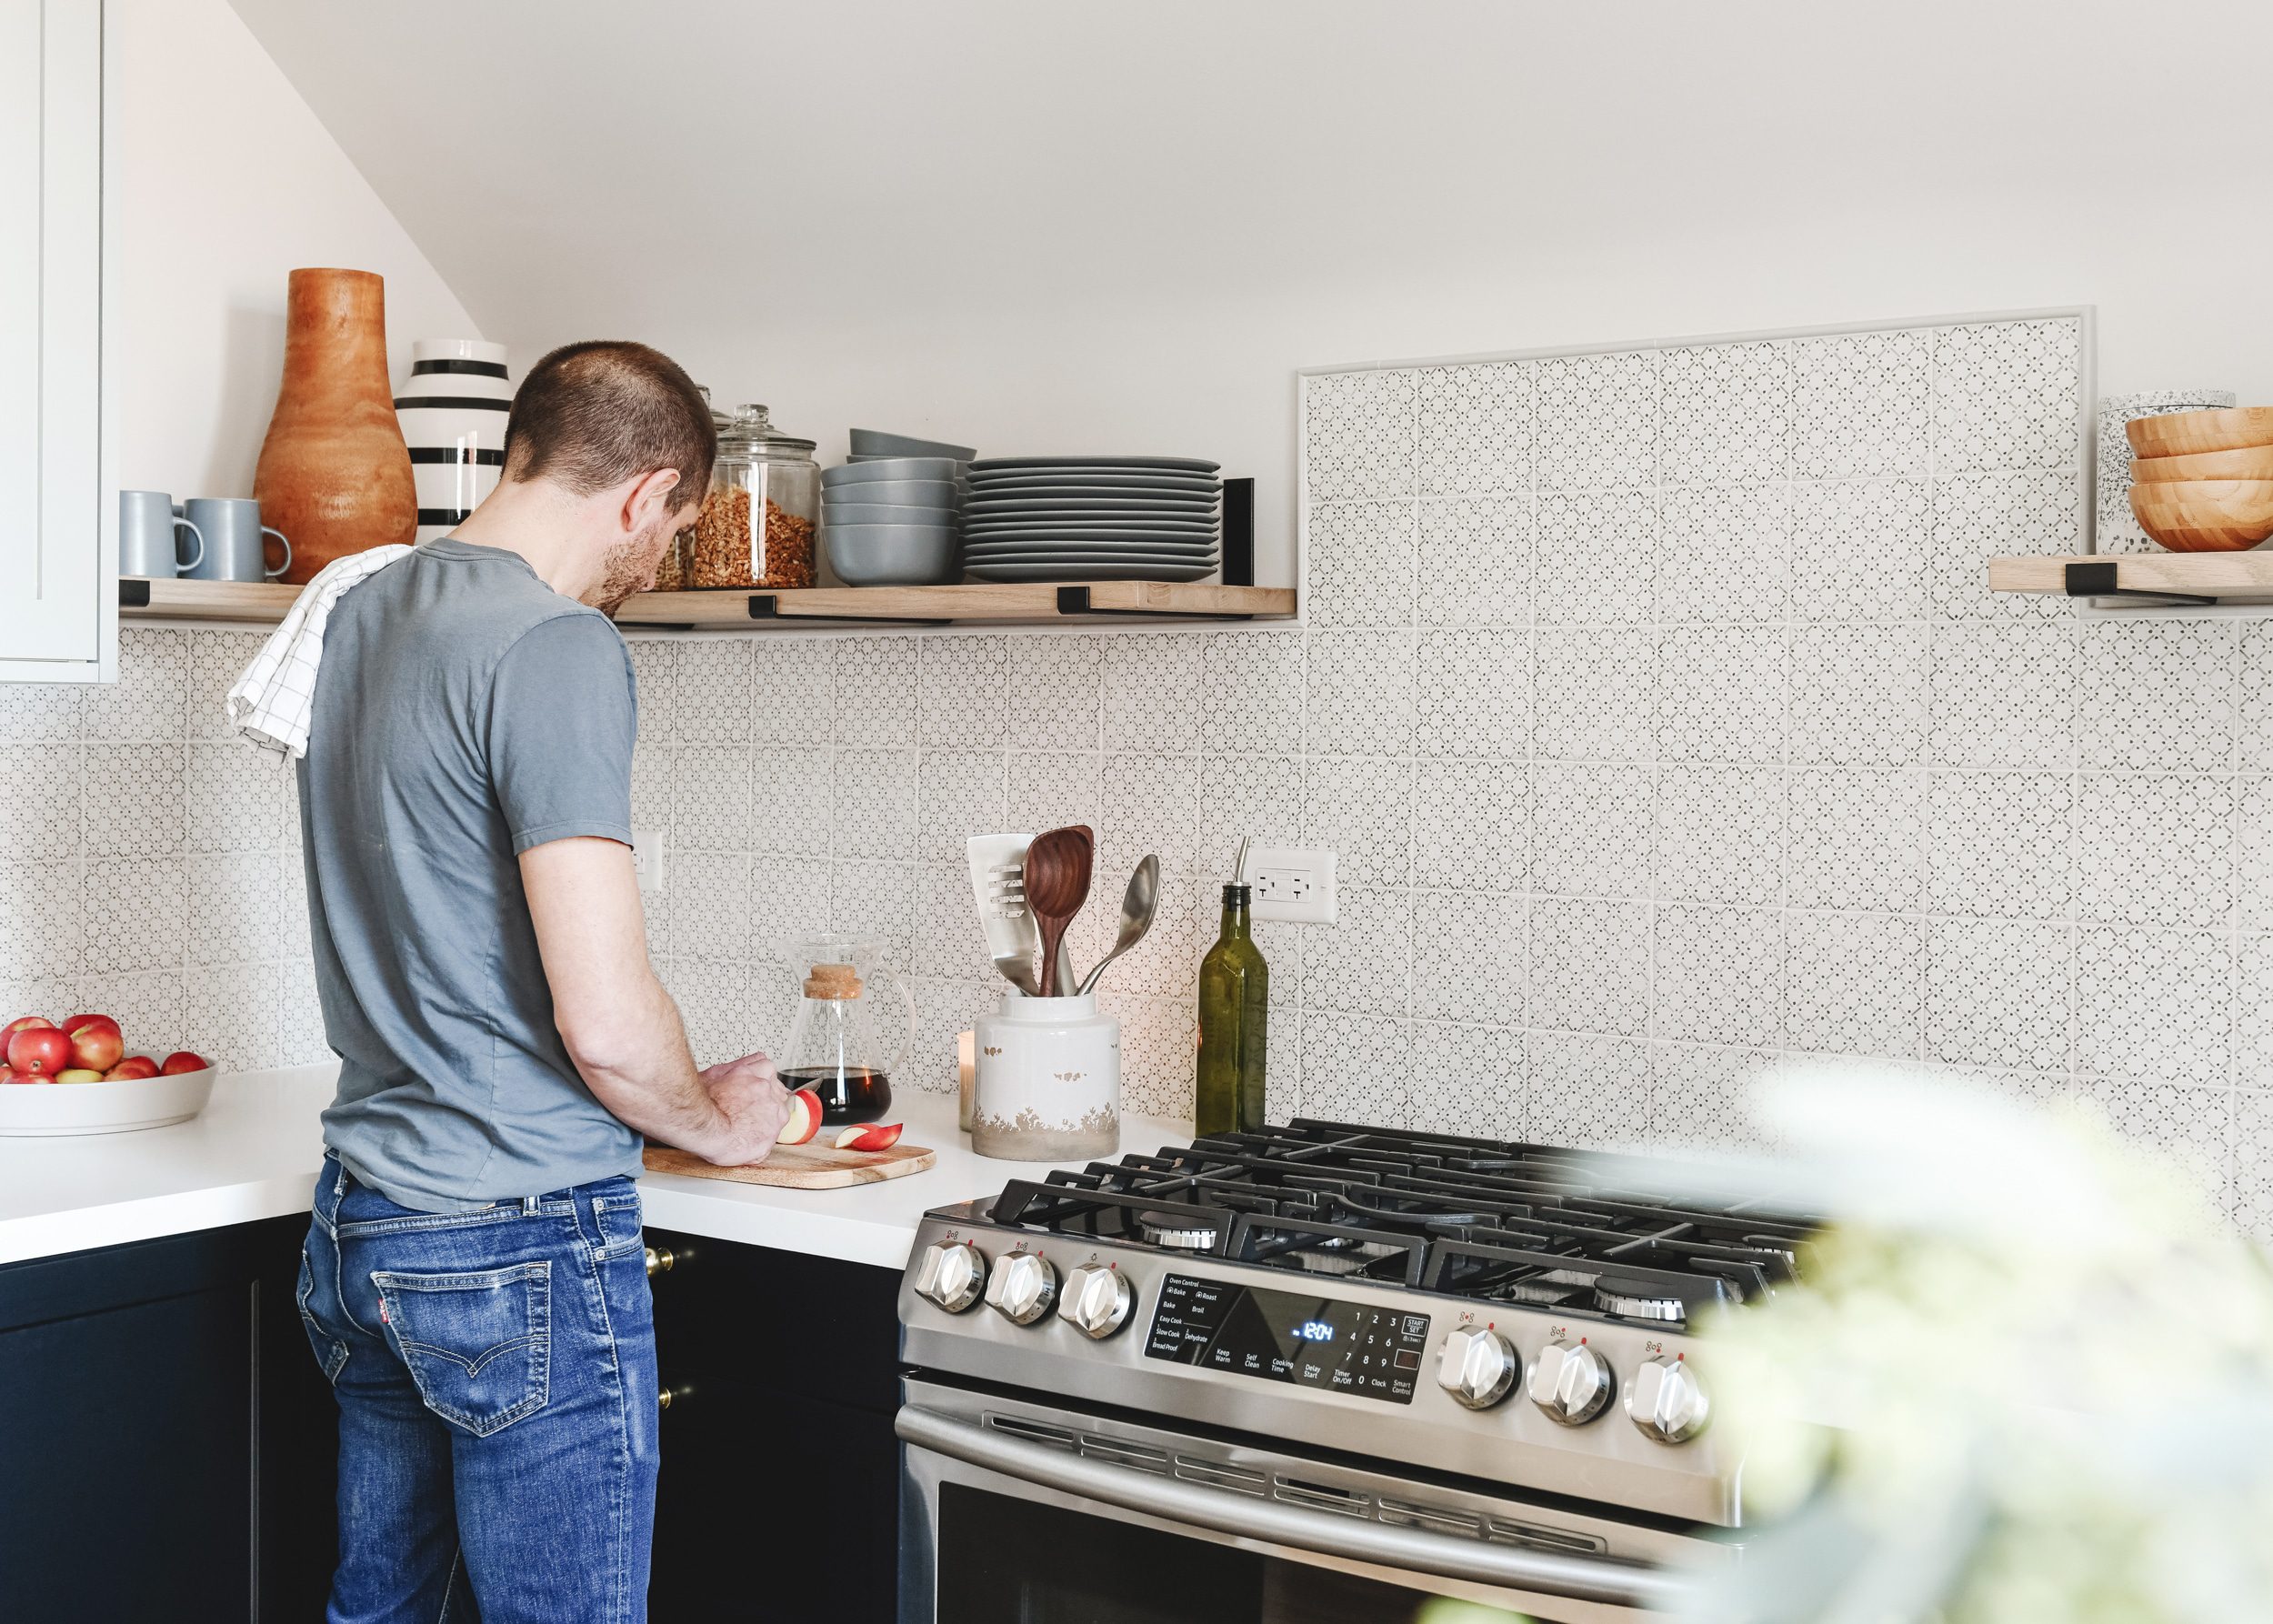
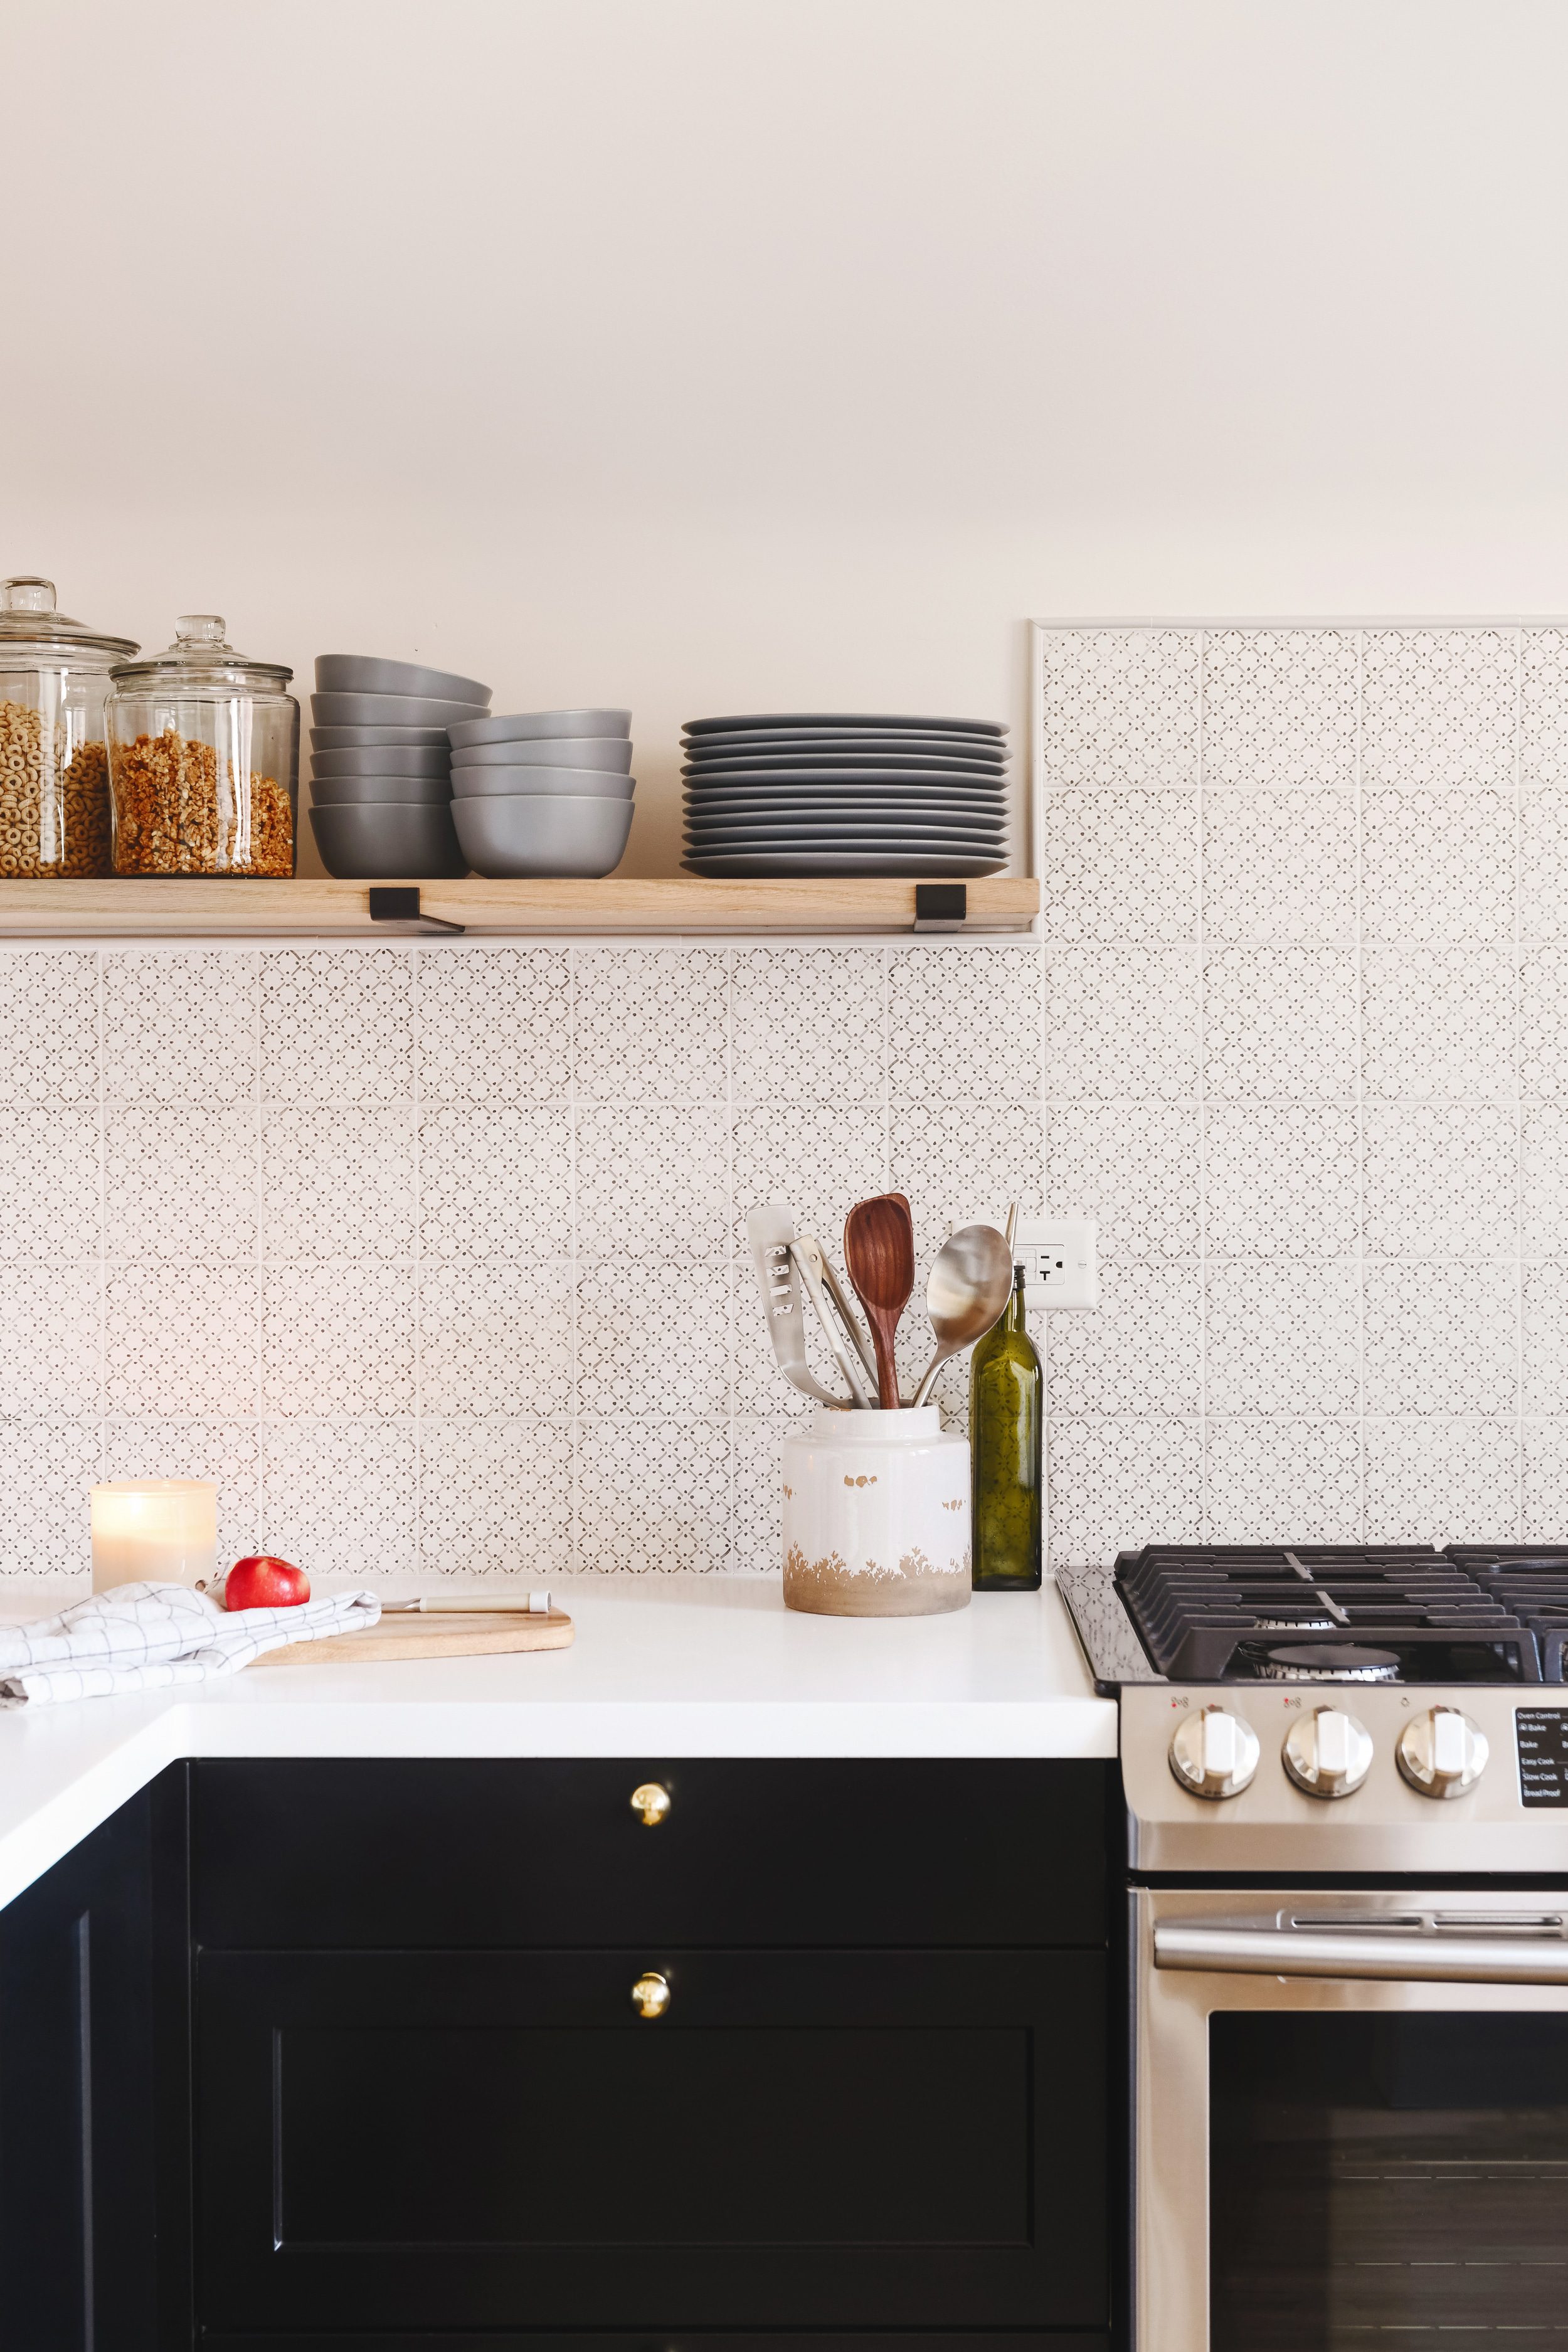
To make up for the lack of upper cabinetry, we flanked the range with open shelving, even having it turn the corner for maximum storage. Our secret for thick, sturdy shelves? Stair treads! This is how we DIYed these shelves on a budget.
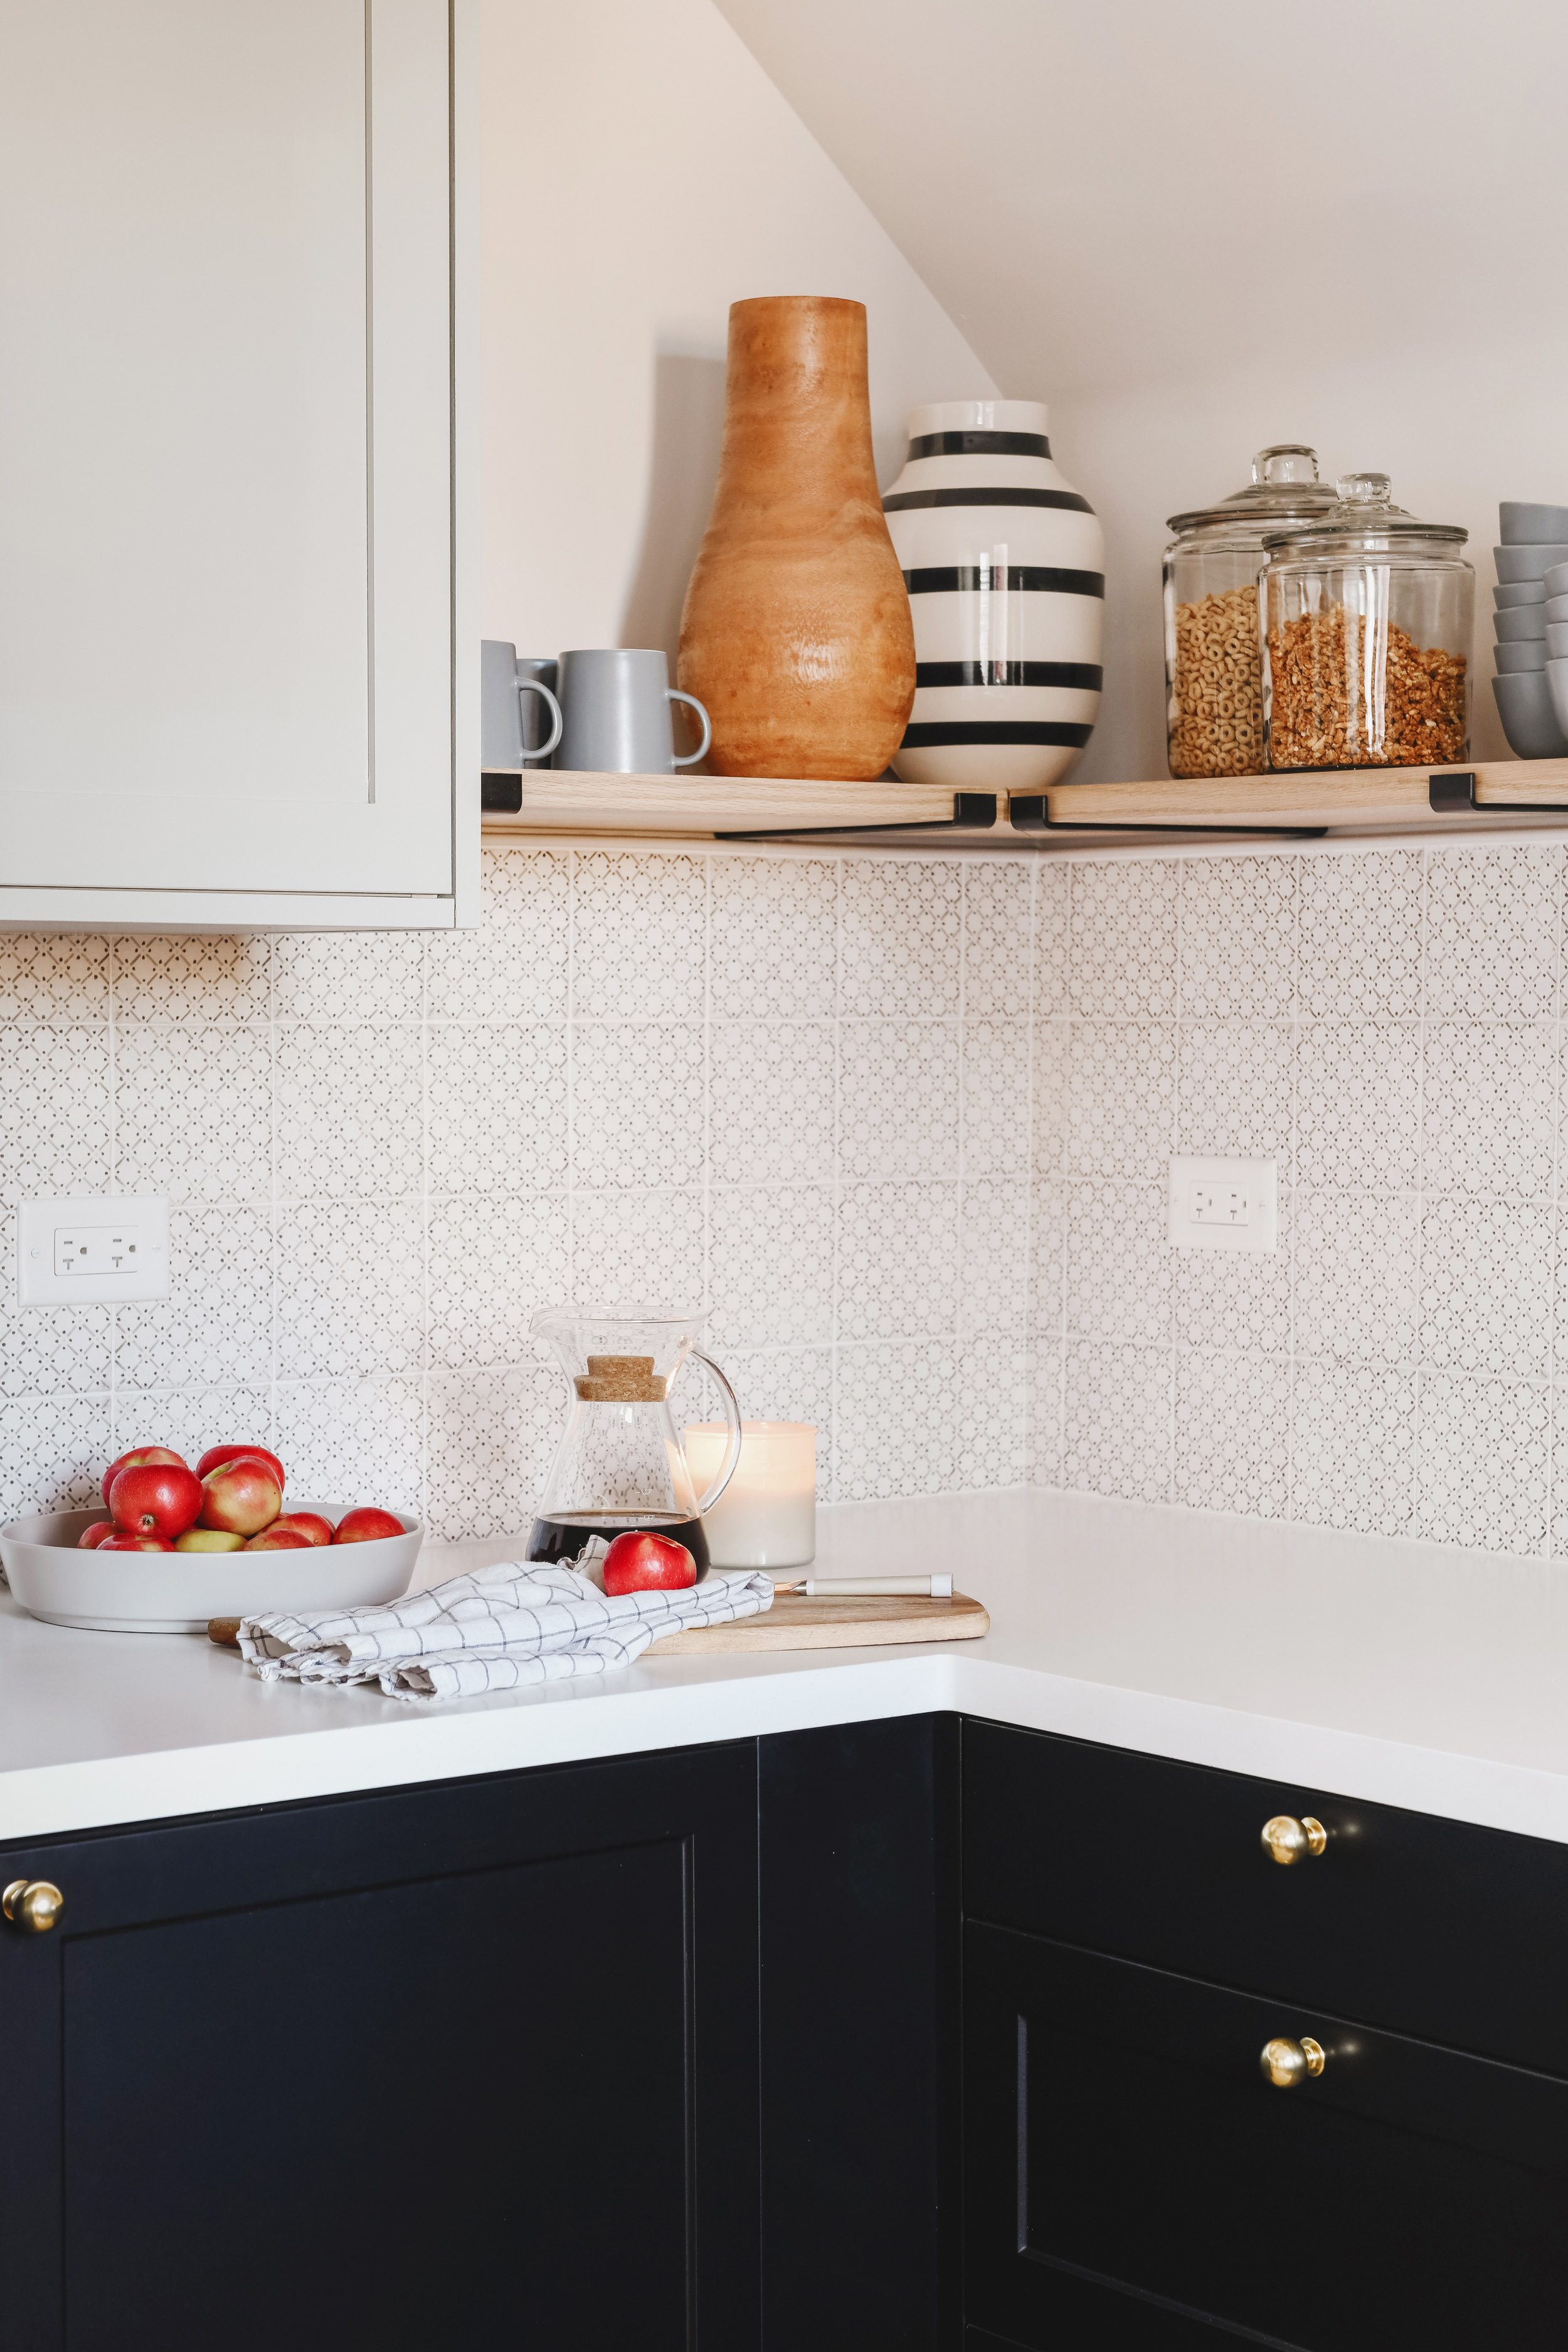
In the end, we think that the sloped ceiling is the most charming detail in the space, and we’re happy with how the cabinets, shelving and tile all play together to show it off!
Working the Work Triangle
In a tiny kitchen – nay, scratch that – in any kitchen, the ‘work triangle’ is crucial, and through a lot of kitchen design play, I think we nailed it. The range is the focal point, and the counter-depth refrigerator and sink are on either side. For a room of this size, all our planning paid off – it may be small, but it is mighty!
Cabinet + Hardware Pairings
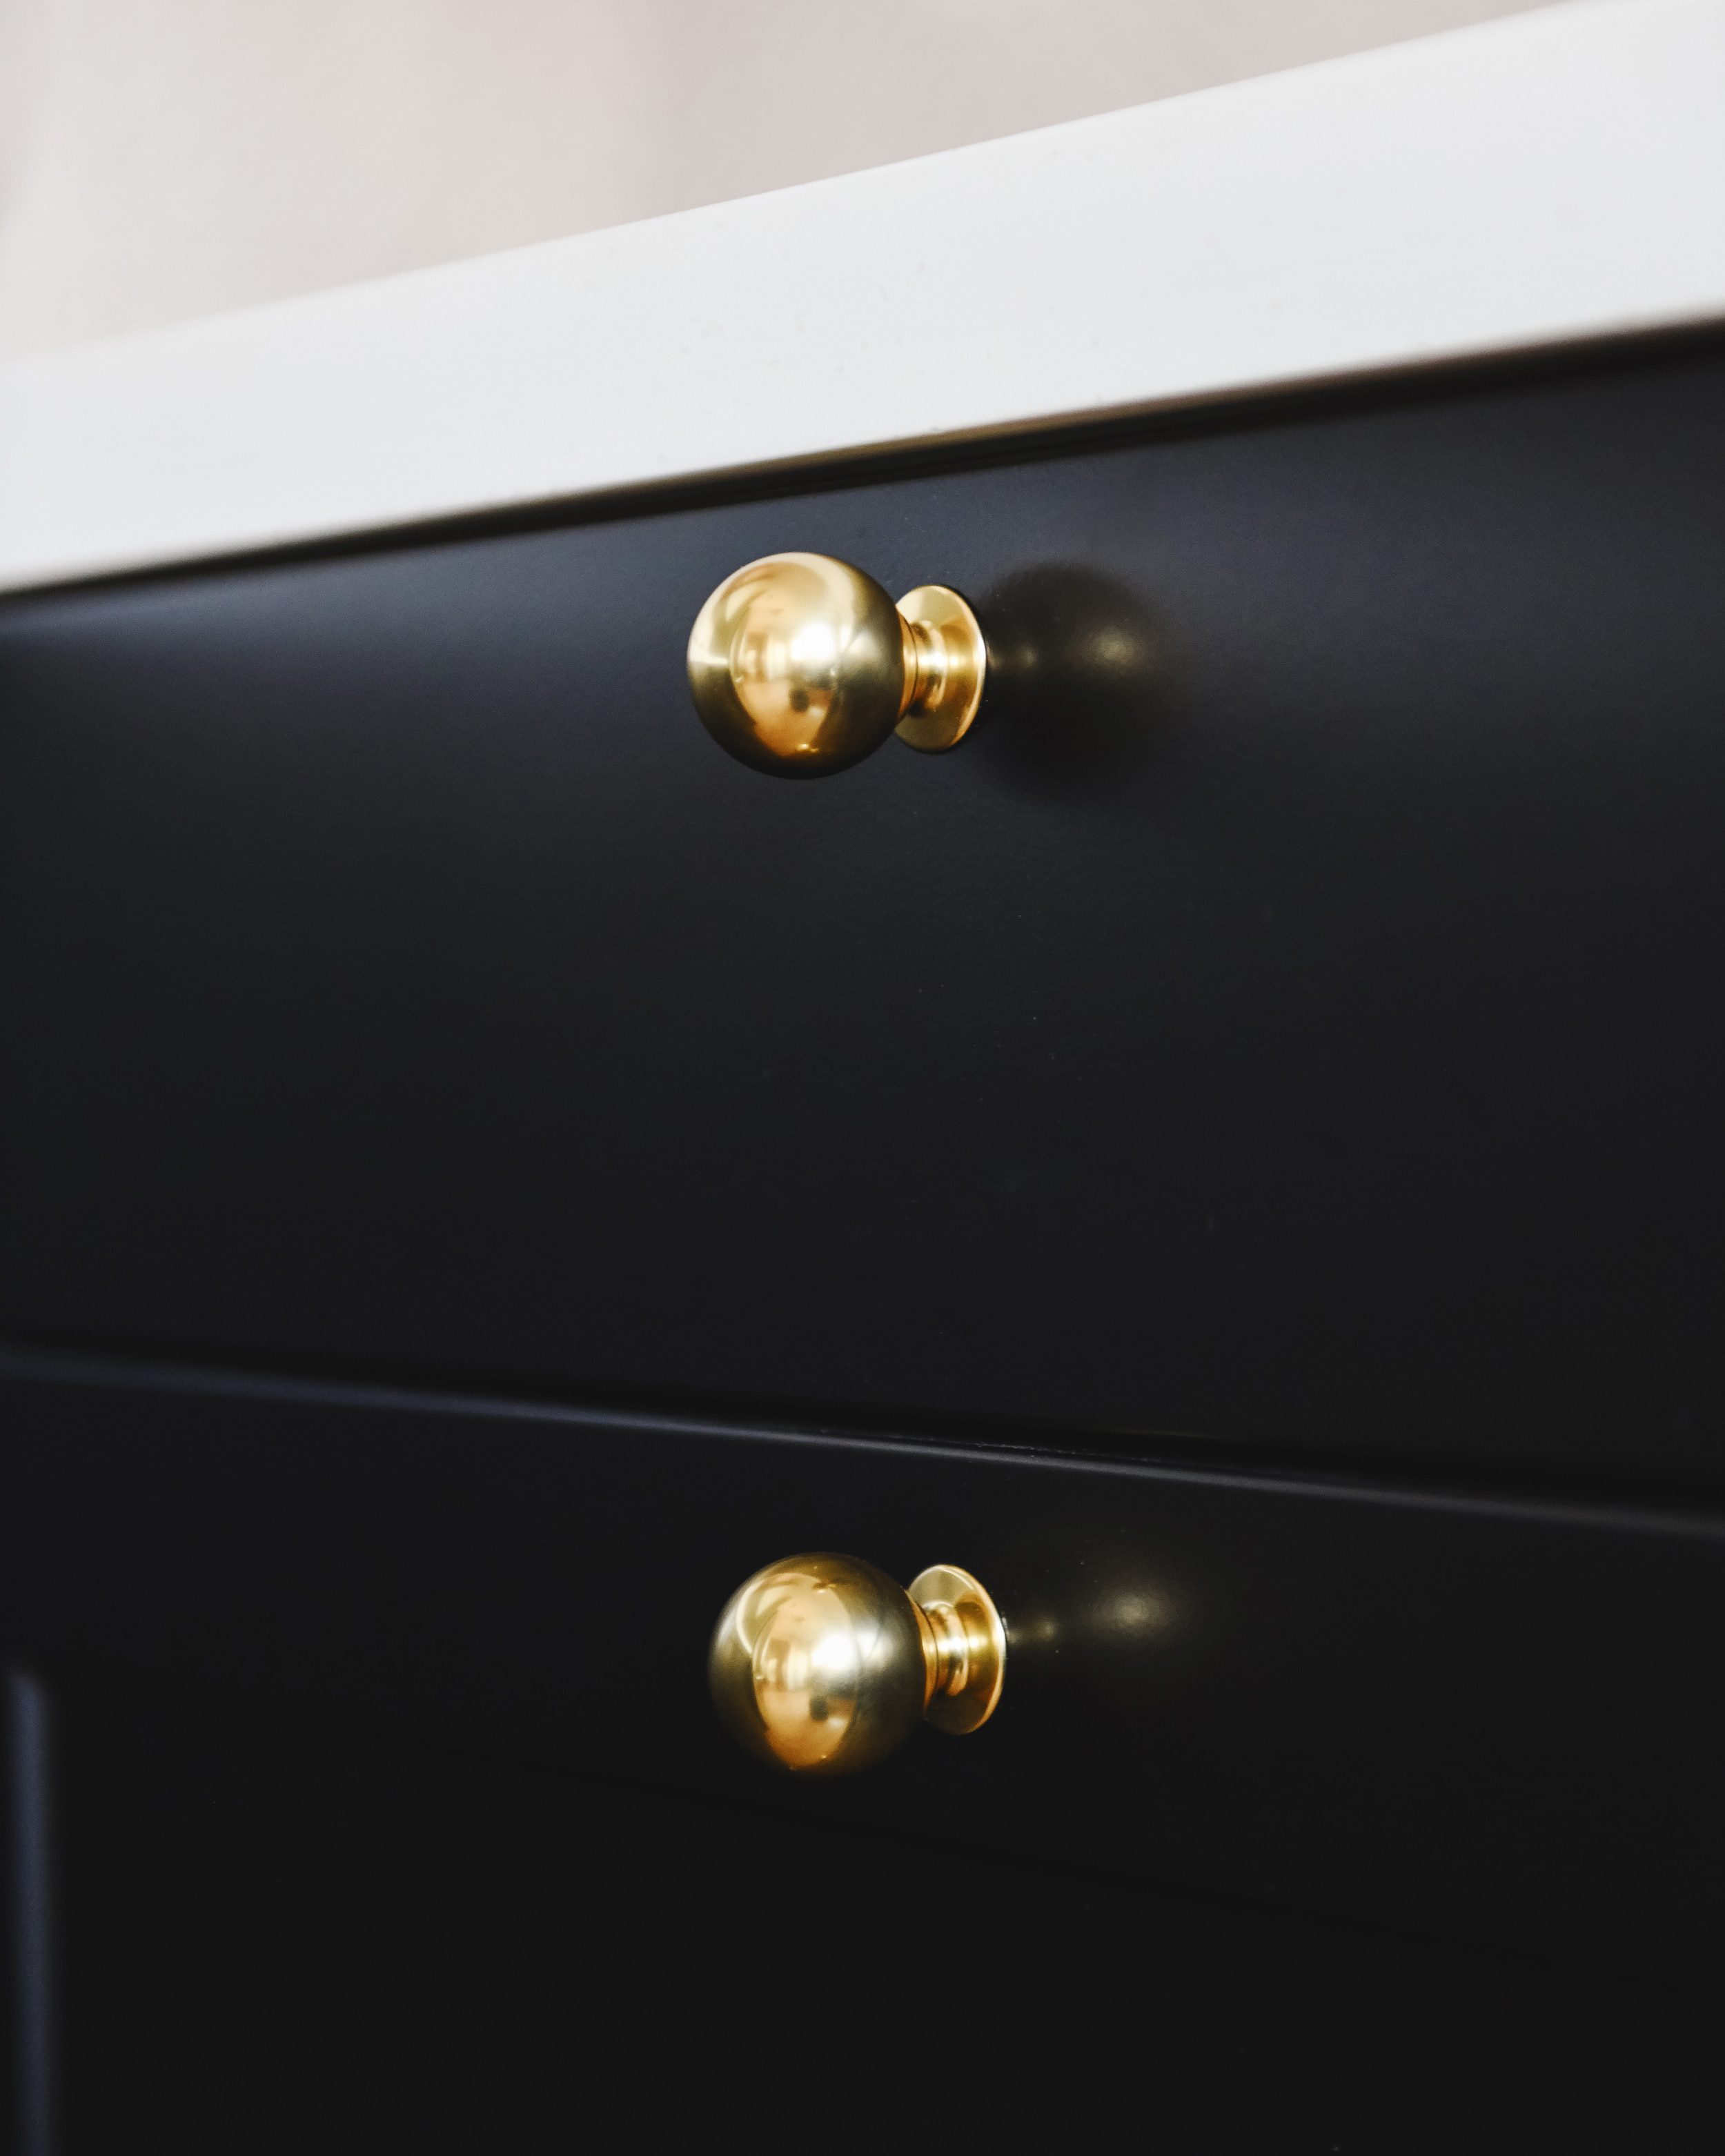
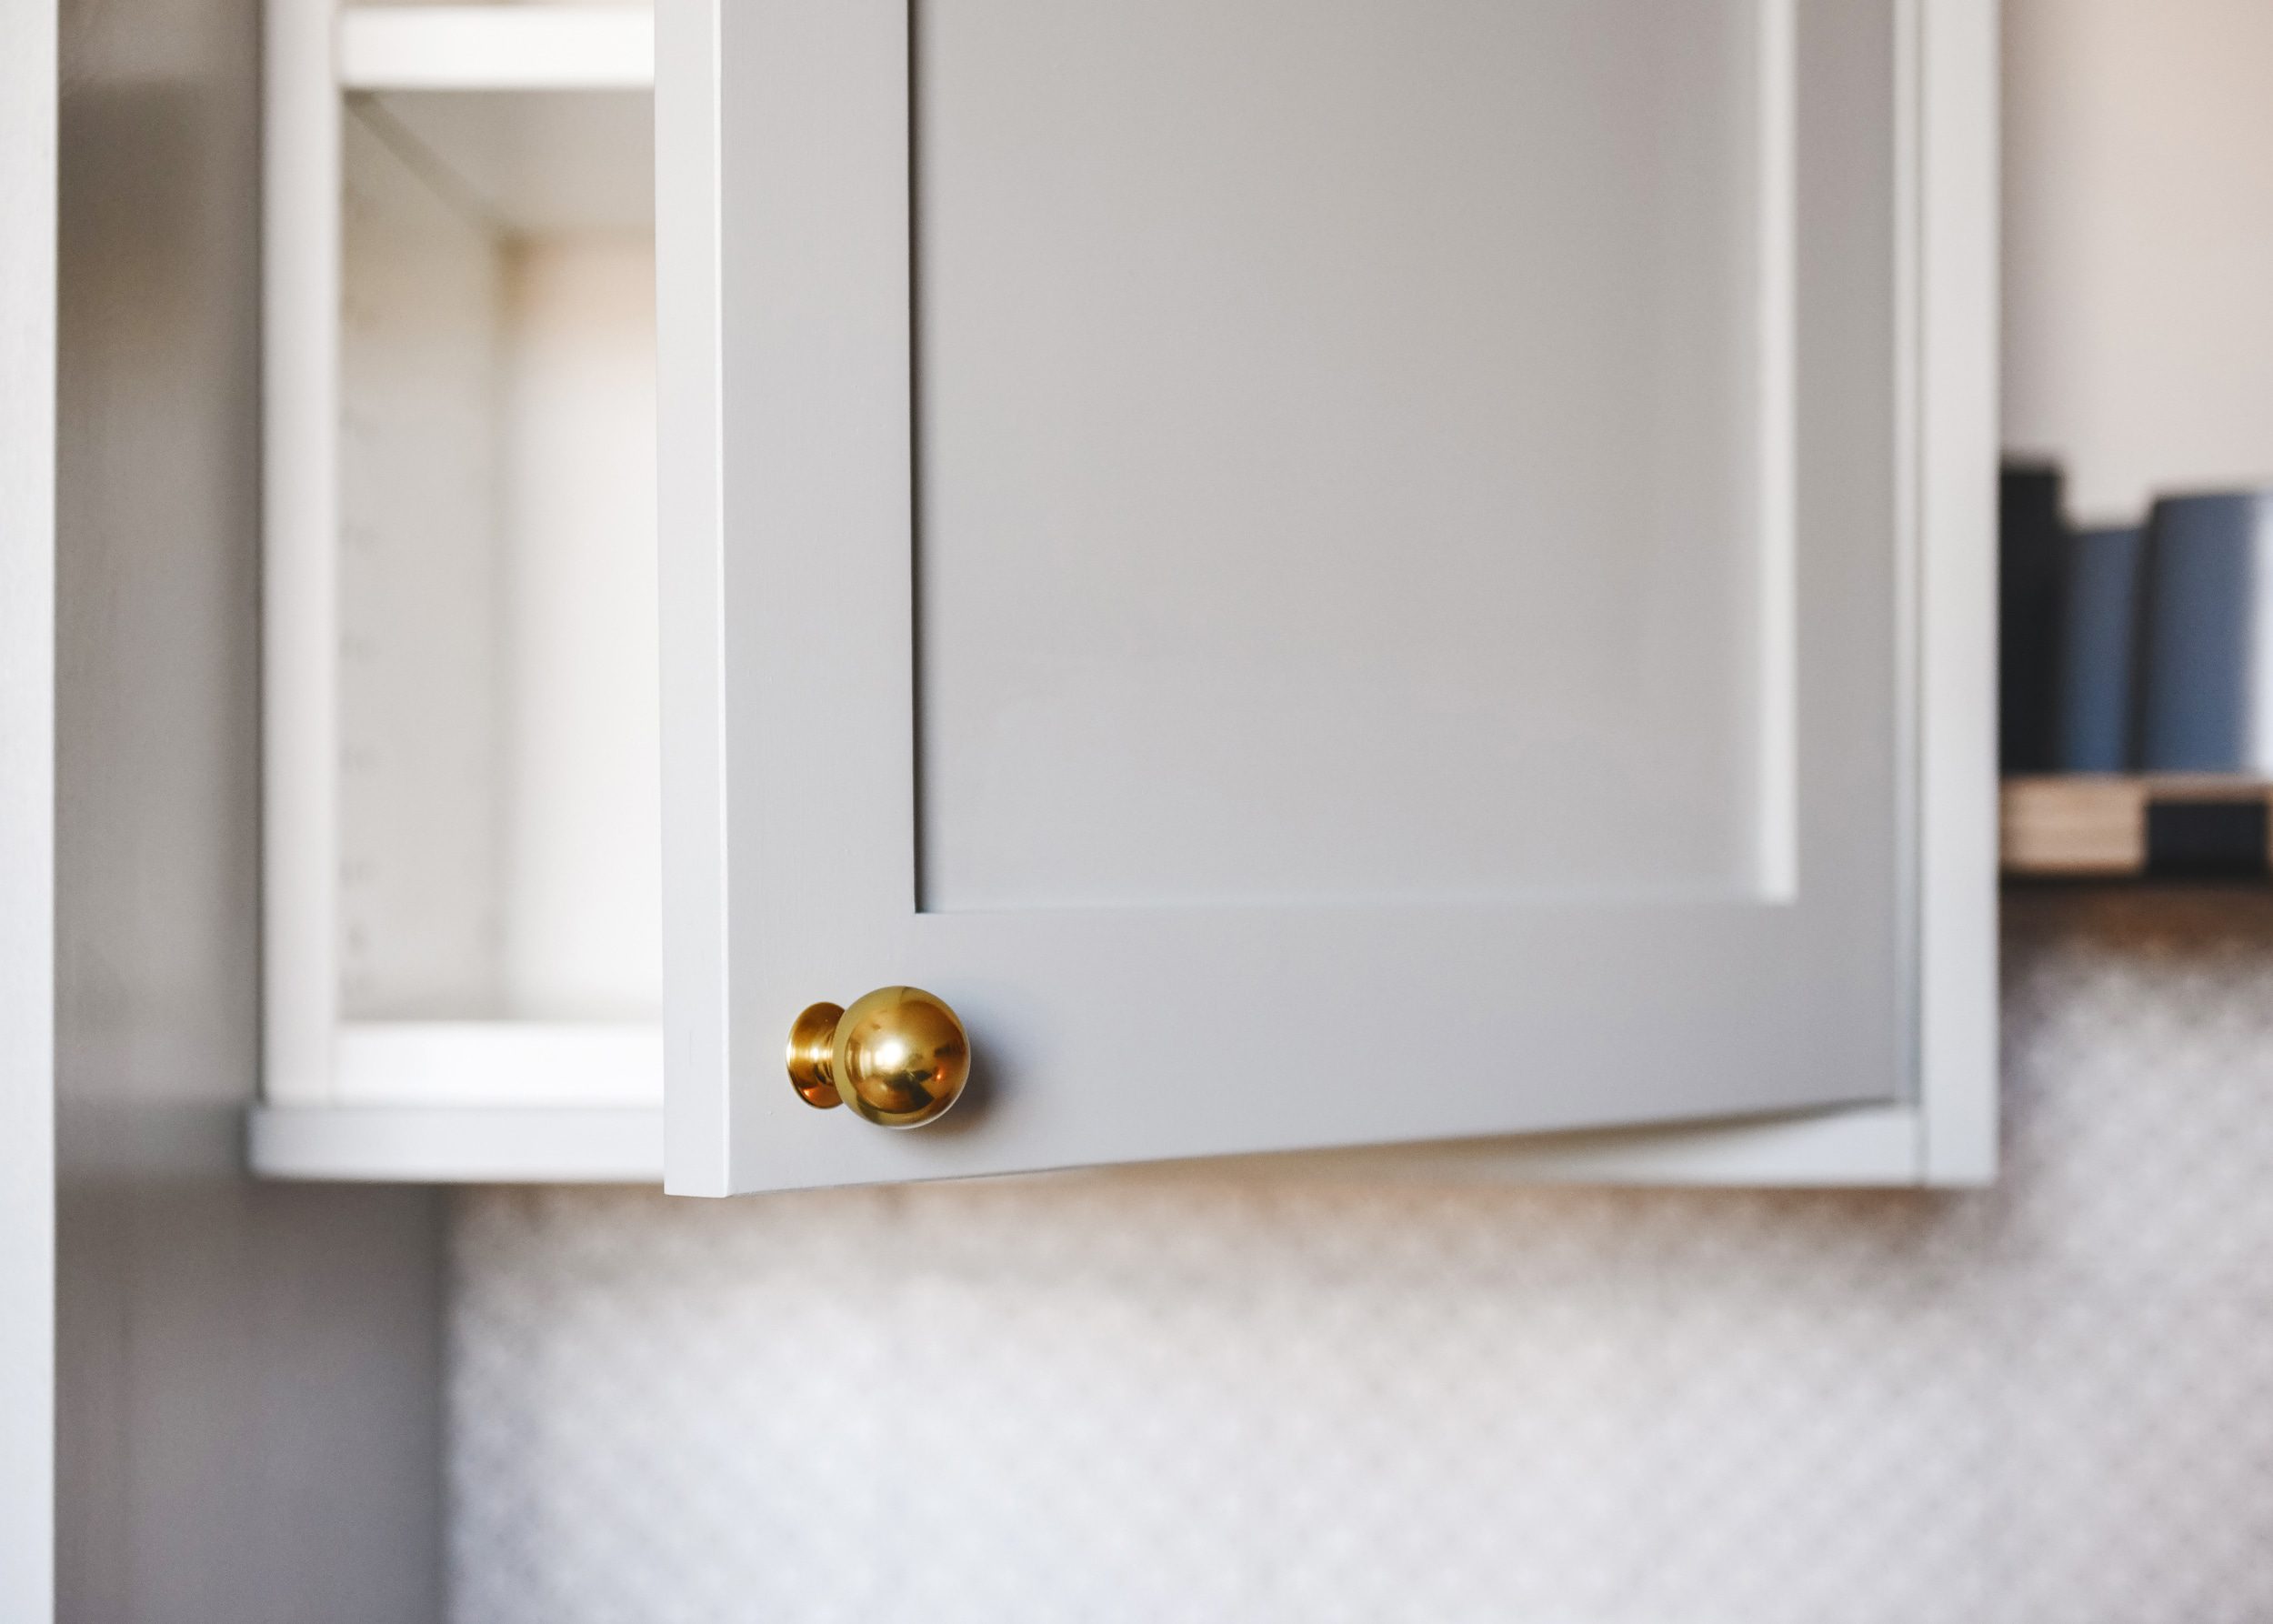
Just as we did in the Unit 1 kitchen, we chose Semihandmade doors for IKEA SEKTION cabinets. We’ve lined the room with Supermatte Black Shaker panels, and the for the few uppers we do have, we used DIY shaker panels and painted them Sherwin-Williams Magnetic Gray, the same color as the trim. Every filler panel you see is also Semihandmade, for a seamless, custom finish throughout the space!
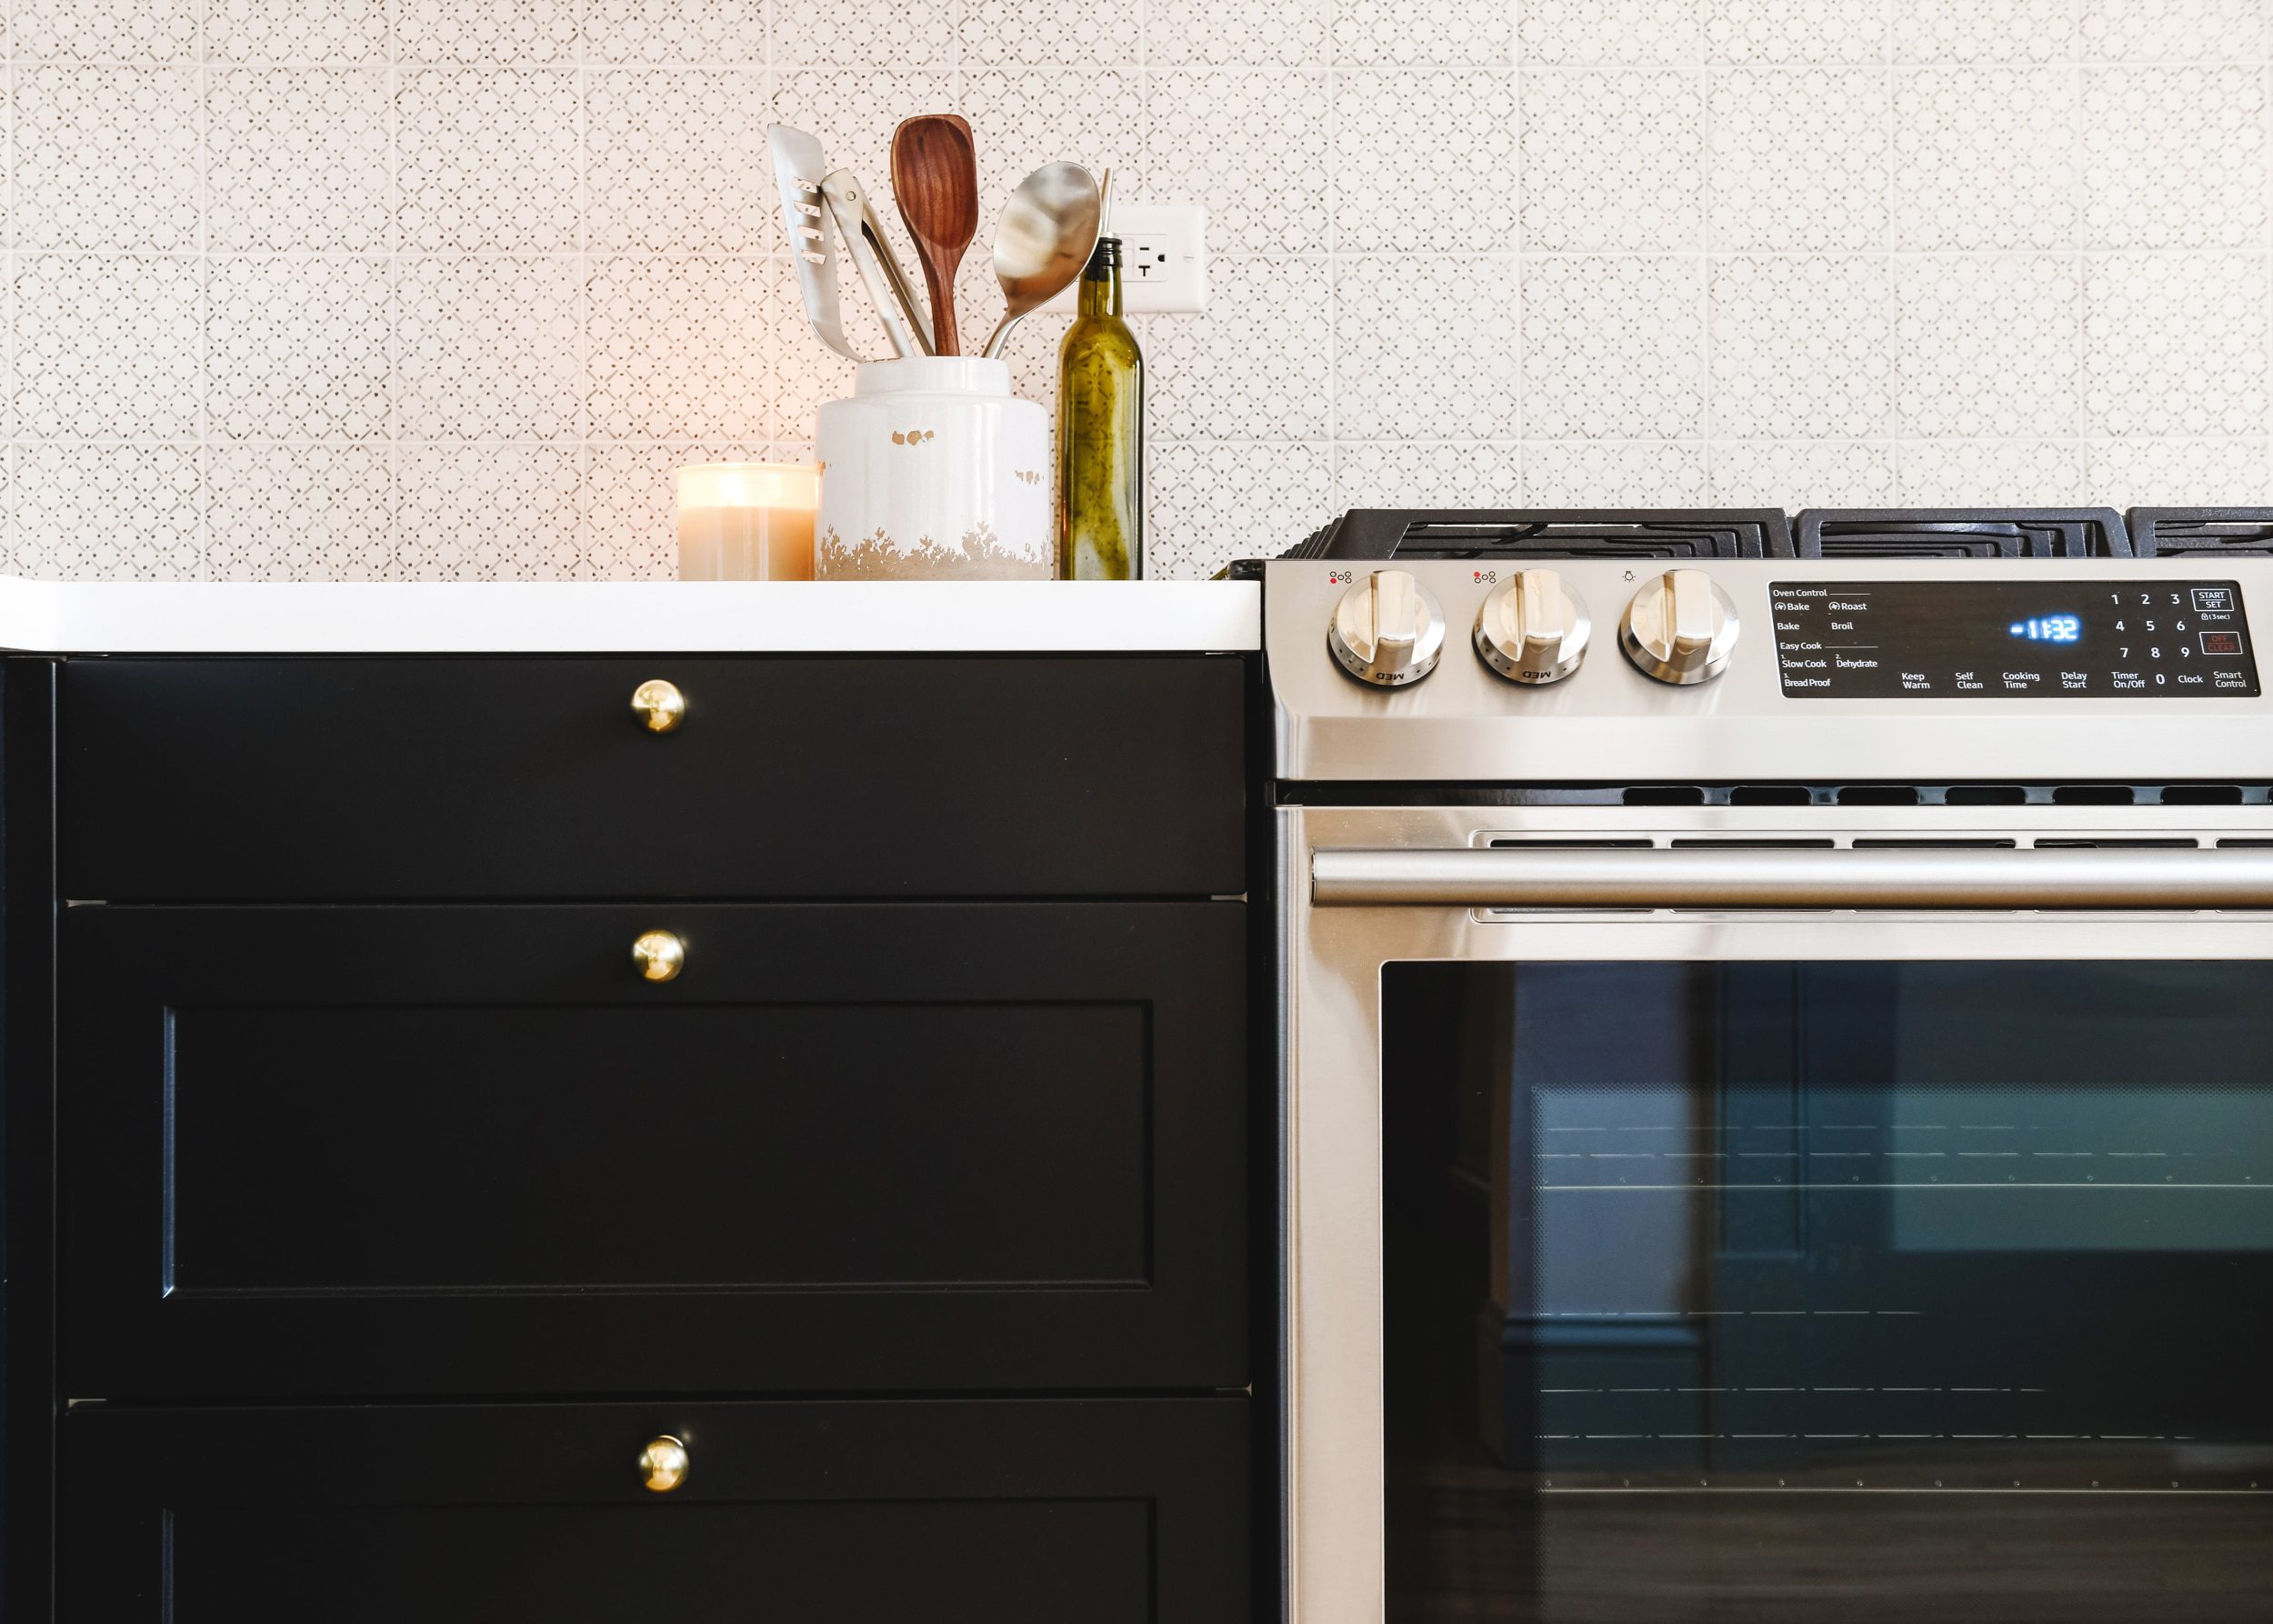
I have long loved these substantial ball knobs (we used them in Unit 1 as well!), and they’re the prettiest contrast with both the Supermatte Black lowers and Magnetic Gray uppers – especially when paired with our Everform™ Solid Surfacing countertop in Bleached Concrete!
Secrets Behind Closed Doors
We can’t get enough of hidden conveniences, and this kitchen is no different! Because we were so tight on space, we needed an 18″ dishwasher, and this one fit the bill! It’s panel ready, so we were able to pair it with our Semihandmade door:

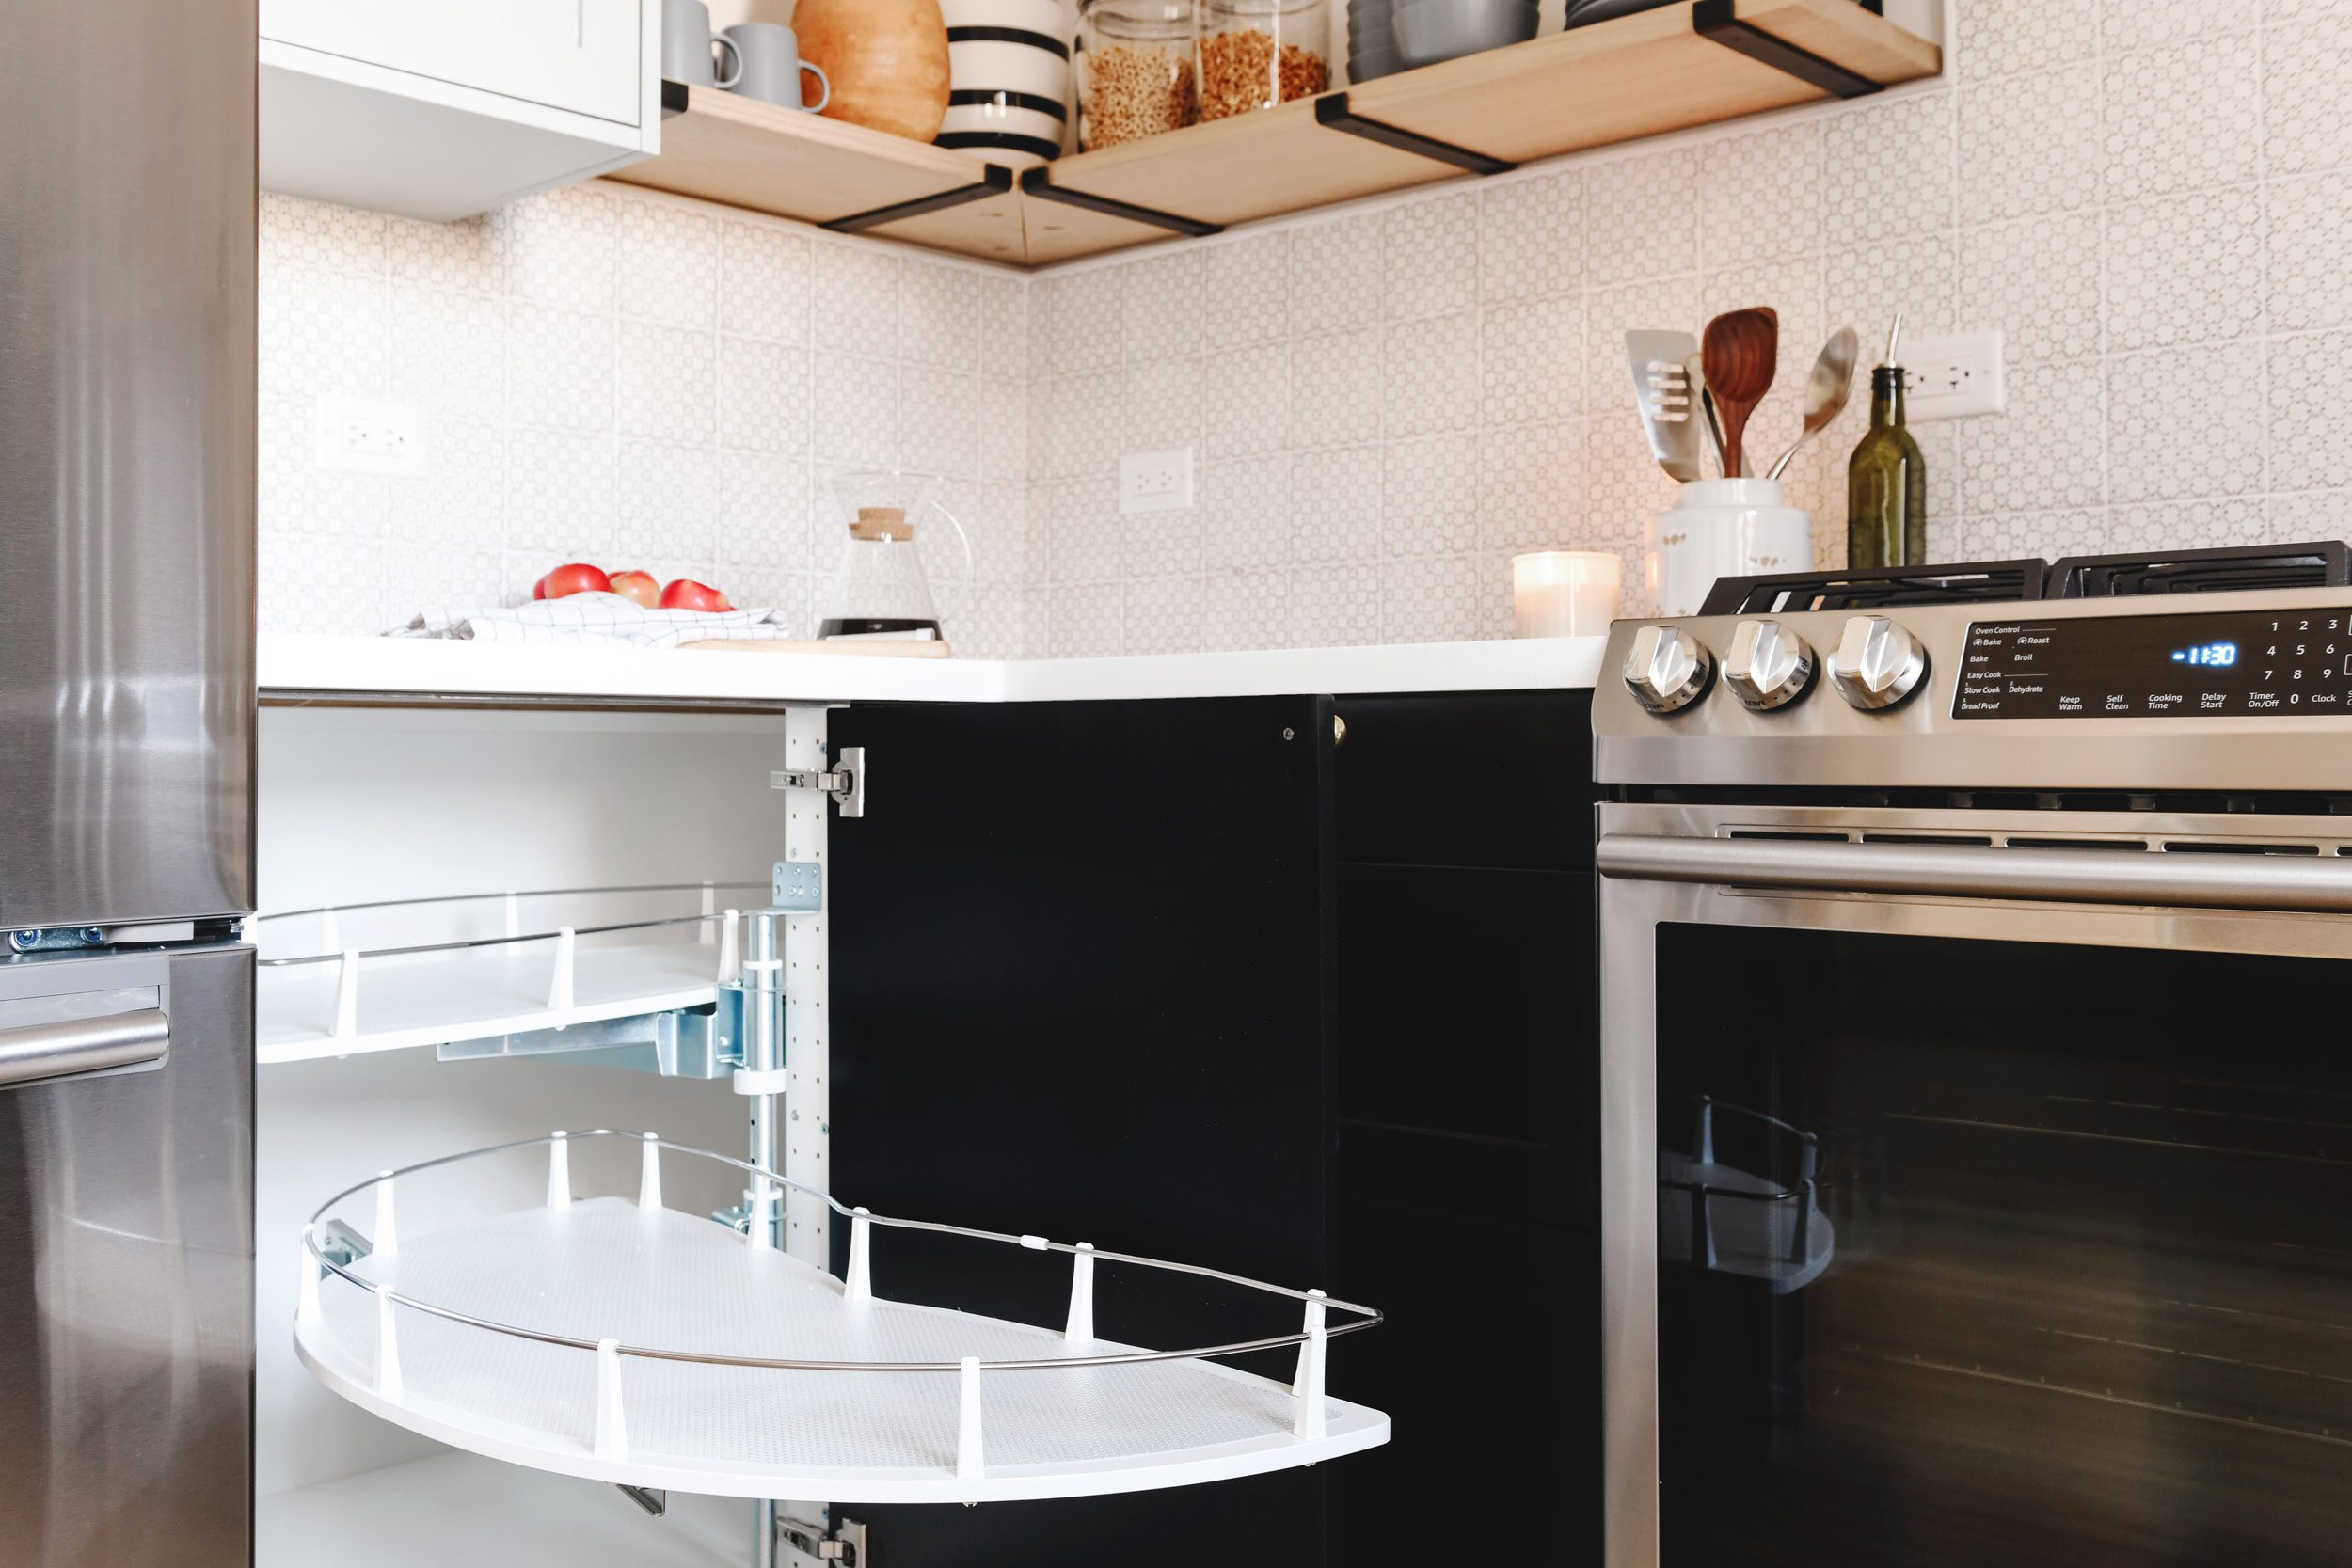
These corner cabinets are unique, because the lazy Susan pulls all the way out! What! It eased our fears about items getting lost in the back, not to mention, it’s easier on the knees and back since you don’t need to bend over or get low to find The Thing you’re looking for. (And yes, that’s a stock IKEA option!)
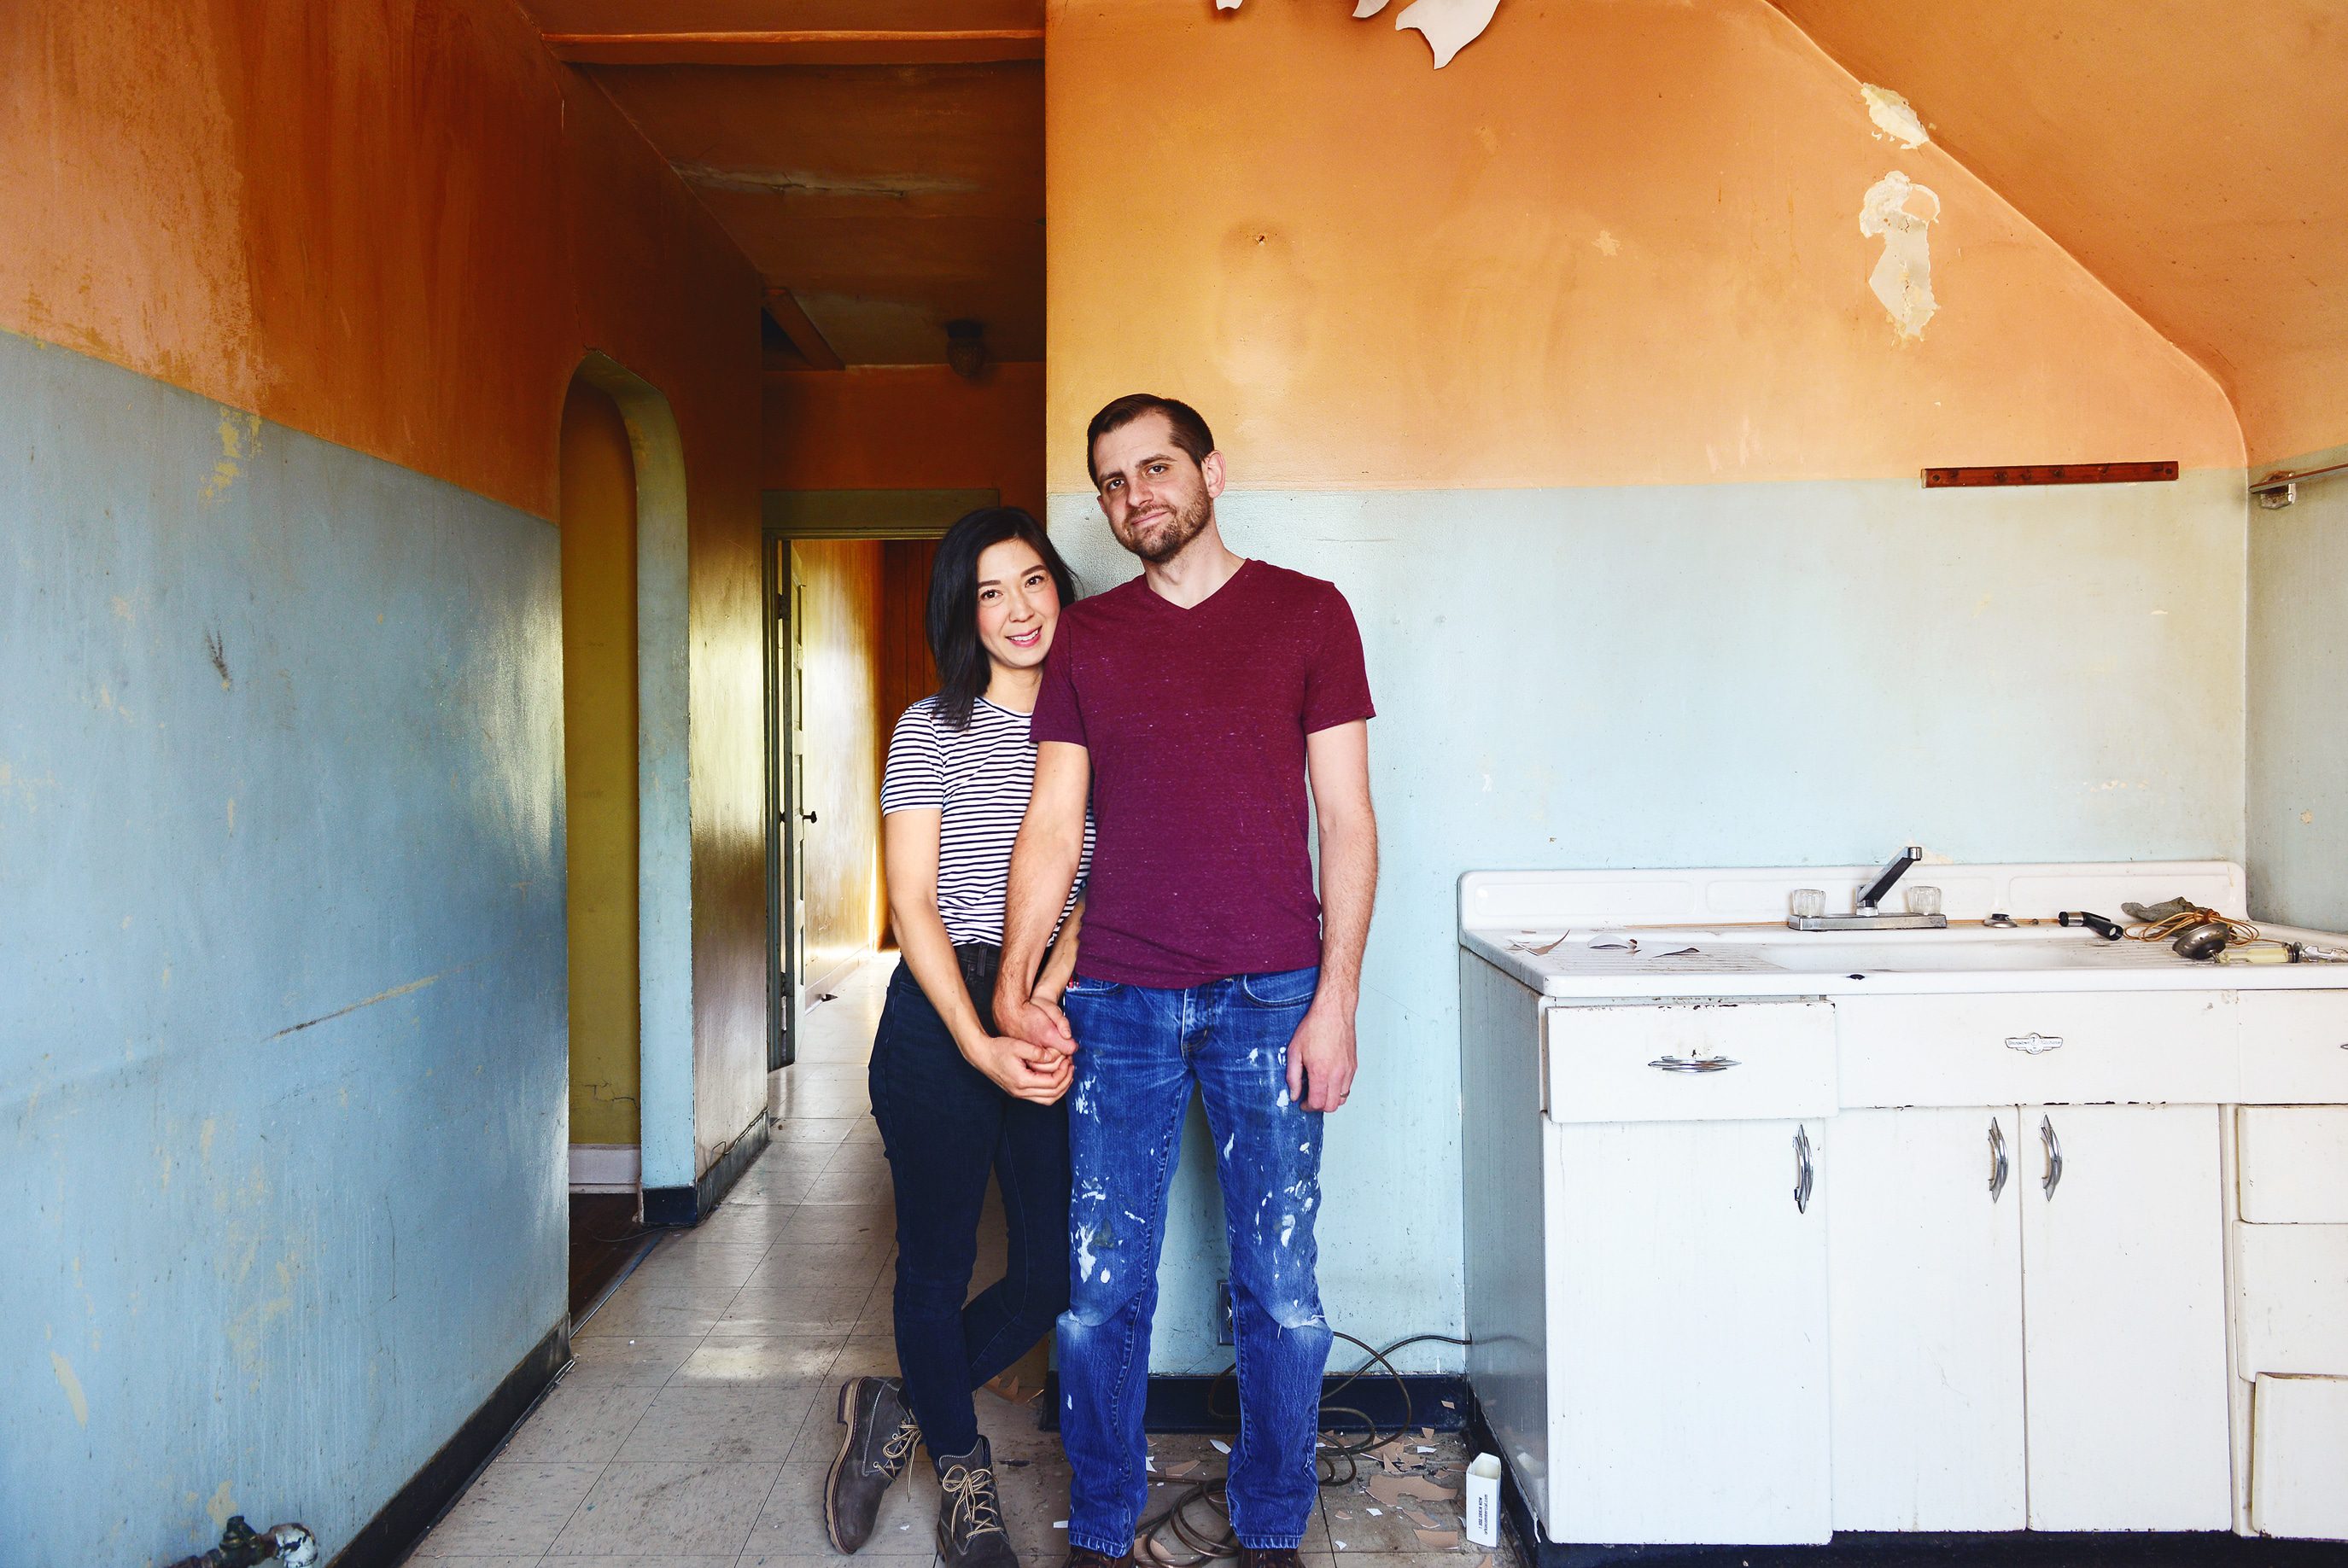
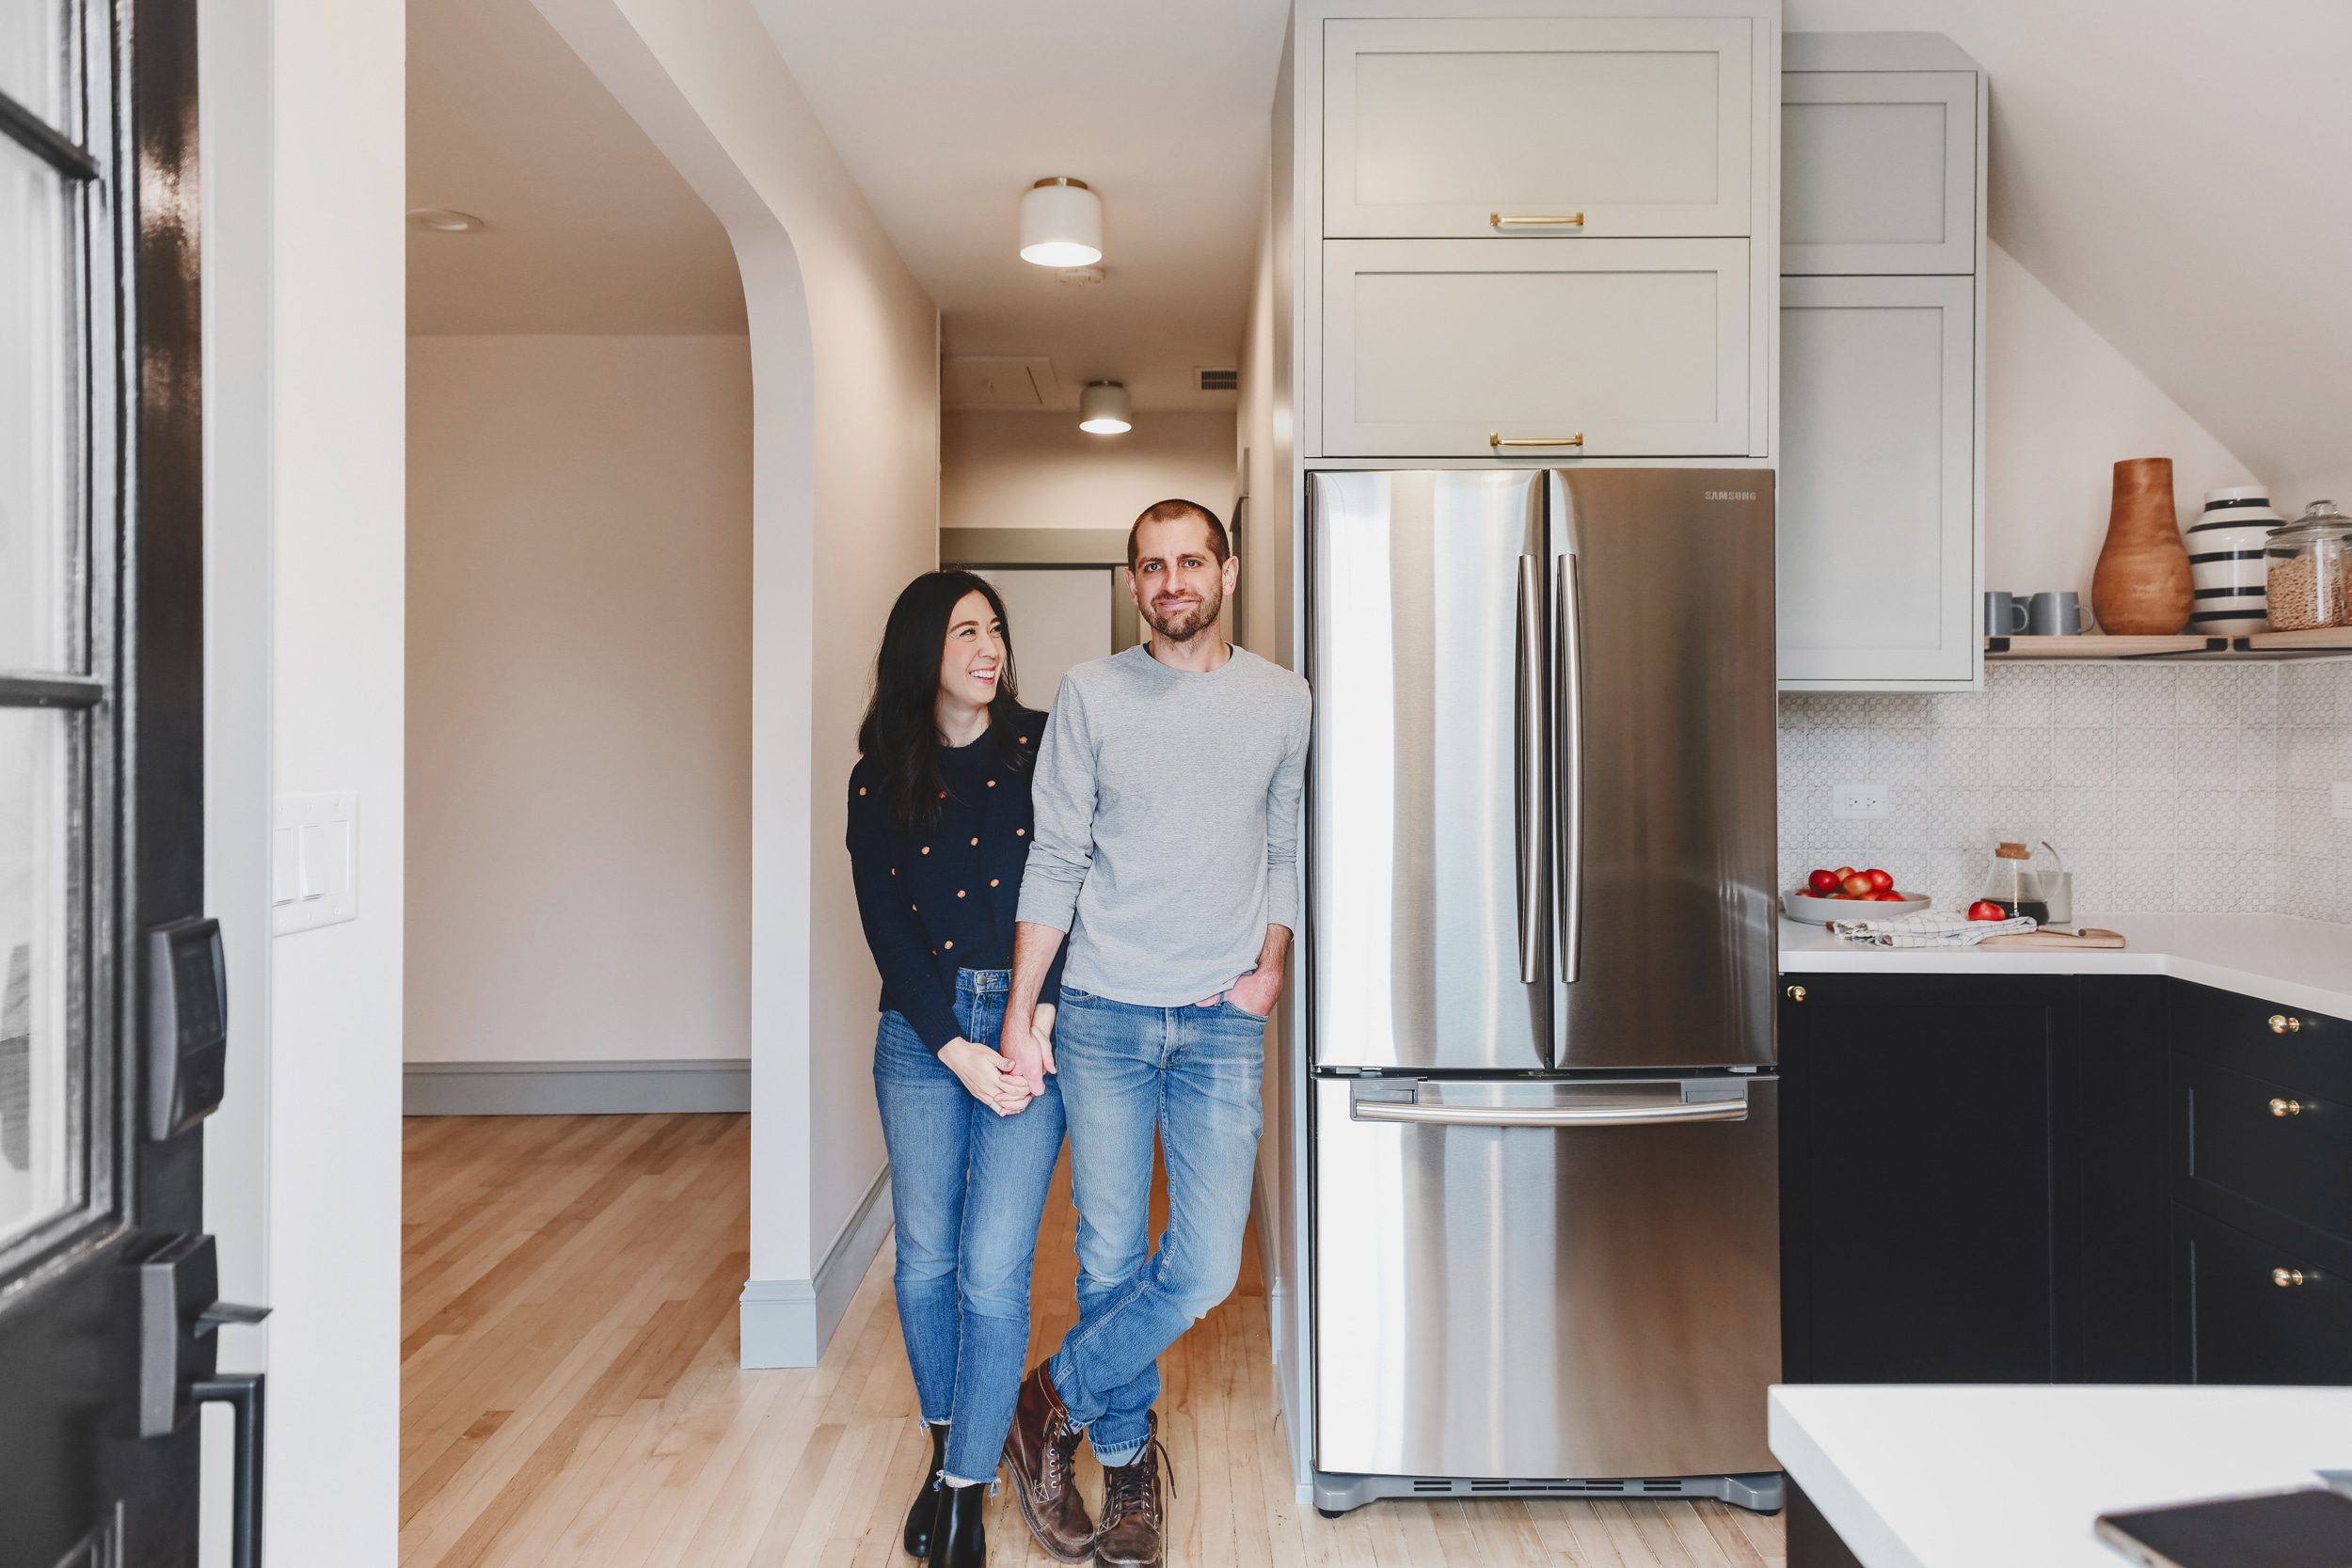
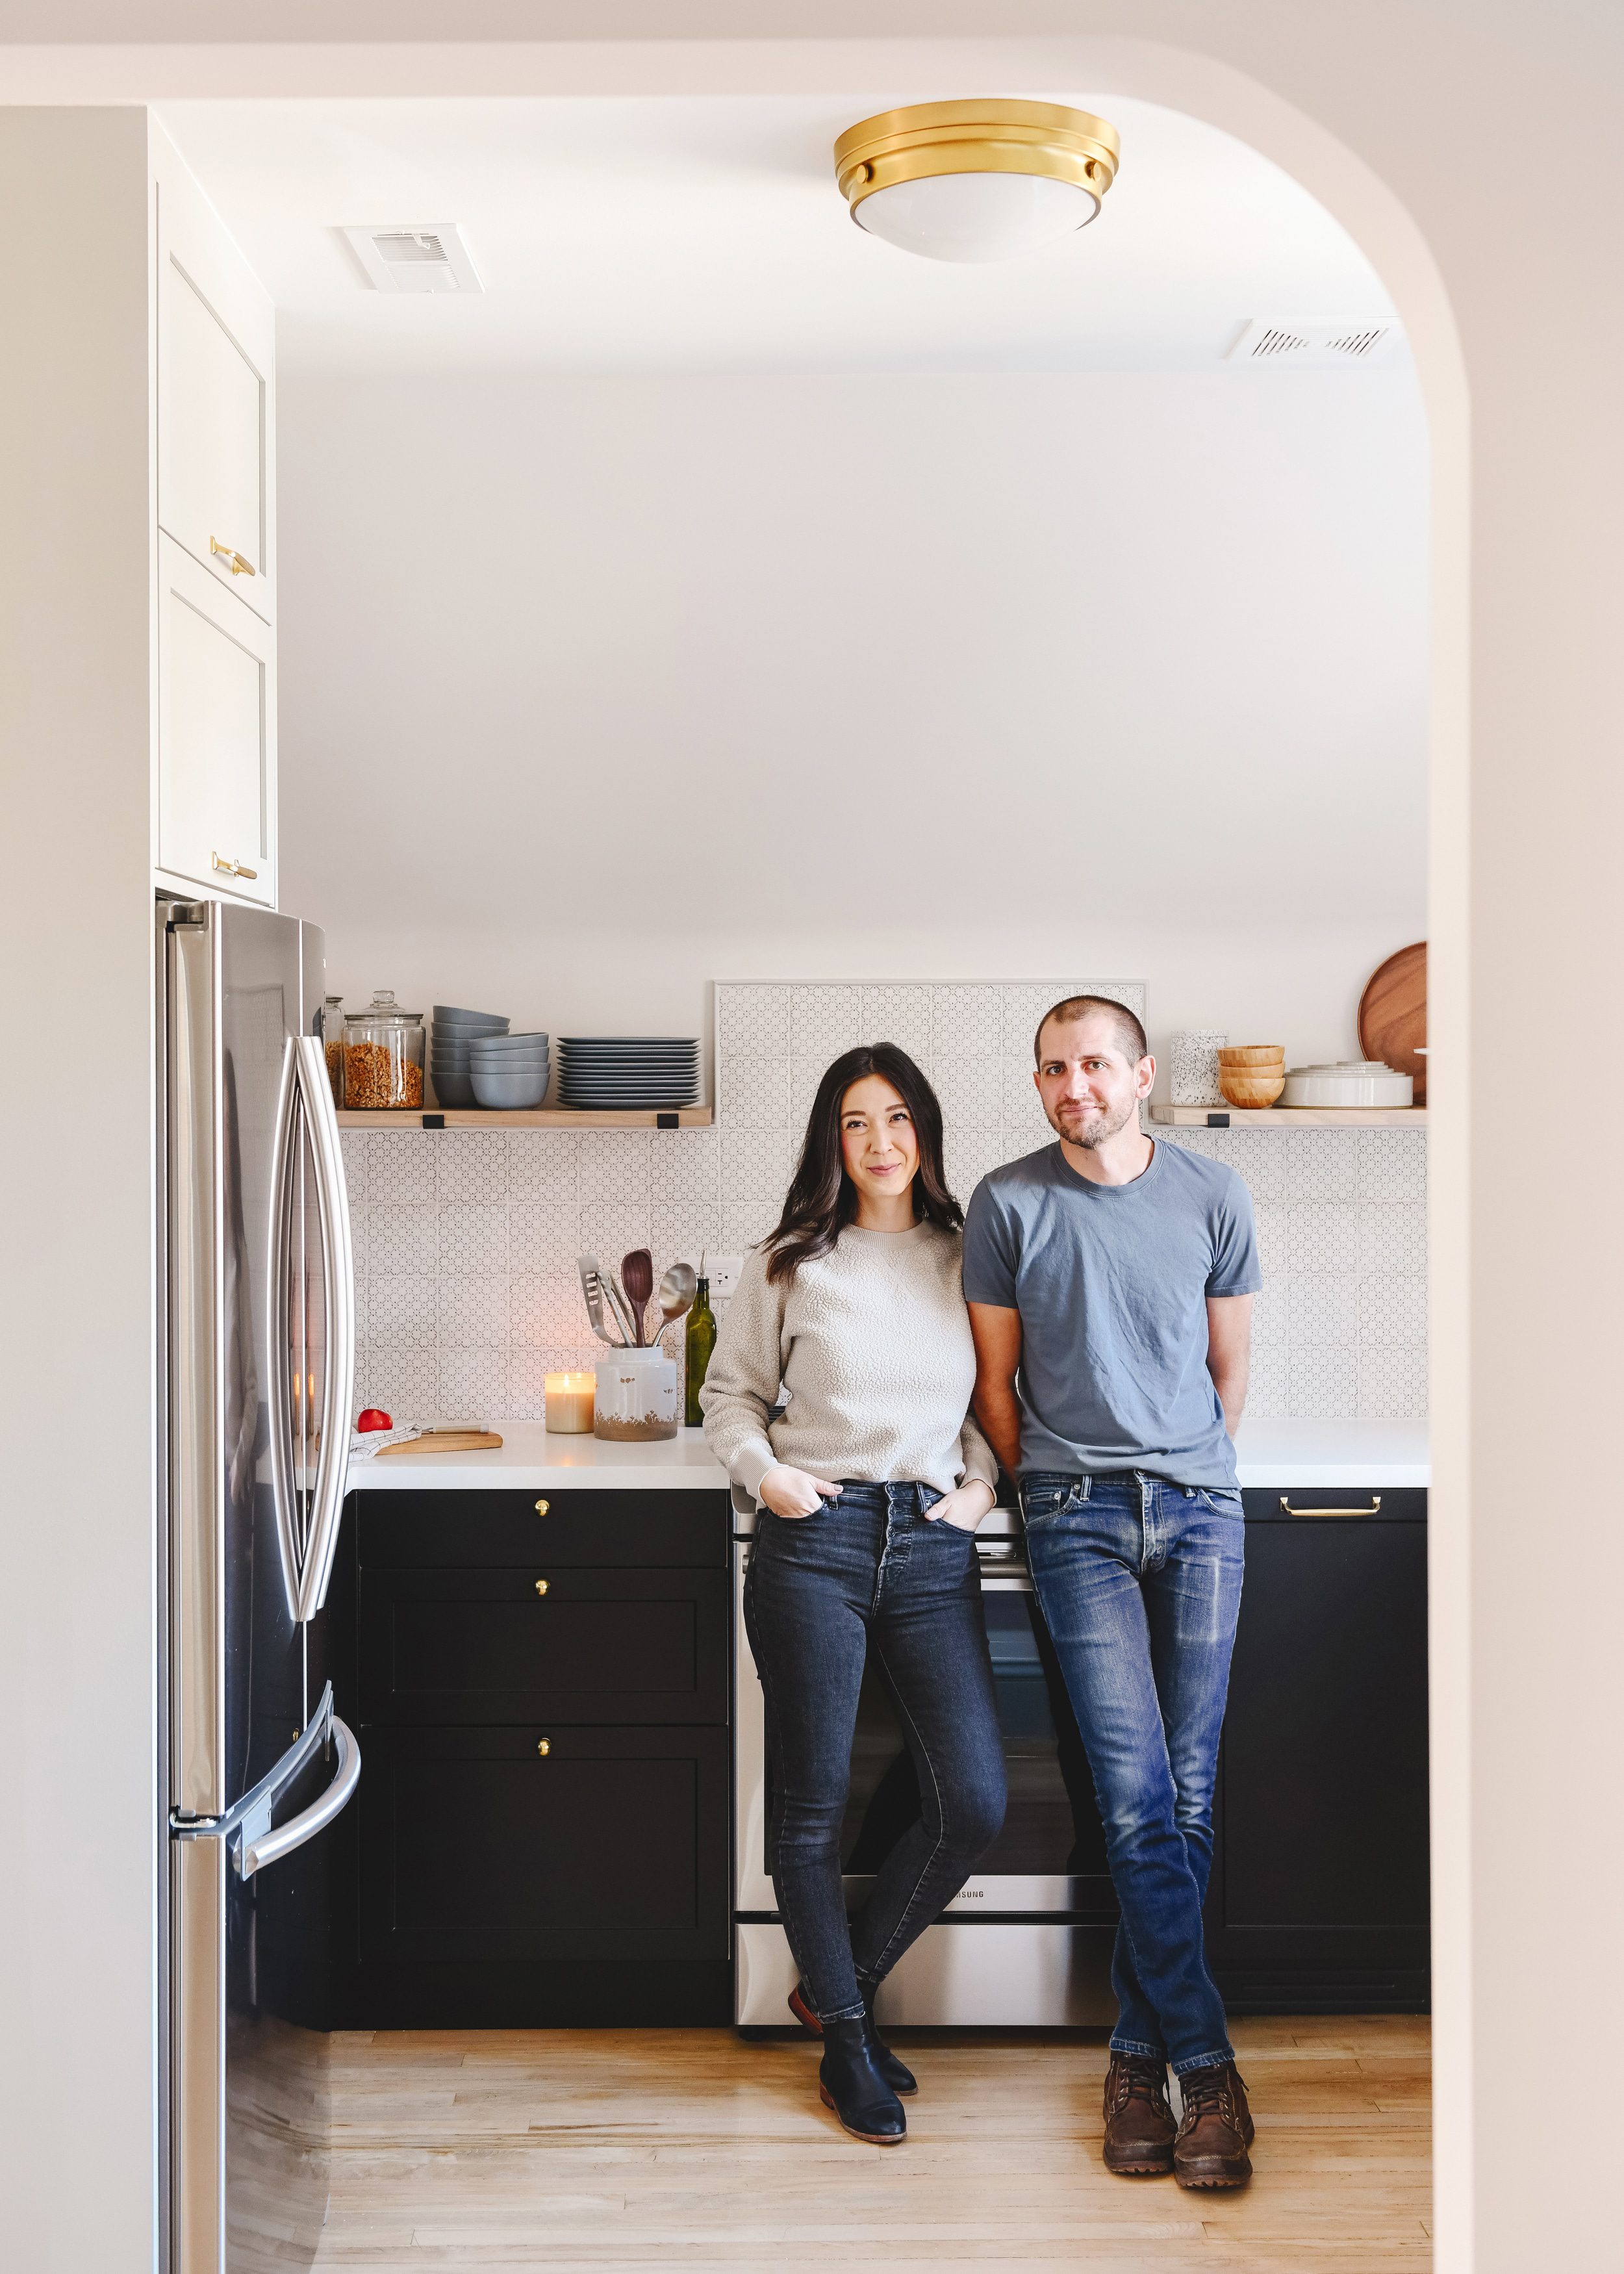
We’ve Come a Long Way!
Over the course of this whole home renovation, it’s been a fun challenge for me to take photos that really show how far we’ve come. The way I’ve done that is by setting up my camera to shoot from the same angle, with us as subjects. Not only has it been pretty cool to see our background change (dramatically!), but even the length of our hair, the expressions on our faces – and yes, the new bags under our eyes (ha!). See below for before, during and after!

And as Always, Thank You!
It’s hard to choose a favorite kitchen in the Two Flat (here’s the Unit 1 kitchen, if you’d like to compare!), but there is one thing we know: We have you to thank for being as enthusiastic about the process as we’ve been. We’ve given it our best to share every up and down, because renovation is anything but easy. Thank you, thank you.
PS: You can see this kitchen renovation unfold from the beginning under ‘Room Makeovers’ in the menu bar.
Unit 2 Kitchen Sources
Paint + Cabinetry: Wall color is Sherwin-Williams Heron Plume SW 6070 | Accent trim color is Sherwin-Williams Magnetic Gray SW 7058 | Everform™ Solid Surfacing countertop in Bleached Concrete | IKEA cabinetry | Semihandmade base cabinet panels | Semihandmade upper cabinet panels | shelf brackets + shelving | backsplash tile | grey pencil liner
Appliances + Fixtures: gas range | counter-depth refrigerator | dishwasher | bridge faucet | stainless steel sink
Lighting + Accessories: ceiling flush mount light | wall sconce | brass ball knobs | brass pulls | soap pump | blue dishes | striped vase | cereal jars | small stacking bowls | pour over coffee carafe (similar) | cake pedestal | nesting bowls | linen hand towel | utensil holder


Wow – this kitchen has everything you need! Great job!
Gorgeous! I love how you’ve troubleshooted the lack of usable space for uppers – for a kitchen this size, it has so much storage! I’m excited for more reveals, this house is certainly a looker now ????
We love a good challenge. And thank you!
You guys should be super proud of all the insane hard work you put into this place and it totally shows.
We really love this home.????
I just was thinking last week that your hair seemed so long (looks great!) and now I know I’m not crazy! It’s a beautiful space!
Haven’t had a cut since January, haha!
You knocked it out of the park with this kitchen!!! You managed to get so much in such a small space – amazing job.
Thanks! In a space this small, we can’t let an inch go to waste…
this is my favorite ever! The tile + sloped ceiling combo really does it for me and you’re right that the cookbook nook really makes it! You guys put so much thought into every detail and it shows!
All your hard work shows in this wonderful kitchen!
I get so much more excited seeing the makeovers of these challenging little kitchens and spaces over big fancy renovations that are unattainable for most of us. You guys always come through with your attention to detail, smart solutions and style! I love every inch of the Two Flat and I’m so happy you guys held on to it. Looking forward to the next reveal and project you guys undertake!
This is so kind, thank you, thank you.
Love it!
It is SO beautiful, guys! And such an inspiration to tiny kitchen (like mine) everywhere!
Wow! I am amazed by what you have done in both units. I would move in asap (If I lived there). Really gorgeous!
Chicago would love to have you – we’re still looking for a tenant for this unit! :D
HOW?????????
RIGHT?!
I am totally stunned too. If I could move to Chicago, I would just to rent this place. Love it.
I think we have a vent like that in our rental. Any idea how to clean it?
Most vents like this have a simple pull-down cover. Just give it a tug and you’ll likely reveal two metal tension springs that can be popped out for cleaning. We usually just run it under the faucet for a minute and all of the dust rinses right off. Hope this helps!
We run our cover through the dishwasher and it cleans it all up!
Great idea Julie!
I rarely comment, but I wanted to make sure you guys knew how awesome I think this kitchen (and heck the whole Two Flat) is. You did an amazing job! I know it’s been a very long road, but the end result is beautiful! Congrats on being done!
Appreciate this more than you know, Kandice!
Wow- the design team of Kim and Scott are top level! You have managed to take a very small space with architectural challenges and leave every one of us thinking that we would trade our larger kitchen for one this size and this functional. While the tile coordination is my favorite, your talents at tying together so many elements is masterful. I have loved every room in this series, and look forward to many more. I taught high school for almost 40 years, and I can tell you that you not only communicate directions and plans superbly, but I don’t even think giving you an A+ would be good enough. What lucky renters/owners will have to live in a space that truly is so aesthetically pleasing. Well done!
Phyllis! We’re blushing over here. You’re too kind. Thank you!
Ditto to all of this. You can feel the love in the space through the beautiful photos and styling. Bravo!
❤️❤️❤️
I love your vision!
I can’t get over how GOOD this is!
Thank you!
First off, just wanted to say that both units (and all your work) is LOVELY! Now that’s out of the way, I have QUESTIONS about the exhaust vent. We bought a house this year that has vaulted ceilings and so many windows in the kitchen, which is gorgeous, but we don’t have a range hood. Someday we will renovate, and trying to figure out a layout that doesn’t end with a hood in front of a window is maddening. Did you contractor say the exhaust fan solution is as effective as a range hood? Any other details about that setup? It would make all my dreams come true!
Thanks for the kind words! Here in Chicago, I don’t think a range hood is required as long as there’s a window in the kitchen. We can’t speak to how this vent will perform compared to a dedicated range hood but it’s certainly better than nothing! For reference, though, many range hoods are rated for around 400 CFM (cubic feet/minute). The vent we used is rated for 100 CFM. We also kept in mind that there’s a nearby window, so that helps as well. Hope this helps!
Thanks for the info! Our stove has a downdraft fan built in, but it basically does nothing. We currently just use the windows, but it’d be nice to have a dedicated solution!
It’s so good!!! Love it — the shelves & tile is making my heart sing.
Transformation – amazing! Every detail. Your elbow grease paid off!
I love that you didn’t have to have a real range hood, even for a gas range. But gasp, I’d never give my tenant a real flame for cooking – but your tenants must be more savvy than mine. I have fond memories of my small kitchen because it’s so efficient and yours is perfectly designed!
Love the kitchen, it has everything anyone would need. I am wondering where did you get the black door knob and lock.
Hi Sarah! It’s the Bowery from Schlage.
This is so beautiful and full of inspiration! Well done, as always! We’re considering those horizonal cabinets that you have above the fridge. How do you like them? Are they hard to close since the door opens up and they are mounted up high? I know you demonstrated it on Stories, but I can’t find it in a highlight.
For sure I would need a step stool, but they are extra deep and AWESOME for items you don’t use as much, but need to hide away.
It’s just so beautiful. Well done, as always! My question is about the small dishwasher. I’m on the hunt for an 18″ panel-ready dishwasher and it looks like the one you used fits the bill (and honestly it’s the only one I can find). Are you happy with the quality? How was installation? Any thoughts would be appreciated! Thanks!
It’s a great little machine! We haven’t used it ourselves since this is a rental unit, but we were super happy with how it came together and how much could fit in there!
Hi! I followed this project since the start and did my own tiny kitchen around the same time. I purchased the same 18” dishwasher but now that I’m finally installing, I’m having trouble with the sizing for the panel! It seems like it isn’t going to match the rest of my cabinets. I also have it right next to my stove like in this kitchen. Do you have any tips? Or the panel size you ordered? Any help would be so greatly appreciated.
The panel will have excess on the bottom of the dishwasher in order to match nearby doors. I remember being baffled by this as well, but we were able to make it work! Just know that even though the panel is longer than the dishwasher, the door will still open.