

Well, the vertical surfaces, anyway! (We’ll get to the porch floor soon.)
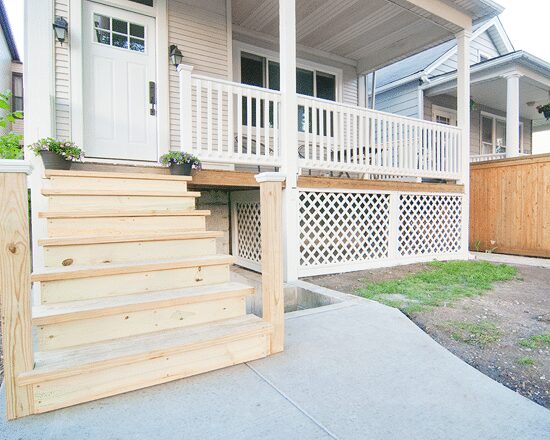
As I mentioned yesterday, the weekend was a full blown DIY party, paint-stained pants, cold beers and all. (Although, that depends on your idea of a party?) The concrete work began Thursday night and was dry by Saturday morning, and while Scott and his dad focused on building new exterior stairs – which you’ll notice are there, but not quite finished yet! – his mom and I got to work on giving the front porch a fresh coat of paint. Or, it’s first ever coat of paint!
For this project, we worked alongside Ace Hardware, having just launched their in-store Paint Studios; all their colors are displayed beautifully and in our case, the Valspar line was arranged by mood (calm, serene, ooh, aah!). We knew we needed a good, clean white – nothing too bright, nothing too blue and definitely nothing too yellow.
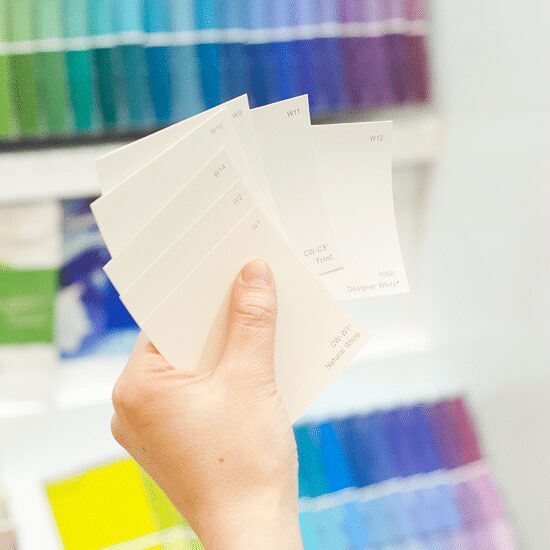
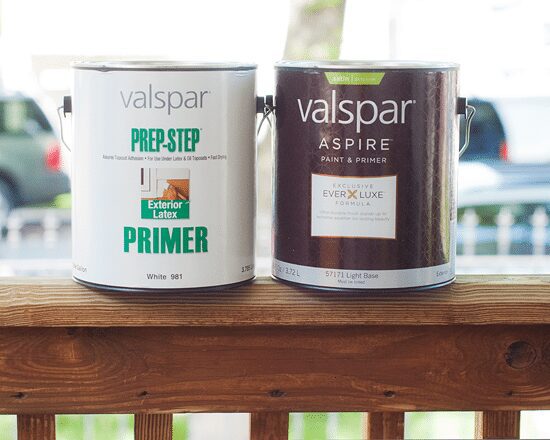
While Valspar has a vast selection of whites, we found ourselves gravitating towards the white choices for Clark + Kensington, and we ultimately landed on Designer White (as it’s described on the swatch, a cool white with a pale shade of gray). In our case, however, we had it color matched using Valspar Aspire in a satin finish, their exterior paint line. And because our porch is weathered pressure treated wood, we also opted to pick up the Prep-Step Primer to prevent any bleed through whatsoever. (We have a handful of sappy knots and the color of the wood is pretty dark; better safe than sorry – especially with the amount of work we were about to put in!)
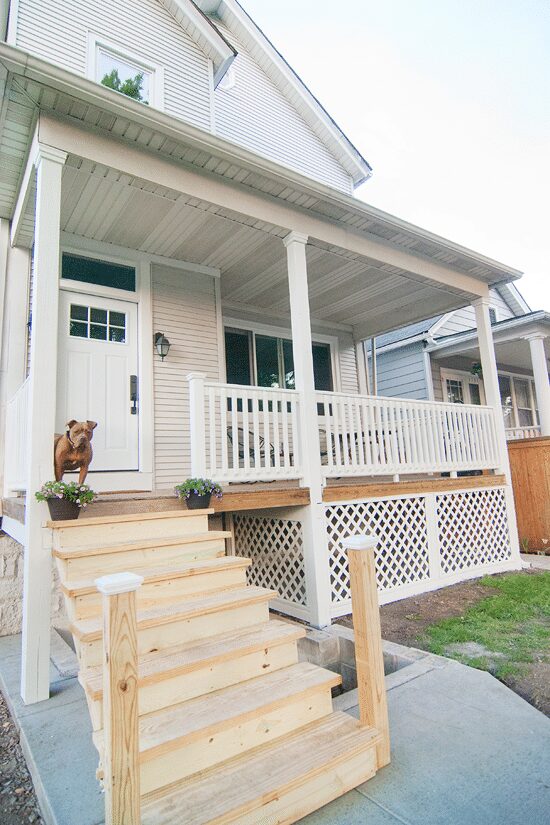
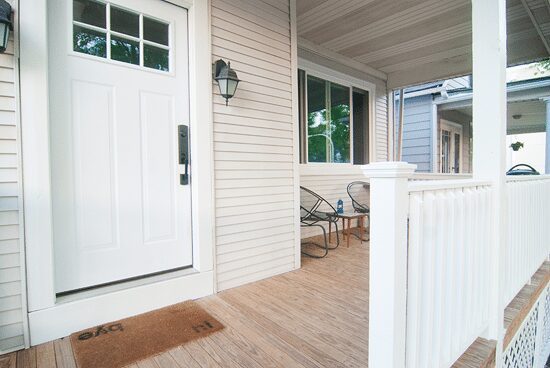
I’m not going to sugar coat it – this porch was a beast. But my goodness, what a difference it has made! Let me fast forward for just a moment:

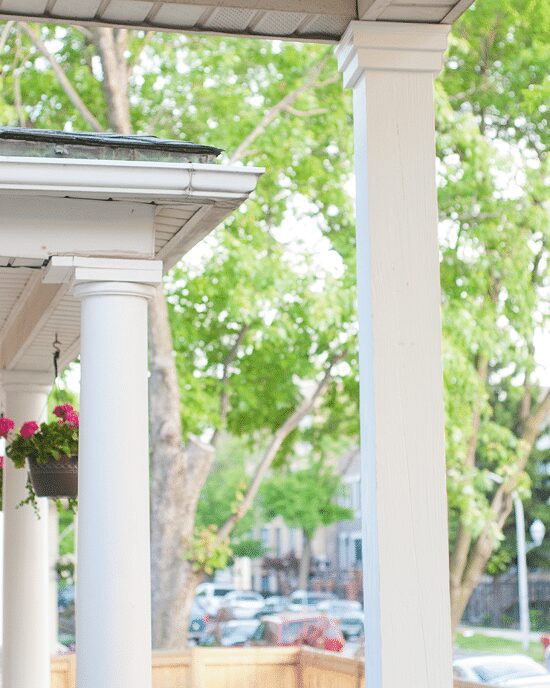
But you know there’s more to the story than just a few coats and calling it done, right? For starters, the columns on our porch are just typical 6x6s, so to give them a little more oomph, we first trimmed them out with plastic molding where they meet with the metal sheeting:
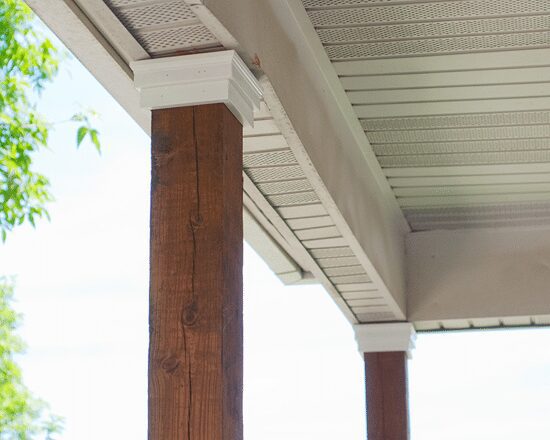
Below on the right, you can see how they look now. On the left, you’ll see our neighbor’s column, which was also trimmed out (as are a few other houses on our street, all of which were used for inspiration):
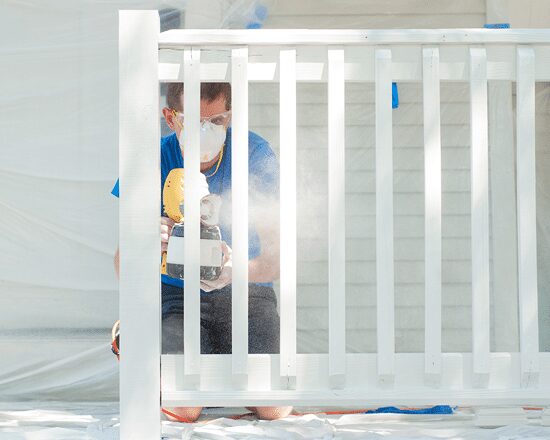
And now, let’s jump back even more – back to the priming. In the end, we’re so happy we decided to prime first, even if it was the worst job ever. I used a small foam roller and an angled brush, and Scott’s mom did as much cutting in with another angled brush (by the way, she is a trooper – thank you a thousand times over, Ann!). With both of us working non-stop, this took us a good seven hours. Every time we thought we had coated every single surface with the primer – nope! (Spoiler alert: we got the job done!) Regardless of the self-induced torture, we do think the primer helped to seal in some of those tougher knots while eliminating an extra coat of Designer White. Note: We also used wood putty on some of the deeper cracks in our columns, although the Aspire paint filled in a lot of the hairline cracks really well.

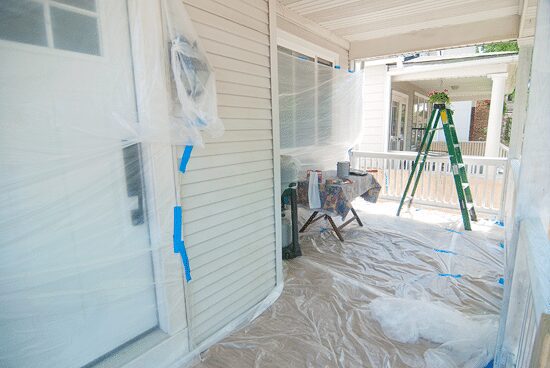
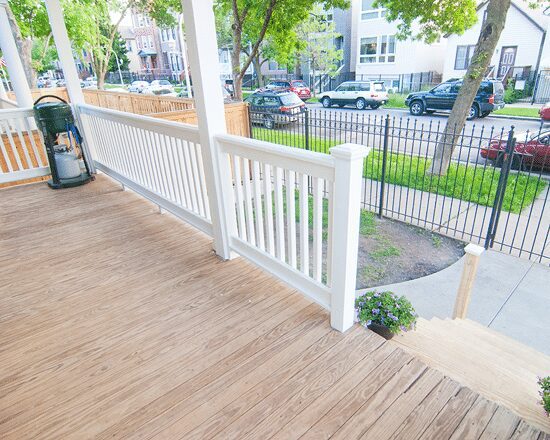
Sunday morning, the Vargo parents headed back to Cincinnati, but Scott and I were determined to finish the porch painting. With the primer out of the way, I told Scott, there’s not a chance in hell I’ll brush and roll that porch one more time! The thought alone made me want to run for cover, and so, we spent a good hour (or two?) taping and sheeting off our house. And our fence. And, yeah, the grass. I did roll the columns (just so we didn’t have to also tape off the porch ceiling!), but aside from that, it was paint sprayer time!

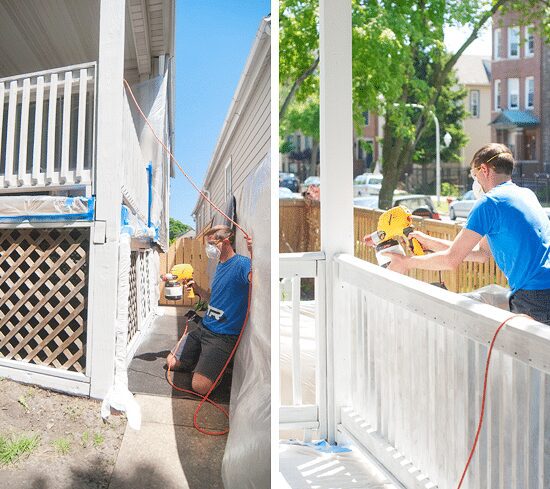
We knew our sprayer would waste some paint – which is to be expected – but especially since we’d be spraying through slatted railing and lattice. But, no matter! It was worth every bit of not having to pick up an angled brush and cut, cut, cut. All in all, we used 3 gallons of the Valspar Aspire, and it took around 1 and a half hours to coat every last bit.
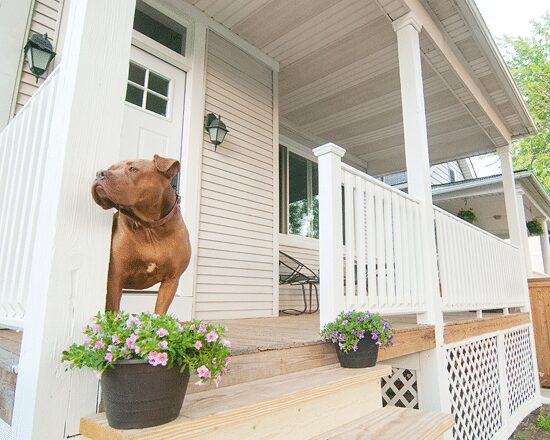
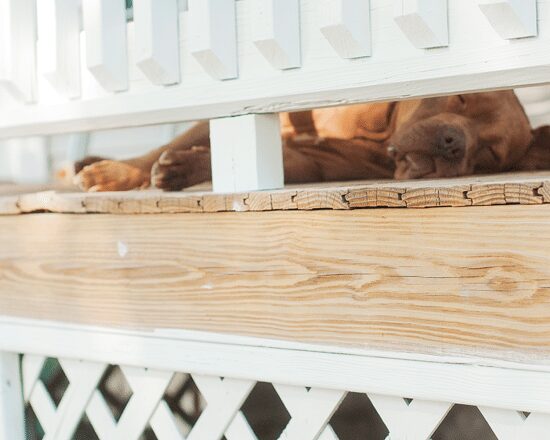
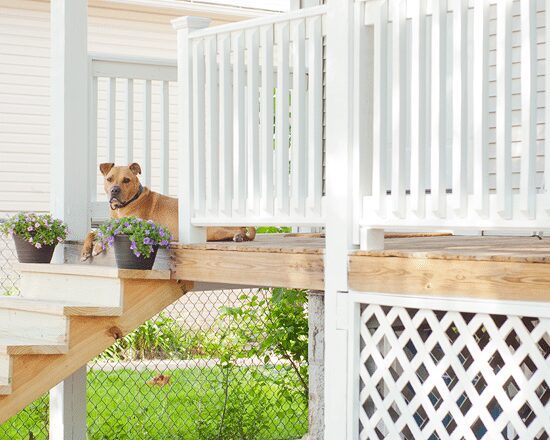
This has got to be one of the most satisfying and instantly transformative changes we’ve made to our entire home – we were (are) so happy, we couldn’t (can’t!) stop smiling! Once we were done, we toasted drinks, sat on our new porch chairs and watched the pups play in the yard for the rest of the day. Note: The stairs are thisclose to completion; we just need to finish up that banister, and we’ll circle back around once we can finish it up. But hey, how ’bout that concrete?
Our tape lines weren’t perfect along the porch floor or the 2×4 directly beneath it, but any of the raw wood you see left – with the exception of the stair stringers/risers, which will also be Designer White – will be covered with deck paint. We’re leaning towards a medium gray (to hide dirt), but overall, we’ll be keeping things light and lively on the front porch.
As for our thoughts on the Valspar Aspire, we are fans. Truly, we’d pick it up again in a heartbeat. It took one coat with the paint sprayer, and it covered so, so well. (Although if we were to cut and roll the entire porch, it would likely take two coats, simply because a sprayer is able to provide an even, thick coat in one shot.) The satin finish is the perfect sheen for exterior use (I had waffled between satin and semi-gloss and had second guessed my decision at one point, but I’m thrilled I stuck with my gut!), and we were impressed with how well it covered!
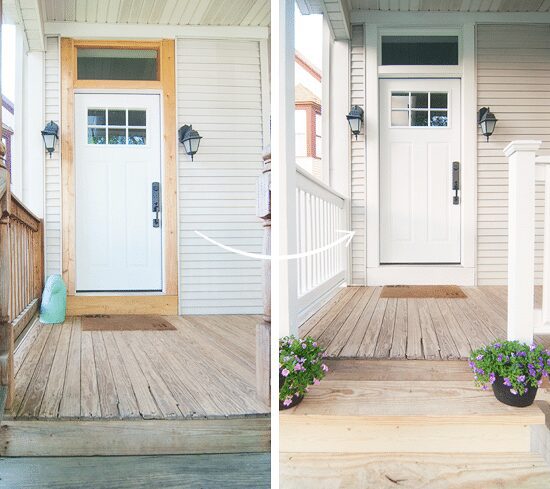
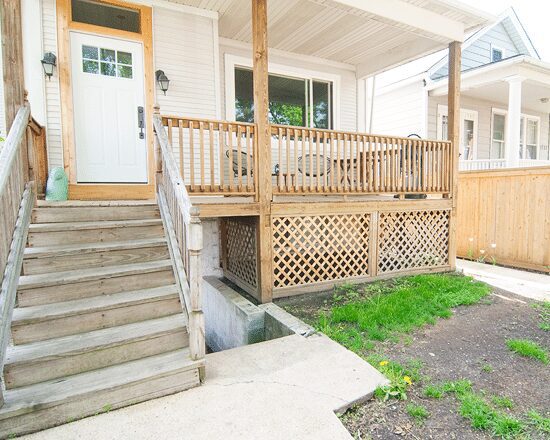
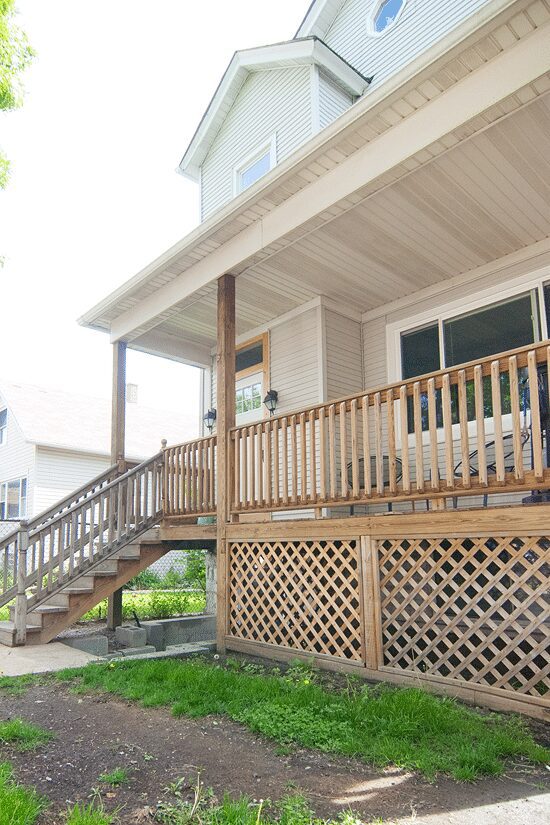
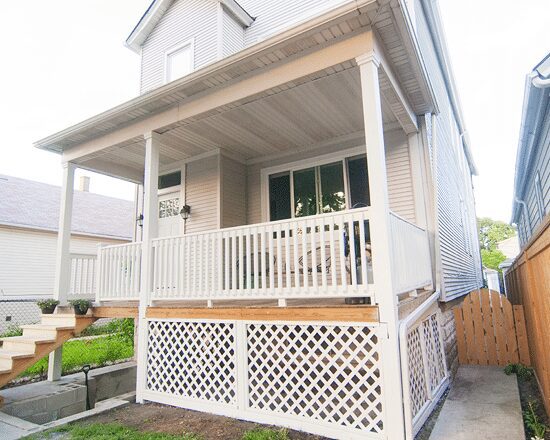
Of course paint can transform just about anything, but you guys. Look! Just last week, we were looking like this:
And now? This!
But wait! Remember this?
So much better. (So, so, so much better!)

We’ve come a long way on the exterior in just one weekend, but we are so looking forward to what’s to come! Here are the items on our short list:
• Swap out the old outdoor lights for new ones (they’ve arrived, and we can’t wait to install!)
• Paint the front door
• Paint the porch floor
• Finish the staircase hand rail
• Paint the staircase – that is, once the pressure treated wood has dried (boo)
• Top the downstairs cinder blocks with limestone caps
• Garden!
• Install a path from the pavement to the side of our home, alongside the garden
• Sod / grass seed
Oh, and there’s a pretty big one, too: Build a fence. Our neighbor to the south has a gorgeous cedar fence that we’d like to mimic on the opposite side (it’s currently raggedy, old chain link), but we’re working on receiving a few quotes. These two? We’re not building that ourselves. (We’d rather garden!)
We’re excited to be collaborating with Ace Hardware as a part of their Ace Blogger Panel! Ace has provided us with compensation and the materials necessary to complete this project (hey, thanks, Ace!), and all opinions are our own. Cute puppies are an added bonus.


I totally understand your decision to spray paint the porch, with all the railing/lattice pieces to deal with! Everything is looking more and more finished. Did you not tape off the house itself when you were spraying (I saw you did the door, etc)? Is that because you’ll be repainting the house as well at some point?
I just realized that the photo of the covered up porch was taken right before Scott taped off that part of the house! We did cover up all of the siding (you can sort of tell in the photo where I’m painting the columns), so we didn’t get over spray there. WAY down the road, we’d love to replace our siding with something wider and in a darker color!
This seriously looks amazing! So fresh, so clean!
Yea! for helpful Mother-in-laws! Don’t you love the transforming power of paint and lots of hard work?
Looks awesome! It’s amazing what framing out those columns and painting the spindles can do for your exterior space. Great job!
What a change, it looks awesome! And, I love that last pic of the pups they look so happy on their porch!
What a difference some paint makes! Looks amazing, I imagine your neighbors are excited too :)
Wow! What a difference! Your neighbors must love you guys.
Ehhh… either that, or they’re wondering when we’ll finally be putting the loud power tools away!
Floppy ear love!
The front of your house looks so good now too. It reminds me of an east coast beach house.
Ha, that’s the same thing Scott said!
Such a great transformation!! I love a paint project because it always makes such a big visual difference. It makes you feel like you are really making progress. The plans for the yard sound great, I can’t wait to see the results!
What a facelift! It really looks great- Momelia and I might have to walk over and get a better look tomorrow!
Wowzas!!!! What color will your front door be? I am amazed at the difference! Once we kicked ourselves into gear (maybe 2-3 yrs after we moved in? Haha) on our yard/outside I was shocked how good it made me feel! It really is a wonderful feeling to pull in your driveway of your pretty place! And my in-laws were/are a major help too, thankfully! :)
Thanks! The front door will be the same navy that’s on the garden unit, and the same color that’s on our coat closet!
What an amazing difference! We are also about to tackle this project…as in the stain is waiting on me in the garage. Why did you go with exterior paint for the rails vs. solid weather proofing stain? We are planning to use solid white stain for the rails and semi-transparent light grey for the floor. I struggled on which to choose, I’d love a little insight!
Hi Jeney, to be honest, we didn’t even consider solid stain for the railings – we’d just always loved the painted look of the other porches on our street, and took that as inspiration! It sounds to me like your stain is going to be a great bet though, so it seems like the right choice!
Hi! Who did you go with to frame and install your new front door? We are looking for local contractors to do ours, and I figured if you were happy with yours maybe you could recommend him/her? Thank you!
Hey Nicole! Our front door was installed by the same contractors that did a TON of the dry wall work in our house, and they’re typically scheduled pretty far out. However, most recently we used Harry to install a bunch of interior doors, and he was great and fairly priced!
Looks amazing! Thank you for sharing :)