

Today, I want to talk about the super riveting topic of soap shelves! But seriously, have you ever thought about it? Until we really got to tiling, we weren’t super aware of all the things we’d have to think about. Things like outside corners! Inside corners! Bullnose trim! Tile above the baseboards and tile around the tub filler – and shower head and hand held and transfer valve. To be fair, we didn’t just start blindly, but as thoughtful as we were about every decision, I’d be lying if I told you we didn’t cross our fingers more than a few times.
We fell down the internet rabbit hole on a handful of occasions as we debated which way would work best for us on each task, and not surprisingly, there are quite a few methods to do ev-er-y-thing. The trickiest of all the tricky things, though? Those soap shelves. Never again will we take grabbing the shampoo off of a carefully crafted shelf for granted. Never, ever.
Any tutorials we found online were brief (with little to no illustration), although this one was the most helpful and extensive. Between what we learned with Lisa and the collection of shower shelf photos we’d amassed, we found a happy medium of what worked for us, so if you ever find yourself in a soap-niche-tiling-situation, hopefully this will help you, too!
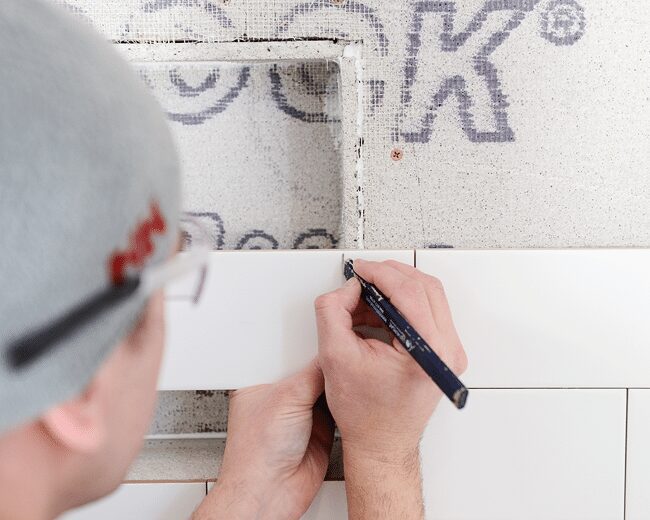
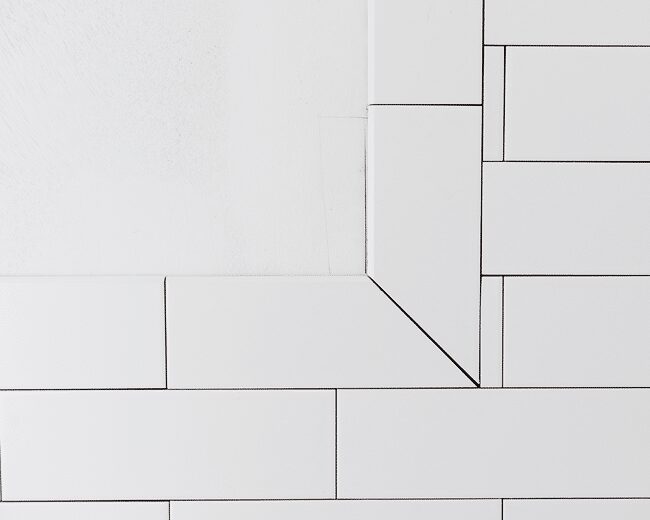
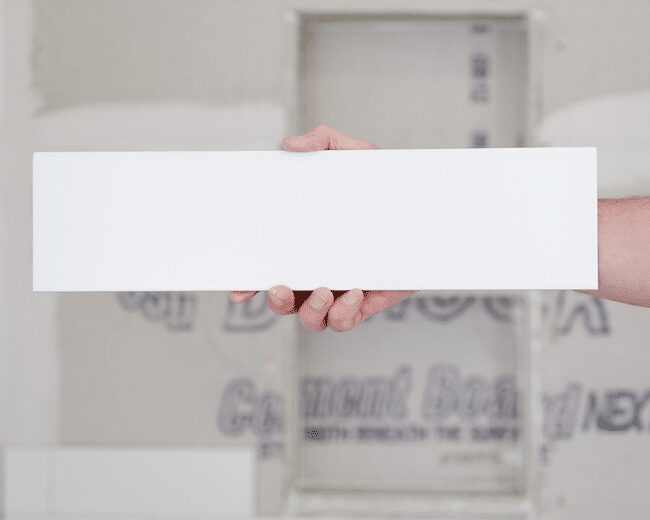
WHAT WE DID. Needing to keep the subway pattern the same from left to right, we worked (obviously) from left to right. We continued tiling up the wet wall, so that we could continue on to the largest wall – the one with the soap shelves. Once we made it to the right of the soap shelves, we worked backwards from right to left so that we could get as close to each niche as possible. Once we reached the point where we could no longer avoid them, Scott would hold the next tile up and mark it with a pencil exactly where the cement board ended. We wanted the tile to be as flush as possible with the edge of the shelves.
We continued working left to right and, again, right to left until we had worked our way around both shelves. Scott made the cuts very carefully on the wet saw, while I mortared each one into place. We were thrilled with how things started shaking out, but I will say that it was a slow process! At a minimum, we were cutting around the shelves for a solid 2 hours, and this doesn’t take into account the inside of each shelf.
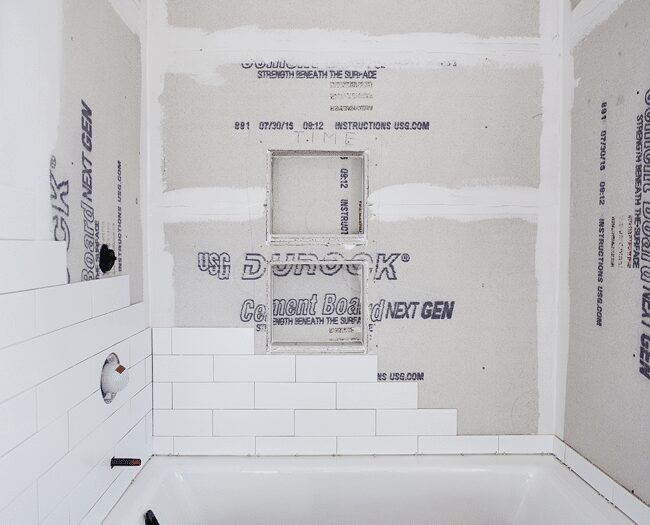
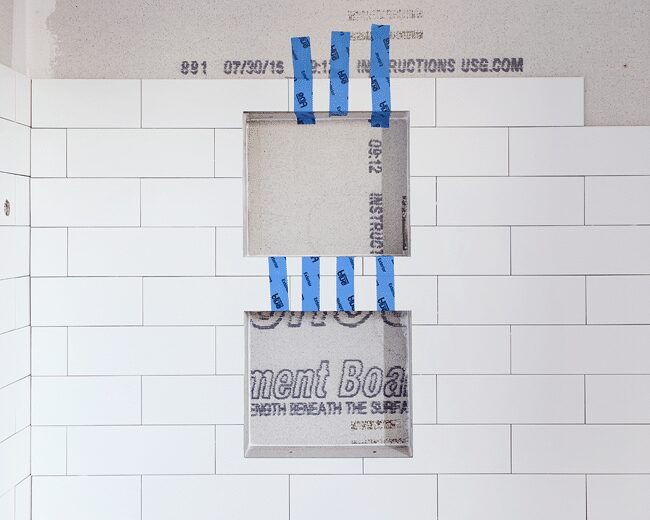
As we tiled between and above the shelves, we used tape to hold them in place so they wouldn’t begin to shift:
Not wanting to add any weight to the more delicate pieces while the mortar was fresh, we spent the next few hours working on the bullnose trim around the tub. It was so, so important to level every trim piece, ensuring that the tiles stayed aligned as we built them up.
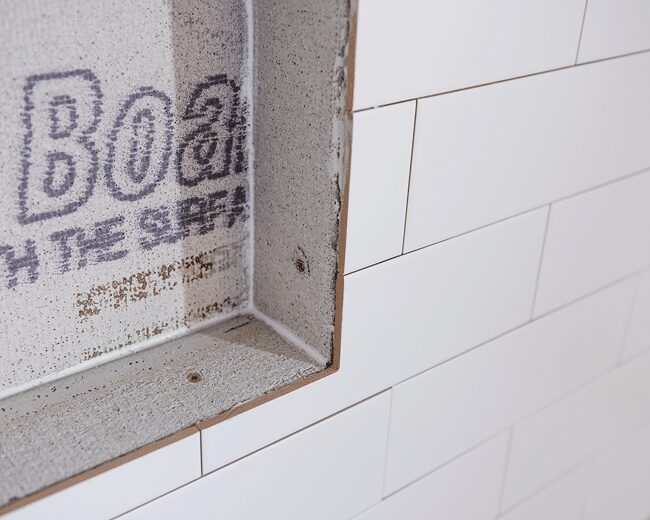
Once we had our bullnose borders in place, we went back to the shelves, double checking that the mortar had hardened enough to continue building upon the cut tile. Because we are so slooow, we got the green light to move forward! Scott and I finished tiling to the ceiling in the shower before moving on to the inside of the shelves:
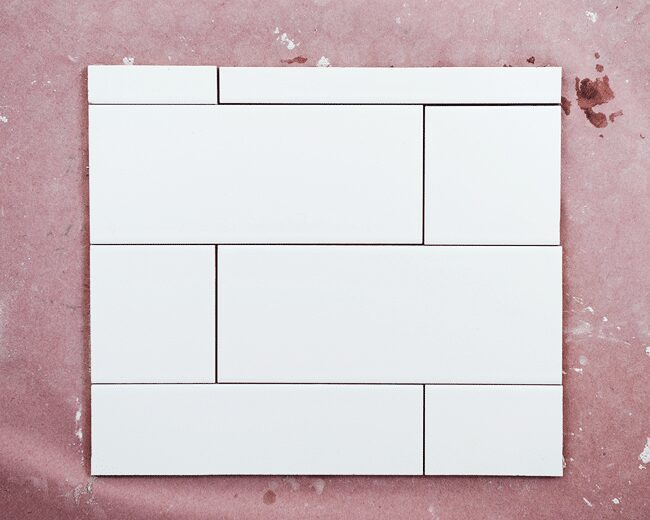
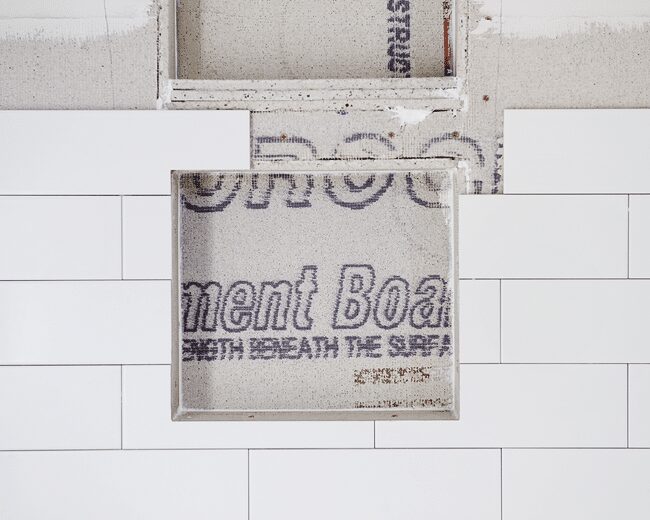
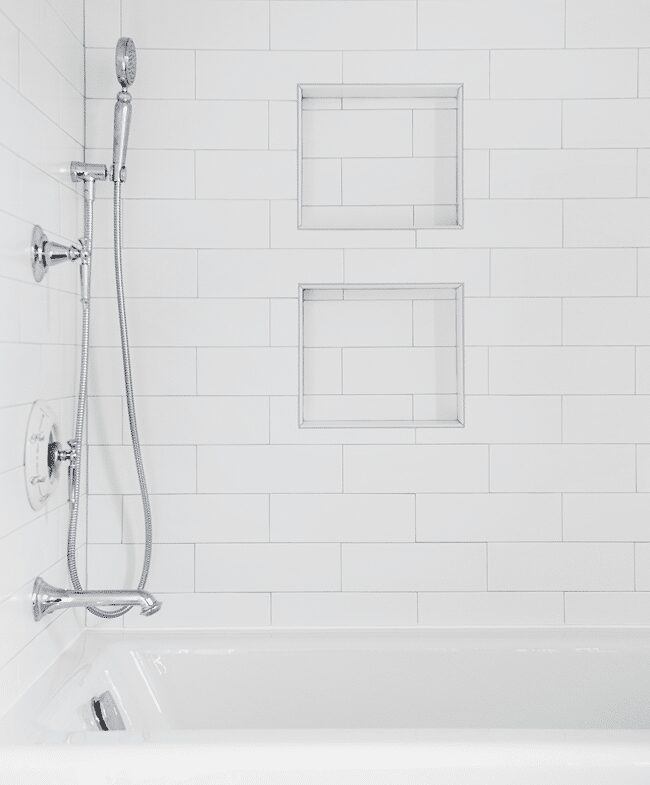
Above, you’ll see the remnants of each cut tile that surrounds the shelves. As each cut was made, we saved what was left and laid them out in the same continuous pattern. To be honest, we weren’t sure if this would work, but omg we are so happy it did! The remaining tile pieces fit perfectly in the back of the corresponding shelf, eliminating any disruption to the pattern!
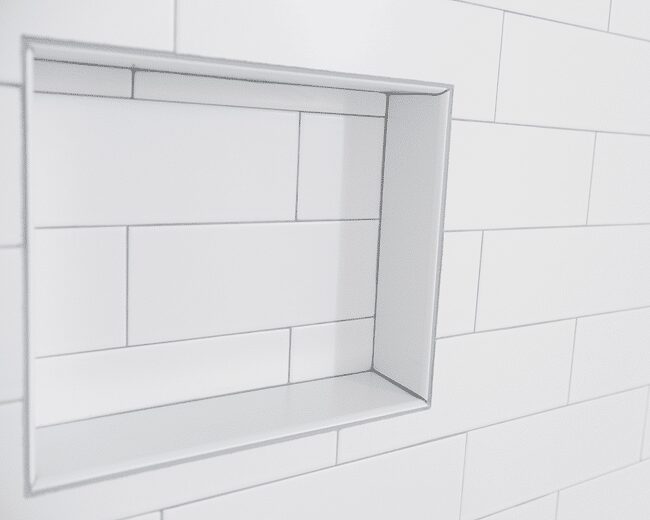
With the back of the shelves in place, we moved on to the top, bottom and sides. Each shelf is about 13″ wide by a foot tall, and our tiles are 4″ x 12.” We didn’t want grout lines where any toiletries would sit, so we picked up 4″ x 16″ bullnose tiles with the bullnose along the 16″ side.
We measured each side of each shelf individually – both length and depth – and we gave the longer tiles a mitered edge where they meet. When installing the bottom tile, I applied additional mortar to the back so that there would be a slight (indiscernible) slope forward, which would keep water from pooling around bottles and settling into the edges. Once grouted, I was a little bummed to see that some parts of the bullnose were still visible – that teeny, tiny edge of orange ceramic. But! I taped around the tiles, applied a bead of caulk, and all was forgiven:

You can see that we did finish the grout like we hoped, and over the weekend, Scott installed the shower plumbing fixtures, while I finished caulking and touching up the baseboards. I say things like installed the shower fixtures and caulking and touching up like it’s no big deal, but my goodness, it is a big deal! We caulked, spackled, painted, touched up and plumbed for a good 10 hours, but you guys, it’s finally starting to look like a usable bathroom!
A full reveal on the bathroom tile (plus a few things we learned along the way) is coming later this week – and we’re throwing in a giveaway to celebrate. Hooray!
Sources: Subway tile: Storka Manhattan Snow White Matte 4″ x 12″ // Bullnose tile: Storka Manhattan Snow White Matte 4″x12″, 4″ x 16″ // grout: Polyblend non-sanded Platinum // caulk: Platinum unsanded Color Fast caulk


Your niches are beautiful and you did a fabulous, super-meticulous job – as usual :) Having read about your projects for awhile now, I am 100% sure that you considered all of the alternatives for tiling the tub/shower. I’m curious why you decided not to use RedGuard or Kerdi or some other form of waterproofing membrane under the tile? Thanks for the inspiration, as always :)
Hi Sara – thank you! We got some similar questions on the last tiling post, but after speaking with our contractor, he insisted that RedGuard isn’t needed in our case, but it would be necessary if we were, say, tiling the shower floor. Because we have a bathtub, there won’t be any water settling onto the surface of the floor that can start seeping into the walls/floor/drywall/Durock. But I definitely recommend anyone to check with their contractor before tiling!
I highly recommend you find a new contractor. That’s not meant to be mean or snarky. A bathtub surround is a wet area. The walls and thus grout will indeed get wet. Grout is a Cementous product and therefore porous. It’s not waterproof. Moisture will get behind your tiles. Even a lot of tiles are porous themselves. Waterproofing is absolutely necessary for a tub surround. I’ve torn out many bathtub surrounds only to find mold and damage behind the old tile.
Looks GORGEOUS!
You really did a beautiful job! I love the light grout color you chose. It’s just enough contrast.
Did you do anything to figure out where on the wall the niches would sit (vertically) so you didn’t have any weird tile slivers surrounding them? I want to add niches when I redo my tub surround, but I have nightmares about having to cut a tile down to 1/10th its size to make it fit around the hole in the wall and then having a meltdown when it inevitably shatters every time I try.
Stacy, YES! Oh my goodness, I literally had nightmares about tiling these shelves leading up to the Big Day. Our contractor had them high enough so that we’d have 4 full tiles leading up to them, but that would mean we’d need a full tile resting on the tub. You’ll notice that we only have a partial tile sitting on the tub, because we chose to have the full tile sitting on top of the baseboards… which lead to a 2/3 tile on the tub.
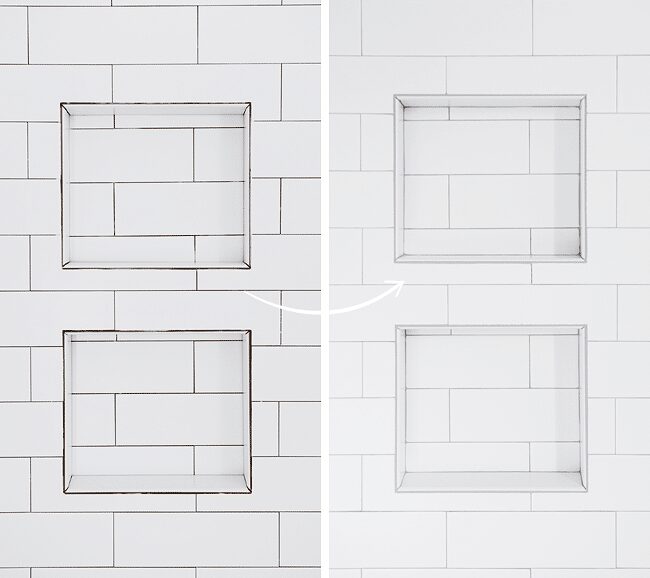
And then to prevent a sliver in between the shelves, you’ll notice in the second photo of this post that we added a couple extra layers of cement board. This allowed the tile above the bottom soap shelf from being a sliver – which it sounds like you are worried about.
SO MUCH TO THINK ABOUT. I got traumatized just typing that out! My advice is: think about where you want the the tile to start, taking into consideration everything from the tub to the baseboards to the bottom of your soap shelf to the SIZE of your tile. It all matters. Now that we’ve survived, it has all been worth it!
Wow. That is exhausting just reading about it! Y’all did a fantastic job.
This looks so very intense and absolutely perfect.
The tiling job (not the final caulking) was finished the evening before we got to play in the cold together (haha). You can see now why I was so relaxed and happy to be there with you!
I am looking at using the same tile (floor and wall for my master bath). Will you be posting a photo of the wall tile against the balck hex soon??? :)
Everything looks great so far!
We will, we will! I’m taking photos today for a post this week! Stay tuned, because there’s a giveaway component (and some discounts!) as well…
This looks amazing and I KNOW, having just upgraded my kitchen by myself last year, how every inch and possibility is considered before jumping in. It IS exhausting to think about, but it’s true…you never look at these things the same again.
Is there a reason why you didn’t choose a different tile style/pattern for the back of the soap shelves? I’m just thinking the contrast would have been very nice with all that white.
Thanks, Kathy! We considered a different pattern for a minute – but because our tiles are so large and the shelves aren’t huge, we didn’t feel like there was enough space for a pattern to fully show. For example, a herringbone wouldn’t have had the space to shine! We even considered just buying a large sheet of white tile to fill the back, but in the end, we decided to match the pattern seamlessly.
Wow, opened up my RSS feeds and it was like looking in the mirror – this is EXACTLY how my husband and I did our shower. Needless to say, I approve of your design choice XD
I did a similar soap niche in our bathroom remodel and I didn’t think ahead at all about the placement of the niche and how the tile ran. Luckily our contractor did. He dry fitted all the tiles and added the niche where it would line up exactly with the bottom and top of the tile. Glad he thought to do that because all that measuring and trimming sounds rage-inducing. Glad you muscled through it because the result is really lovely!
Hooray for awesome contractors!!
It sounds like SUCH hard work, but it really does look so amazing! I think if I am ever having a shower surround tiled, I might have to hire it out, though… it sounds so intense!
I got tense just reading that! You are an artist and that helps you do such wonderful work. Is Scott an artist too? You should be very pleased with that!
Thanks, Vanessa, that’s so sweet. Scott is not an artist 9-5, but he is one of the most imaginative people I know! (You should see his robot drawings :) )
Wow, they look awesome – really impressed, this looks like pros did it!
I love this bathroom. It looks awesome. I was just wondering where you got all your hardware for your shower/bath!! Thanks
Every last piece is from Kohler! :)
[…] Source: The Yellow Brick Home […]
Hi! Did you use spacers while installing the tile? Thanks!
No spacers! There is a small easement on the edge of the tiles that leaves a thin line for grout.