

We’ve finished installing one run of cabinets on flooring that slopes upward about 1/2″ in the back. Here are our tips for getting everything secure and level.
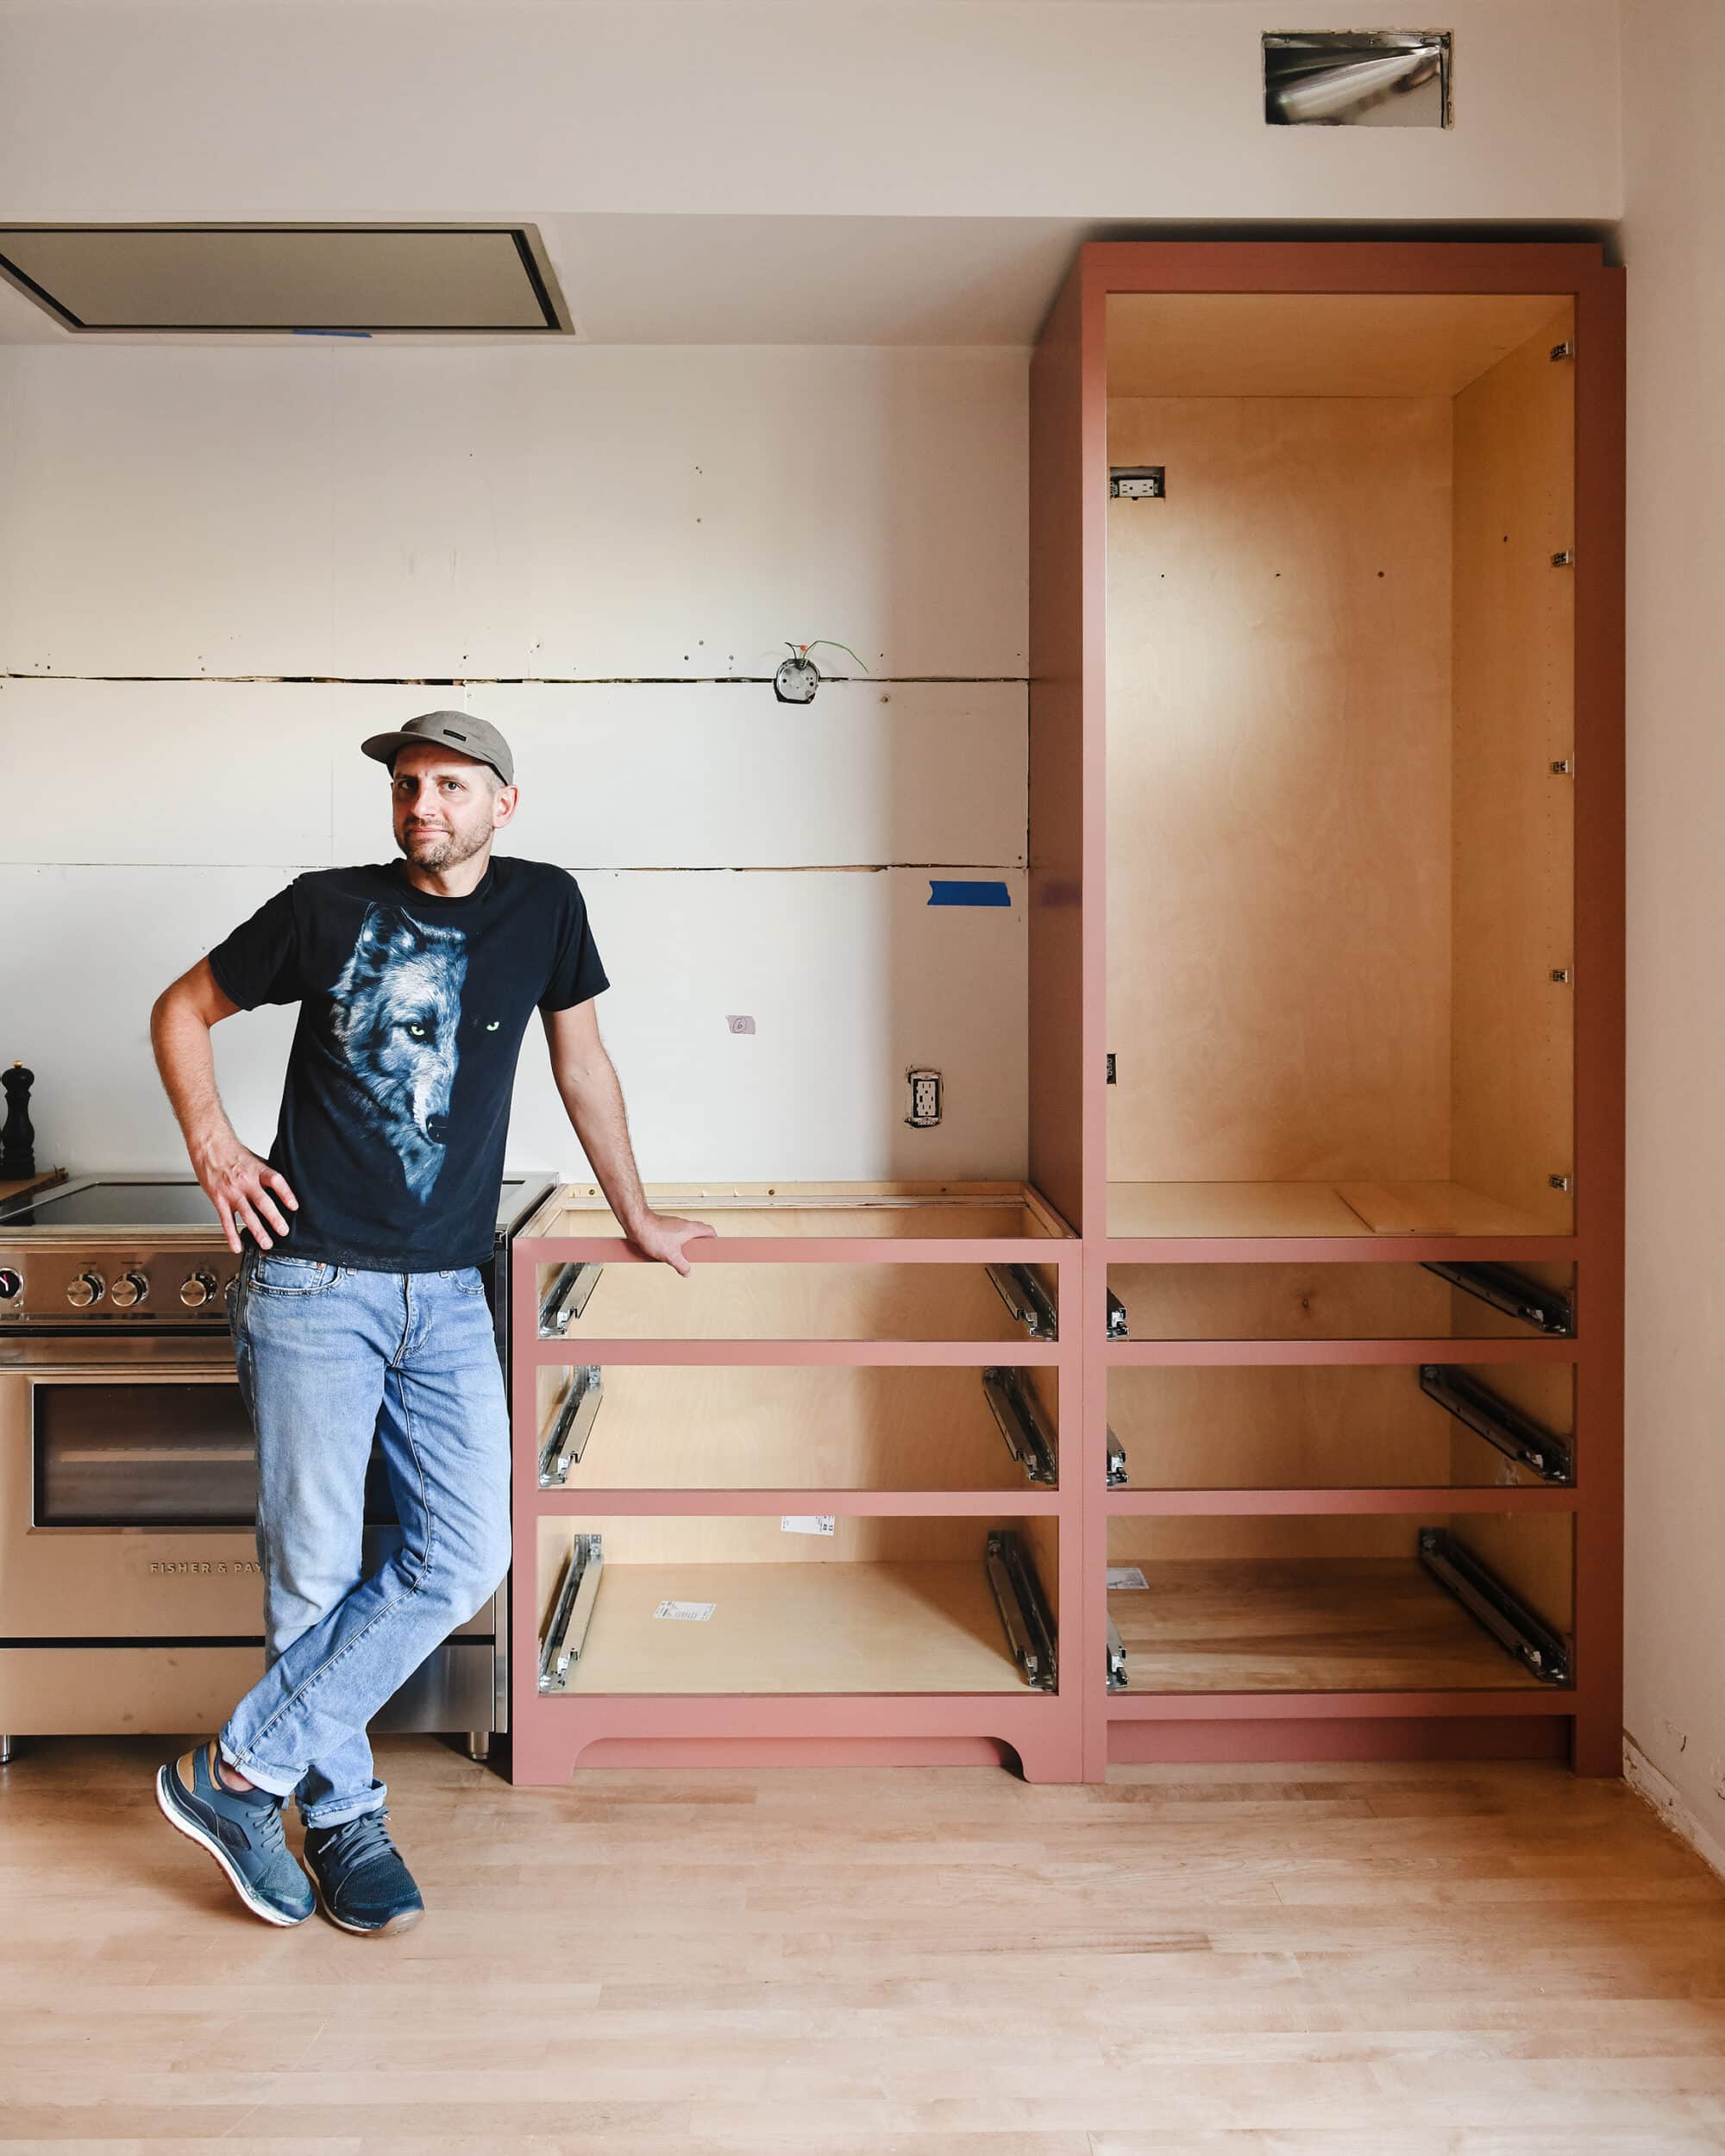
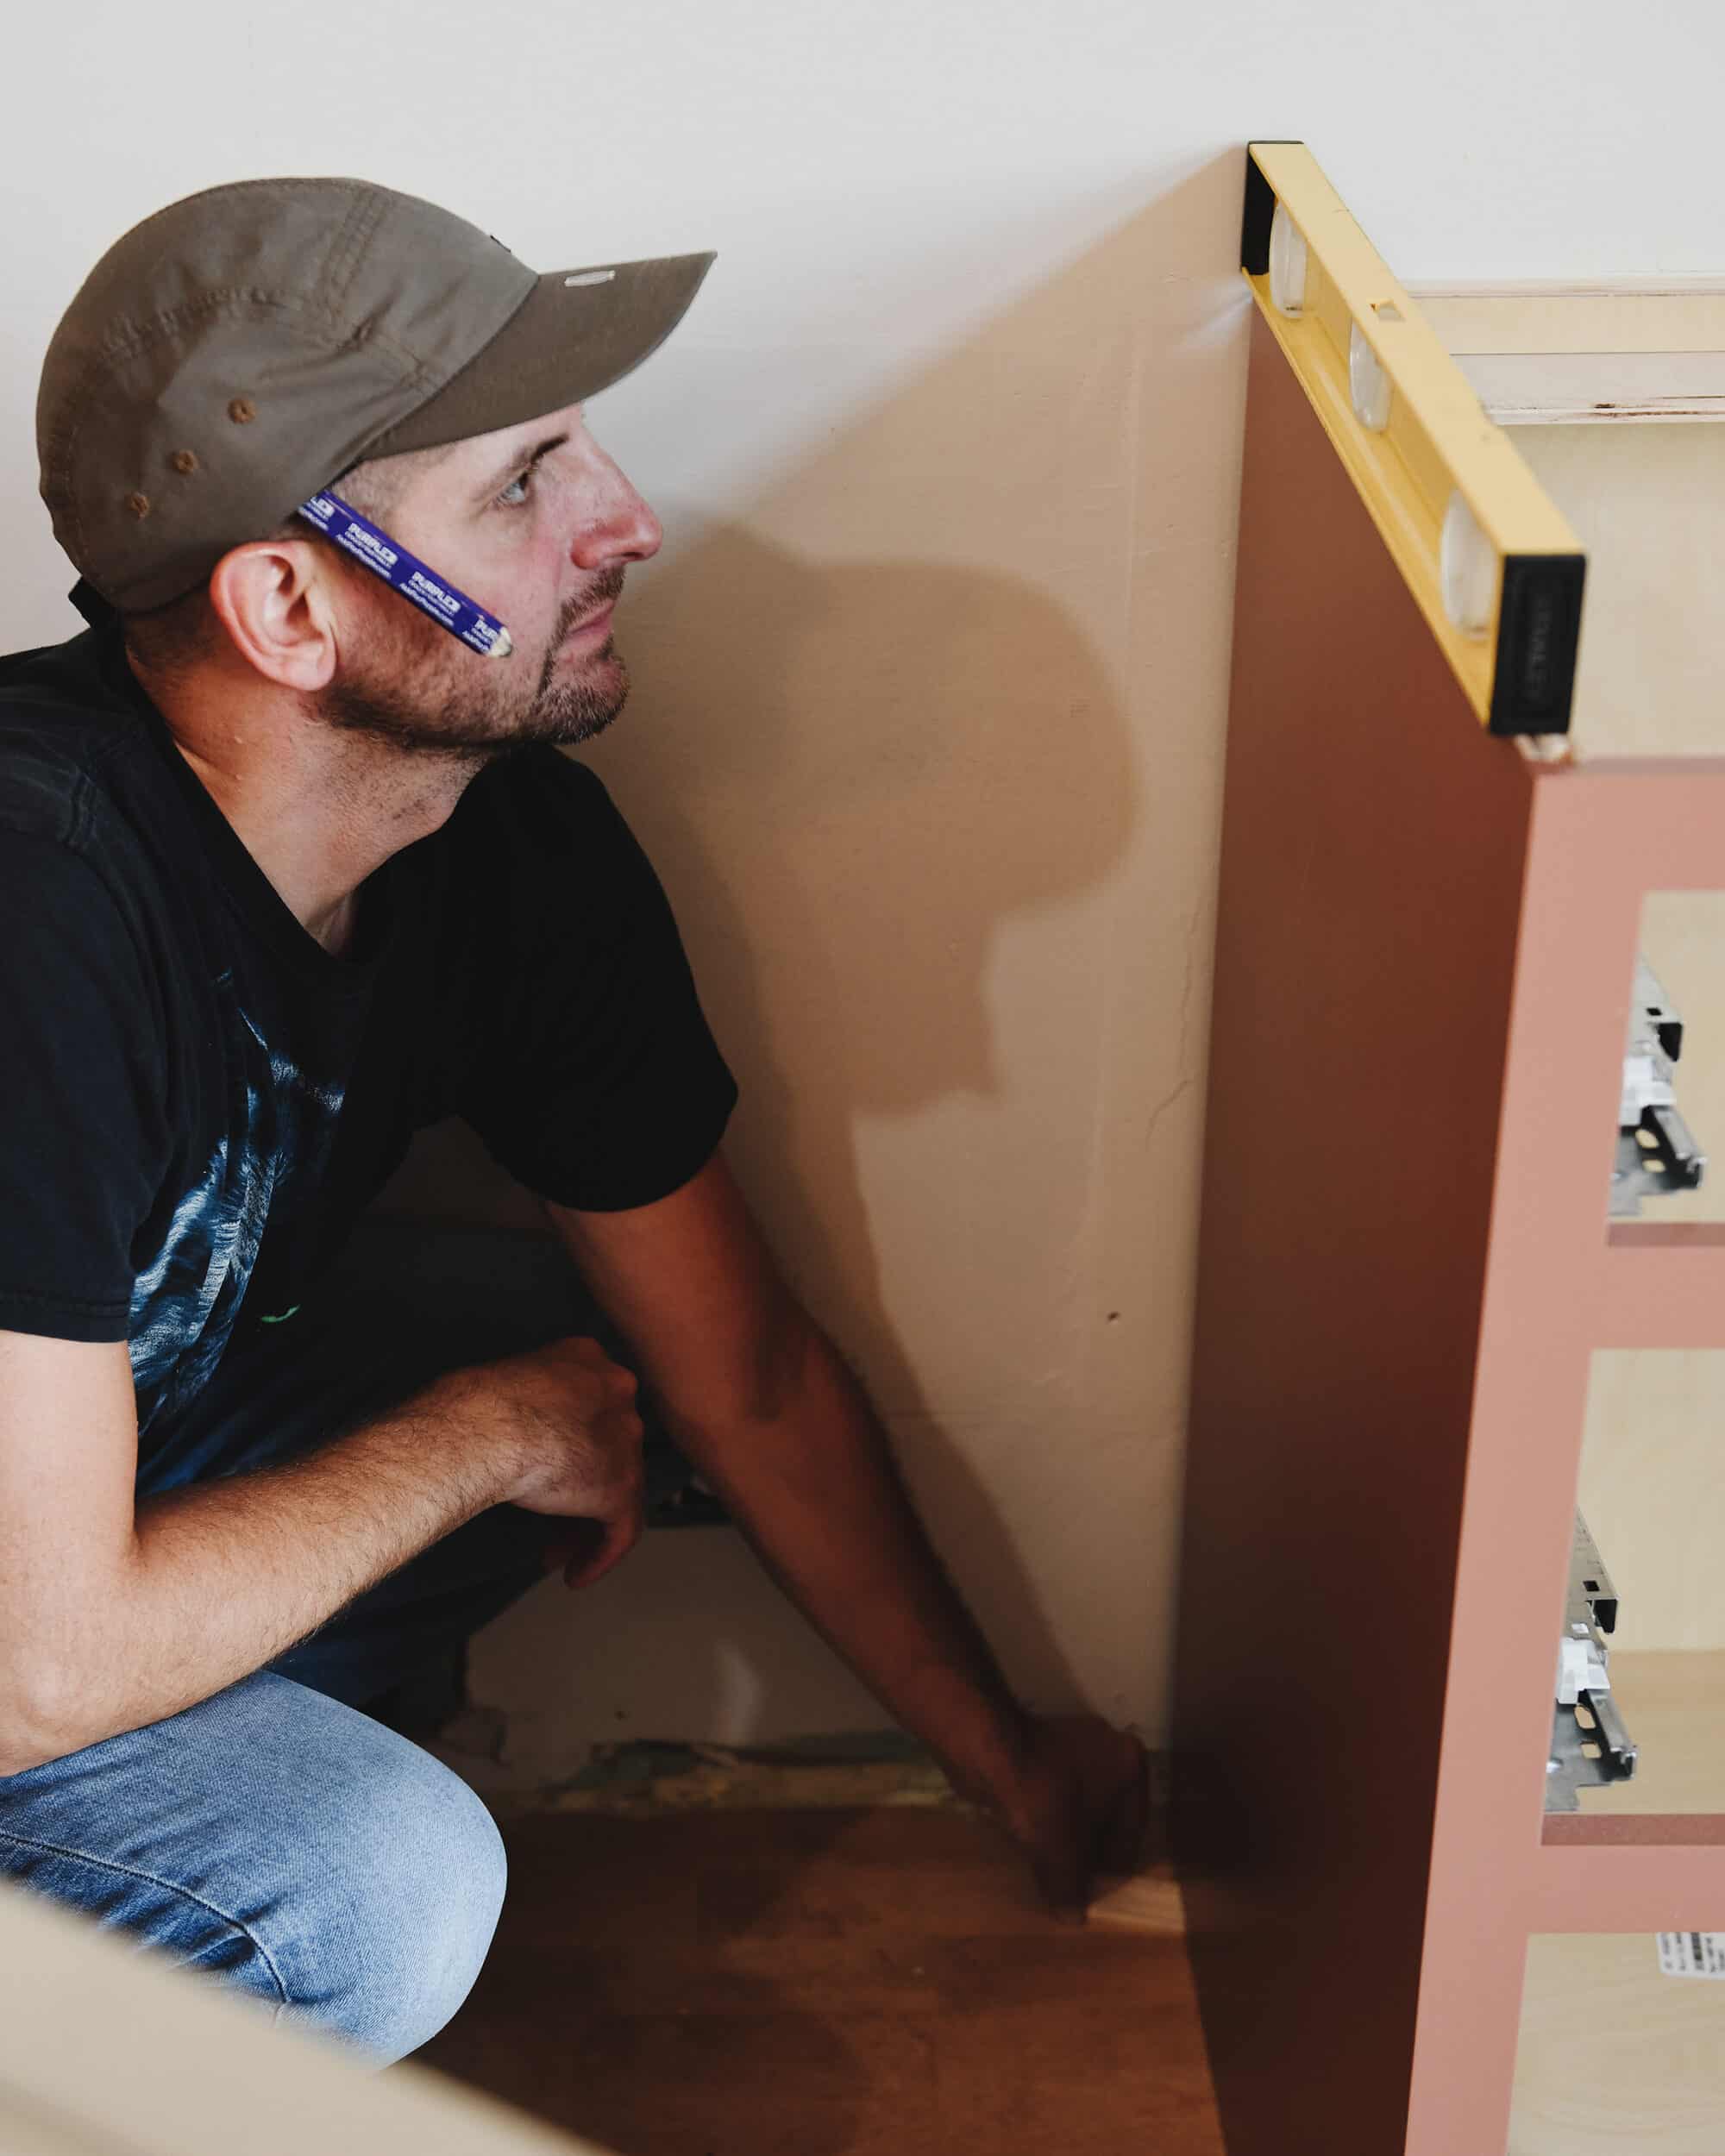
The floors of our Chicago kitchen are pretty level overall, but there is an upward slope of around 1/2″ at the rear of the cabinets. Usually, this wouldn’t be terribly significant, but when installing kitchen cabinetry, it presents a unique challenge. As can be seen in the photo above, we selected custom face frames with an integrated arched toe kick for a few of the cabinets. Since the custom cabinet face needs to sit flush to the floor, we couldn’t use traditional shimming methods at the front. (If we did, any shims would be seen under the decorative toe kick!) Instead, we made the decision to trim down the back of each cabinet to help lift the front. Confused? Here’s how we worked around the issue.
Follow along with this renovation from the beginning: why we’re renovating the kitchen | a happy surprise | choosing cabinetry | sharing the new kitchen layout | choosing backsplash tile | choosing an eat-in kitchen table (vs. an island) | the mood board | the kitchen is GONE and how we’re making it work | maple flooring is in! | appliance first impressions
In This Post
Trim Cabinet Sides
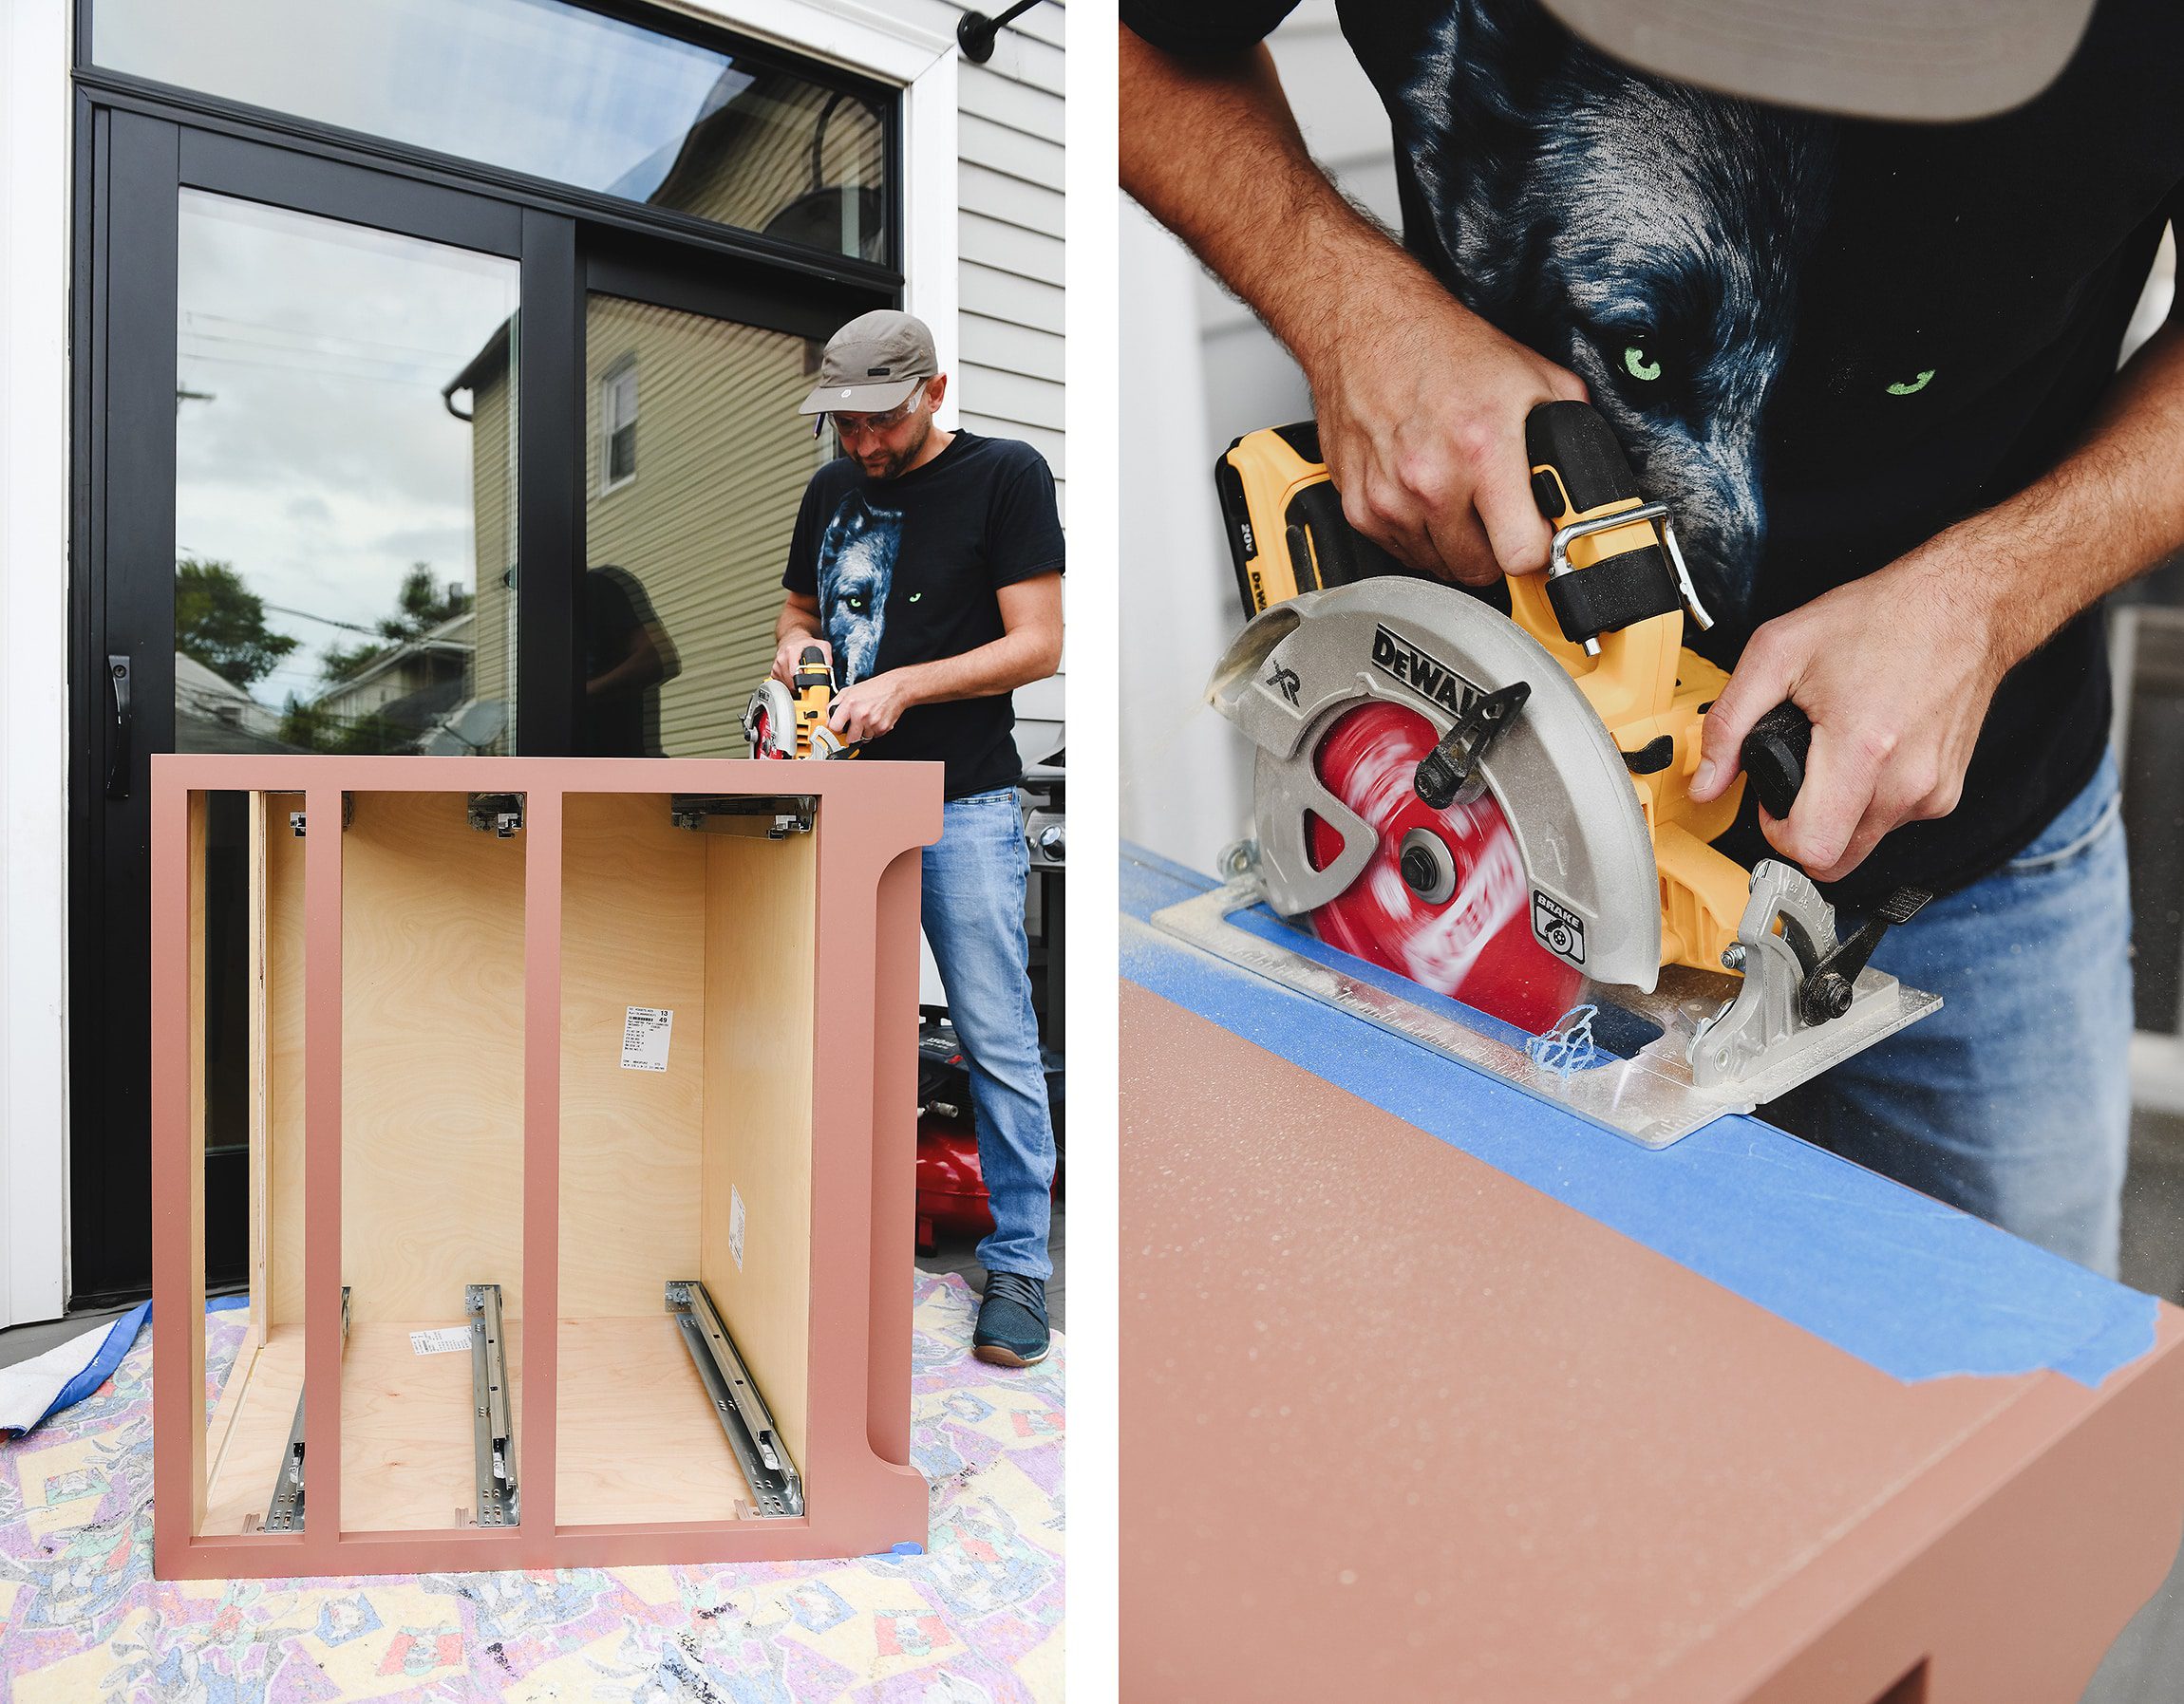
Since shimming the front of the cabinets upward wasn’t an option, the only logical solution was to remove material from the rear. This enabled the rear of the cabinet to move downward and maintain proper plumb and level. We measured 1/2″ at the rear of the cabinet, then ran a tape line that sloped to meet the face frame of the cabinet at a consistent angle. Then, using our favorite circular saw with a 60 tooth ultra fine finishing blade, we removed the excess material from the sides of the cabinets. This allowed the cabinet boxes to work with the slope of the floor instead of working against it.
Install Blocking Behind Cabinets
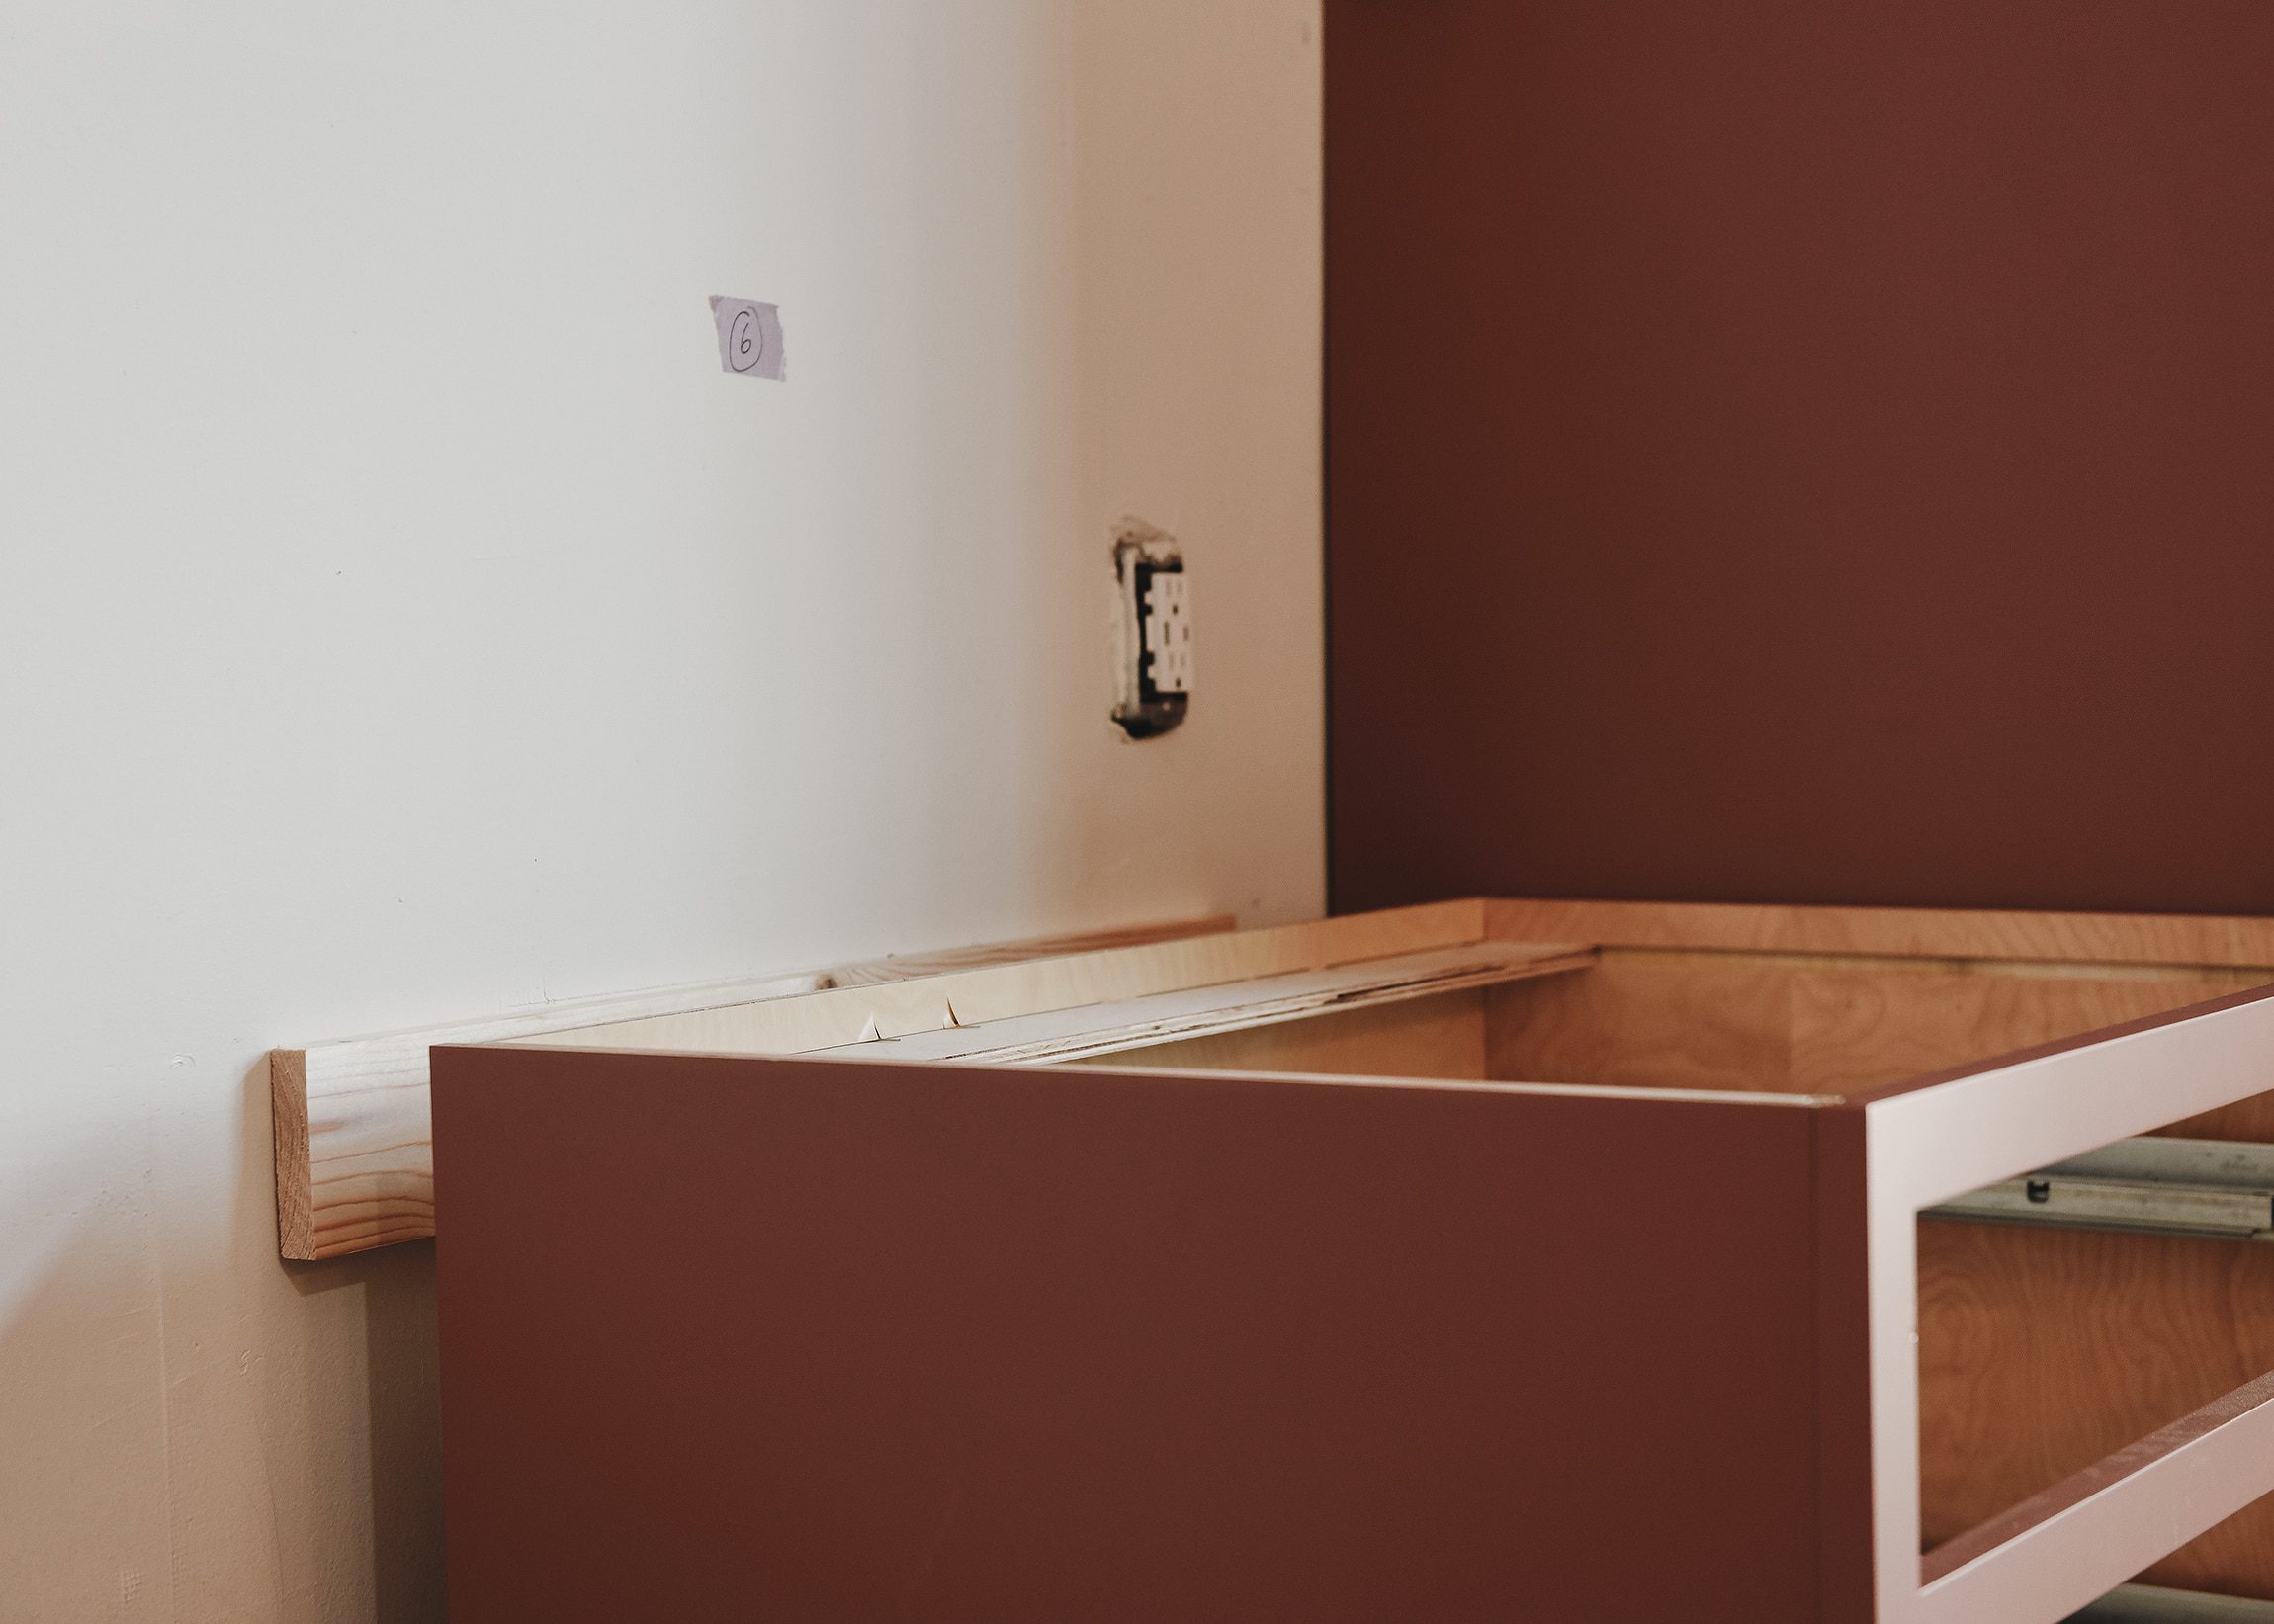
Since our home is old and lots of work has been done inside the walls over the years, locating studs can be a bit tricky. To aid in fastening the cabinet boxes securely to the walls, we installed simple blocking behind each cabinet.
Before we go any further, it’s necessary to mention that we’re intentionally installing our cabinets at 25″ from the wall instead of the traditional 24″. This will allow the front of the cabinets to sit flush with our new range and provide a small percentage of additional countertop space.
While this method won’t work if you’re installing for a 24″ counter depth, I can’t recommend considering an extra inch of countertop enough! Rather than needing to locate each stud through each cabinets (all that math!), this will allow you to locate studs beforehand, add your blocking, and be able to attach your cabinets to the blocking anywhere you’d like. Of course, keep in mind the depth of your appliances, but even our counter-depth refrigerator is 25″ deep.
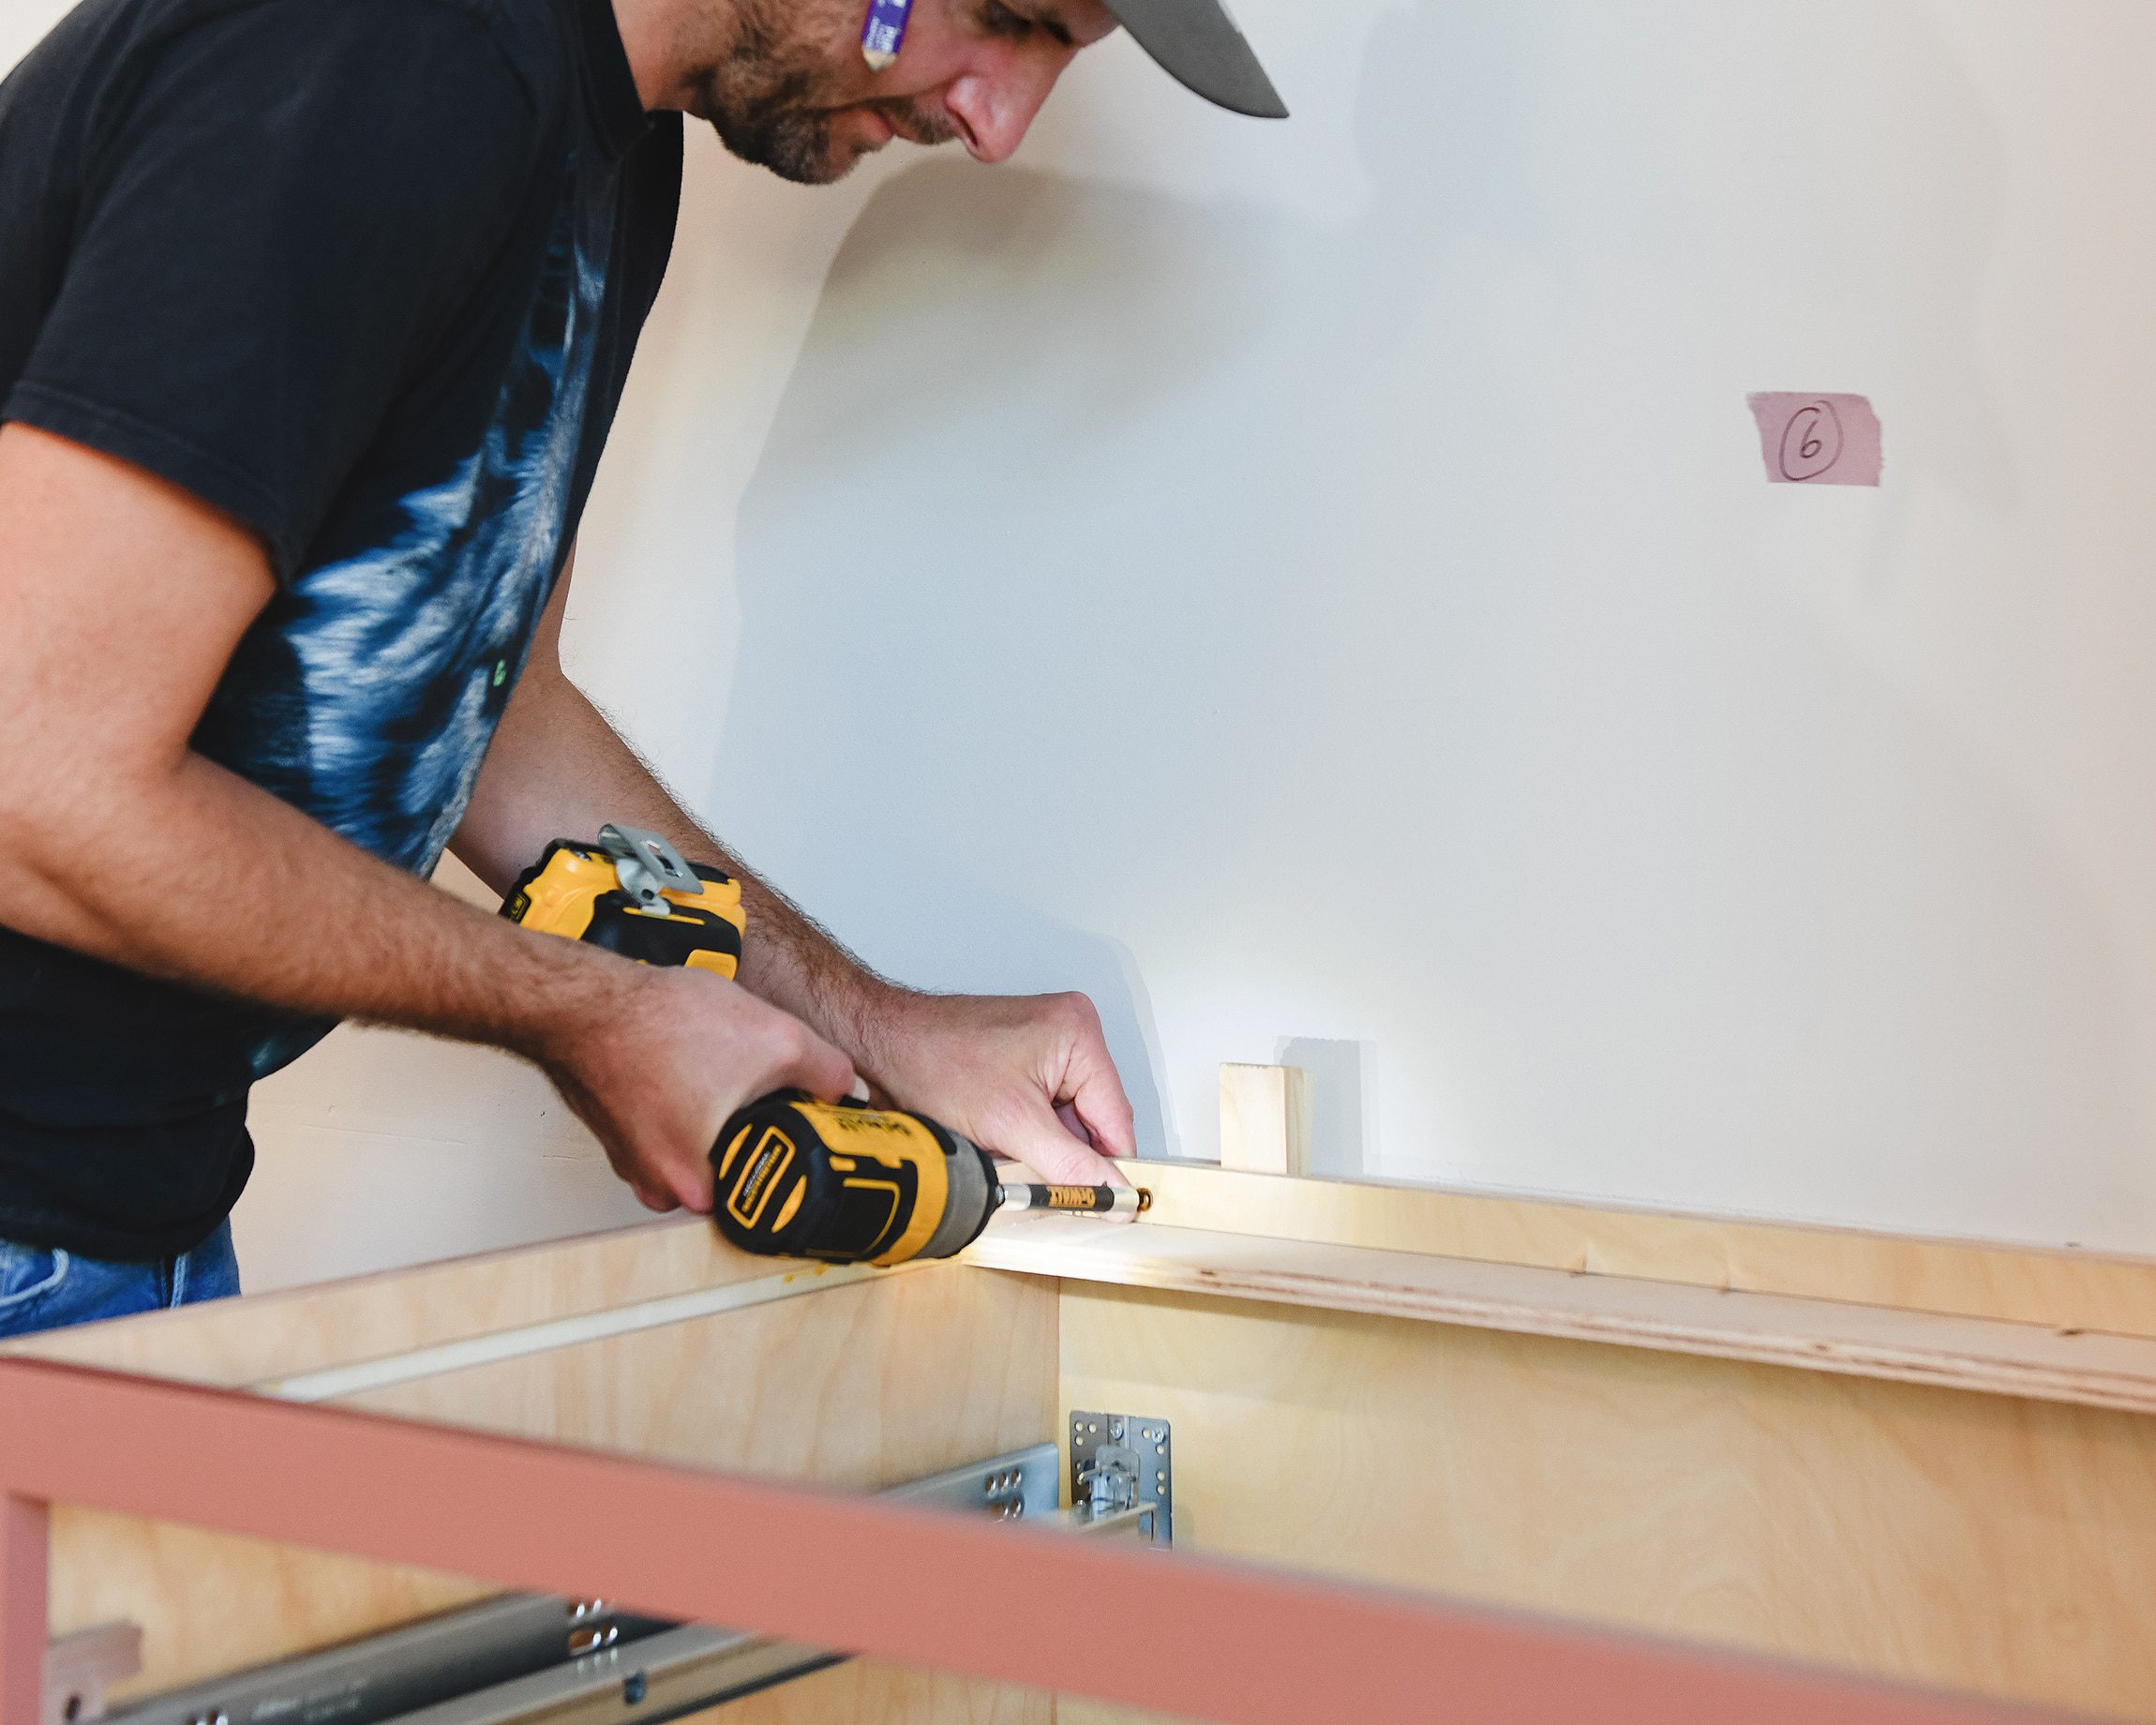
The process was fairly simple. We located and marked the vertical studs, then fastened a 1″ x 4″ board in place with the top at 34″ from the floor. We then used these specialty cabinet screws with integrated washers to fasten the boxes directly into the blocking. It was almost like we designed our own version of IKEA’s rail and bracket system!
Use Shims Under and Behind Boxes
It’s obviously tricky to remove the exact amounts of material necessary for perfectly plumb, level and square cabinet installation. To help get everything perfect, shims are your best friend! Prior to starting this project, we were sure to have a few packs on hand because they’re simply invaluable. We stacked a pair of shims to make up the extra 1/4″ of space behind each cabinet and ensure that they were perfectly in line with each other.
We also used them under each cabinet side to make certain they were level front to back and side to side. When installing cabinetry like this, there are A LOT of planes to keep in mind. Each cabinet need to be plumb, square and level. They also need to be all of those things in relation to each other! It can be a mentally exhausting and time consuming process, but it’ll all be worth it in the end. Fun fact: When the countertop fabricator came to make templates for the Tree House kitchen, he remarked that they were the most level kitchen cabinets he’d ever seen. He asked who installed them and he was in disbelief when Kim told him that we DIY’d it!
Specialty Fasteners + Joining Cabinets
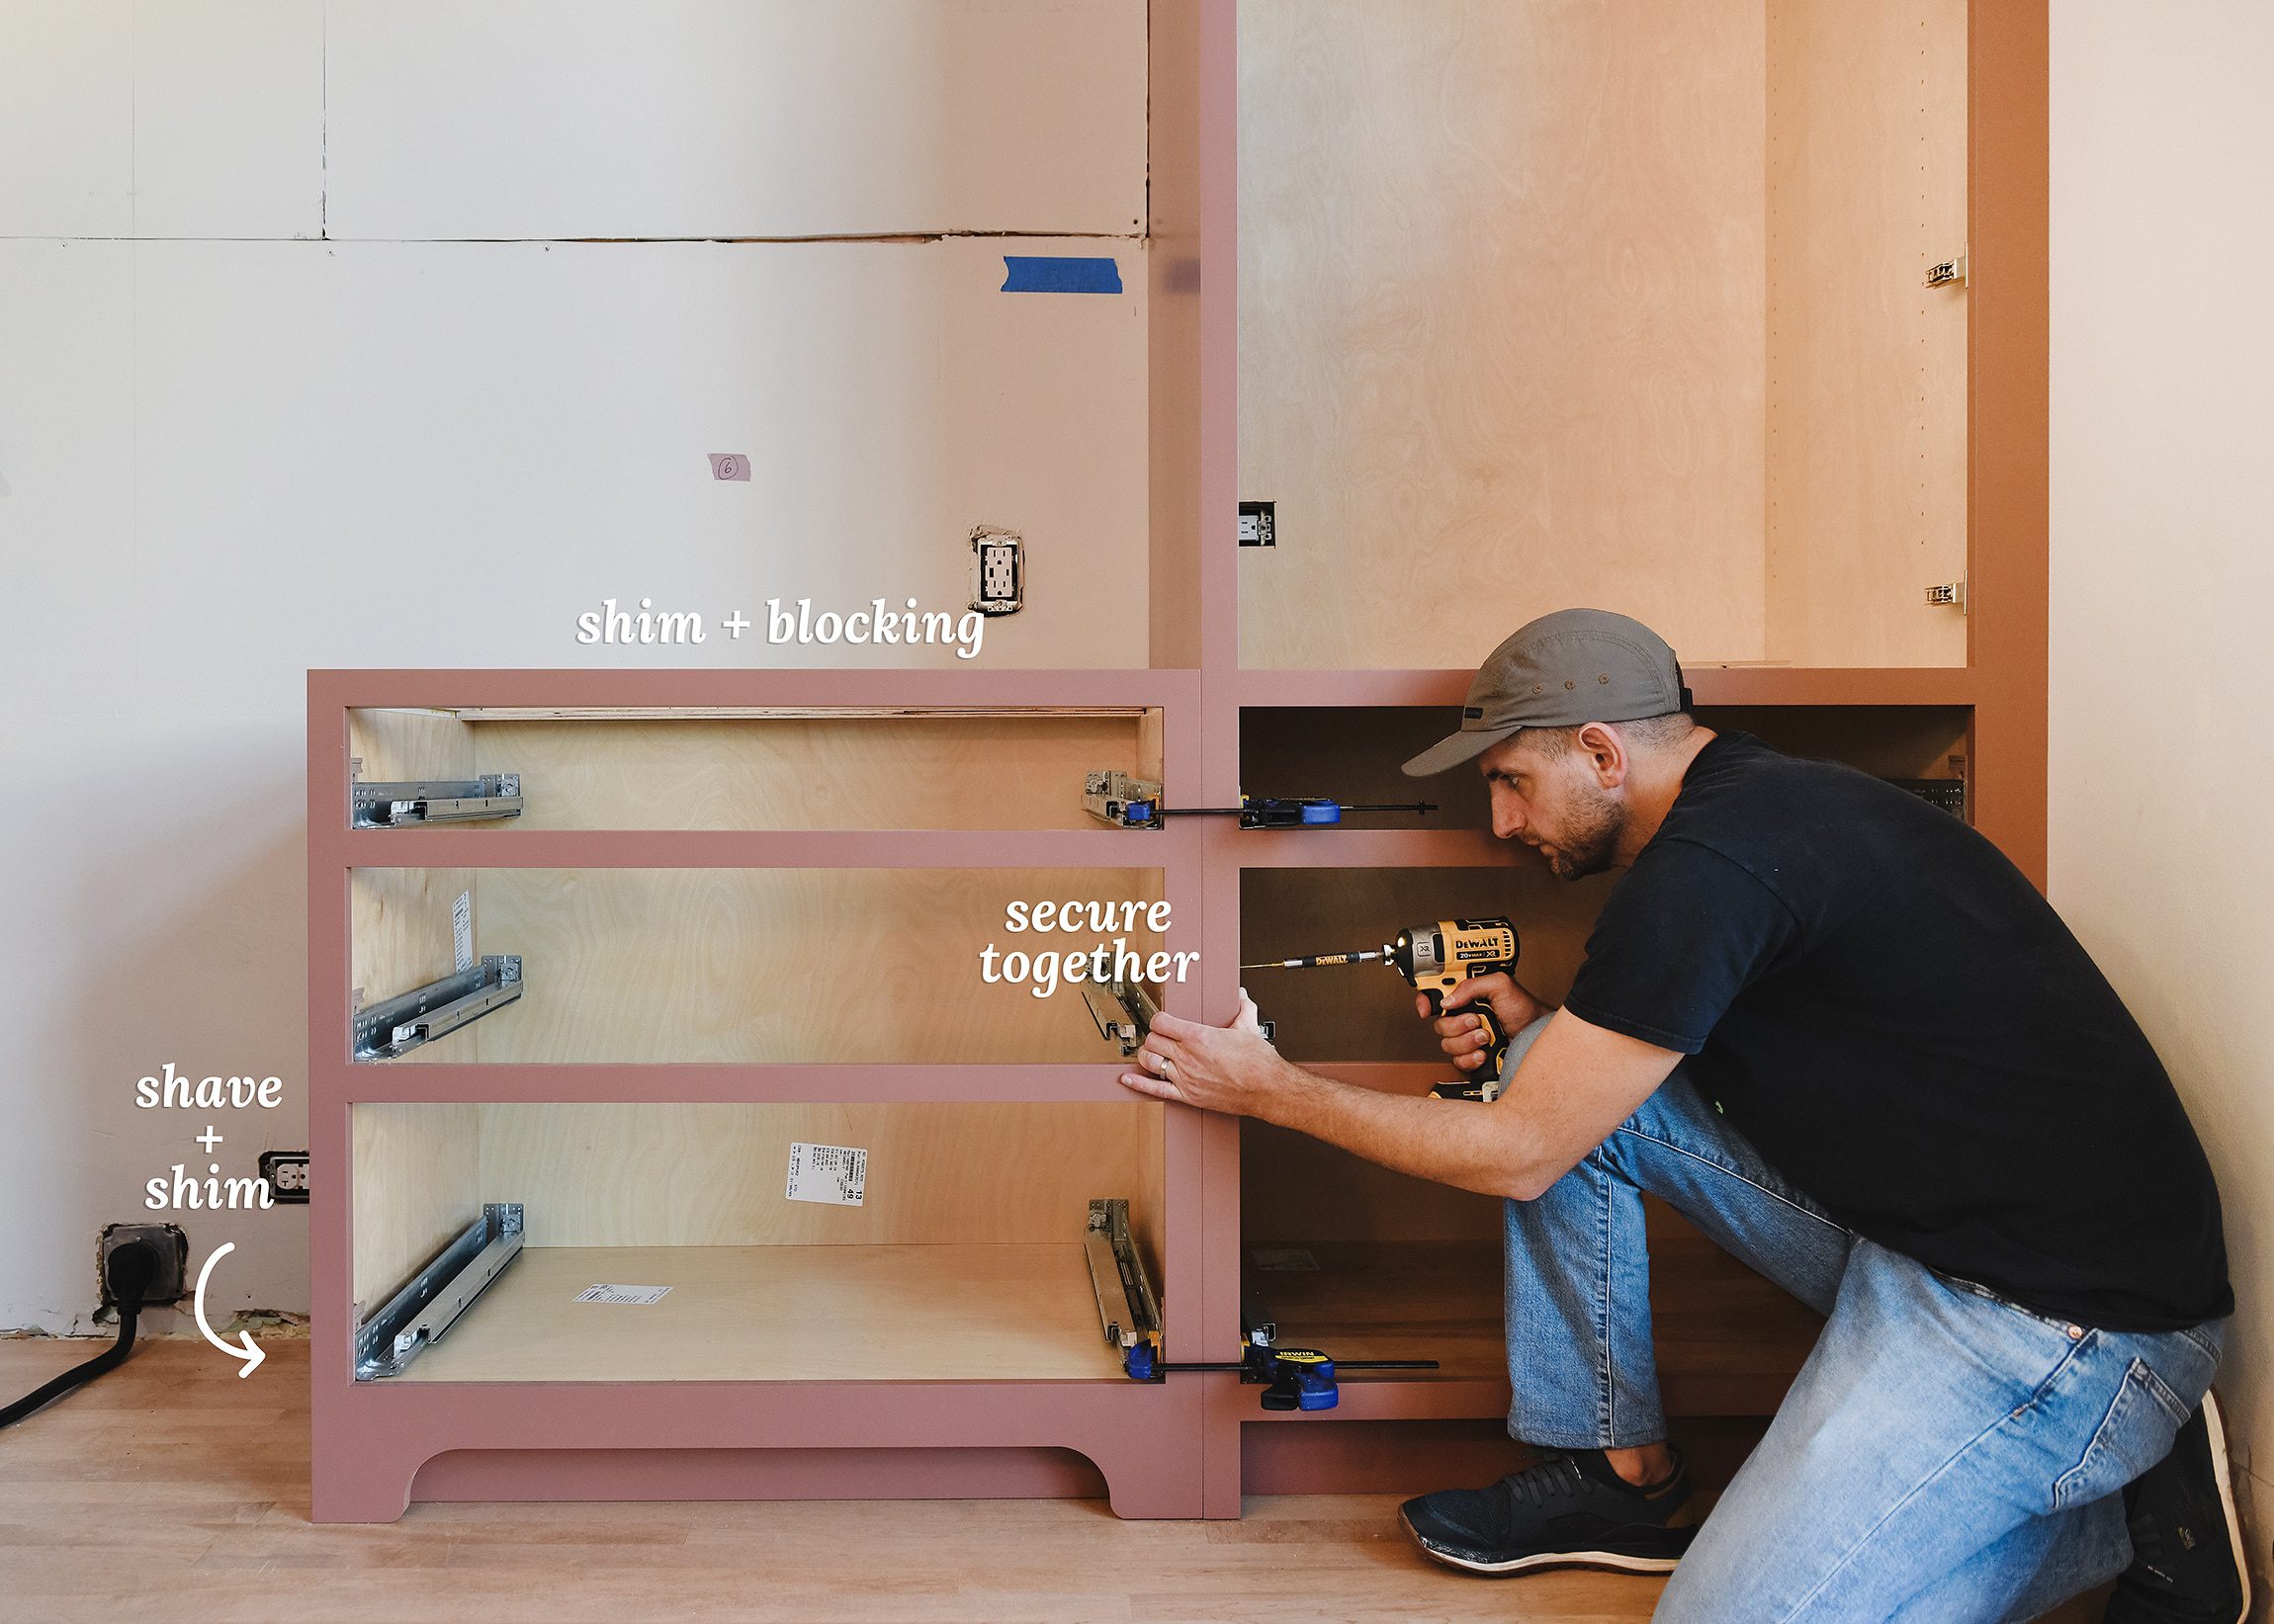
Once all of the cabinets were in perfect position, we were ready to join them together. We ensured that each face frame joint was perfectly flush, then used quick grip clamps to hold them securely in place. We drilled a tiny pilot hole in the side of each face frame, then used trim head screws to secure them to each other. These fasteners are pricier than standard wood screws, but they’re nearly invisible once installed. Along with the cabinet screws we used earlier, these specialty bits made our job significantly easier and delivered much better looking results.
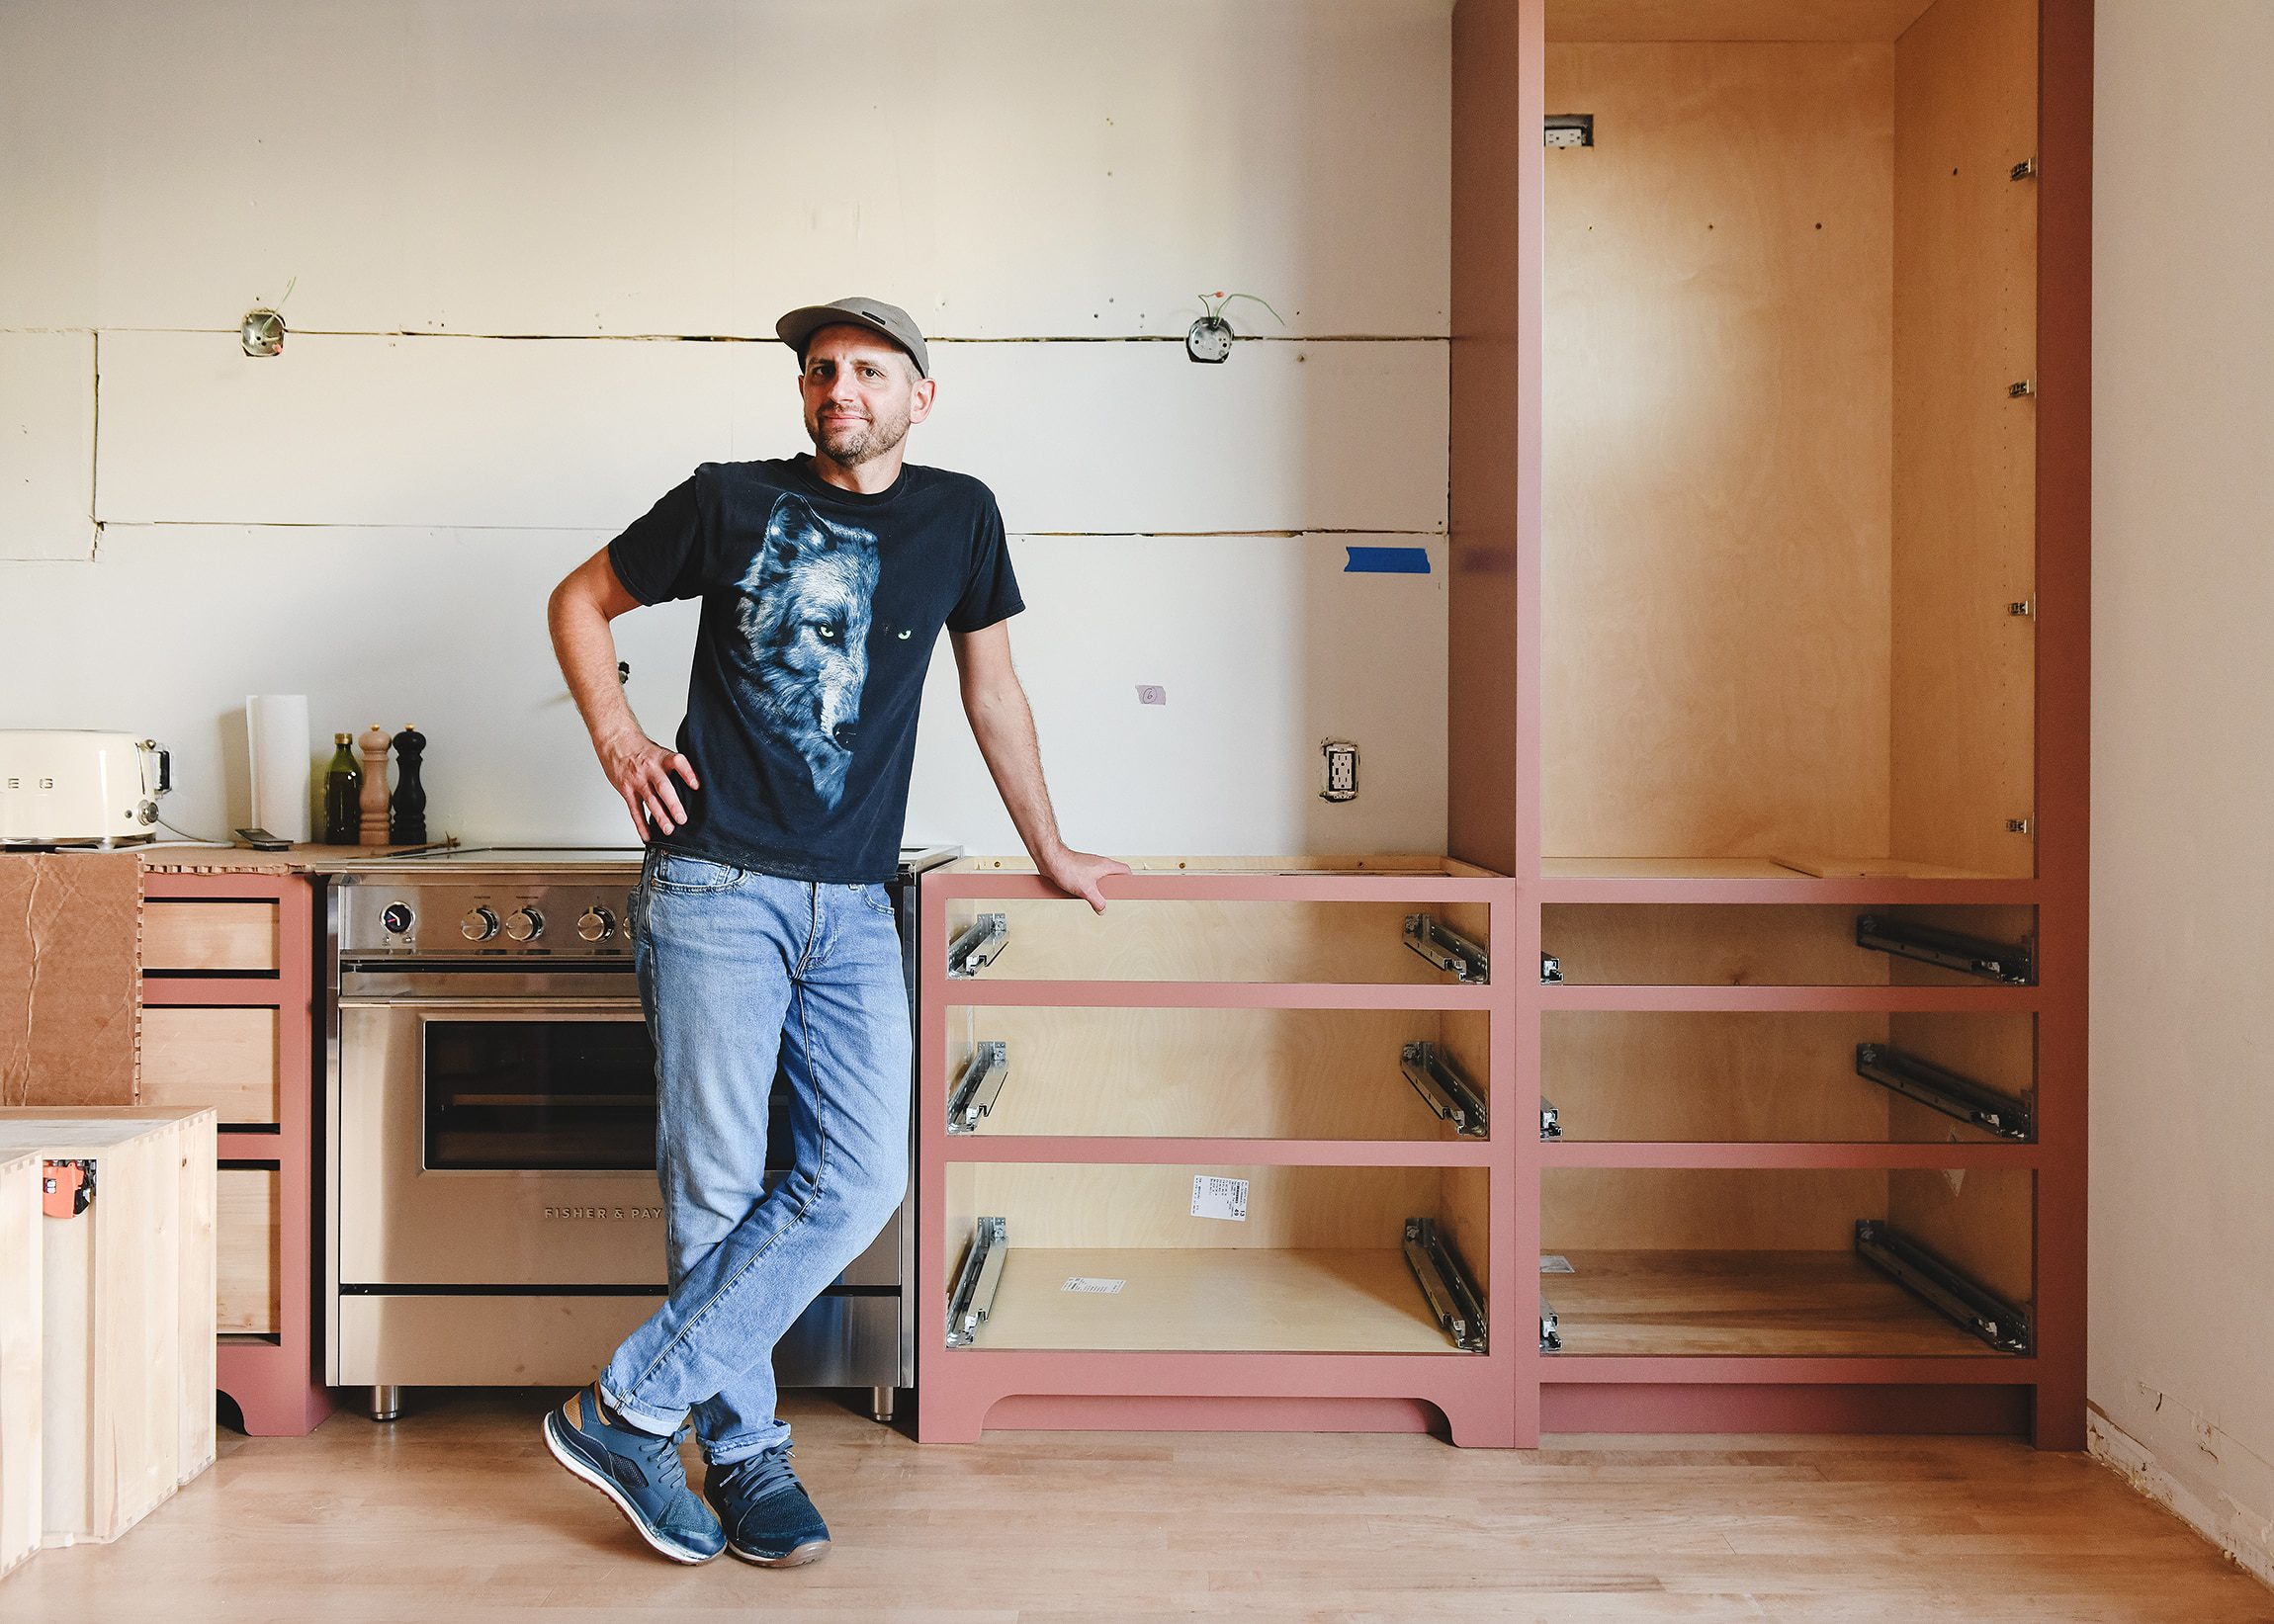
The kitchen is one step closer to completion and we hope to install the wet wall cabinets by the end of this week. Countertop templating is currently scheduled for Monday, so we’re really pushing to make that deadline happen!
PS – If you’re just catching up on our kitchen renovation, here’s how it started, here’s the plan for the layout, here is a big progress update, here is a big update on our new flooring and these are our initial thoughts on the new appliances!


Ah doing the blocking behind the cabinets is genius!
I definitely had to make some Swiss cheese holes when I didn’t hit a stud in our old well worked walls and this would have saved us.
Hey Corey! It’s a total game changer if you have the space!
Good job, guys! We love holding our cabinets off the wall, even up to 8” when we can, to get that extra countertop space!
Ah, you two are professionals, not diyers. Well done as usual!
Thanks!
Just curious – why didn’t you choose to do the arched toe kick for all cabinets?
Hi Lindsay. A few of the cabinets are less than 20″ wide, so the arched toe kicks would have looked forced and busy. We decided to use the arches as statements only on the cabinets flanking the range and the sink cabinet, which will act as the main utility and prep areas.
Oh okay, those locations for the arched toe kicks make total sense! I wasn’t piecing it together with just that picture so I thought I’d ask. So excited to see how the whole space turns out!!
Ugh… wish I saw this before my cabinets were installed! My installer shimmed the legs and now I’m not sure how to resolve the gap that’s left behind… cut the legs off (which hurts my heart!) or add trim pieces to make a “boot”???
That’s tricky. Depending on the size of the gap, some tiny trim moulding might be your best bet.
You can mark where your blocking will go, remove that entire band of drywall, and replace with strips of 1/2″ plywood (or solid wood) to accomplish the same concept with standard countertops. Solid work gentlemen!
We’re a gentleman and a lady, but thank you!