

The Unit 1 kitchen in our ongoing Two Flat project is almost complete! Today we’re walking through the DIY beadboard backsplash and integrated custom floating shelves made from (mostly) scrap wood.
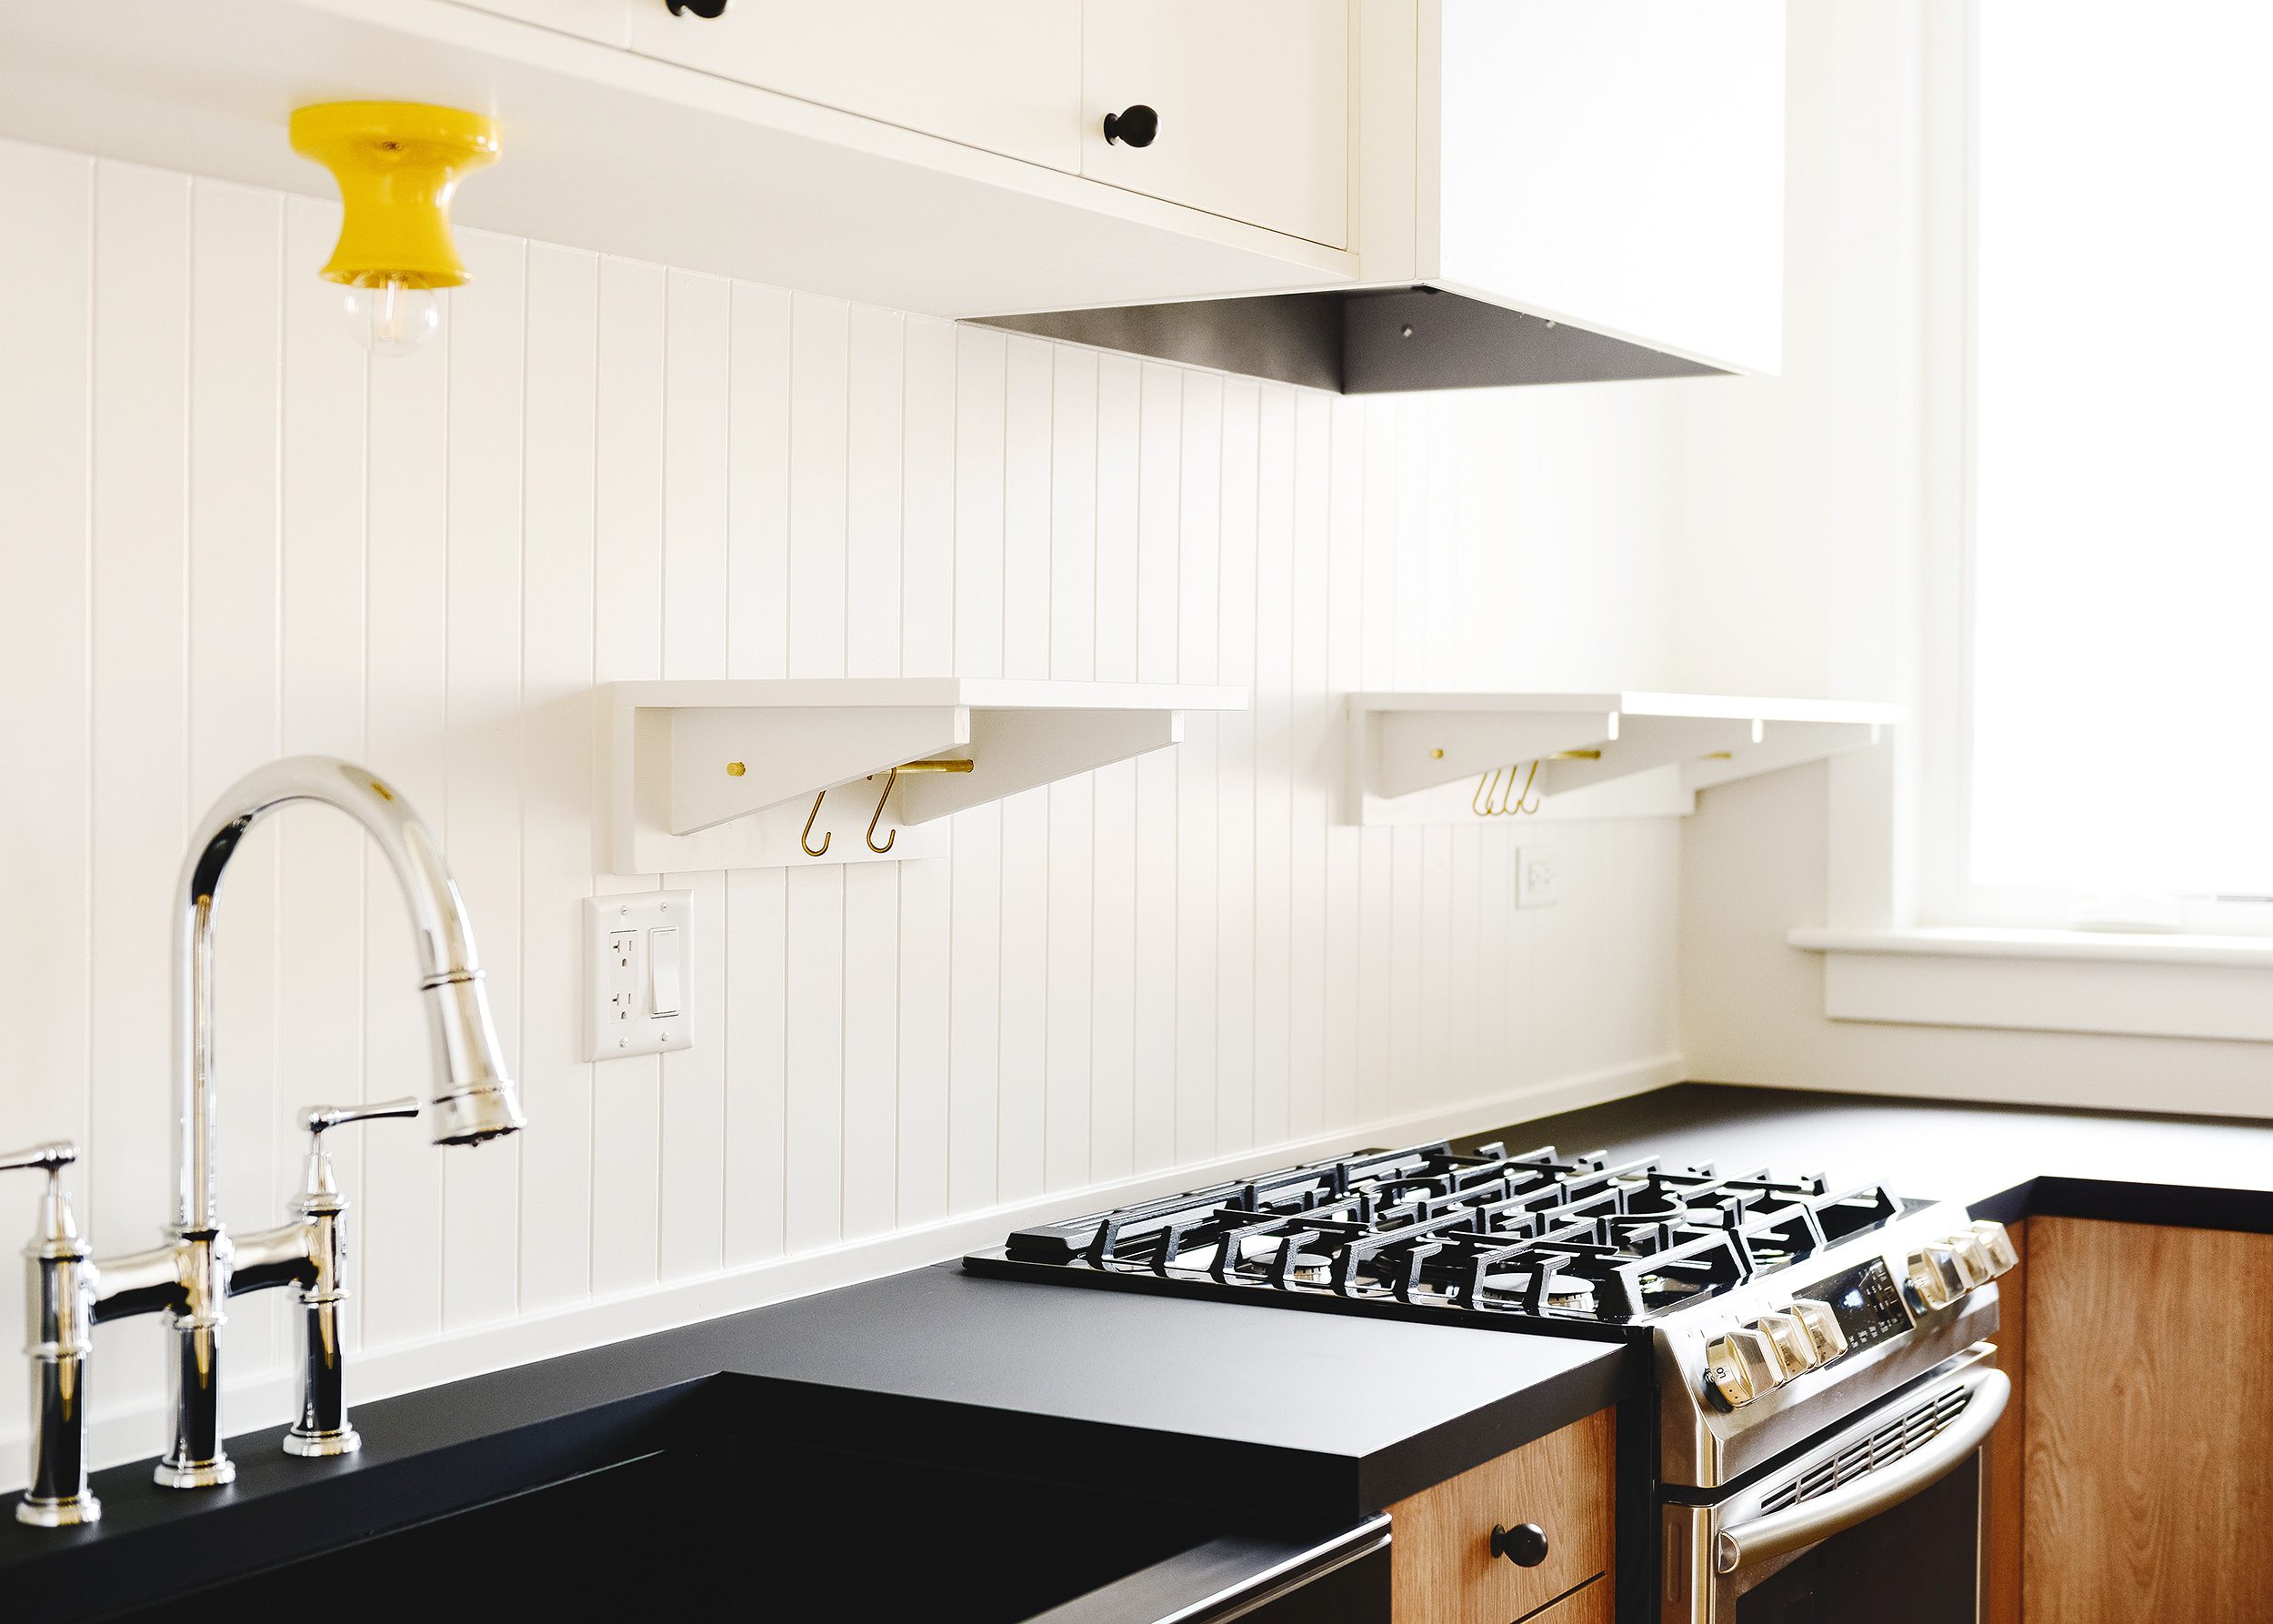
It’s kind of crazy to finally say this out loud, but with the exception of the adjacent staircase railing, the Unit 1 kitchen is done! We recently completed the beadboard backsplash and shelving install, and we couldn’t be happier with the way it turned out.
Beadboard as Backsplash
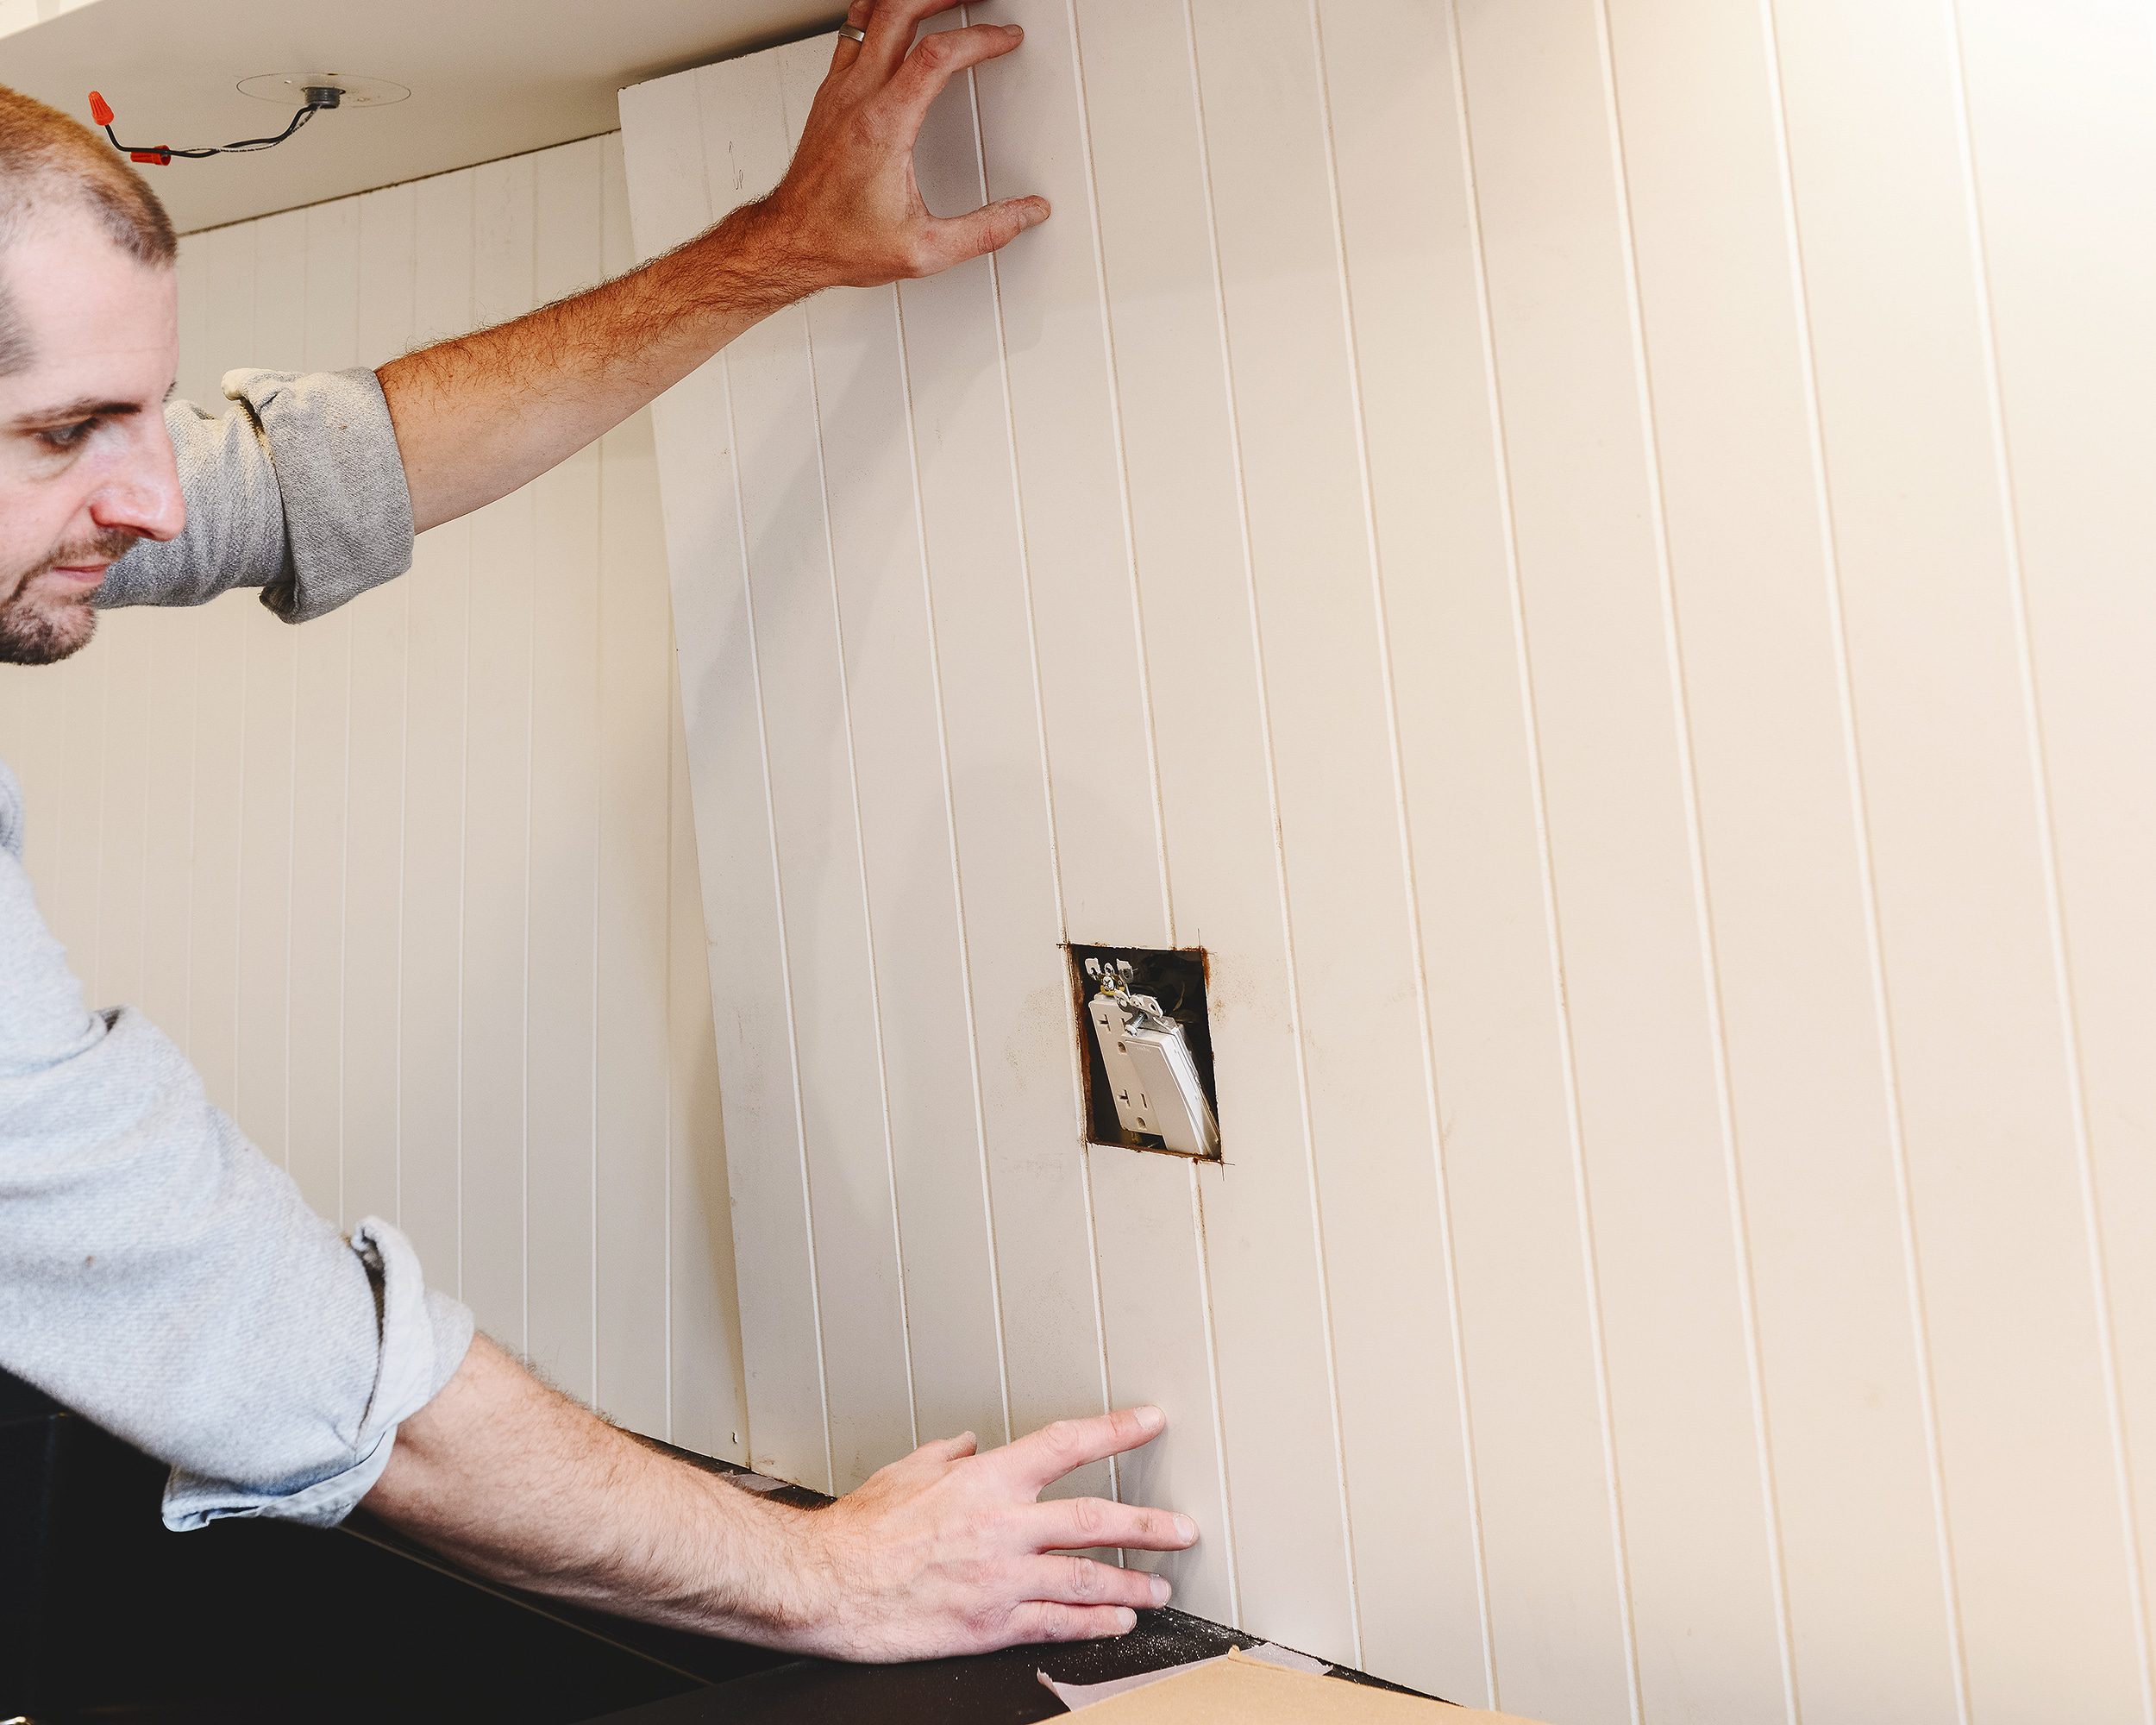
We started the process by installing the beadboard itself. We started with two 4′ x 8′ sheets of the same V-groove beadboard that we used for the back and sides of the hutch in the adjacent mauve dining room. We cut them to the proper height and utilized the full 4′ width to keep seams to a minimum.
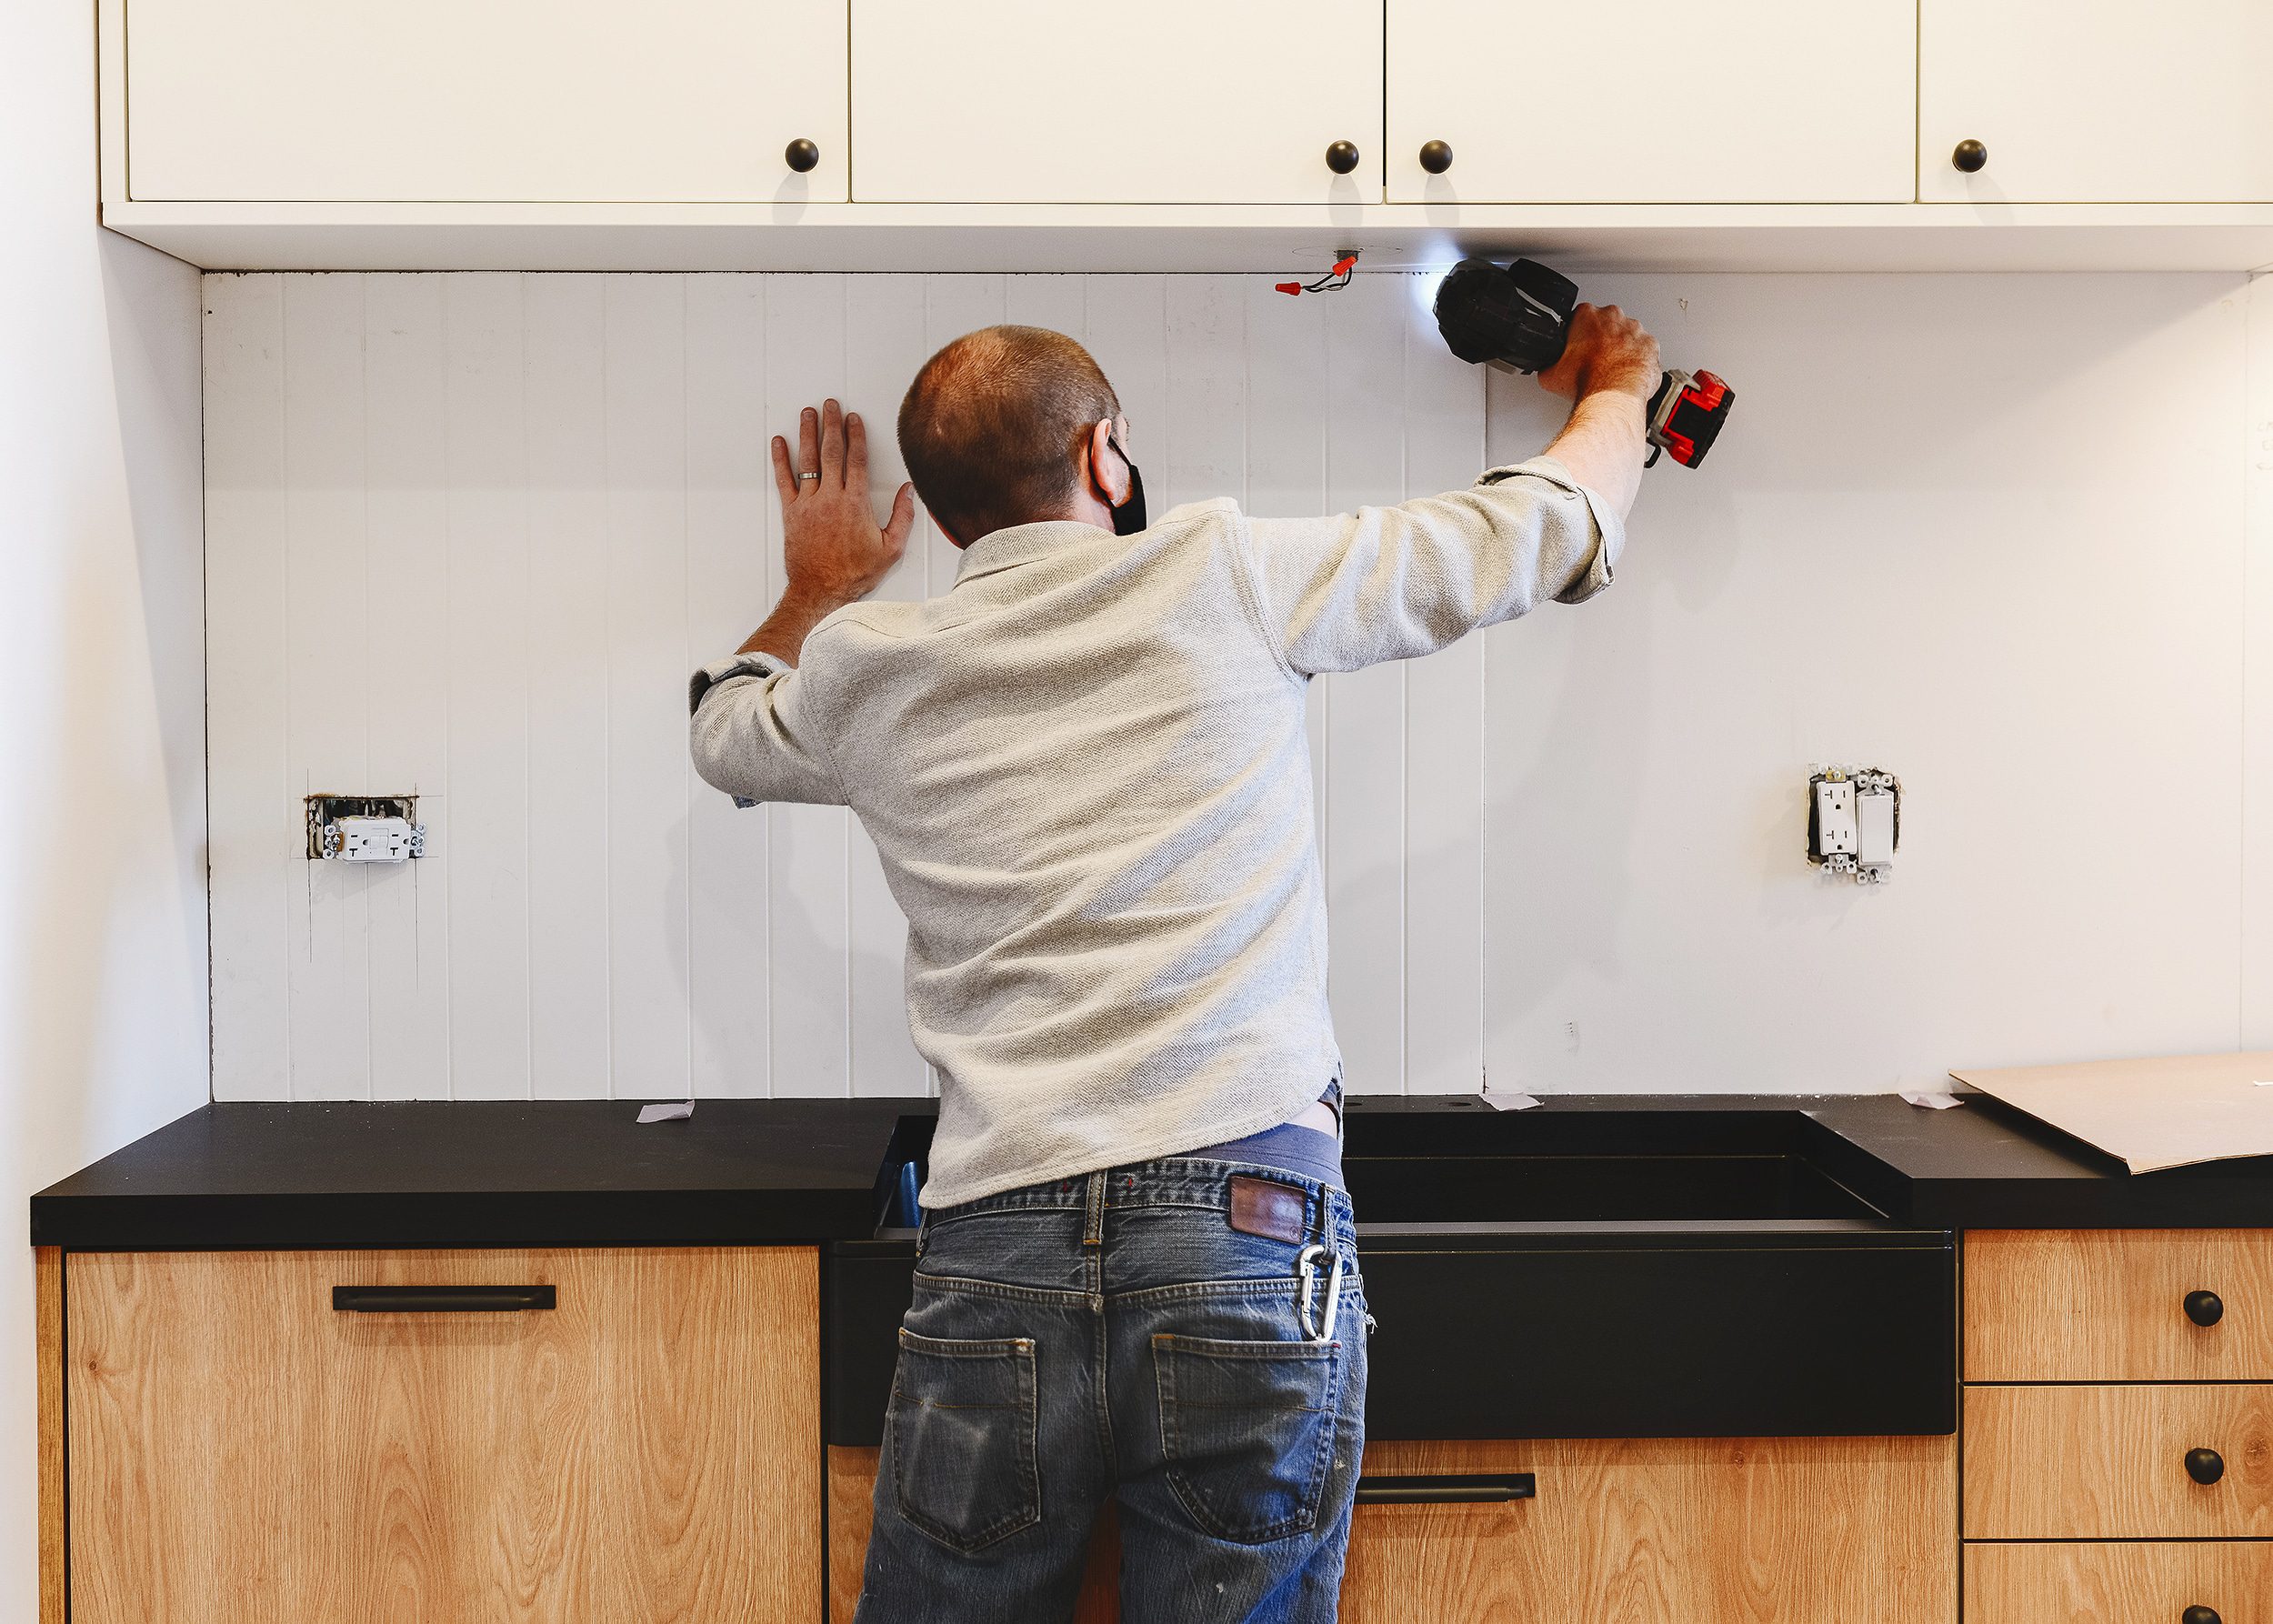
There are three outlets along the cabinet wall in the kitchen, so we made careful measurements, then cut the opening for each receptacle with a fine tooth blade on our oscillating tool. Remember to measure twice and cut once!

If our math checked out, each piece of beadboard would slip right into place. We used a generous amount of construction adhesive on the back of each panel and nailed into studs along the tops and bottoms. Perfect fit!
Floating Shelf Assembly
Once the beadboard paneling was all in place, we moved on to building the custom shelves. You can see in our initial mood board that our design was inspired by Cathy from The Grit & Polish, but instead of having our shelves sit at the bottom of the brackets, we chose to have the shelves sit on top of the bracket. Then, our friend Ashley at The Gold Hive suggested we that we add a rod to the support brackets for hanging storage! The exploded view below shows how each piece fit together:
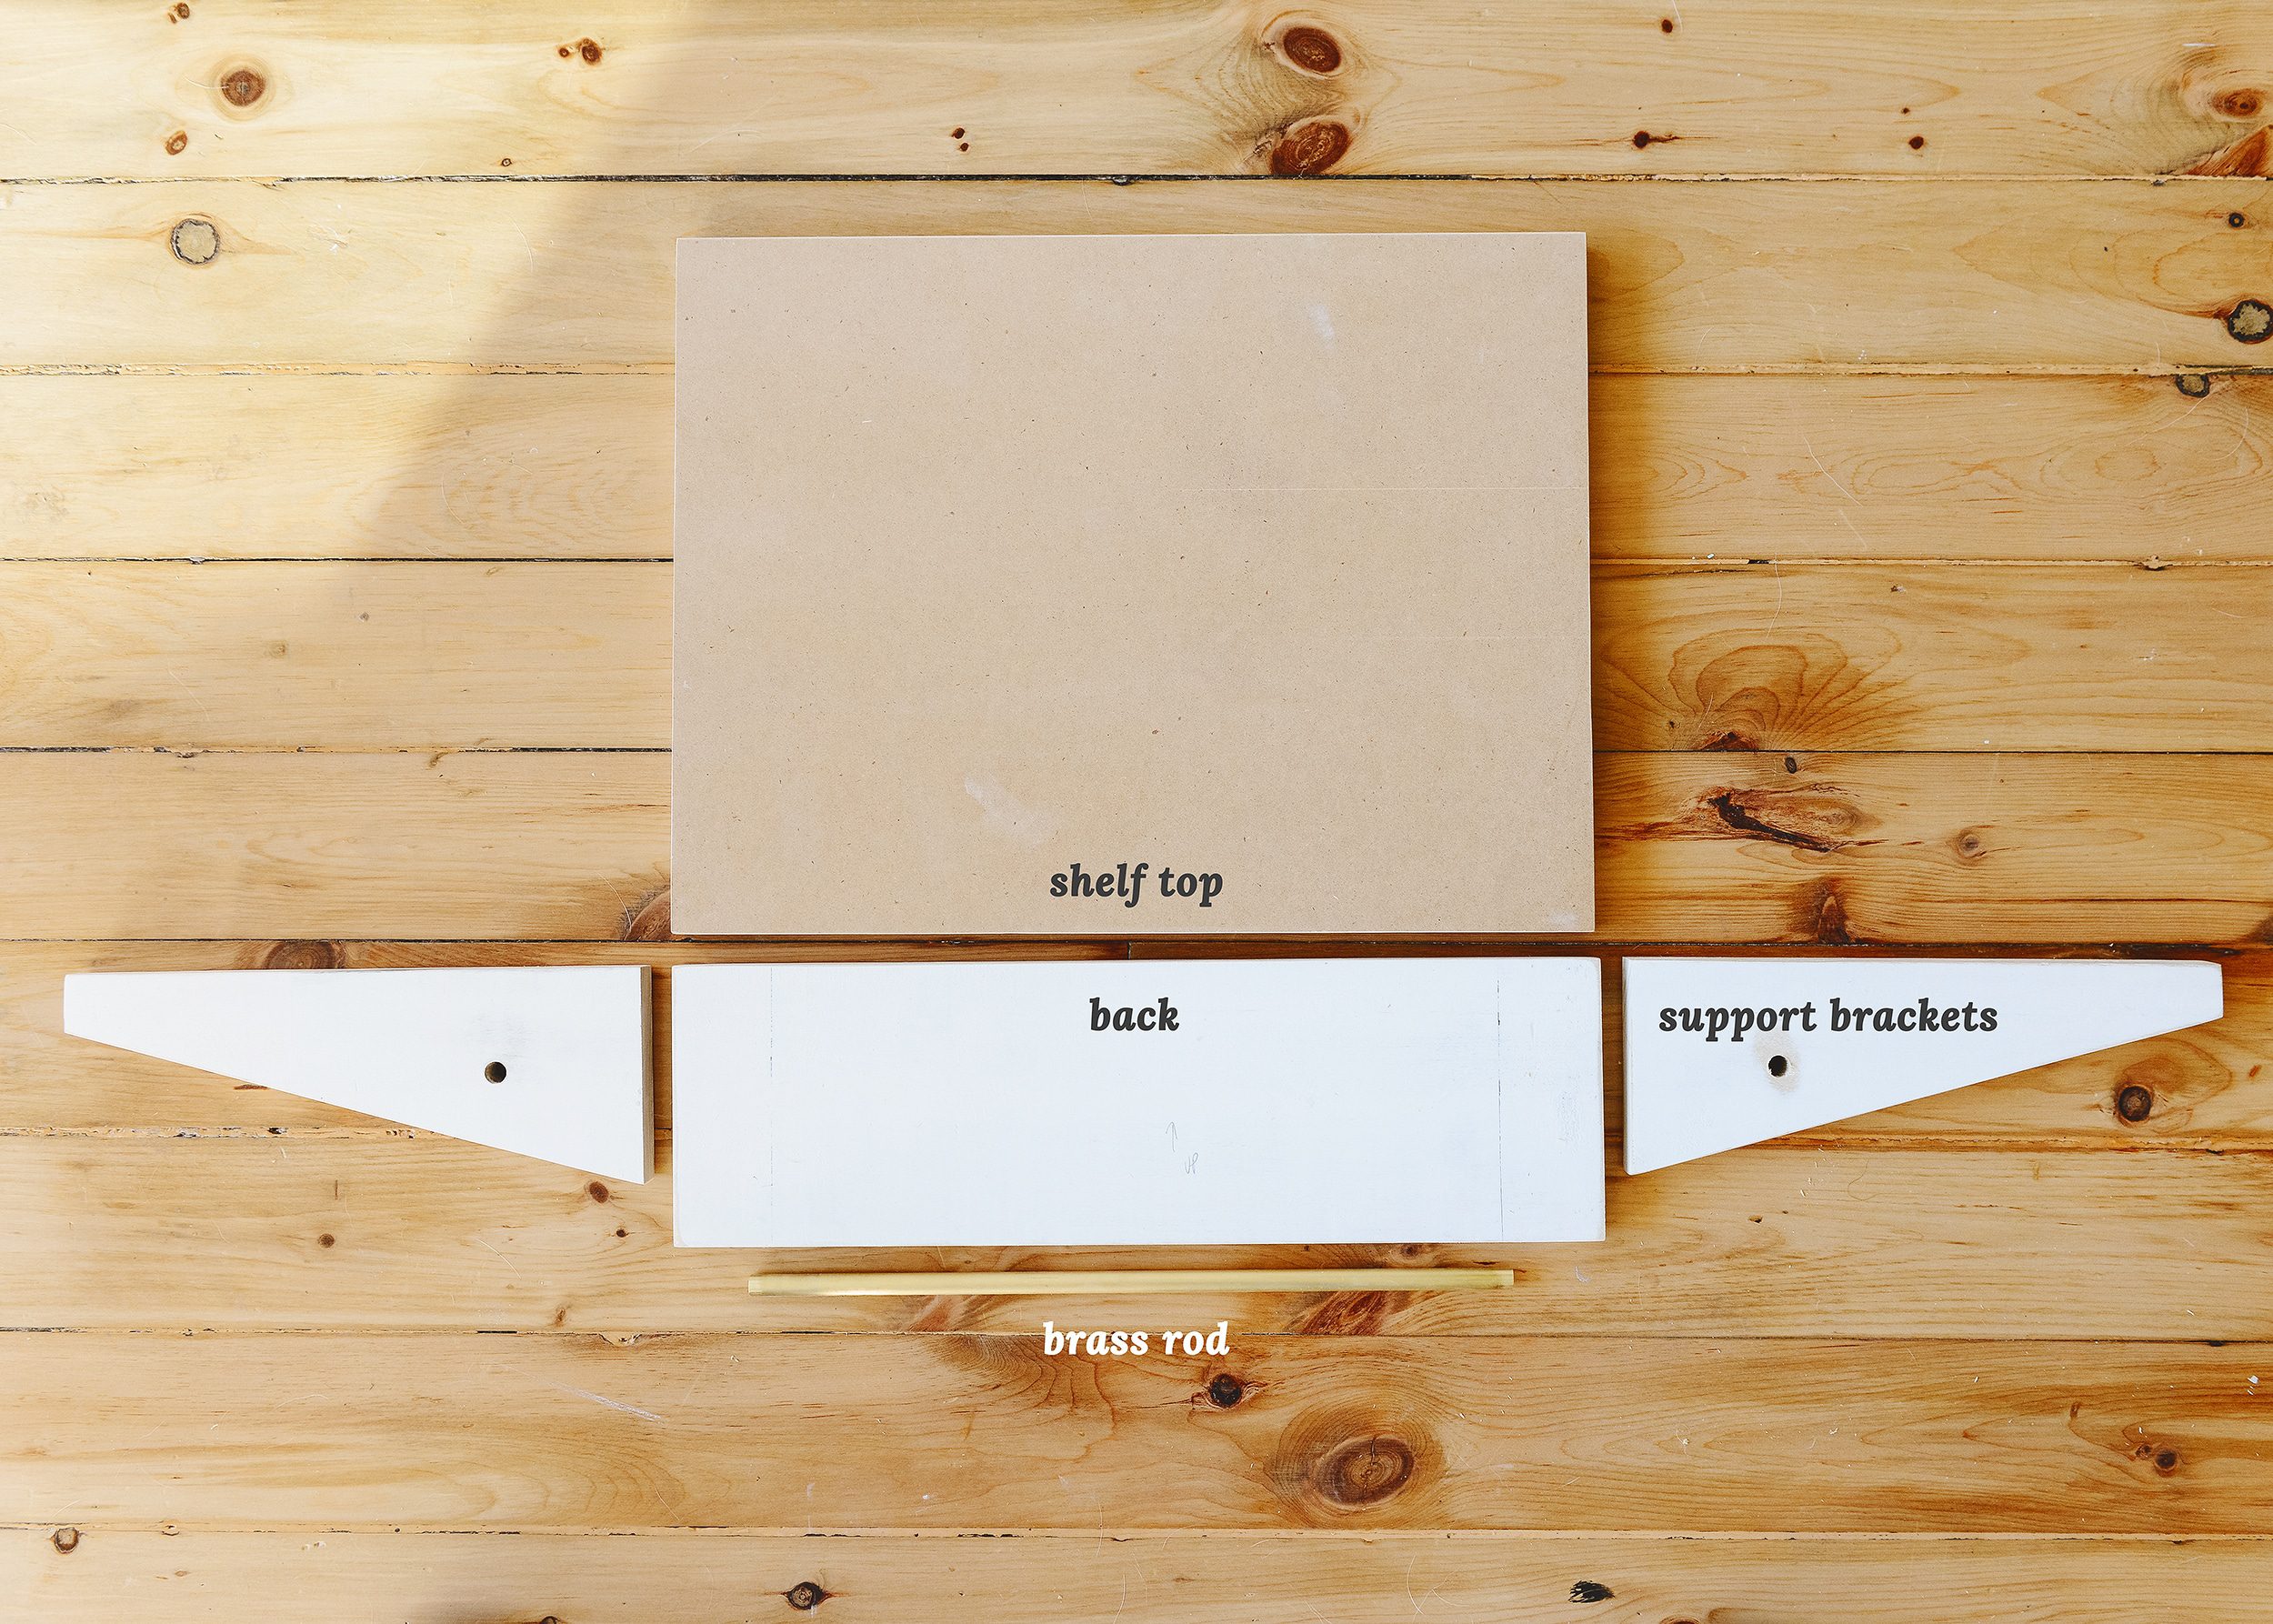
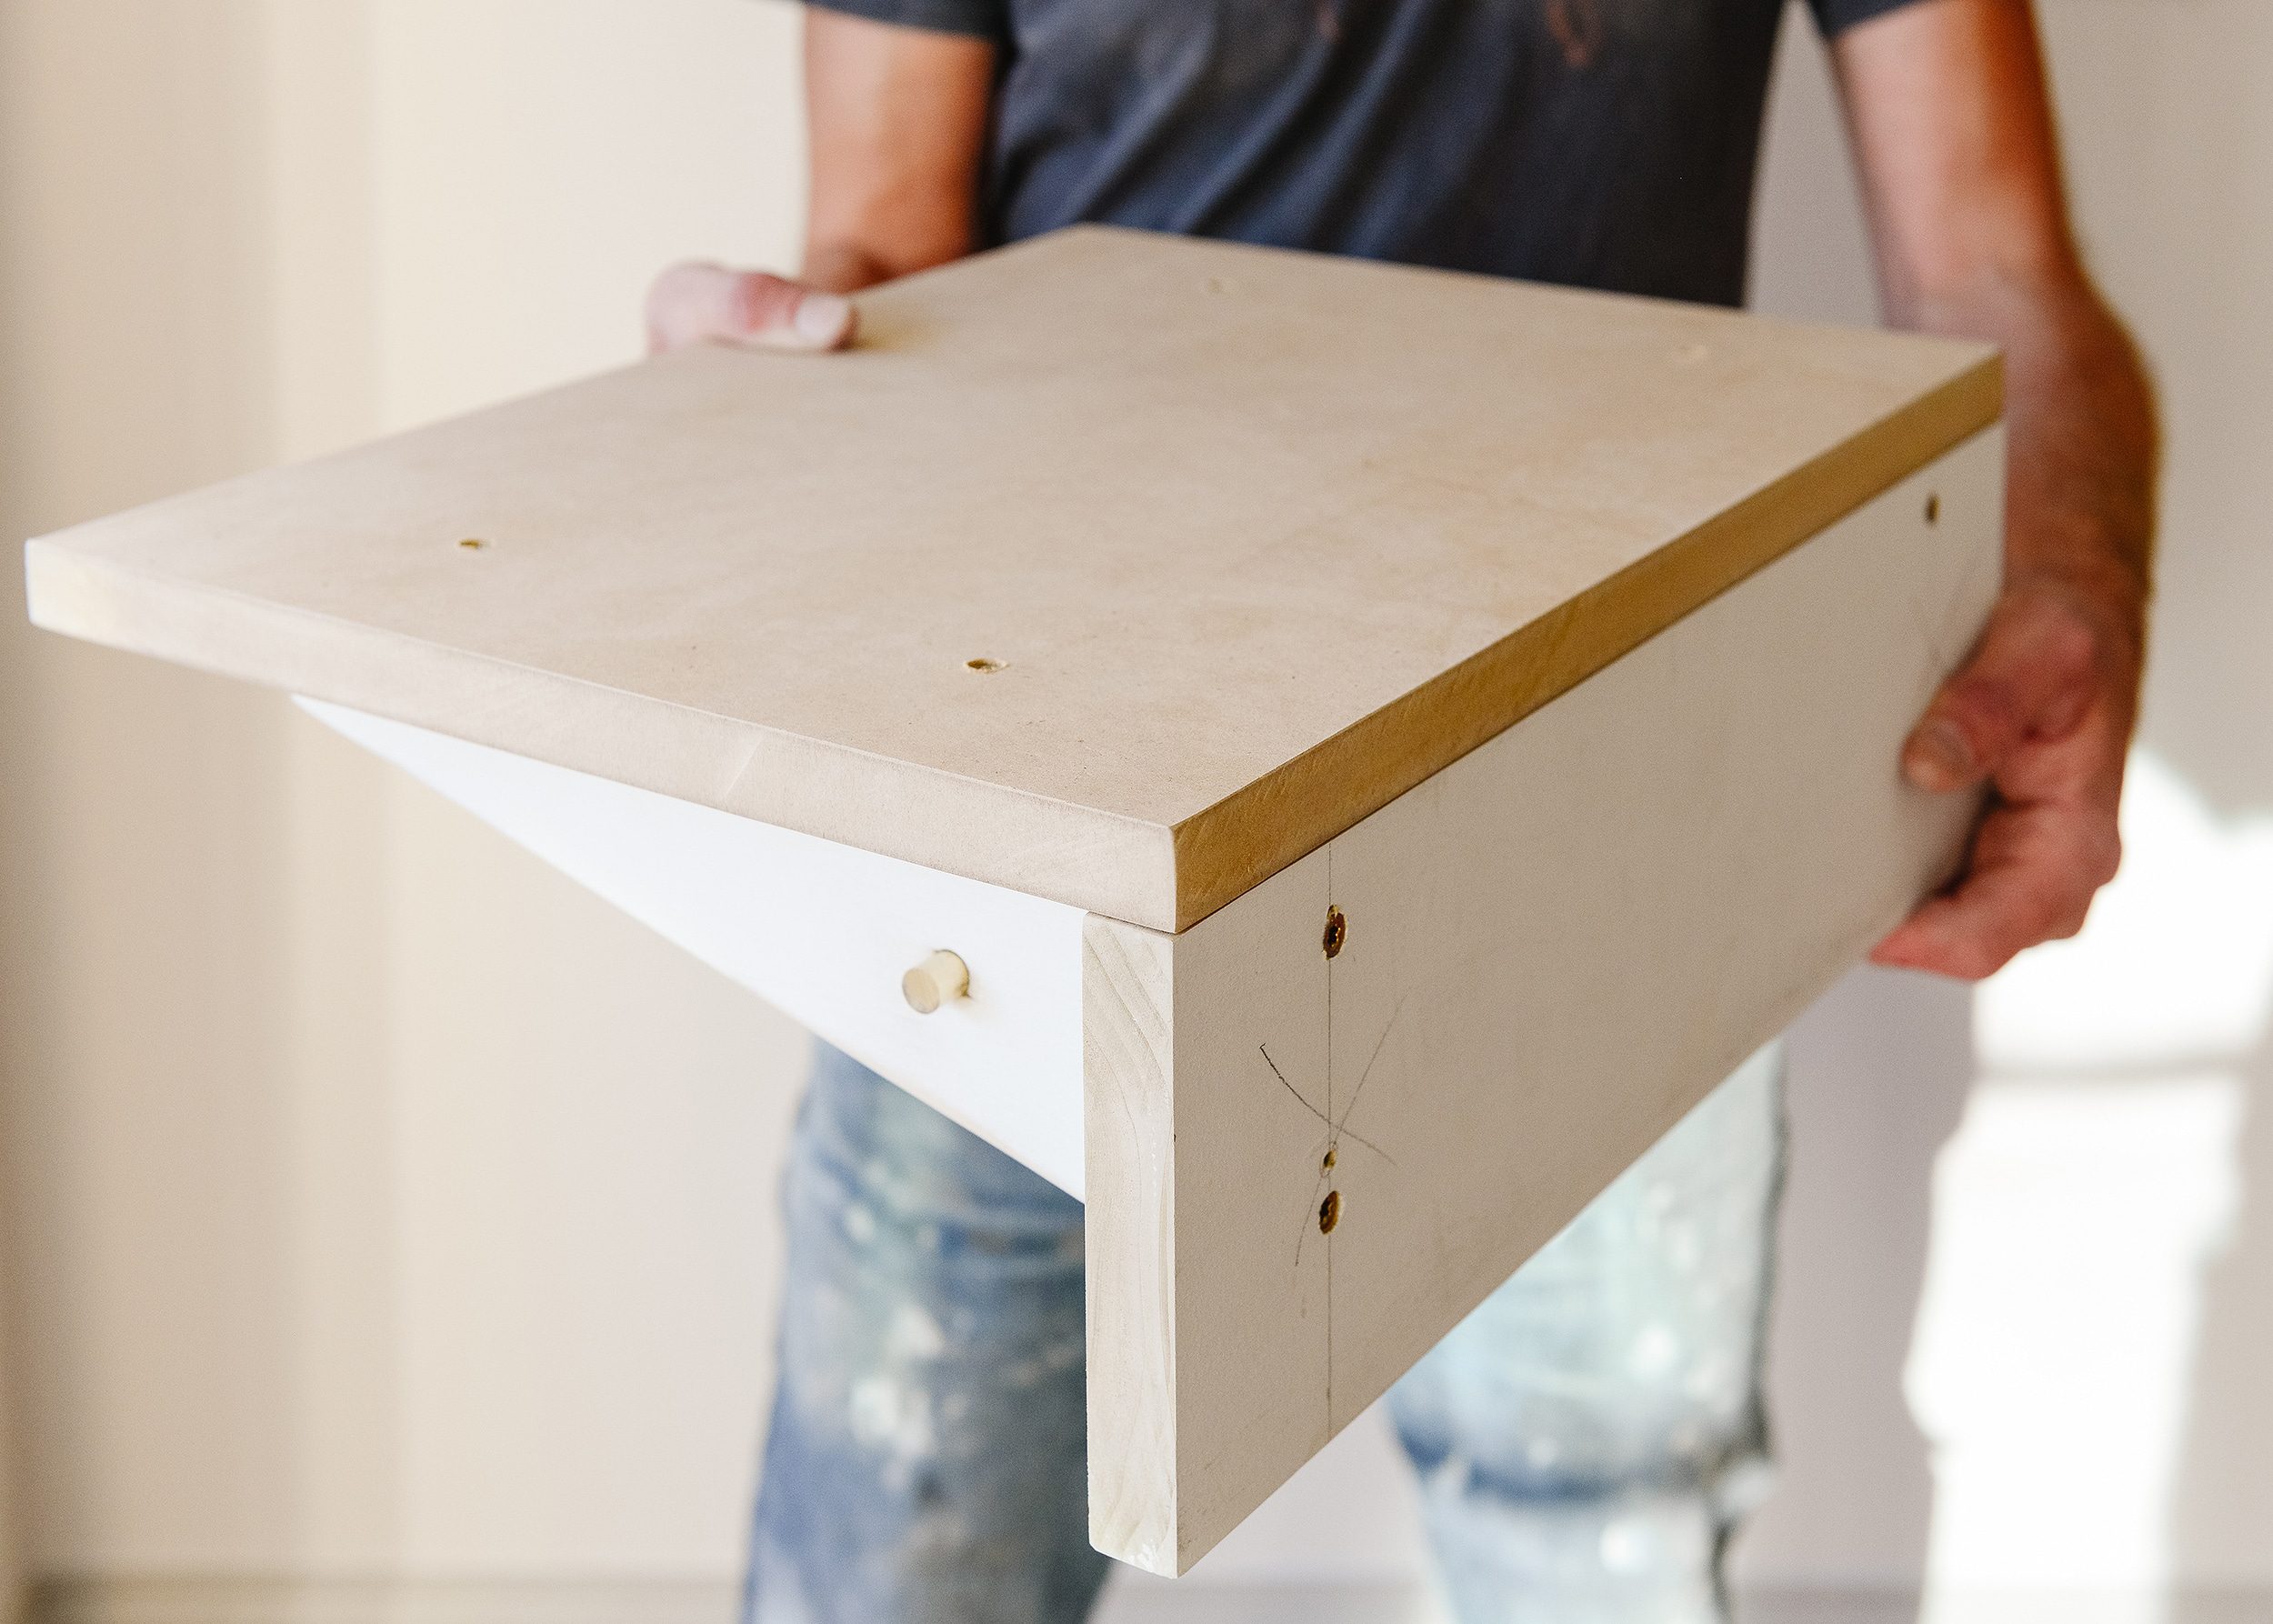
The shape and size of the support brackets is totally a matter of preference. We chose a simple wedge shape to keep the lines looking clean. Since we’ve been up to our eyeballs in projects at the Two Flat, we were able to build the shelves completely from remnants! The shelf backs and support brackets were constructed from 1 x 5 primed lumber leftover from the window casings in our contrast trim project. The shelf tops were fabricated from MDF leftover from the Unit 2 kitchen. We always do our best to keep material out of the landfill to save money and eliminate waste. In this case, the shelves for this project saved us a good chunk of change because we used leftover material we had on hand!
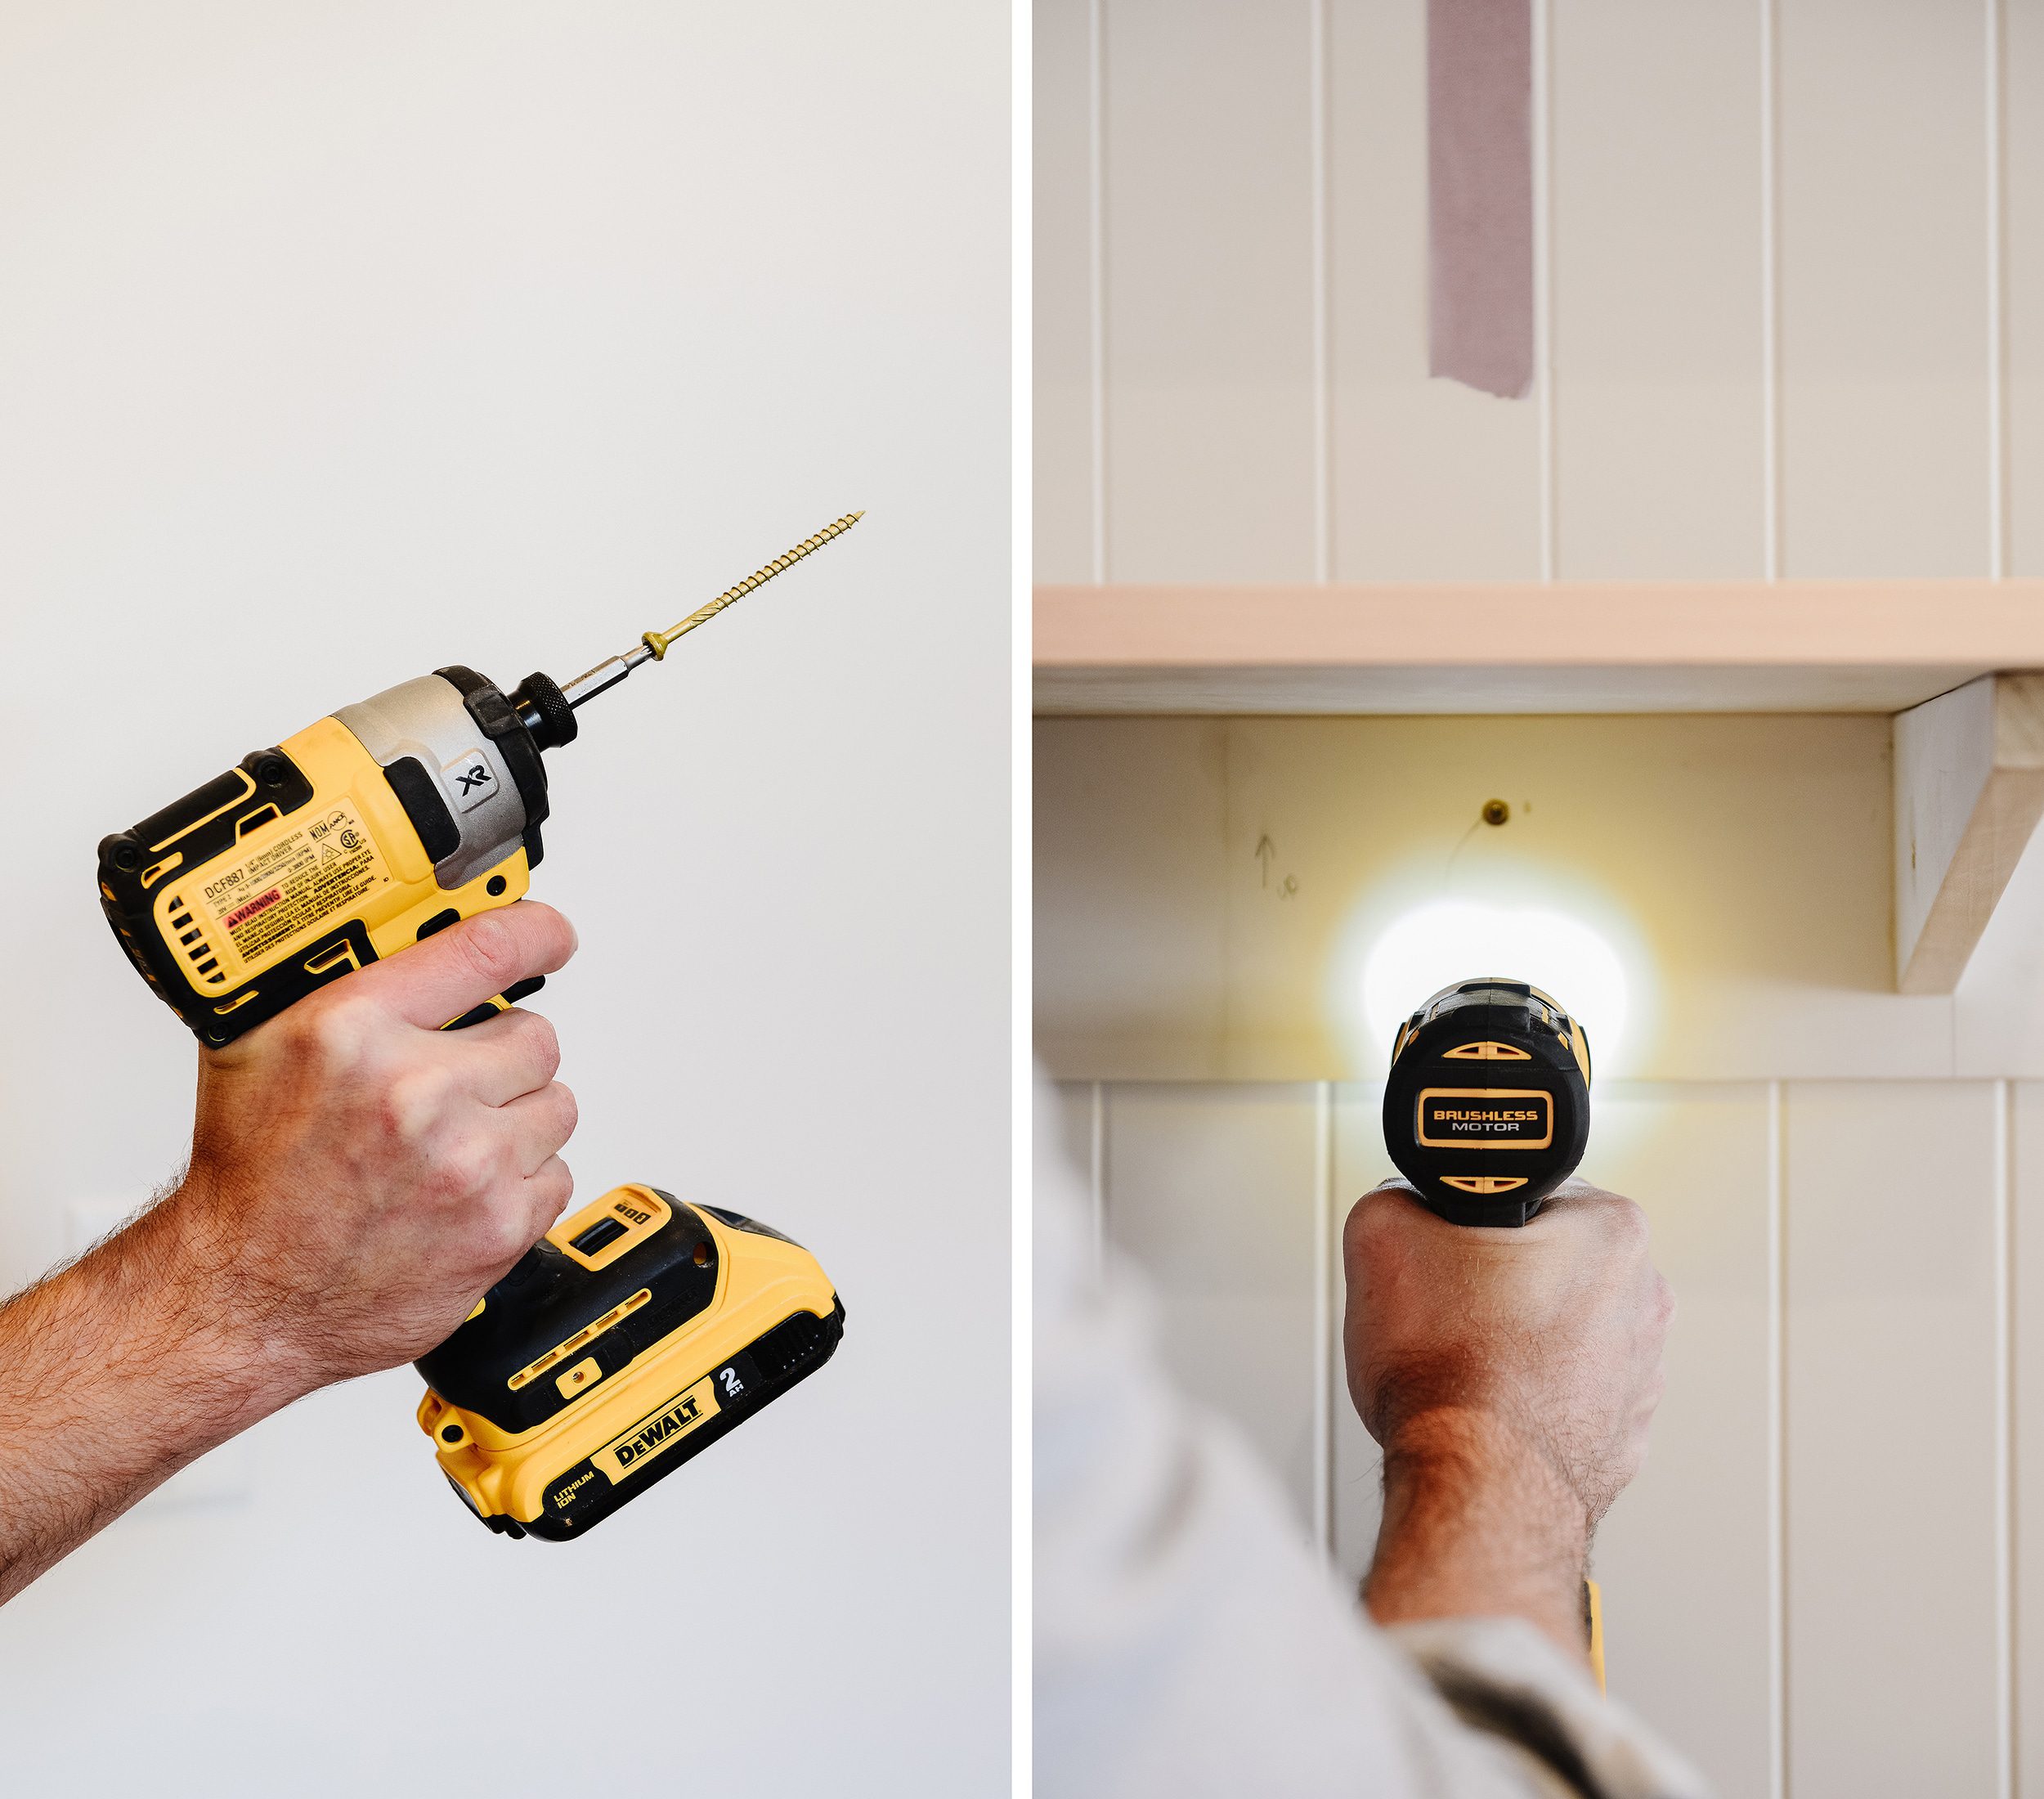
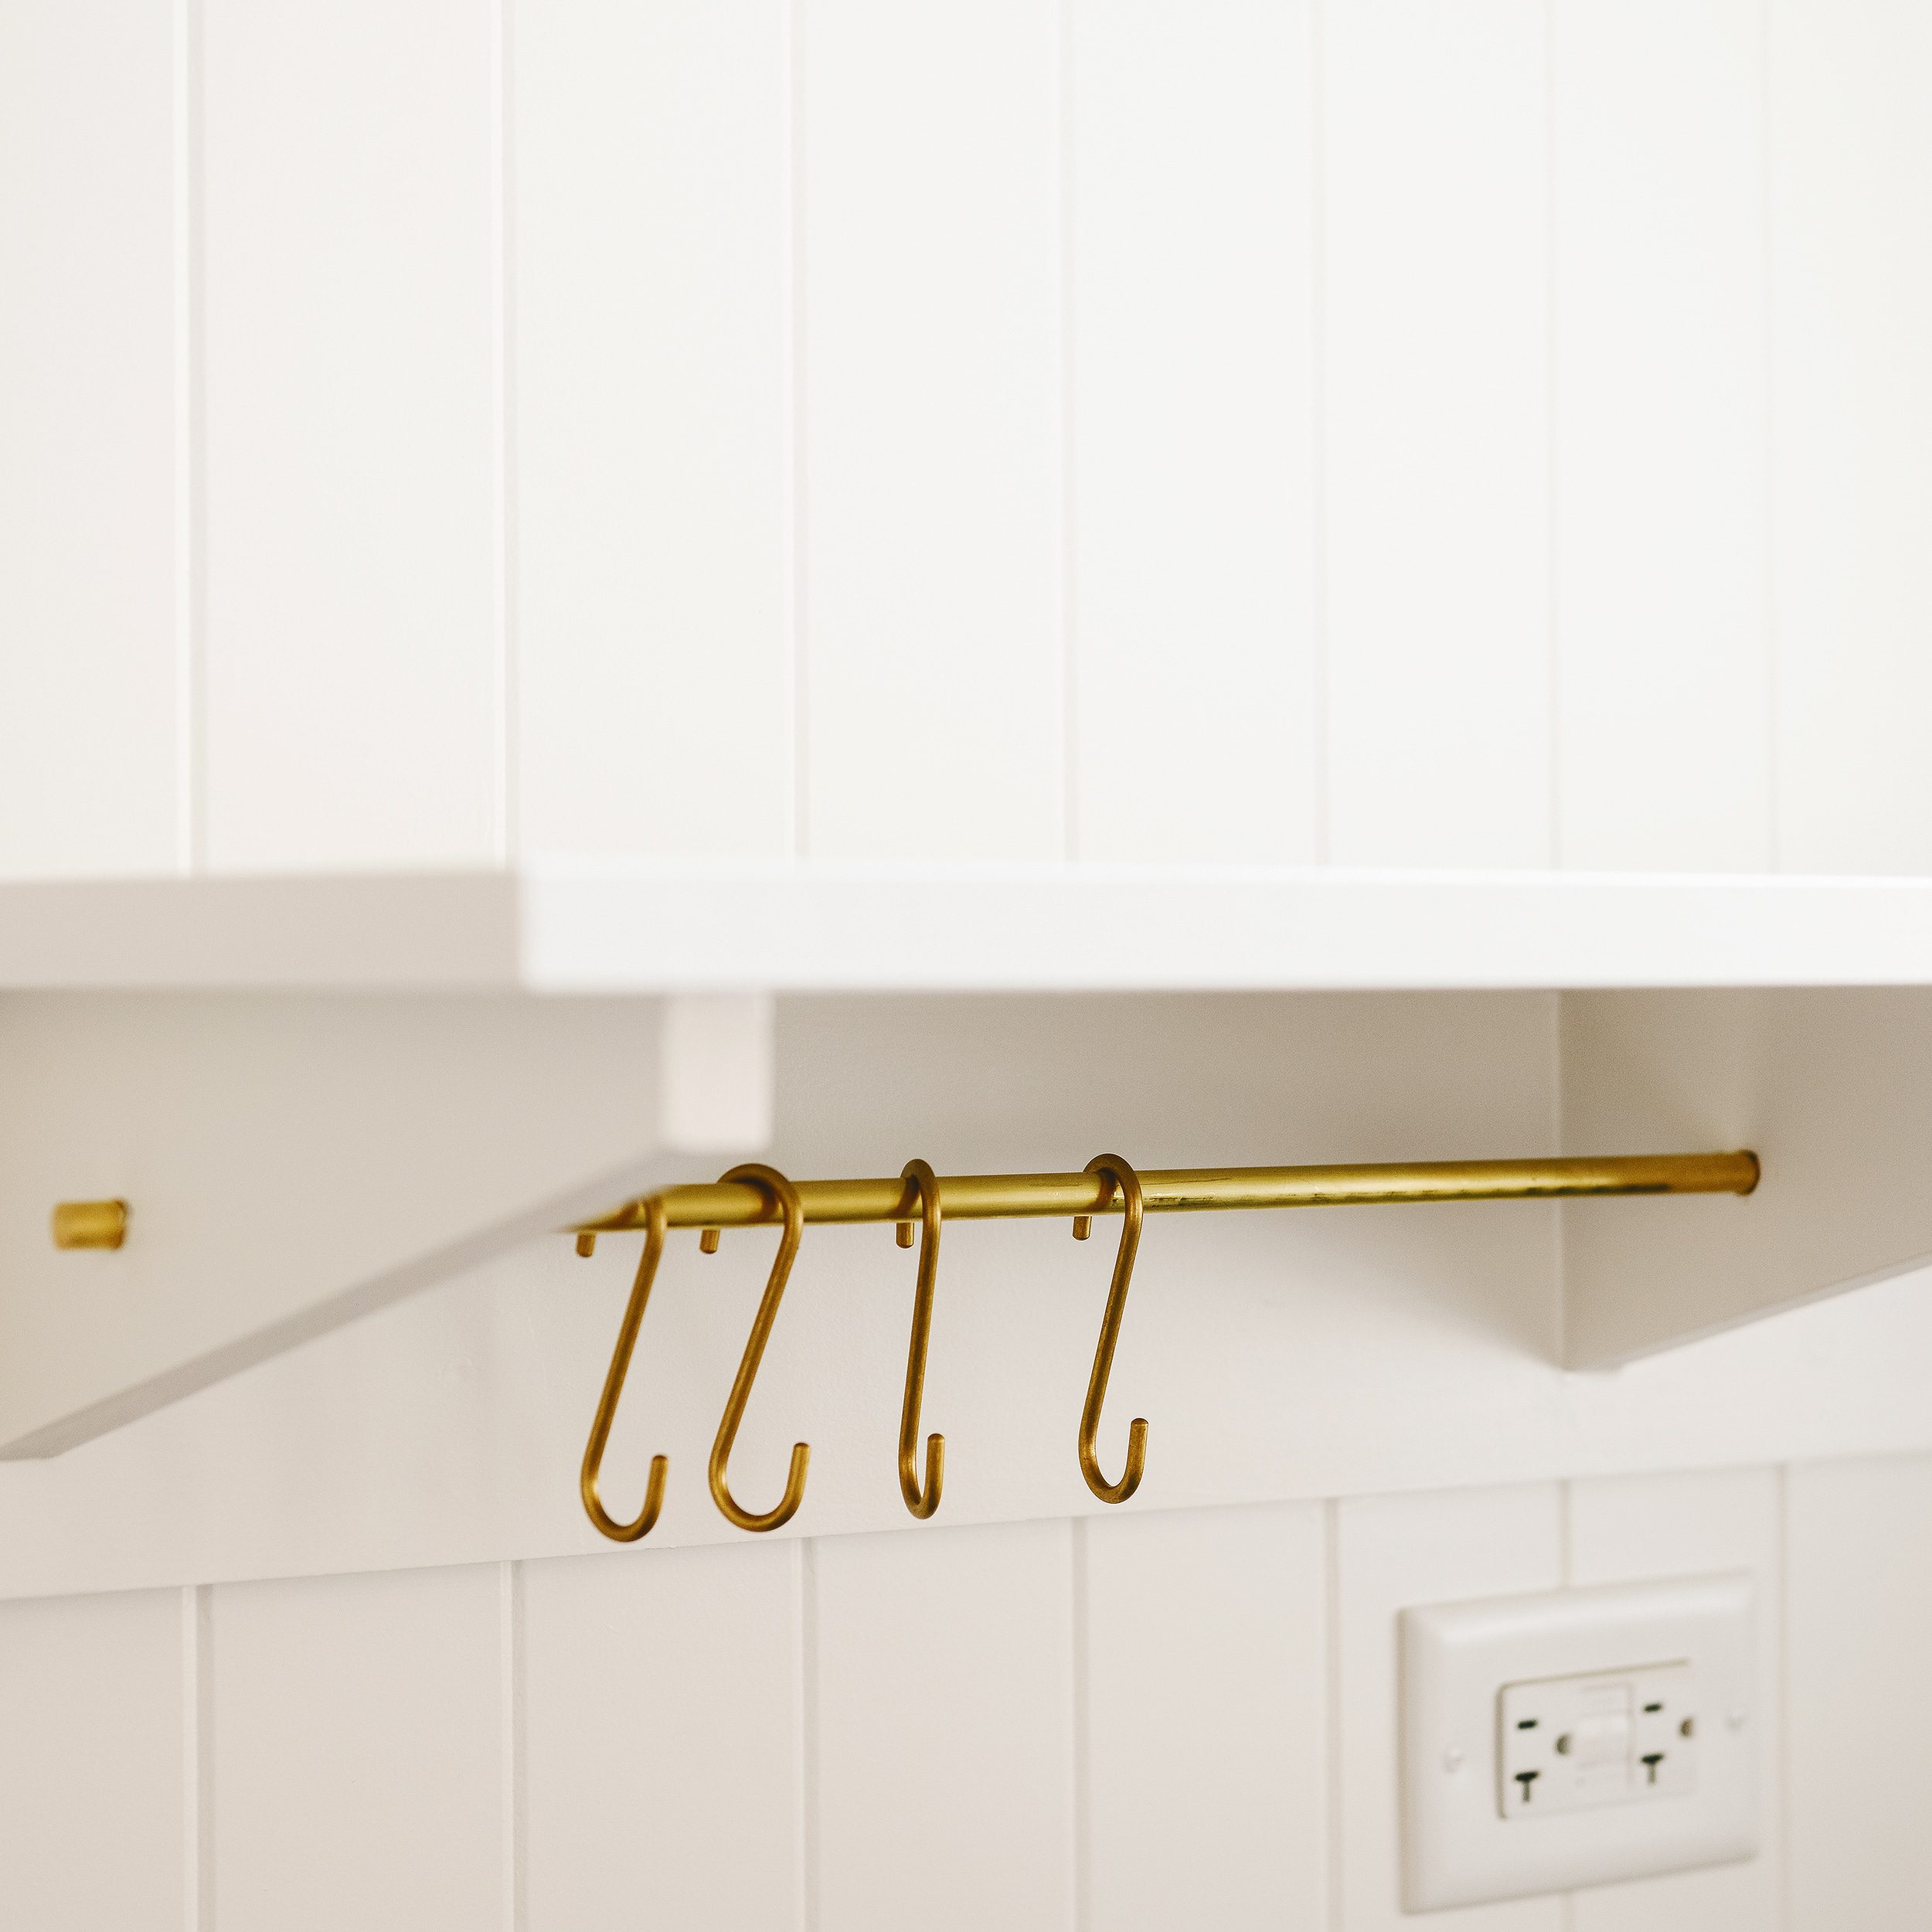
Prior to assembling the shelf pieces, we carefully measured and marked for the holes that would accept the brass rods. Since we wouldn’t be using any mechanical fasteners to keep the rods in place, it was very important that the rods fit snugly into the support brackets. We used 3/8″ brass rod that we found on Etsy, so the corresponding 3/8″ drill bit was the perfect option for a snug fit. Pro tip, the seller was able to cut the rod to any length, so we didn’t have to fabricate anything ourselves!
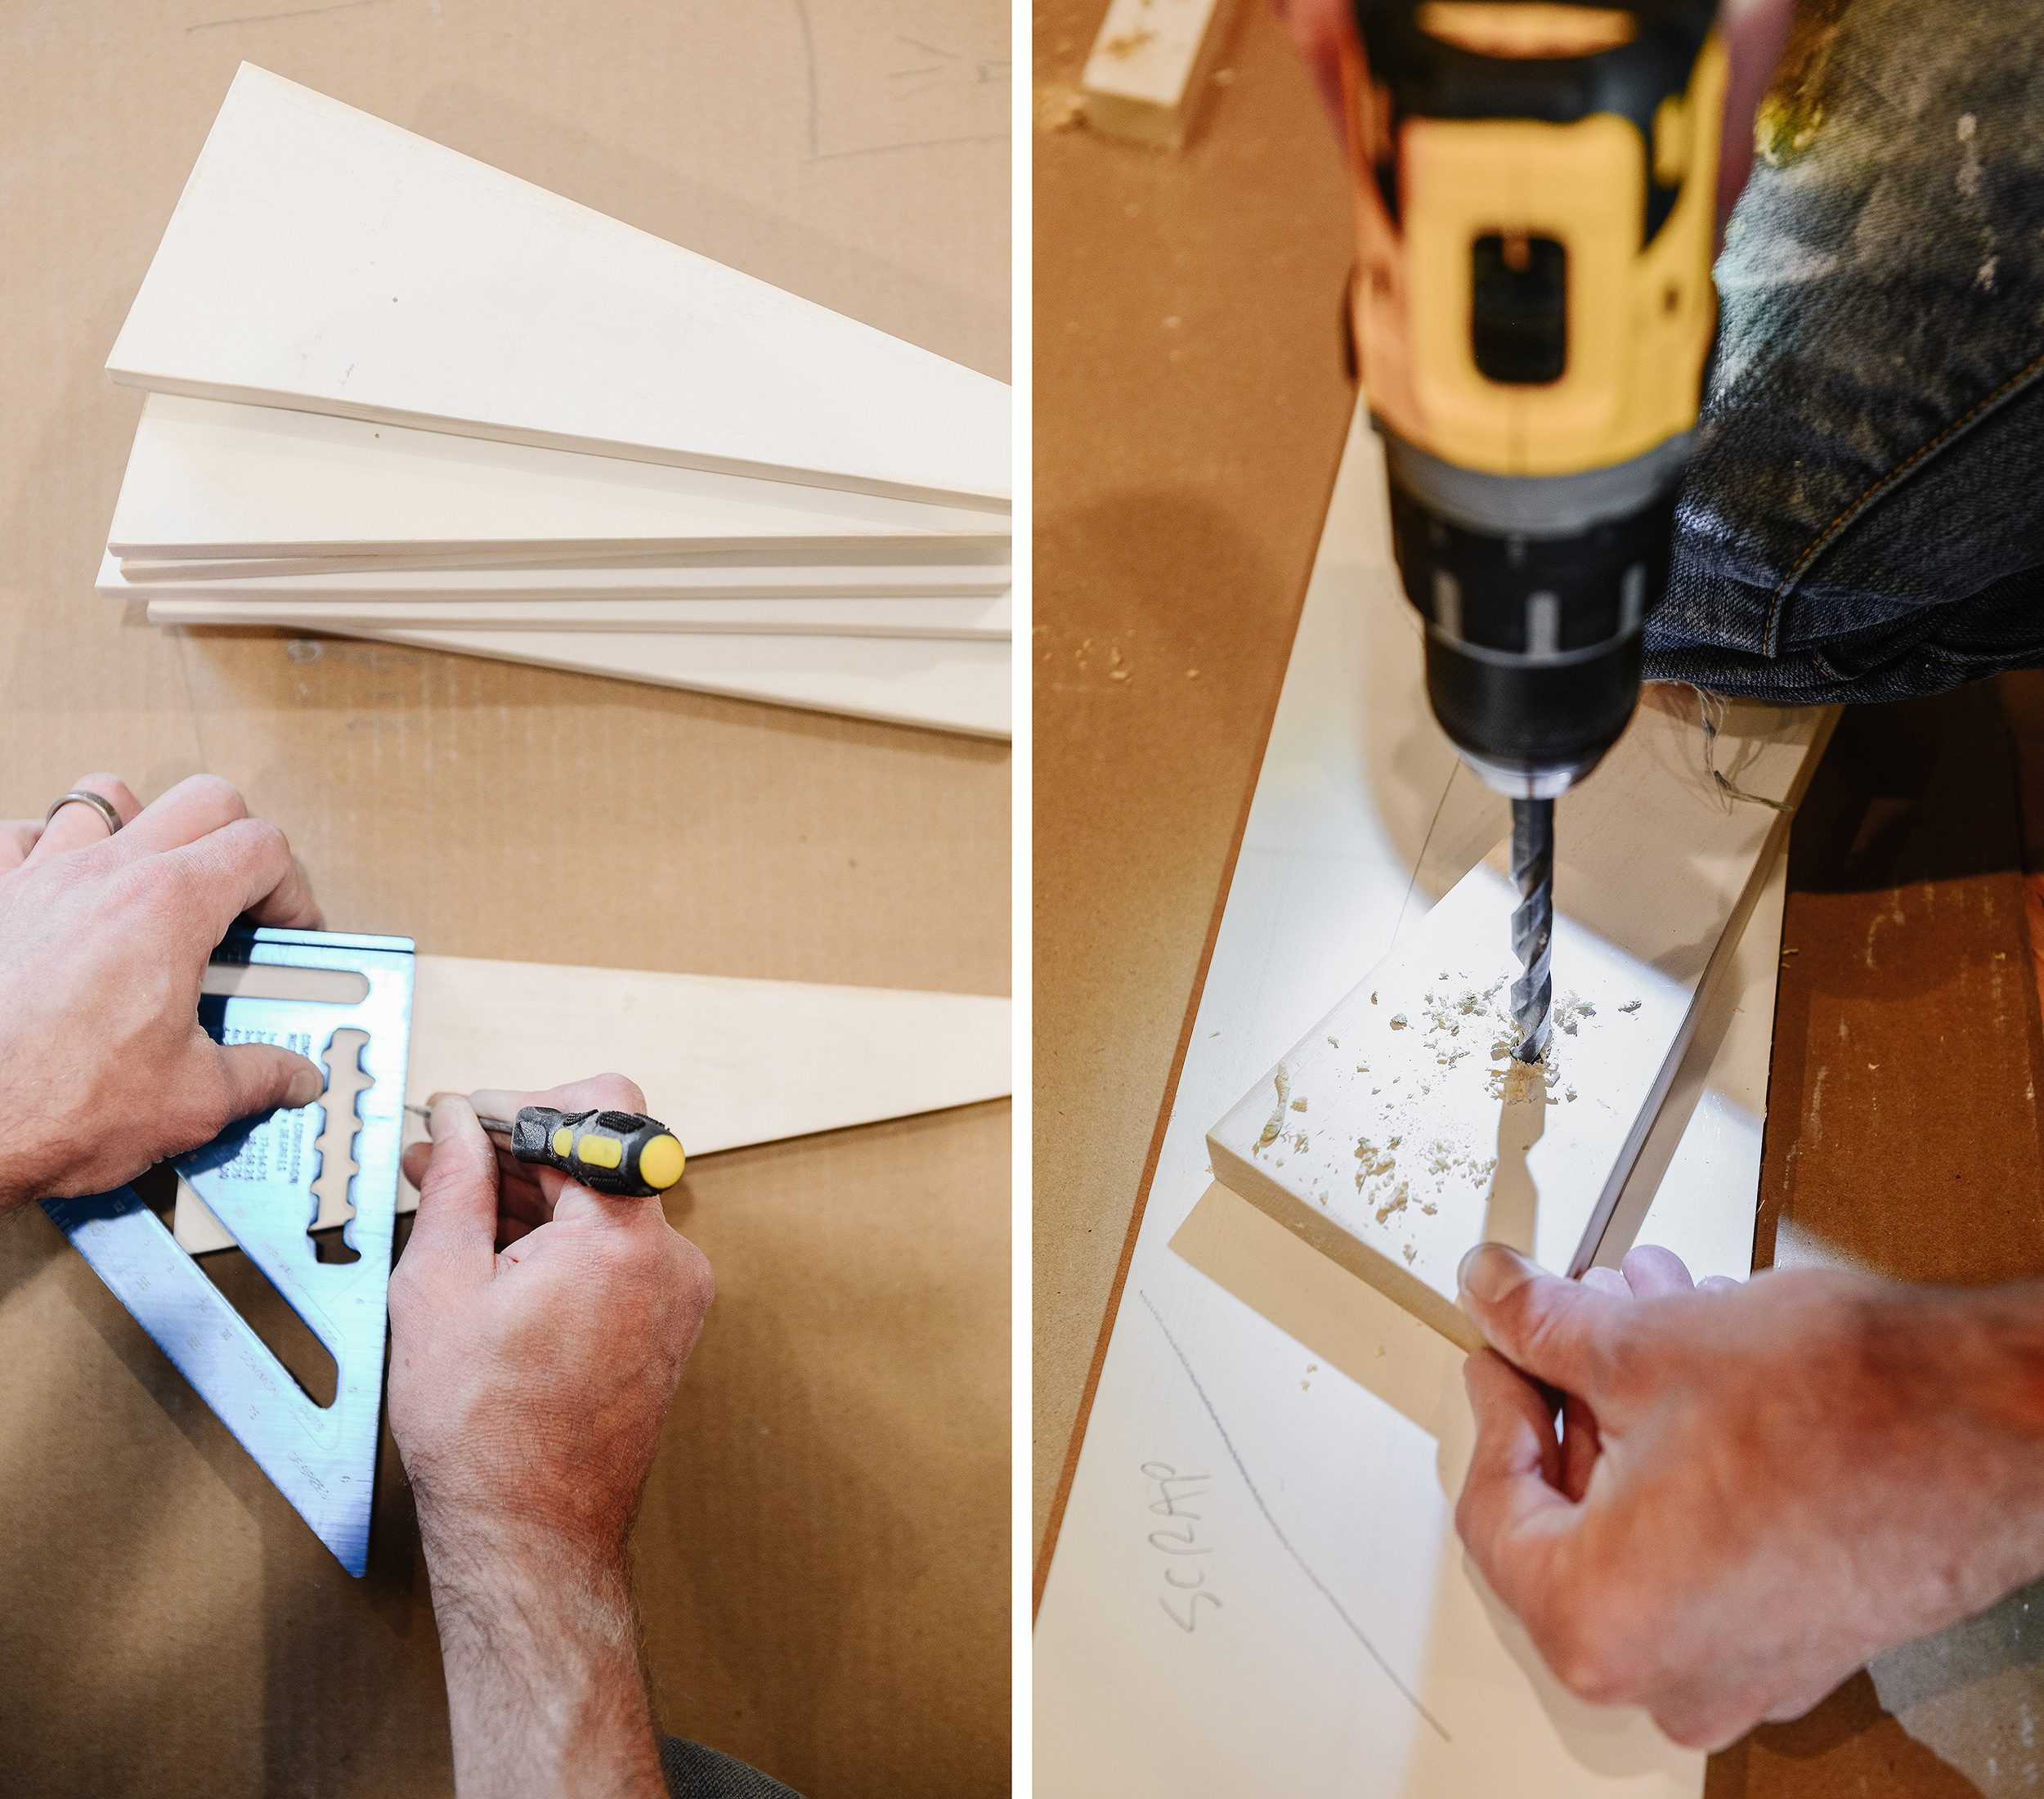
Once the holes were drilled, we did a quick test fit and were juuuust barely able to push the rod through the holes. The fit was spot on!
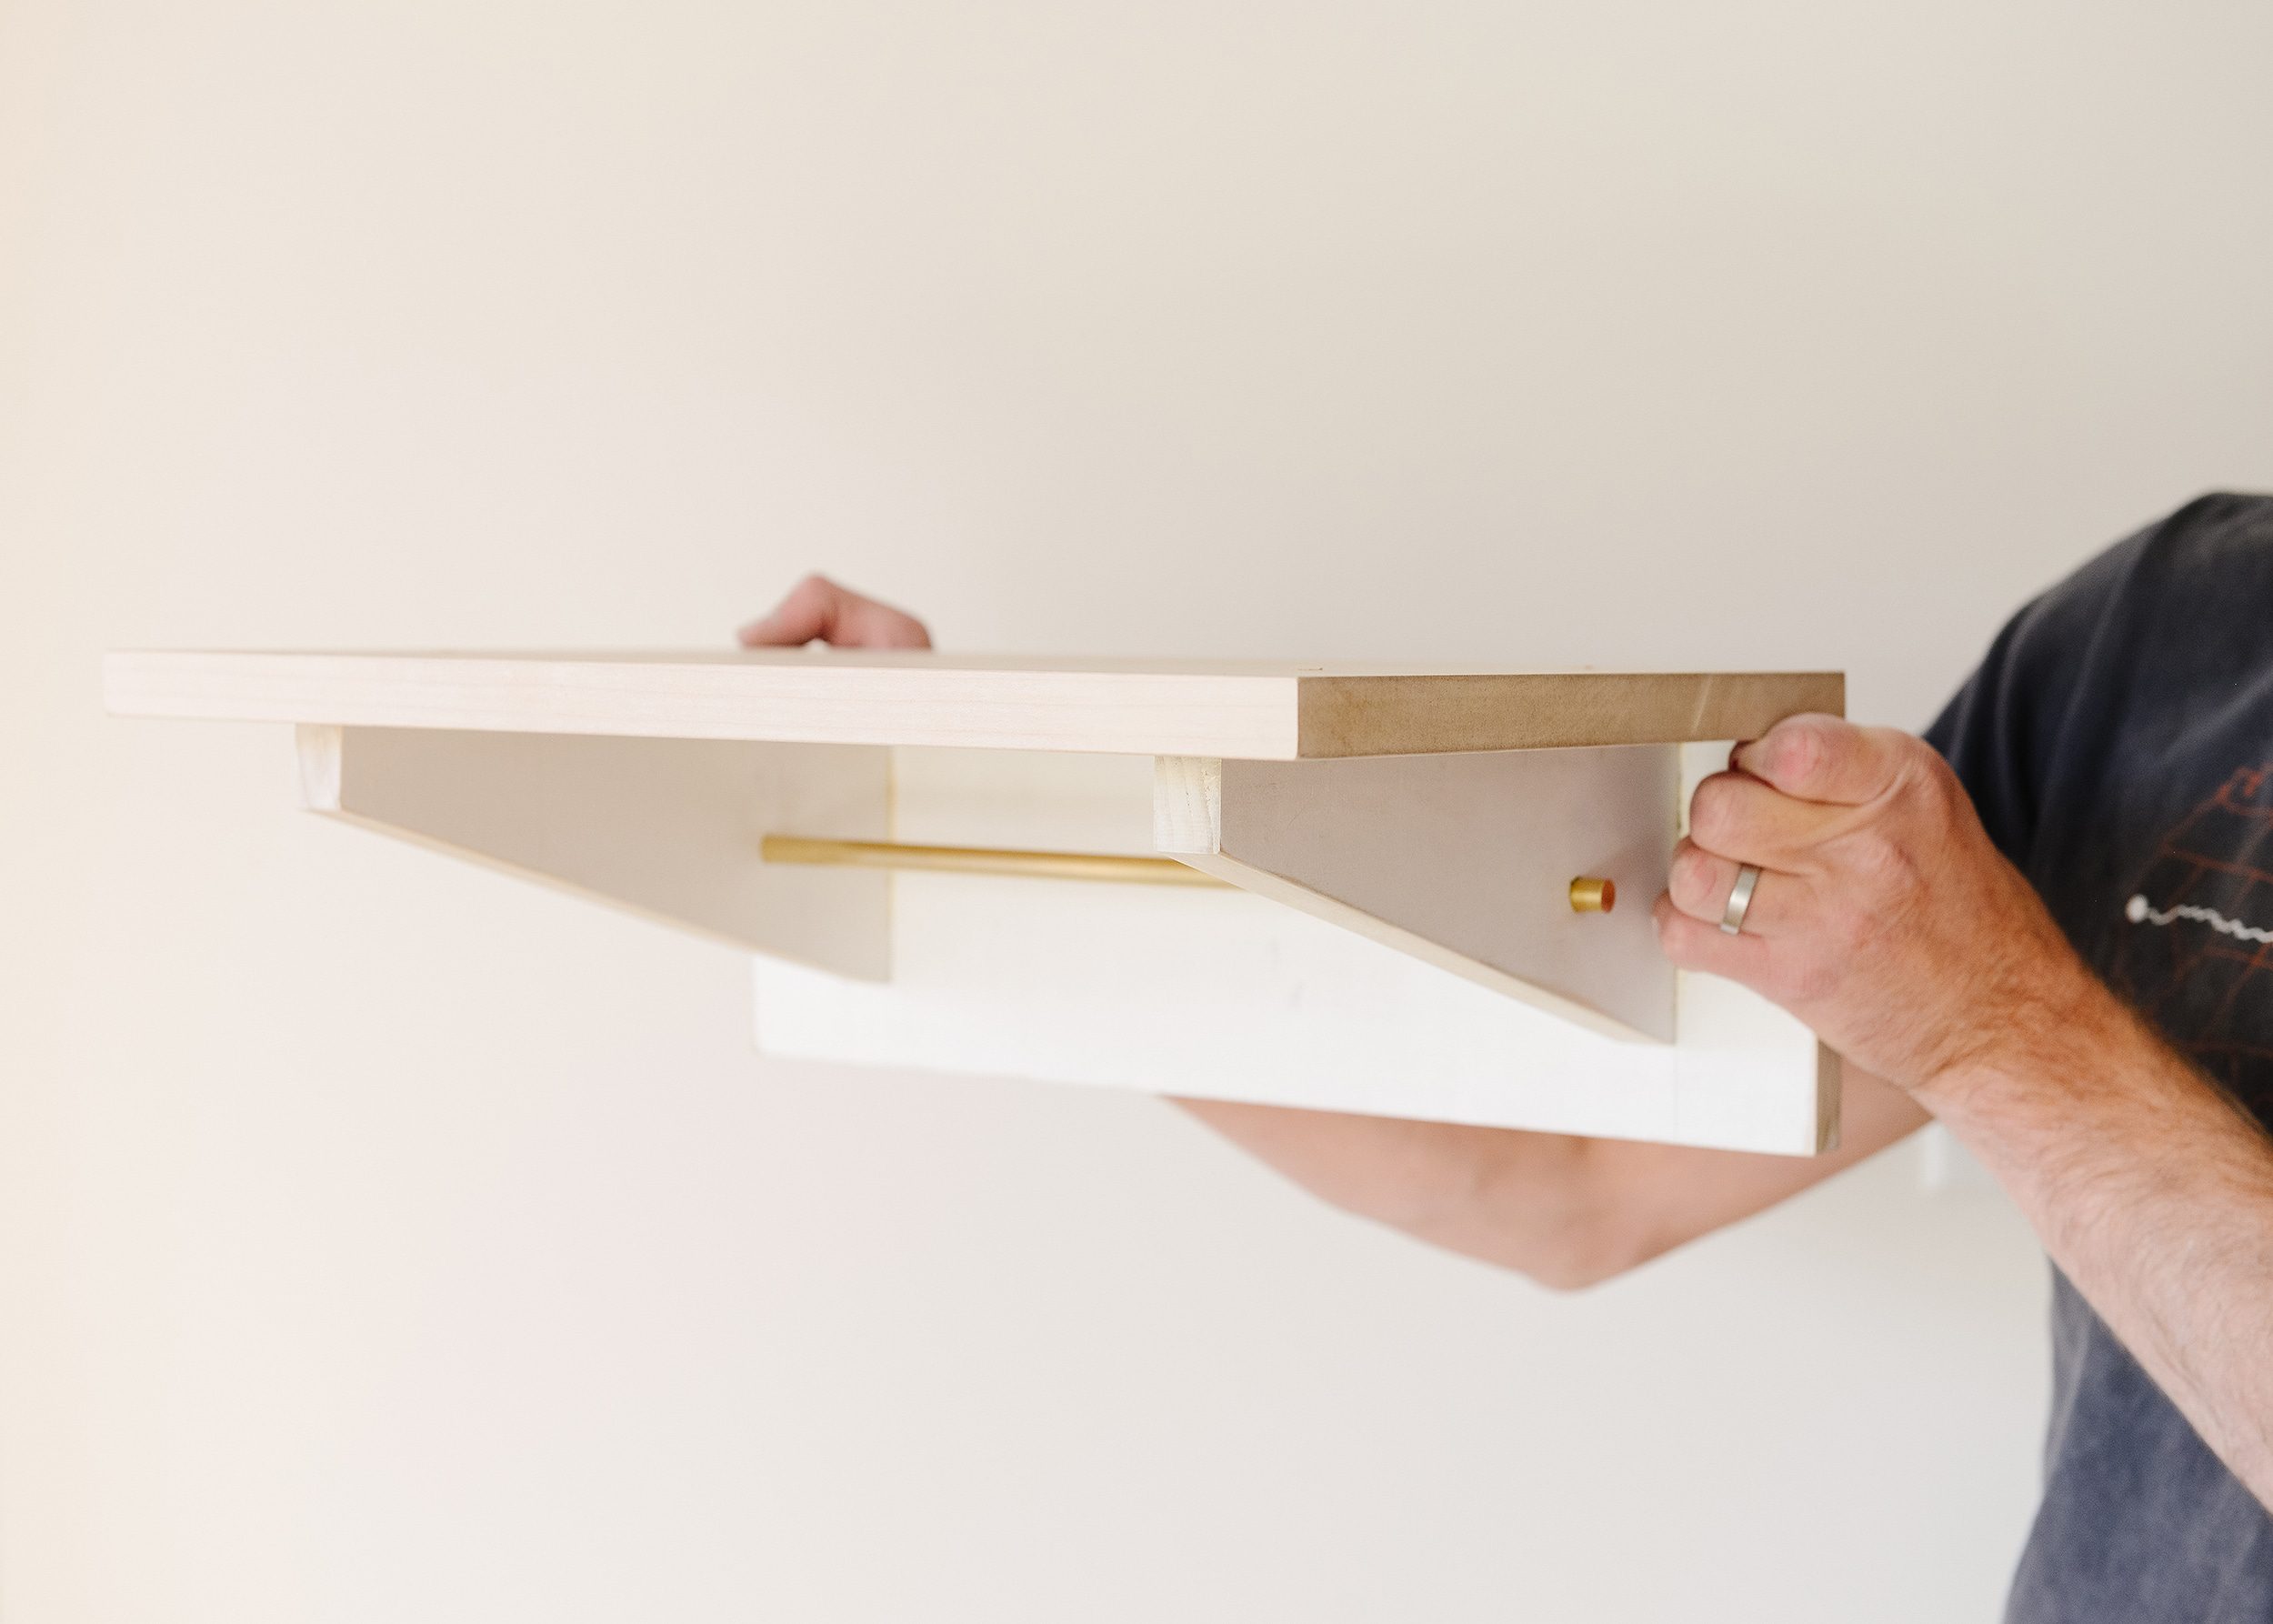
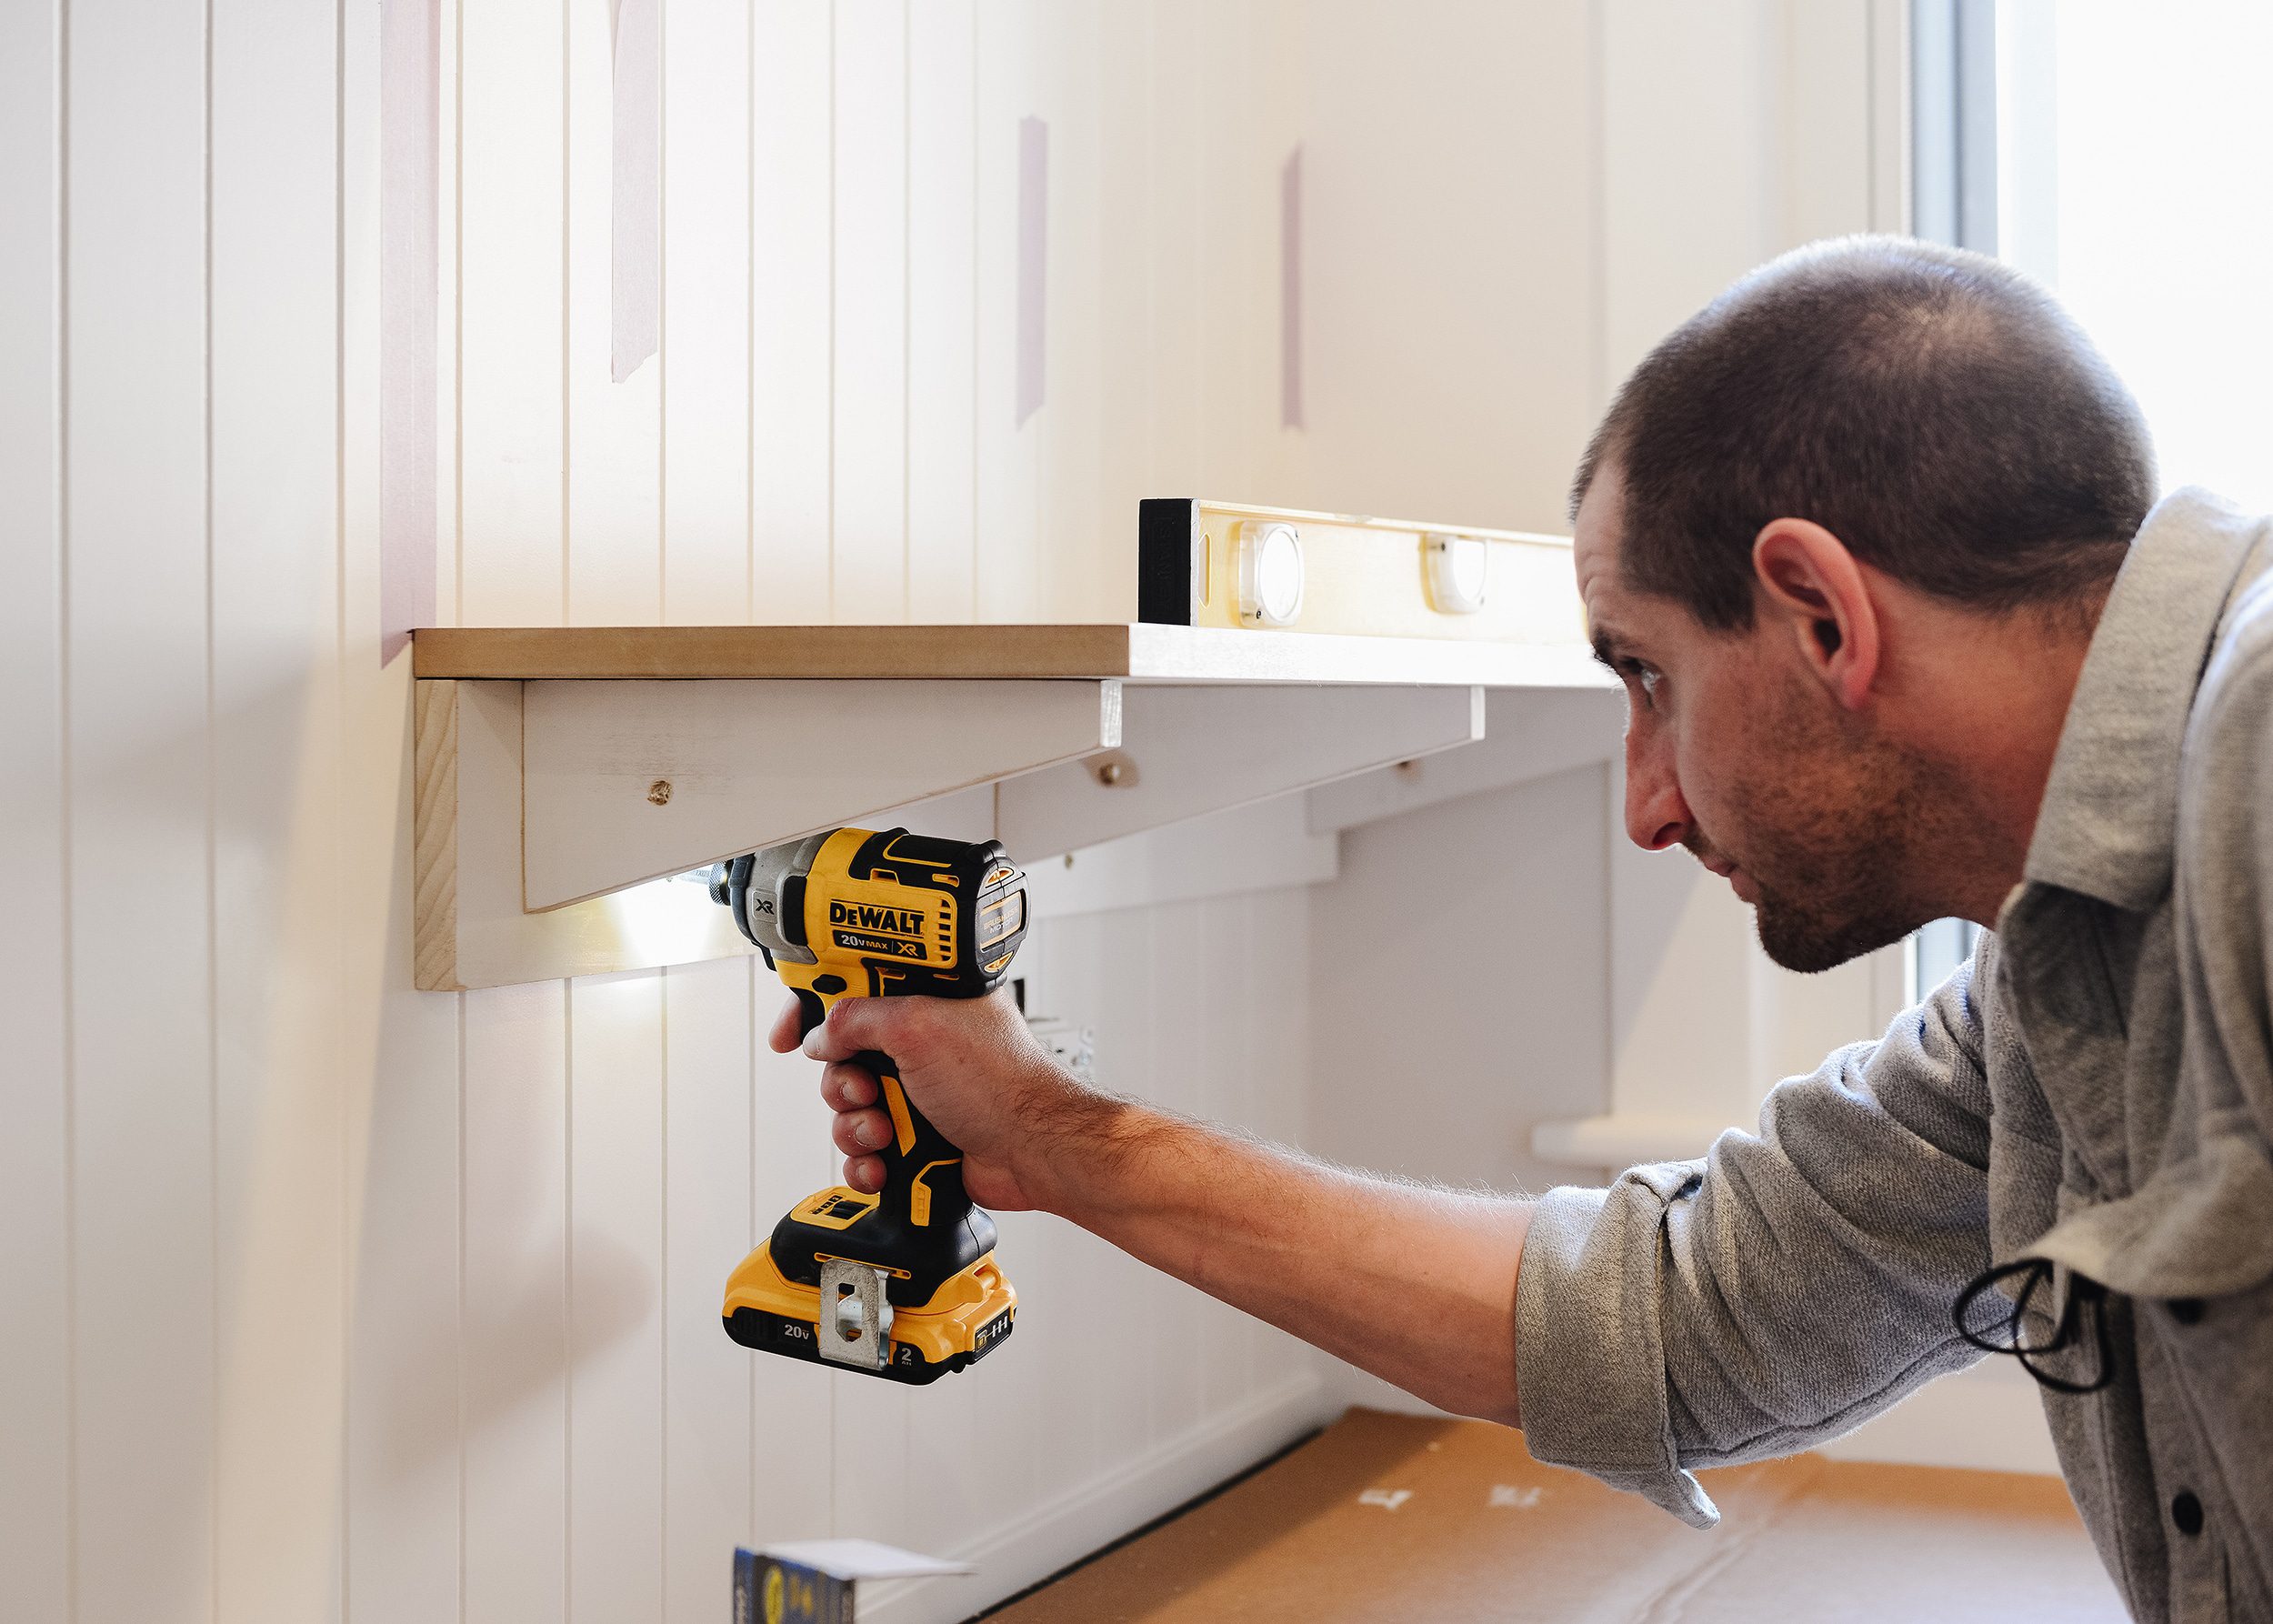
Not pictured is the actual assembly of the shelves but the photo below shows how they were constructed. Pilot holes were drilled and 2 1/2″ construction screws were driven through the back of the shelf and into the support brackets. The MDF tops were attached using 1 1/2″ screws and all parts got a healthy dose of wood glue for good measure. Once assembled, we filled all visible holes with a couple of coats of our favorite wood filler. Everything was then sanded smooth and we were almost ready for install.
Painting + Installation
While I was busy building the shelves, Kim got a head start rolling a few coats of Sherwin Williams Emerald Urethane Trim Enamel onto the beadboard. To calm any concerns about using MDF in any part of a kitchen backsplash, this paint is rated for interior and exterior use which will keep any moisture from penetrating into the MDF shelf tops and beadboard. We also finished the bottom seam of the beadboard off with a pine stop and sealed every joint with silicone caulk.
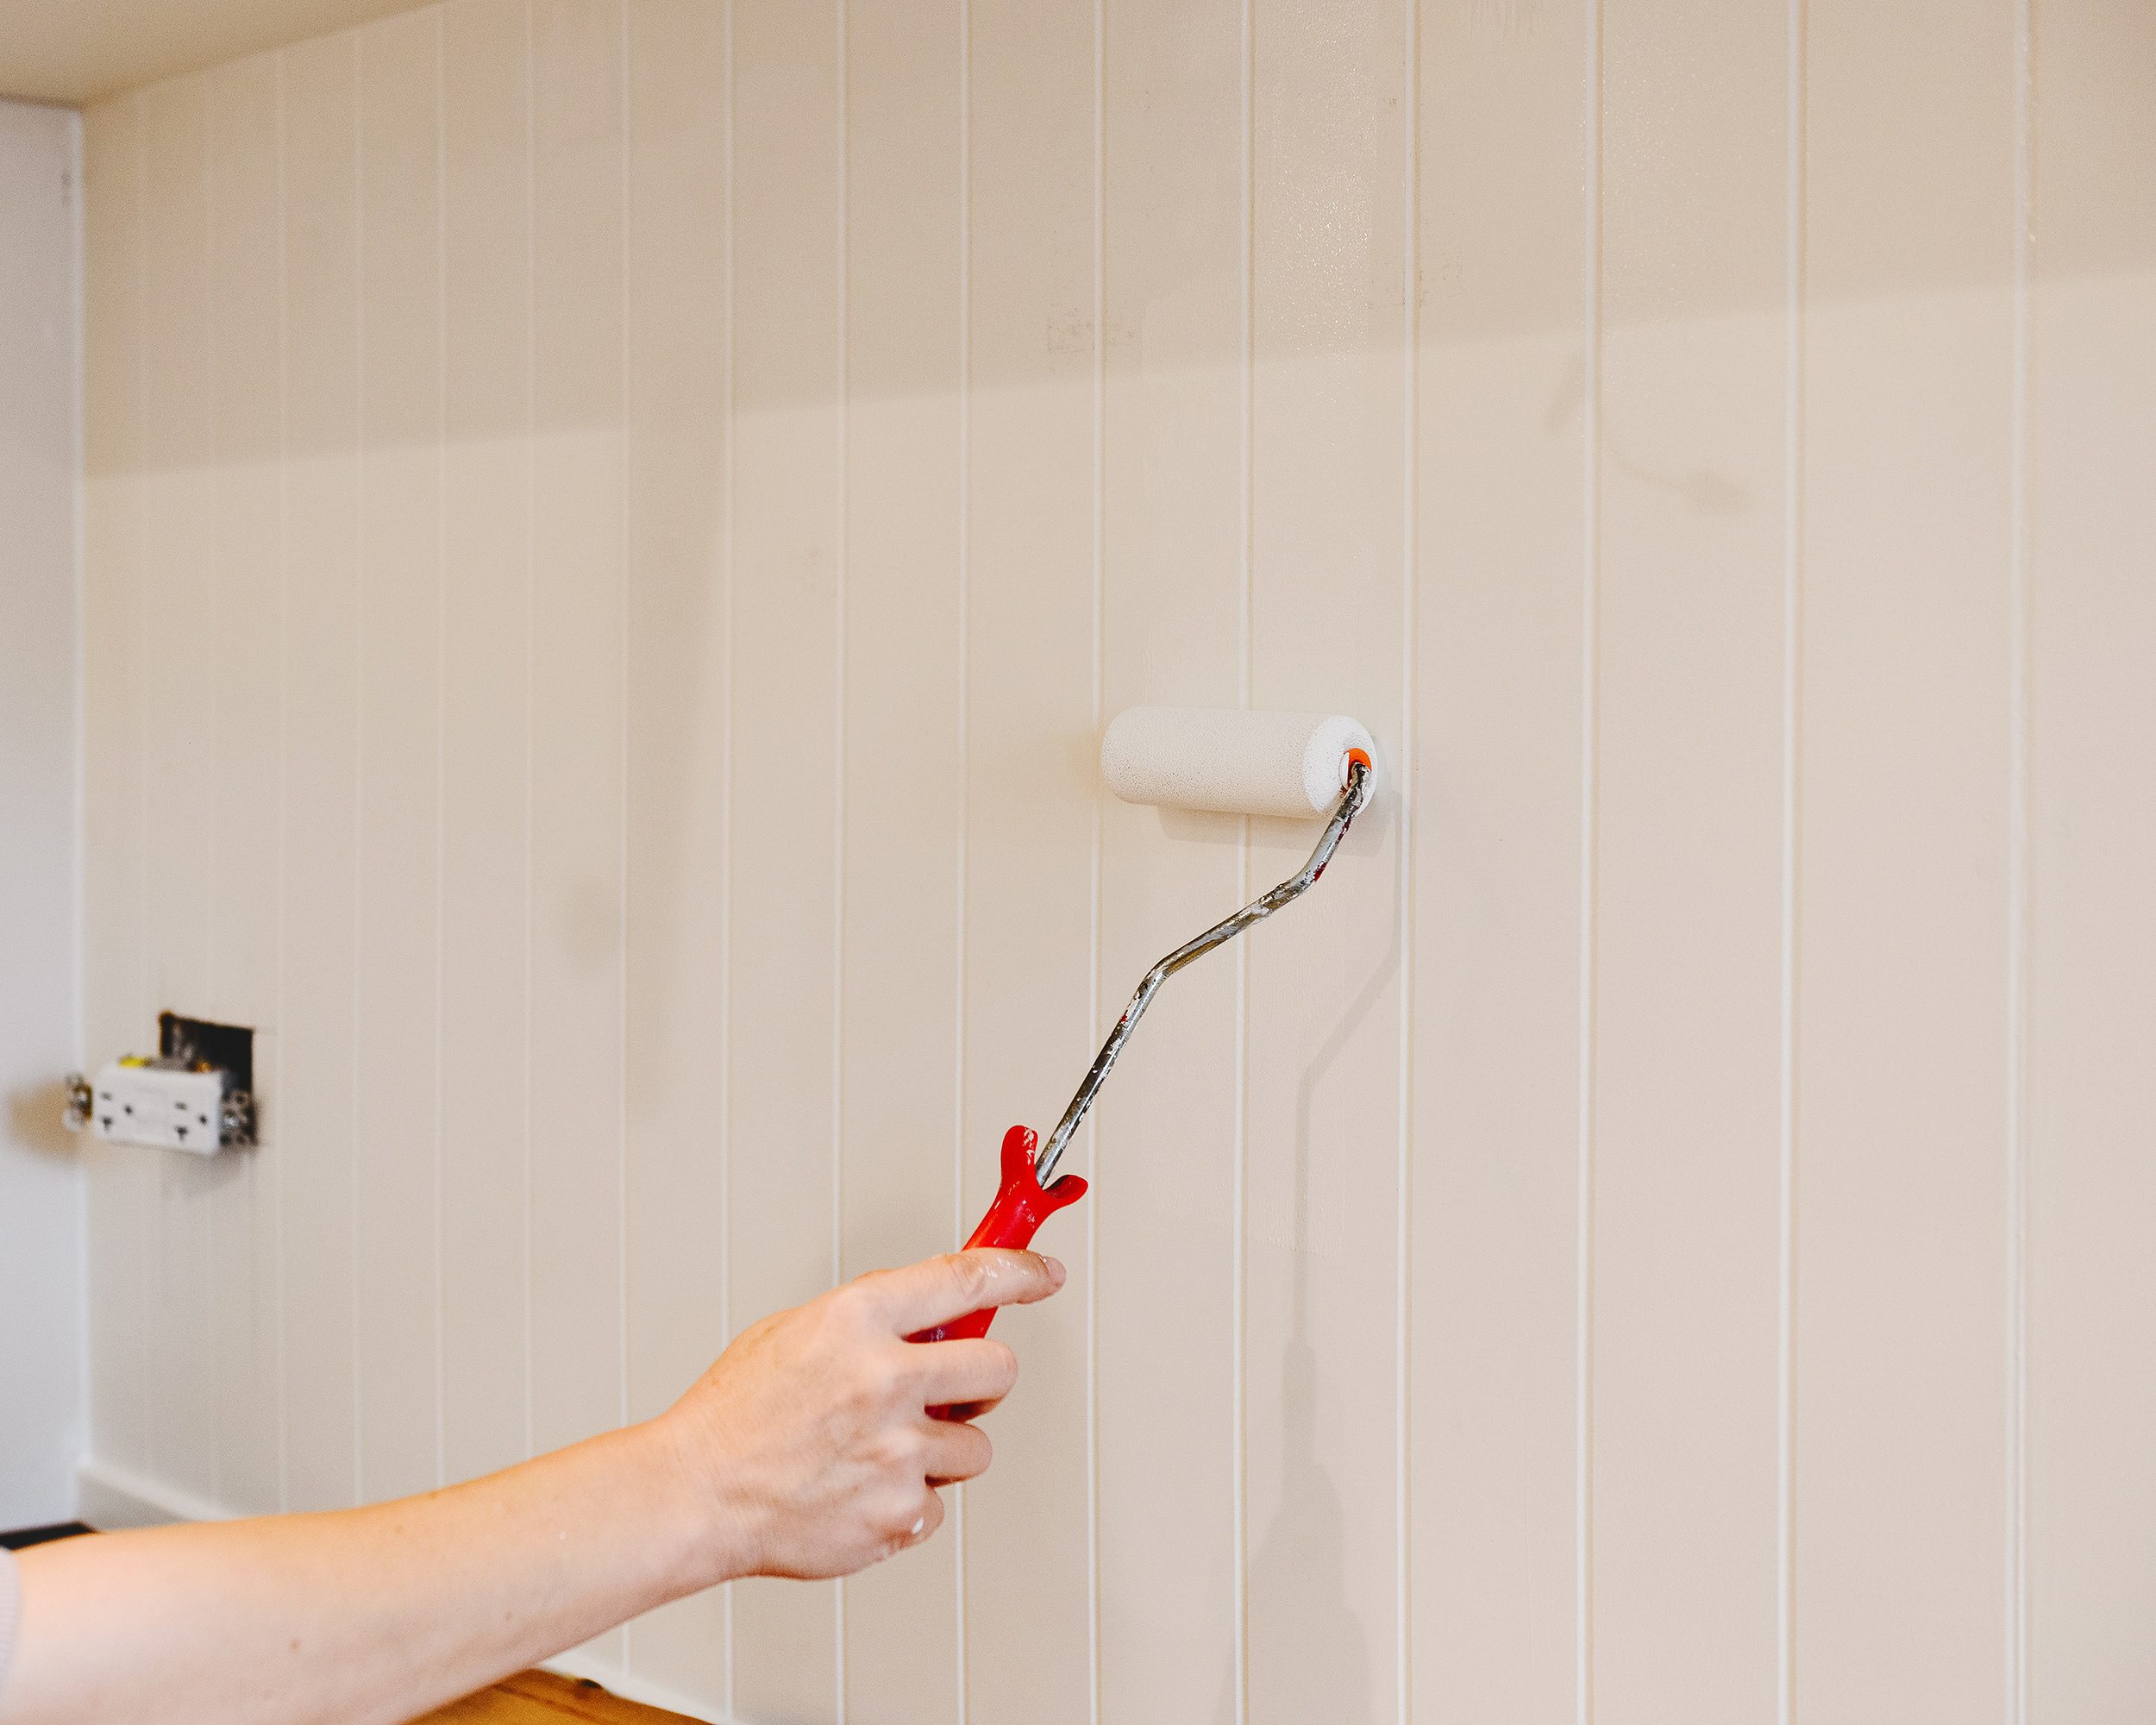
By using products that are good enough for the exterior of a house that gets exposed to all manners of weather and huge temperature fluctuations, it’s good enough for a backsplash and some shelves! Bonus (not so?) fun fact: this paint is so durable, that we continue to have trouble removing it from hinges and hardware after the great painting debacle of 2020. The quality is top-notch, but be sure to protect your surfaces!
Once the beadboard was given time to cure, we were ready to install the shelves. We used our studfinder to locate studs and marked the location of each with painters tape for quick reference. We used a liberal amount of construction adhesive on the back of each shelf and drove three 3″ exterior wood screws into each stud location. Anything worth doing is worth over-doing, right? These shelves aren’t going anywhere without a fight!
The Finished Product
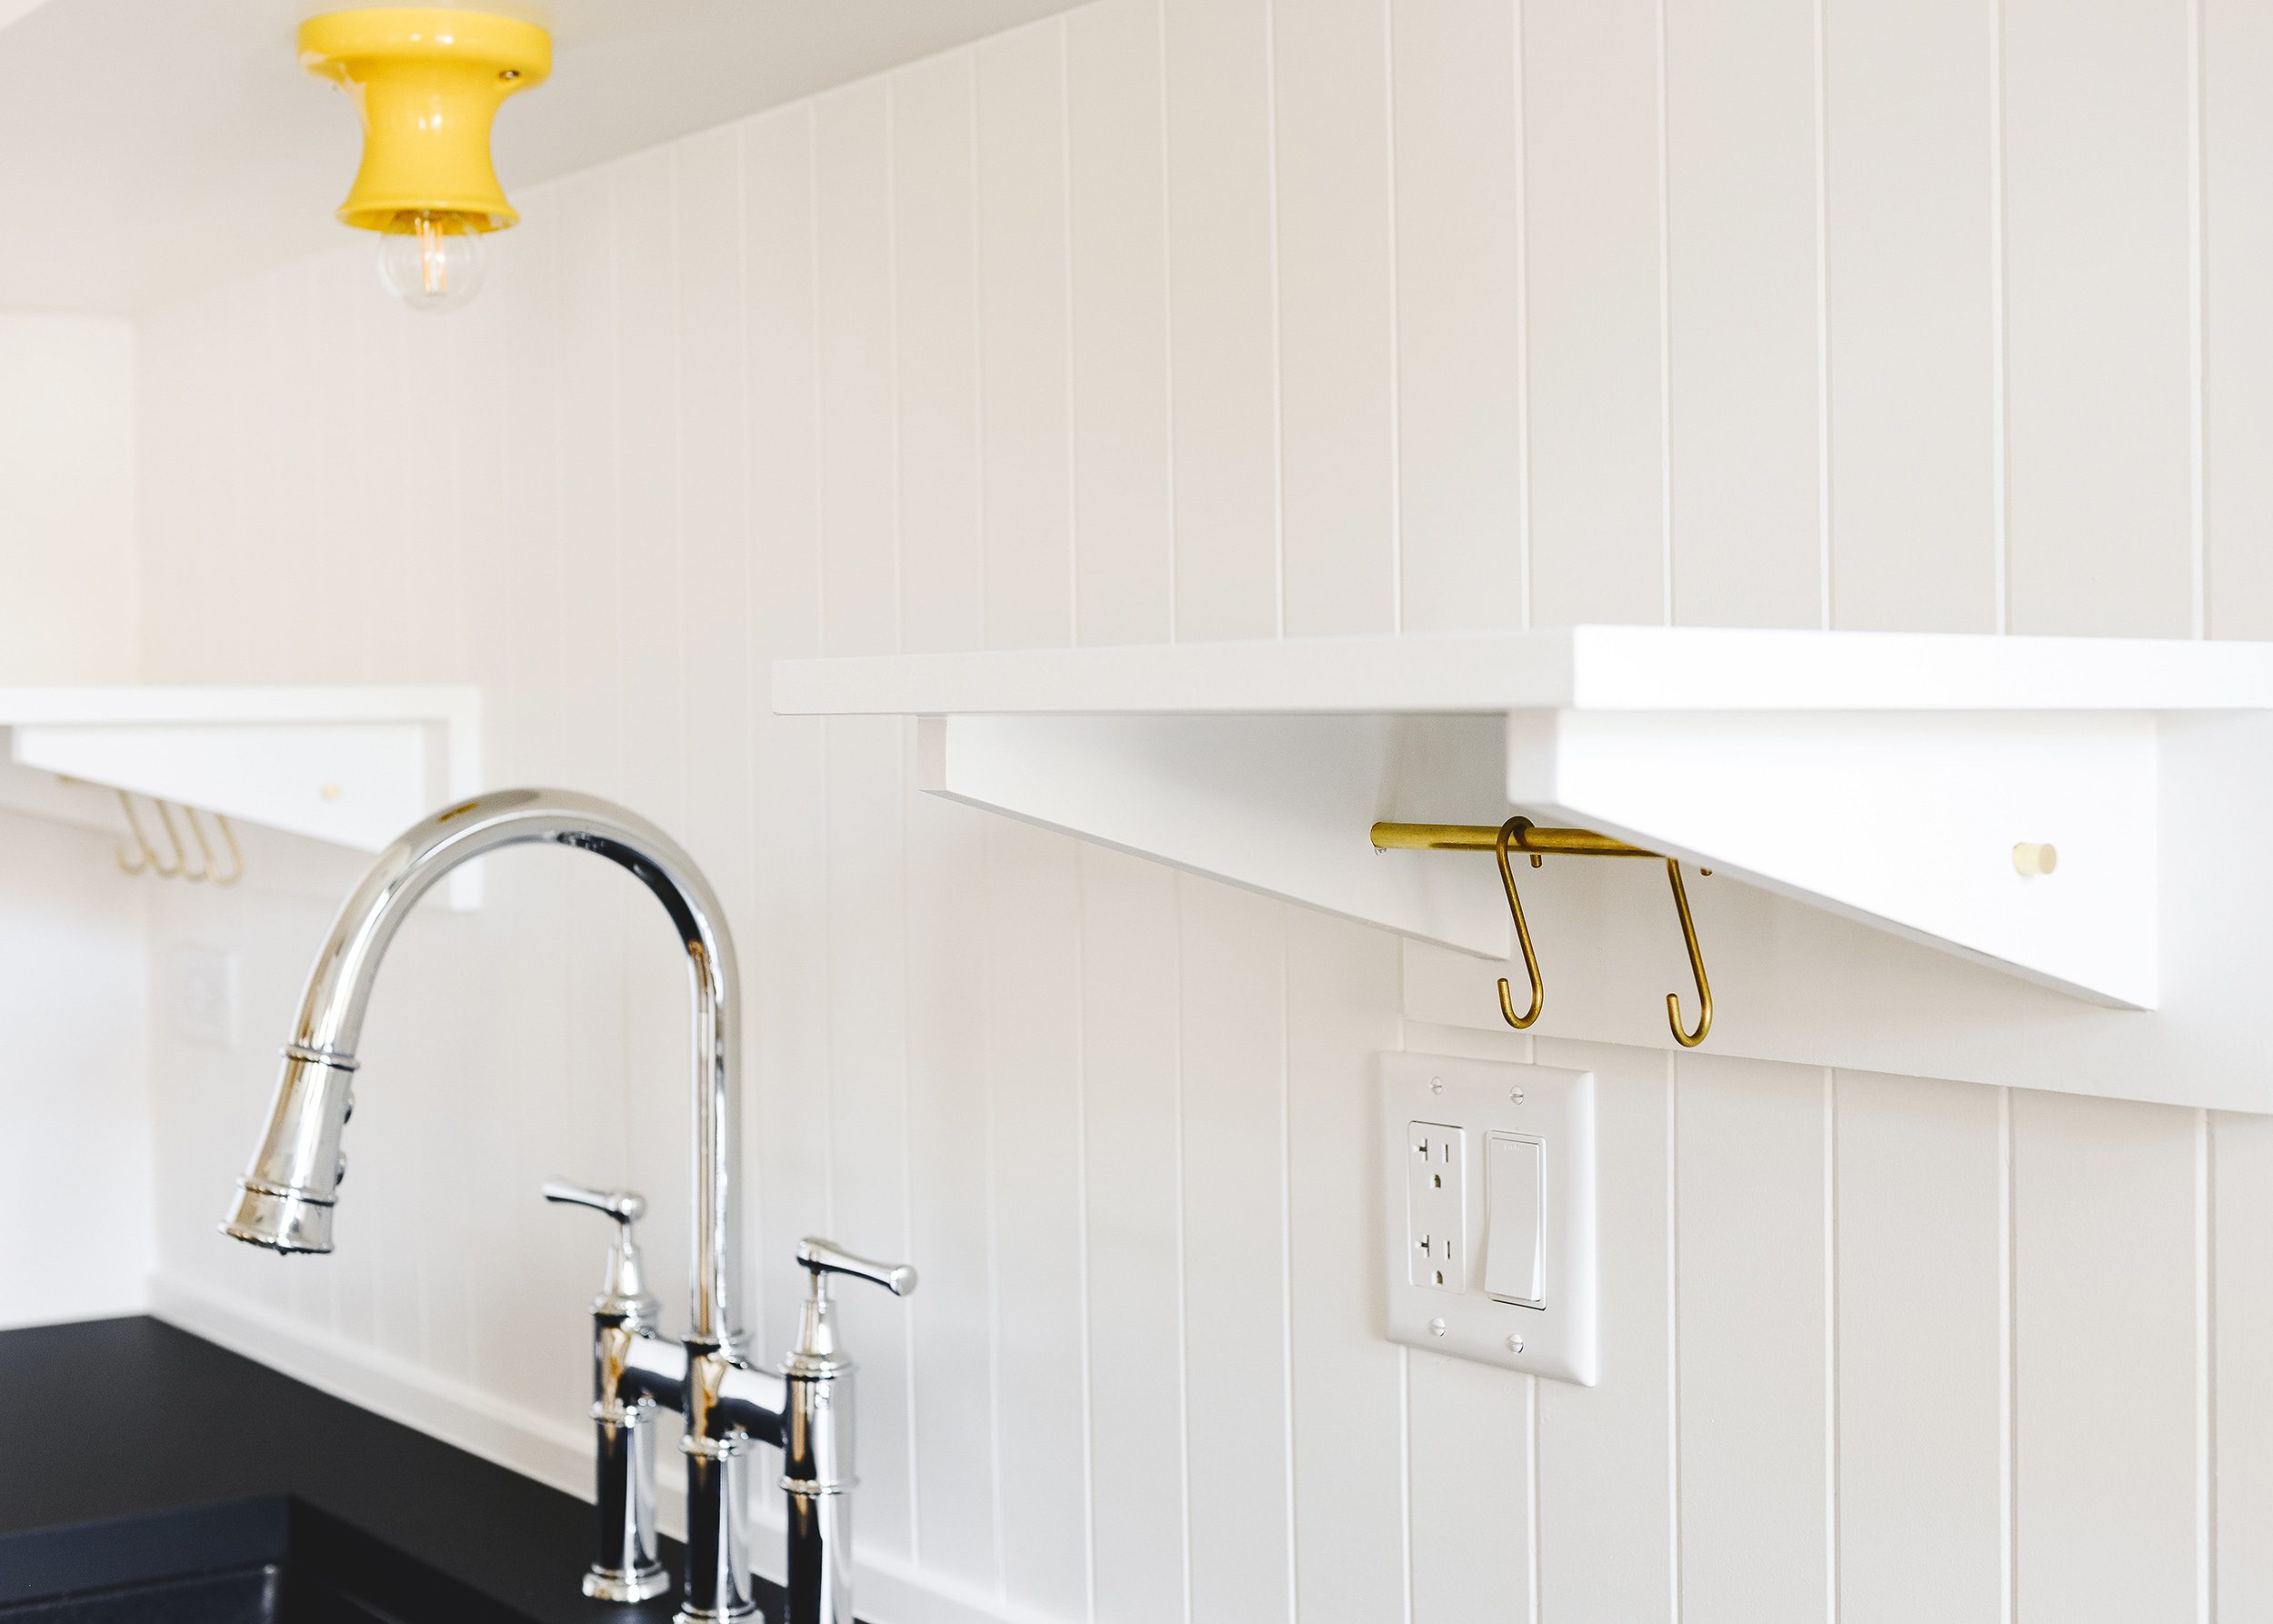
After Kim meticulously caulked all of the seams and painted the shelves in place (3 coats for a good seal!), I gently tapped the brass rods into place using a scrap of wood as a mallet, and we were ready to call the project done! The view through the enlarged dining room opening into the kitchen is potentially our favorite angle in all of Unit 1. The way the sink, faucet and sconce align in perfect harmony is the stuff of dreams! I assure you, this was no accident.
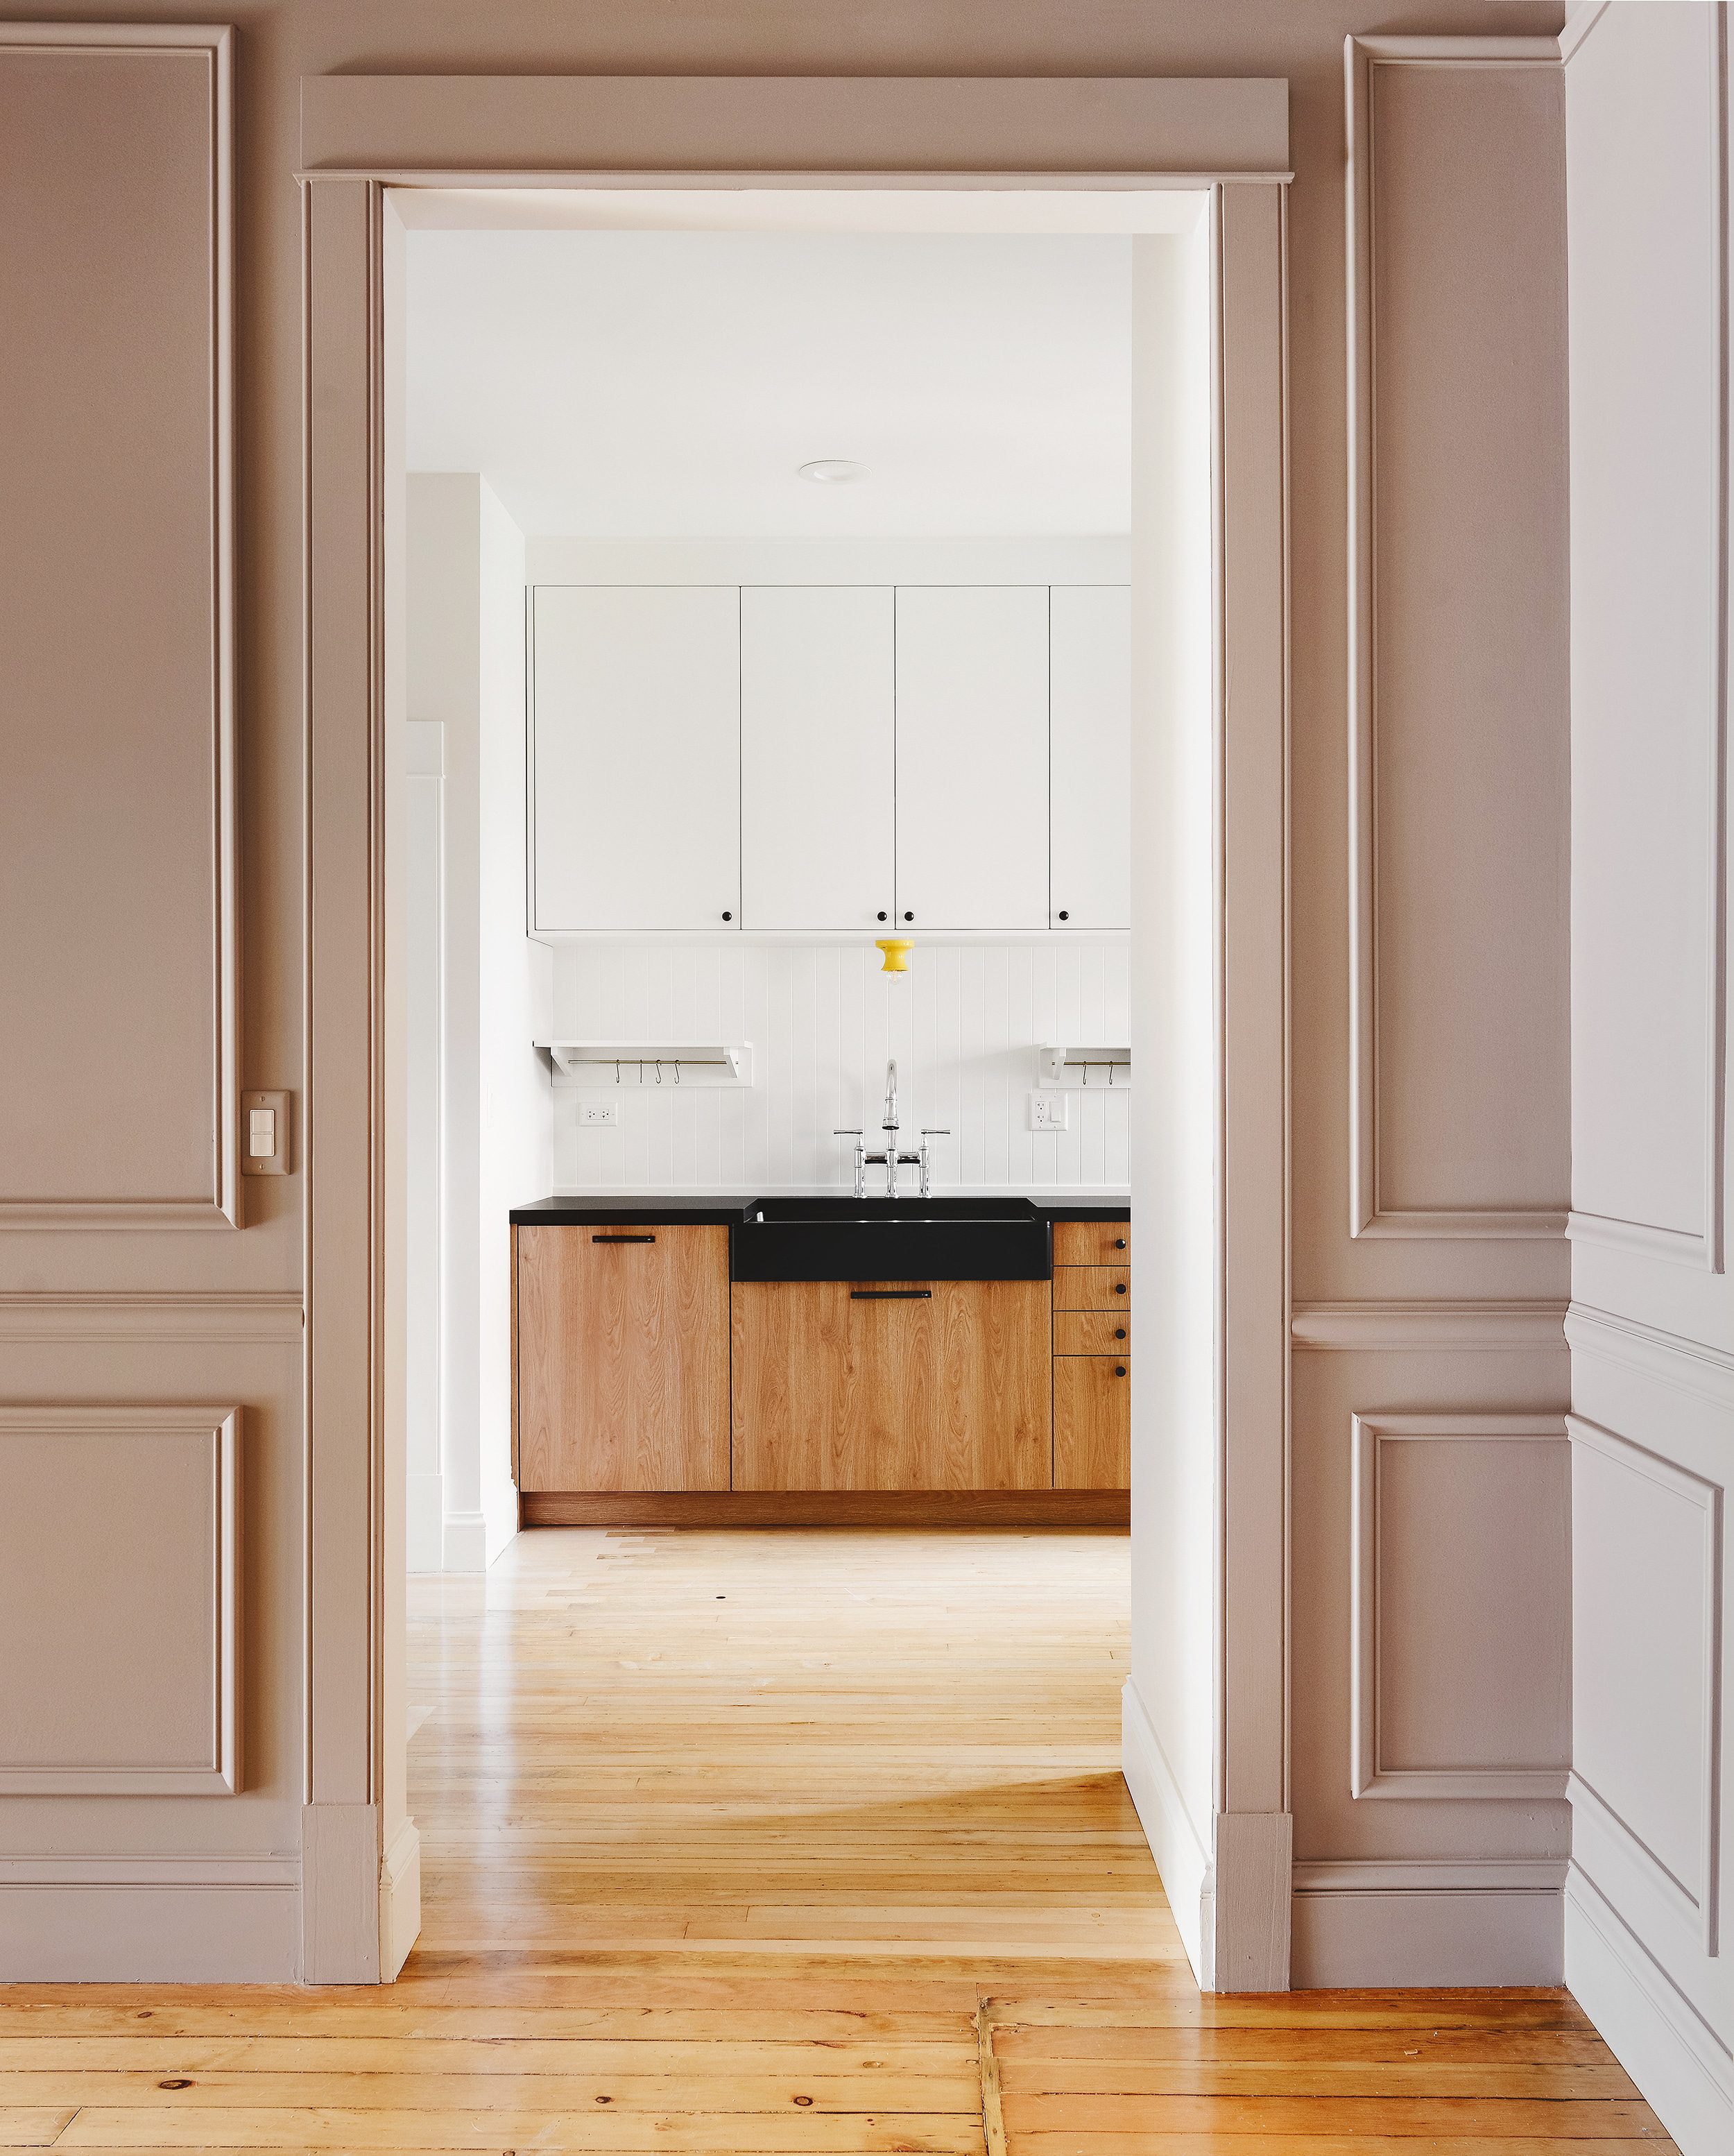
The adorable yellow ceramic sconce is just the cheery touch that this white + wood kitchen needed! We feel that lighting over the kitchen sink is almost mandatory in any renovation as you can see here, here and also here.
While the rest of the kitchen was happening all around us, the electrician and HVAC contractor were finally able to stop by to wire up and duct the vent hood! That allowed us to install the face board and complete that project as well.
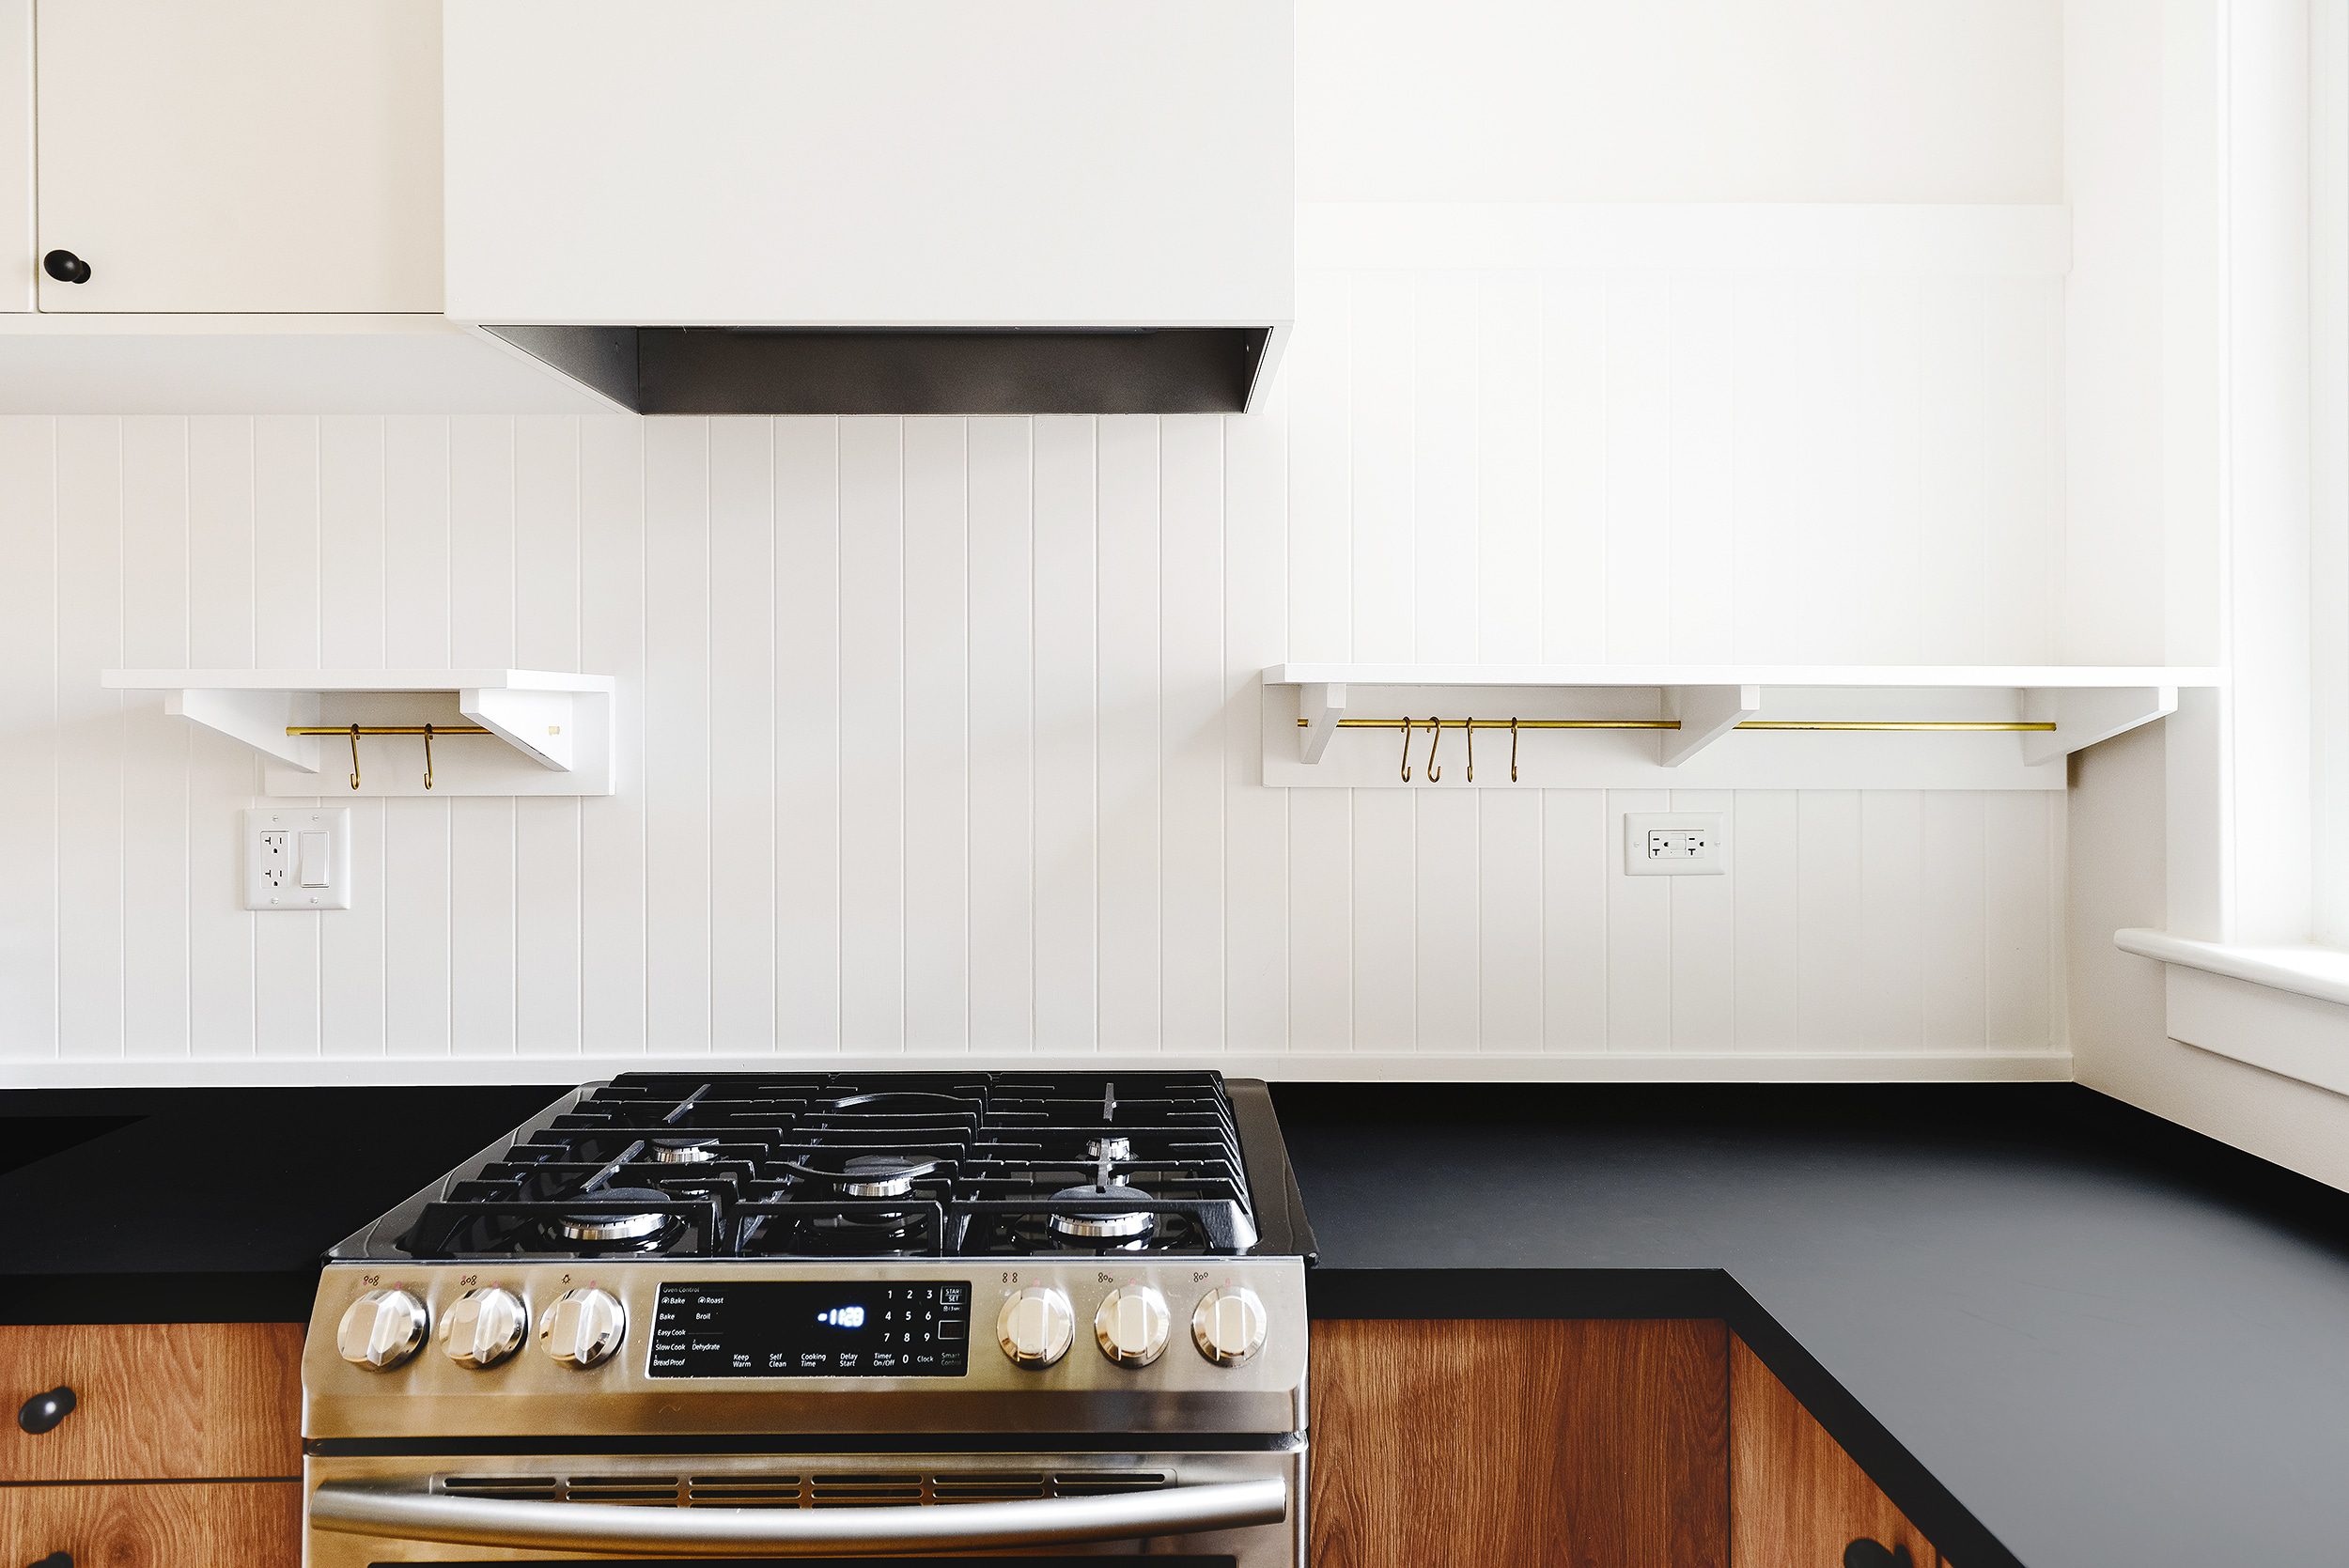
To complement our cute lil brass rods, we picked up 20 of these brushed gold hooks that will allow for hanging just about anything.
This kitchen will soon belong to a kind renter, so who knows what will end up displayed on these shelves, but if it were up to us, they’d probably hold Catfish’s treats in a cute vessel, a potted plant or two and a few stacks of everyday dishes and bowls. Between the shelves and hooks, the possibilities are pretty endless.
Be sure to check back soon for all of the details on the Formica countertops you see throughout this post. They’re truly stunning, and we’re looking forward to showing you more!
PS: Here’s our tutorial for thick floating shelves, and these are our top tips for tiling a backsplash.
Unit 1 Kitchen Sources:
Wall color: Sherwin-Williams Heron Plume SW 6070 | backsplash + trim color: Sherwin-Williams Pure White SW 7005 | countertop | base cabinet panels | upper cabinet panels | gas range | range hood | counter-depth refrigerator | ORB ball knobs | ORB pulls | ceiling flush mount light | sconce | bridge faucet | farmhouse sink


This looks beautiful! So much so that I am now considering doing bead board instead of tile in our renovation! Did you have any (combustible related) concerns about that material behind the range?
Thank you! We had a few questions for our GC/Architect to make sure everything was safe, but he assured us that we were A-OK.
I love that you guys are conscientious about using scraps and keeping things out of the landfill. What your example shows us is that you can also make it look good while doing it. I do think it’s an important consideration.
Thanks! We do our best! Why waste money and material if you don’t have to?
Looks amazing! Is there a post I missed about the installation of these cabinets? And do you use a contractor for the installation? It looks so professional! I’m starting a kitchen remodel soon in Hyde Park and am very inspired. :)
Thank you! The cabinets are from IKEA. We didn’t do a specific tutorial since we’ve covered installing their cabinets in the past, but search on the blog and you’ll find a wealth of IKEA kitchen knowledge!
I love the combination of materials in this space! The little yellow light fixture is perfection, too. Any tips on installing headboard over plaster walls?
We’ve never had plaster walls, so I wouldn’t want to lead you astray! Can anyone else chime in with some tips?
I’m curious if there’s a reason that you chose to drill the rod all the way through the brackets to poke out the sides, instead of doing a slightly shorter rod with dead-end holes so that the brackets cap it off. It’s adorable, I just wondered if that was an aesthetic choice or if it was more about functionality (in theory I suppose the rod could be removed, this way, if a renter wanted to add something to it that was a loop rather than a hook).
It was an aesthetic choice, but your idea would also work!
I love it! I’ve been trying to track down this headboard but can’t seem to find it. Did you find it locally or from a big box store?
We found this kind at Menard’s, but Lowe’s sometimes has it!
Looks amazing! So fresh and clean! I’m curious as to why you didn’t add additional cabinets to the right side of the range hood? Is it the window that won’t allow for a cabinet?
Exactly. That window really threw us off, so we had to work around that inconvenience.
What a great little kitchen!
I cant wait for the post on the countertops! They are stunning!!
Coming this week!
Hey there! It looks great! I know its not *the* point of this post, but I’m trying to do a similar “boxed out” range hood like you did. I saw you linked to the hood itself, but it seems to be recessed in the box. Is it sitting on a frame or trim piece? thanks!
Hey Ryan! The vent hood fits into this hood liner, which is fastened to the box itself. Hope this helps!
Lovely! How did you caulk the line where the counter meets the backsplash? Did you tape the counter and the backsplash or just the counter? Thanks!
I taped just the counter and caulked it!
If your traffic shows hours of someone poring over every kitchen post you have ever done, that’s me! We also have a Chicago two-flat and are about to tackle a long-neglected kitchen. Thank you so much for sharing your creativity and skill, and taking the time to make it accessible to a beginner!
Love how it came out! A year out, I have the same question as the last commenter. How has it held up to heat from the range?