

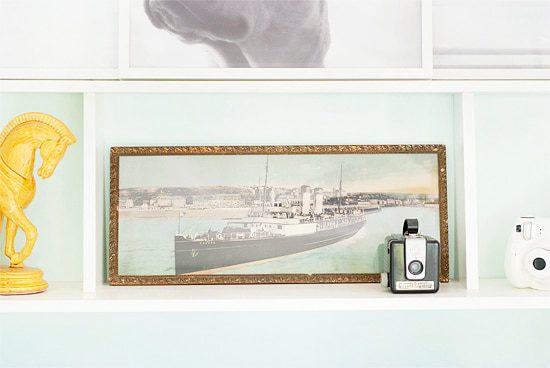
Our Onward! ship print (picked up during our whirlwind Parisian weekend at Les Puces) has been sitting on our kitchen counter top for weeks. We hadn’t so much as picked it up to wipe off the dust, let alone fix up the framing issues. So on Monday, I asked Scott if he could find a sturdy piece of cardboard while at work (and he did). I’d use it to replace the poor, water logged frame backing, clean up the glass and get the art on a shelf to display. Here she is before, and trust, she was dirrty (think: Xtina):

It started like any other unassuming project.
I took out the current nails holding the backing in place, then slipped out the print and glass. Everything got a good wipe down (the glass took a minimum of 3 passes on each side; it was filthy!), including the print itself – I just used a dry, soft cloth to rid the surface dust. For good measure, I even applied a bit of wood glue to the corners of the frame from the back; it wasn’t necessary, but why not? Once everything was clean, I used the old backing board as a template for my new, sturdy cardboard, cut it out, then put all the pieces back together.

Here’s where I hit my road block.
The new cardboard backing was at least triple the thickness of the former flimsy piece, causing it to rise above the frame itself. Our usual method with the staple gun wasn’t going to work, but I also didn’t want a thinner backing board. Because it was much thicker, the frame as a whole would be stronger – if only I could figure out how to hold it all together.

I tried clean tack nails (there was no way I’d use the old ones!), but nope. It was messy at best, nevermind that it wasn’t about to hold in the backing board. I moved to decorative tacks with a round head, thinking it would sort of hold the board in place, which turned out meh. Then I thought, I’ll just tape it in, what the hell! After trying gaffer tape with no success (it just kept peeling off the wood), I toyed with the idea of duct tape, then immediately scolded myself for being so brash with such a delicate antique! But when Scott suggested Gorilla Tape, he took it to a whole ‘nother level. And I went right there with him.
We had a winner!
Because the frame and print were very much made for each other, I convinced Scott and myself that it didn’t matter if we sealed it up. Forever.

It may not have been our first choice for re-framing and salvaging the antique art, but it worked. And when you’ve reached your peak of frustration on what should’ve been a fairly simple task, a load of tough tape’ll do just fine, thank you.
When we were deciding on whether or not to purchase the print in the first place, we asked each other, where will it go? I suggested the media wall, knowing the slim center shelf would be the perfect spot. We shuffled a few items around, held our breath to see if it would even fit – and she did. Barely, but barely counts.
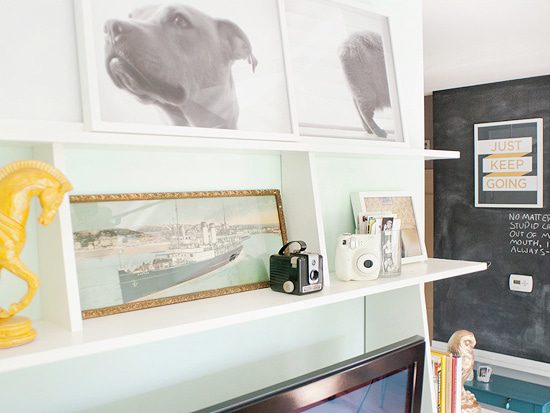
And so goes the story of Onward!, our little inspirational ship-that-could. As for the cobra battling mongoose, well, I’m putting that off until Scott brings it up first.

Have you been cleaning up any summer treasures lately? Or perhaps you’ve started an easy project, only to feel defeated halfway through? We totally get it.


What doesn’t Gorilla tape do?!? I love it for everything lately! The new art looks like it was made for that cubby.
oh, it looks great! a perfect fit.
every time i see your media wall i turn a little greener with envy. even if the point of the post had nothing to do with the wall, haha.
Kaylan, too funny – but thank you!
My cat Rommie is kind of a brat. She amuses herself by letting me drift off to the edge of sleep and then batts me on the nose. She’s evil but I love her.
It always turns out that what you think will be a quick and easy job becomes a mission. Well worth it though, the finished product looks great! PS Love that blue table in the first pic!