

Monday night, Scott and I shared a bottle of wine that we’d been saving for 8 months. It was a gift from our friends (thanks, Joe and Kara!), given to us last December as we embarked on our kitchen journey. They told us it was one of their favorites (La Crema Pinot Noir, if you’re curious), and they asked us to enjoy it when we had a reason to celebrate. We promised, and we said we’d save it for the completion of our kitchen – which we estimated to be around March. March!
Oh, how silly and naive we were.
Well, after the door debacle that held us up for almost half a year, we opened that bottle, toasted, celebrated and, as you do when you’re celebrating, polished it off in the same evening. We cooked a big meal to go with our full glasses, and we did it in the comfort of our kitchen that we couldn’t be more excited about! We talked about the tile we installed, the endless Ebay searching for the rug, and we agreed that hanging art makes all the difference. Remember when there used to be a window there?, we said. It felt so long ago; now we really have All the Light! It feels good.
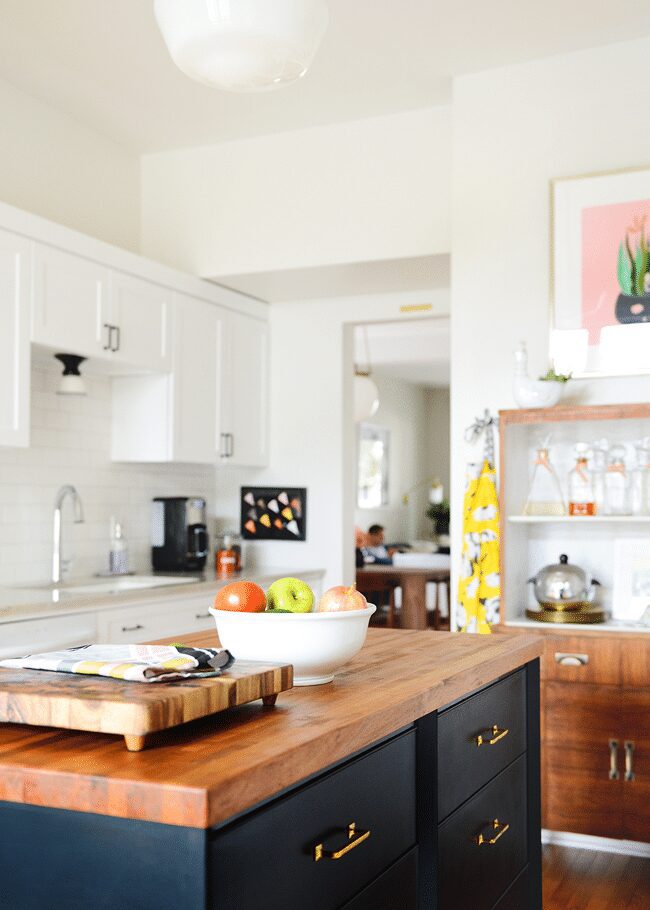
Our kitchen is right off of the dining and living rooms, with a load bearing wall separating it from that larger great room. At almost 130-years-old, our house is a stubborn little lady, stuck in her own way, and we knew from the beginning that it didn’t feel right blowing down walls and drastically changing the floor plan. We like that the kitchen is in the back of the home, but you can easily see into the dining room and even hold a conversation with anyone sitting on the couch. At the same time, we still had our obstacles – I’m looking at you, furnace! – but with a hefty price tag to get it moved and without a good option of where it could go, we worked around it and made peace with our decision.
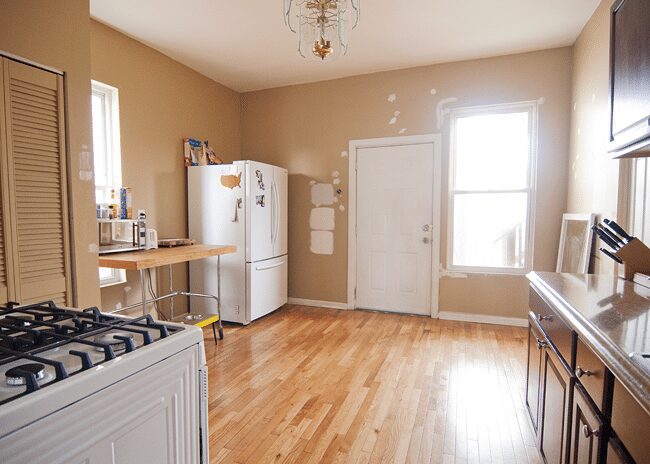
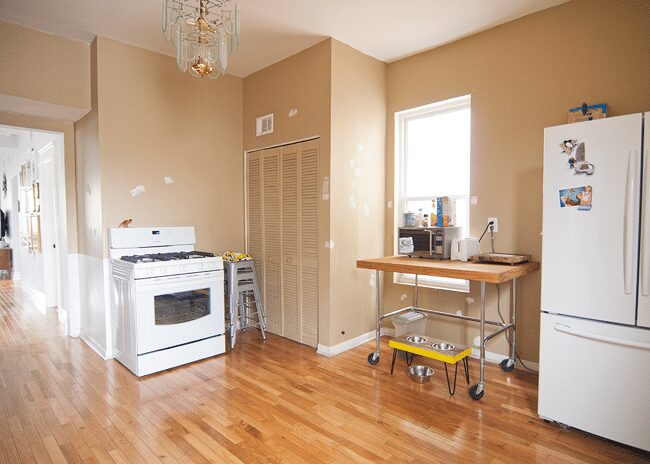
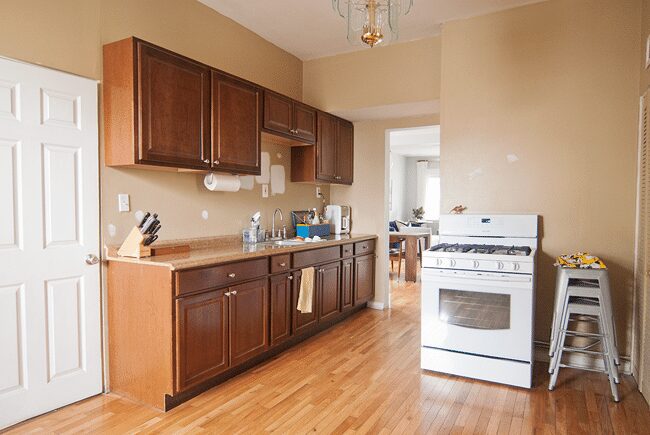
Do you remember where we started? It’s funny, because aside from our floating appliances, it doesn’t feel like much of a kitchen at all! There’s a large amount of space being under utilized, but there were also oddly placed low windows, making it impossible to install a proper a countertop. The upside? The space was generous, but we often joked it would be better suited for a dance party than prepping a meal. Before + after:
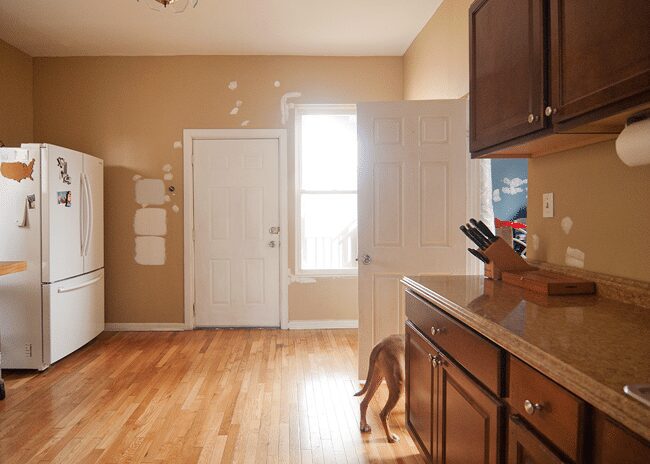
Here’s a similar view facing slightly to the left, standing in the doorway from the dining room. I’m laughing as I look at our half-hearted attempts at spackle and paint swatches – we turned a blind eye to those, um, improvements for at least a year!
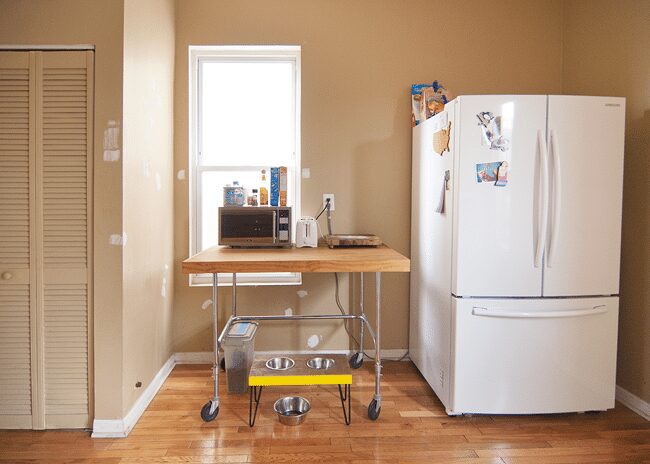
Rotating to the left completely, you can see where the only other window in the room is. Again, it’s much too low to allow for a counter, so we ultimately nixed it altogether, adding a new gas line to accommodate our stove. A wall of cabinetry was installed, including a refrigerator surround, pull out pantry and spice rack. The base cabinets in our kitchen were built with sliders to prevent items from getting hidden in the back, a perk we’ve been loving as we grab for pots, pans and lids! Before + after:

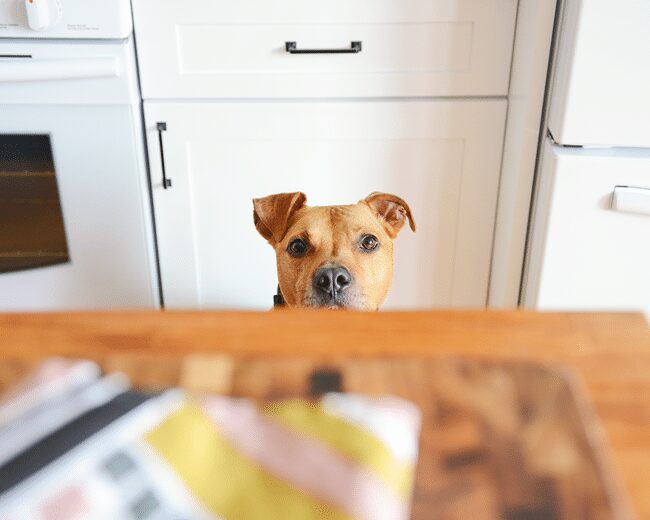
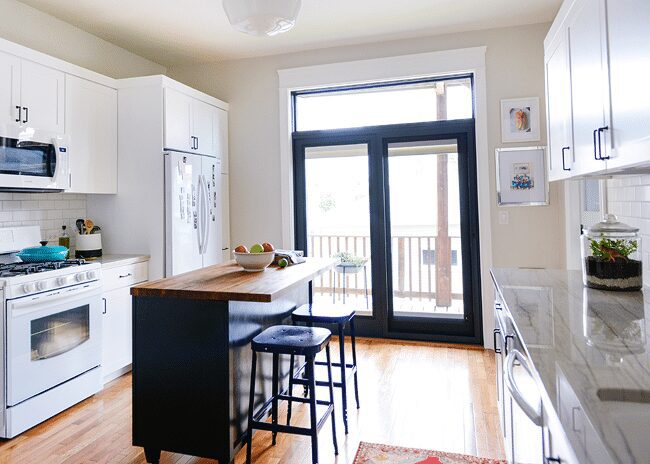
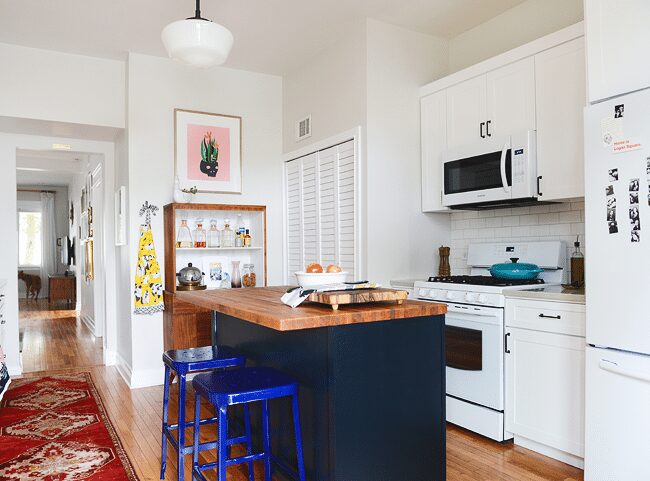
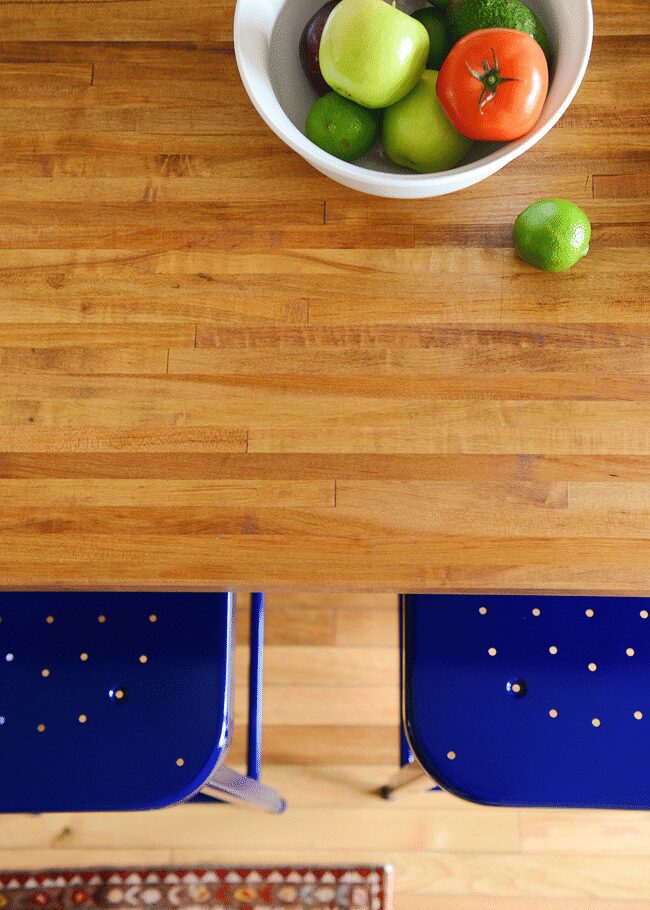
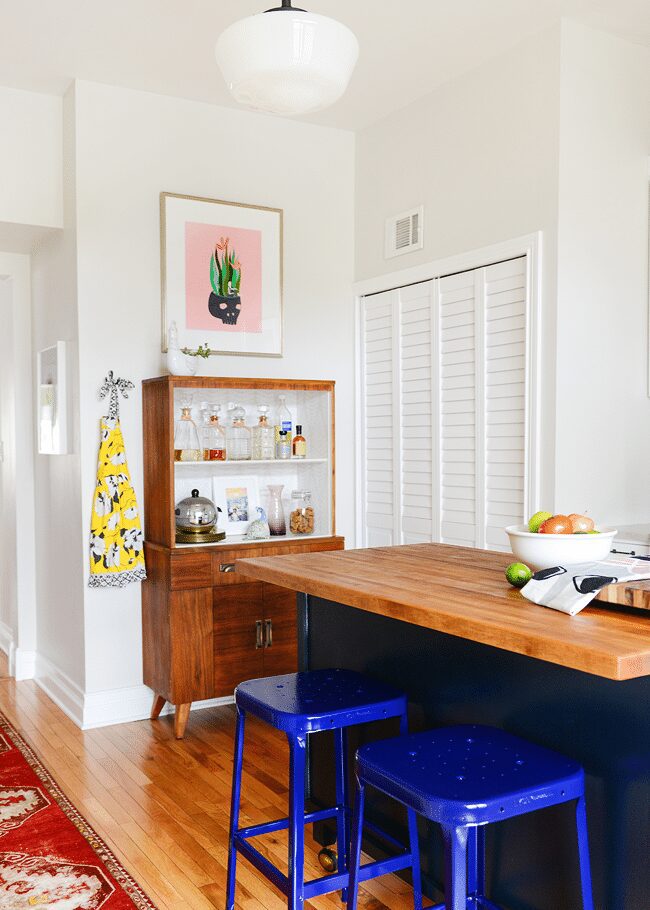
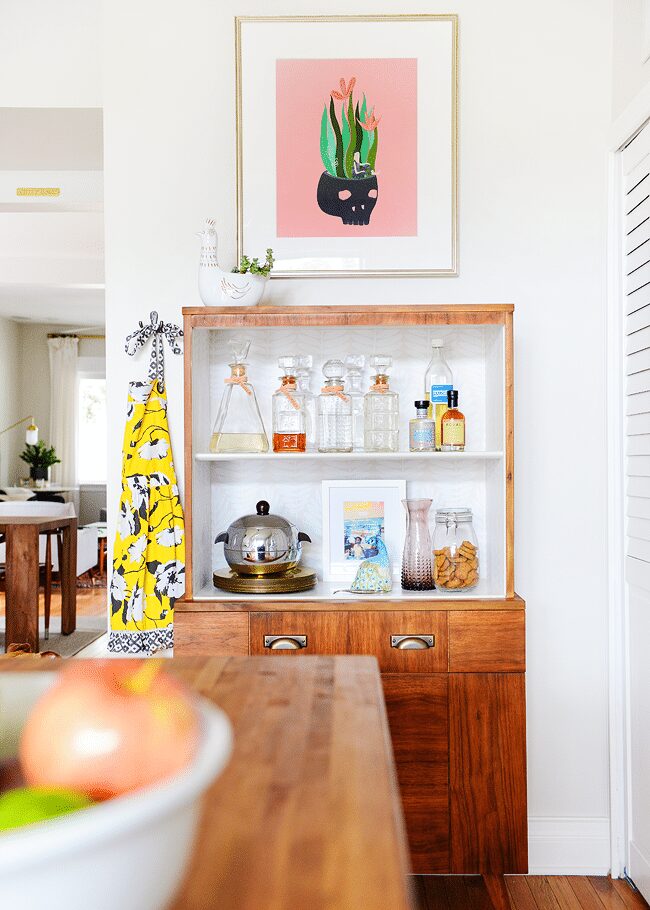
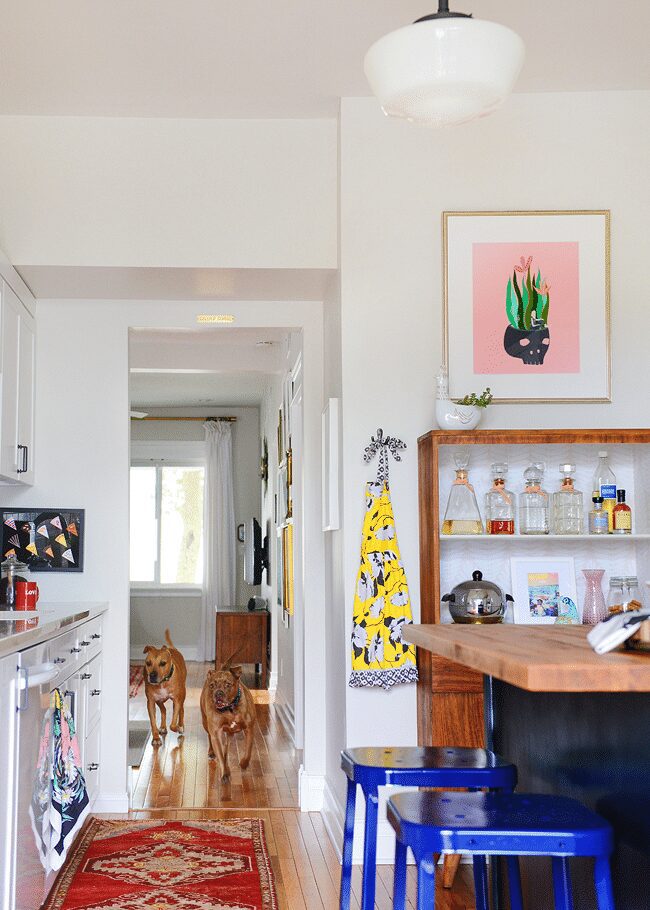
To the left of the stove and turning towards the living and dining rooms is our furnace (behind the louvered doors), which stayed put (boo). But! By shifting the stove to the now defunct window wall and replacing it with a small, slim vintage hutch, the kitchen feels less like a hallway upon entering. Our DIY island is accompanied by glossy blue stools, acting as the kitchen command center while storing everything from food containers, puppy medicine, dish towels and foil. I picture a lot of great conversation, veggie chopping and catalog flipping happening around this hub! Before + after:


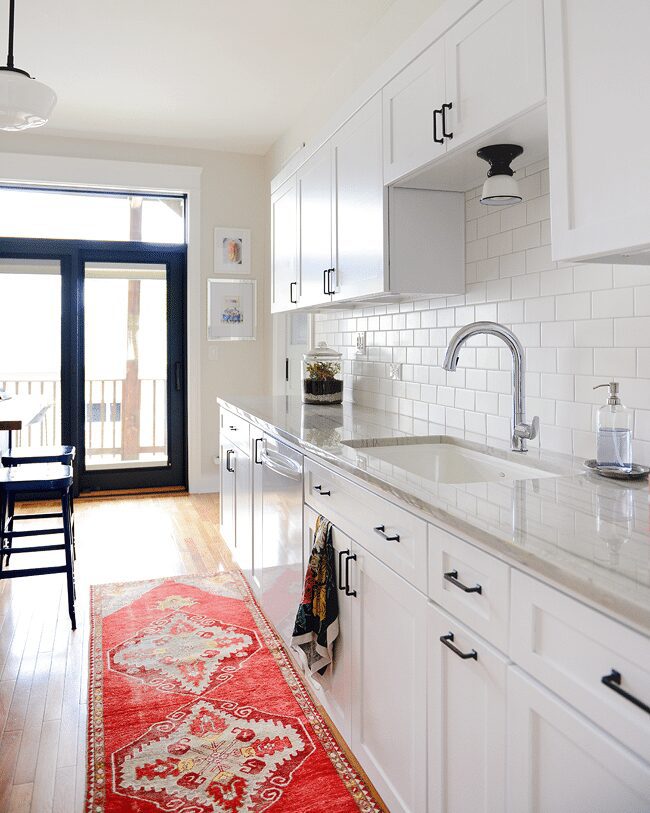
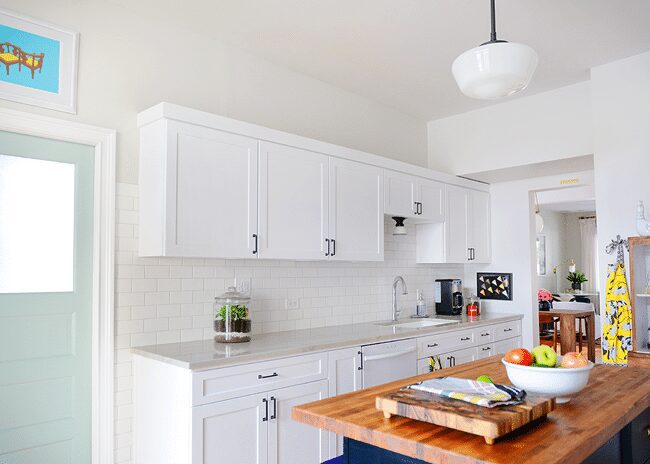
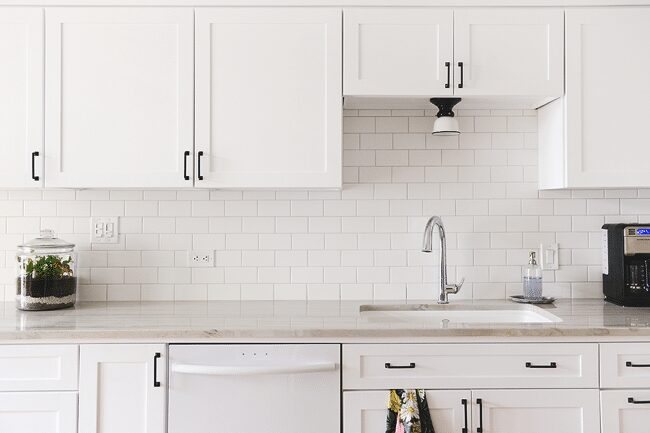
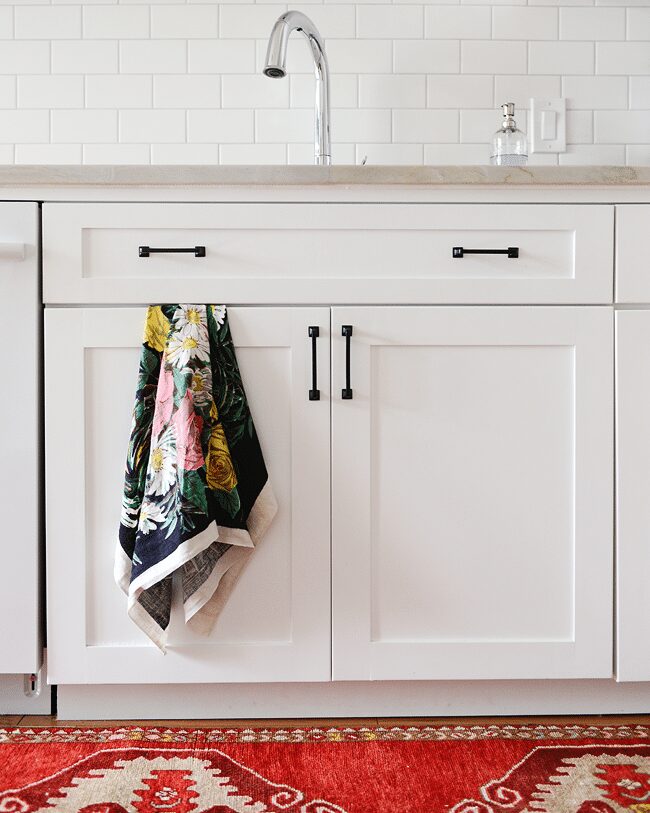
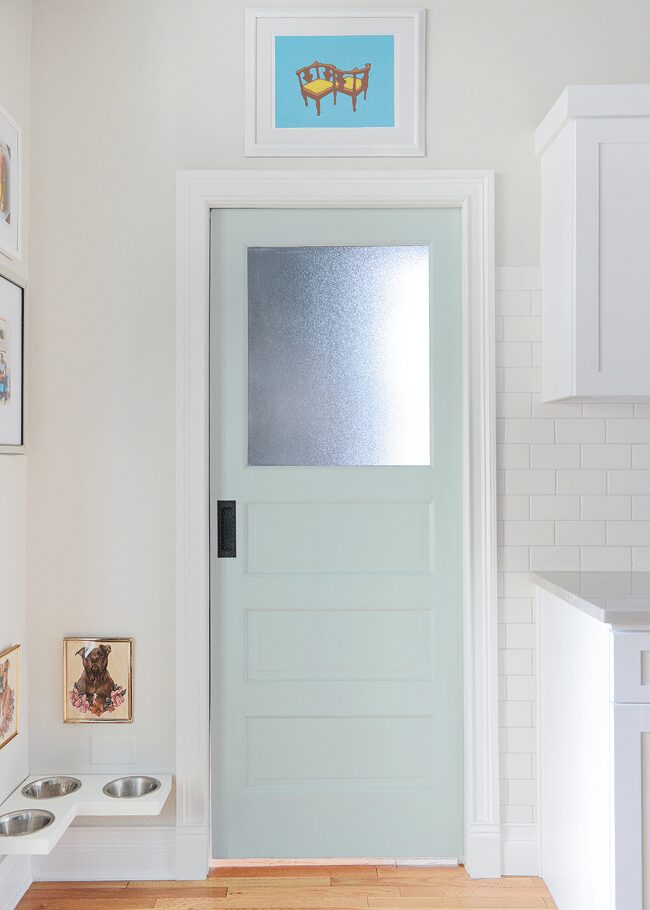
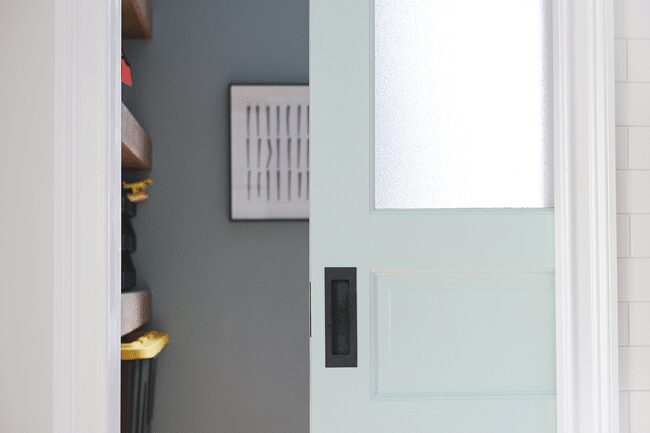
The wet wall was upgraded with a longer working surface by moving the existing door (which leads to the workshop) closer to the back wall and swapping in a pocket door to save space – plus, pocket doors are cute! To save money, we refaced the cabinets we could salvage, needing to add only one additional upper. The base cabinets were a different story, as they began to fall apart as soon as we wriggled them free from the wall! We took that as an opportunity to reconfigure the drawers, add pull out waste and recycling and include a tip out tray for the sink. Before + after:
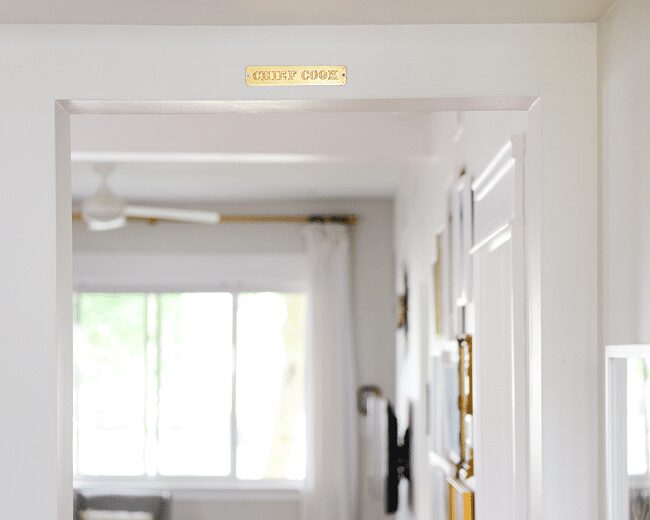
Below, we found this solid brass sign at a yard sale for a buck, and we snagged it knowing it’d eventually make an appearance in the kitchen! Scott cleaned it with a dab of Brasso, and it shined right up.
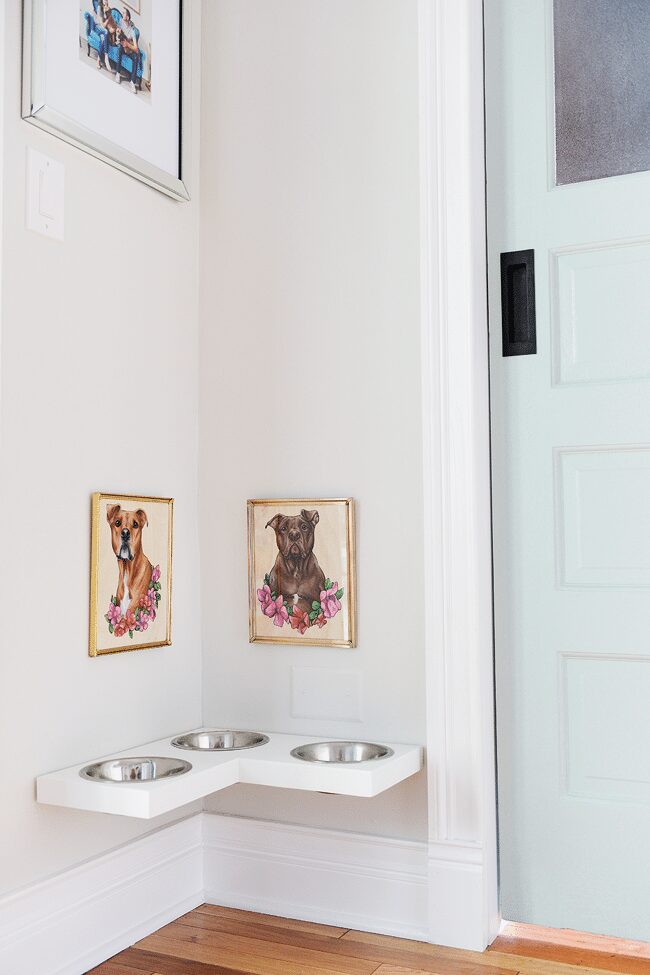
When we made the decision to opt for a 6′ wide sliding patio door, it meant that we’d have to rethink the dog food area, which, big deal, right? If we had stuck with our initial intention to go with a 5′ door, we would have had enough space to stash their station, and I have a pretty marble shelf that was waiting – so patiently, mind you! – to float in that bare wall space, too. Being the crazy dog mom that I am, I stayed awake at night reconfiguring how our two meatballs would dine in style, and finally (finally!), we landed on a sweet little corner station that took us a few hours to complete. See it? (Sadly, the marble shelf will continue waiting for her perfect spot. The bathroom remodel, perhaps?)


Over the course of 8 months (8! Although to be fair, there were a few months of waiting), we’ve had a good amount of time to break the space in, learn our kitchen habits and re-work the guts of the cabinets to create optimal work flow. We have our lighting scenario down to a science (under cabinet lights in the evening, with a low dim overhead), and Jack and CC have already learned that the low hum of our patio door blinds equates to breakfast or dinner. We made choices in this room with the idea that large purchases would feel classic, timeless – and so, I’d like to share some of the decisions that we consider our favorites.
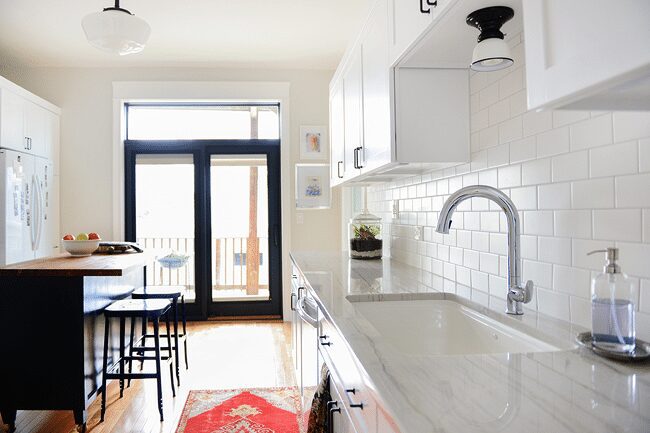
THE COUNTERS. Remember when we couldn’t be more on the fence between black or white? The white macaubas quartzite counters were our biggest splurge in an area where we thought we might be able save, but they really do make us smile every time we enter the room. Worth it.
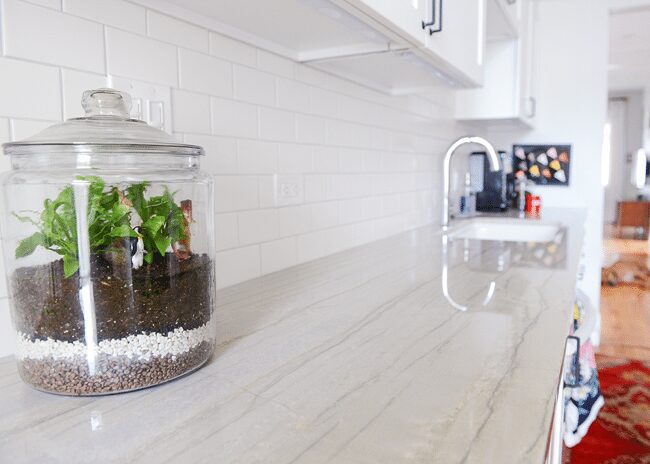
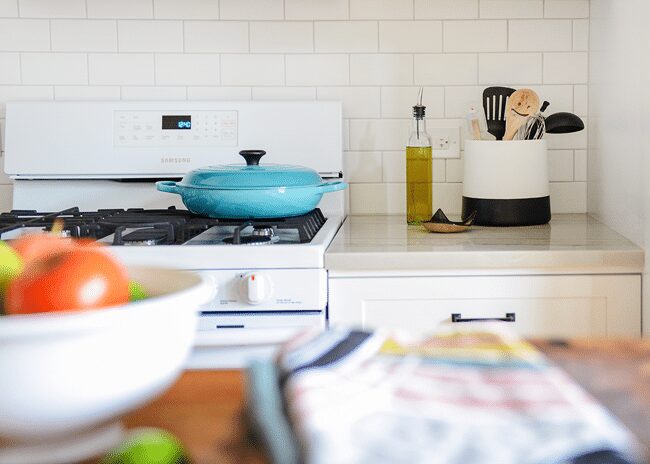
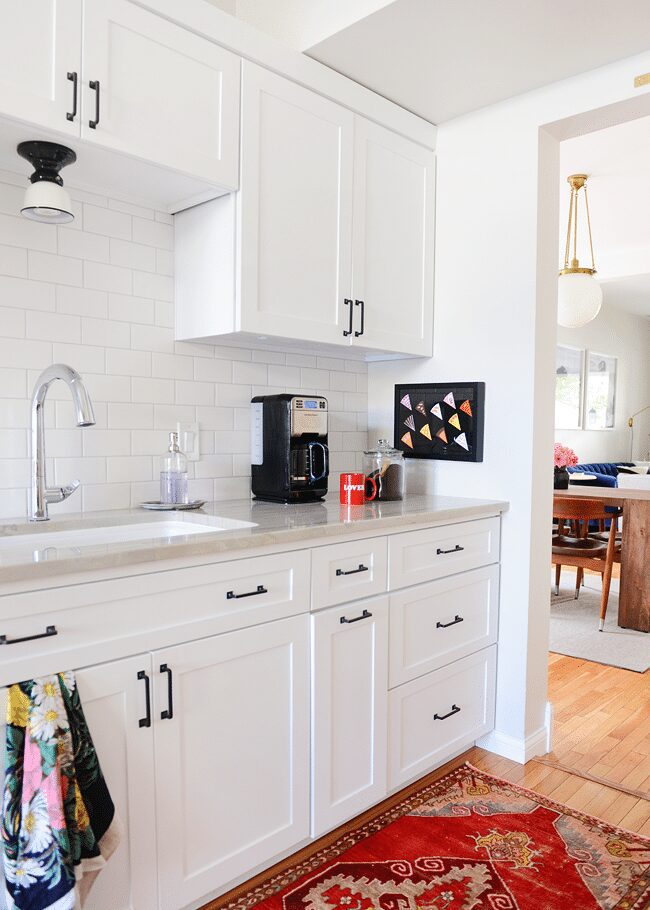
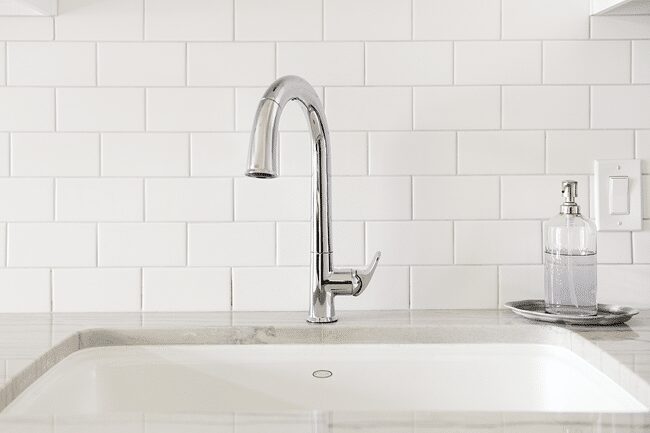
TOUCHLESS FAUCET + ALL WHITE EVERYTHING. We paired our Kohler Sensate touchless faucet with a large white enamel sink, and we couldn’t love it more. The hands-free model keeps the chrome spot (and hassle!) free, and because it runs on electricity, there are no batteries to fuss with. Wanting to keep a completely seamless feel throughout the kitchen, we opted for all-white appliances, and we haven’t regretted that decision for a second. White appliances have come a long way!
OUR DOORS. Between the cute-y pocket and the mammoth slider, we are in door heaven! I painted the patio door and transom last weekend, and although it was the most difficult door I’ve ever had to paint, she is a stunner. Scott suggested we use the same black paint as the island (Nein! Nein! Nein! OK Fine by Clark+Kensington in an exterior satin finish), and although it matches, it doesn’t feel overtly matchy-matchy. We are already itching for next summer so we can tackle that back deck now!


THE MIX & MATCH HARDWARE. Between the shiny brass pulls on the island, the burnished brass on the hutch and the oil rubbed bronze on the cabinets, we’ve got it covered! Toss in our chrome faucet, and we’re repping all (well, most of!) the metals.

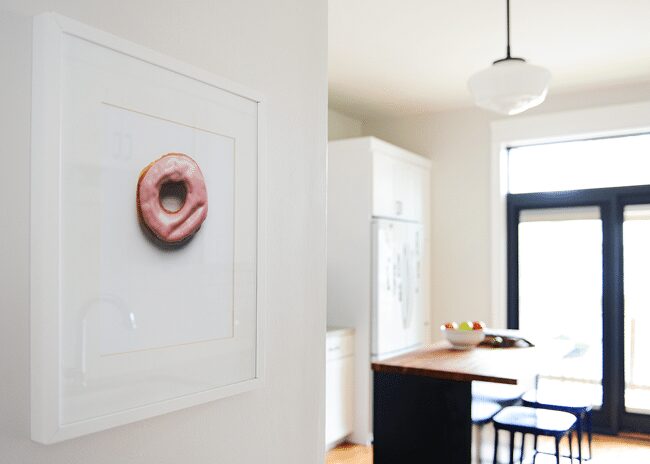
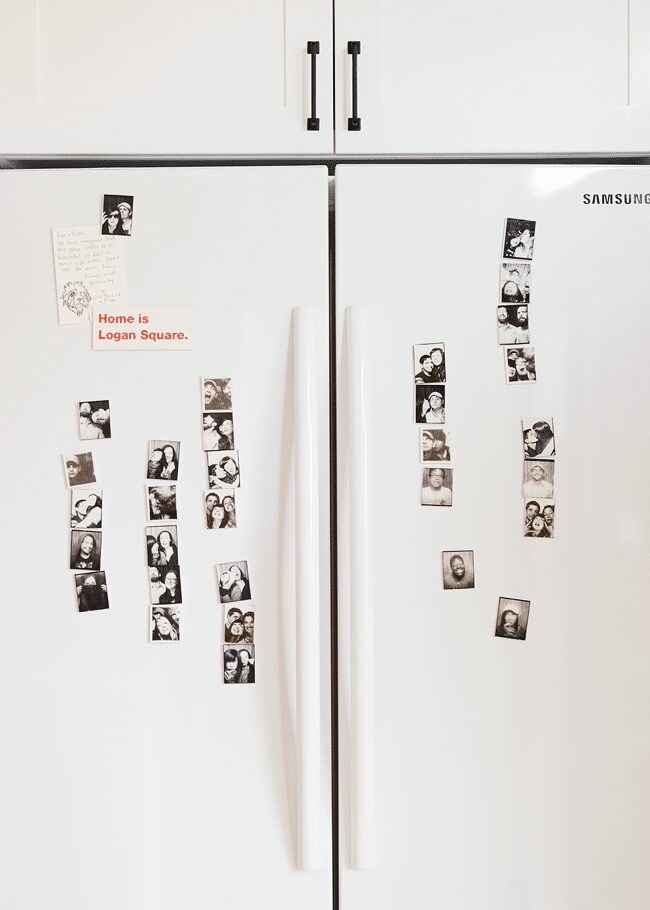
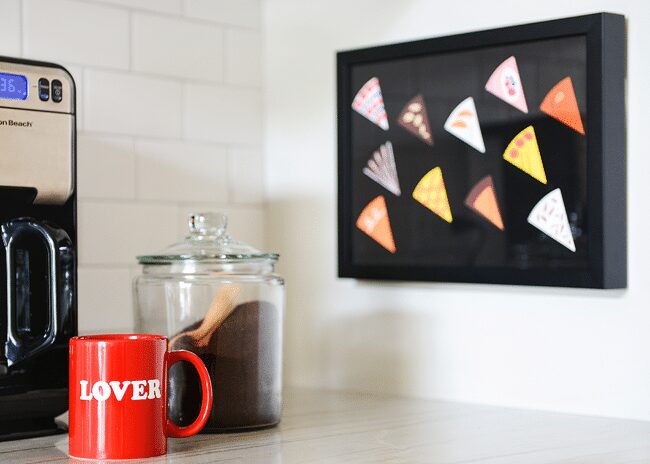
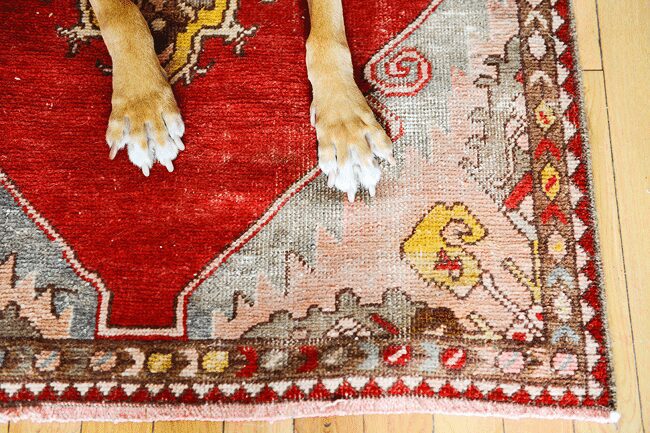
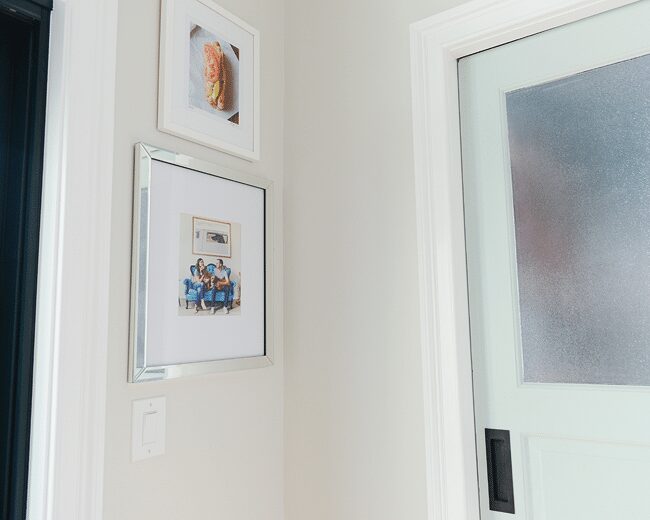
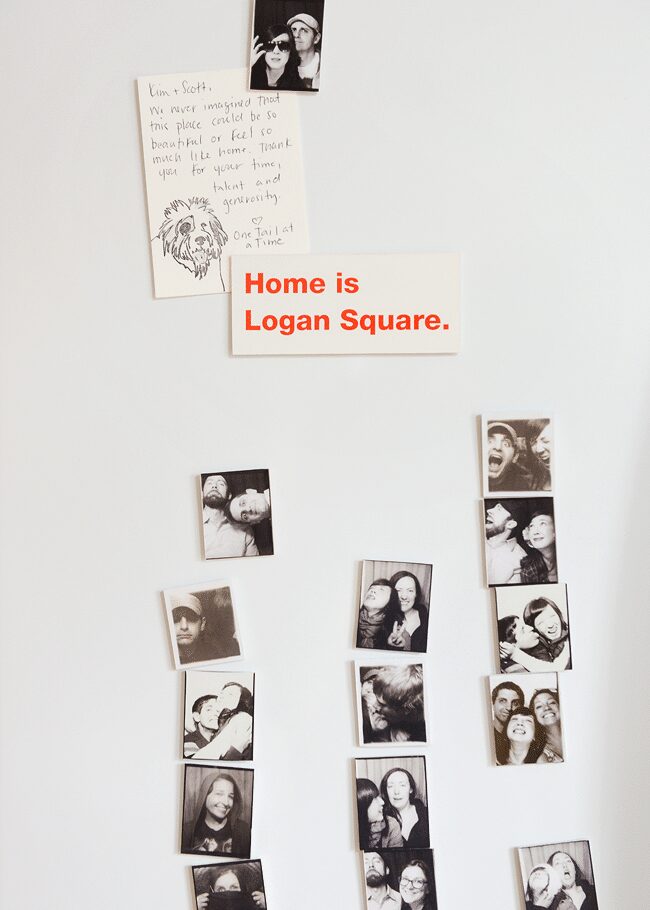
THE FINAL TOUCH. We waited until the very, very end to hang a single thing on the wall; we treat it like a reward, the final touch. From the small (personalized photo booth magnets!) to the not-no-small (that rug!), it was all this that turned our grayscale blank slate into a place that feels so much like Kim and Scott.

Below, you’ll find all the past posts that have documented our kitchen journey (just click on any thumbnail to take you there). We’re happy to answer any questions we may have missed, and in the meantime, we’ll be in the kitchen. With a glass of wine (me) and gin (him), of course! Hip, hip HOORAY!
KITCHEN SOURCES: Wall color: Intense White by Benjamin Moore // Cabinet color: Distant Gray by Benjamin Moore // Baseboard + Door Trim color: Ultra Pure White by Behr // Counters: White Macaubas Quartzite // Backsplash: Rittenhouse Square matte Arctic White, Whisper Grey grout // Appliances: Samsung // Patio Sliding Door: Pella Windows & Doors, painted Nein! Nein! Nein! OK Fine by Clark+Kensington // Pocket Door: vintage from Rebuilding Exchange, painted Swept Away by Ben Moore // Island: DIY // Counter height stools: Aurora industrial stool, Rejuvenation // Hutch: thrifted, Mission pulls with backplate, Rejuvenation // Rug: Vintage, Ebay // Faucet: Sensate by Kohler // Sink: Cape Dory by Kohler // Cabinet hardware: Mission pulls, Rejuvenation // Overhead light: Eastmoreland pendant (6″), Rejuvenation // Sink light: Hannah small semi-flush mount, Rejuvenation // Corner dog food station: DIY // Dog paintings: The Pet Shop (by yours truly!) // Fridge Magnets: DIY // Decanters (all glass!): Ebay // Decanter tags: DIY // Purple carafe: Kulture Bomb // Terrarium: DIY using Heritage Hill Jar // Chicken planter: West Elm // Utensil holder: CB2 // Chicago hot dog art print: Frangomint // Mirror frame (family photo): West Elm // Donut art print: The Donut Shop // Skull on pink art print: Laura Berger, framed by Framebridge // Cake Part art print: Baba Souk


It took a lot of work and time (been rooting for you guys all along the way) but the result is just absolutely stunning. Great job!
Your encouragement is soooo appreciated! I bet you could tell we were getting pretty flustered at the halfway point…
Yay, I get to be the first commentor to congratulate you on your GORGEOUS kitchen! I love all of the light, the doors, the hardware, and the puppies, of course! (while I watch my two labs wrestle their way around the kitchen ;))
Nothing like two pups under foot to make a good sized kitchen feel cramped! Ha!
It looks so great! You made some great function decisions with the stove and the window. And all that white just sucks the light into the room, which is awesome! Love the hutch best. :-)
This is beautiful, awesome, everything! I love all the details. You guys did a great job. I also wanted to thank you for the great backsplash posts you wrote a while ago. I was studying them a couple of days ago, as we are getting ready to do ours, and they were super helpful. :)
You can do it, Anni! It was a weekend job for two people, but it makes all the difference, for sure.
Before I got and pin ALL OF THE PICTURES to my kitchen inspiration board (next summer, woot!), I have to ask how the La Crema was? I’m hosting a blind tasting later this month and the hostess has to have a less common wine choice, no?
I absolutely love your kitchen. It truly is timeless! I am excited to show it to my husband and convince him of so many elements (the BRIGHTNESS and the white and those counters!). Congratulations on a beautiful space.
SO GOOD. So smooth. Dangerously so. A go to for sure! It didn’t take long to polish off!
This is functional and bright without feeling cold and sterile. I rent but, I think I would make similar decisions in a house.
That is so ridiculously good. A feast for my eyes!!!! What a dream kitchen. Those doors are to die for, that SUNLIGHT!!! So good.
I’ll admit I was skeptical about getting rid of the second window. But it totally paid off. The kitchen is so full of light! It looks like a beautiful place to cook.
Thank you! There’s way more light with the door than there ever was two windows, so the move paid off. (Not to mention, the other window faced our neighbor’s house, and in Chicago, houses are like 2′ apart!)
Round of applause from this Mommy of 2 in Michigan! Your kitchen looks wonderful. The furnace corner is my favorite. I also love your food bowl shelf, so cute! I think everyone needs a donut pic in their kitchen!
My jaw has officially dropped! Job well done Kim & Scott!! The kitchen looks amazing! Having just completed our own DIY kitchen renovation, I understand all the struggles; but isn’t so 100% worth it!? I still walk in to ours and just smile ear to ear! and our furries love it too! Enjoy it!
Cheers,
Allison
The struggles feel like a million years ago! It was all worth it.
OMG, it looks absolutely incredible!!! Worth the wait for sure! The before and afters are just magical. And I love the pup portraits over their bowls… ahh! :)
The kitchen is gorgeous! I particularly appreciate your choices for where to hang the artwork – I’m struggling with that myself currently, and it’s neat to see some non-traditional choices for inspiration. The whole space is just so good.
Also – I remember when I picked up my Milo chair last winter that you’d mentioned painting the pups in a new style, and I’ve been wondering what you were going to come up with. I *love* the new paintings – they’re hysterical!
Haha, oh man, that feels like ages ago! I think I’ve had these paintings done since February, because we thought we’d be done with the kitchen by March. It’s been killing me to keep them tucked away!
This exceeded all my expectations and my expectations were high for you two. Every detail feels so intentional and so you, yet it’s a kitchen I wouldn’t mind spending my own life in! It’s perfect. While our kitchen is turning out to be exactly how you described it, the moody older sister to yours, I’m so glad you finished first. Because as always, you remind me that great design is personal and has some quirk. (note: must add quirk!) I love it. I love it. And I couldn’t be happier for you guys to be on the other end, enjoying a glass, errr celebratory bottle of wine in your fabulous finished kitchen.
Thank you, woman! You are a constant inspiration to me (and Scott!), and I am loving – LOVING – watching the moody sister unfold. XOXO
I love everything about this kitchen! Worth the wait! We are currently deciding on tile for our kitchen, and I am wondering your opinion on the matte tile. I love the look but wondering how it is to clean vs glossy tile. Thanks for any info!
It’s no more difficult to keep clean! It’s not completely matte… more of like an eggshell. So while not glossy, it’s still super wipeable. We love it so so much.
I think this may just be my favorite kitchen reno, yet! While I do like it when walls are blown out and you get this completely new space, I’m a huge sucker for leaving an old home with it’s more original floor plan. Great job!
Also, did you paint those portraits over their food station? The flowers add the most hilarious touch, and I really really want some of Lou and Spanky now! :)
I did! And I want to paint Lou and Spanky! See The Pet Shop here: http://shop.yellowbrickhome.com/
HOLY MOLY! This looks so incredible and has me rethinking my own kitchen (with 96-inch windows that go nearly to the floor, I get the counter space issue). I’m so impressed with this, you guys. Well worth the wait.
What a fabulous transformation! The dog station is genius.
Bravo!!! What a payoff! I’m sure those months of waiting don’t seem so bad now that you have such a gorgeous finished space! I LOVE the choices you made and the way it all came together!
Two VERY important questions:
1. Does your wooden spoon have a smiley face on it?
2. Does the storage jar keep your coffee fresh? I need a better (read: prettier) solution to the bags coffee is sold in!
Kitchen looks amazing!
Yes, very important indeed!
1. It does! For the life of me, I can’t remember the website/vendor where we got it, but we picked it up locally at the Randolph Flea Market where they had a booth set up. Does anyone local know?!
2. It does not have a rubber gasket around the lid, so I think that if you’re a sow coffee drinker, it has the potential to go stale. We love the jar though (Heritage Hill jar from Crate & Barrel), and we drink coffee very fast. Apparently we love our vices. (wine, anyone?) We’ve had it for a few months now, and even when we grind up a whole bag of nice beans and pour it in, it’s good to the last drop!
One more question: which La Crema Pinot Noir was it? I looked on their site and there are a lot!
Ah, just checked – it was the Monterey 2012!
OK – the kitchen is absolutely gorgeous (love the colors and the flow!) but I literally laughed out loud with glee when I got to the food station for the puppies. Those paintings are absolutely fantastic and just MAKE that corner. :)
Congrats!!!
This is absolutely incredible, Kim and Scott!! Those 8 months were worth it for this payoff! It gives me such encouragement as we are starting our kitchen remodel!
The kitchen looks amazing! Quick question for you on CC’s stylish collar – where did you guys find it?
Dublin Dog! Jack used to have one in blue/green, and it held up for YEARS before it was munched on at doggy day care by another pup. You can find it here: http://www.dublindog.com/collars/ecolucks/ivy-league
They’re on sale! Highly recommend.
Thanks so much!!! Ours (Penny) has one but it’s changed colors from light pink to brown – she needs something more girly. :)
LOVE LOVE LOVE. So pretty and clean and bright. I am so glad white appliances are back. I’m getting pretty bored with stainless everything.
Okay, I know you’re done, but wouldn’t stained glass in that transom look amazing? Just bring some color and warmth to that wall, and the sun would shine it right on to your island? I can’t stop picturing it.
White appliances #ftw, right?!
Looks beautiful. Where are those leather liquor decanter labels from? So cute!
They were a DIY! https://pinholepress.com/community/30-minute-remake-diy-leather-decanter-tags/
Beautiful! Where did you get those awesome booze bottles with the cute little pink labels?
Decanters were found on Ebay or flea markets, and the tags were a DIY! https://pinholepress.com/community/30-minute-remake-diy-leather-decanter-tags/
What a beautiful space!
you guys are amazing! It looks absolutely fantastic! I covet your natural light and all the artwork. Excellent job friends – you deserved that bottle of wine…and probably what used to be a full bottle of bourbon…it’s looking a little low :-)
Hmm, the booze in our home seems to disappear quickly! Must be the elves.
SOOOOOO good! Are you planning to do a budget breakdown? :-)
Oh, Amanda! Our budget philosophy is always, ‘what can we save by DIY, and how can we do this as little as possible without sacrificing quality?’ It has been so long, but I can absolutely let you know a few of the larger priced items:
Appliances = $2,500
Cabinets (refacing and new) = $5,000
Quartzite counters (slab + install) = $4,000
Moving electric, gas, patching drywall, pocket door install = $3,000
Sliding door + transom = $5-6,000 (provided by Pella)
Sliding door install = $3,000
All said and done and over the course of almost a year (going back to when we slowly started buying appliances), I can realistically say that this huge overhaul cost us around $18,000. That said, we also collaborated with some amazing, wonderful companies that allowed us to stretch our dollars a bit more. We do not take that position lightly, and we owe a tremendous amount of gratitude towards everyone who reads up on our adventures!
I sincerely hope this helps a bit. :)
i think the stove/refrigerator wall is such a huge improvement over the ‘before’. the cabinetry and appliances fills out that nook and really helps hide your furnace closet. that and your gorgeous little hutch make the need to work around your furnace a non issue! of course all the rest is lovely too, but that before/after shot of that view was a standout to me. great job on everything including the waiting!
p.s. i like the island turned around with blue! stools towards the wet wall…
Thank you! All those things you mentioned were the hope and goal. And yes to the island! Those blue stools were a game changer. So vibrant when the sun streams in.
Just beautiful!! I LOVE the rug and all the hits of color scattered around. Y’all have been so helpful in our own DIY adventures. Seriously, we have used your guidance for a ton of things in our own home. Great job!!
I love it! Where did you hide this room’s construction picture?
You have a great memory!! There isn’t one – yet. I should tuck one of the pocket door demolition by the door, perhaps?!
Hooray! Gorgeous. The pictures are a bit deceiving, though–it is hard to believe you had that much room over by the fridge–not only for the stove, but also for a pull out pantry!
I’d love to see a tutorial for the dog bowl station. I love how it is up off the floor. We should do something like that for our fur baby.
It’s true, there really is a ton of room along that side of the kitchen! We even have empty cabinets, which is a really glorious feeling.
I did take photos of the process, and we’ll share the tutorial for sure!
Congratulations to you both, you’ve created something beautiful.
Everything is STUNNING!!! I love, love, love how much artwork you have hanging in the space! And those rugs! And that door! And those pups! Everything is so perfect :)
Guys!!! It looks so amazing! Of course I love everything. The slider is perfect in black and all the gorgeous art adds the perfect personal touch. Congrats.
Wow what a gorgeous space! May I ask where you sourced your countertops? We are about to switch out our counters, and white quartzite is top of my wish list!
We picked our slab at MGSI: http://www.marble-granites.com/
They had a lot to choose from, and they were very patient with us as we looked at many of them and tagged our favorite!
All I can say is WOW!!! I LOVE your kitchen! I think it reveals your personality about each choises you done… I love how you have bring your room together. Great job!
Blessings
I cannot stop looking at the photos of your GORGEOUS kitchen. (Seriously, have looked at this post 3 times already). AMAZING job, you should be so proud of your hard work. I love the combo of the colours and accent pieces, it is utter perfection!!
Can I ask what the width of your kitchen is between the cabs, and the dimensions of the island?
Again, amazing job (now I am going to look at your pics again!)
Thank you so much, Emily! To answer your question: we have about 3′ on two sides of the island (between the island and stove, island and sink area), about 4′ by the hutch and a good 4-5′ to the sliding door. The island itself is 4.5’x2′(ish).
Thanks so much for the information! We too, have an old house (1924) and the kitchen is not the modern-day open layout and we’re trying to work within it. I would love a little island space and your feedback is incredibly useful.
I’ll be back about 50 more times to drool over your photots :)
Cheers!
Amazing! Like everything you do, it’s immaculate and stunning, but this kitchen really is a show stopper.
Where is the demo/before/construction photo going like you’ve had in the other rooms?
Ha! Bethany commented on this too! You guys are good. We hadn’t included one – yet! I’m thinking maybe the pocket door construction to hang by the door? It’s tough, because the kitchen construction wasn’t as insane as the other parts of the house, and I’m not sure if I have a good shot. I’ll need to dig through my photos for sure! :)
Please consider a post on the cabinet pull out shelves and what you did to improve the access/organization for use of the cabinets. I always learn something new from reading about your home rehab projects thanks so much for sharing.
I second this request! Would love to see your organization in the cabs.
Love the kitchen too. I love how it’s modern but not like every other kitchen out there. So much personality!!
Thanks, guys! Our cabinet organization isn’t that special, I promise! We do have a lot of extra cabinet space, because we purged, purged, purged at a yard sale this summer. (For example, we have a set of 12 glasses, about 6 wine glasses and 6 cocktail glasses. We purged anything else we didn’t use all the time, and we haven’t missed a thing!)
We also use cubbies/baskets to organize deeper drawers and you may have seen our under sink pull out organizer. GAME CHANGER!
Here are some links I meant to add that show the things we added to keep us organized:
https://yellowbrickhome.com/2015/02/10/the-cabinets-are-in/
https://yellowbrickhome.com/2015/02/24/kohler-in-the-kitchen/
Love the whole kitchen, and that you stayed true to the original space, but I had a real moment of nostalgia over the ice bucket, my mom had one just like it.
Scott’s mom has one too! We love it. So sweet.
I love how bright it is, with the added door and light and the bright white finishes. Love the counters of course, makes me miss our quartzite from our first house. Great job! All of the personal touches really add a final layer to the space :)
I love it! The all white with pops of color from the door and the island. The art is very cool, the donut piece is my favorite. And, the corner feeder for the dogs is so clever! The kitchen just looks amazing. And, the wine was a very good choice, my husband loves that one.
It’s definitely a new favorite for us now too!
What a treat it is seeing it all come together – you guys must be over the moon! I especially love the pops of color and personality, and it’s great to hear how things have been performing for you. Congrats!
You guys! It’s absolutely stunning! Congrats on finally crossing the finish line on this renovation :)
ZOMG YOU GUYS!!!! It looks amaaaaaazzzziiiing!!!!
Haha, thank you for always being our cheerleader, Jodi!
Congrats guys! This was a long, hard road but you both ended up at a beautiful destination. Kitchen looks amazing and all the finishing touches you added make me envious. So happy you have such an awesome space to enjoy now! Cheers!
Congrats! It looks awesome and was well worth the wait – ooh, that natural light! I love the mix of eclectic items with the clean sleek modern, and hooray for white appliances. We’re working on finishing our kitchen remodel and went all white for our appliances. They are so shiny, bright, and reflect the light so nicely. I too am looking forward to hanging art – thanks for such an inspirational post that encourages us to tackle the remaining items on our to do list and get to that art!
The art will be soooo satisfying!
Wow! This is absolutely beautiful! Every detail!! The black door, the artwork, stools, hardware, touches of wood, light… All of it! Congrats.
This is such a beautiful kitchen! Congrats! Do you have any advice for finding rugs like that on eBay?
Hmm, so what I do is: put Persian rug in the search, narrow the category by antiques and size, then I sort from low to high. I’ve found some great sellers that way!
You’re kitchen is absolutely stunning! I am amazed at your attention to details. As a dog owner, I’m so in love with the feeding station. Seriously, the best thing I’ve seen on the internet, dare I say ever!!!
So sweet! Thank you, Brandi!
[…] Have been following this renovation since the beginning, so happy to see the final reveal. […]
Your kitchen looks seriously good. What a great job you both did. Would love to have something like that!
Looks amazing!!
[…] Kitchen! Done! | Yellow Brick Home – KITCHEN SOURCES: Wall color: Intense White by Benjamin Moore // Cabinet color: Distant Gray by Benjamin Moore // Baseboard + Door Trim color: Ultra Pure White by … […]
[…] Kim and Scott remodeled their outdated kitchen and included a special corner for the pooches to dine in style – complete with art. (Door color is Benjamin Moore Swept Away). See the full remodel here. […]
Hi Kelly– Really lovely renovation. I want your black cabinet pulls. Would you mind sharing the brand? Thank you.
Hi Kris, they’re from Rejuvenation! All sources can be found in our Shop the House page here: https://yellowbrickhome.com/shop-our-house/
Hey Kim
I just found your site and I am in LOVE! We are hoping to put the same sliding door in our dining/kitchen area. Was there ever a post on how you painted the inside of the door?
Happy you found us! I didn’t share a post, but I very patiently and very carefully taped everything off once I decided when and where the black should stop (especially along the frame). It wasn’t a quick process, but 2-3 coats of exterior grade paint is still holding up really well! I used a short handled angle brush for tricky corners and a 4 (or maybe even 6)” foam roller for the wide, flat surfaces.
Hello, I was wondering if you were happy with the Samsung gas range? I was considering buying it, but read that the baking performance wasn’t great, and that Samsungs are prone to breaking and are expensive to fix.
Hi Jesse! We are really happy with the range. We haven’t had any issues with baking (everything is nice and even), and knock on wood – we haven’t had a reason to have anything get repaired. The ONLY issue we have with our Samsung appliances is that you have to push harder than normal on any of the buttons (like ‘timer’ or ‘start’ or something like that). I hope that helps you at least a little!
I love your kitchen and your home, drawing a lot of inspiration from it. You mentioned the painting of the door was hard, i’m wanting to do the same thing. Any suggestion/recommendations?
There was just a lot of taping off to get it JUST right, and it took several coats. I would recommend using an exterior grade paint finish and a good primer!
Your kitchen is beautiful. I love the counter. I will be re.odeling my kitchen soon and would like to know where you bought the window pocket door. Thank you, Sue
Hi Sue, we found that at an architectural salvage, here’s the story on that: https://yellowbrickhome.com/2015/01/06/the-pocket-door/
Home Depot and Lowe’s will be able to special order doors with windows if you don’t feel like going that route though. :)
[…] the future kitchen from the future pantry/laundry) might look something like this charming door from Yellow Brick Home’s kitchen… just two of them since the opening will be double wide like the one […]
[…] the future kitchen from the future pantry/laundry) might look something like this charming door from Yellow Brick Home’s kitchen… just two of them since the opening will be double wide like the one […]
[…] the future kitchen from the future pantry/laundry) might look something like this charming door from Yellow Brick Home’s kitchen… just two of them since the opening will be double wide like the one […]
[…] the future kitchen from the future pantry/laundry) might look something like this charming door from Yellow Brick Home’s kitchen… just two of them since the opening will be double wide like the one […]
[…] the future kitchen from the future pantry/laundry) might look something like this charming door from Yellow Brick Home’s kitchen… just two of them since the opening will be double wide like the one […]
[…] the future kitchen from the future pantry/laundry) might look something like this charming door from Yellow Brick Home’s kitchen… just two of them since the opening will be double wide like the one […]
[…] the future kitchen from the future pantry/laundry) might look something like this charming door from Yellow Brick Home’s kitchen… just two of them since the opening will be double wide like the one […]
Your kitchen is beautiful! I am especially interested in what you used for molding at the top of your cabinets. I would like something clean lined like yours-rather than the traditional crown moulding. Could you share what it is?
We just used simple 1 x 4s (or 1 x 3s?) and painted them to match the cabinets! Nice and clean.