

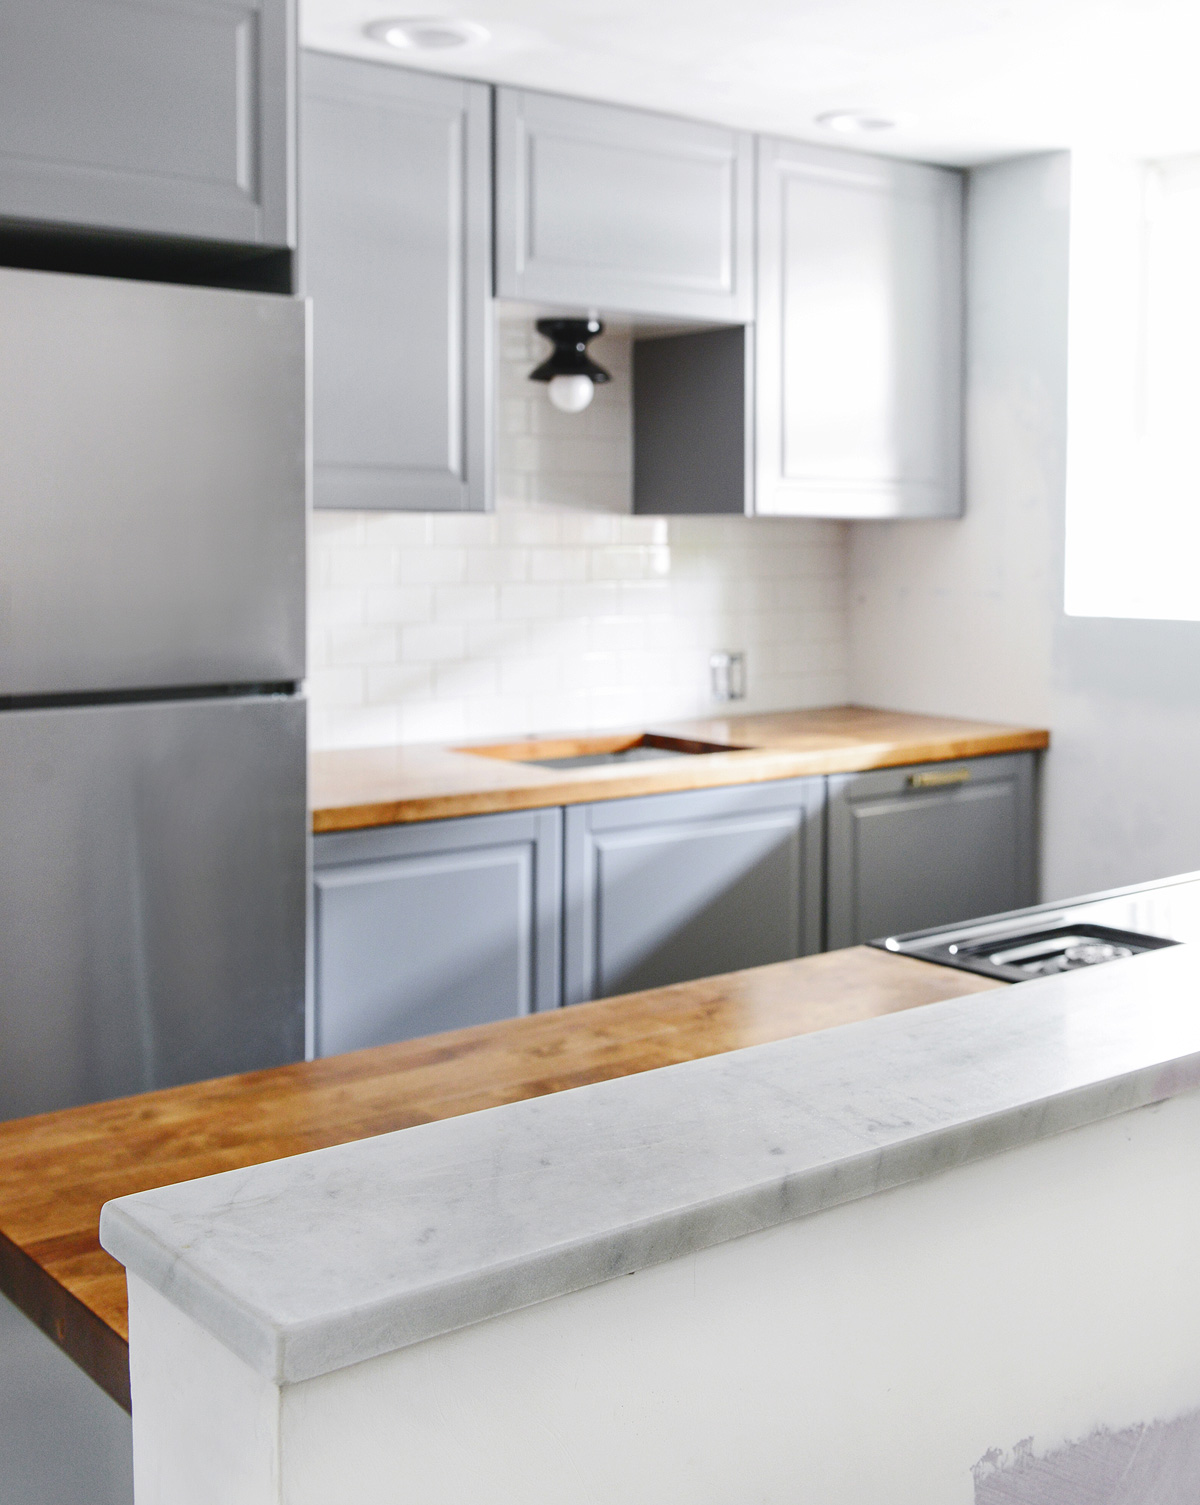
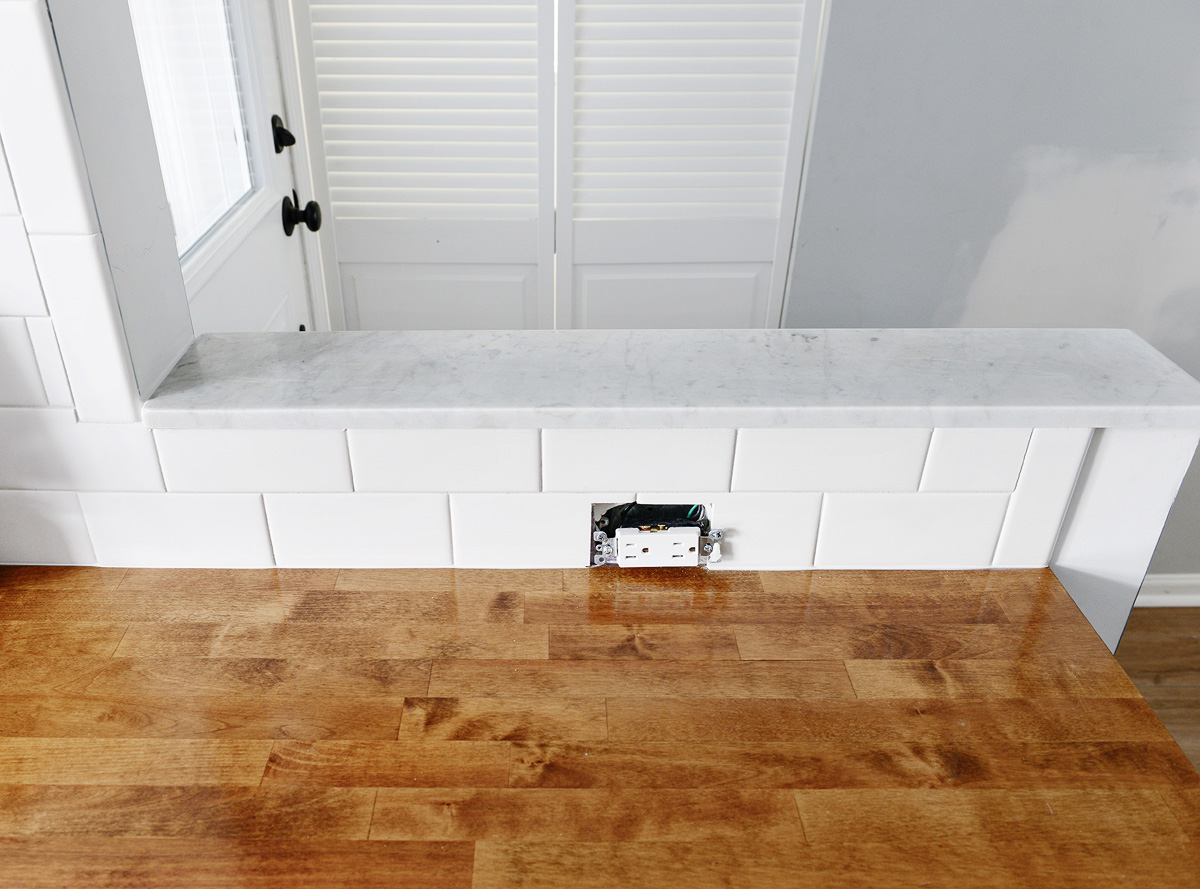
As we’ve been chugging along on the garden’s kitchen remodel, we’ve been receiving questions on that little half wall – what’s going to go there? And it’s not just you; as our friends pop down to see the progress, they ask the same thing! It could be simply painted the same color as the walls, sure, but those corners are sharp, and we imagine that our future tenant might use it as extra prep space, a spot to toss loose change and keys or a place to rest their morning coffee.
For a hot second, we considered the same butcher block we used on the counters, but we didn’t love the 1 1/2″ thickness for this application. Instead, we had another idea up our sleeves – marble!
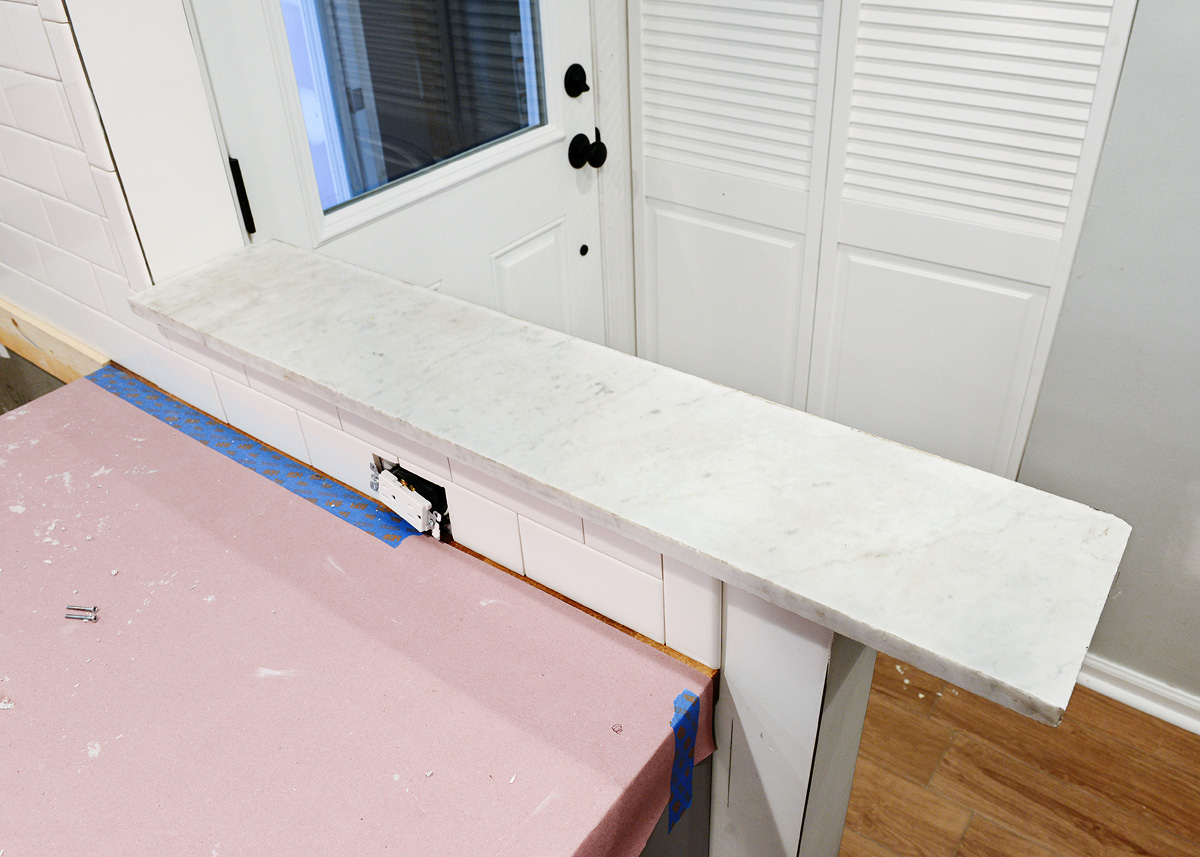
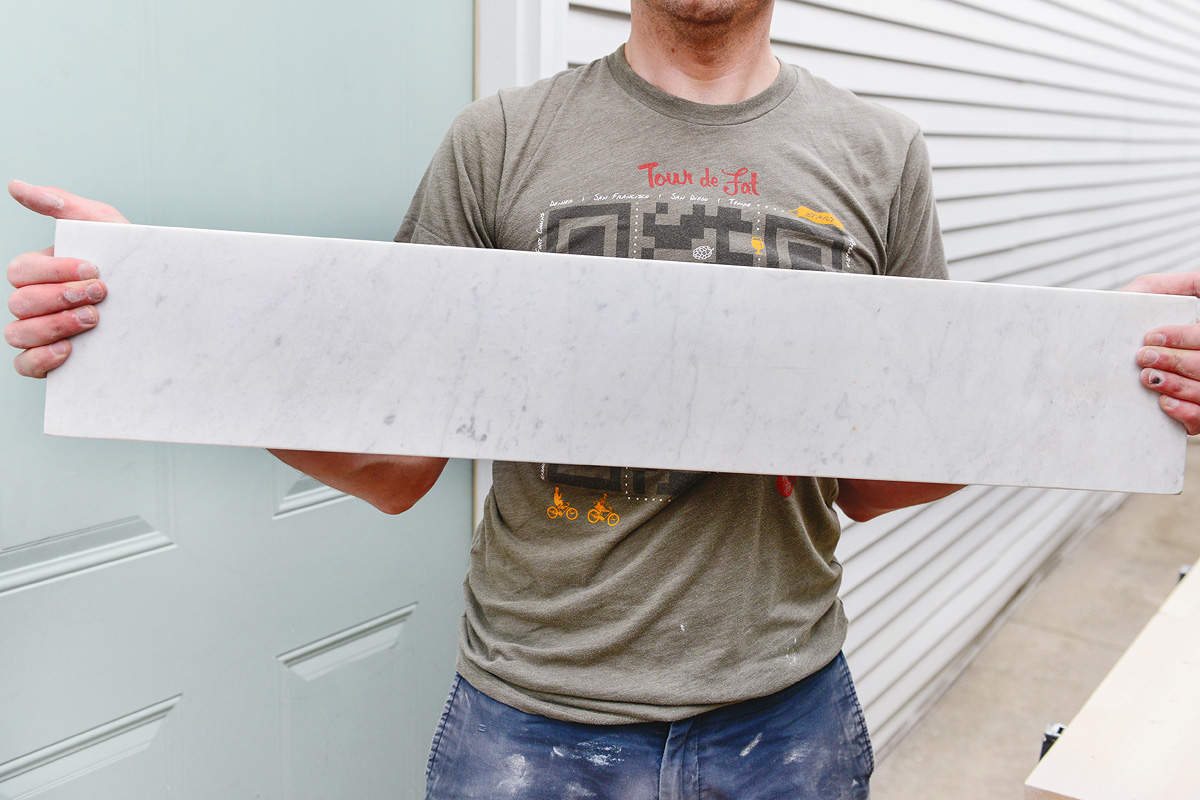
A few months ago, we found what we think is an old window sill at a local architectural salvage warehouse (Rebuilding Exchange for our Chicago friends!), but get this, for free. The shop was purging old sills and countertop remnants, and although we had no idea what we’d do with it at the time, we couldn’t pass it up.
For a rental, you might think we’re nuts, right? But marble is one of those stones that we think only looks better with age (similar to our feelings on brass), and the more it patinas, the more handsome it appears. That seems to be the name of the game in the garden, and we’ve given a lot of thought to the materials we’re landing on. Just like our butcher block counters, it may be a gamble, but similarly, it’s a stone that can be salvaged over and over again with a little buffing and sanding – and we were about to dive into our first attempt!
While beautiful as-is, it was obviously the wrong size, and there were a few minor repairs we wanted to tackle before setting it in place, such as chips along the edge and slight discoloration:

We decided to give it a good polishing, which was simultaneously nerve wracking and so, so satisfying. The goal wasn’t to make it sparkly and new, rather, we were aiming for a slightly honed finish, as a more dull finish will hide mishaps over the years a bit better.
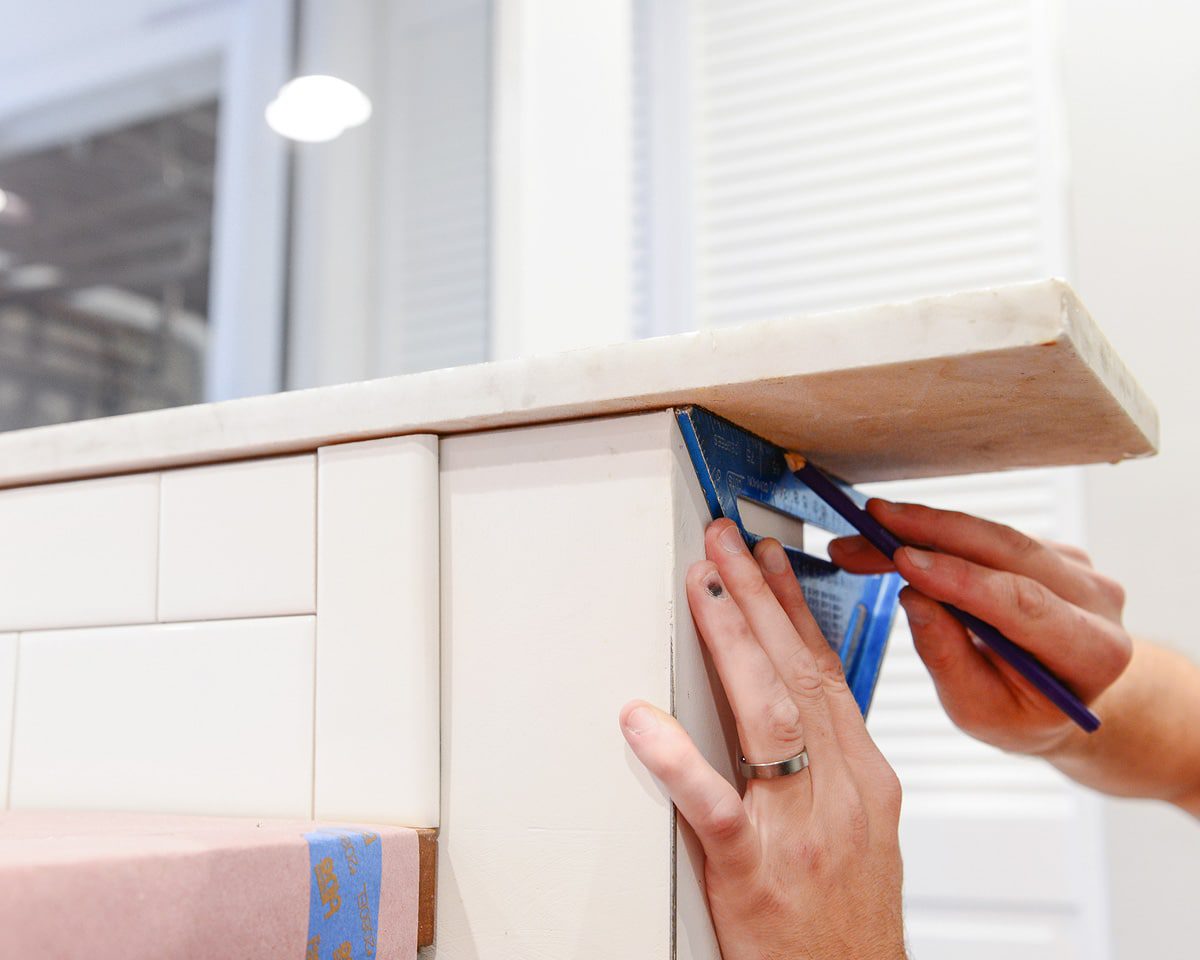
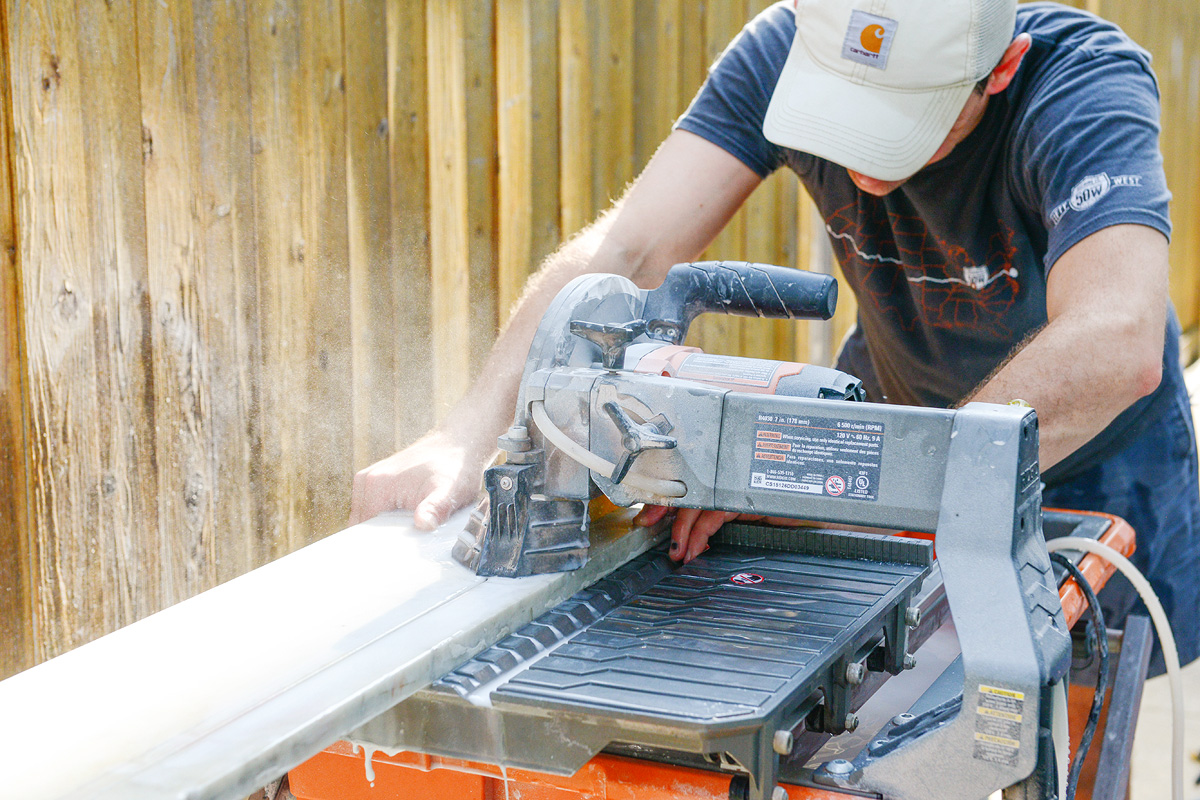
Since no wall in this house is perfectly straight, we traced our cuts in place, mostly eyeballing the placement and checking for level. We were competing with tile on one side of the wall and drywall on the other, so we split the difference and landed on an overhang of roughly 1/4″ overall.
You can see in the photos above that we had just finished tiling the backsplash, so while our wet saw was out, we made our marble cuts, too.
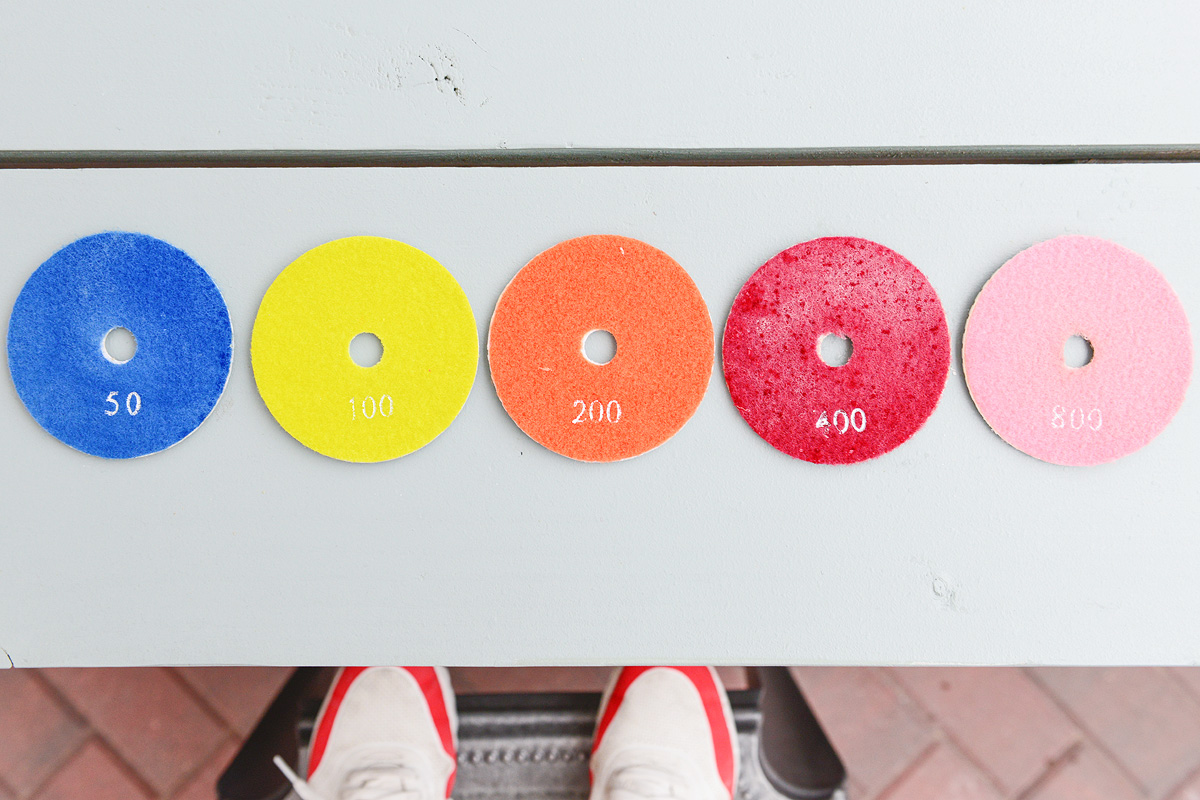
Next, it was time to polish! We purchased this kit of diamond pads for our angle grinder, which came with grits ranging from 50 to 10,000 (I didn’t even know that was a thing!). The pads can be used wet or dry, and the advantage of using our angle grinder over, say, our orbital, is that the angle grinder can put out much higher RPMs. For our needs, we only used the pads ranging from 50-800 for the majority of the polishing, and Scott hit the marble quickly with the 1,500 grit for the final surface prep.

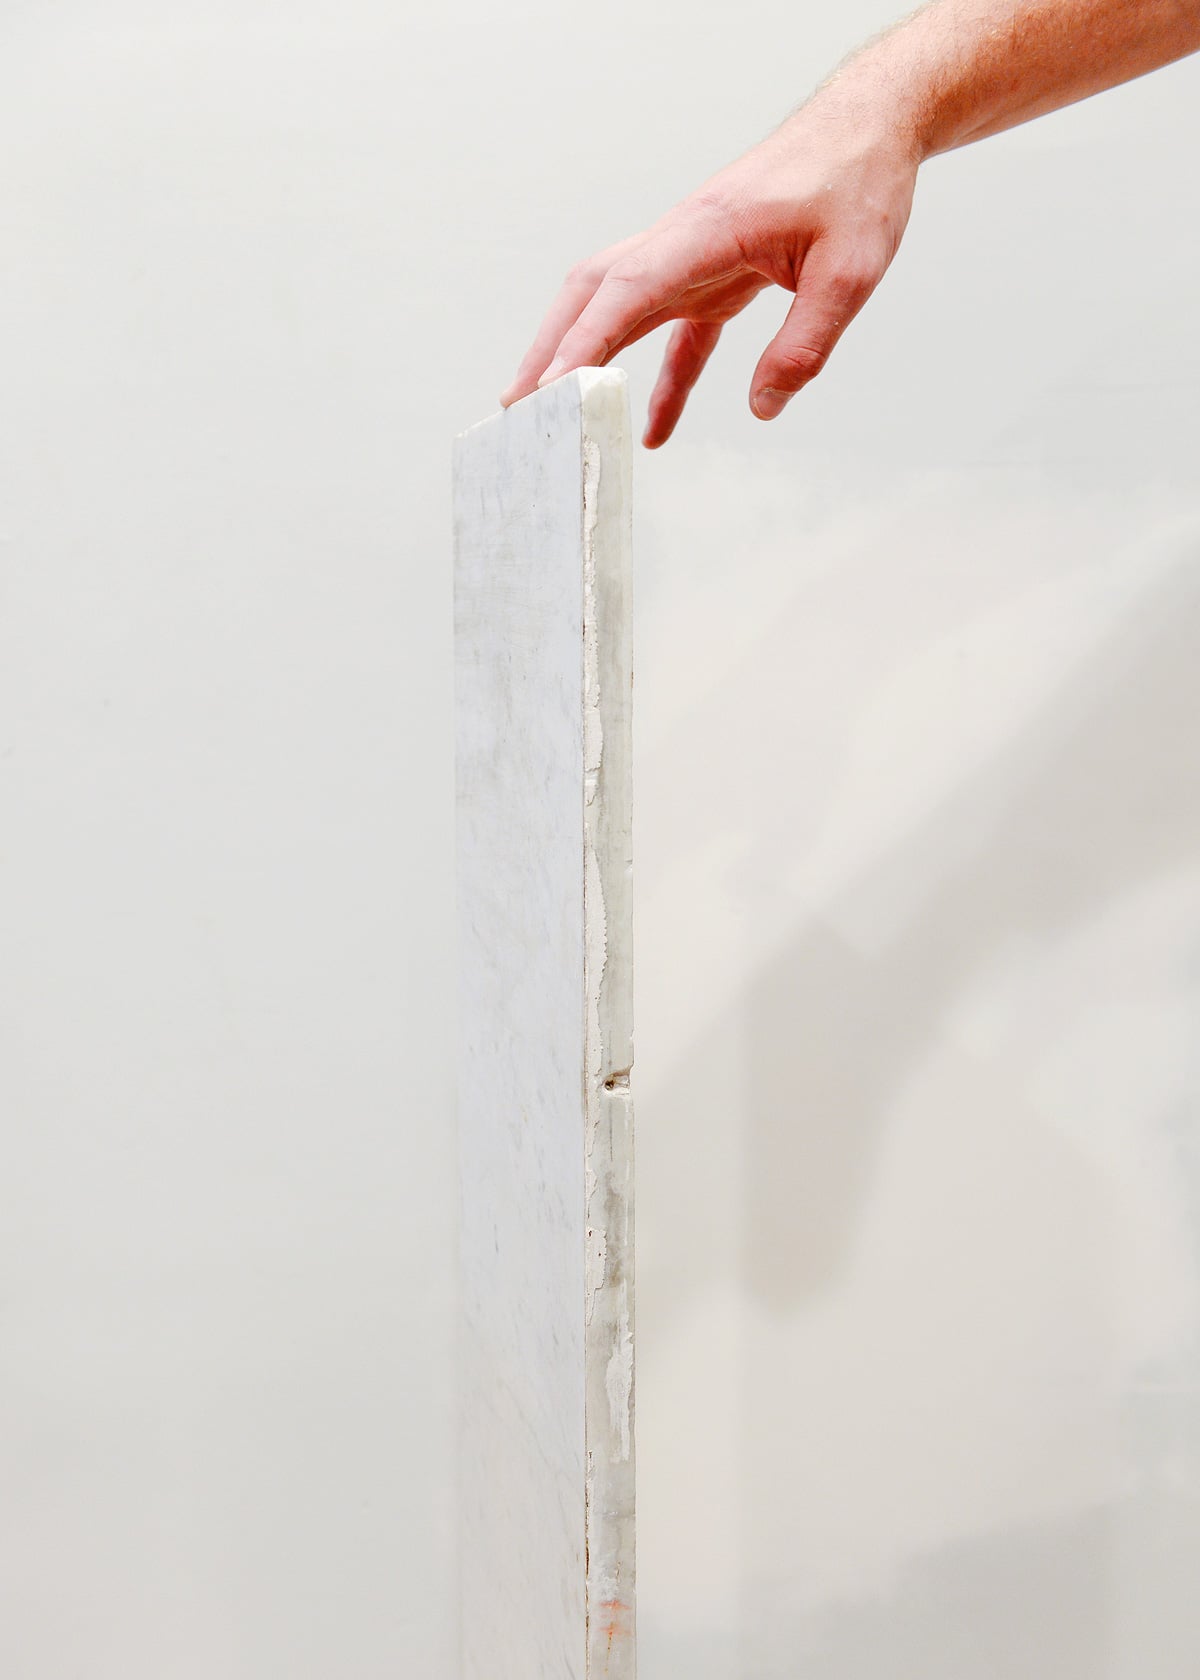
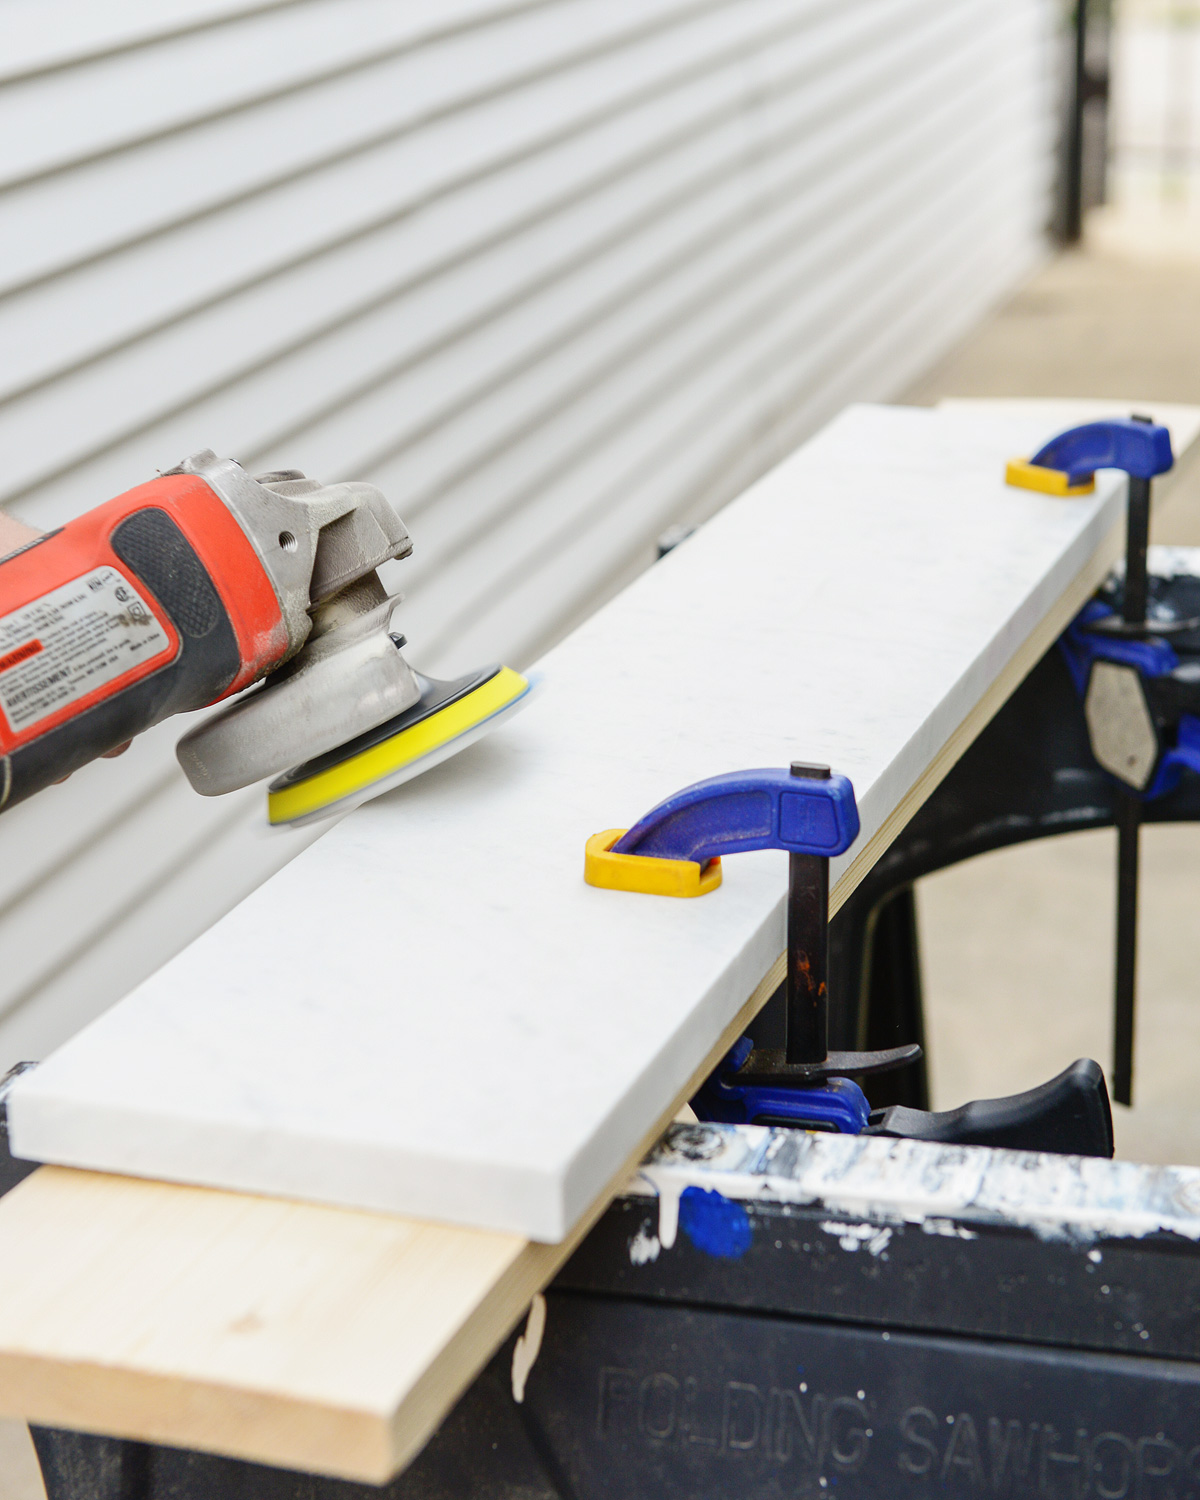
To get started, we set up the marble slab on saw horses, resting it on a length of scrap wood and securing it with clamps to support the middle. For the first pass with the grinder, Scott carefully eased all four edges:
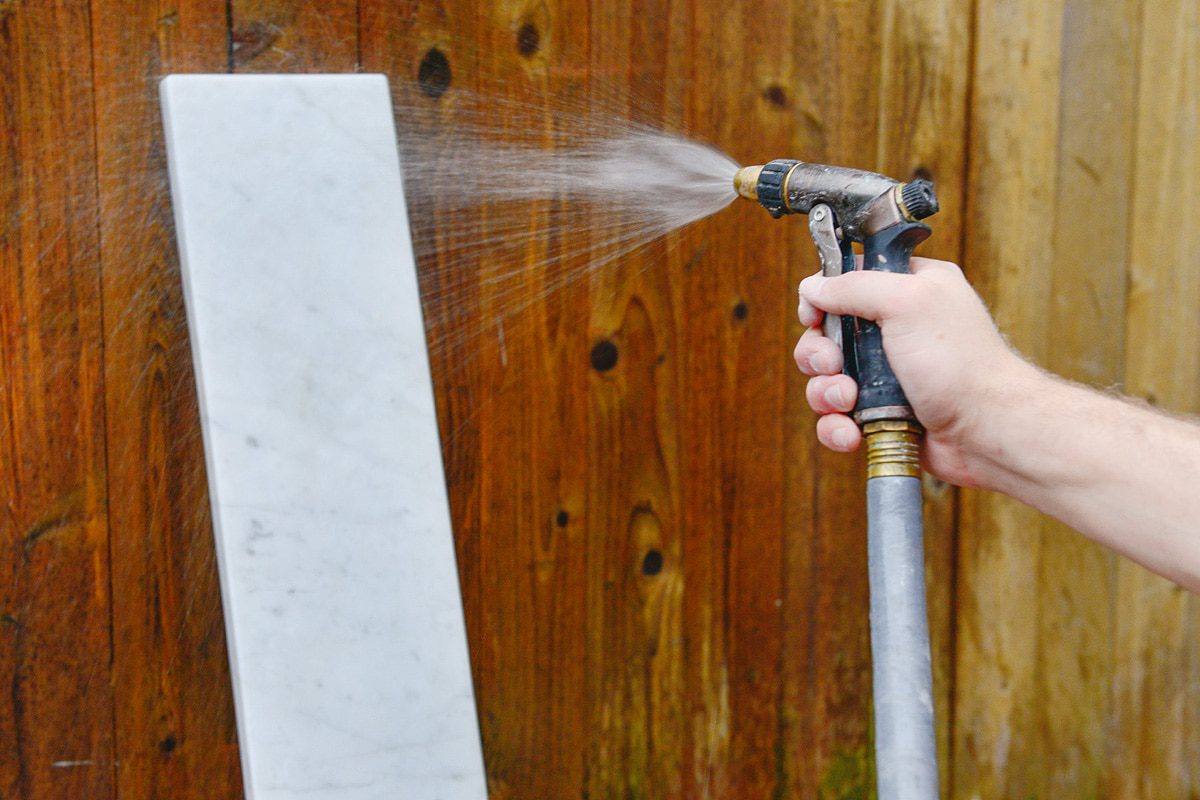
Next, we hosed off the slab to prep it for surface grinding. Each pad was used for about 1-3 minutes, and every now and then, I would lightly spray the surface for Scott to continue grinding. By keeping the stone slick, we were able to avoid burning the surface (which may have happened a few times – we learned quickly!).

The first pass of using the 50 grit pad immediately knocked down the discoloration, and we slowly worked our way up to 1500. With every step up to the next pad, the marble got smoother and shinier, so not wanting to get too glossy, we were careful to hose it off between pads to check on the progress.
Stopping at 1500 gave us a slightly honed, slightly satin finish, which we found to be our sweet spot. (Of course, the higher you go, the more polished it will become. I can only imagine that slowly stepping up to 10,000 will give the illusion of glass!)
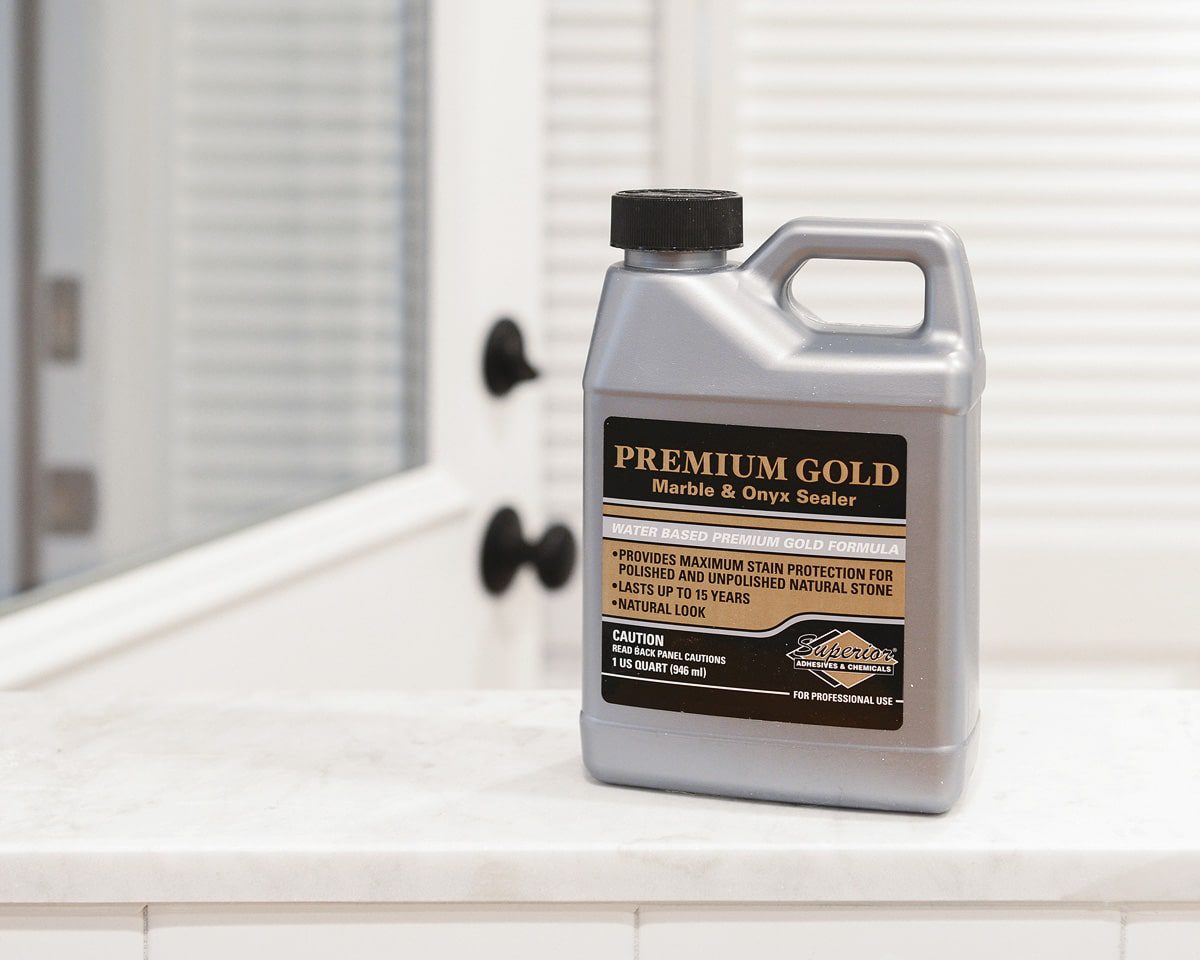
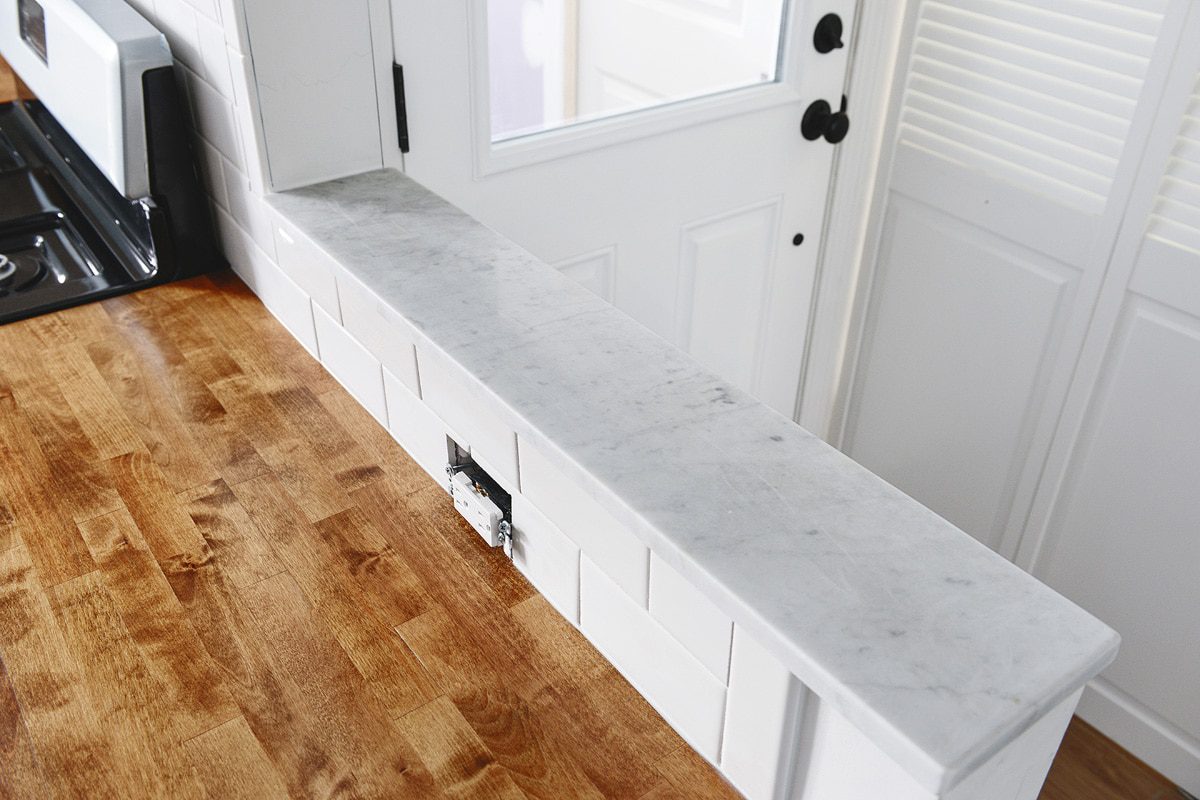
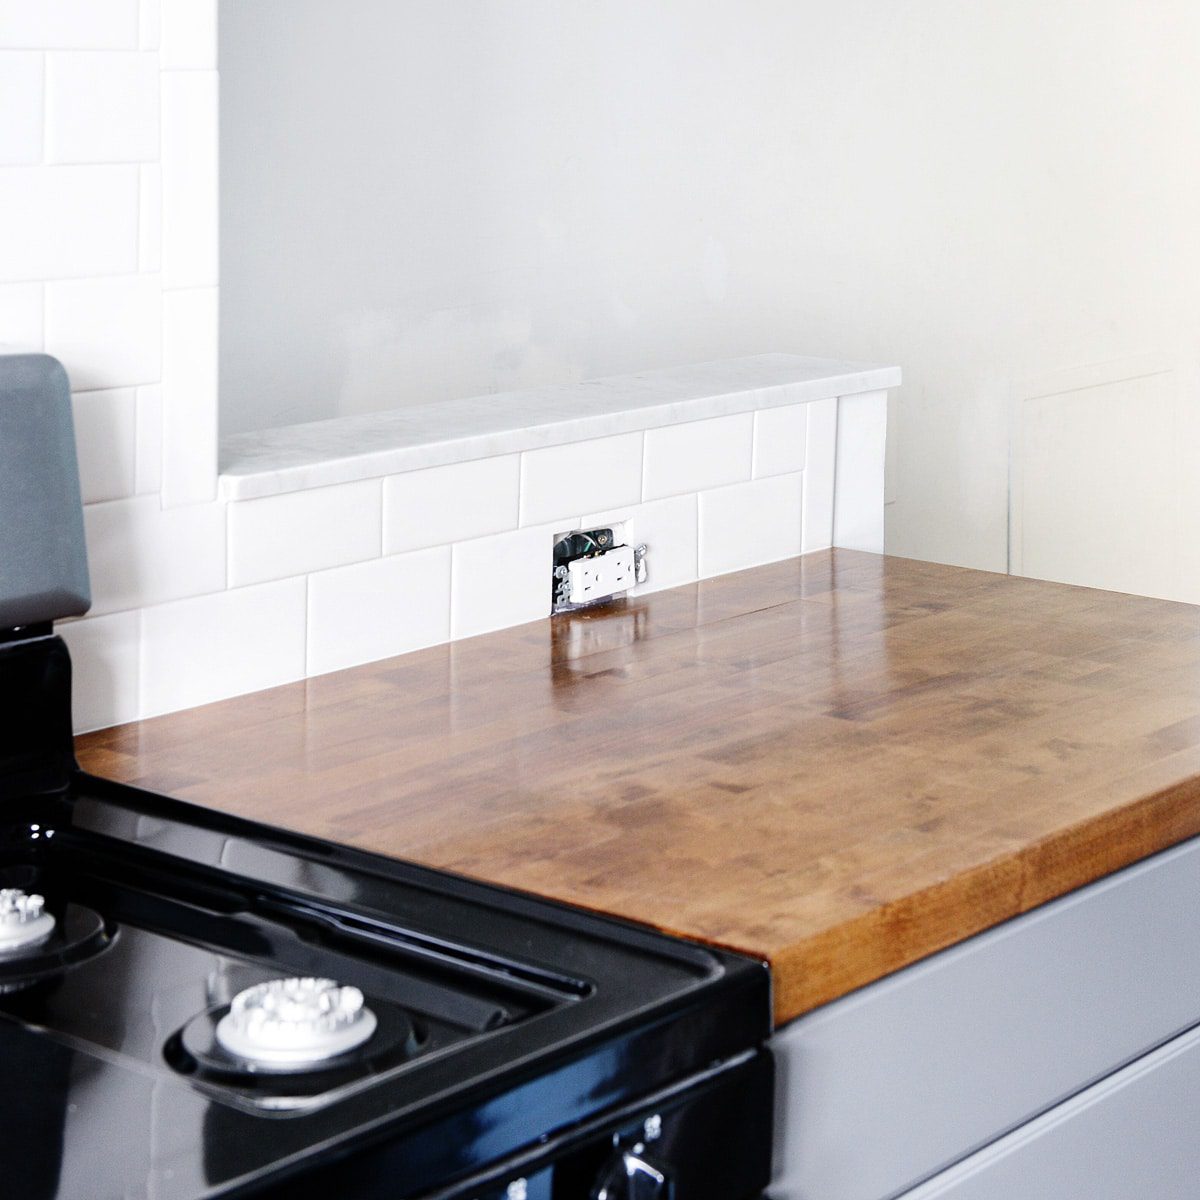
Finally, it was time to put it in place! We used construction adhesive to secure it to the half wall, and we allowed it to dry overnight with our tool bag placed on top – by far, that bag is heavier than a stack of the thickest books! The next day, I used this sealer from The Tile Shop (leftover from our marble entryway project) and applied two coats, following the instructions on the bottle.
And that was it! Before we began the project, we were both slightly fearful that we would risk damaging the marble, but as it turns out, marble is beautifully resilient. It only gave us more confidence in choosing this stone to cap that half wall, and we are tha-rilled with the results!
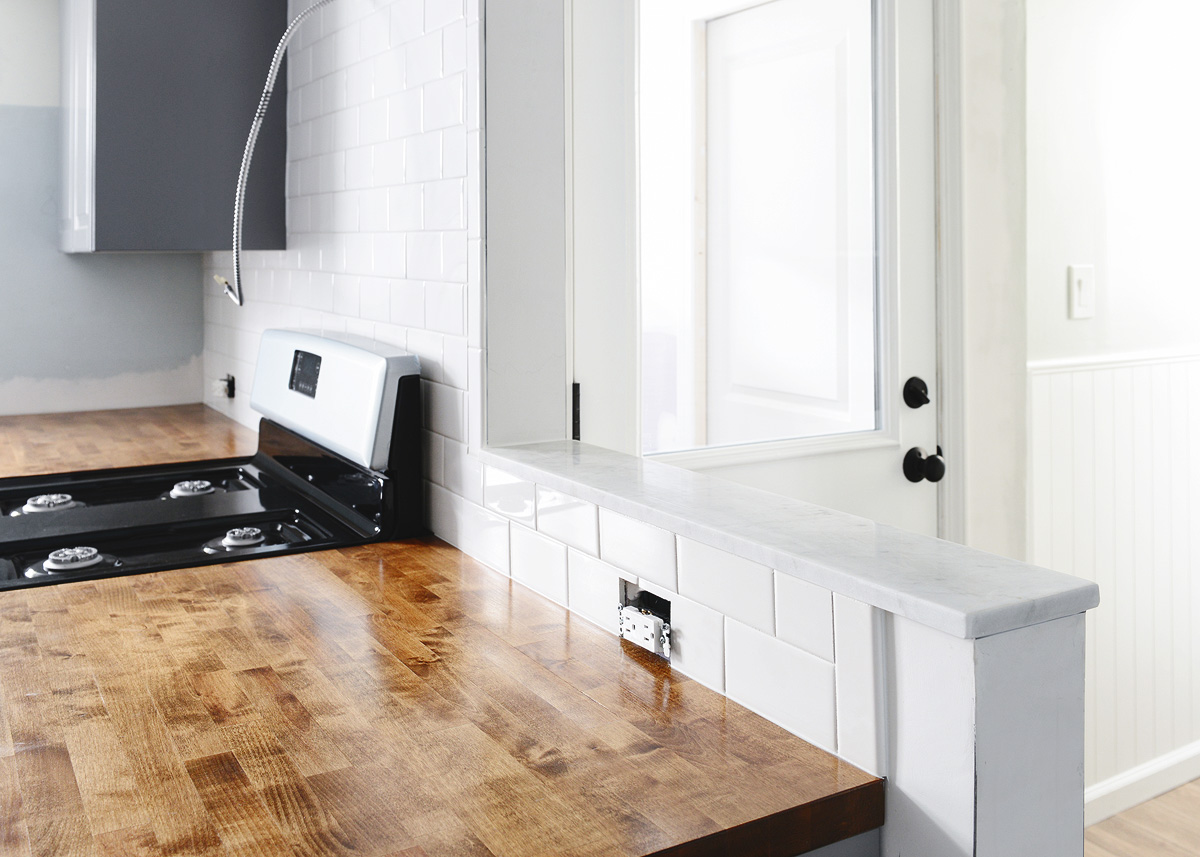
On a side note, can I just say that we are counting down the seconds until this place gets painted? It’s going to be transformative on a level that we can hardly wrap our heads around. Ignore the walls (and ceiling and trim), and instead, focus on this! Pretty marble!
Our entire to-do list finally fits on our dry erase board, and there are few things more satisfying than crossing another item off the list. This weekend? While Scott tidies up the kitchen plumbing and range hood, I’ll be focusing on the details – window frosting, cabinet hardware, spray painting light fixtures and scrubbing every last surface in preparation for paint.
We’re thisclose!


Oh, I love it! I’m a sucker for marble anyway, but I think it looks perfect right there!
This is awesome! Years ago, I bought a marble topped cabinet from a hotel resaler. It’s an awesome piece that I reconfigured to use an island (added wheels and a backer board (it used to house a fridge). But the marble could use help. It has some discoloration and a baaaaaad circle from a glass. I bet we could fix it up with this diamond kit!
I have a question – how much money are you putting into the garden apartment and how long do you think it will take to recoup the investment through increased rent?
You can totally save that marble top with this method!
Our budget for the garden apartment was always ‘as inexpensive and smart as possible, but done right.’ It’s sort of how we go about all of our renovations, but I’d say we’ve personally spent about $15k-ish. We’ve splurged on a few pieces and budgeted on a few others, just like most things in our home! You’ve seen that we’ve had some tremendous help and support from amazing sponsors, which have allowed us to go above and beyond the original scope we were planning on.
We weren’t charging nearly enough for rent for our former tenants, partially because they were friends and partially because the current state of the unit. Because of that, we feel pretty good that we’ll recoup the costs in the first year, year-and-a-half of rent, after which, it will be all profit. We’re just so happy that this unit has as much love poured into it as our home! After all, it’s ALL a part of our house!
So awesome! You have the luckiest tenants. I hope Scott was wearing mouth/eye/ear protection while sawing and sanding!
This is coming along so beautifully. I love the care and attention you’re putting into your future tenants’ home (and wish I’d found something like it when I lived in Chicago!)
I know this post is about the marble but I *really* love the butcher block counter tops!!
Thank you! I think the butcher block can really shine, now that the backsplash is tiled and the marble is in.
I love everything about this – i have tackled a bunch of diy but it would never have occurred to me that i could cut and polish granite! thank you for taking one more thing off the “i couldn’t do that!” list, and for inspiring us to reuse and renew stuff that might otherwise get thrown away.
Hi Kim,
I’ve been following your post and website for a long long time. Glad to see the kitchen is coming together! I saw the subway back splash was done already. Will you have a post to talk about that? I’m doing the same project right now, just can’t wait to see the blog?
Thanks,
Yiqing
We’ve written about it before, so we won’t be doing so this time! However, we have detailed posts right here from our own kitchen renovation:
Setting the tile: https://yellowbrickhome.com/2015/03/11/setting-the-backsplash/
Grouting and clean-up: https://yellowbrickhome.com/2015/03/17/checking-off-the-backsplash/
You can make both steps easier by using pre-mixed mortar/grout, which can easily be purchased at Lowe’s or Home Depot. Good luck!
What a beautiful and practical touch. It always make me laugh when people say marble doesn’t hold up, when I’ve walked on marble steps hundreds of years old in historic locations.
SO TRUE. Further proof it only looks better after hundreds (and hundreds!) of years – ha!
OOOMMMGGGG it looks so good!! I wish I lived in Chicago so I could rent this place! haha
That is such a smart little project and design choice! And you can’t beat a FREE slab of marble?!
What a beautiful detail! I’d want to run my hand across the top every time I came through the backdoor.
This is just beautiful! I’m curious why the half wall extends a few inches beyond the cabinet and back splash. Did you consider lining up the edge of the wall with those elements?
We debated this for a while, and after looking at a few inspiration, we liked the look of a 2-3″ return so that we could contrast the cabinet with the wall color. 100% personal preference on that choice. :)
I always think it’s nice too, to have a little return like that at the end of cabinets if someone wants to tuck a step stool or something along the side somewhere. (We have our mail sorter hanging on the end of a return like that, and it works perfectly).
That is really lovely Scott and Kim and it’s is so nice to be able to reuse something (anything) in a remodel.
Beautiful! I have been eyeing your backsplash tutorial and just need to pull the trigger on ordering tile. I see that you guys created a little trim on the free edge of the wall. I have 4 (!!!) spots in my kitchen where the backsplash is going to end in the middle of a wall (rather than at a corner), and I’ve been trying to find bullnose trim tile so I don’t have to make a border…but it’s impossible! I need several different kinds (bullnose on top and left side, bullnose on top and right side, bullnose on right side only, etc.). I know these tiles exist, but it feels like no one carries them! Home Depot has some on their website, but they are always sold out. I thought you guys might have some tips as to where to find? Or, confirm for me that they’re pretty tough to get and I should just suck it up and create a trim, even though I really was hoping to avoid it? THANKS!!
I hate to tell you, Kate, but it really would almost be easiest to create your own trim! We just used the bullnose tile to create our edging, and we had to get creative where it met up with the marble half wall. Once everything is grouted, I promise it’ll all look good!
Inspired by you,I found my own slab of marble to refinish! Is there another sealer you’d recommend and in a smaller quantity? The one you used is expensive.
Awesome, good luck!
Hmm… all the decent marble sealers I’m finding on Amazon are all coming out to around the $30 mark as well. I’d pop into a tile shop and maybe ask if they have any recommendations, and ask them what makes the sealer stand out above the rest. After all the hard work you’ve put in, you’re going to want to protect it!