

This post is sponsored by Lowe’s.
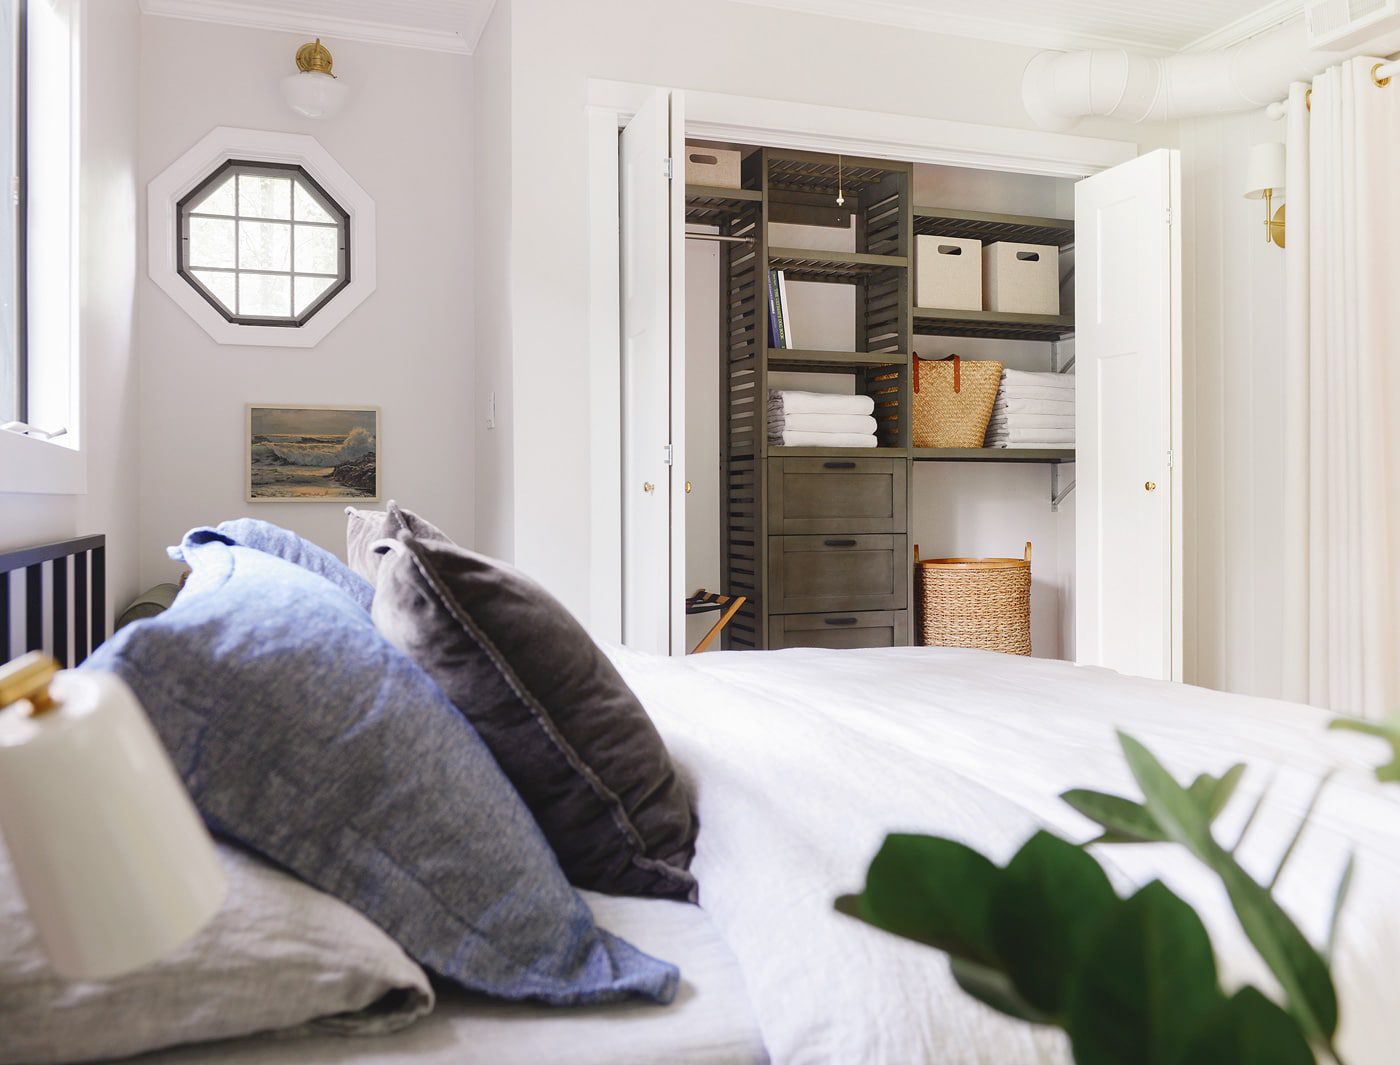
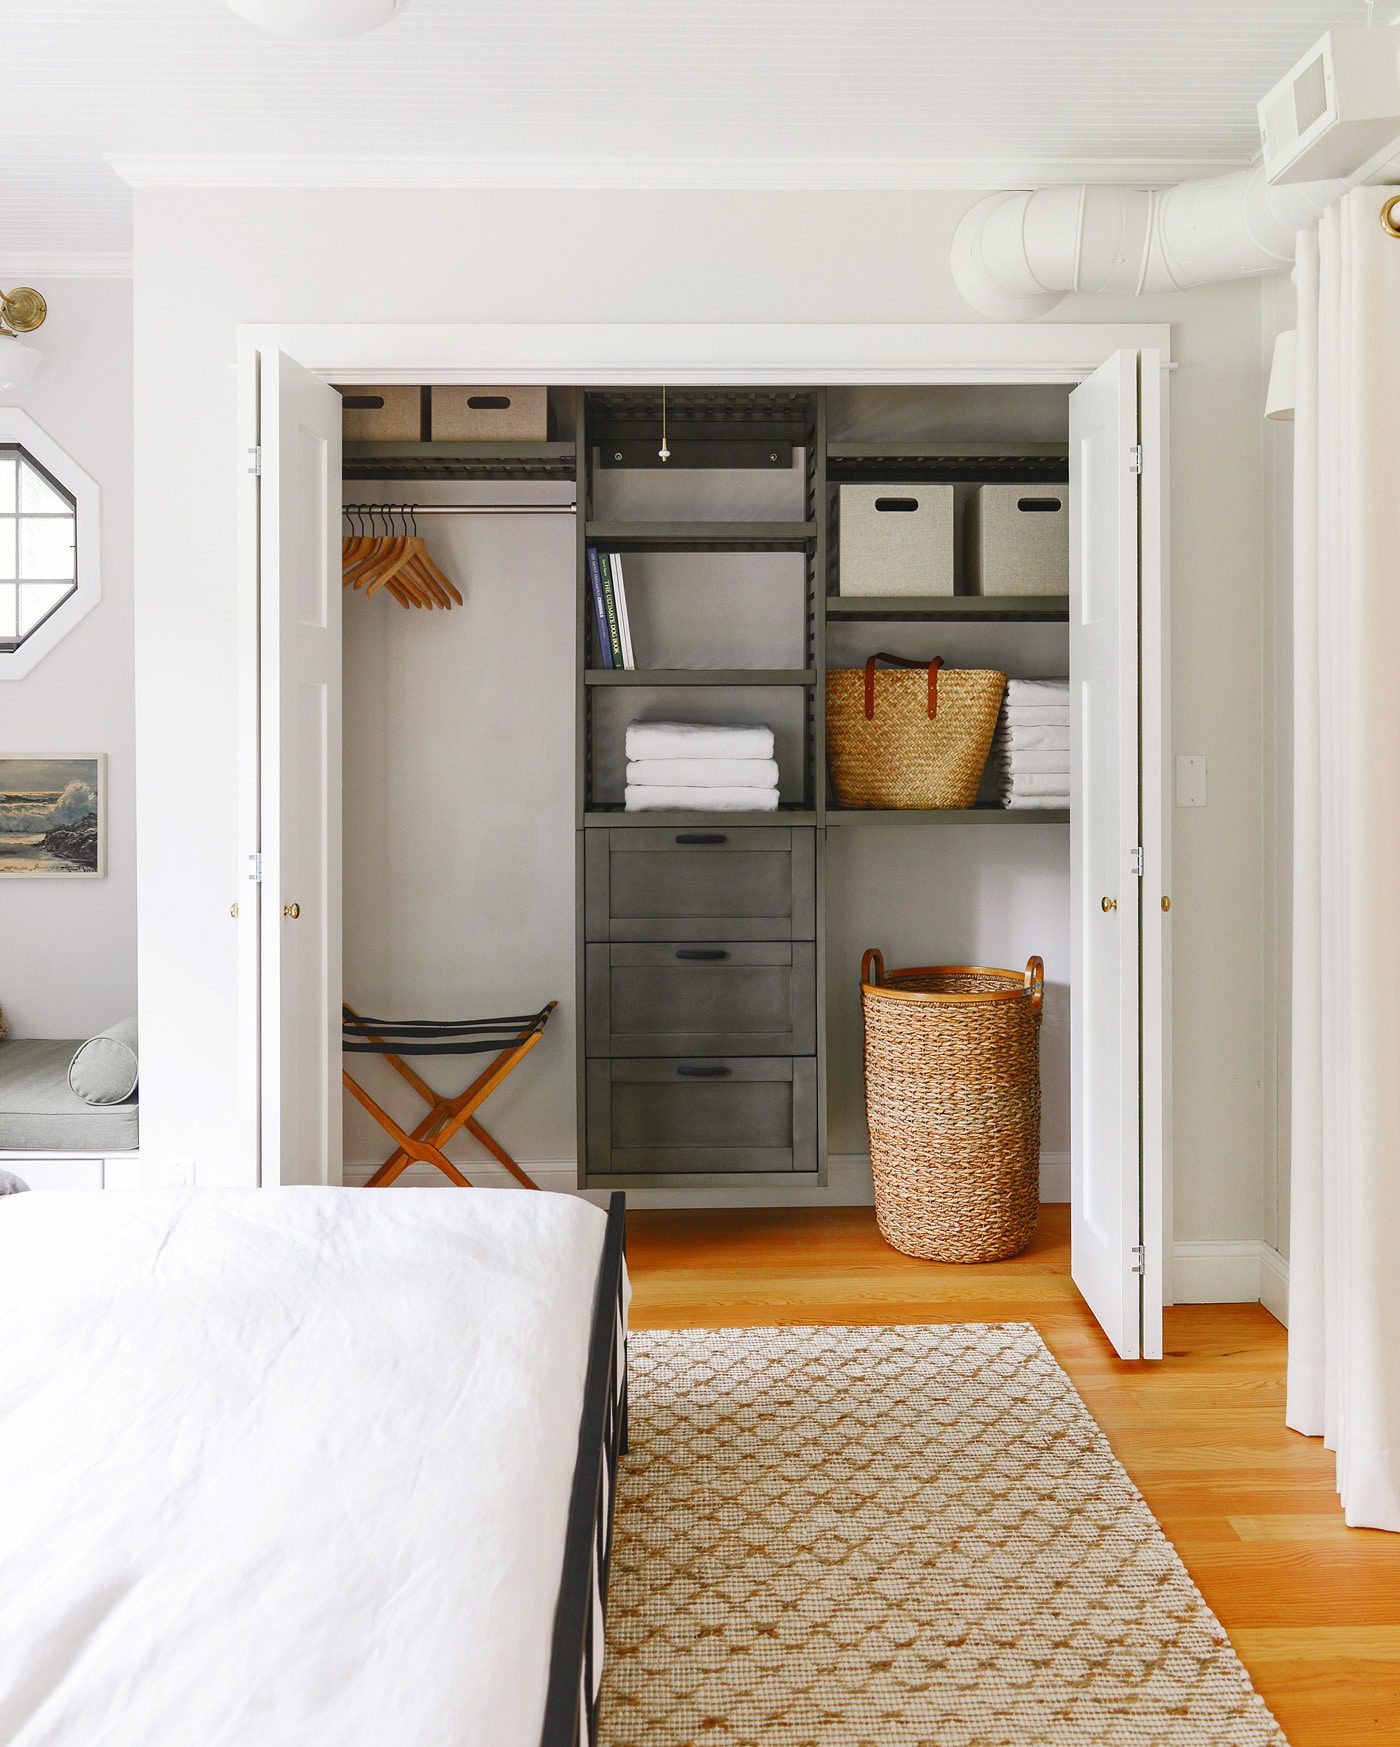
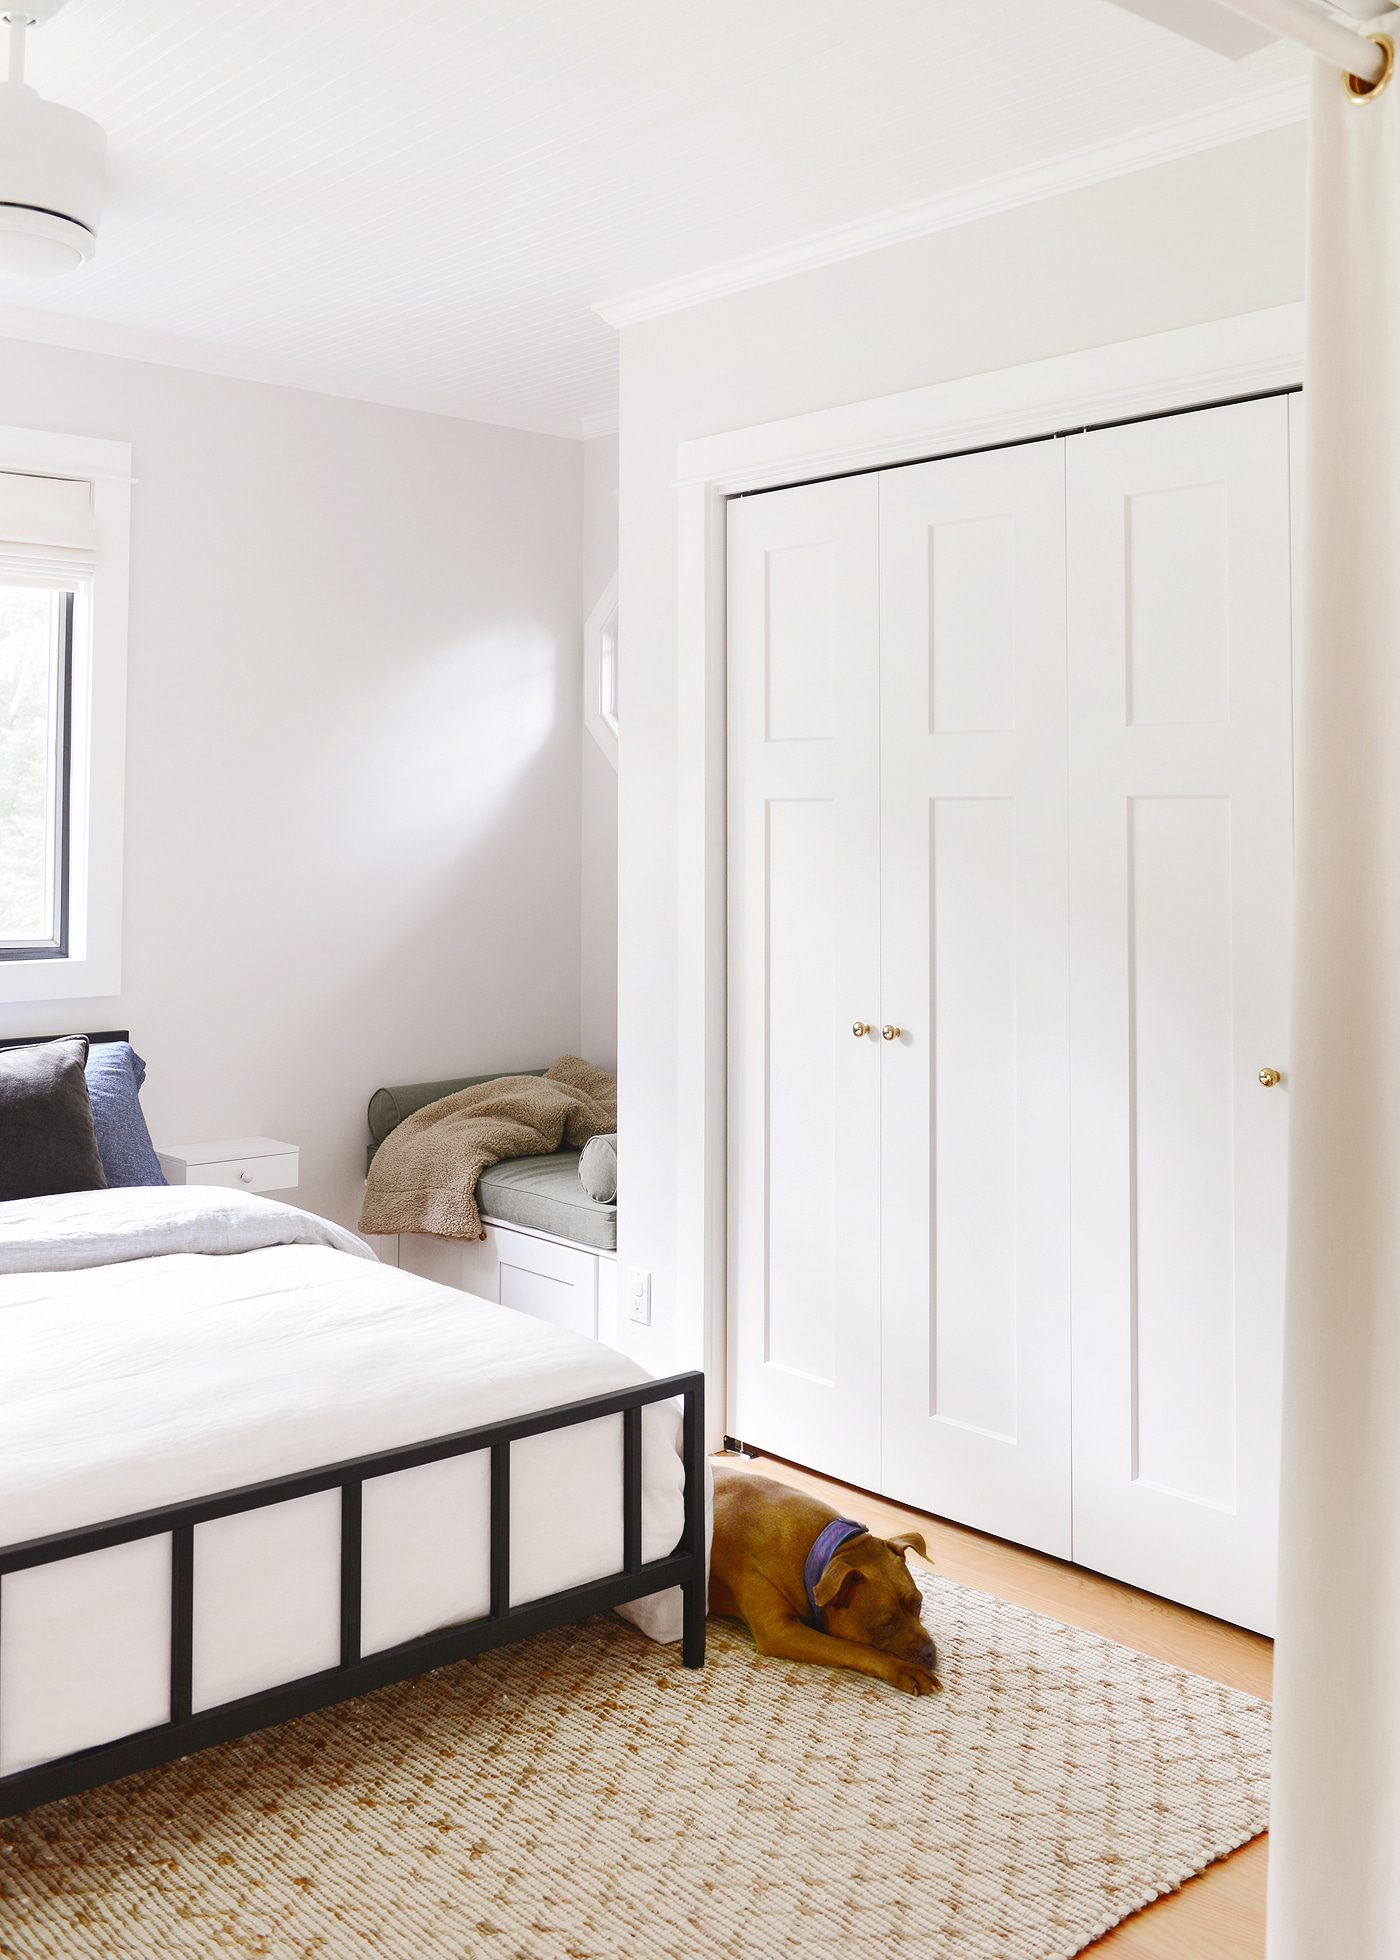
Our master bedroom closet at Tree House is a jack of all trades. Since other large scale storage space in the home is limited, it has to hold all the functionality of a coat closet, linen closet, and ‘hall’ closet in one space. Unlike a typical bedroom closet, the one thing this closet does not need to store is much clothing. Since we don’t live here full time and only pack a small suitcase when we make the trip, we don’t require too much traditional closet storage.
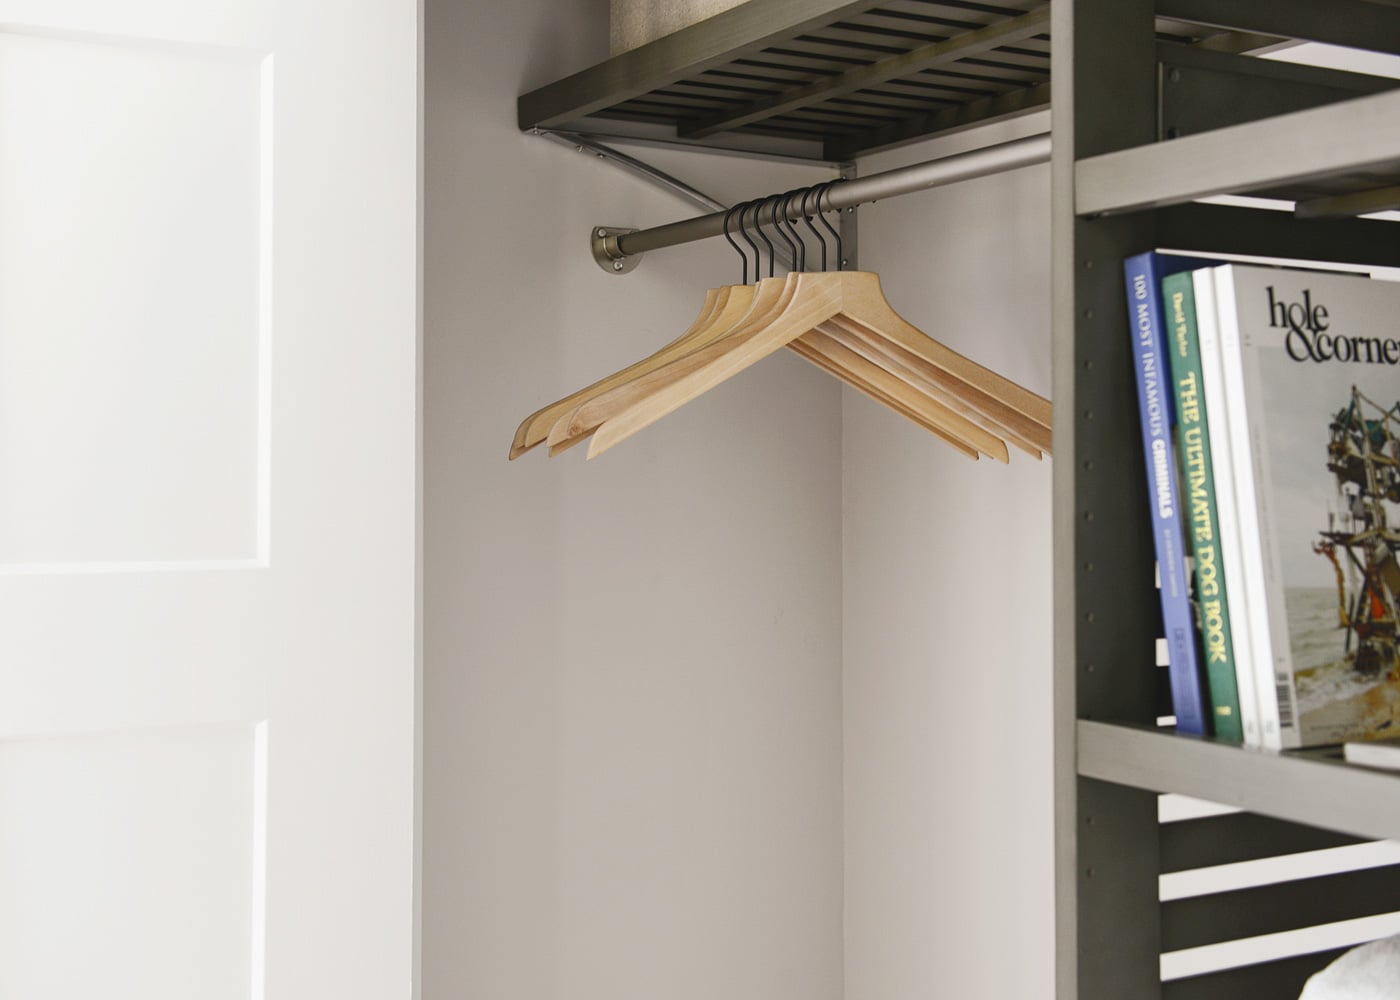
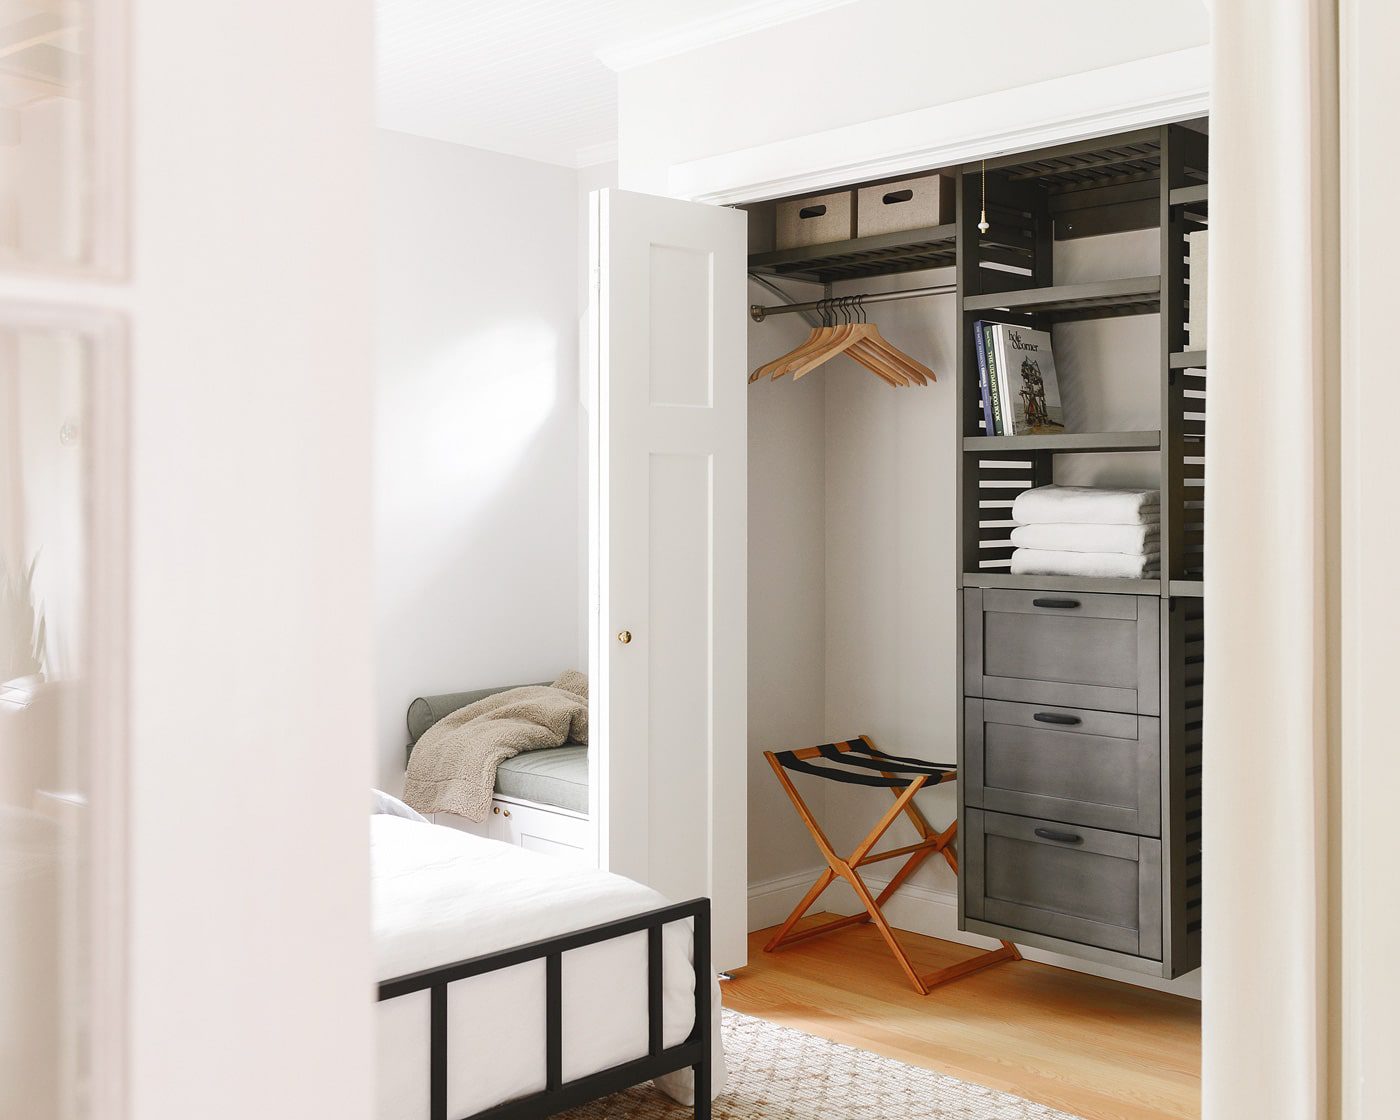
All that to say, when it came time to finally(!) give this closet an overhaul, our focus was on shelves and drawers that would be handy to store items like extra linens, towels, and beach blankets. Of course, we still wanted to maintain space for at least one clothing rod so we’d have a place to hang coats, dresses, button-ups or anything else one might unpack and hang when on vacation.
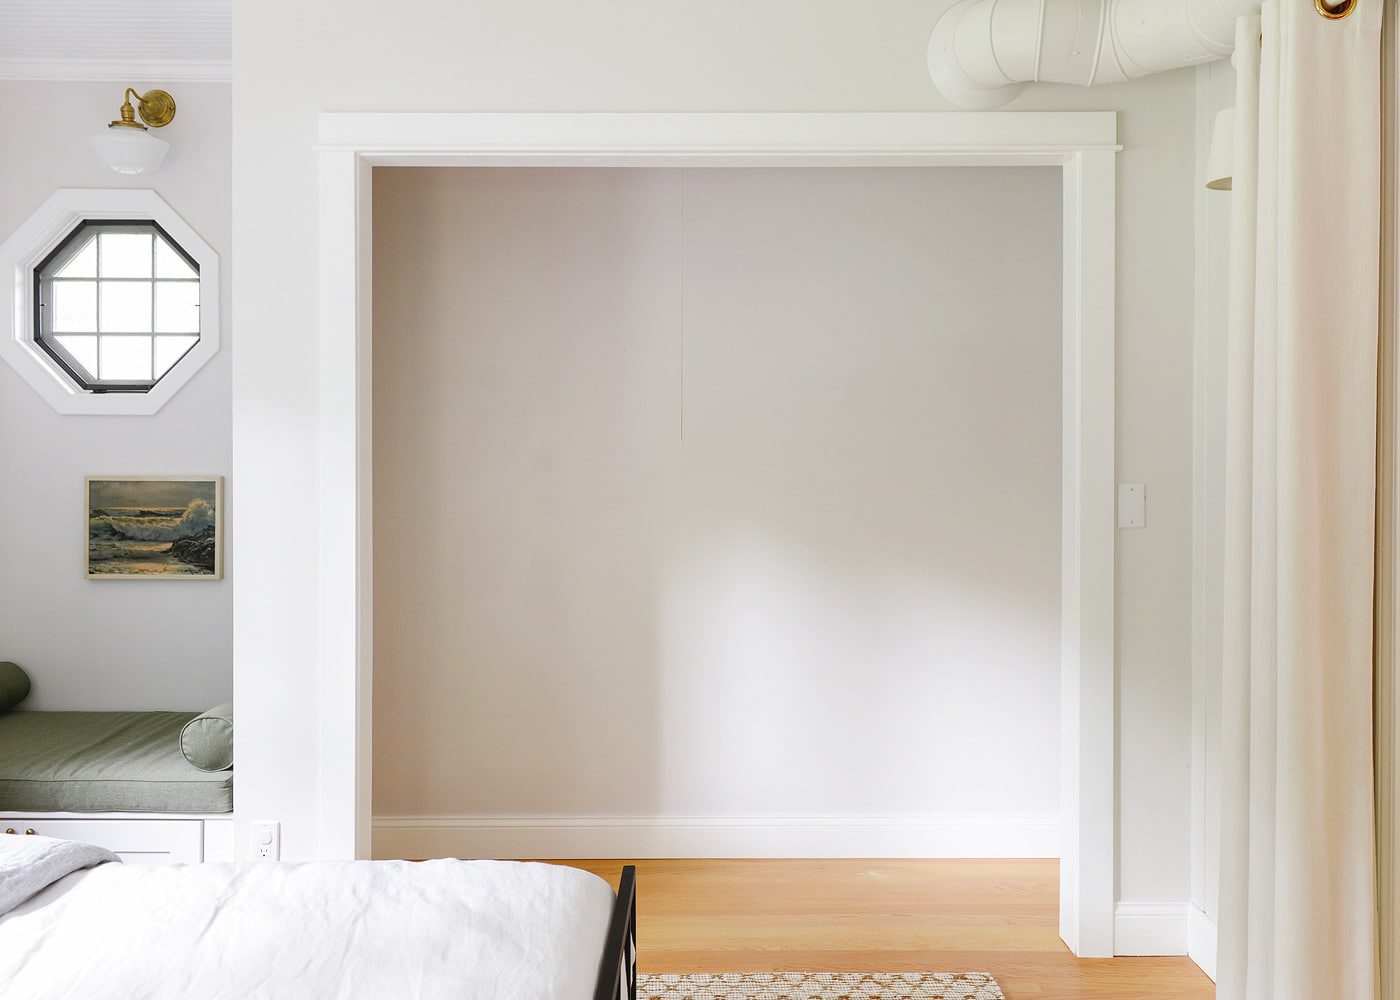
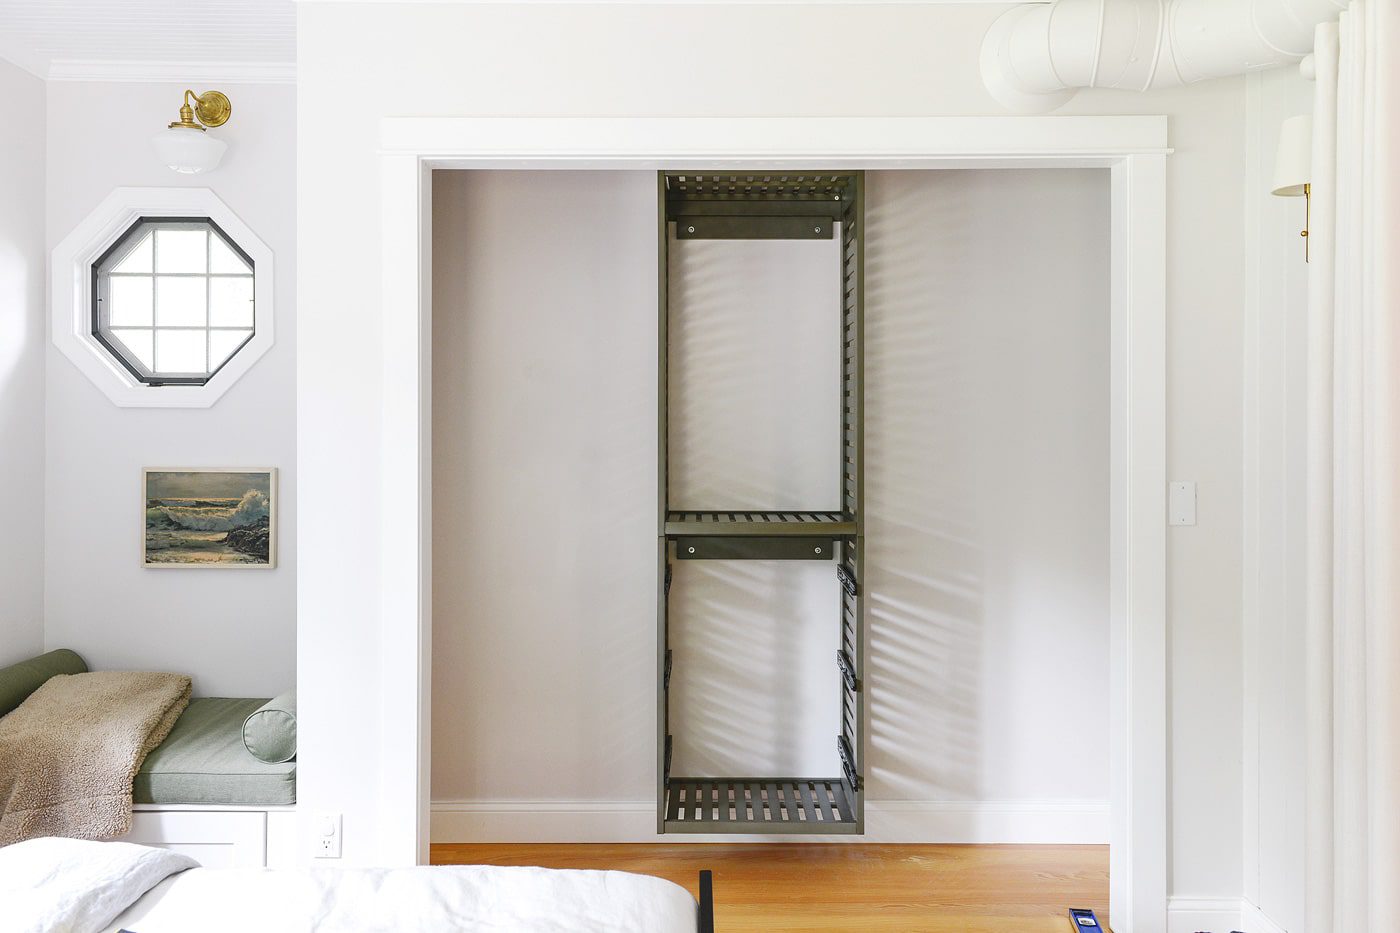
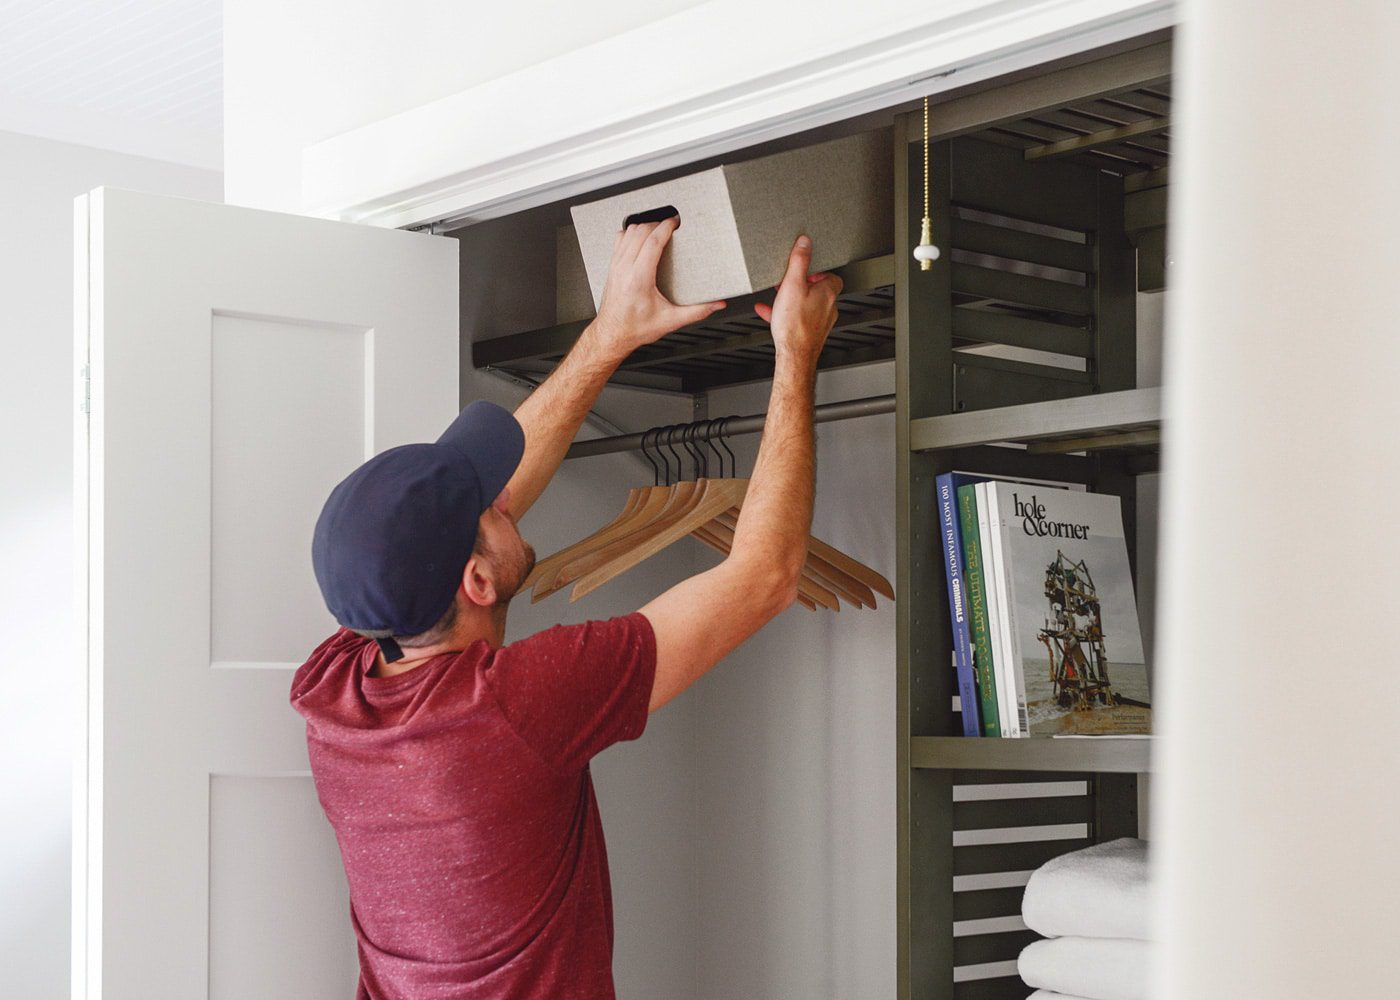
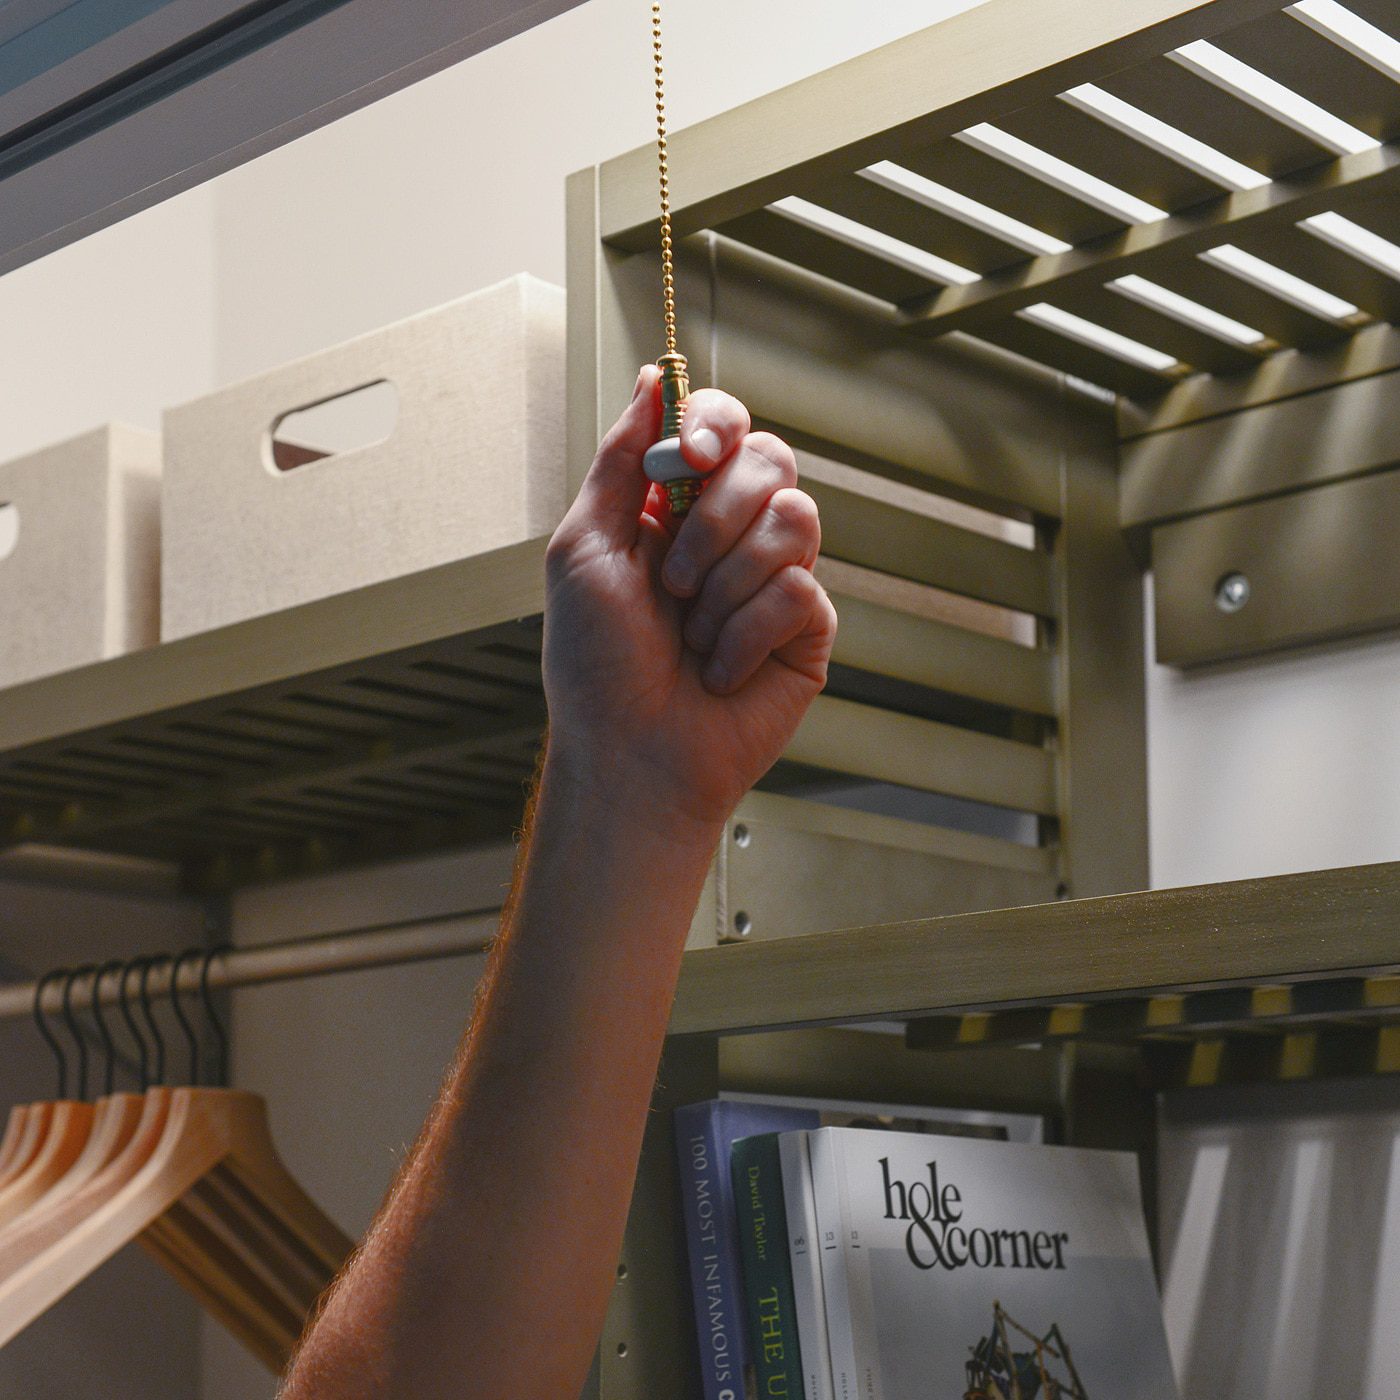
After emptying out the previous closet system (ahem, two rickety wire shelves), we touched up the paint with the same color as our bedroom, added baseboards and trim, and started with a blank slate. The closet is roughly 7′ wide x 2′ deep, which left us a lot of layout options. Oh, and do you see that long string hanging down the middle? Squint. That’s the pull string for the light fixture, which wasn’t going to remain untouched. Promise.
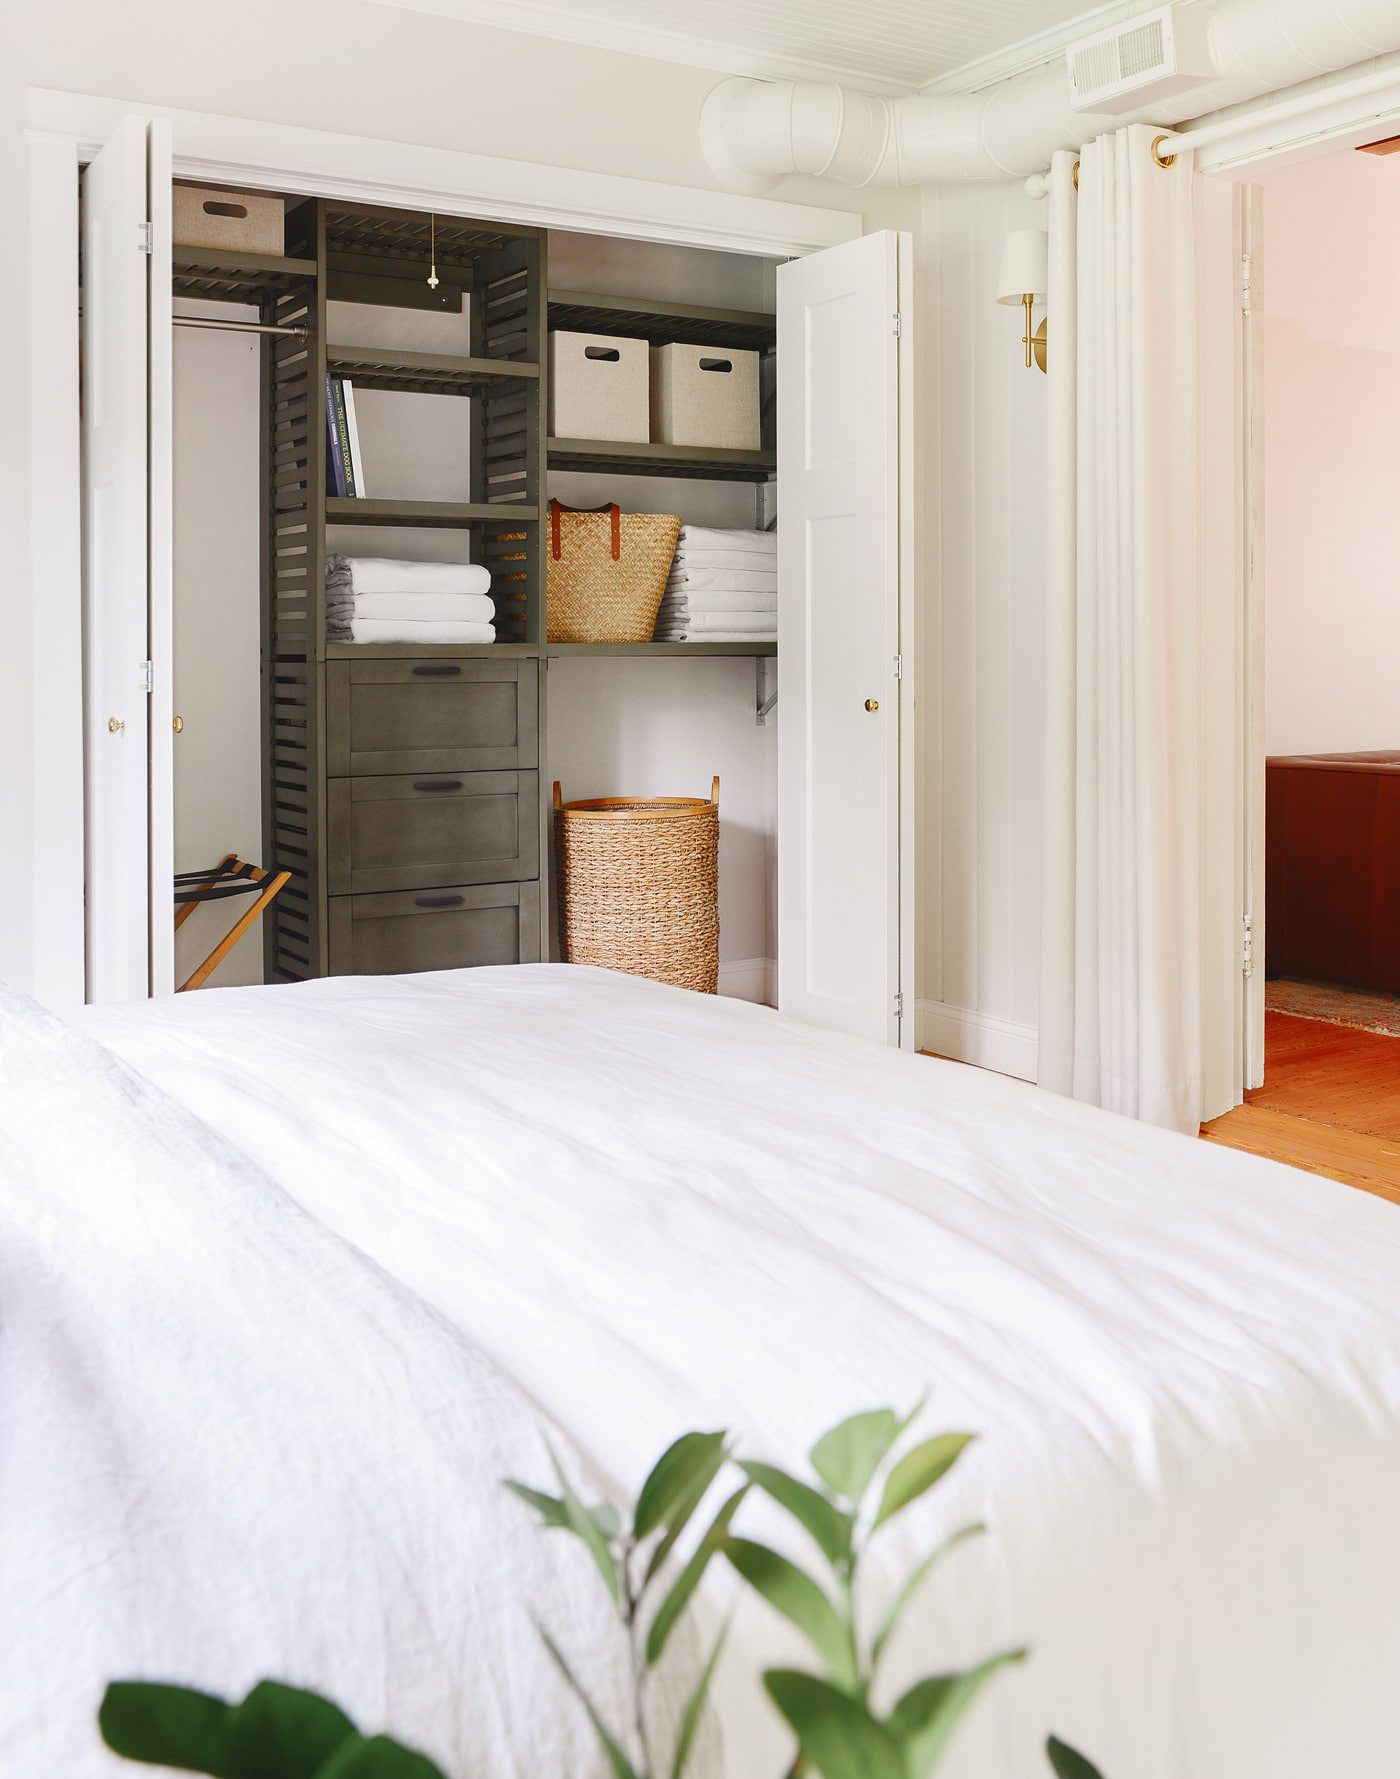
Initially, we thought we might build our own system from scratch, but the more we sketched out options, the more we realized that we were making this harder than it needed to be. (Guilty.) We scrapped that half-baked plan, and we turned our attention towards ready-to-go closet kits! We surprised ourselves by choosing this allen + roth kit from Lowe’s in a dark gray finish, after initially thinking we wanted light, bright and white. The more we looked at it, the more we agreed that it was, actually, quite handsome, and we liked that we could add more of what we needed (drawers) and scale back on items we didn’t (clothing rods)! To create our layout, we started with the main kit and added two shelves to replace surplus rods, and we swapped the drawers for a flat paneled Shaker style.
Supplies Used
allen + roth closet kit
allen + roth drawers
allen + roth shelves
JELD-WEN Bifold doors
Richelieu brass hardware
HGTV HOME by Sherwin Williams Ultra White paint
allen + roth tall storage bins
allen + roth short storage bins
What We Did:
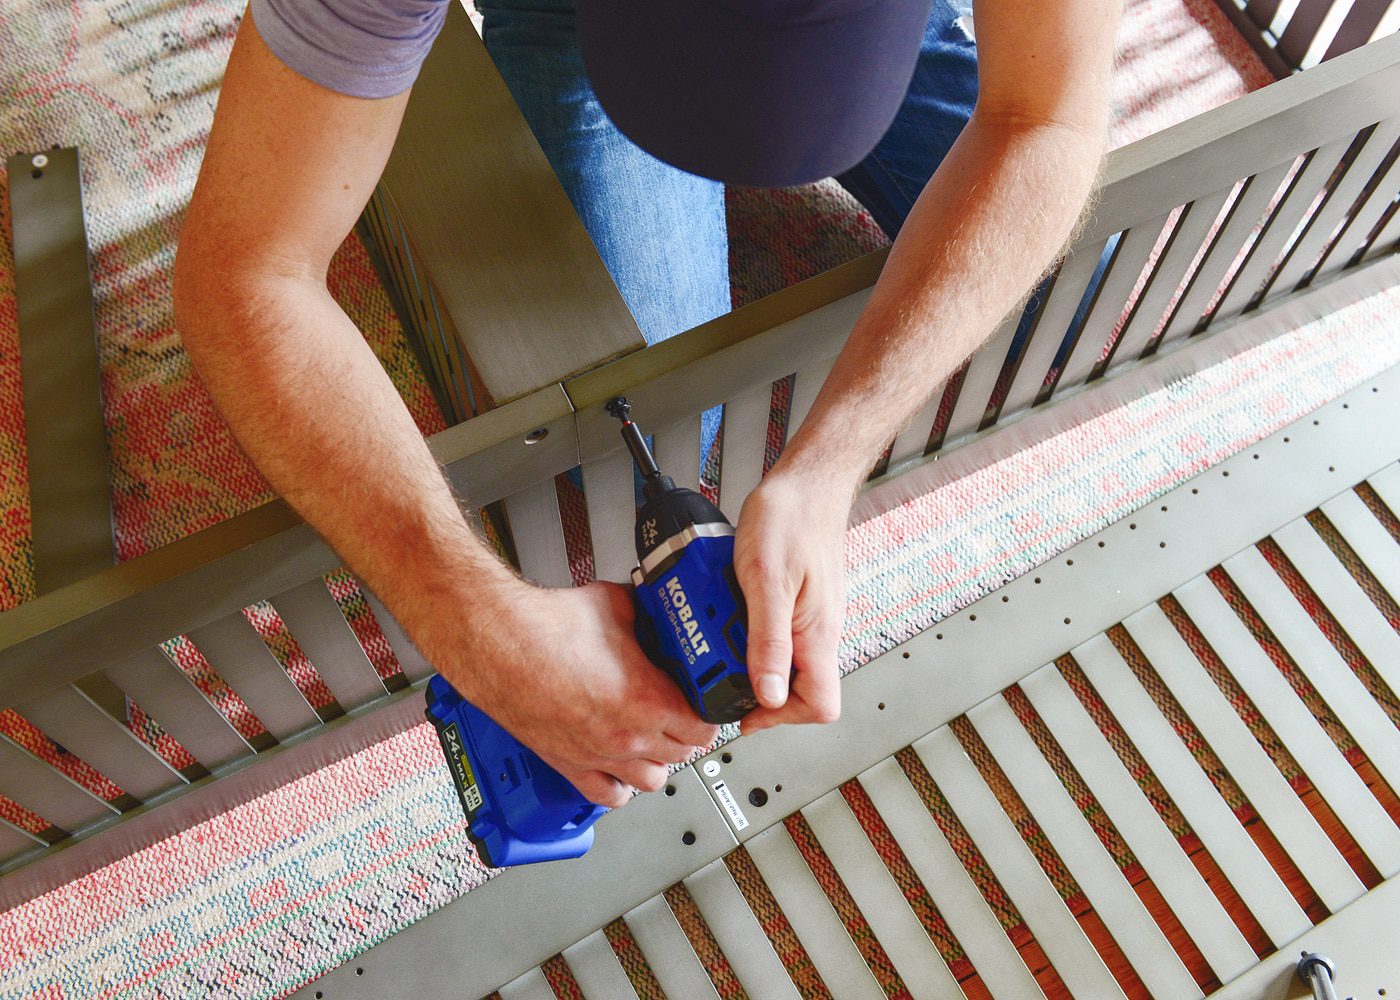
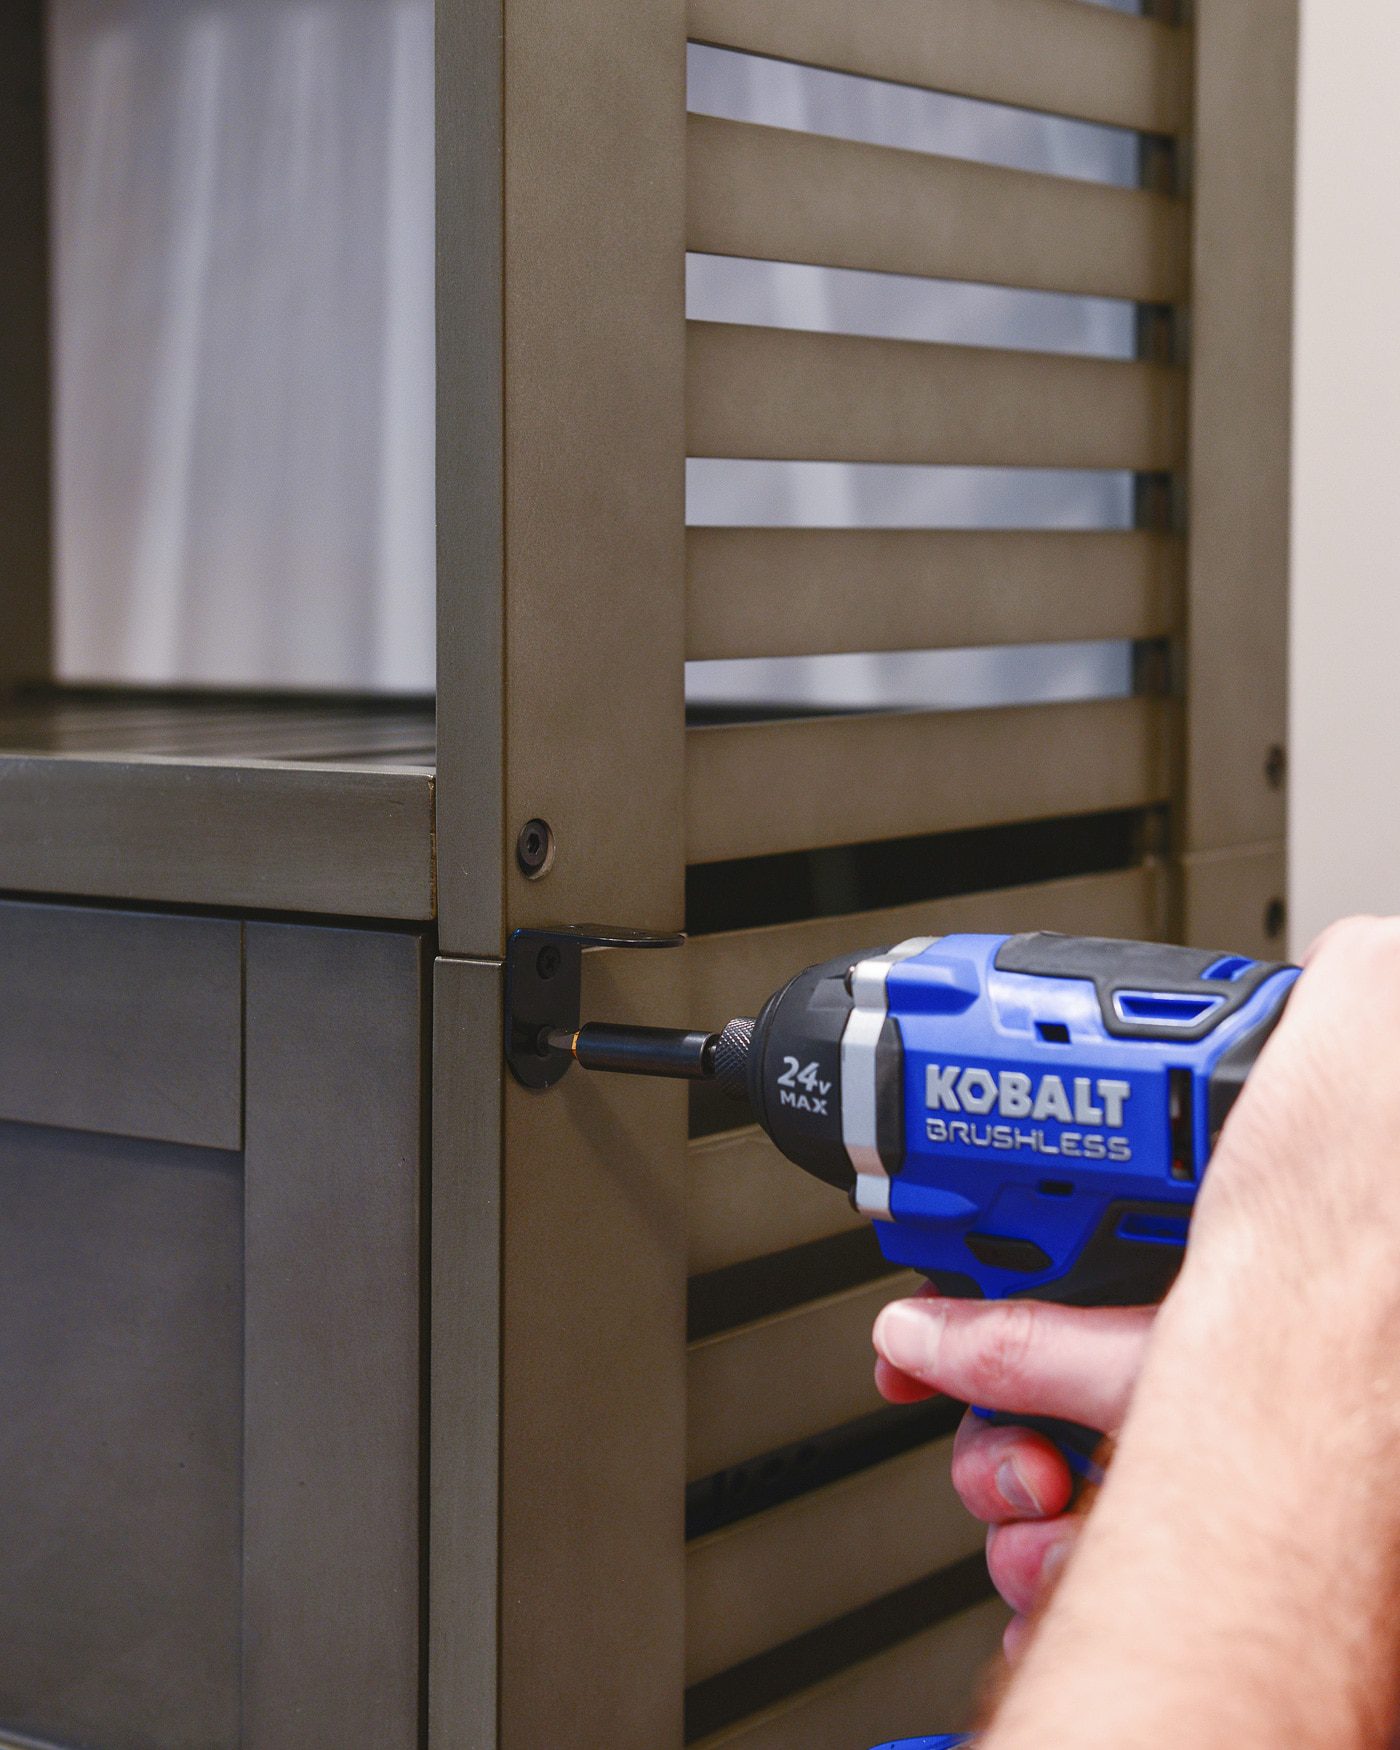
If you’ve assembled flat-pack furniture in the past, you won’t be surprised by most of the assembly instructions for this kit. Everything here, however is 100% solid wood, so no crumbling fiberboard to mess with. Nice! The instructions were well laid out, and the kit went together smoothly.
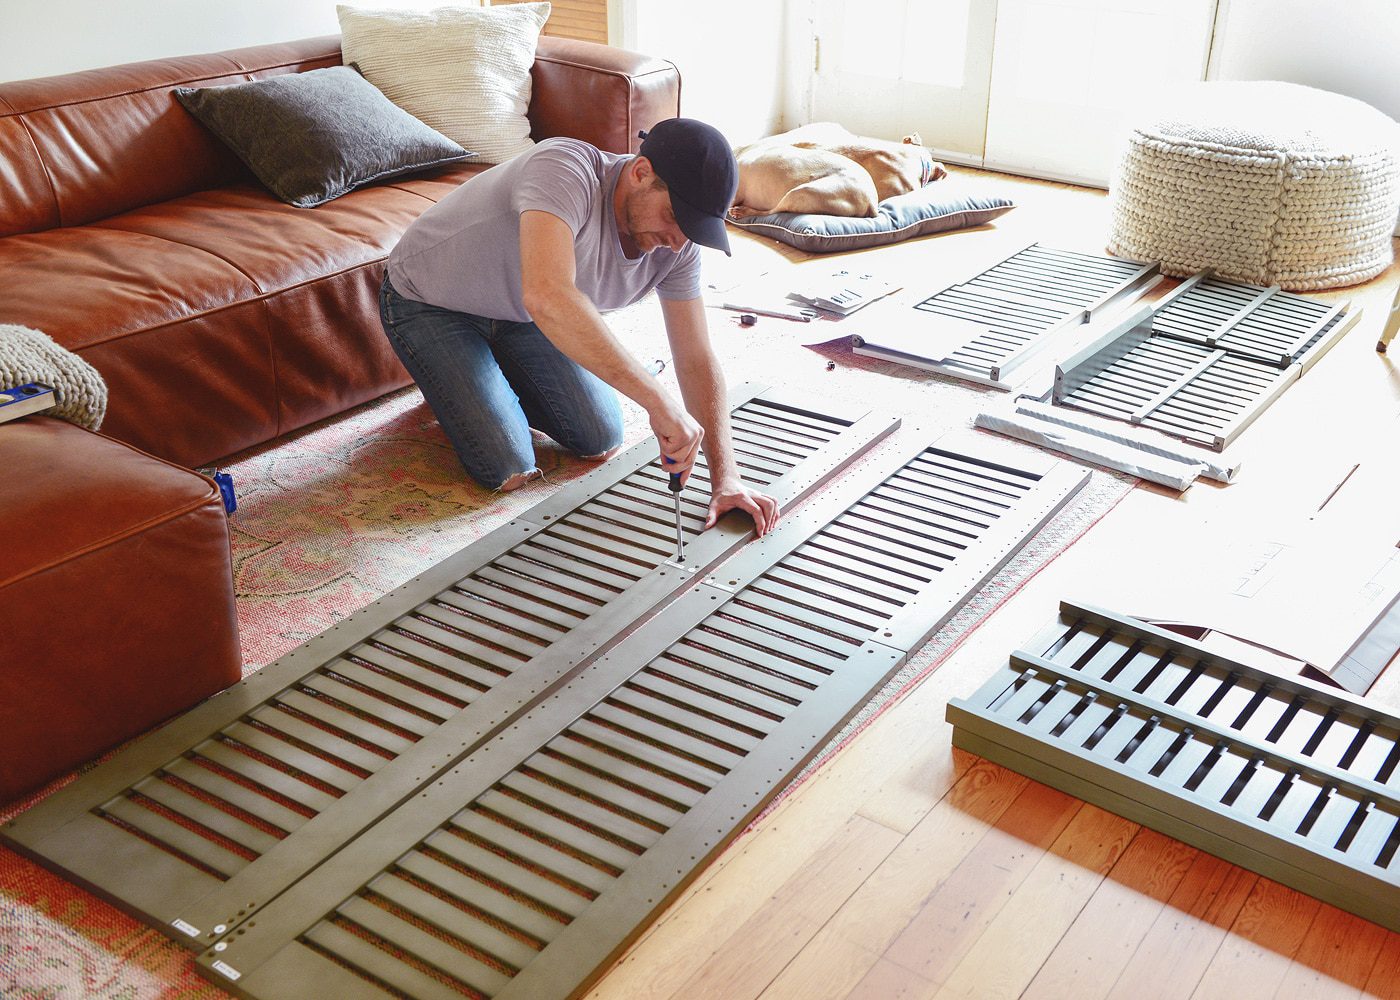
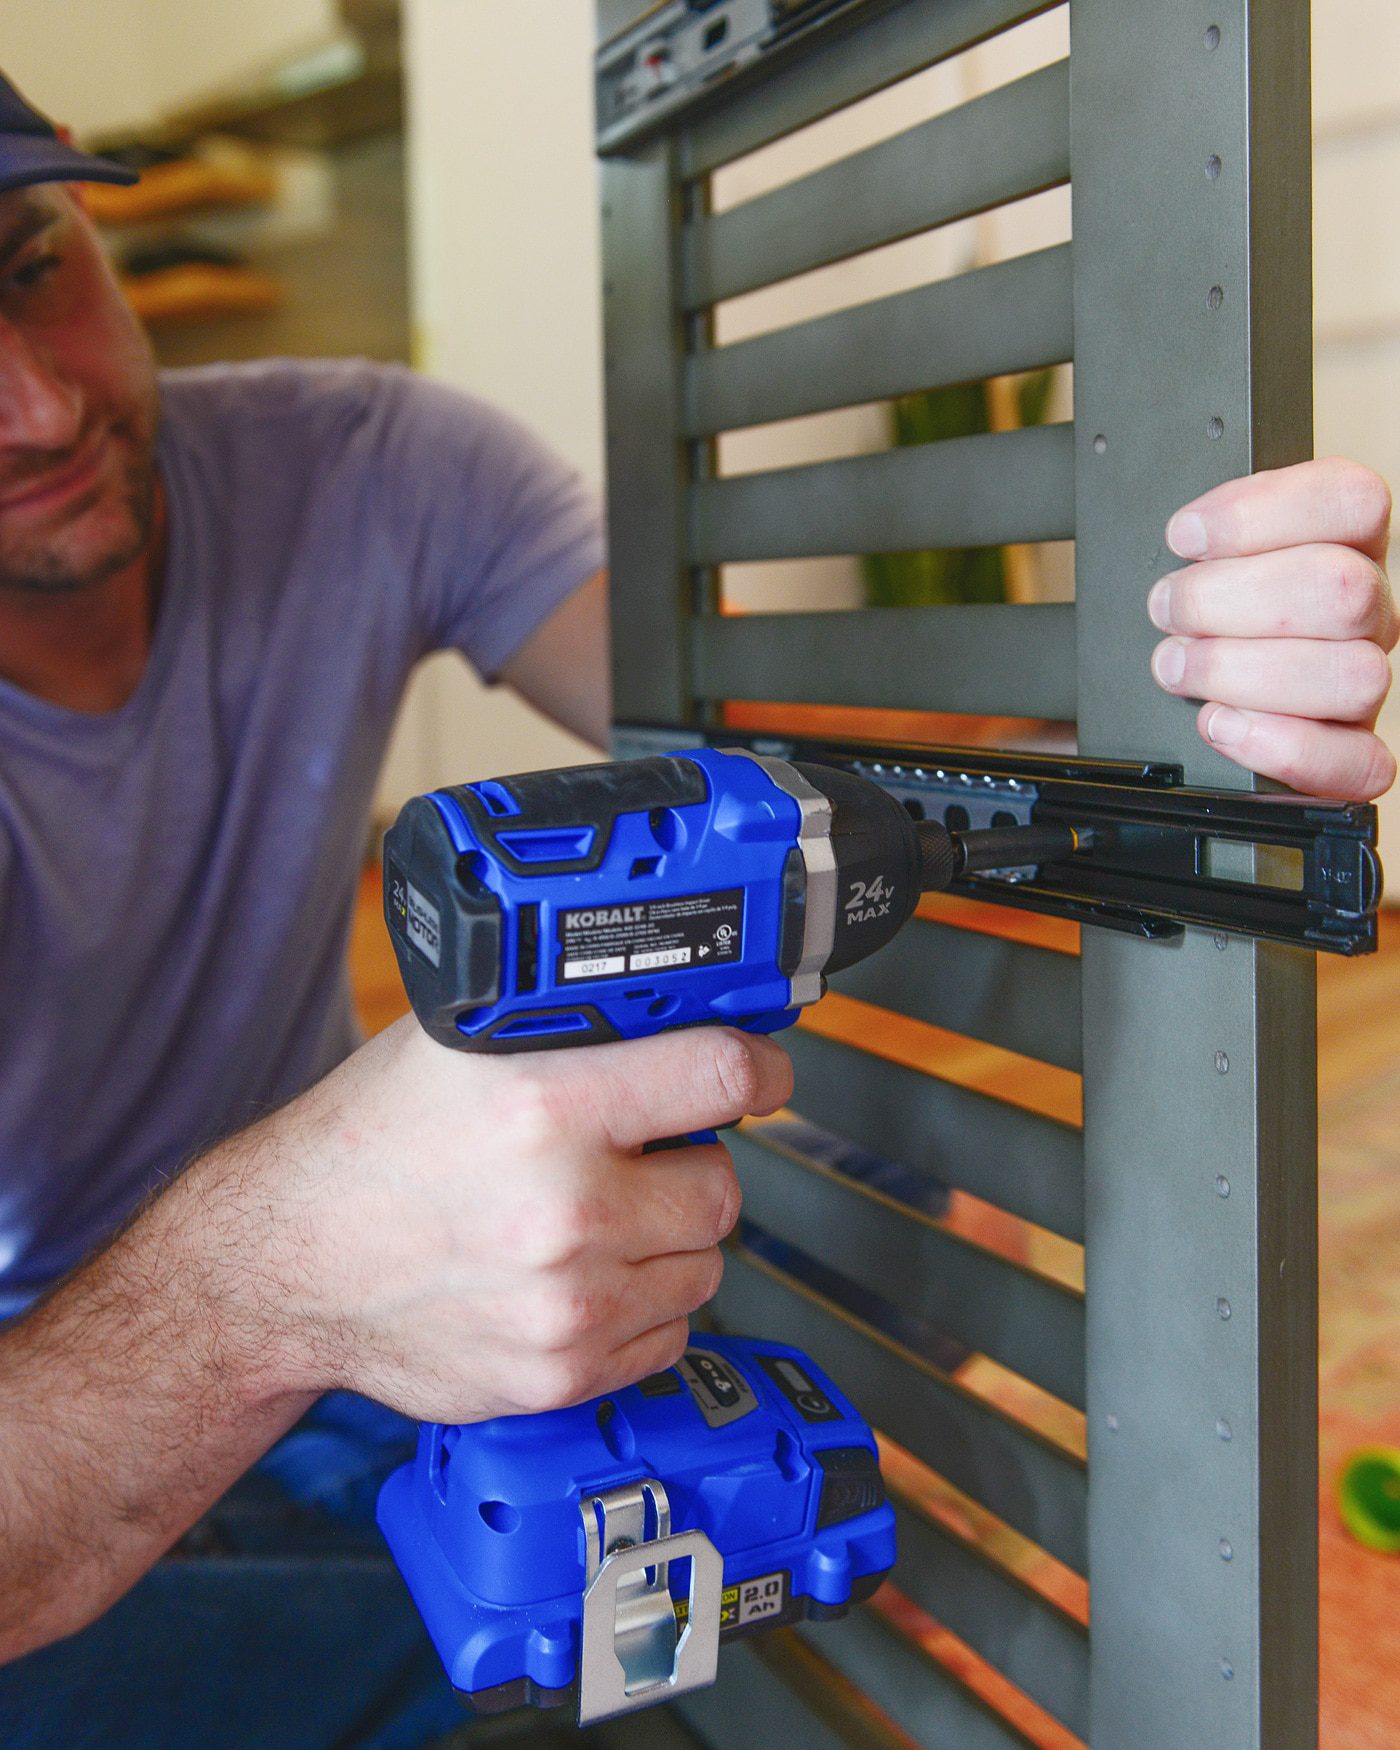
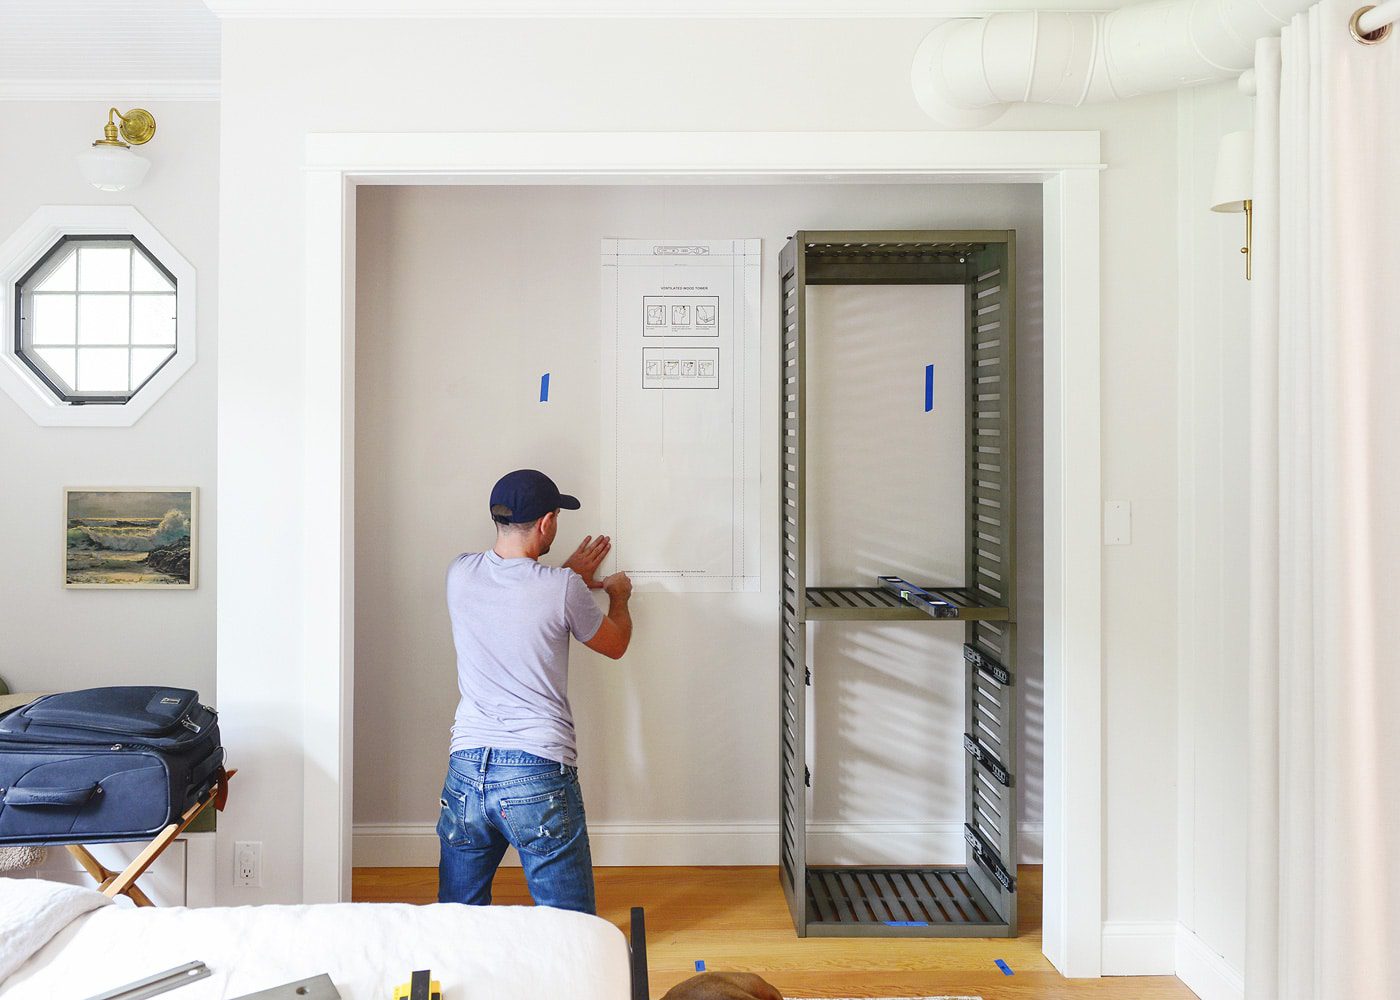
The closet kit centers around a main tower structure, and you can build off of that – think: rods at any height you wish, drawers or no drawers, two shelves or ten shelves. Once our main structure was assembled, we moved into the closet to search for studs. The allen + roth kit includes all of the hardware necessary for it to be mounted to a pair of vertical studs with modern 16″ spacing, but since our Tree House is around 90 years old and we think that this bedroom was once a sunroom (built within the last few decades), we found the spacing of our studs to be much, much wider than 16″.
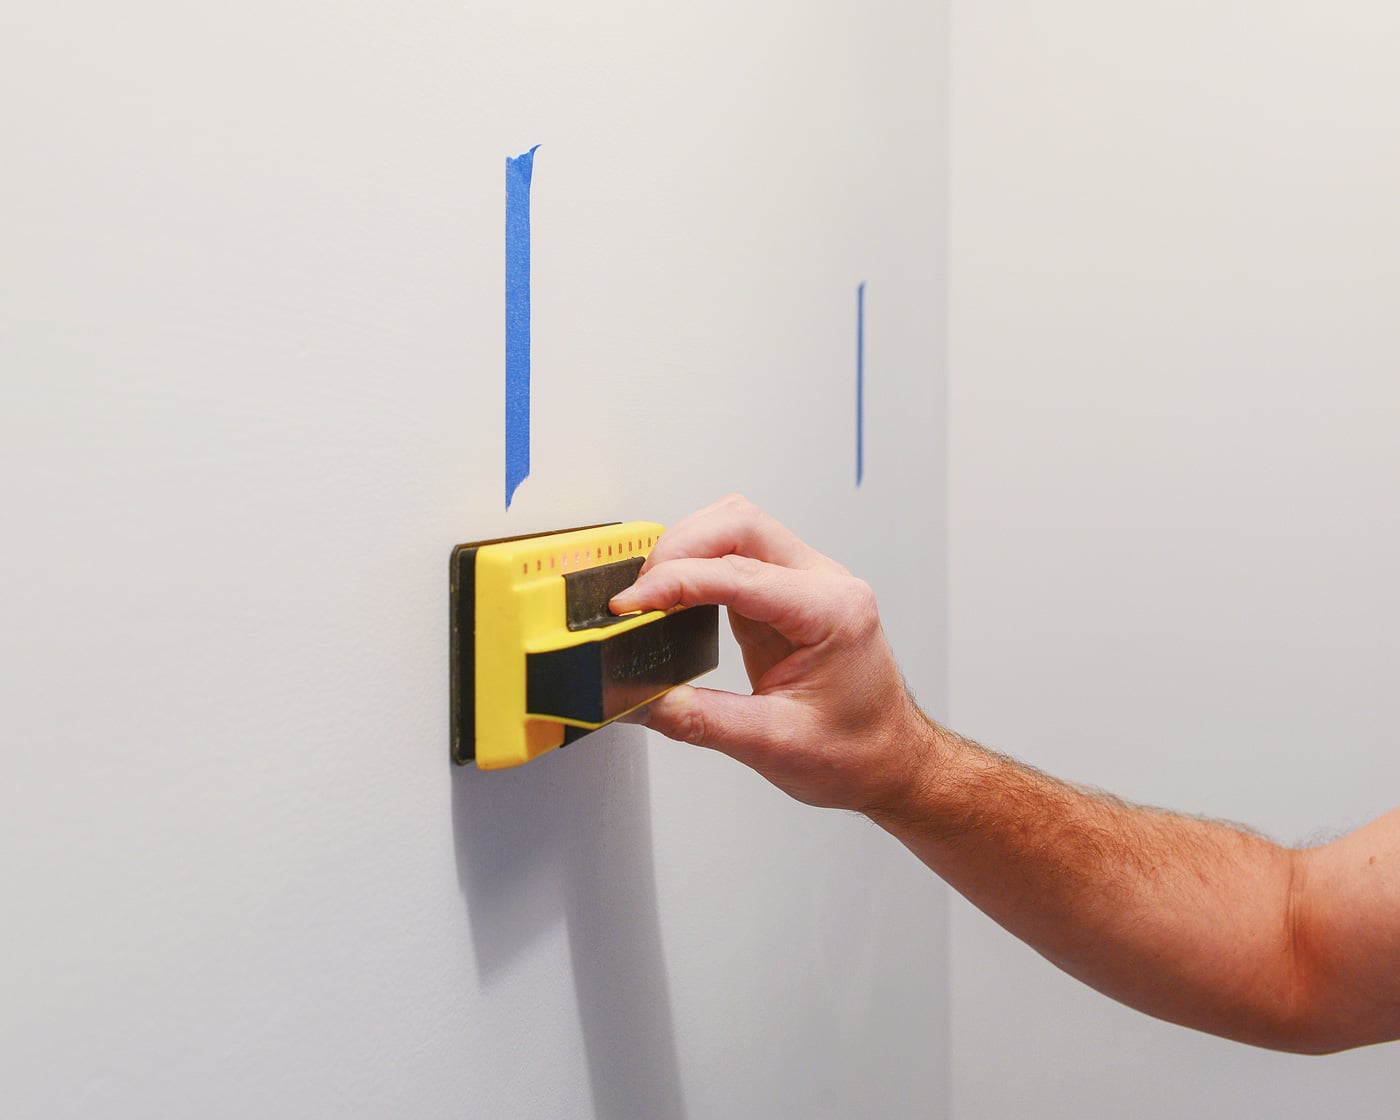
The kit came with a handy template to use as a hanging guide, which we used to determine if we could hit even one of the studs. No matter how we laid things out, we were smack dab between two studs.
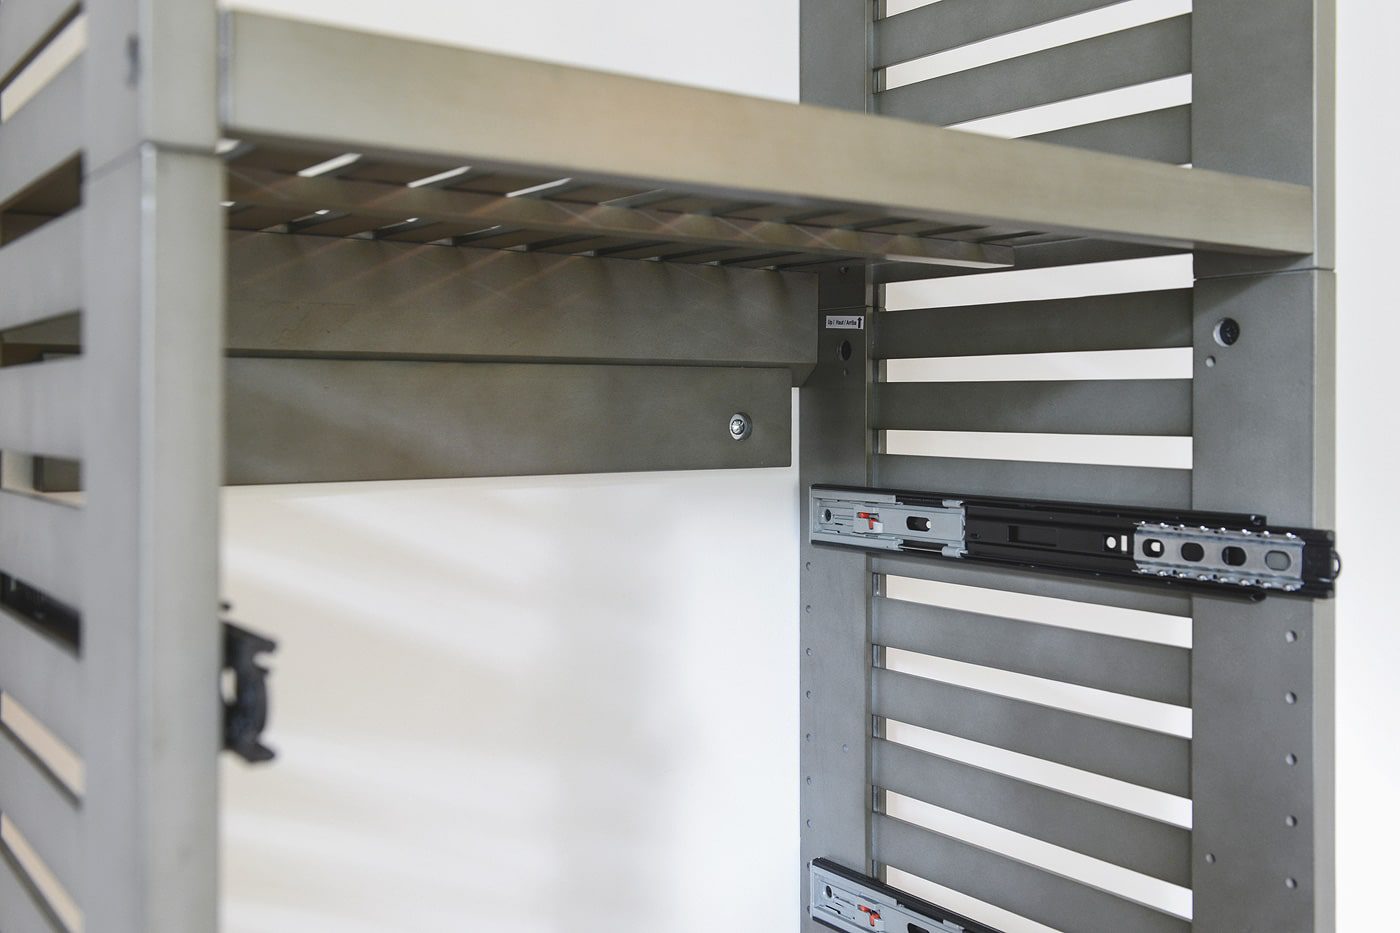
The mounting structure is built around a pair of french cleats that keep the weight well supported. Ideally, we could have hit one stud per cleat, but instead, we ended up using 3/16″ toggle anchors and couldn’t be happier with how sturdy everything feels!
This system also provides a bit of wiggle room side to side once everything is installed, so it’s very forgiving. Our baseboards are 5 1/2″ tall and we wanted the option for shoe storage underneath, so we chose to mount the tower approximately 6″ off of the floor.
Once the tower was mounted securely in place and we were happy with how it looked within the closet, we double checked for level and side to side clearance and moved right along.
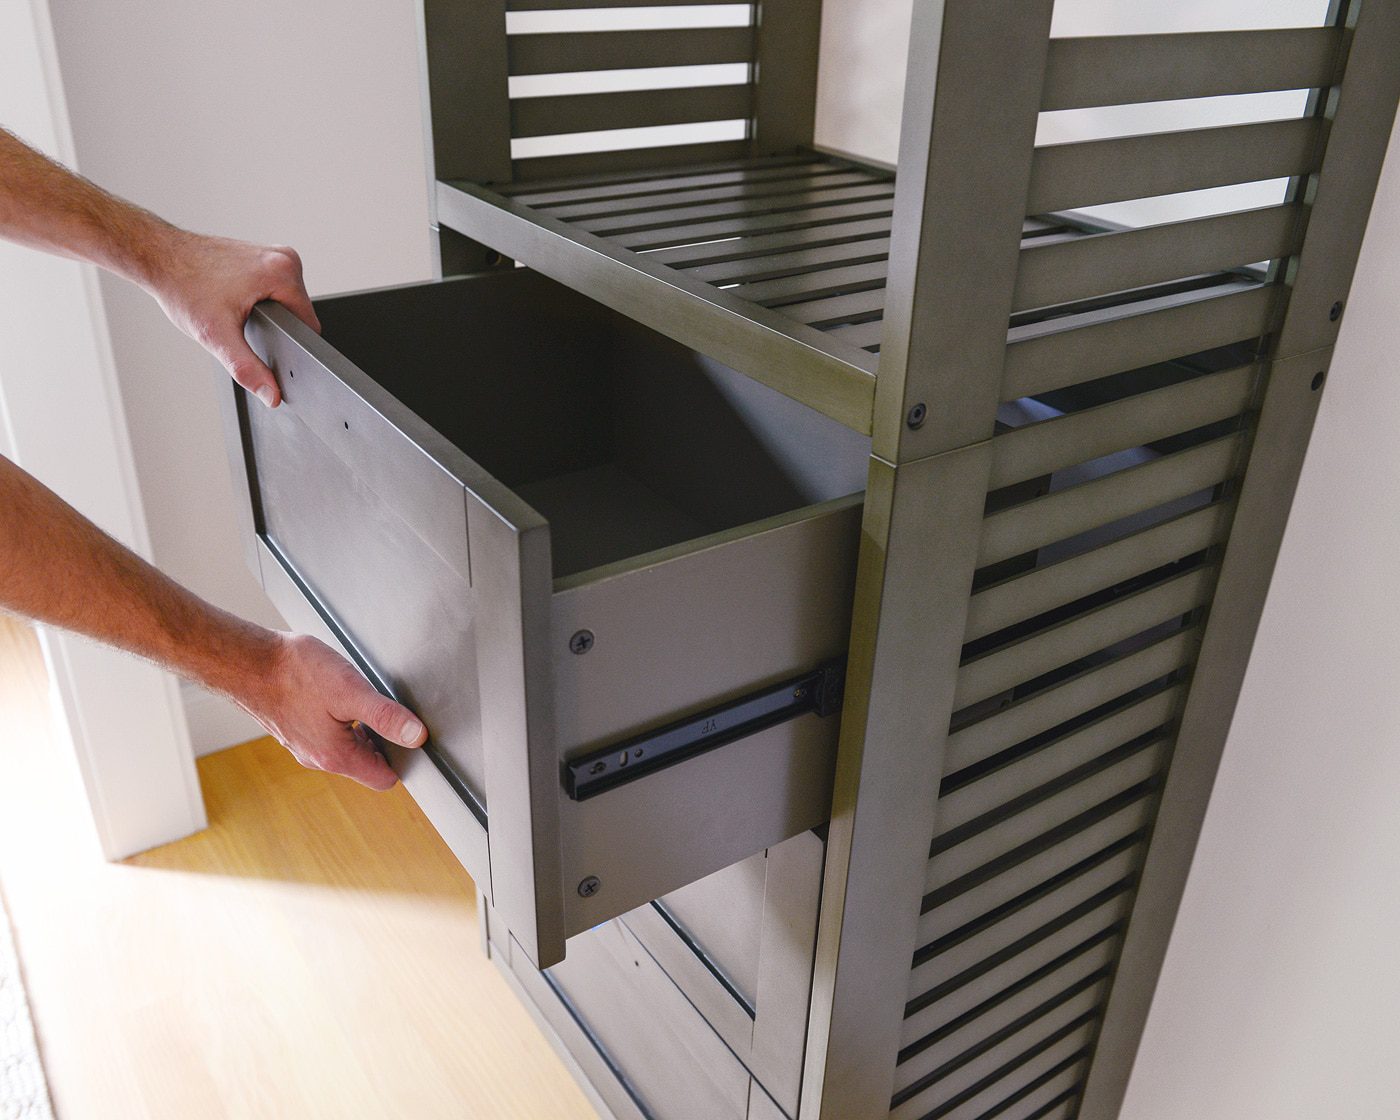
Pre-drilled holes made it very easy to mount the drawer glides earlier on in the assembly process, and at this point, we were able to slide our completed drawers into place:
The next step was to decide on shelf heights and screw them into place using the provided L brackets. A nice touch that Kim and I both commented on throughout the assembly and installation process was the quality and finish of all of the hardware. Most of the bolts and fasteners are hidden, but all of the metal components are finished in a nice matte black that compliments the gray very well!
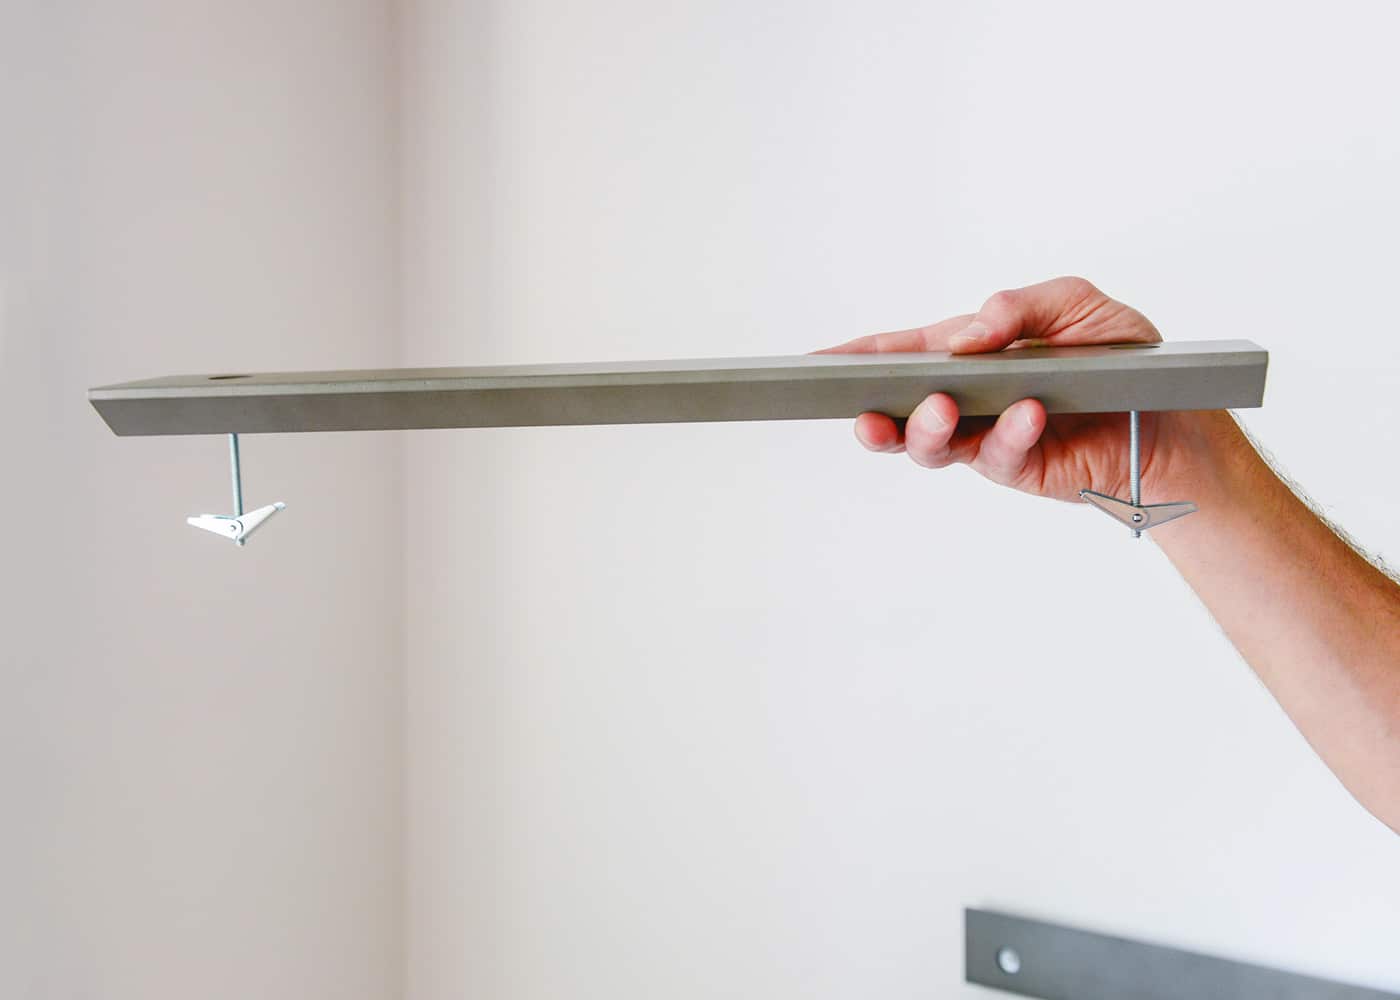
Since the side shelves can be mounted at any height, the holes are not pre-drilled. This made checking level at each step incredibly important. Four screws per bracket into solid wood made for very sturdy connections.

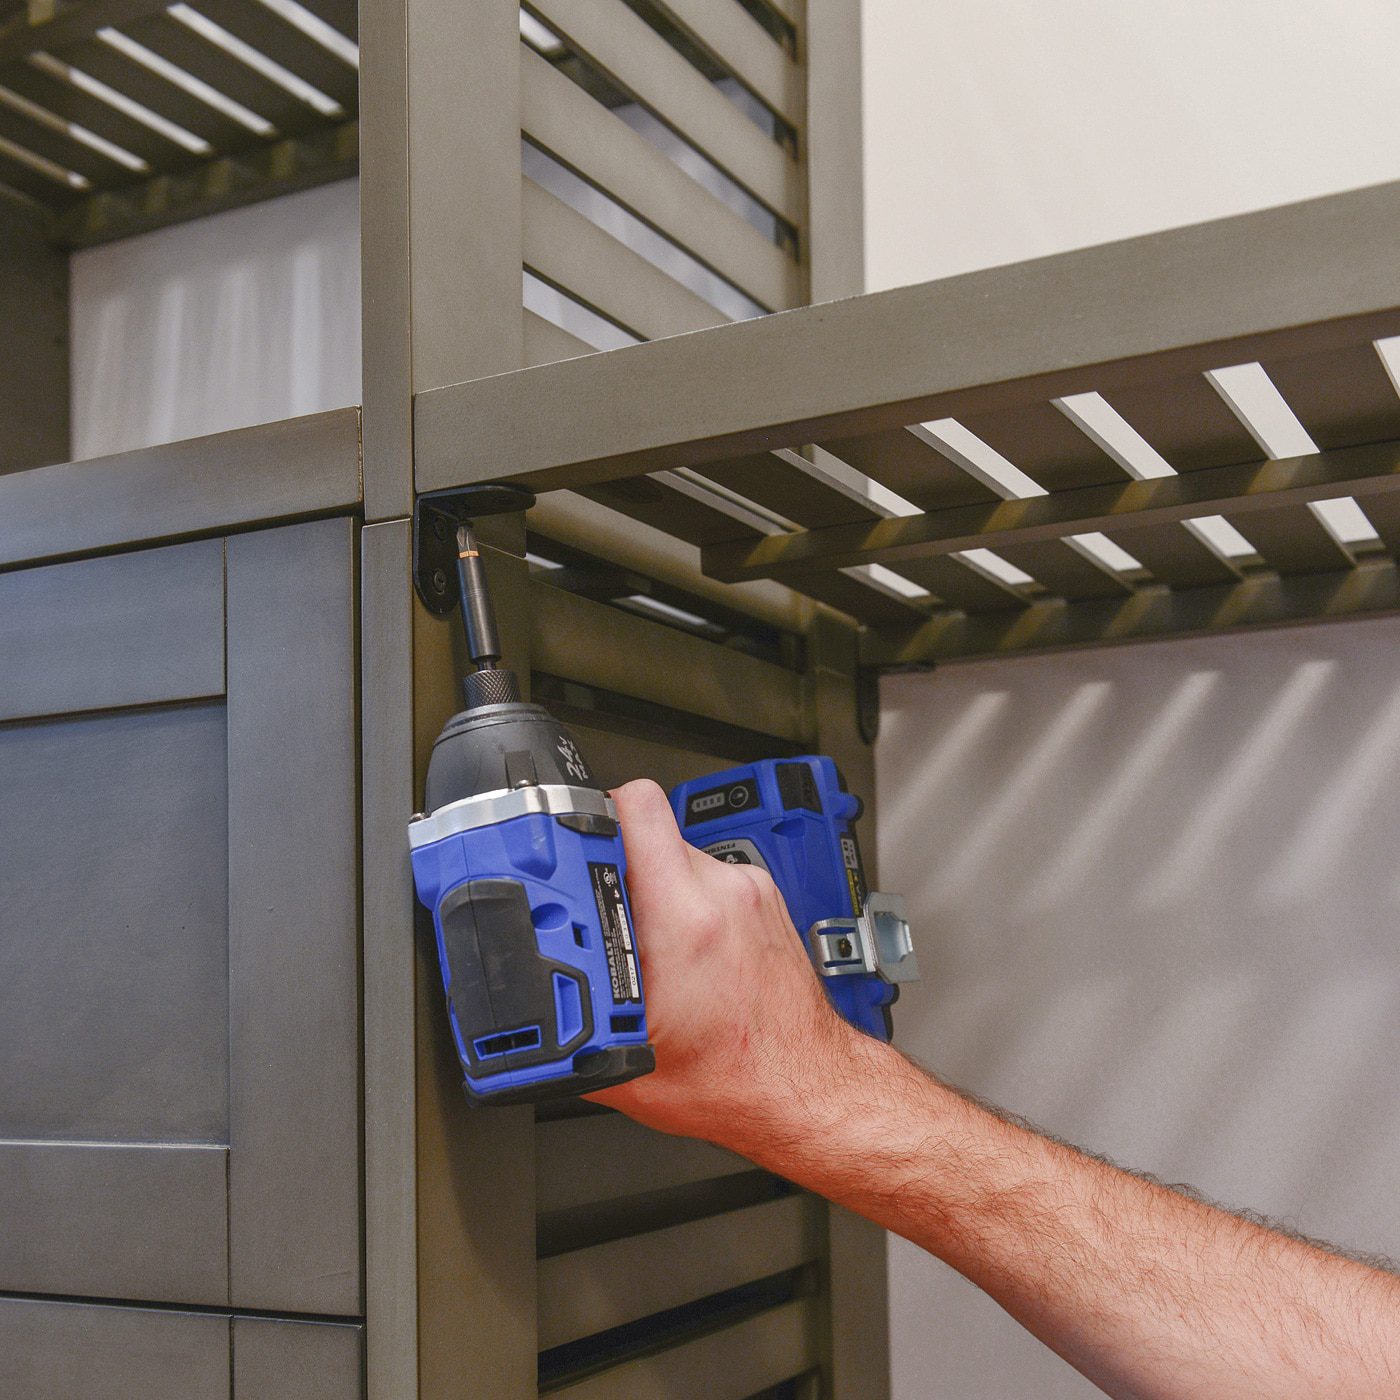
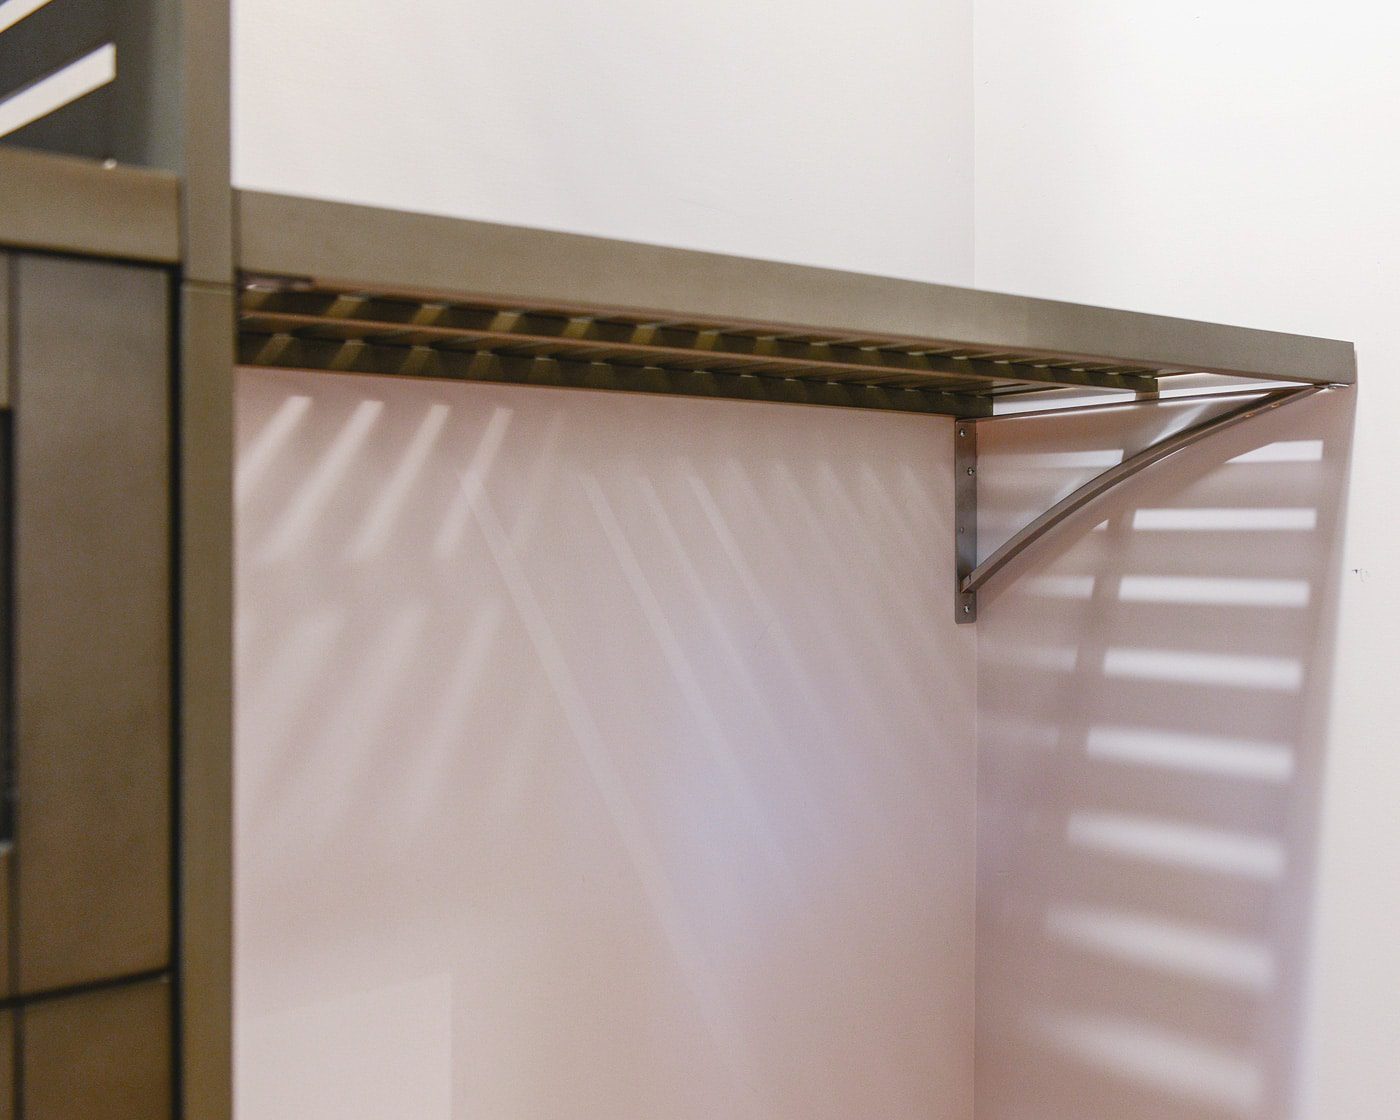
On the side of our closet where the shelves meet the wall, we used the included brackets that came with our additional shelves:
As we started to put things back into the closet the next day, we were both amazed at how much more storage space we had. The kit allowed for such an efficient configuration that we still had plenty of empty shelves!
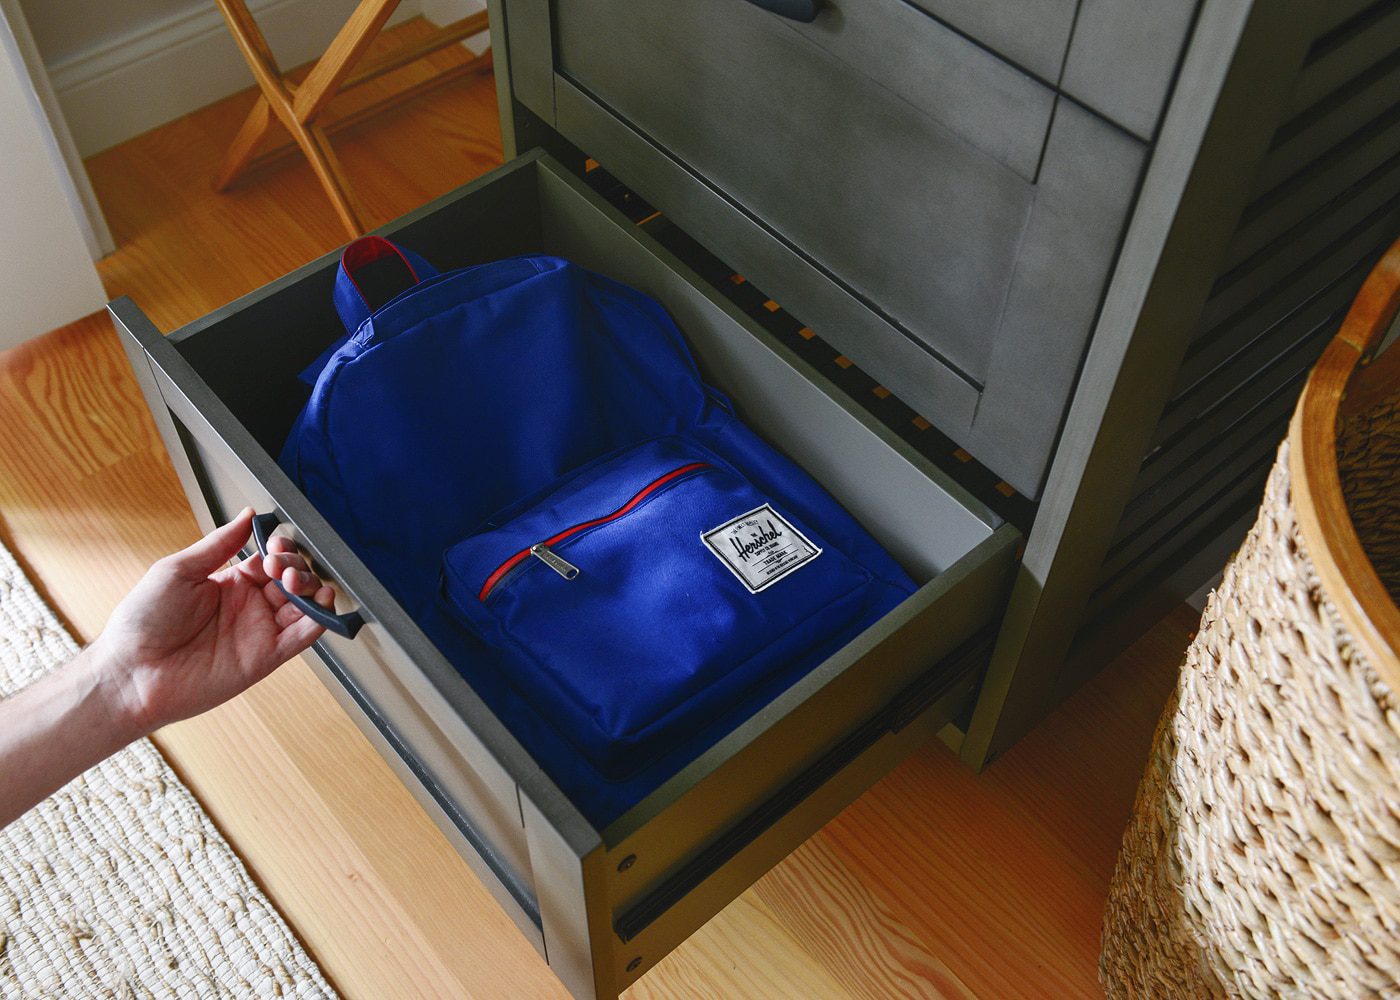
Since we’re only at Tree House for a couple of weekends each month, we don’t use the drawers the same way we might use them at home. We’ll keep them empty and use them to store things that come back and forth with us. We usually bring our laptop bags along with us so we can work remotely, but in the past, we’ve never had a good place to stash them when we’re not working. The drawers are 21.5″ wide and 14.75″ deep and utilize full extension slides, so we can fit both of our bags into one drawer and out of the way.
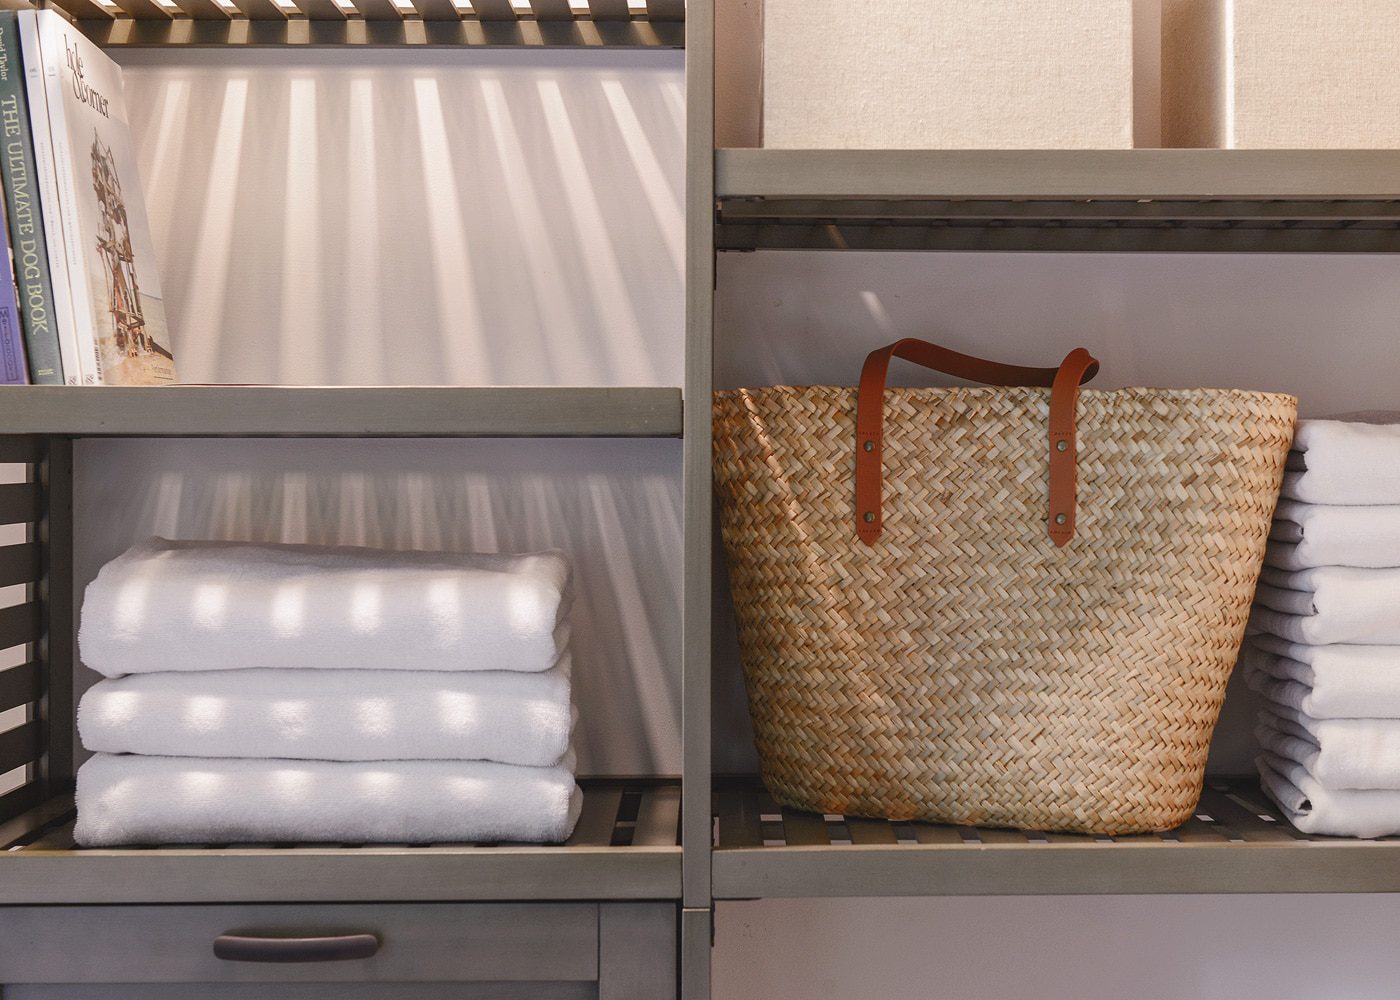
We think the coolest thing about this system is that it’s completely modular and can be created into any configuration that fits your space and needs. The product listings show the upper shelves at the same height as the top of the tower, but we installed them slightly lower so they could still be accessible and usable. These shorter storage bins fit perfectly and will be great for stashing winter hats, gloves and extra warm socks for snowy hikes at the dunes.
Remember when we mentioned that white string from the closet light earlier? It got snipped off in favor of this ceramic pull chain. This little guy has a nice weight to it, and it feels a little more upscale than old cotton string, for sure.
Since there is only one light source in the closet, the ventilated shelves and vertical supports allow light to pass through and keep everything feeling breezy.
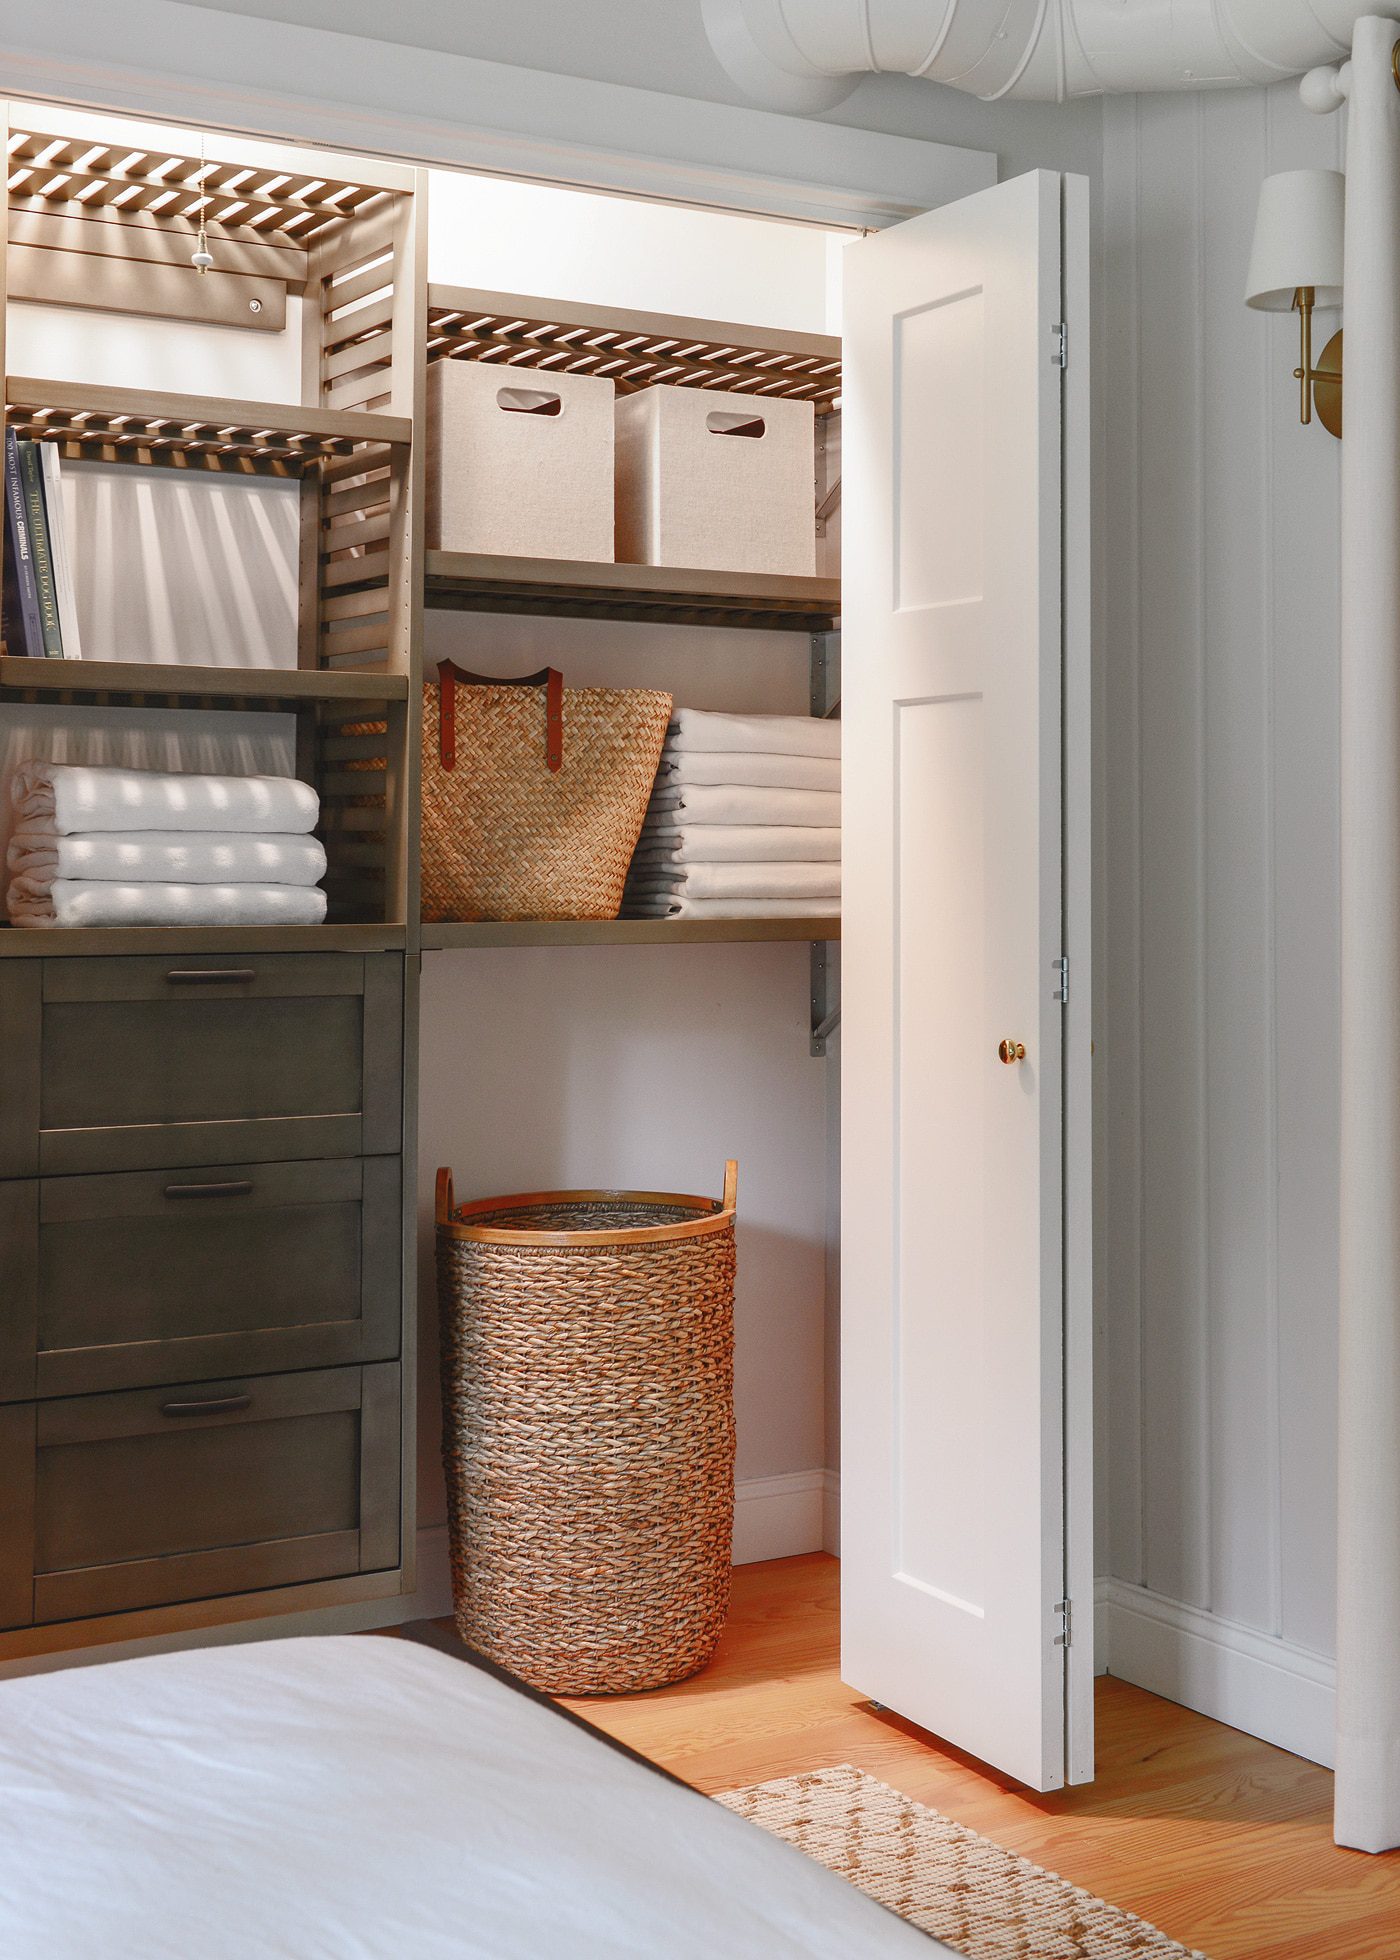
We carved out space beneath the clothing rod for a foldable luggage rack, but there’s ample space above if we’d like to hang anything during our stay:
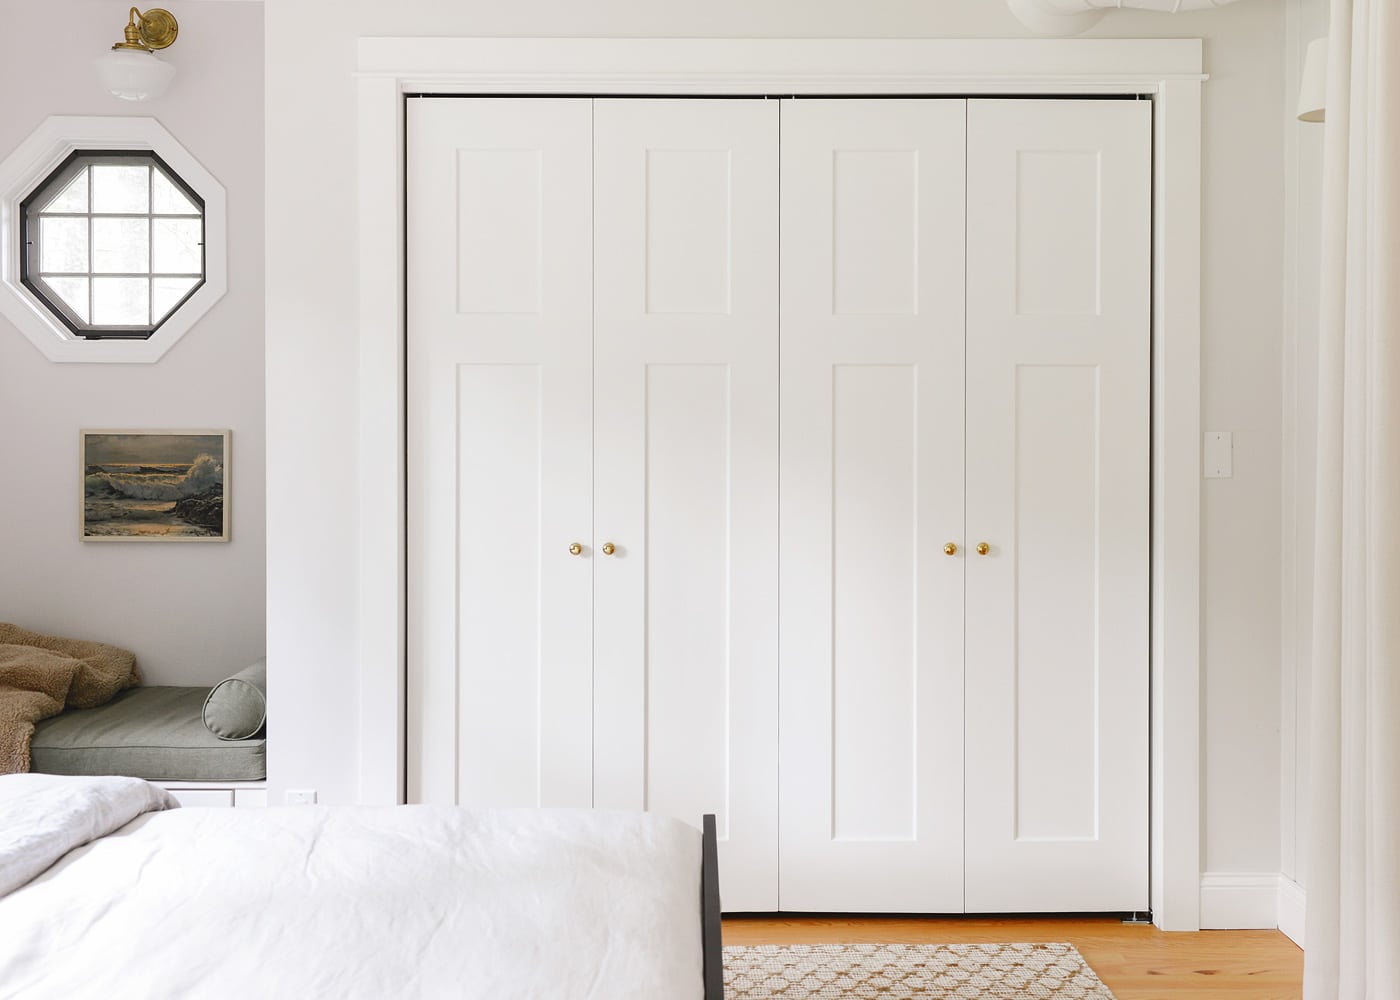
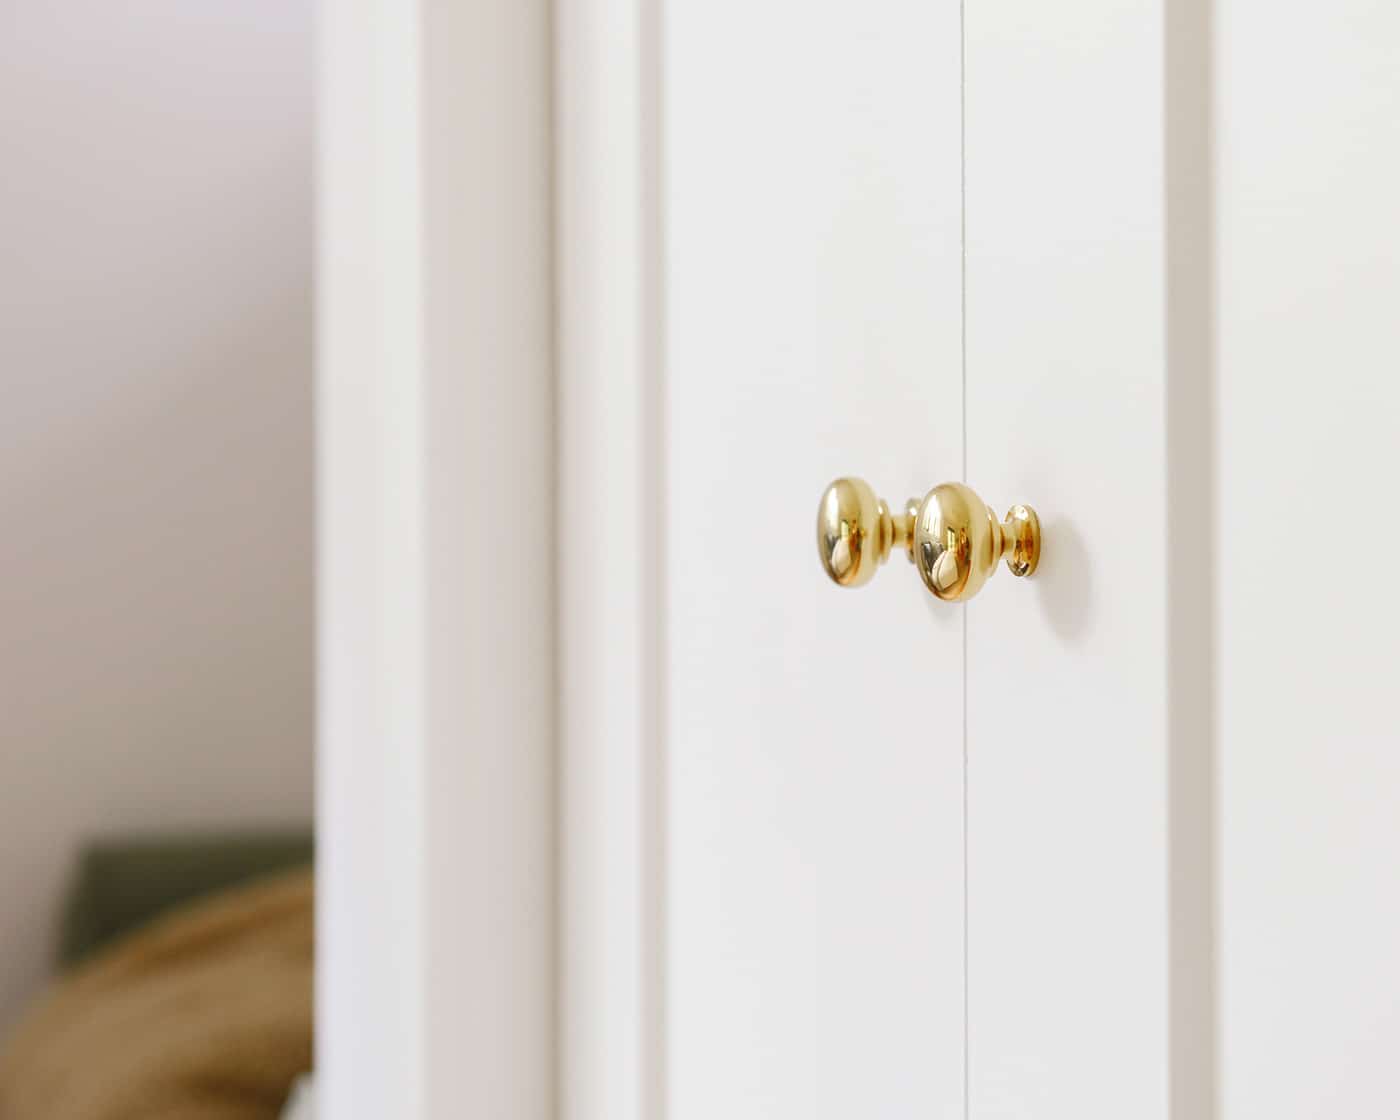
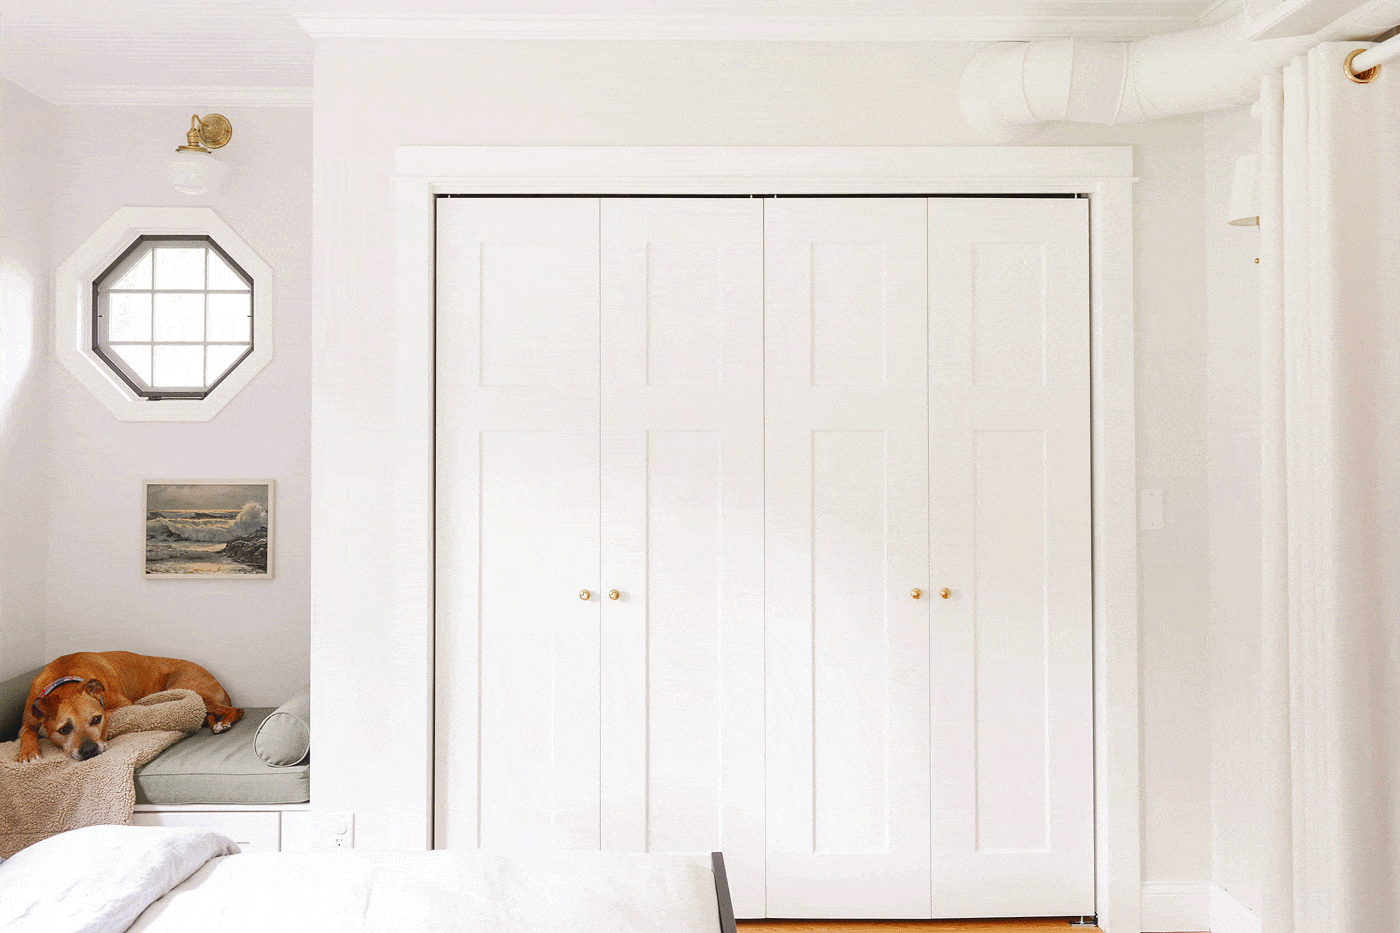
While the closet kit looks great and we almost hate to hide it away, we installed these streamlined bifold doors that came primed and ready for paint. We finished them in the same satin Ultra Pure White that we’ve used on all of the baseboards, trim and doors in the house. A trick we’ve used in the past to make bifold doors feel less like bifolds is to add four knobs to give the illusion of two pairs of double doors! The solid brass hardware that we chose has a chunky weight to it, and it just feels nice, ya know?
We’re absolutely thrilled with the finished product and have already gained back a ton of usable space in our bedroom. We’re no longer tripping over laundry baskets and laptop bags that were formerly tucked away along walls and in corners due to lacking space. As you can see, CC and Jack are thrilled as well!
This weekend project has made a huge impact on the way we’re able to use our space. No more maneuvering around bags and laundry baskets that don’t have a proper place! No more rickety old bifolds that won’t stay open! No more way-too-long-string-pull! With a little bit of planning and a couple days’ worth of effort, our space is packed full of function. Now let’s fill those shelves up with cold weather board games and summer beach toys and forget about laptop bags for awhile!


OMG it looks so good!!! That’s a cool kit! I love the color of it too!
Thank you! We think the color is so handsome. :)
Wow, that looks so good. Unbelievably good!
Thanks, Norah!
Hi! Looks great! Do you mind sharing the source for the luggage rack?? Been looking for one like that for a while. Thanks!!
It’s this one!
Love this! Do you mind sharing how much this project totaled. I have the perfect closet I need to do this to but being lazy and not wanting to total it all up myself. ?
Hi Megan! I suppose it depends on if you’ll need bifold doors as well. If you don’t need doors, you could do the whole project for around $400-500, depending on if you want to swap our the drawers like we did. :) Of course the cost could be much lower if you’re happy with the kit as it stands! We needed a lot more shelving, so there was extra cost with that. The quality of our allen + roth kit is so, so good.
Looks so so good! Haha. I loved seeing Jack in the short gif.
That looks incredible and now we’re considering this for our closet update. Quick question though, the kit says a length of 8 feet and you said your closet is about 7 feet. Did you have to cut down the shelves at all to fit, and if so, was it fairly easy?
We did have to cut them down, but it was easy as trimming them to the right width on our miter saw. :)
I love the Tree House so much! Keep going! One question… if you don’t mind, where is the hamper basket from?
It’s this basket . You can always find our sources on the shop our house page here. Thanks!
Would you mind sharing what you used for the shaker drawers and hardware?