

Last week, some of you might have seen on our Instagram Stories that we added beadboard to the garden apartment’s laundry room! Almost immediately, we received a handful of requests and questions about the install, and we’re happy to share that it’s a relatively inexpensive project with a big impact. Ever since we used beadboard in this year’s Lowe’s spring makeover, we’ve been itching to use it again, and we knew this laundry room would be our perfect excuse to do so!
The room is tiny, but a tiny laundry room is still a laundry room, and we know it’s a huge perk in rentals. (No more counting quarters!) Years ago, we picked up a decent pair of machines on Craigslist, but we were never quite happy with the existing plastic-coated shelving and exposed water lines. It was fine, and our past tenants were just thrilled they wouldn’t have to haul loads of clothing across town. We knew this little room was packed with potential, and we’re excited to finally do it up right! Here’s where we started:
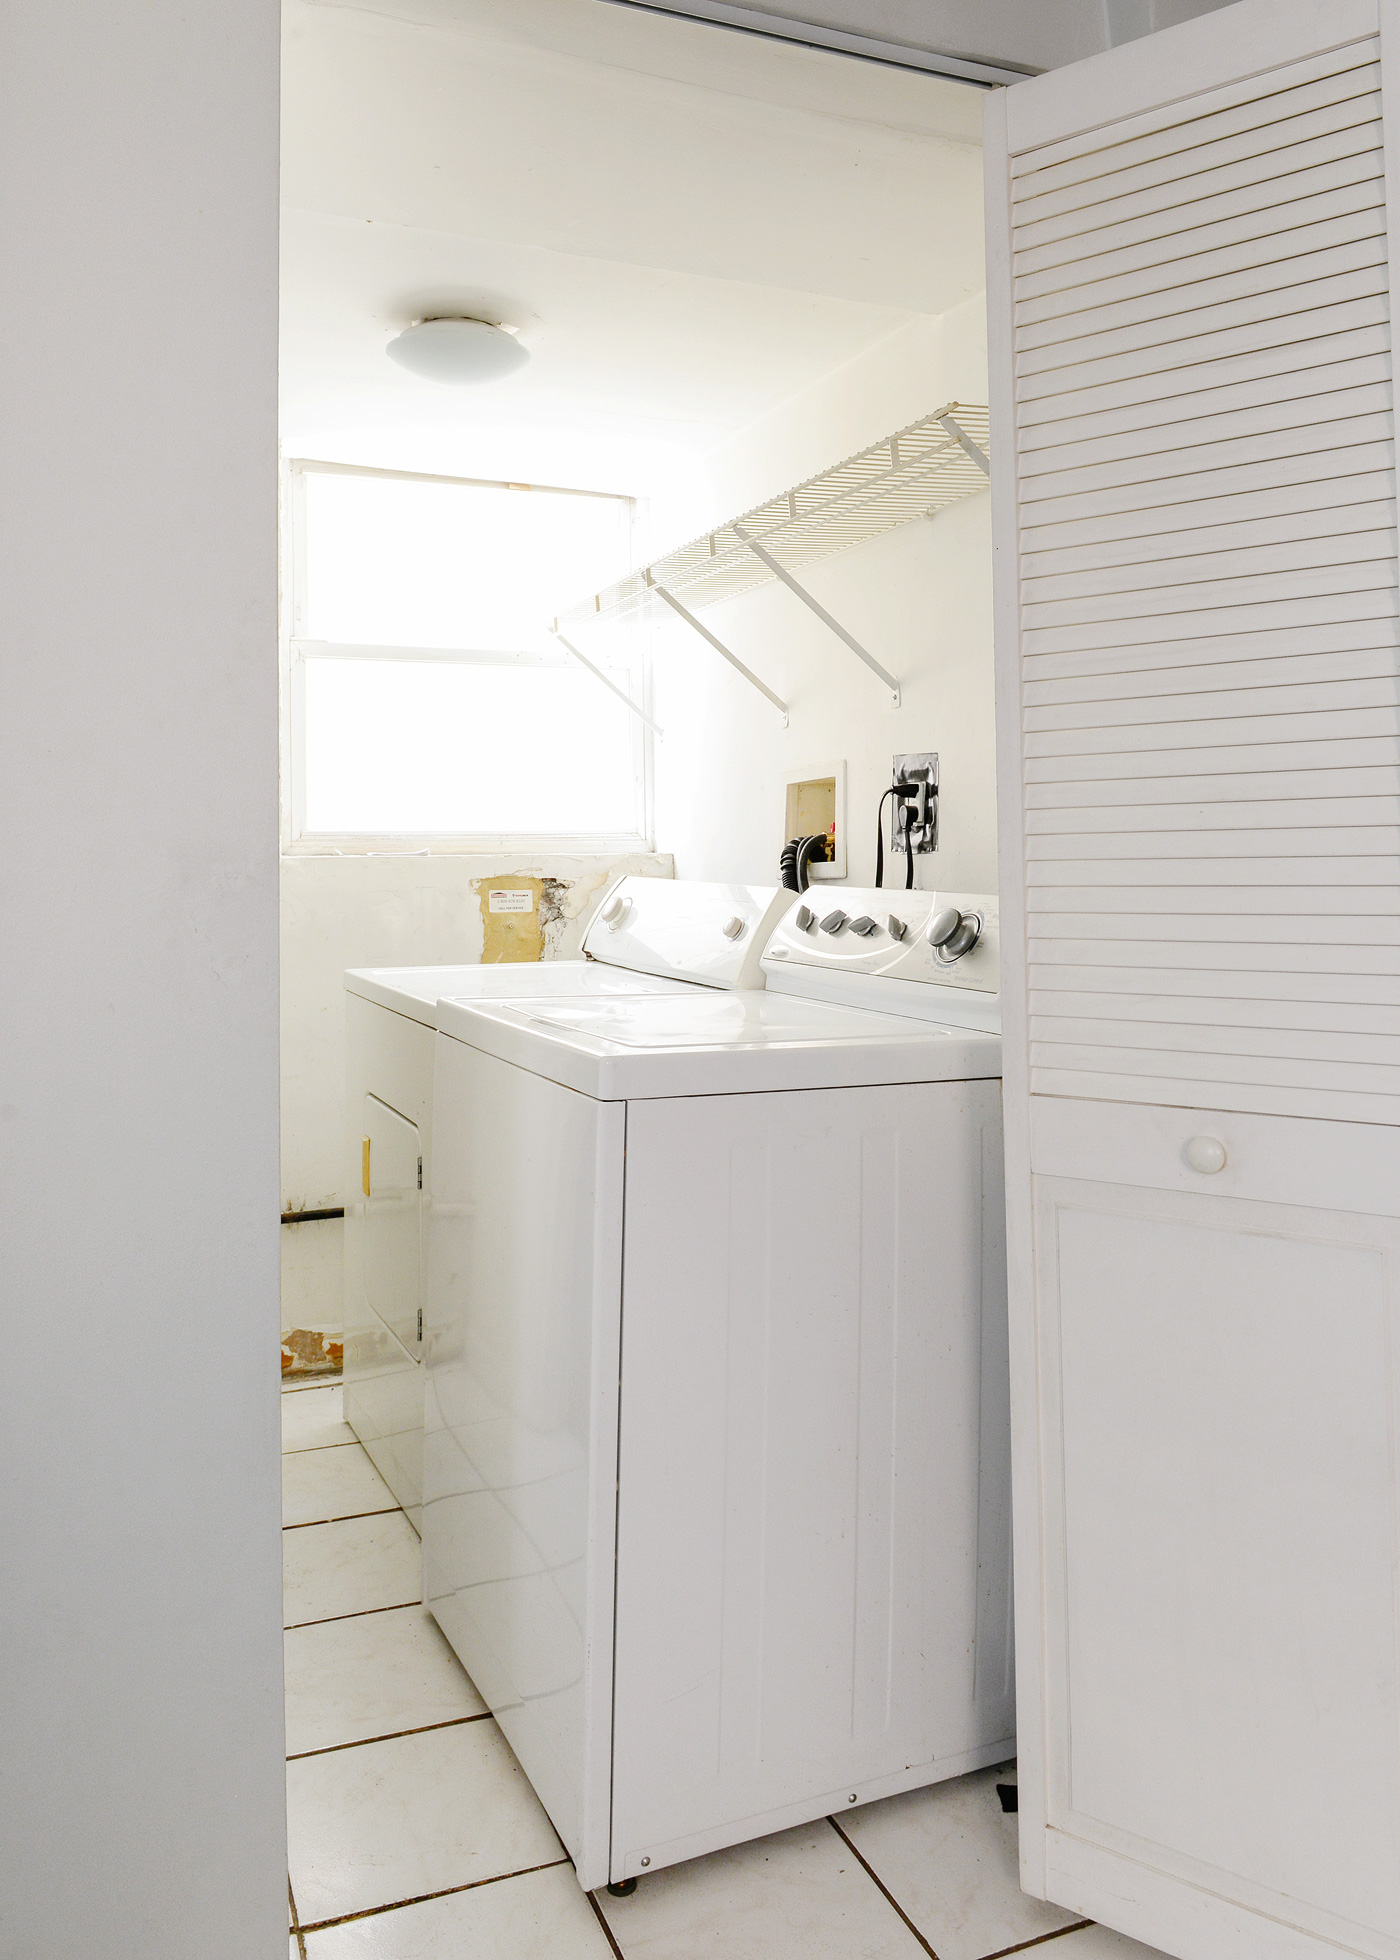
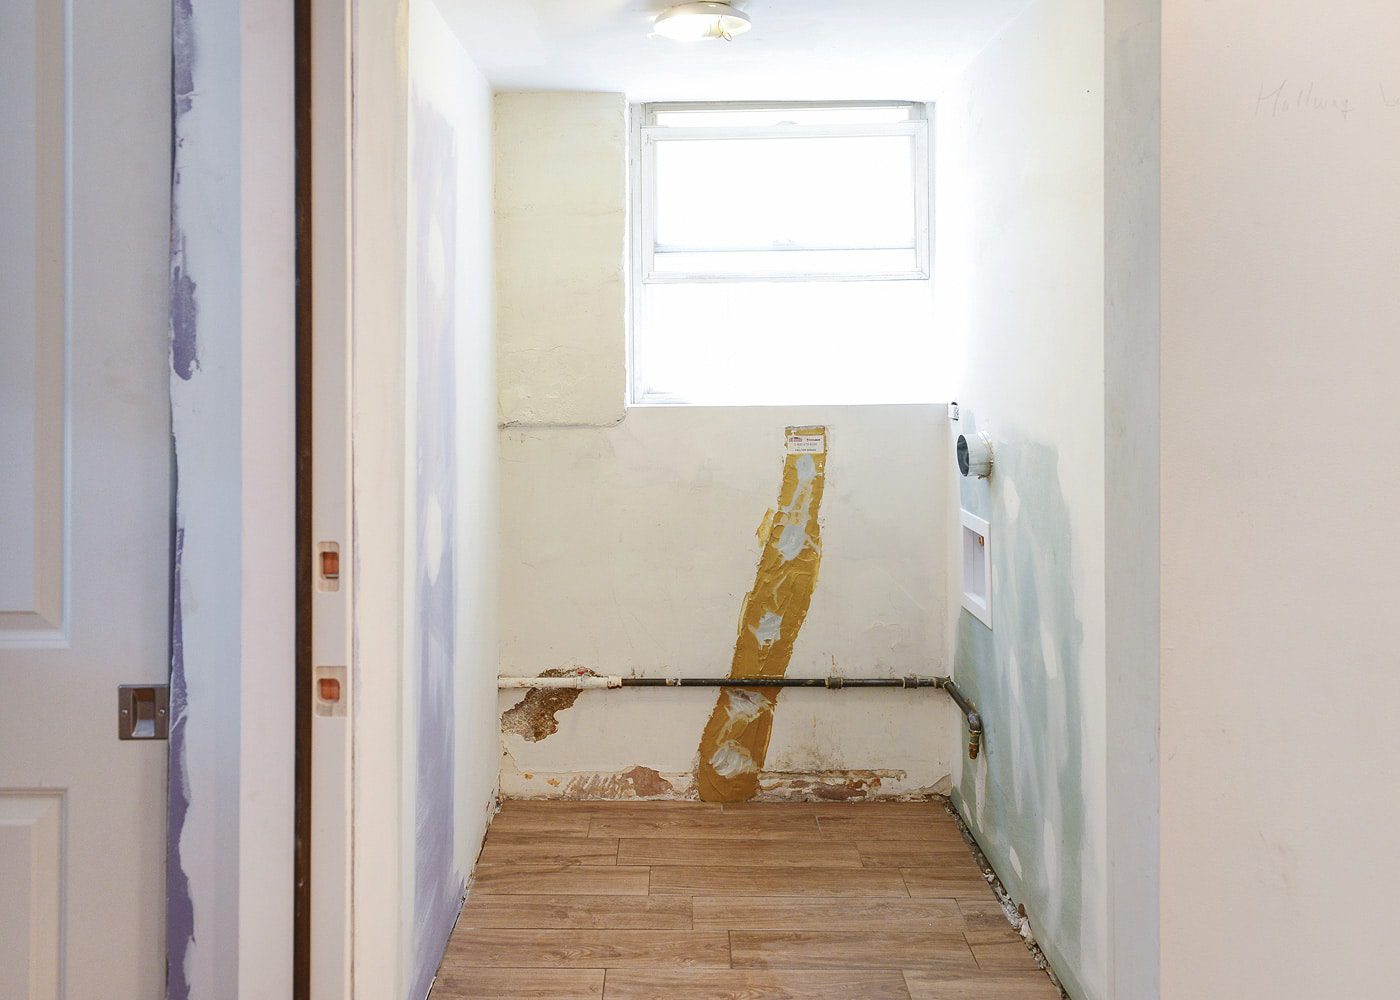
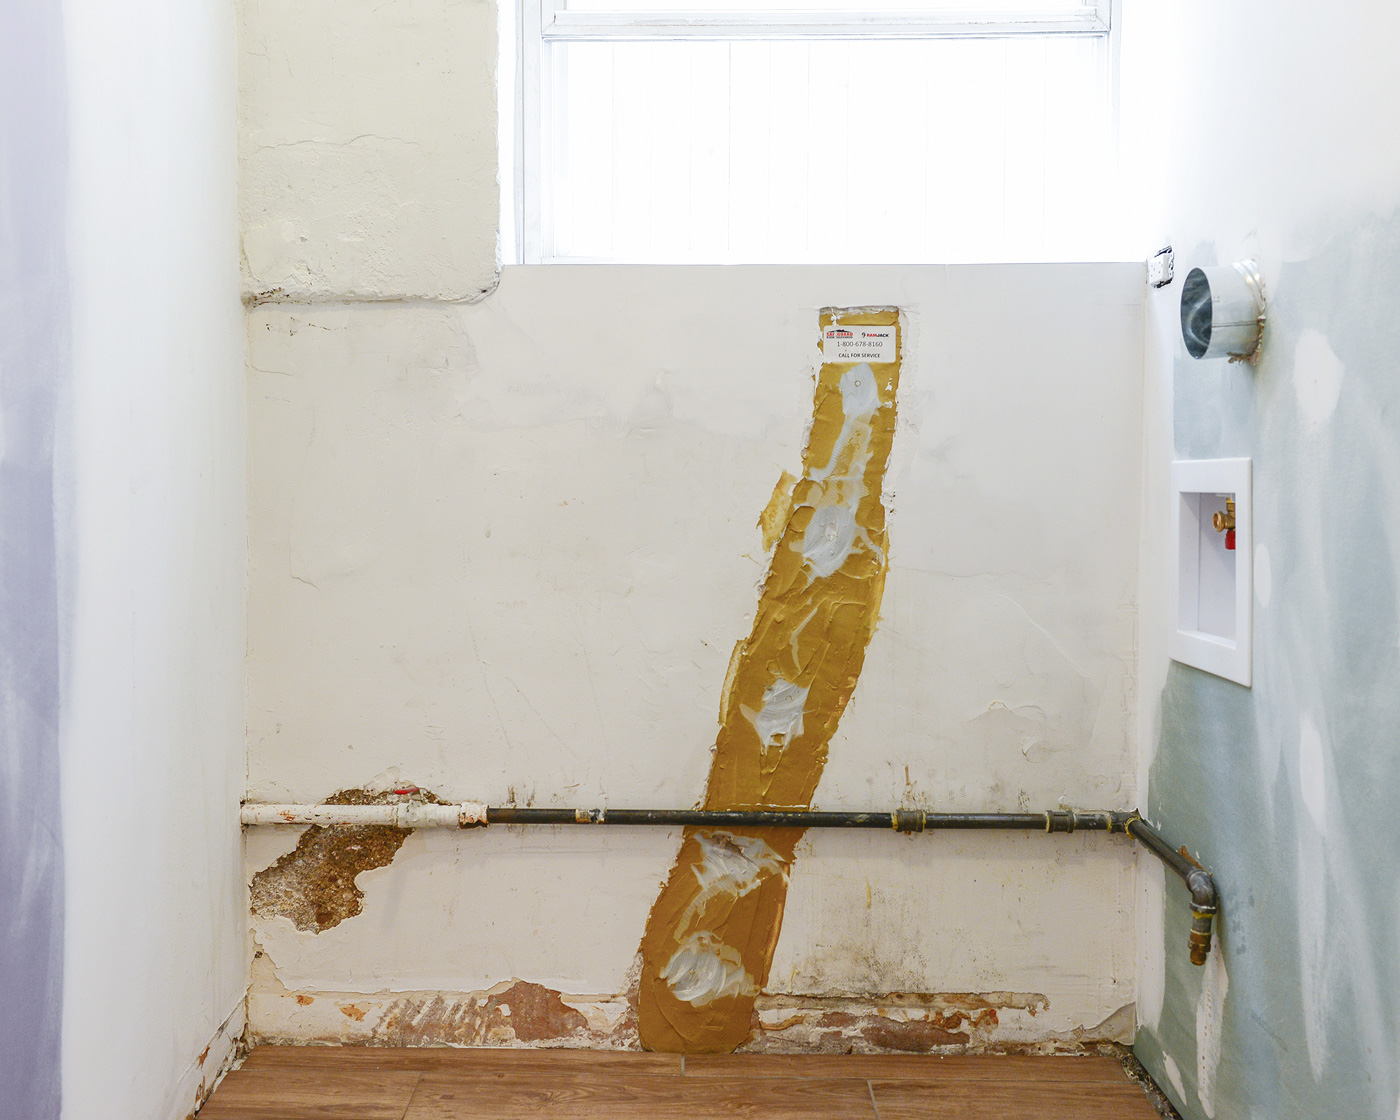
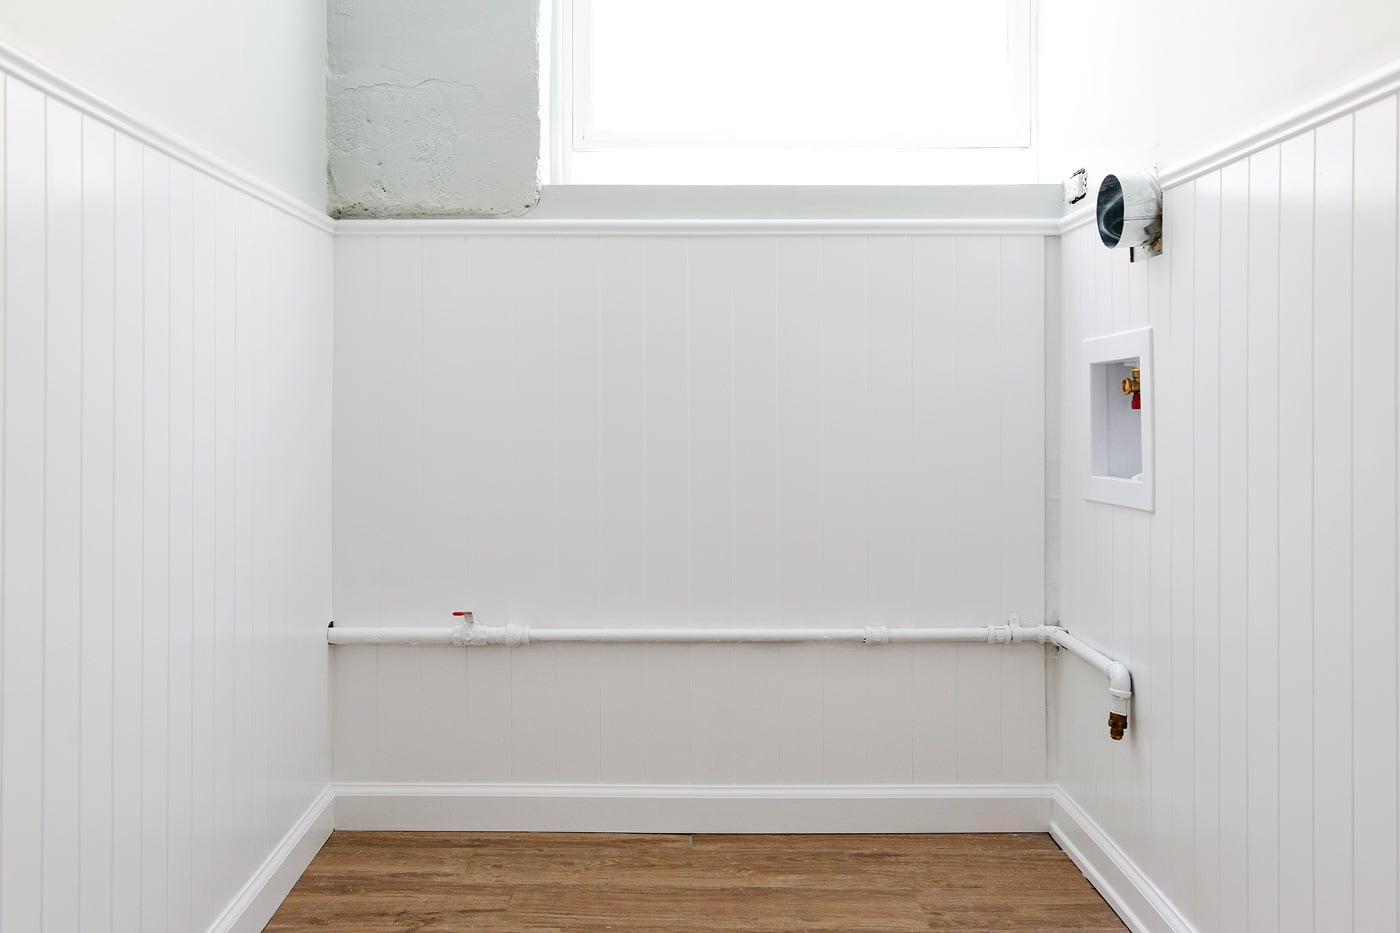
The machines were sold during our big purge right before the renovations kicked off, and although it didn’t need a ton of work on our contractor’s part, we still had a few issues for him to address. First, we moved the water lines to the left, and we did our best to keep them in line with the hook-ups on our new machines. The exhaust was never routed properly, so that was also taken care of, as well as new placement for a couple of electrical outlets:
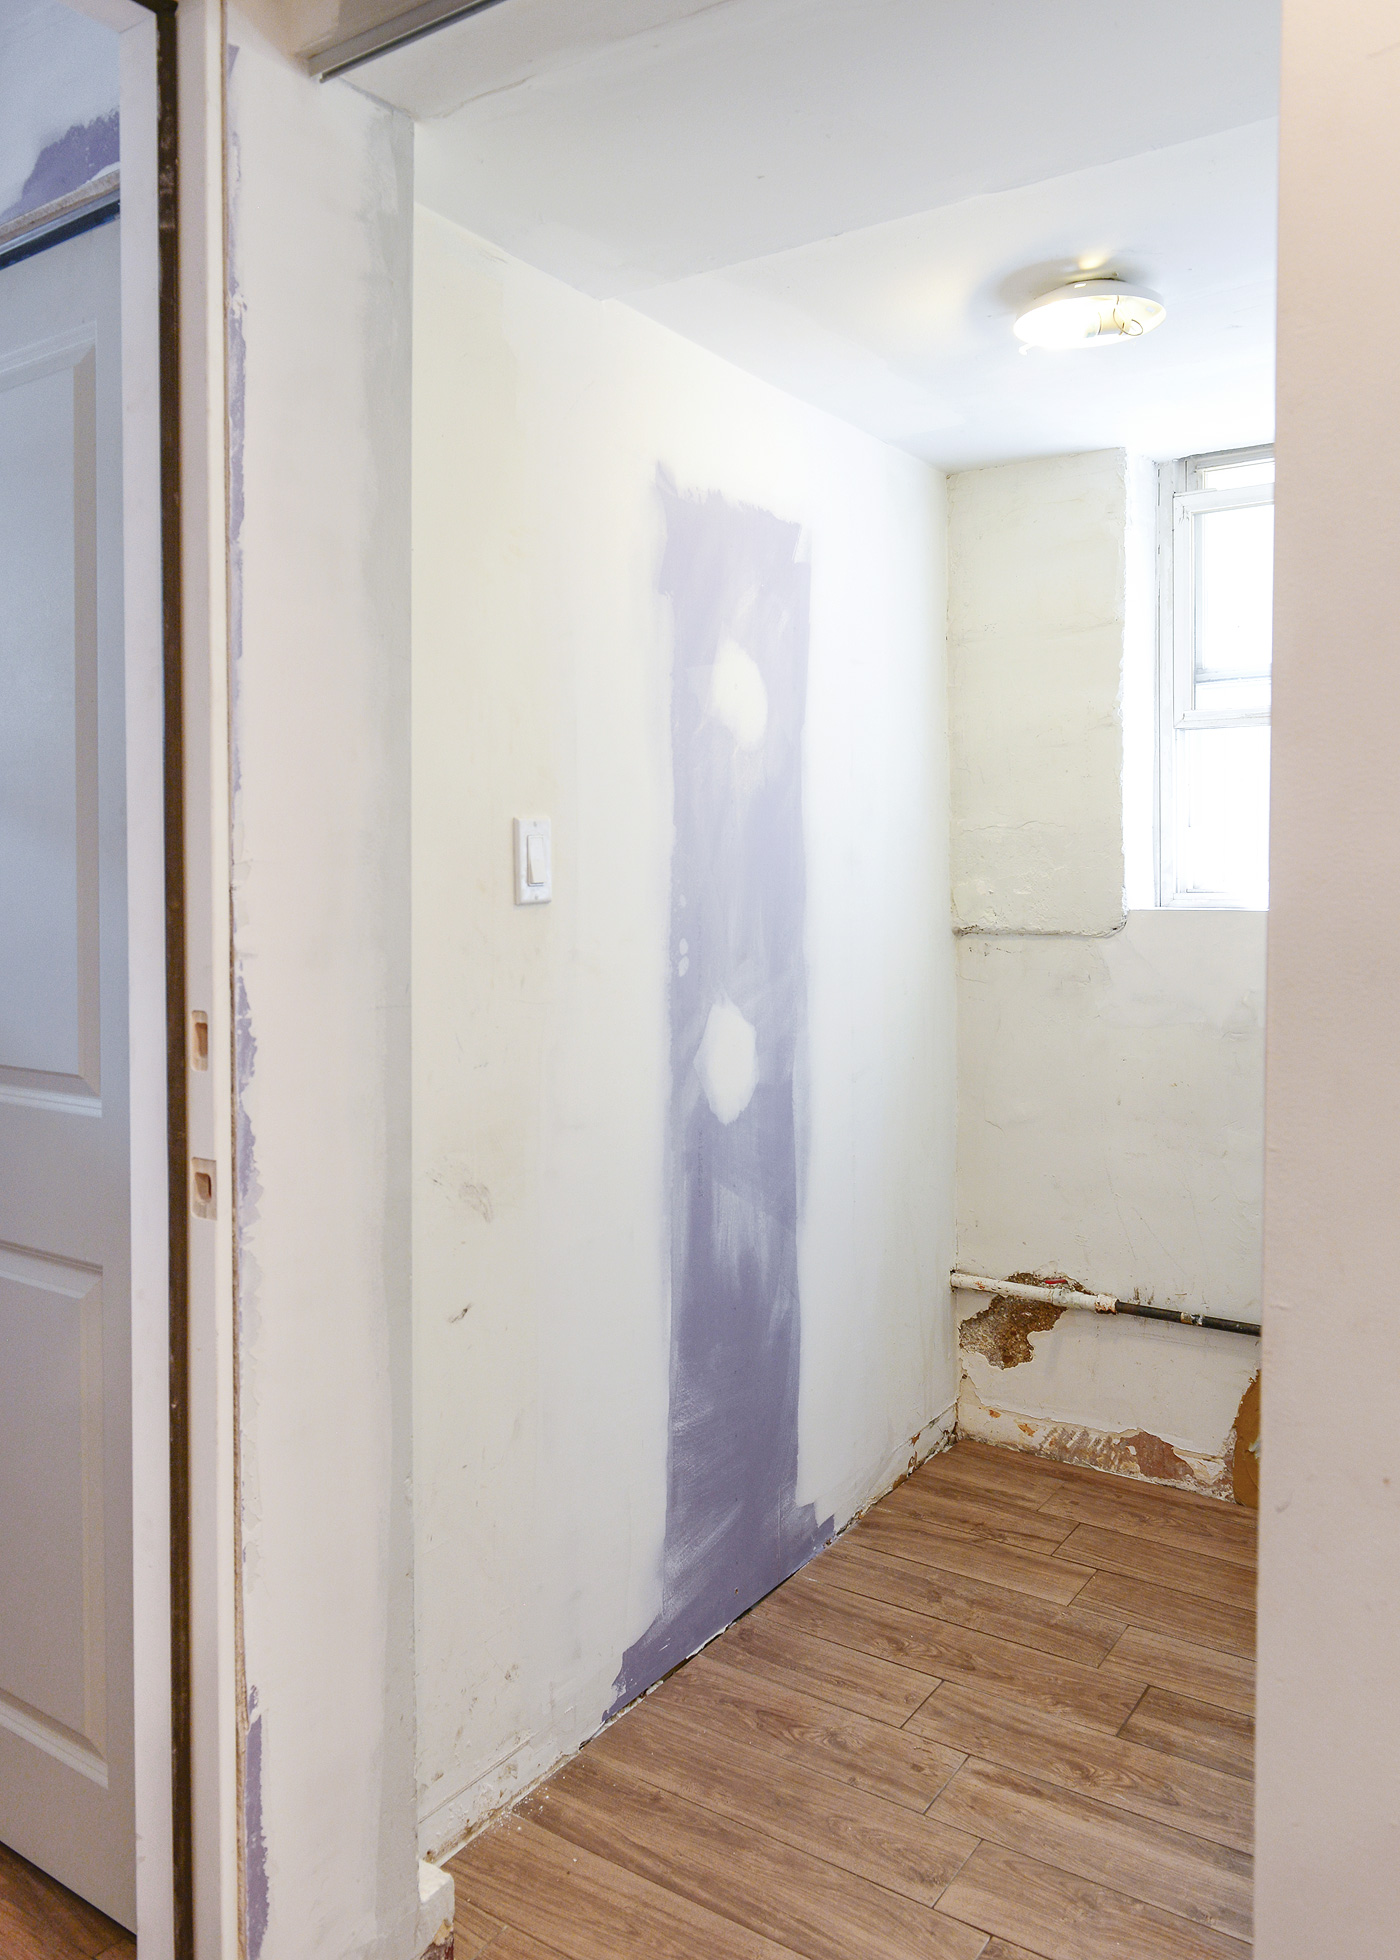
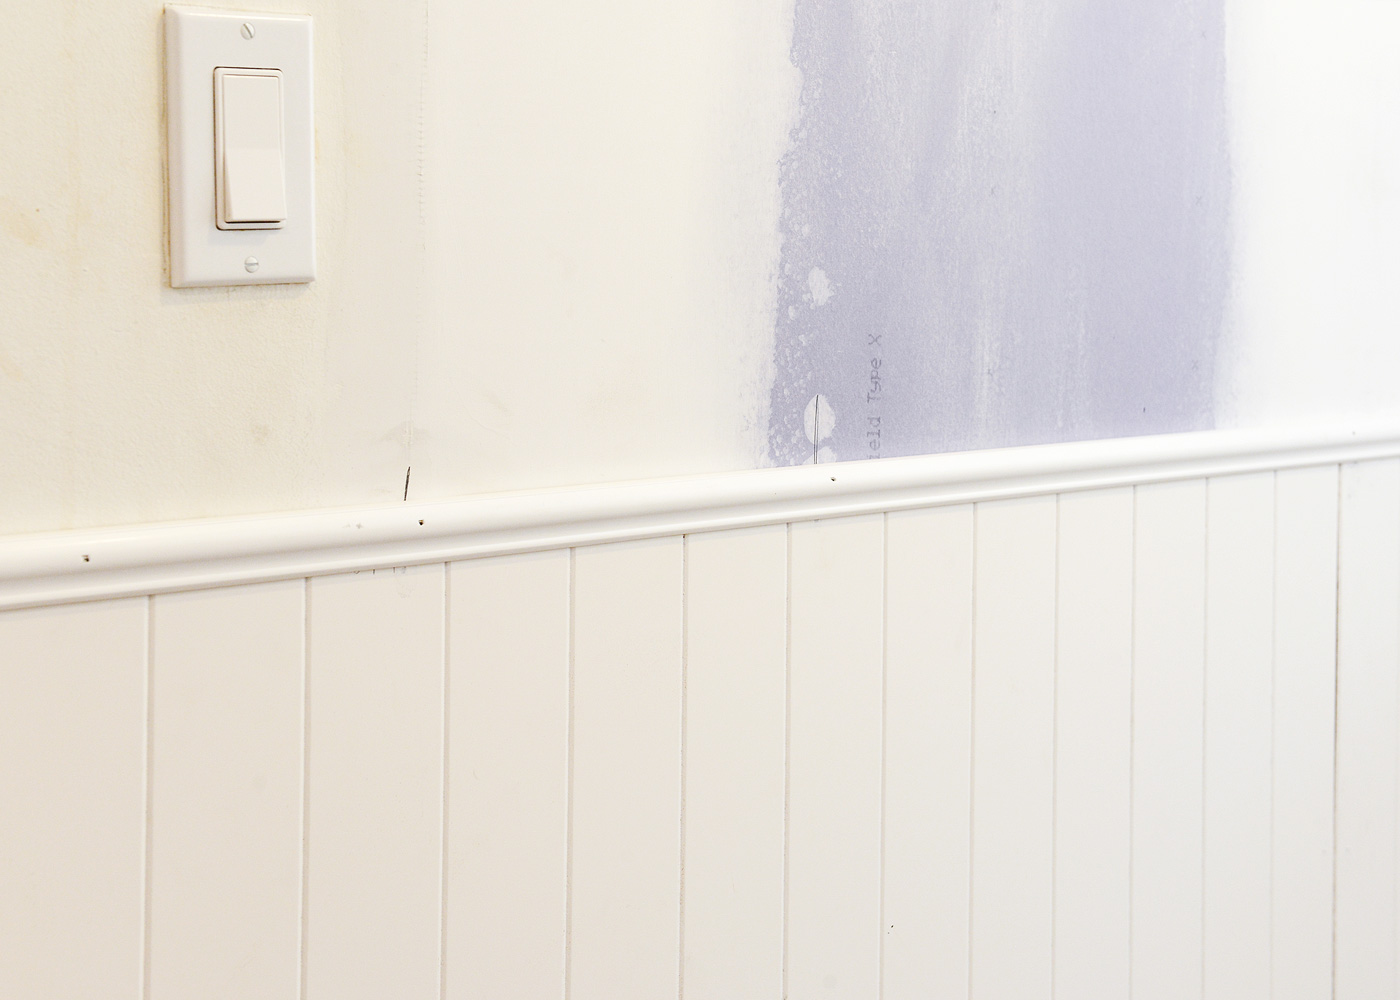
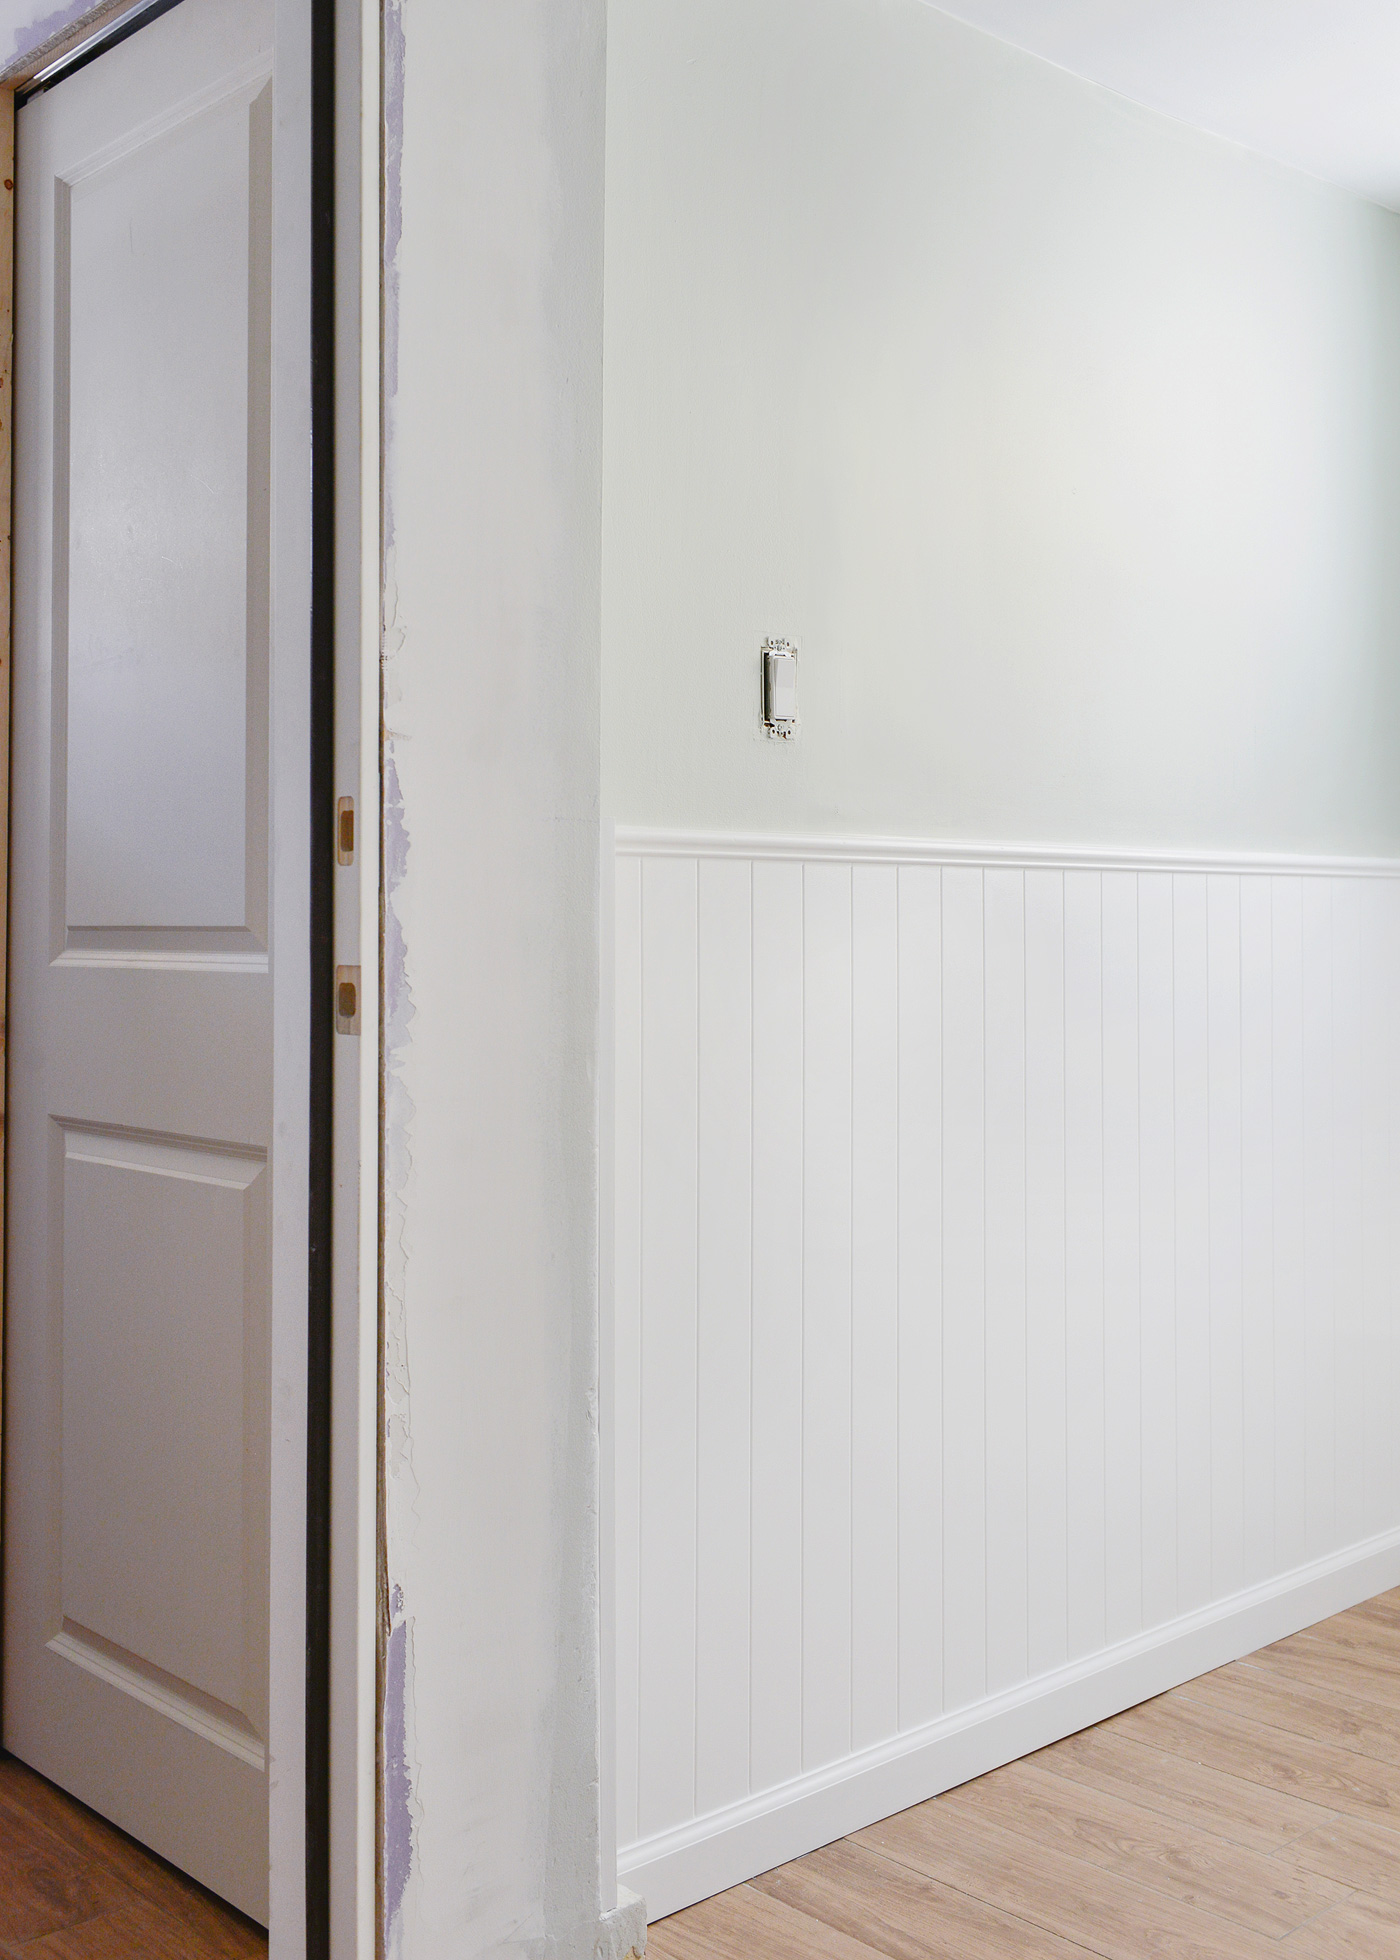
If I swing to the left, the PURPLE drywall indicates where there used to be access to the utility room, but you now know we patched that up and added a pocket door through the mudroom! You can actually see the pocket door on the left side of this photo, which might help to make sense of how these rooms connect:
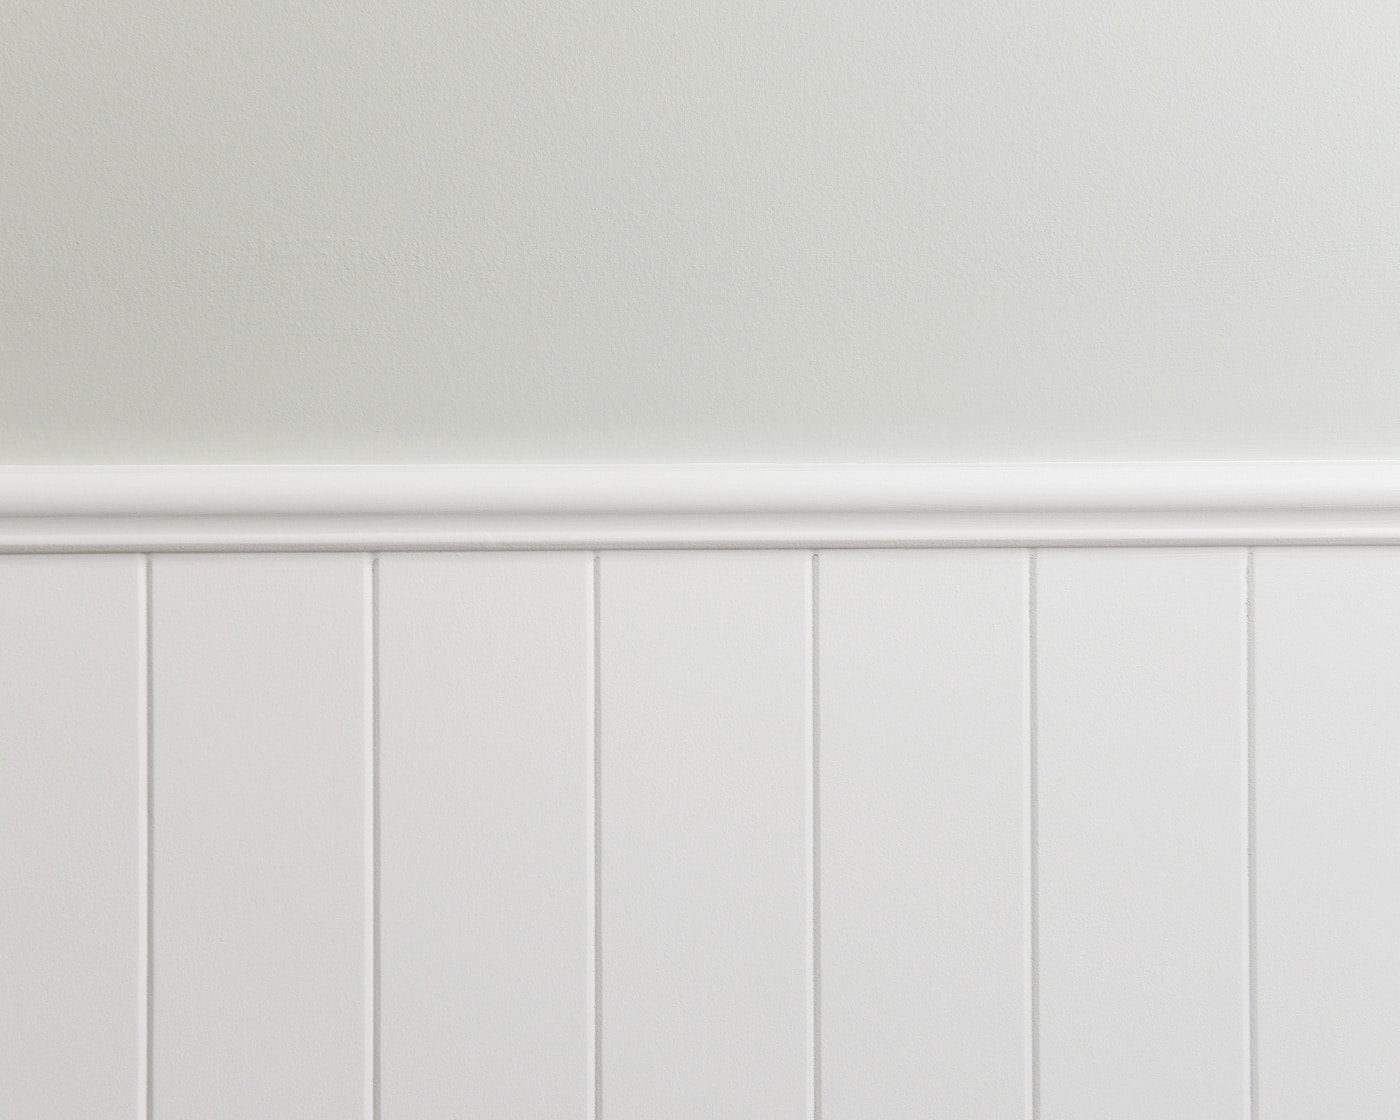
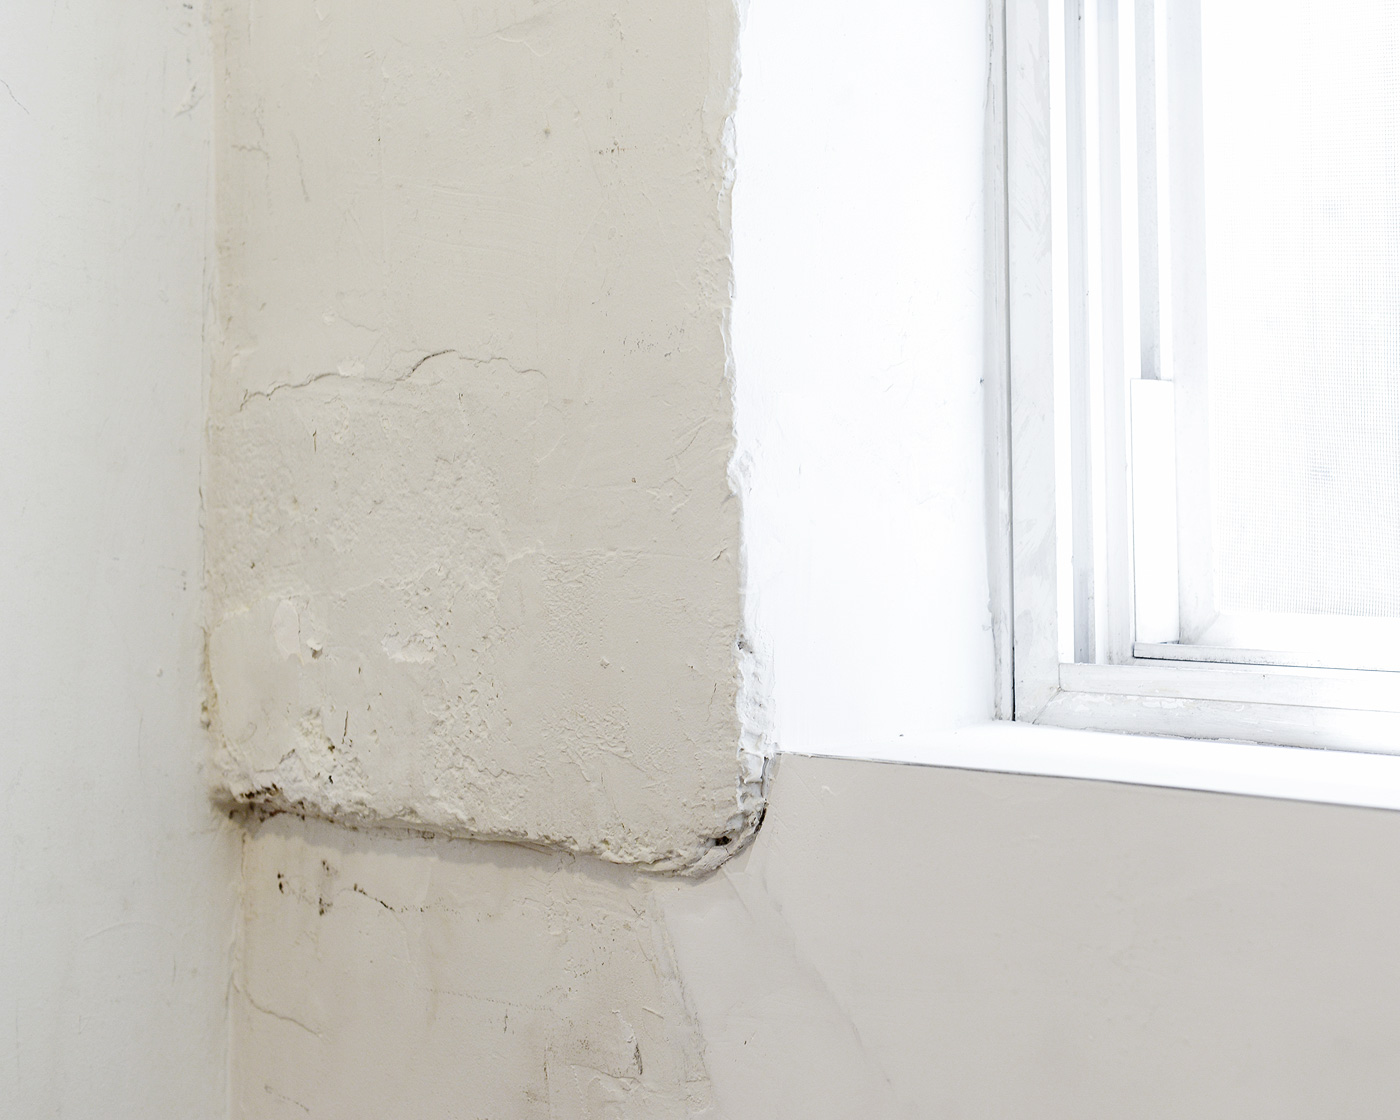
Although things were looking up, we were still dealing with unsightly issues along the exterior concrete wall. For starters, the gas line is on the outside of the wall, and that vertical yellow stripe you see? That’s an old foundation issue that we had filled with epoxy years ago, and there was no way we were going to allow that to remain the star of the laundry room! We knew beadboard would be a great solution to disguise the rough texture of the concrete wall, but it would also be a sweet way to add something unexpected to this small room.
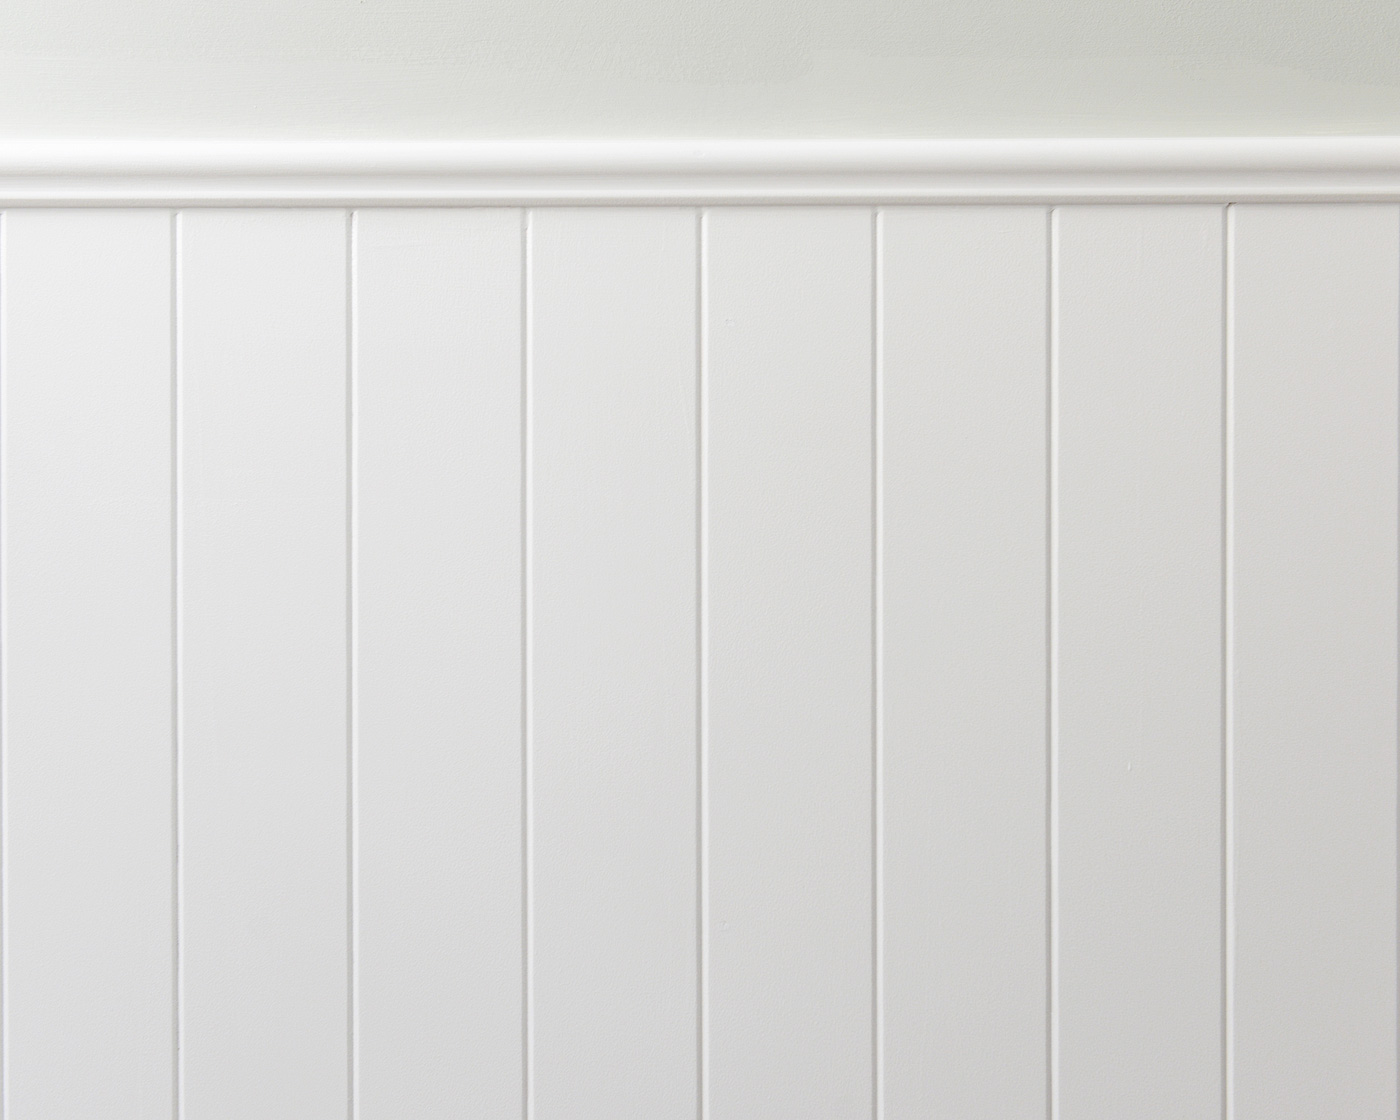
We picked up two 4′ x 8′ sheets of decorative V-groove paneling, moulding for the cap, baseboards and a can of semi-gloss paint from the hardware store. In total, we spent around $80 to panel this 4′ x 6′ room!
First, we needed to decide on a height, and although we would have loved to cut the 8′ sheets in half to create 4′ x 4′ sections, a weird curve in the concrete wall prevented that from happening. Instead, we landed on a 41″ height around the room, which would allow the top of the beadboard to stop just under that funny section of concrete, while still allowing for our cap moulding.
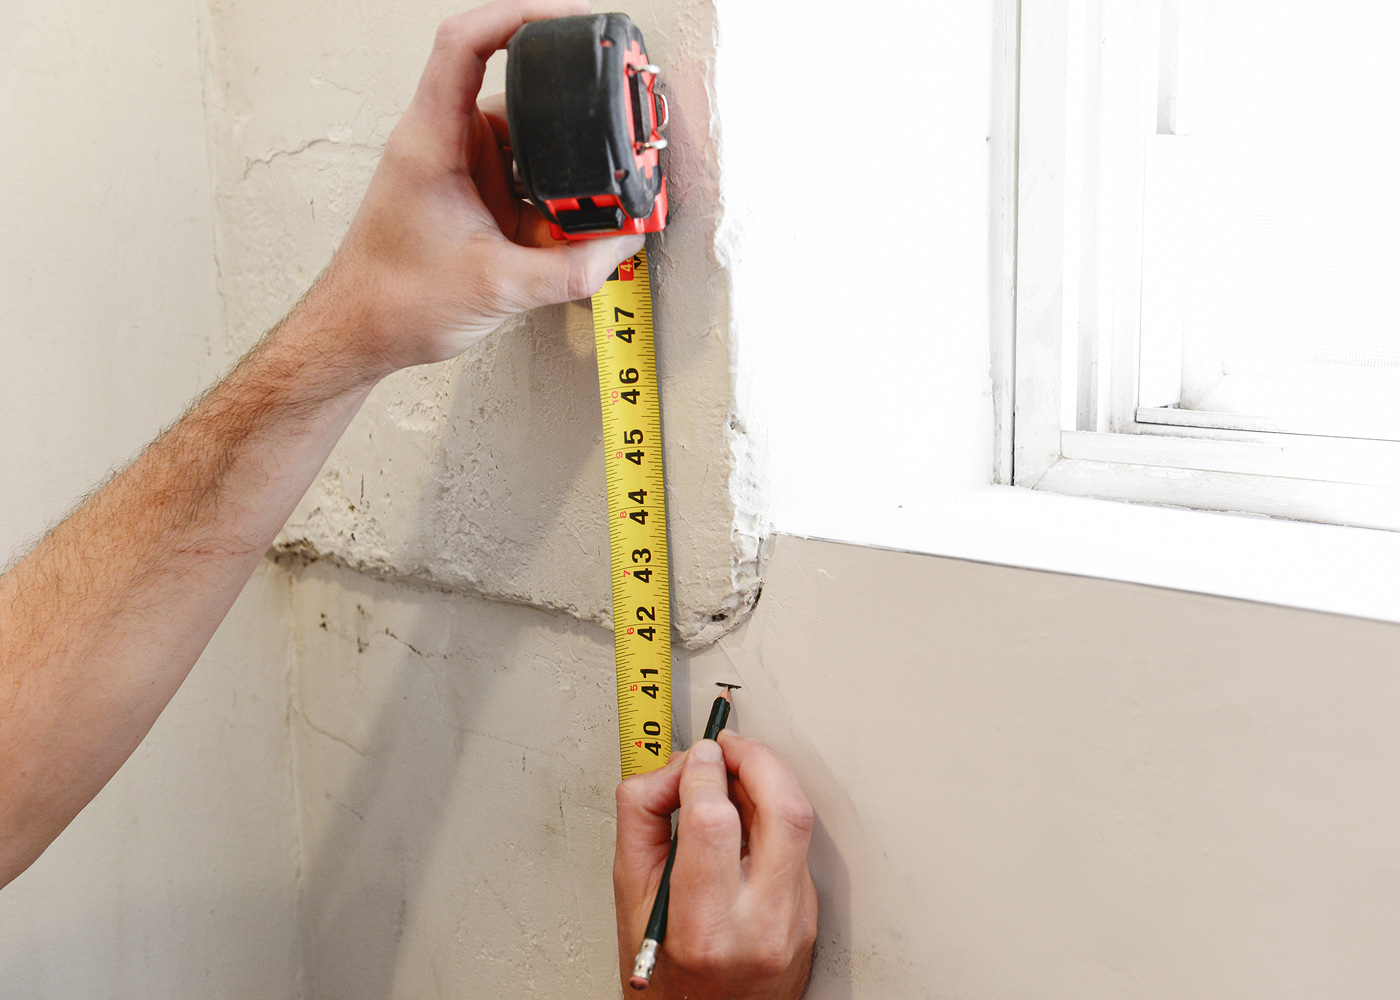
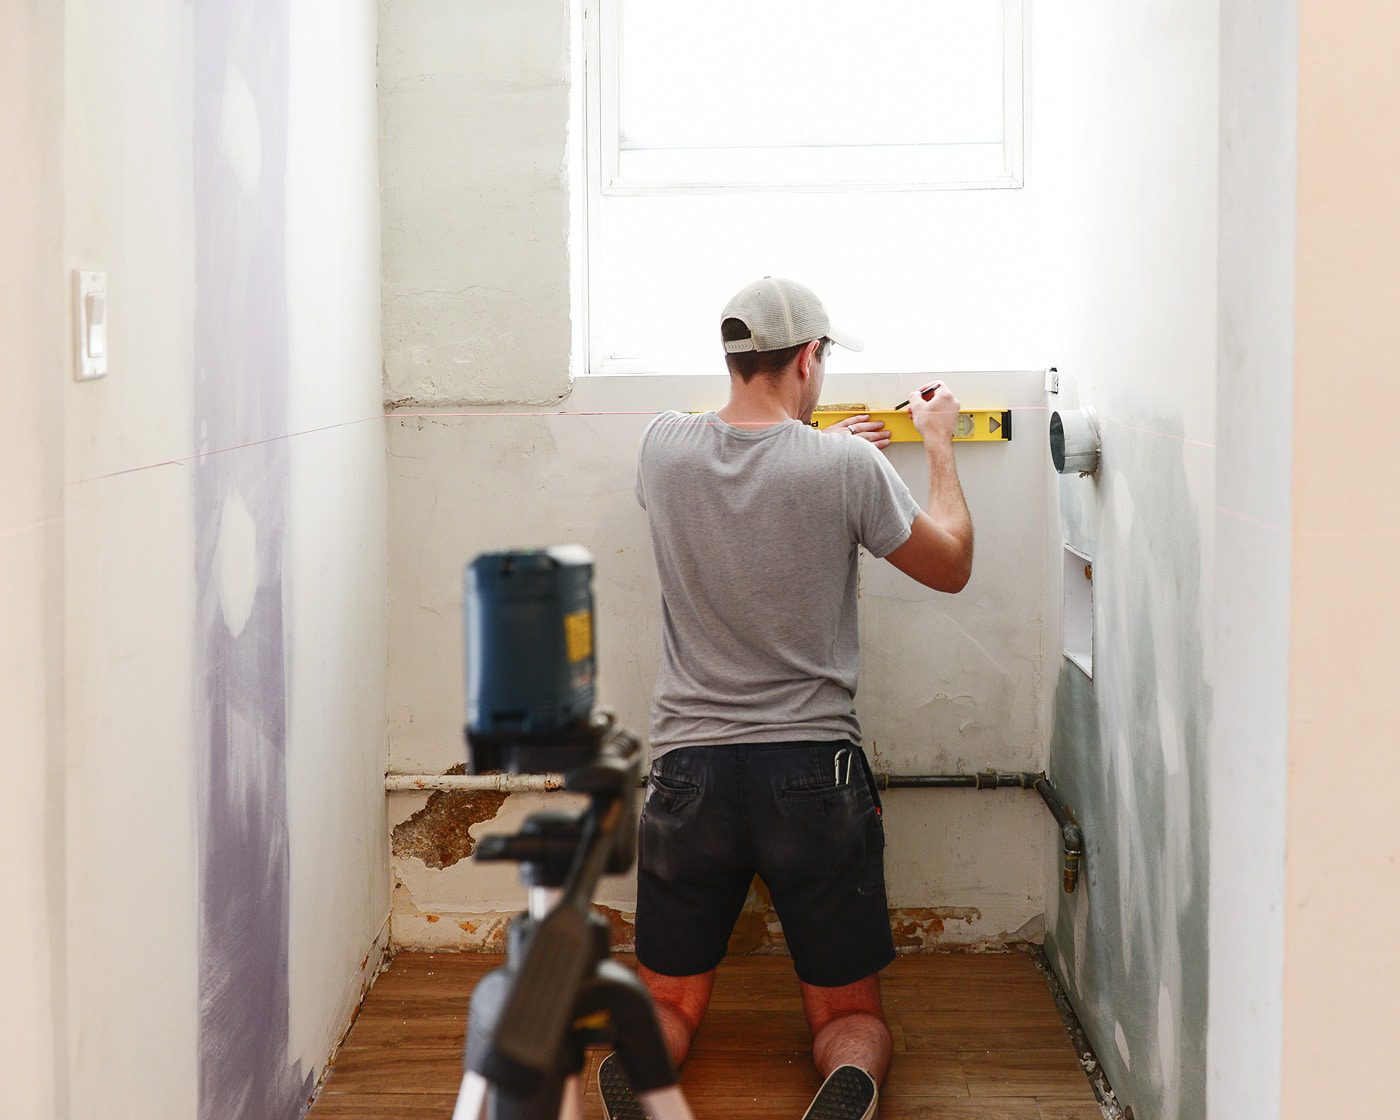
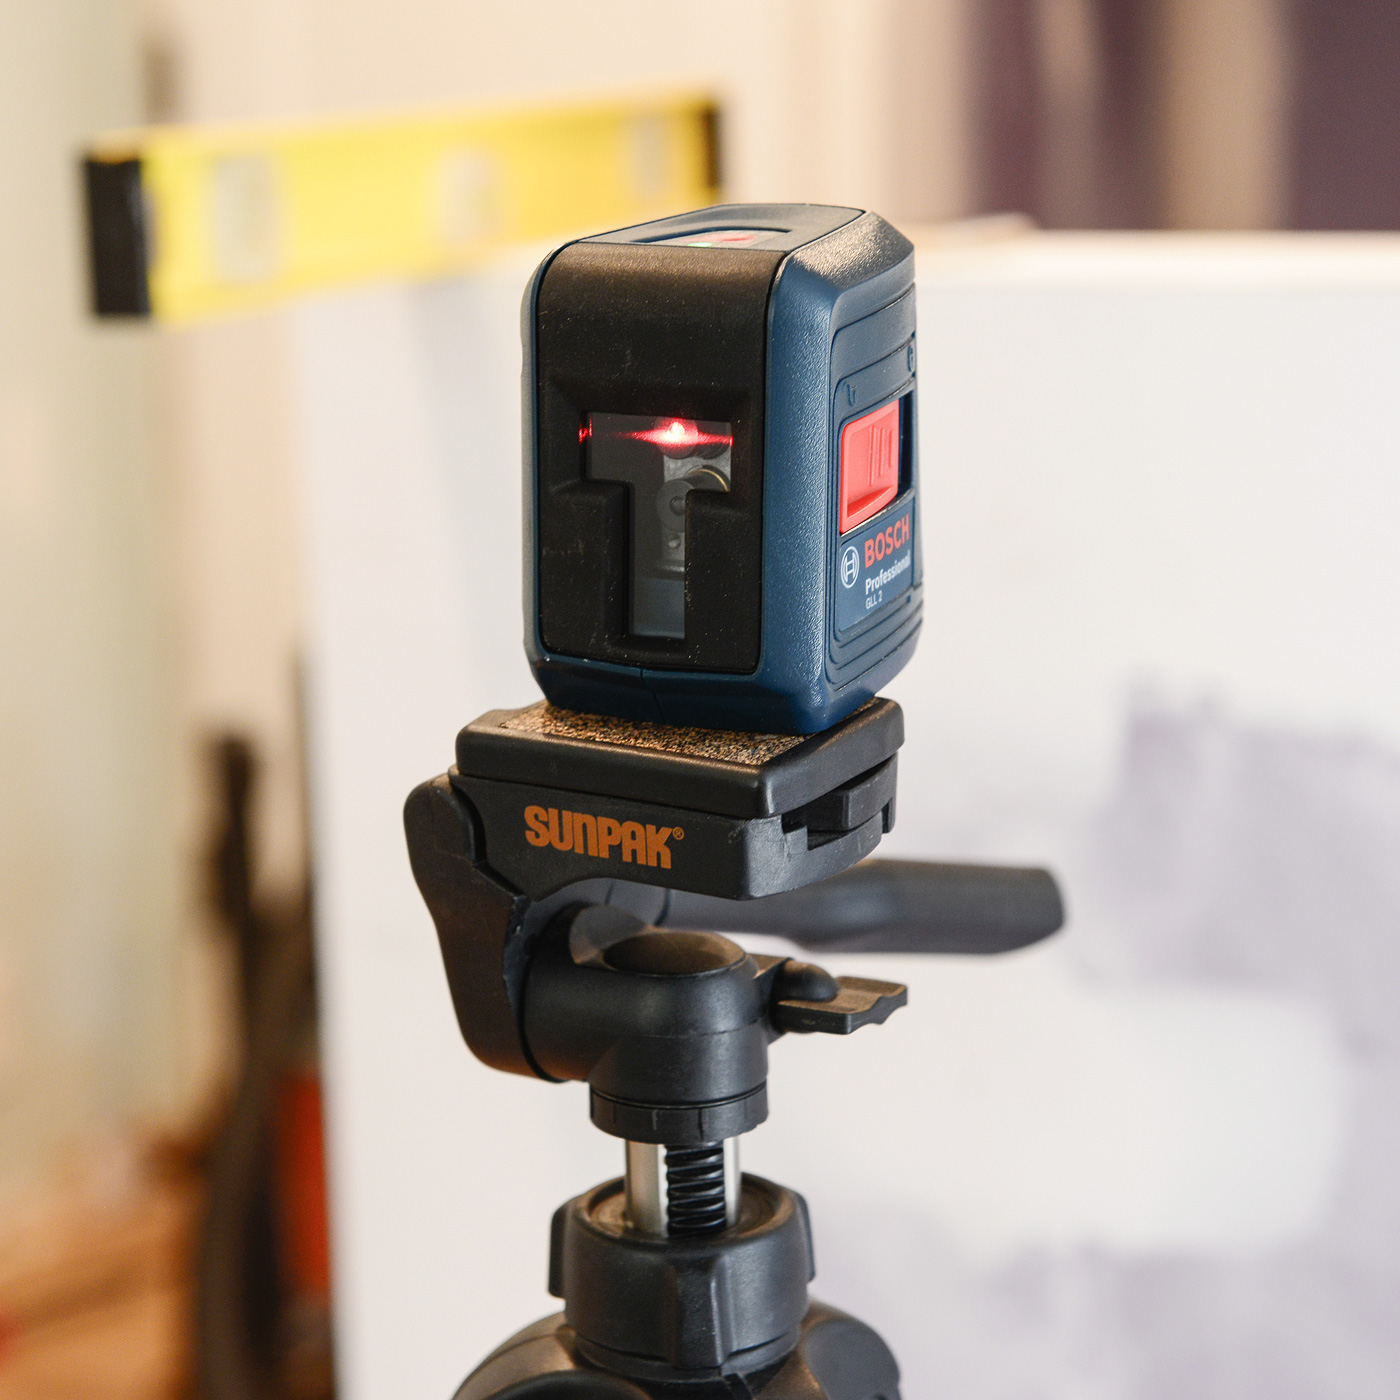
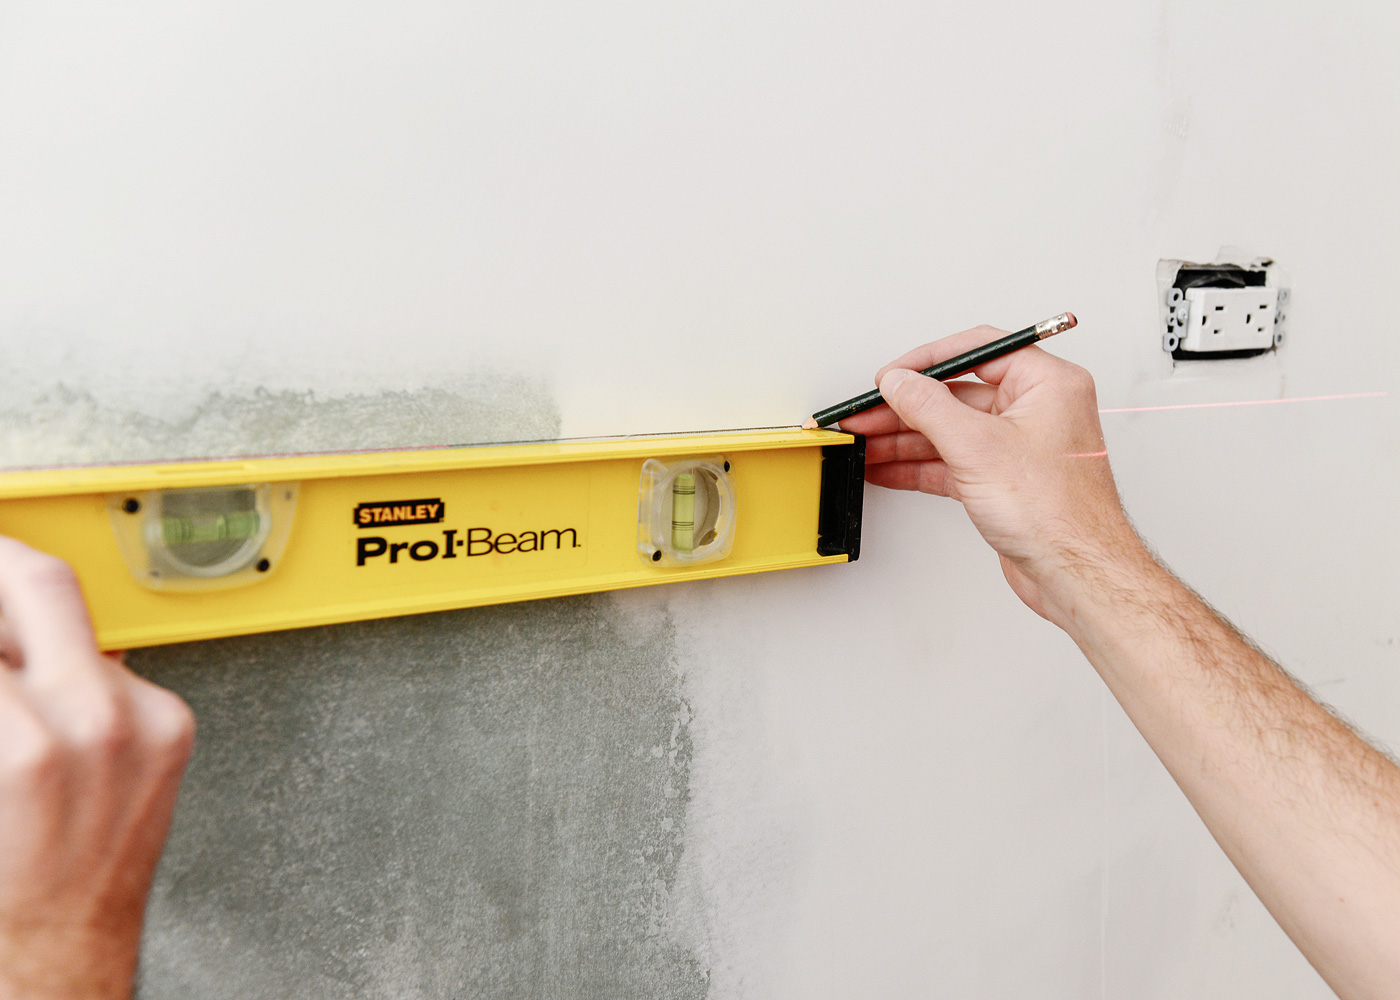
We used our rotary laser level (here’s a less expensive version) to create an even line at 41″ across the room – similar to how we cheated the paint in our master bedroom! – and Scott traced the line on all the walls with pencil:
We cut our boards to 40″ high, which would allow them to float about 1″ above the floor. This takes into account any unevenness that will occur in almost any home – but especially ours!

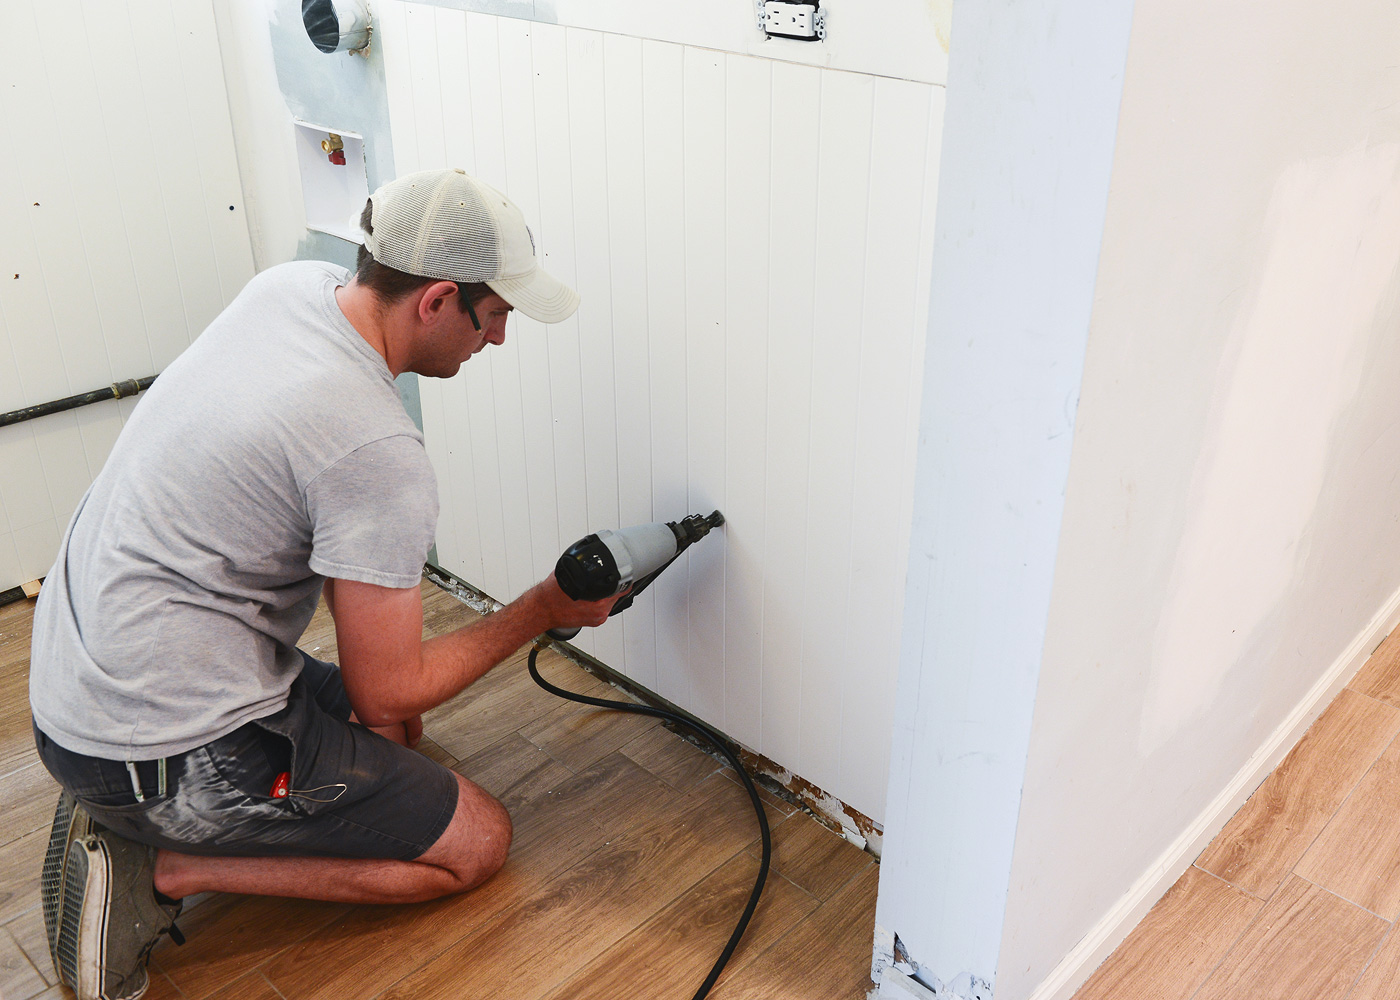
Adhering the beadboard to the wall is relatively simple. After aligning the top of the board to our pencil line, we used our nail gun for the drywall sections, shooting them vertically every 10″ – 12″ and about 16″ apart. (Side note: We’ve been using this nail gun for years, and we couldn’t love it more!) The concrete wall was a bit trickier, but we worked around that by slathering on construction adhesive and using masonry screws to hold that sheet into place temporarily. Once the adhesive had dried, the screws came out, and those holes were filled with spackle. Below, you can see how the beadboard sits proud of the floor by about 1″:
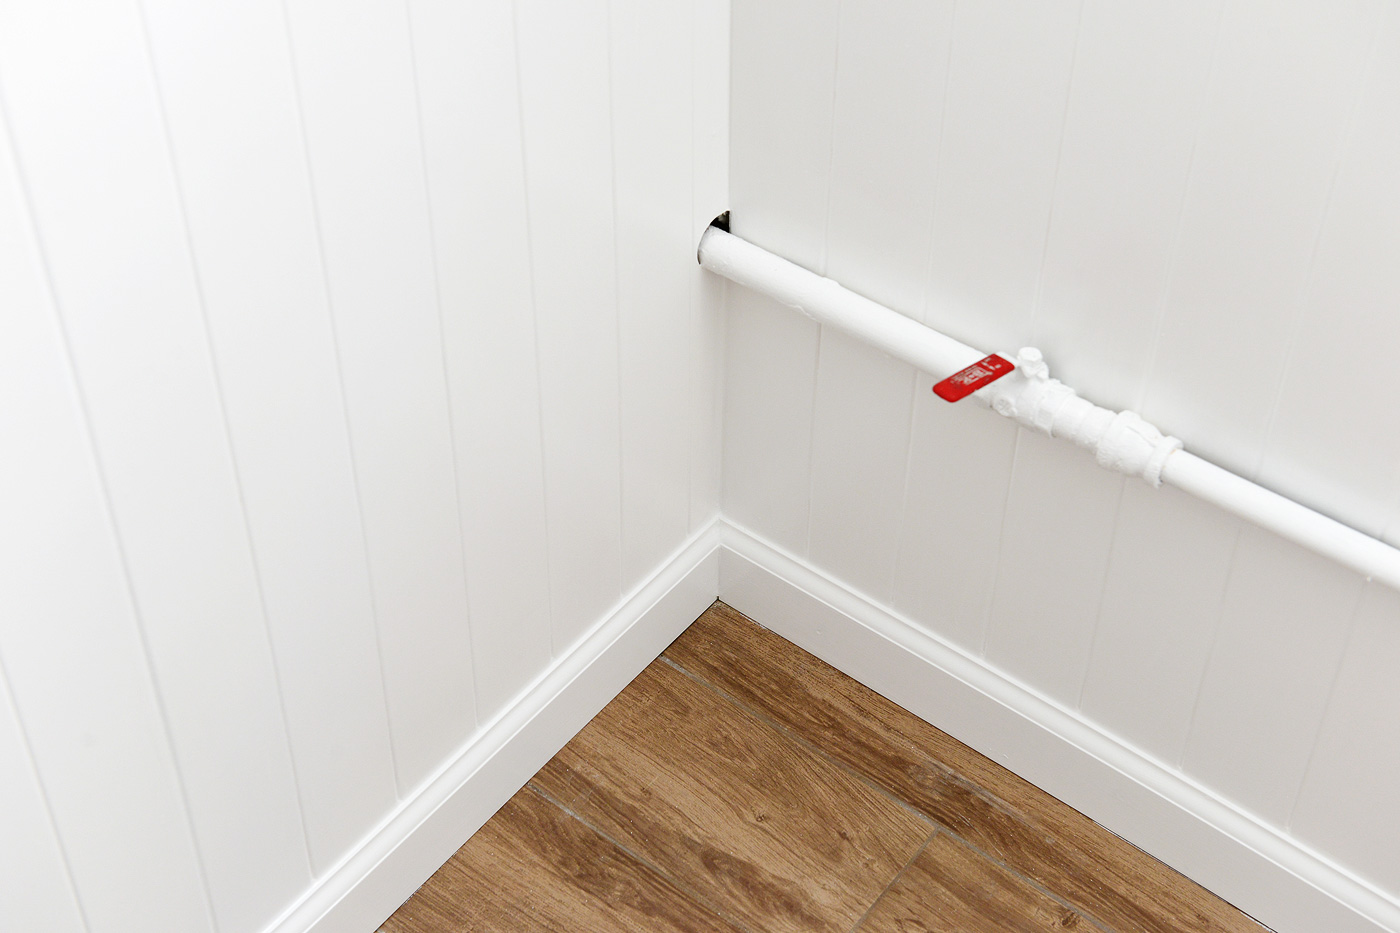
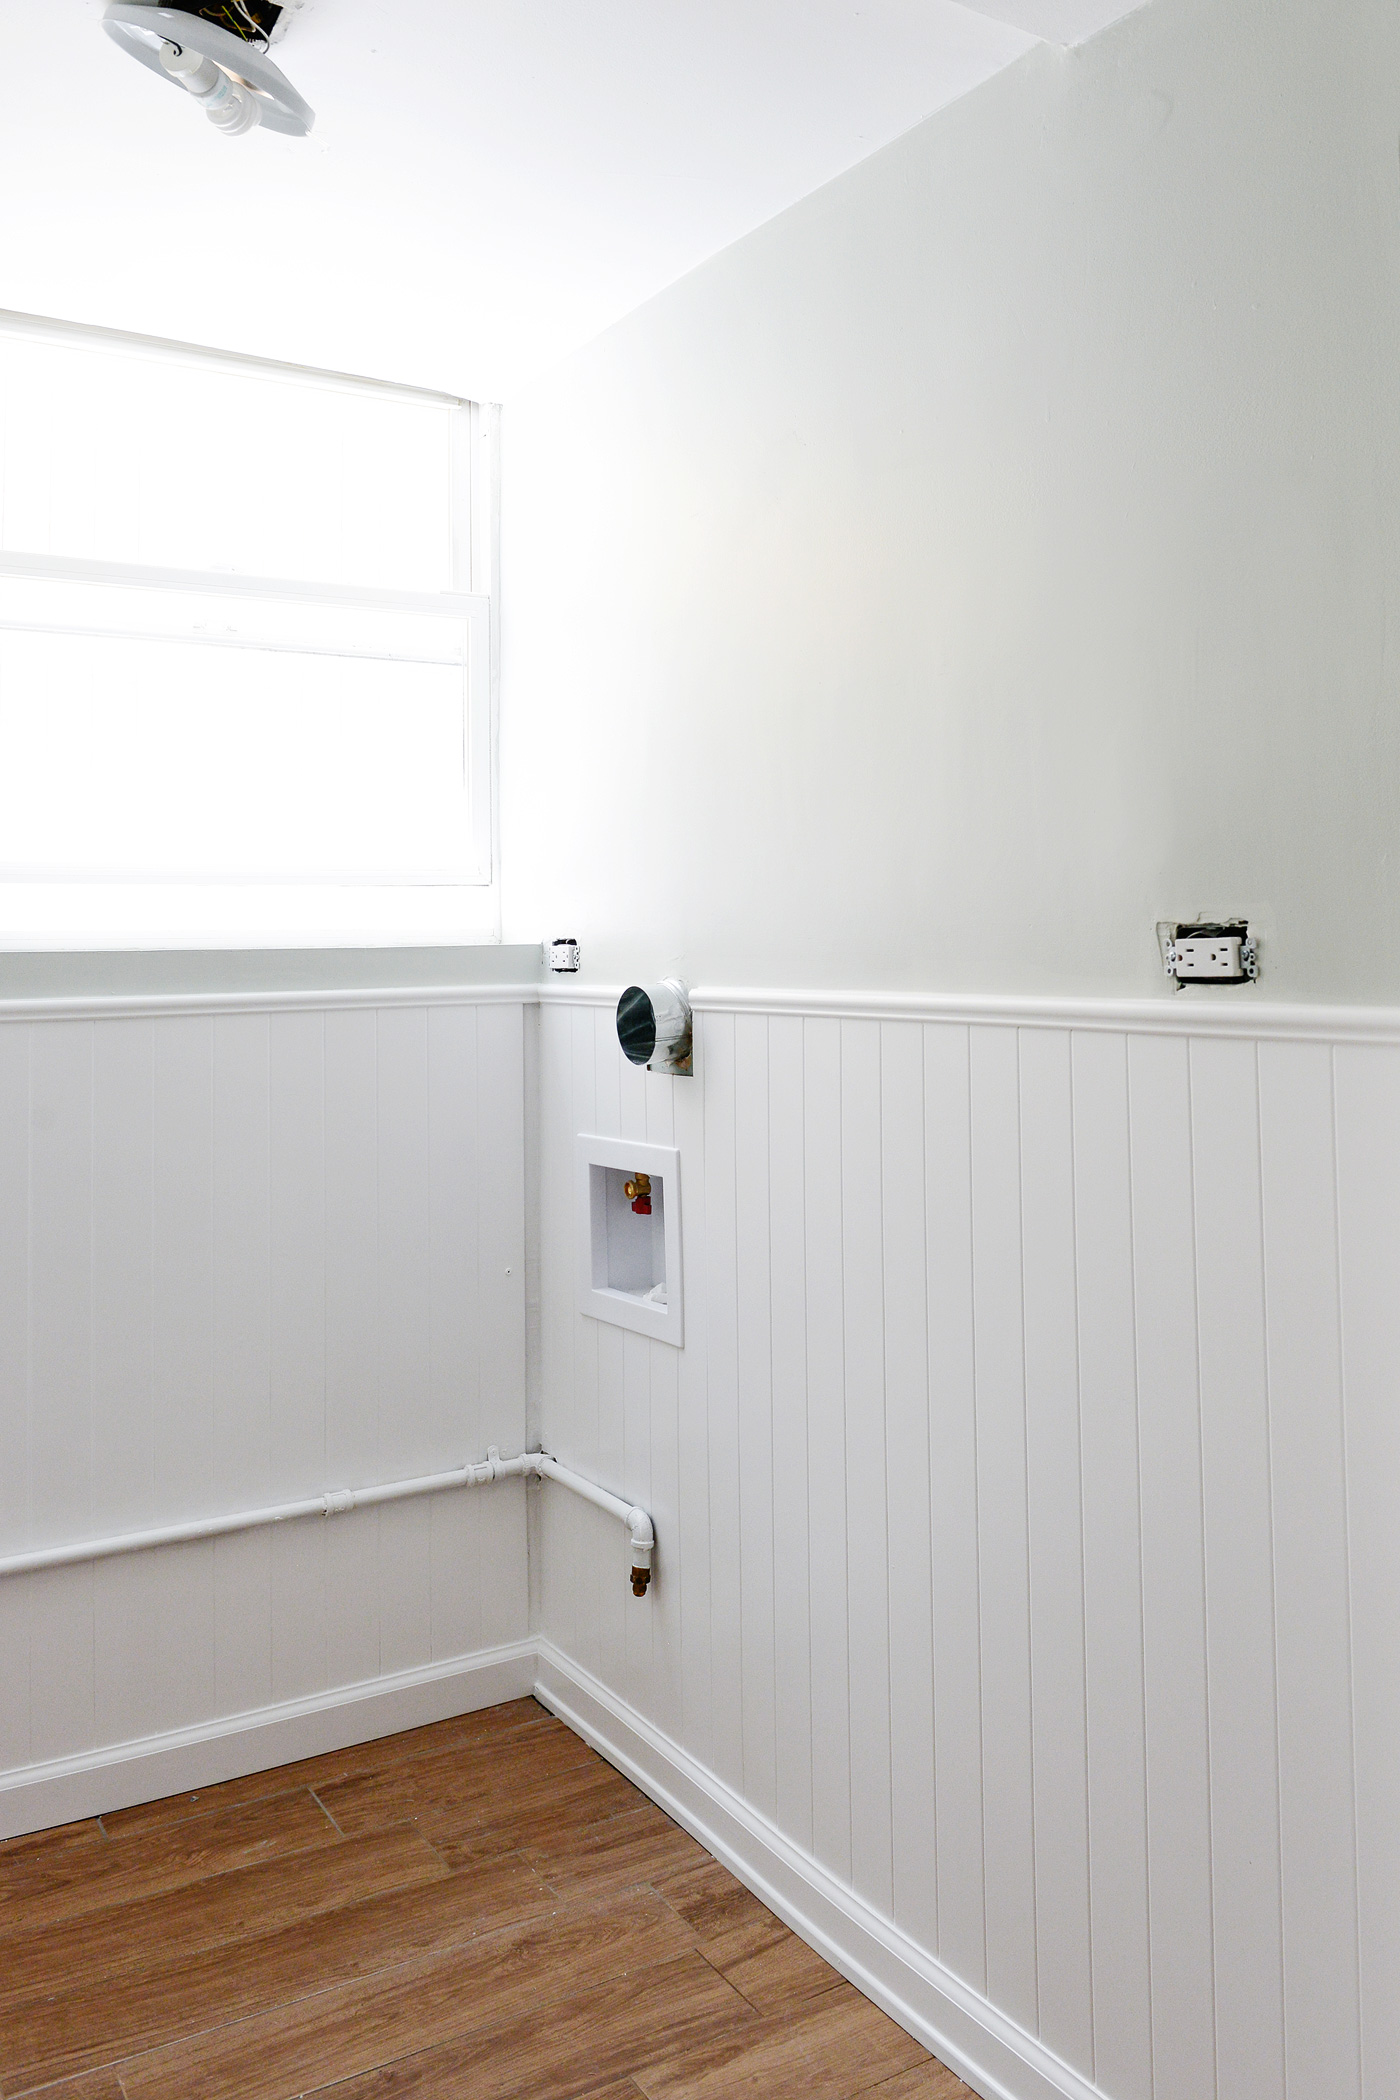
Luckily, we were able to avoid the electrical outlets, but we did need to cut the beadboard around the exhaust and water lines. They’ll be 100% hidden by the machines (and furthermore by a side panel we’ll be adding), and the water lines would ultimately be capped with a trim piece:

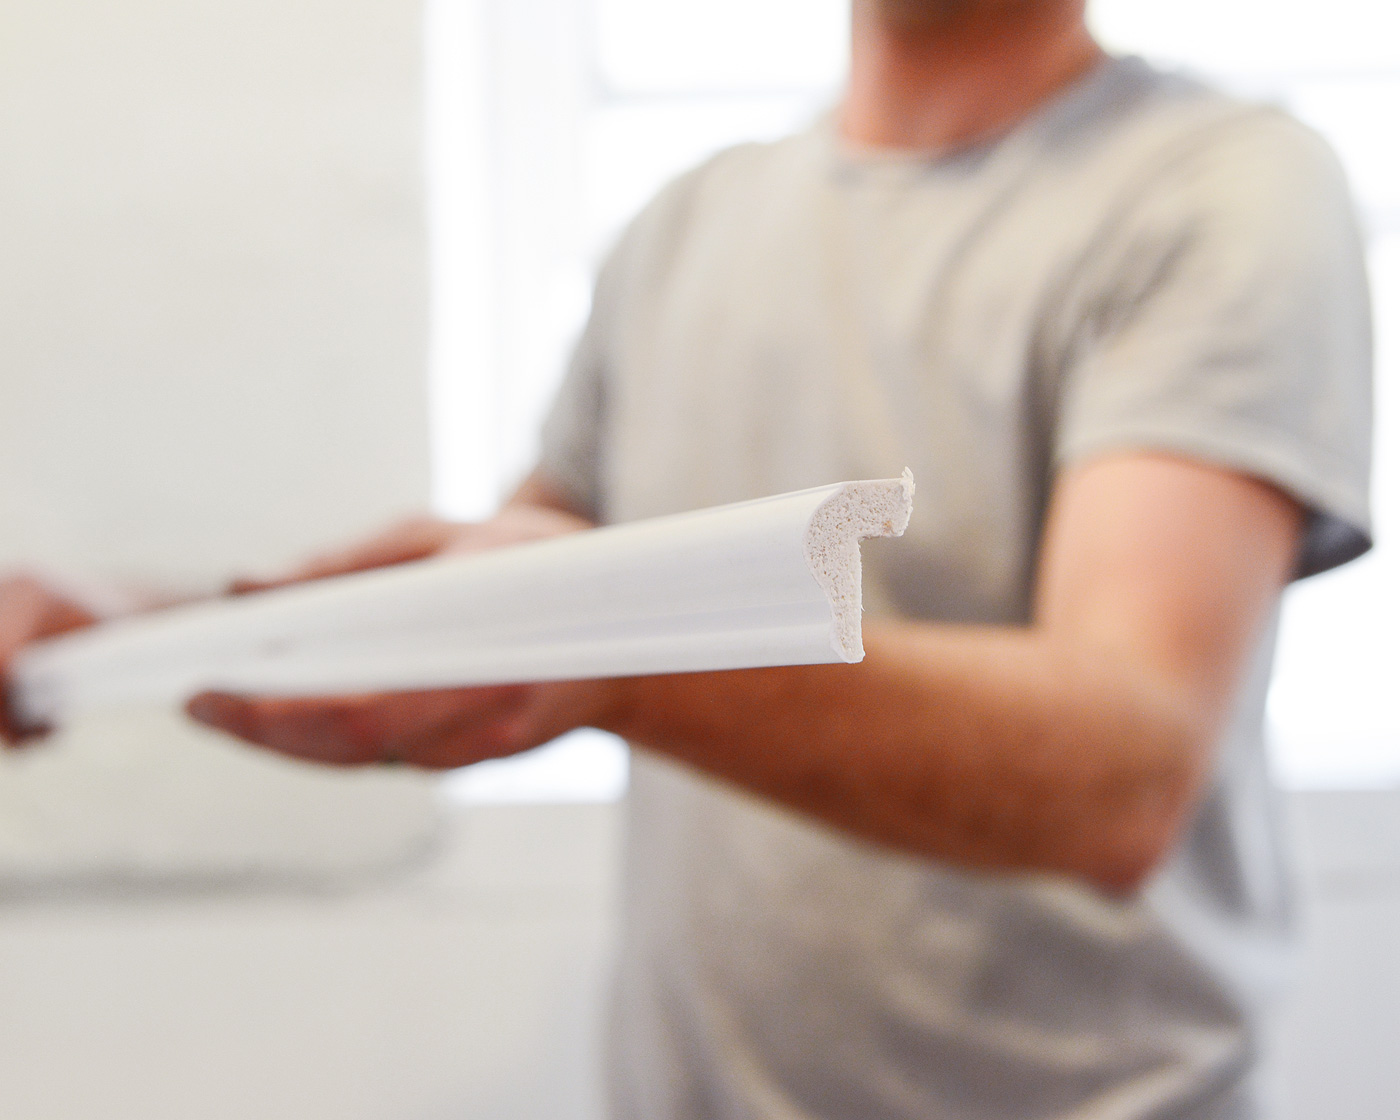
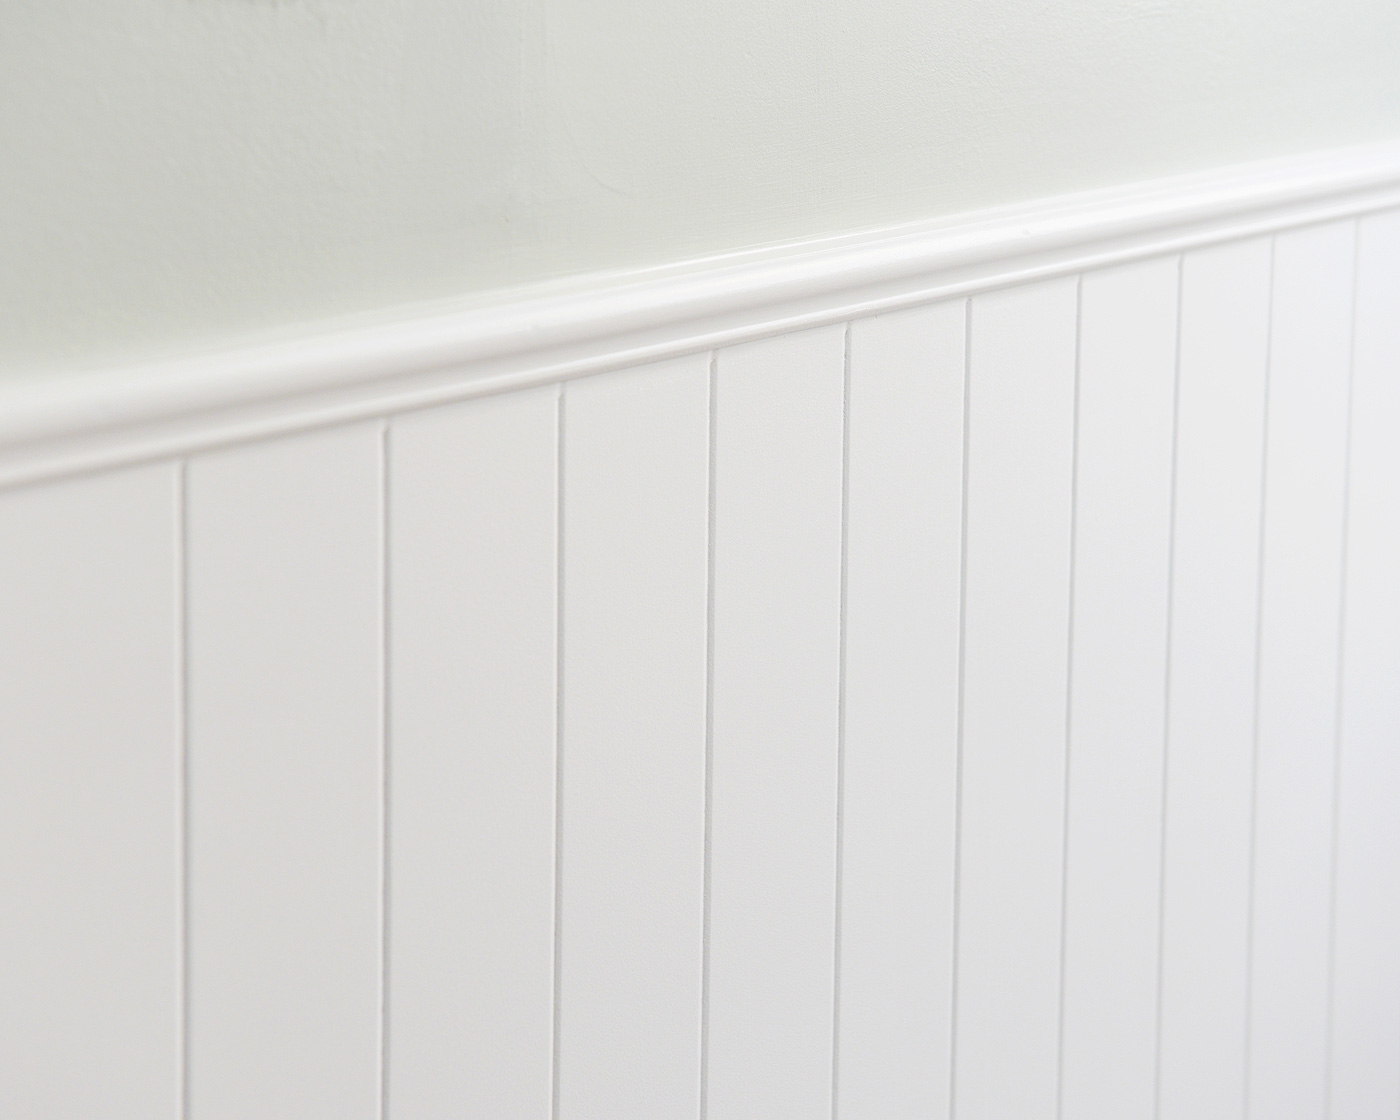
With all the beadboard in place, it was time to top off the rough edges with a strip of decorative cap moulding. There’s a small lip on the back that sits snugly along the top of the beadboard, and just like before, we used our nail gun in the drywall to secure it into place, and we used construction adhesive along the concrete wall. The same method was used for the baseboards, which concealed the floating beadboard beautifully.
Finally, we were able to polish it all up! The nail holes were spackled and sanded, and visible seams, trim and baseboards were caulked. The beadboard was painted in Valspar’s Ultra White (untinted, straight off the shelf!) in a pretty semi-gloss finish, and I used a regular paint roller to cover everything pretty quickly.
The gas line looks much better now, too! I taped off the switch (the red handle you see below), and I used a spray primer to coat it completely; this helped to prevent bleed through from existing specks of rust. Another two coats of the same Ultra White semi-gloss paint was used to help it blend into the beadboard.
You can see in the right corner, below, that there’s about a 1″ section that didn’t get beadboard. Two things: We ran out (we used every last inch of two sheets!), and second, once the machines are in place, that little strip would be hidden completely. We’re not ones to shortcut a project (Scott’s dad always jokes, your eye won’t go there!), but in this case, it really didn’t make sense to cut into another $20 panel of beadboard for a single inch that would never be seen. Truly, your eye won’t go there.
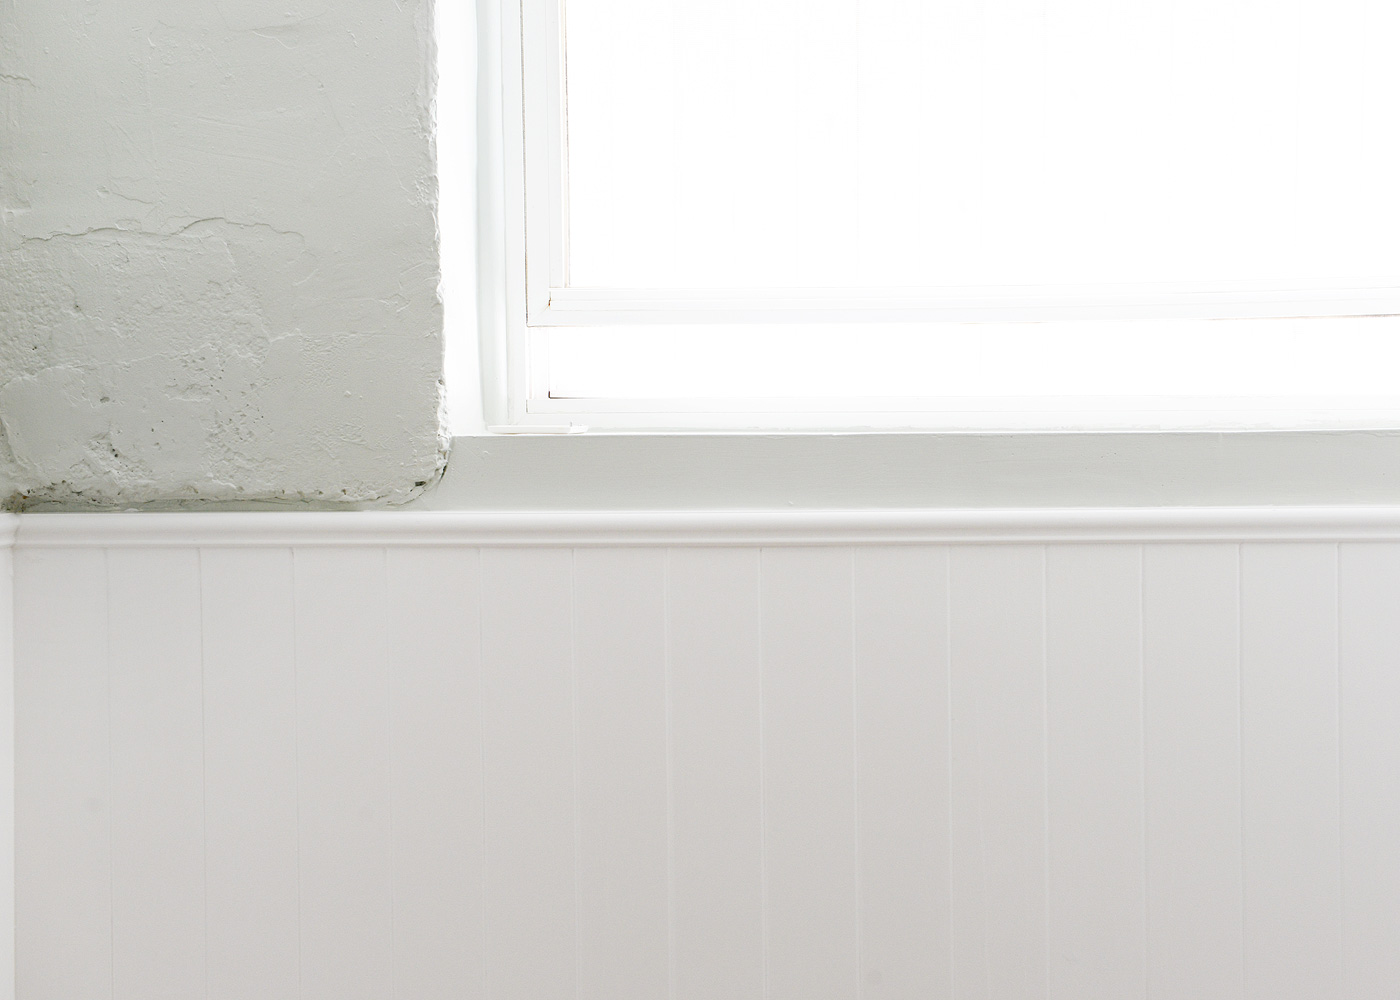
The ceiling was freshened up with a coat of Valspar’s Ultra White in a flat finish, and we landed on Sherwin Williams Sea Salt (mixed to Valspar Reserve in an eggshell finish) for the walls! We knew we wanted to add a hit of color in this room, and we were on the hunt for something muted, not too bright and nothing too polarizing. After sharing a handful of swatches back here, many of you chimed in with Sea Salt!, and so, Sea Salt it was! It’s subtle and pretty, and we think it’s a clean, fresh color for a laundry room. (Every part of us wanted to use Raccoon Fur, the same color in our master bedroom, but we knew it wouldn’t be everyone’s cup of tea.)
And that’s where we are with the laundry room! To allow for hidden storage, we’ll be putting in a stacked washer/dryer and adding a shallow base cabinet with shelving above. While that will block part of the window, we’re prioritizing storage in this case. Because no matter what, it’s a laundry room! A teeny, tiny one, but a laundry room nonetheless.


Sometimes I think caulk and beadboard are the cure-alls for what ails an old house. :) I like what you did in the laundry room. Nice work!
No doubt. EVERY time I use caulk, I tell Scott, this is the glue that holds an old house together!
Where did you get your sheets of v groove? My HD and Lowes only carry sheets of small and wider beadboard. Love your laundry room! I just did mine with wide beadboard and stacked my W/D, it’s so much better already, even though it’s not quite finished. I love to see all the orogress on your apartment!
We actually planned on using the smaller beadboard, but our usual Home Depot, Lowe’s AND Menard’s were all out of stock! We went to a different Home Depot (on North Ave for Chicago locals) and found this, which we like even better.
Love it!
I love it!
This looks so so good! I’ve been wanting to add beadboard to both of my teeny tiny bathrooms but in the one there is a tile trim around the base of the room that is somehow recessed so it’s flush with the plaster if that makes sense. Think we could run the beadboard to the top of that tile and then add baseboard to cover where the tile or should we rip the tile out? This dilemma is pretty much the only think stopping me from beadboarding it up!
If the tile is flush to the plaster, I don’t see why you couldn’t cover it up completely! Maybe go a 1/2″ higher and then add the cap moulding to complete the look!
Dave said, “Ha! I knew she would eventually get me!”
We used Sea Salt in our bathroom remodel and I love it! It looks fantastic paired with white (and wood in my personal opinion!). Loving your laundry room – and you’re right, your eye won’t go there. We have a few of those spots in our house as we’ve remodeled.
Megan, Scott’s Dad here. Thanks for backing me up on “your eye won’t go there”. I am not permitted to utter these words around Kim.
Funny!
We want to do this in our kid’s bathroom!
Paige
http://thehappyflammily.com
How did you get the beadboard behind the gas line?
The gas line is tucked very close to the wall, but not attached to it. We just carefully slid the beadboard behind the line, and the line sits snugly against the beadboard now!
Can you make it a rental requirement that your tenants have great style, and then let you photograph it, so we can see the finished space :)
I would love that!
It looks so good! I love the detail the beadboard adds to the space! We just did a beadboard ceiling in our kitchen totally inspired by your guy’s kitchen remodel!
It’s looking beautiful and so fresh! Does beadboard have some kind of tongue and groove system on the vertical edge to connect the panels? When I lie in bed at night remodeling our bathroom in my head I always get hung up on how the seams between panels are concealed. Can you put my mind at ease?!
I’m happy to put a restless mind at ease! There’s no tongue and groove system, but there IS a little V-groove between each plank in the board. Where the board terminates, it’s one half of a V, and when you put a new bed directly up against it, it completes the other side of the groove! The seams in here were closed up with a line of caulk (that was then smoothed over), so it would be impossible to find where they connect. When you go to buy your beadboard, just put two pieces right next to each other, and you’ll see that they match perfectly.
Thank you SO much for sharing these details! This post – and your response to Katie above – answered all of the questions that have been swirling in my brain. And, thanks for the hot tip re: the North Ave Home Depot. My usual HD doesn’t carry the V-groove that I’ve been looking for. You’re the best!
Yes! Save yourself the time and head straight to north ave!
Hello Scott and Kim! Per usual I have a couple random questions! How do you feel about using essential oils in the home (diffusing, using it in cleaning solutions, putting it in wool dryer balls, etc.)? Next question! You guys know that renovations can make an entire house a disaster. Drywall dust gets everywhere, so how do you keep the whole home clean all the time when you have constant renovations? Would you ever consider a blog post about construction cleaning tips and hacks? I apologize if you’ve already done one and I’ve missed it in my searches. I’m just hoping for some tips because I work in cleaning construction houses and I think even a master of trade can learn from others (not that I’m even close to a master of cleaning).. Anyway thanks in advance for your help and response! I also want to briefly let you know that I really appreciate the work you do!
Hi Molly! We like to use essential oils in our homemade fabric refresher, but it’s definitely something we could learn more about! As for construction dust, it’s a struggle for us ALL THE TIME. It’s partially why we do our best to work room by room, so we can close it off at the end of the day, and we do our best to clean up any floating dust in the rest of the home throughout the process. We don’t really have a great answer, because it’s a secret we’d love to know as well!
I’m working on my basement bathroom and was considering using beadboard. You’ve definitely convinced me! I’ve never done a project like this on my own so I will be using this as reference. Thanks for always sharing such detailed posts!