

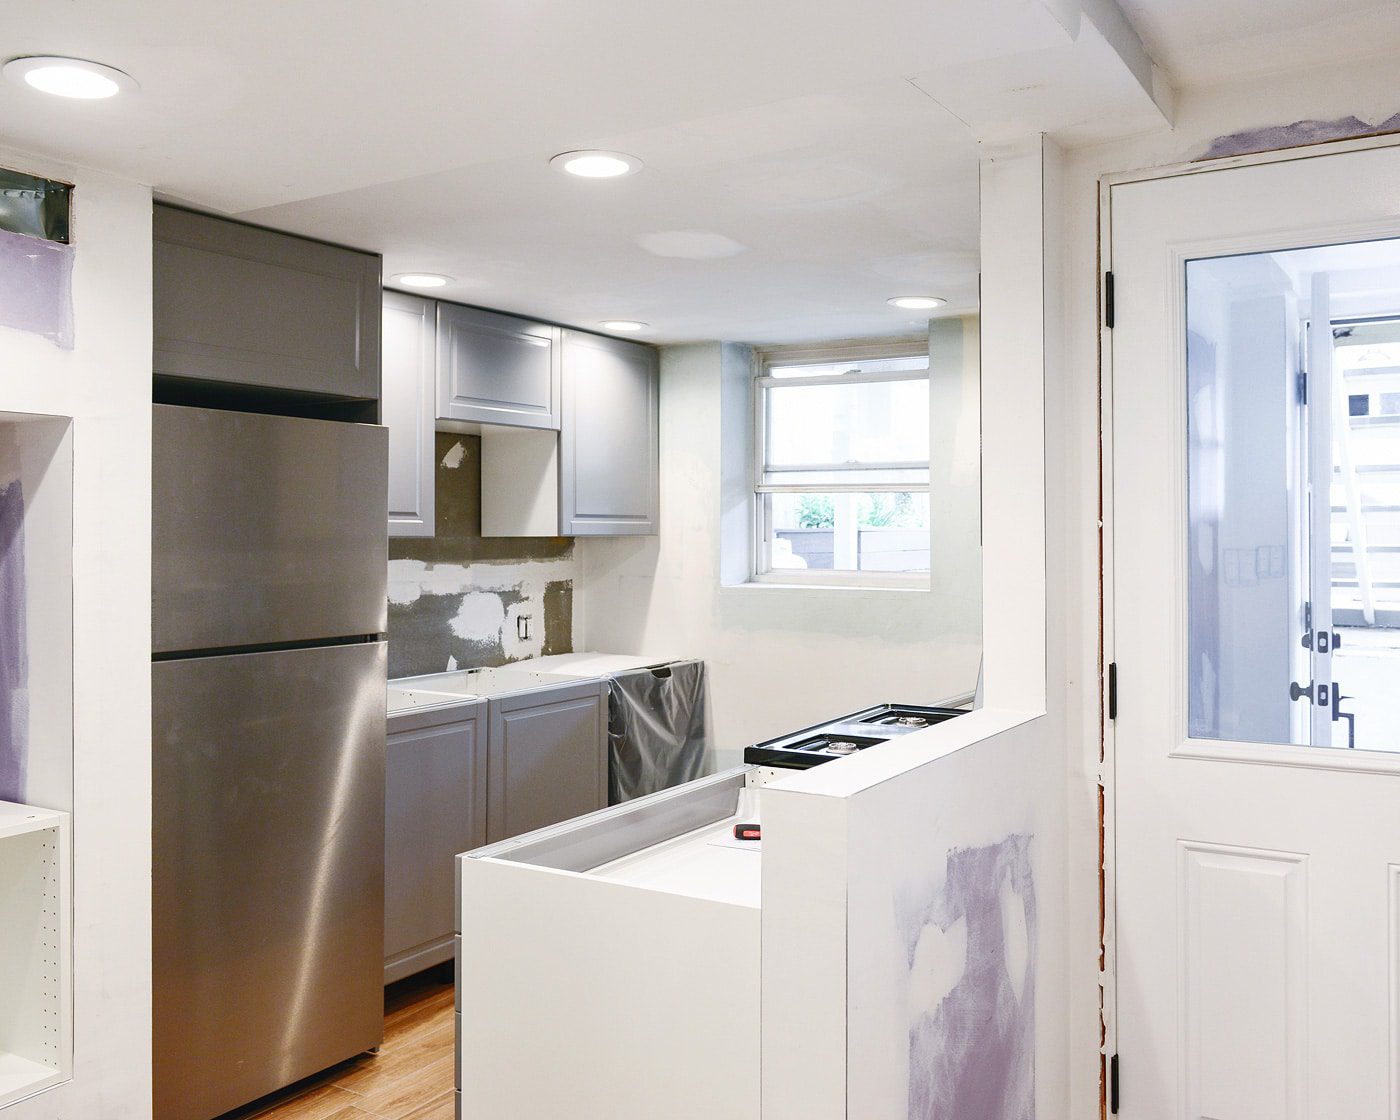
We think it might be safe to say that we’re at the garden kitchen’s halfway point. Yeah! The walls have been rearranged, layout planned and, as of last week, the IKEA cabinets are in! This is the first IKEA kitchen that we’ve put together, but luckily, there’s a good amount of knowledge floating around the internet on how seemingly simple they come together. But! Despite having landed on a floor plan that we love, a positive in-store experience during the purchase process and a relatively painless delivery, we were still a bit nervous.
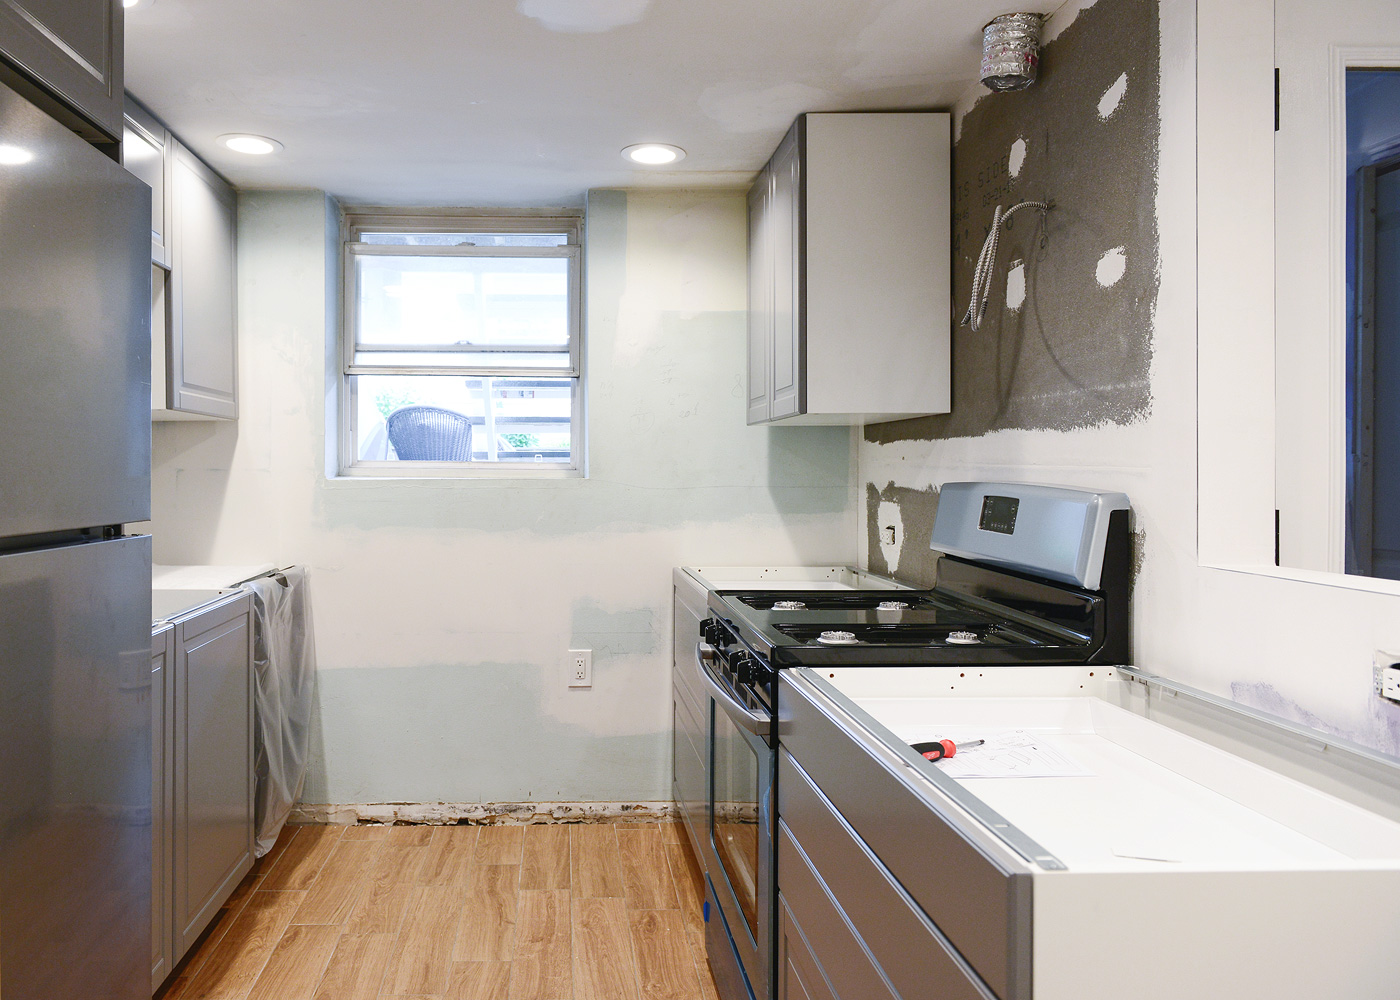
Maybe that’s because, until recently, this is what our IKEA kitchen looked like:
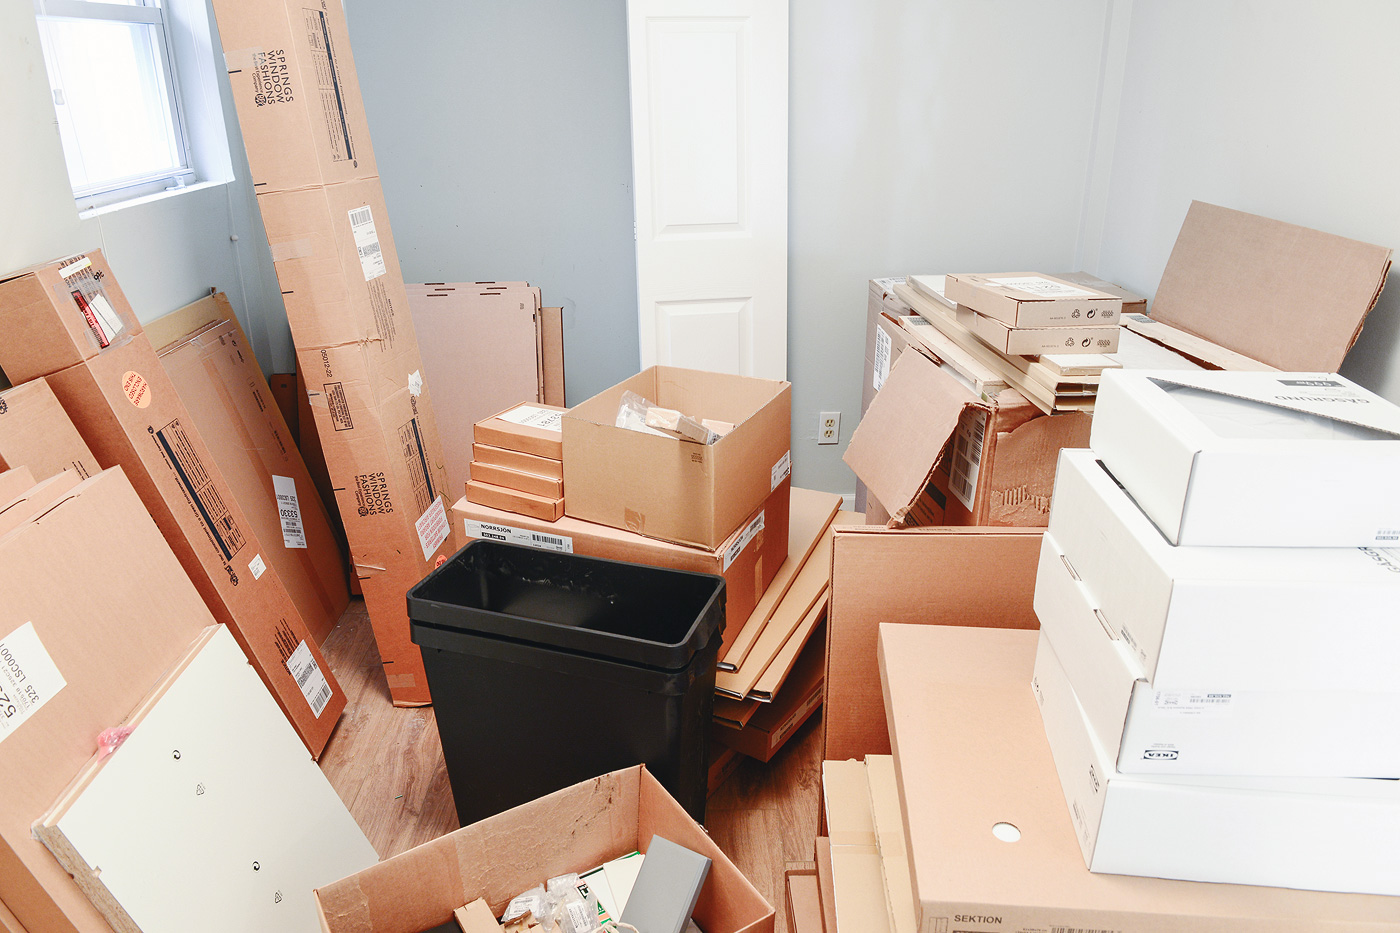
On delivery day, we had the freight company drop off all the boxes in one of the garden bedrooms. In the following weeks, we only added to the mess by stacking light fixtures, waste bins and new window treatments wherever they’d fit. Needless to say, this bedroom became a maze of cardboard chaos, and the very thought of rummaging through the piles for cabinets or doors or hinges made our heads hurt.
The good news? It took only 30 minutes of determination to empty the room, organize the piles and create a kitchen staging area! Boxes were divided into several stacks – upper cabinets in one, base cabinets in another, followed by doors, drawers, side panels, shelving and, finally, hinges and small parts (think: sink drains and conversion kits).
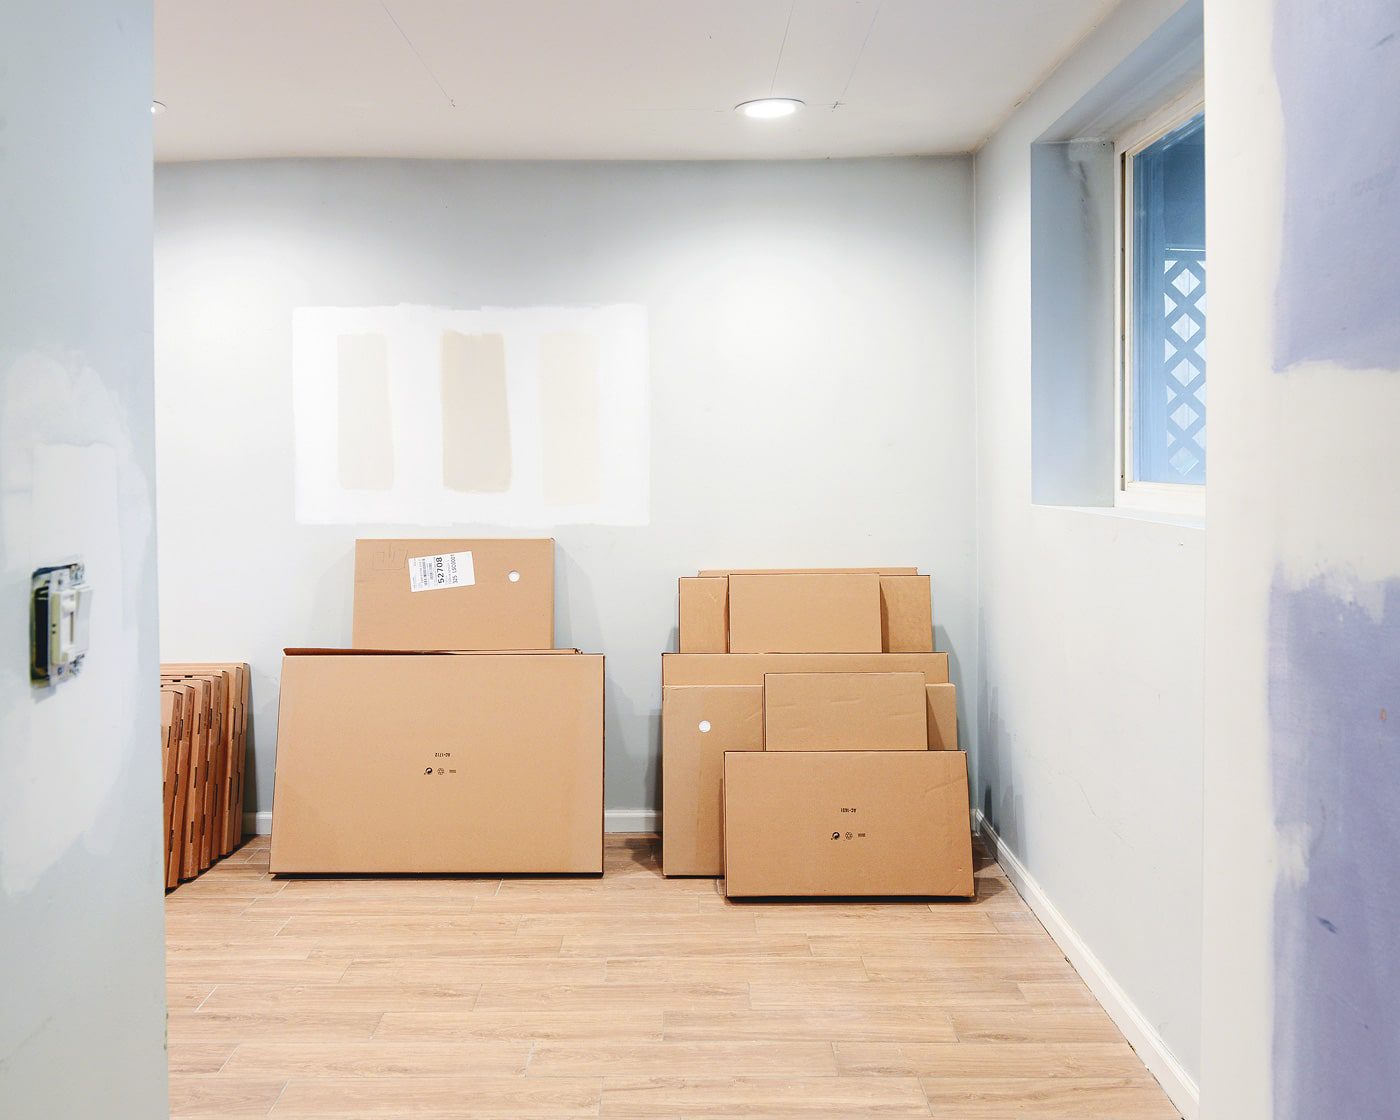

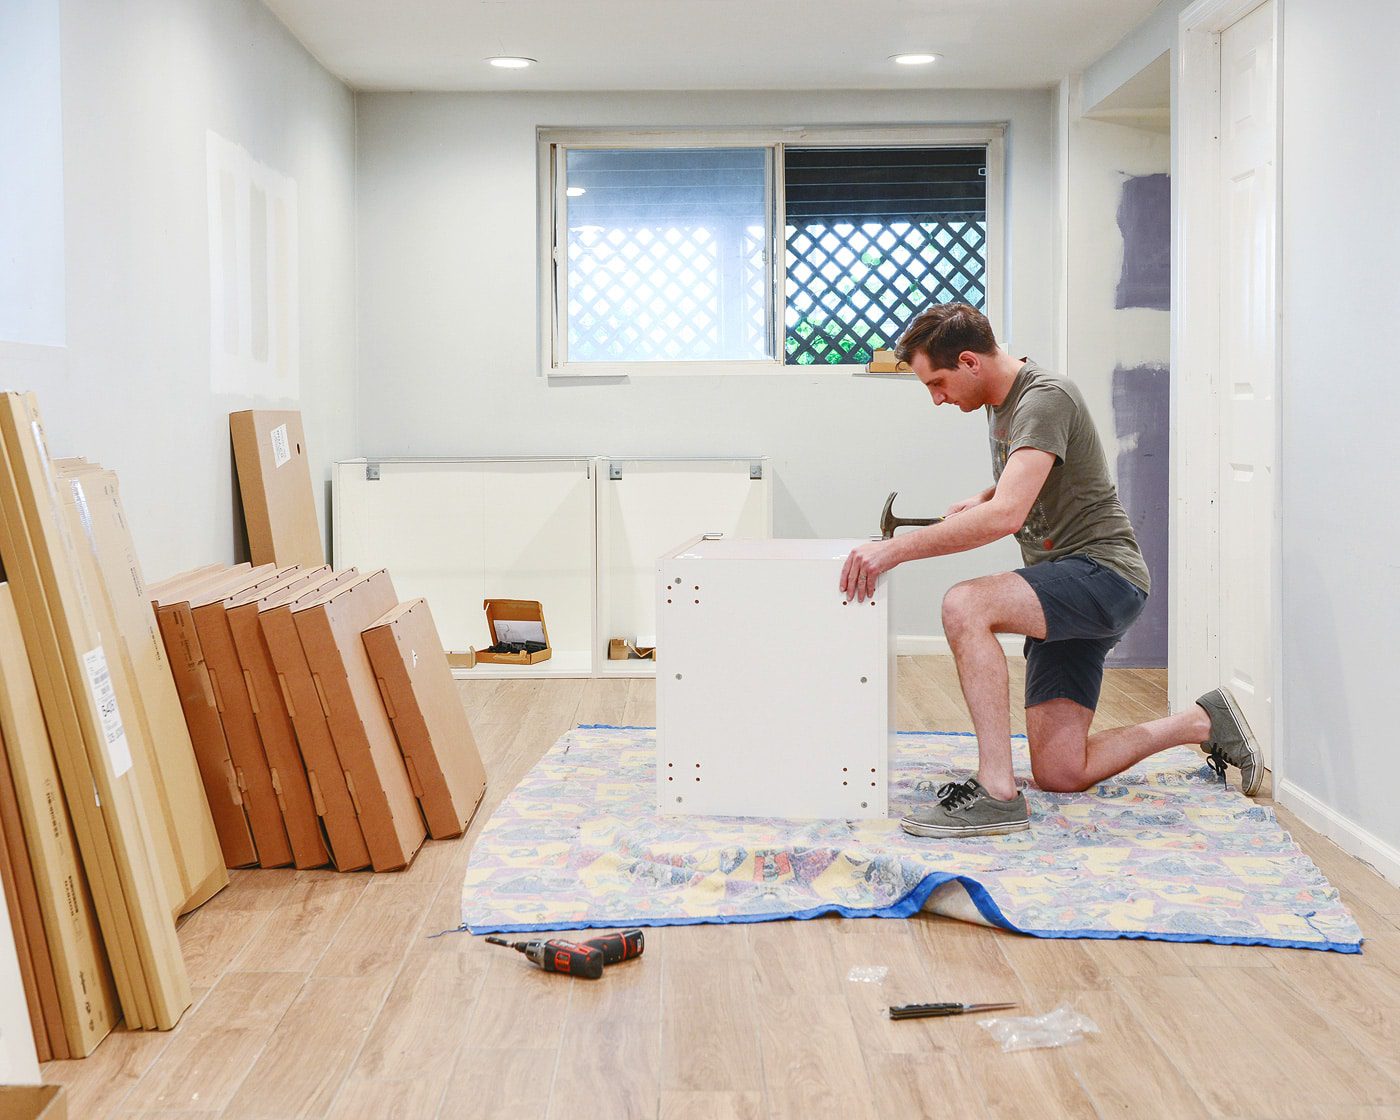
We spent two weeknights building the cabinets (both uppers and lowers), and as we finished them, we lined them along empty walls, making sure to keep the corresponding packs of screws and mounting hardware with each one.
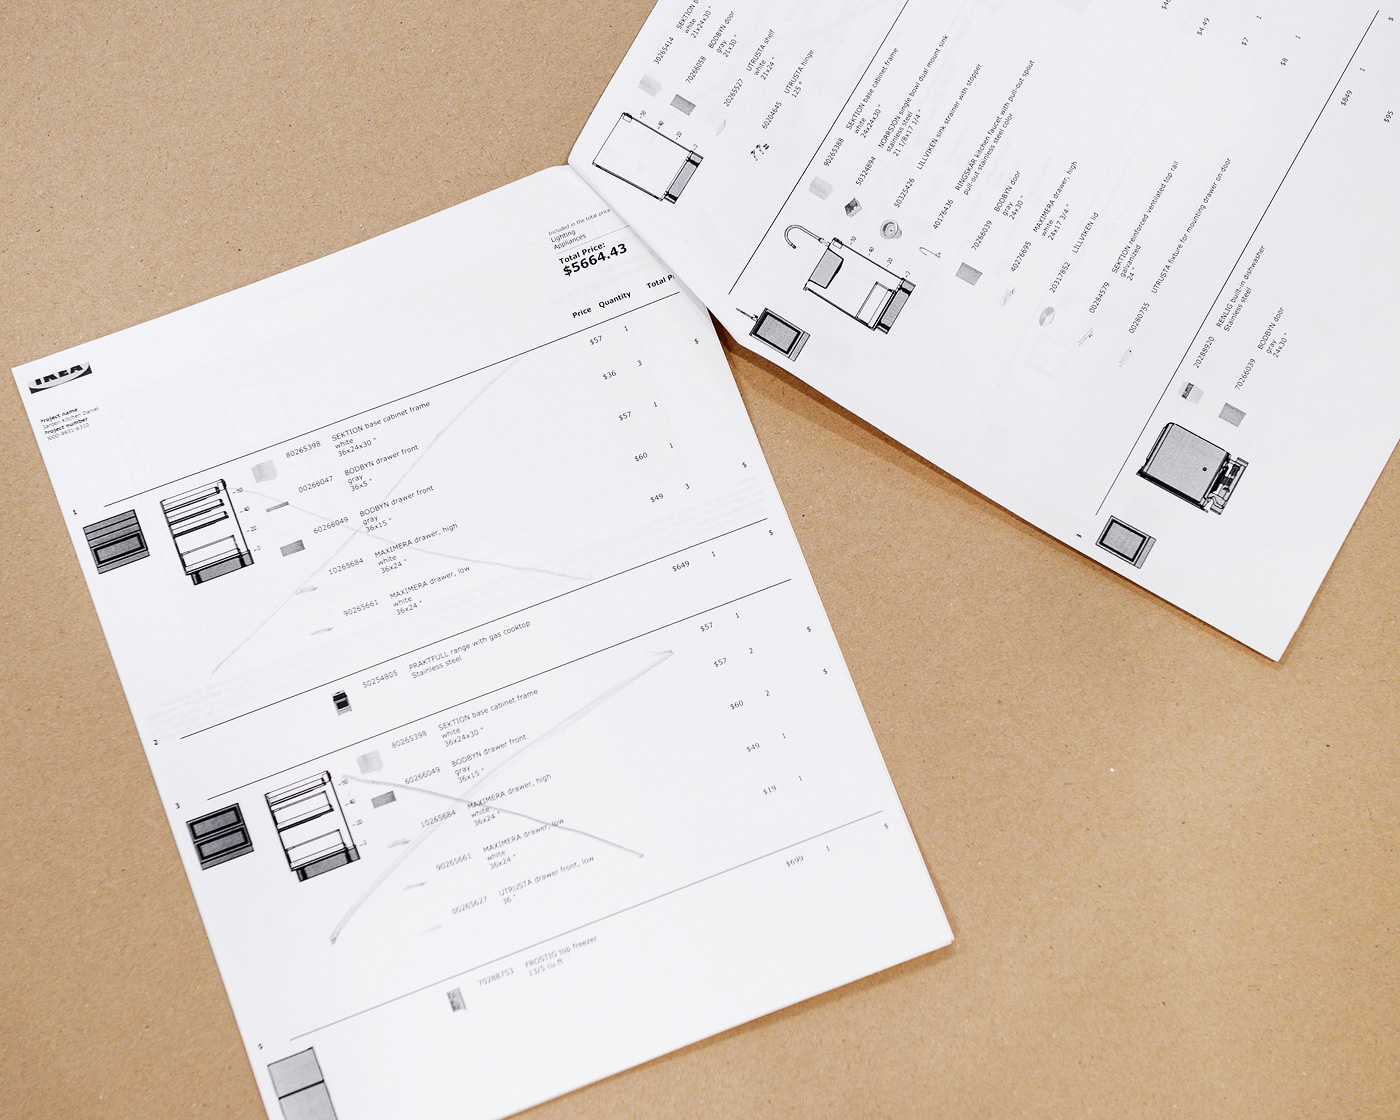
When we purchased our IKEA kitchen, we received a folder with a lot of information. In addition to our receipt, we were given an itemized list of all the parts and printed layouts (from every angle!), but the most important packet in the folder had to be the breakdown of the individual cabinets (and sink, dishwasher and all appliances). In conjunction with our stacks of organized boxes, we used this to track down every last do-dad, from drawers to hinges to screw kits. Quantities are listed alongside diagrams, and it was the by far our most used information sheet throughout the process! During installation, I made sure to cross off each cabinet as it was completed, which was equally helpful in keeping track of our dwindling inventory, too.
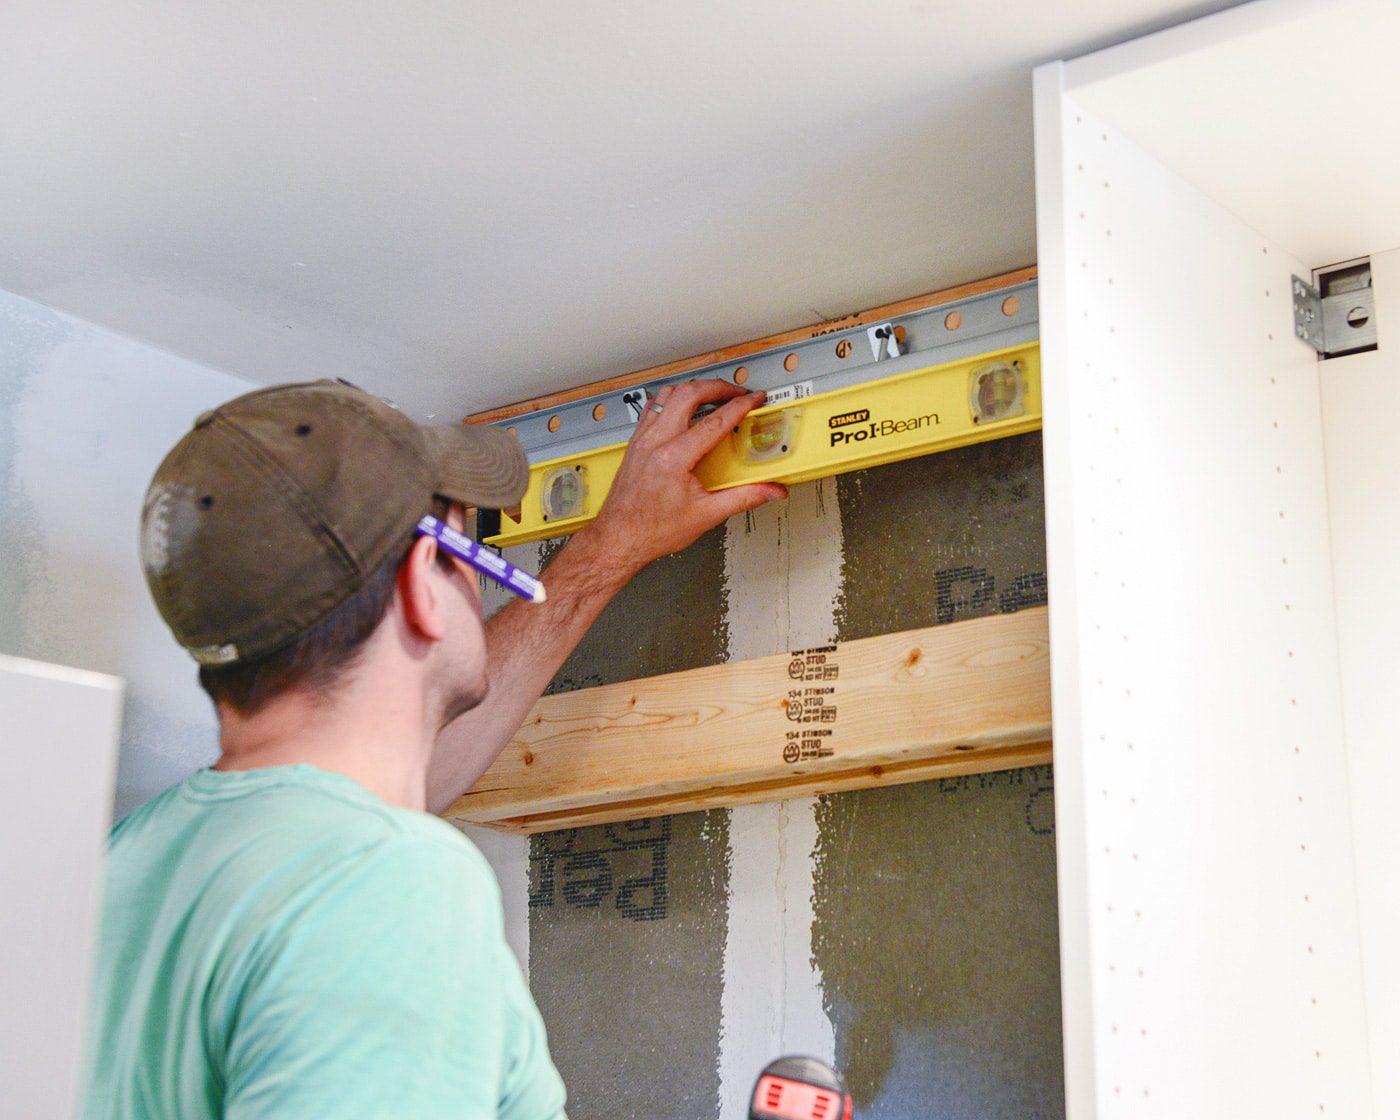
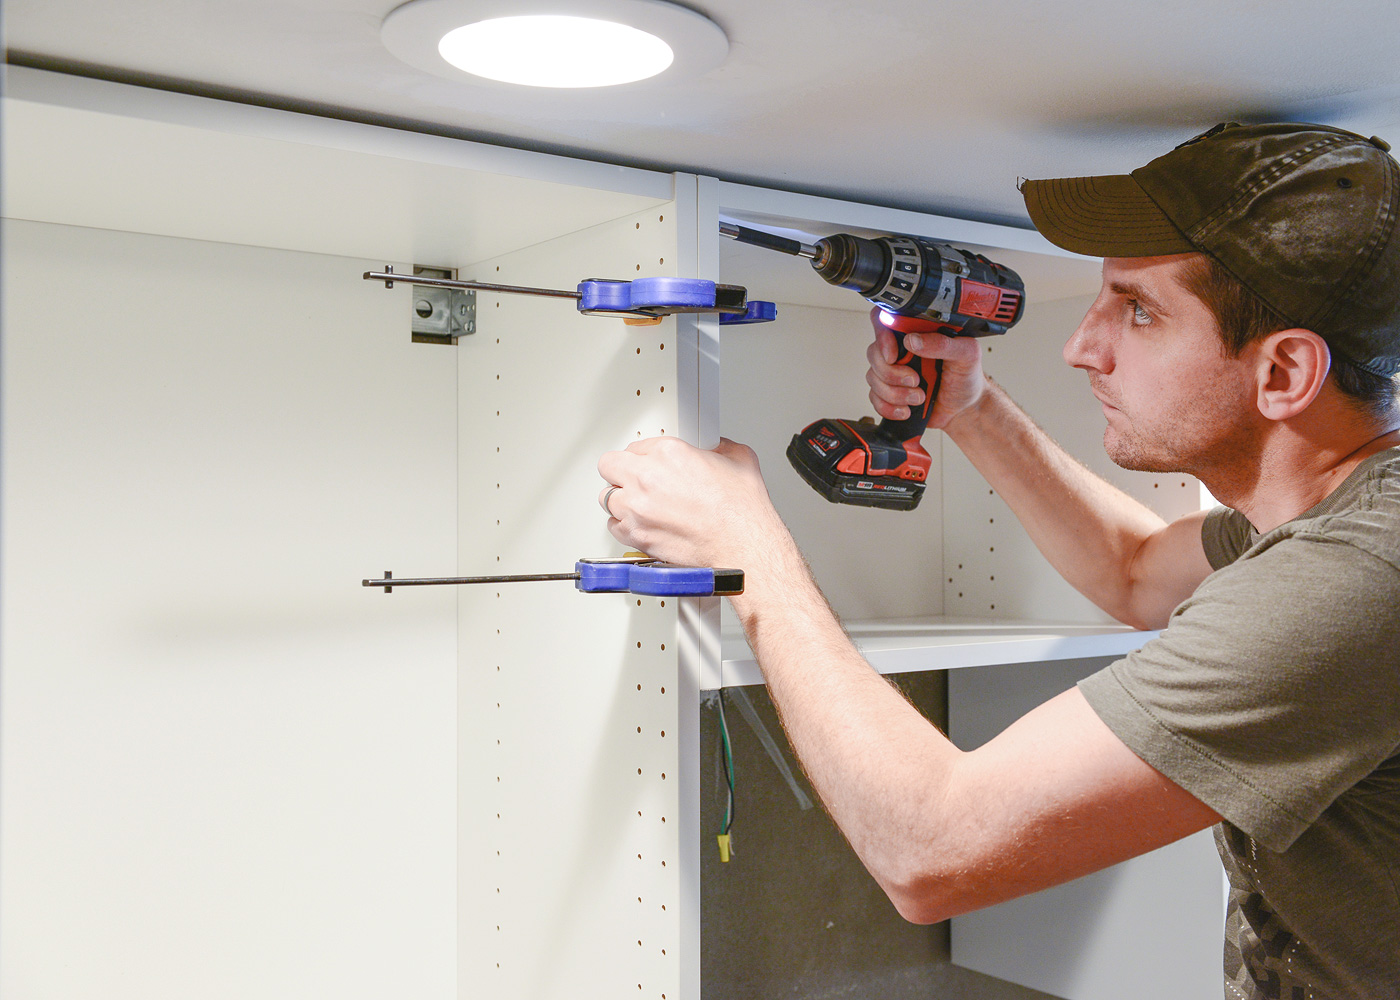
IKEA provides two options to install cabinets, either directly to the wall or by using their rail system. We started by loosely putting the appliances into place, and we decided that we’d have more wiggle room with the cabinets by using the rail system. The rail system allows us the flexibility to move cabinets side-to-side – a huge perk!
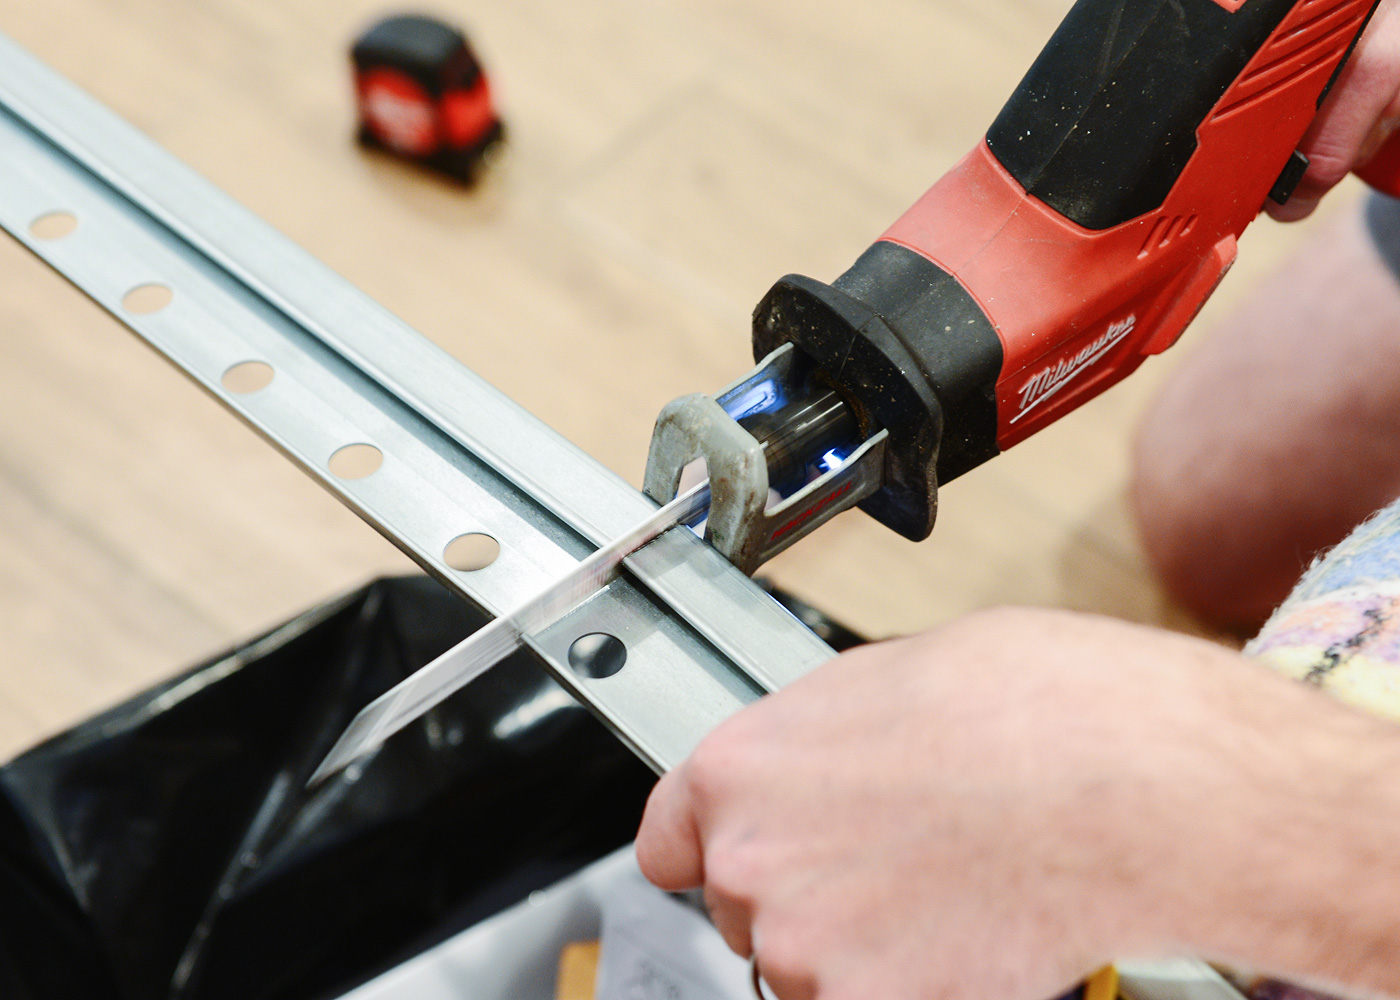
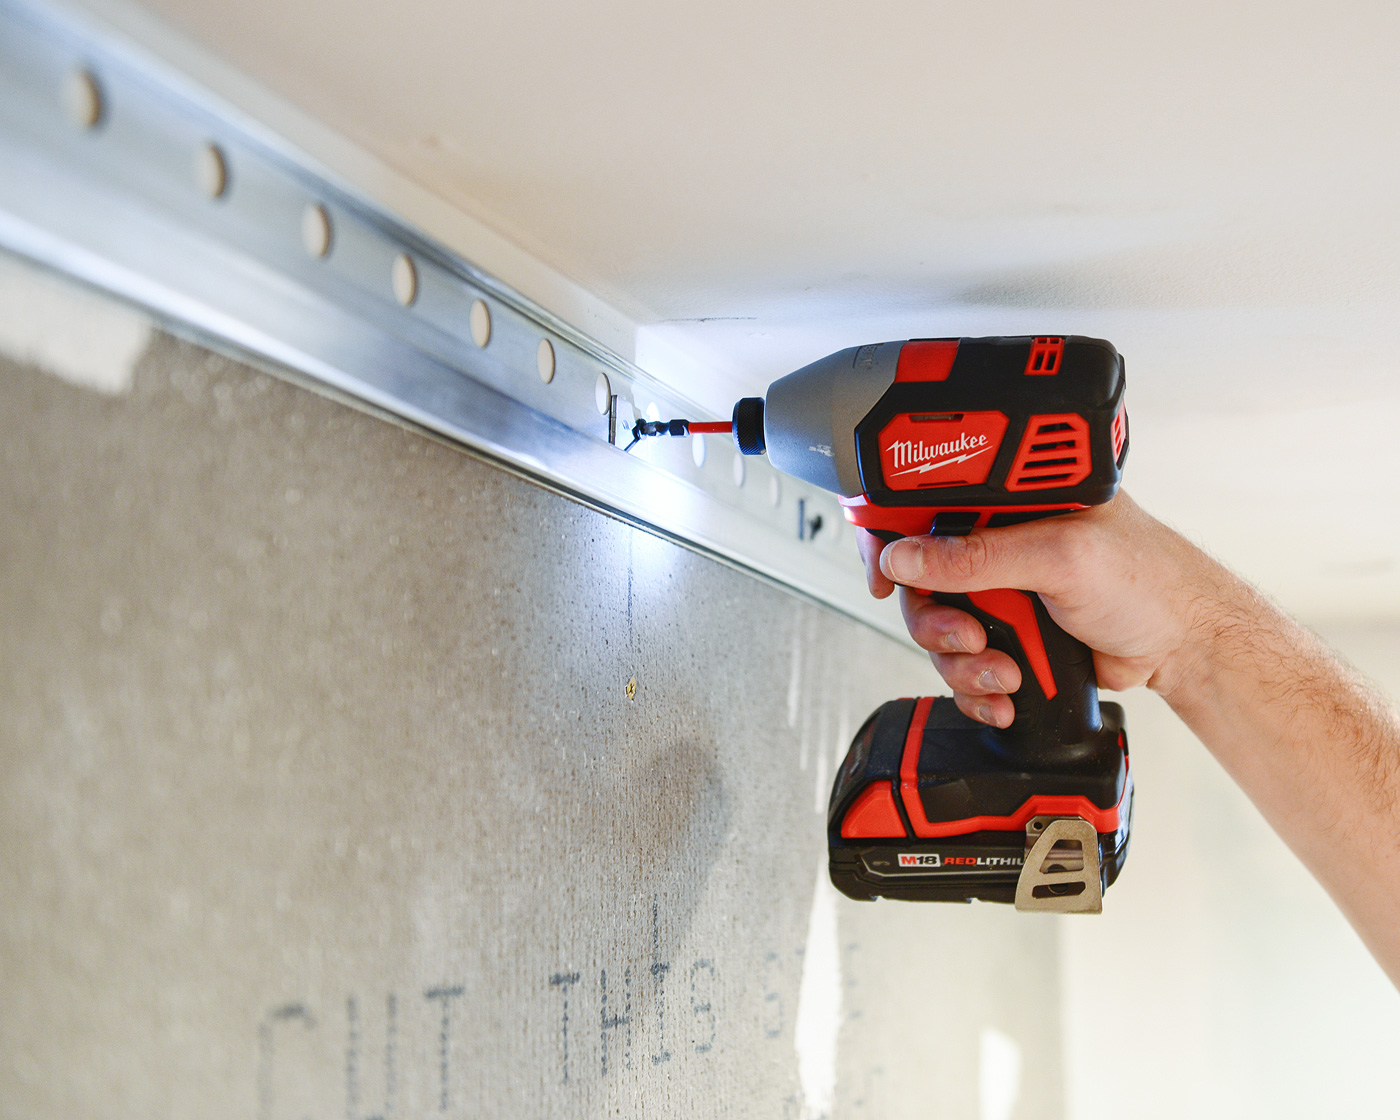
To install, we cut down the rails to the proper width and secured them to every stud we could find. We did have to create our own holes every so often to ensure alignment with the studs, and we used the provided small washer-like plates that help to distribute the weight. Once the rail is on the wall, the cabinets simply hang on a small lip, and we can easily move them to the left and right as necessary.
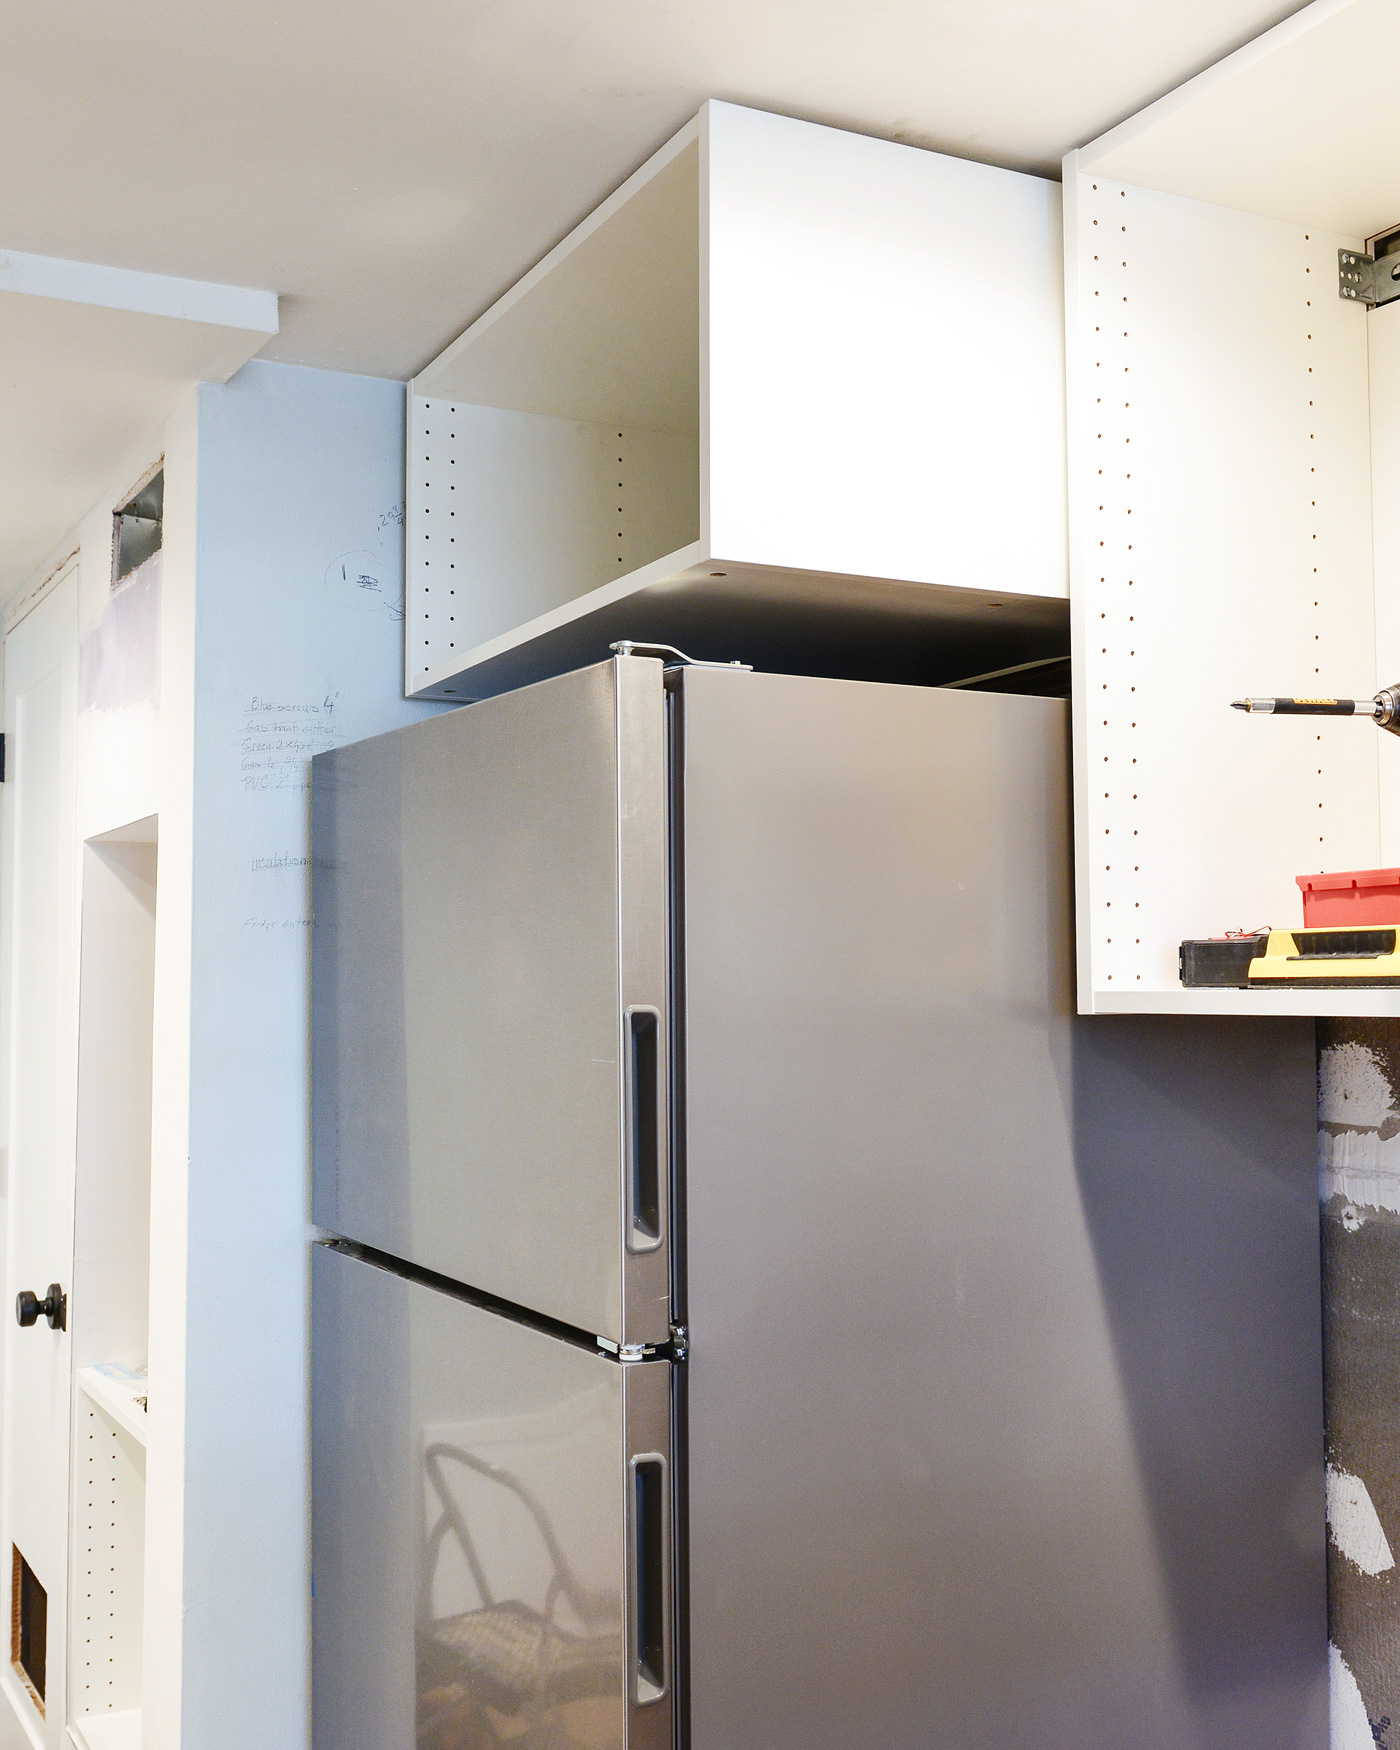
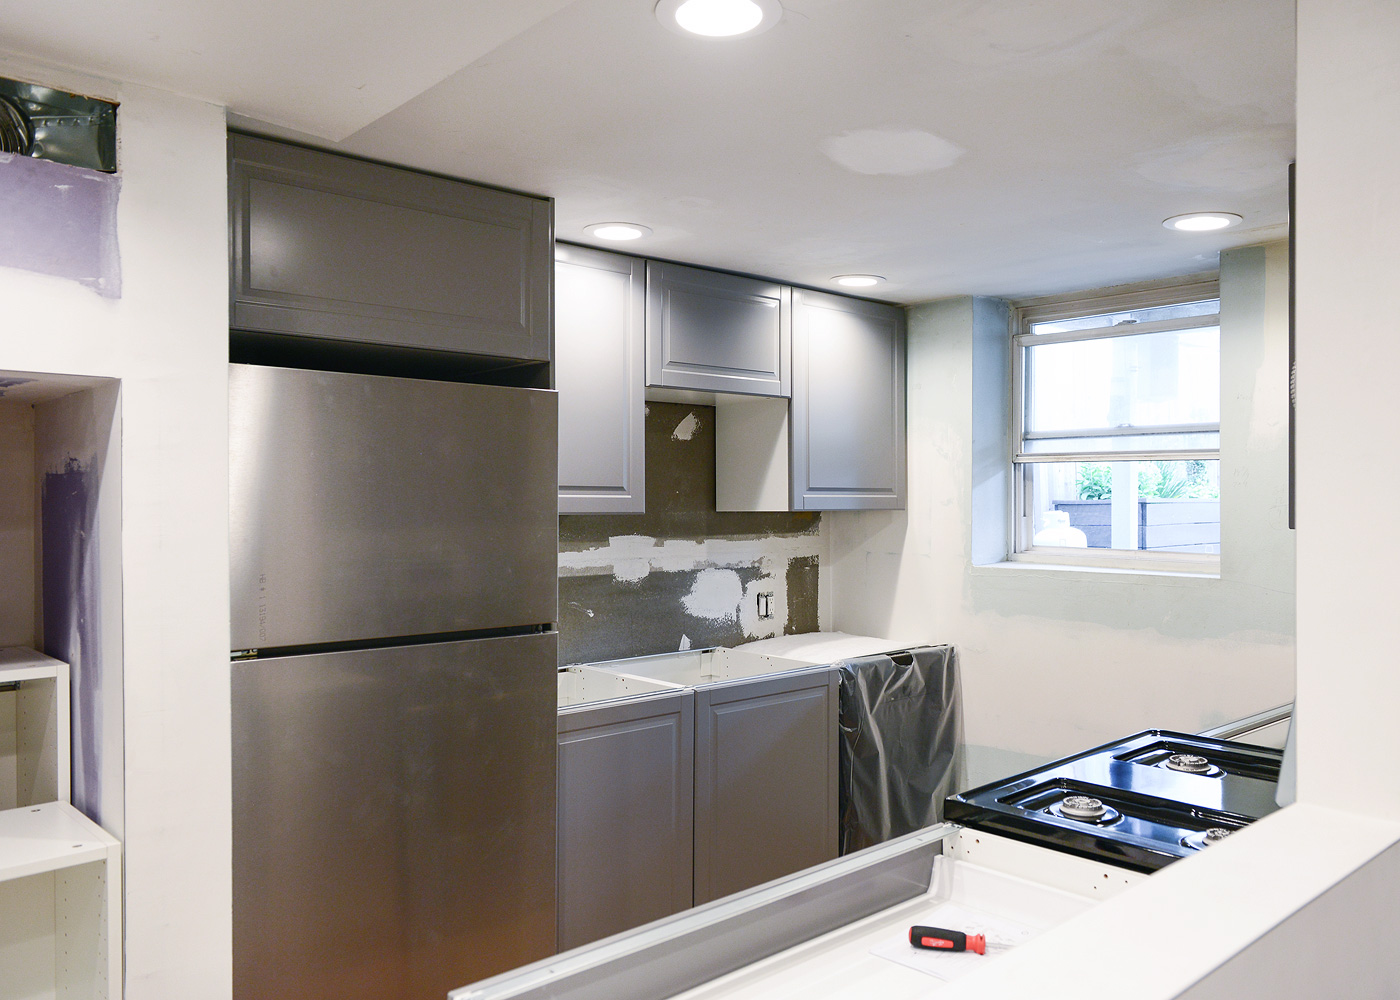
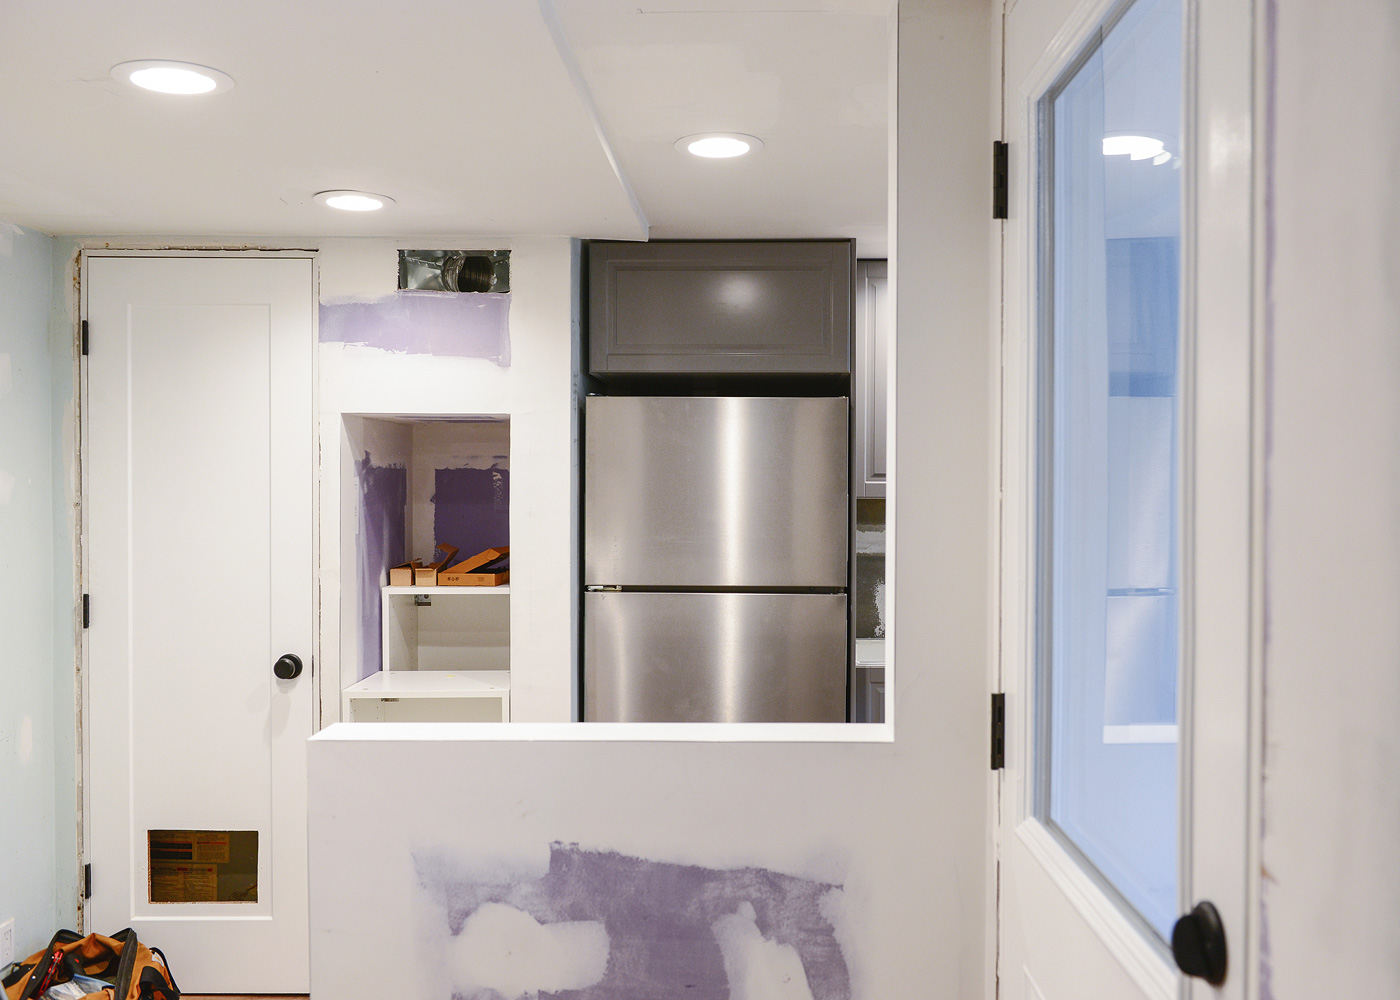
When it came time to hang the cabinet above the refrigerator, we made spacers using scrap 2 x 4s. This cabinet is 24″ deep, however, we wanted it to align with the front of the fridge, which was about 31″ in depth. By aligning it with the fridge, we think it creates a more custom look overall, and the spacers will be completely hidden by the cabinet and side panel. Tip: We still used the rail system by installing it directly to the 2 x 4 spacer.
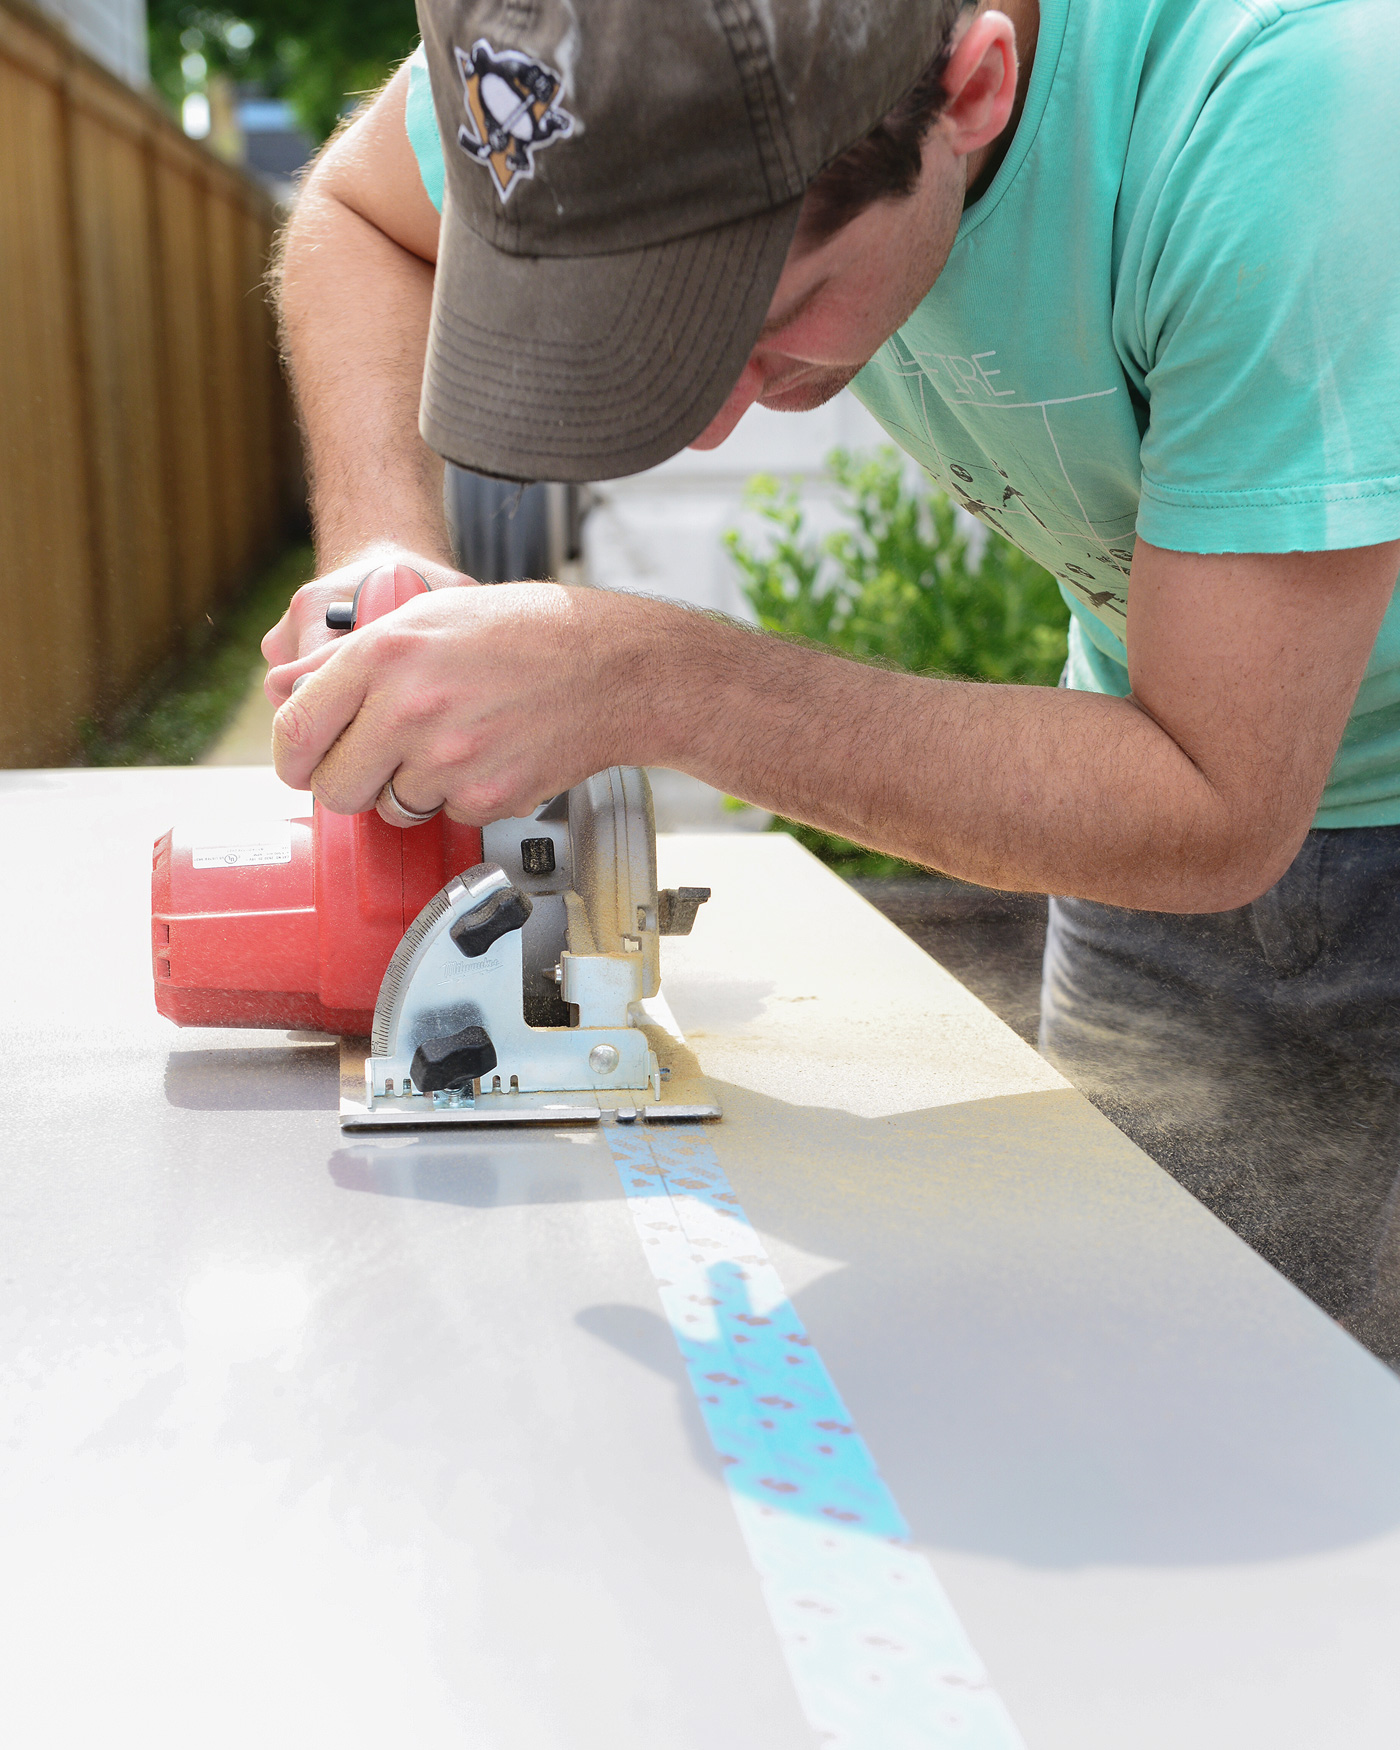
With all the upper cabinets installed, we moved on to trimming the refrigerator side panel. Using a circular saw, we needed to rip a section off along the length of the panel. Because the scrap piece would still be used for fillers down the road, we measured twice (thrice?), and we ran painter’s tape along the cut, which always helps to prevent the board from splintering while the cuts are made:
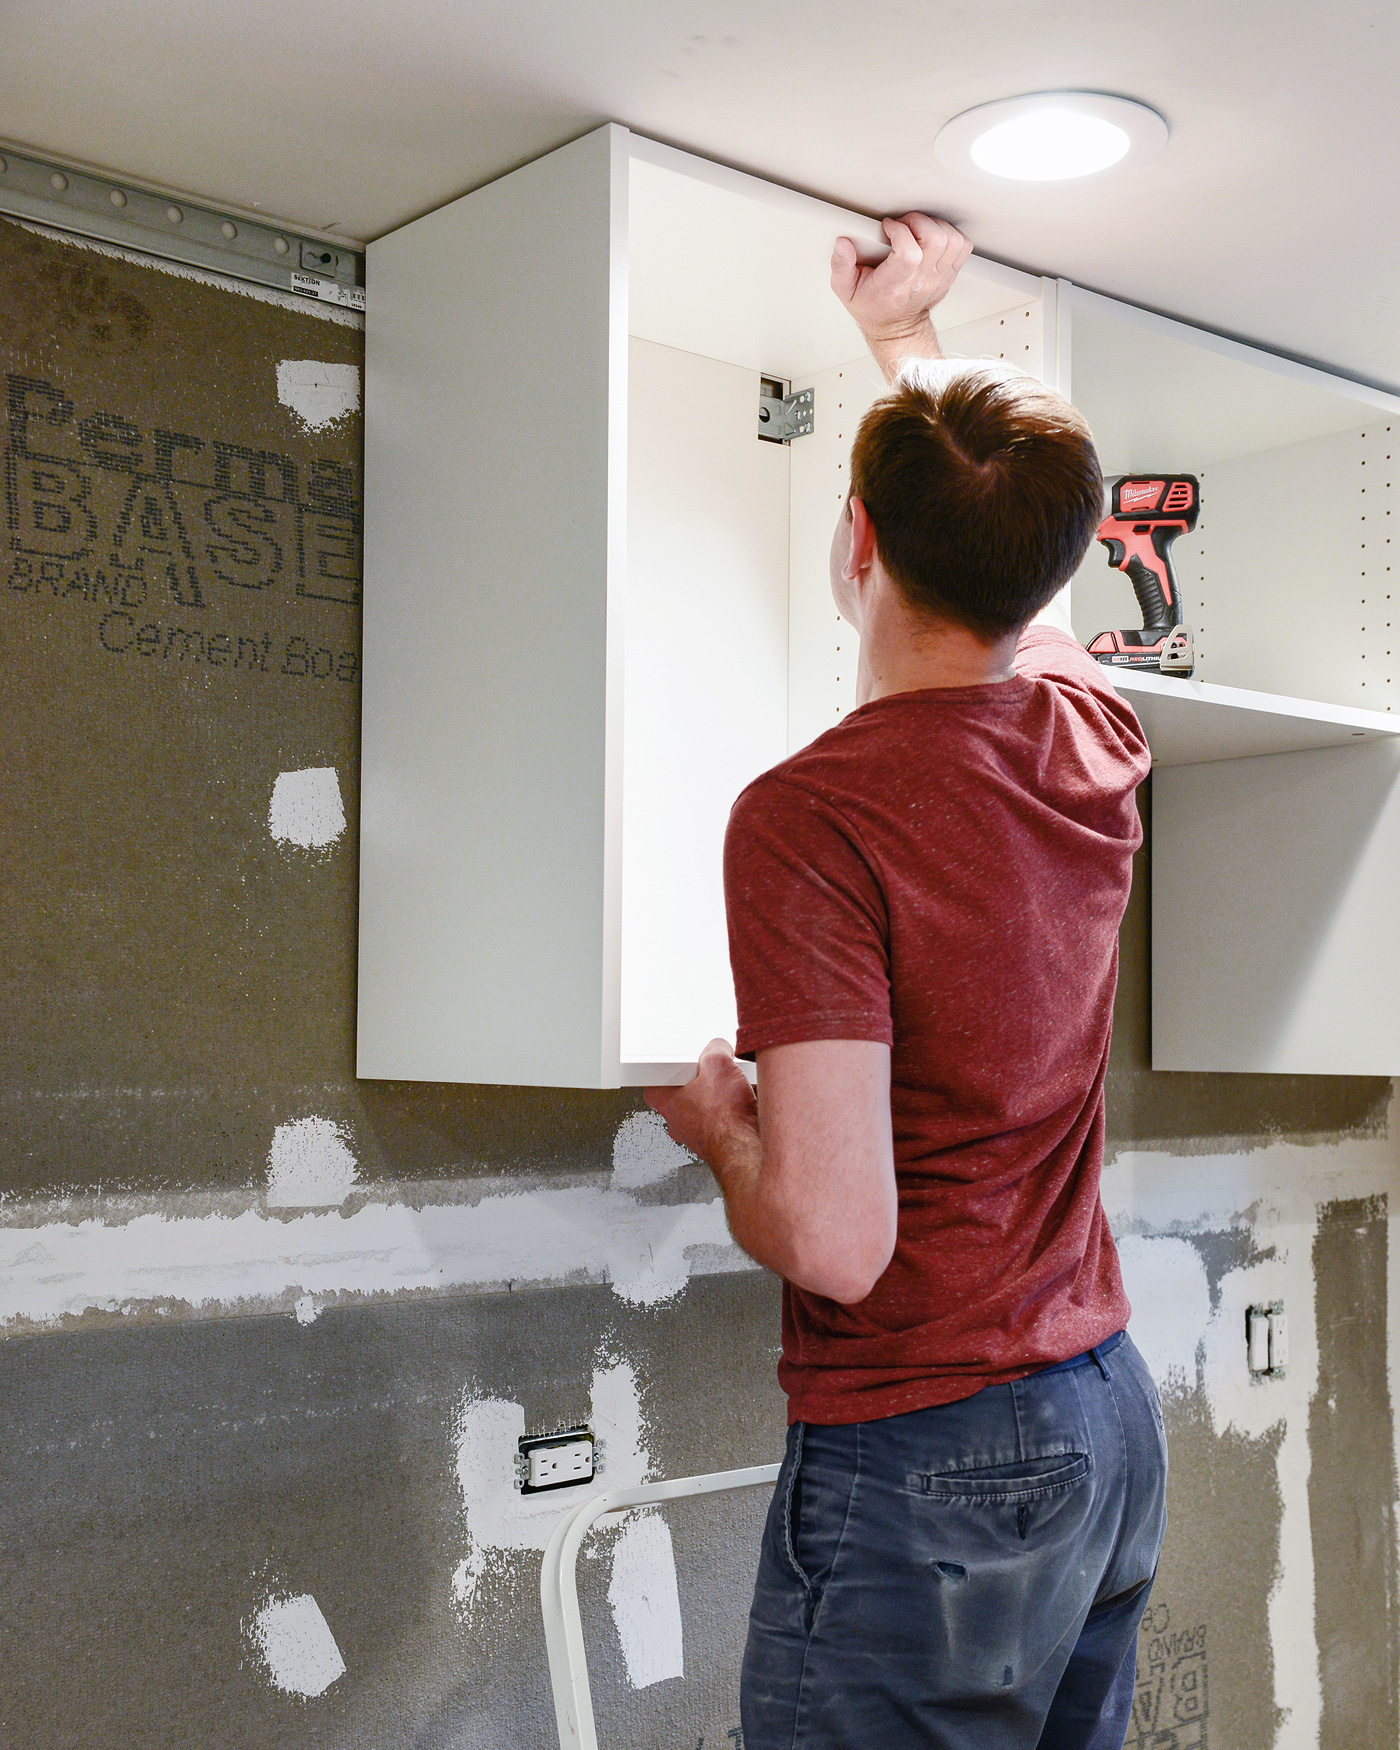
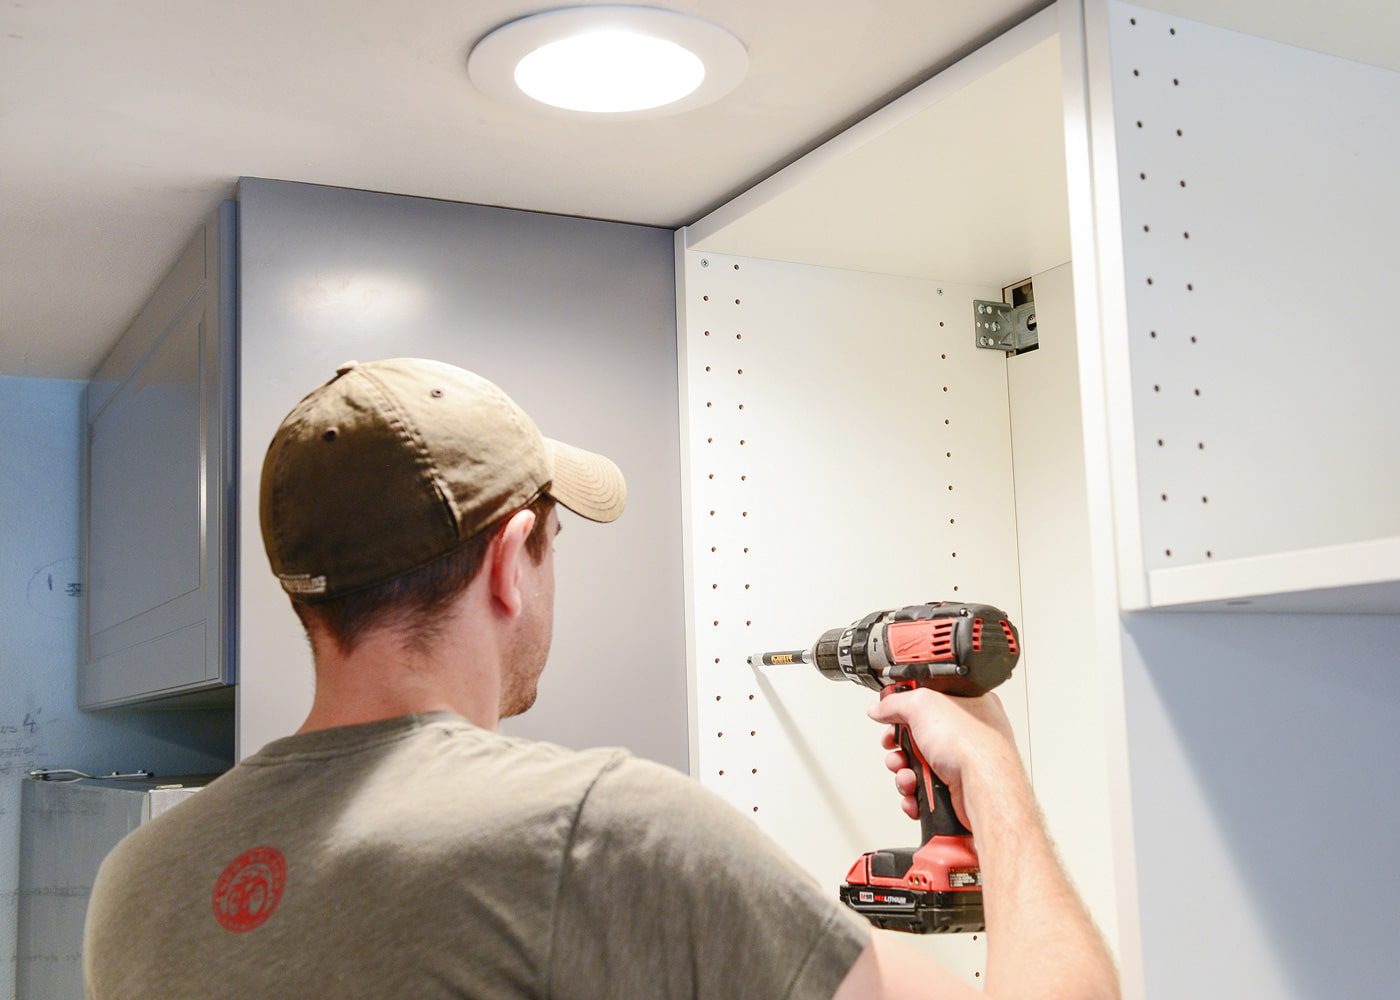
Finally, we could begin securing the cabinets! We started by attaching the side panel to the fridge cabinet, after which, we snugged the neighboring cabinet up to the panel. Ensuring level along the way, we attached that cabinet to the panel as well. From there, we clamped each of the cabinets together, and one by one, we used the IKEA provided screws to connect all the uppers. With the cabinets in place, we then secured the cabinets to the rail once and for all, following the IKEA instructions.
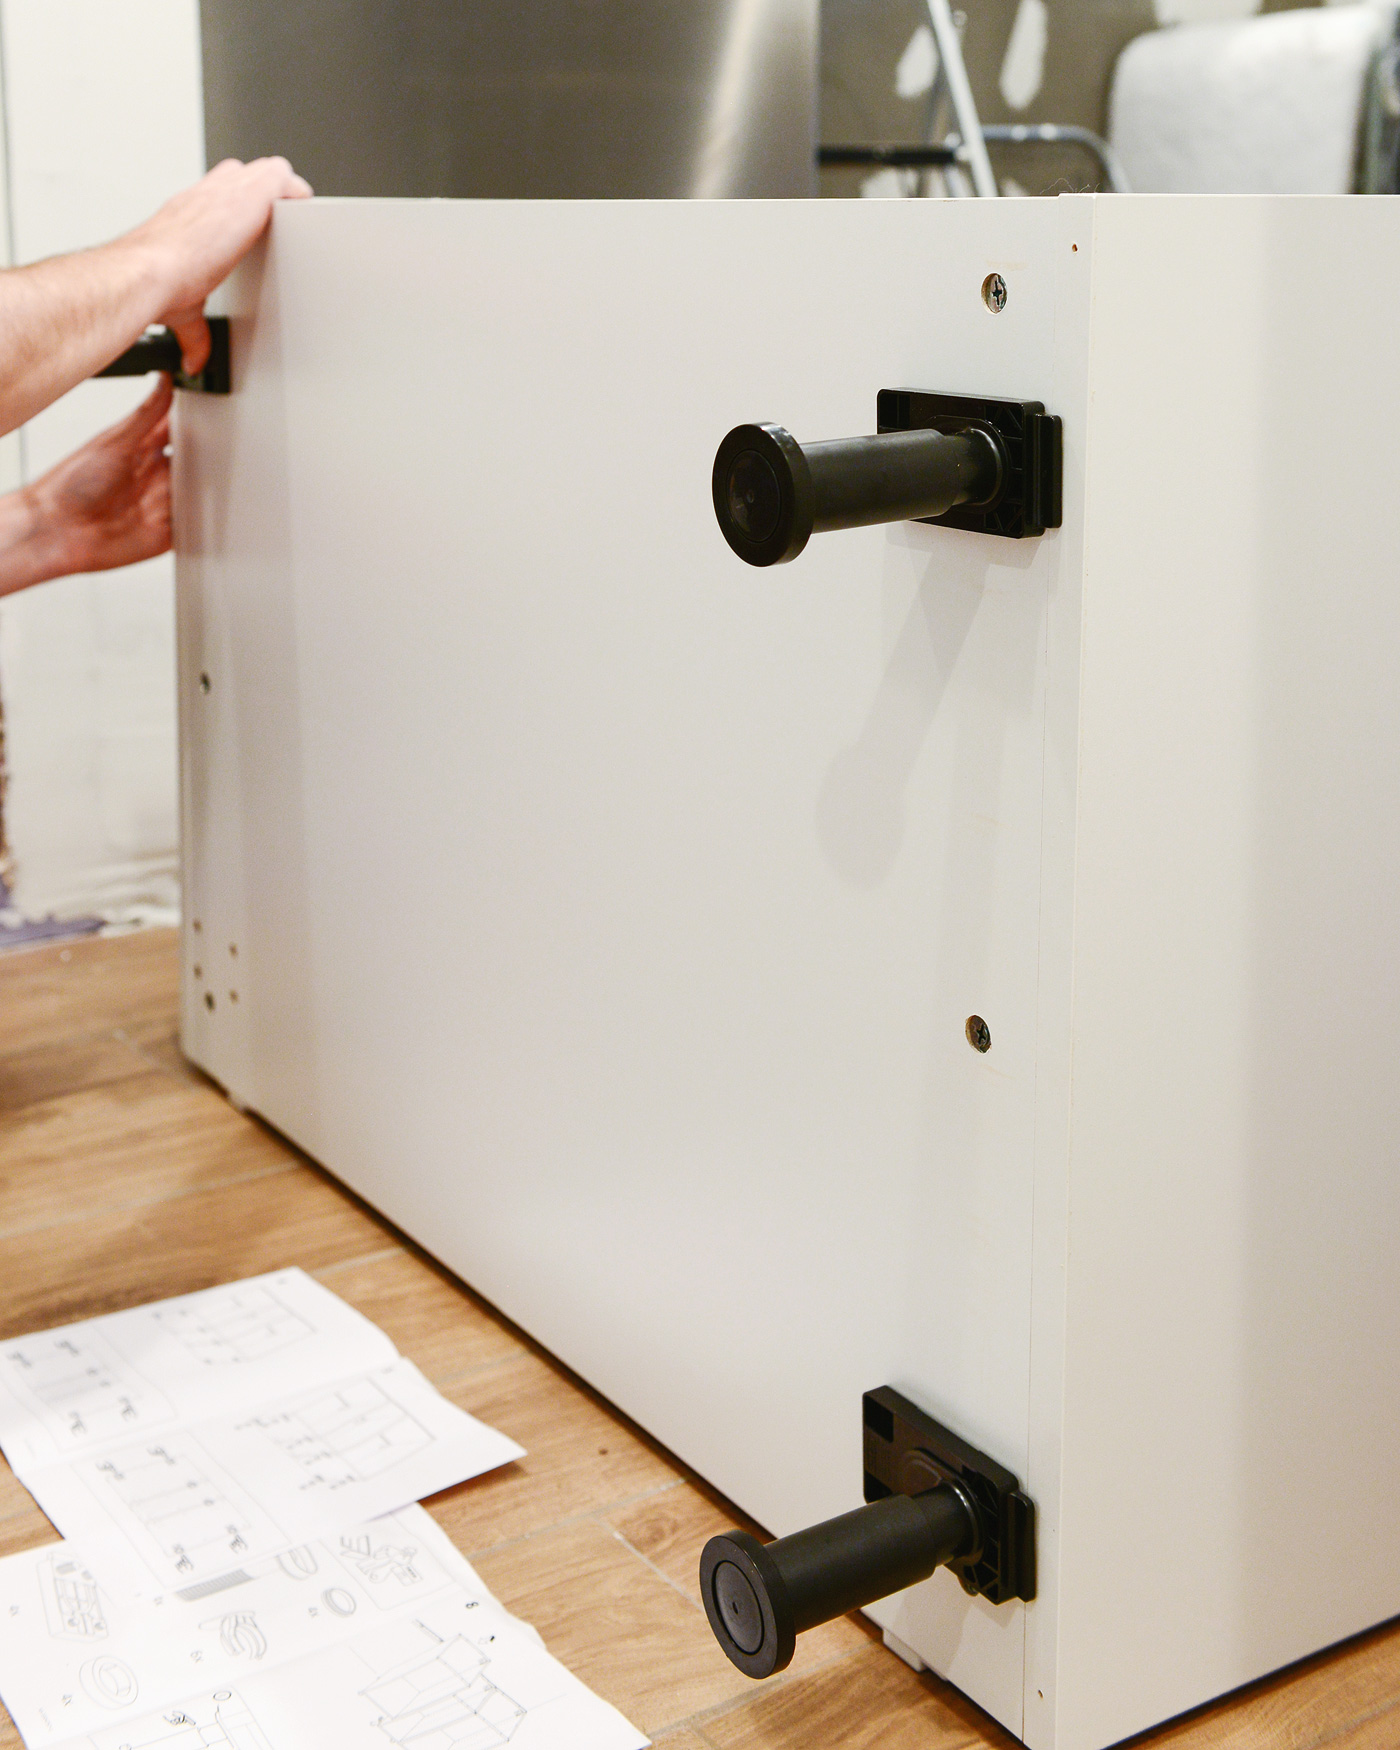
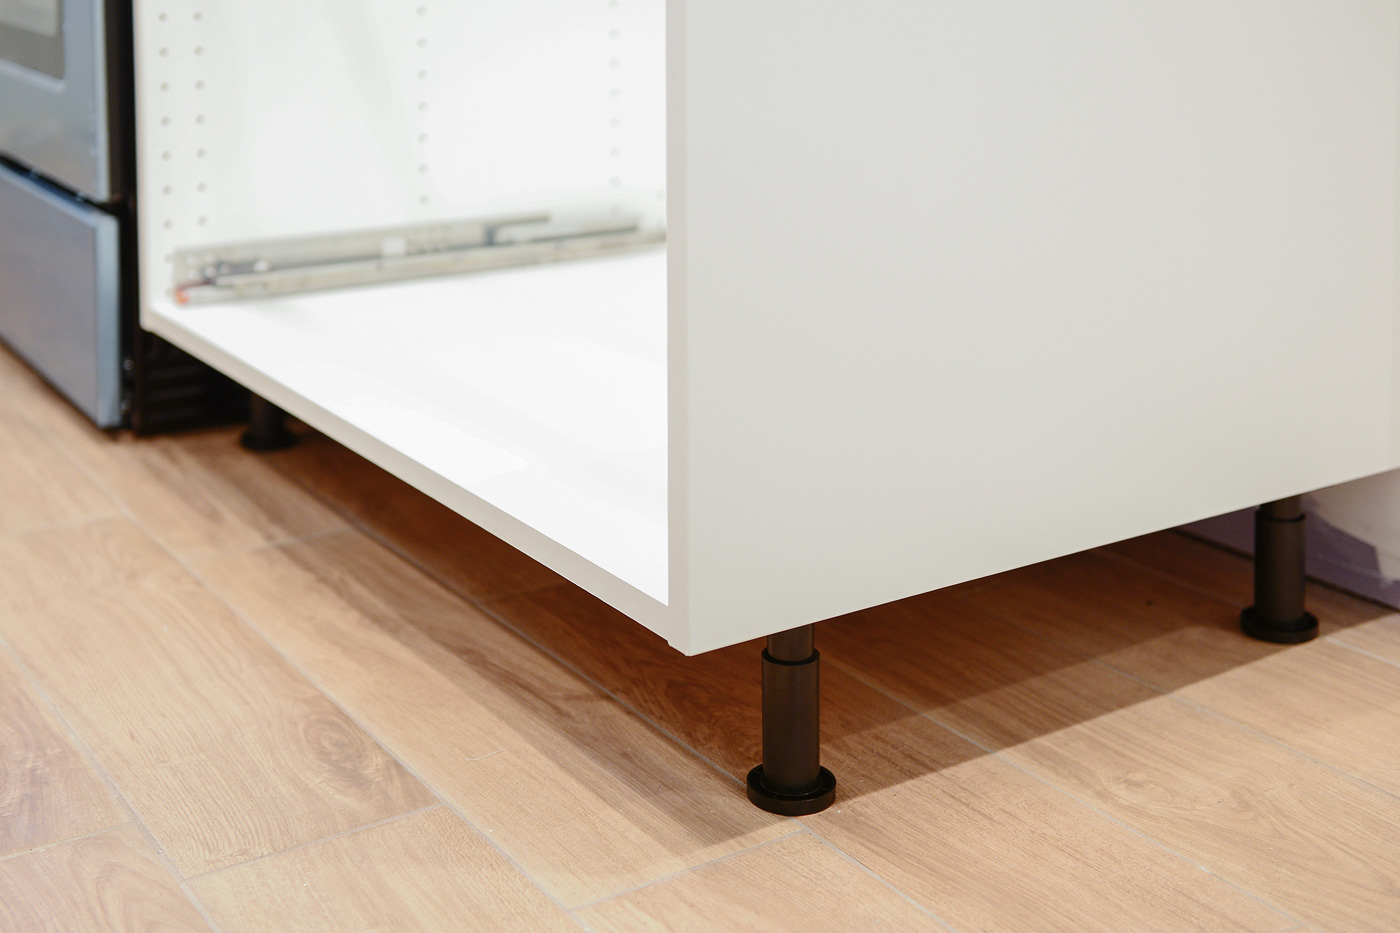
We brought in the lower cabinets last, using the same rail system to secure them to the wall. The only difference here is that each of the base cabinets have 4 1/2″ legs, which can be raised as much as 6″ to account for uneven floors. The base cabinets are 30″ tall, so in addition to the 4 1/2″ legs and a 1 1/2″ countertop, the overall height will be brought to the 36″ standard. Eventually, the adjustable legs will be hidden behind toe kicks.
We fell into an easy rhythm where Scott hung, attached and secured the cabinets, and as each one went up, I followed behind with doors, drawers and shelves. After a weekend’s worth of work, we had all the main components in place, and it was so, so rewarding to see our little galley kitchen come to life! Side note: All the appliances still have their protective plastic coating, which is why they might look blue and/or bubbled/scratched.
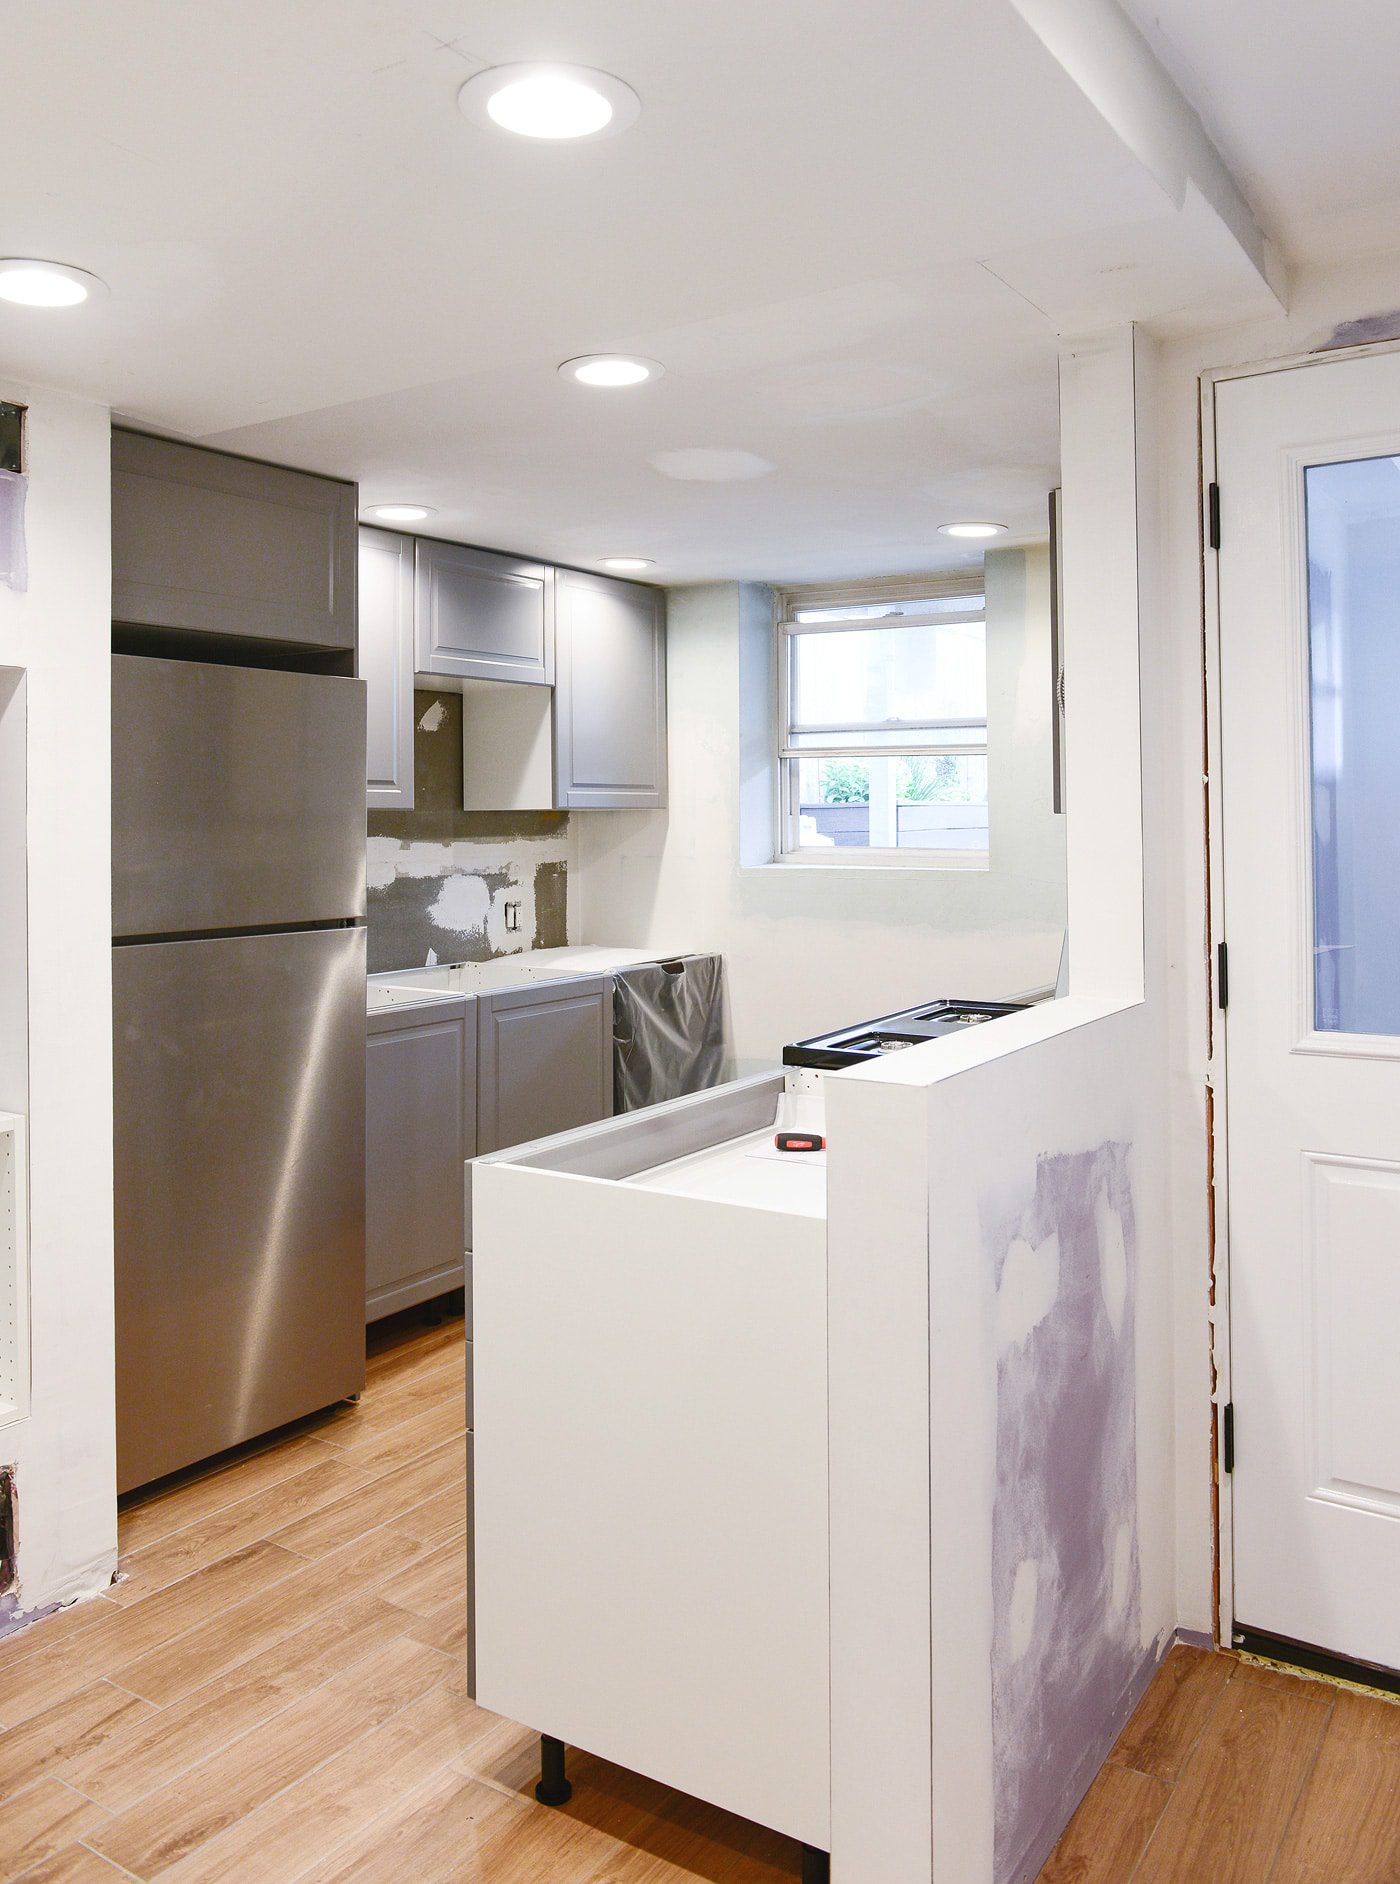
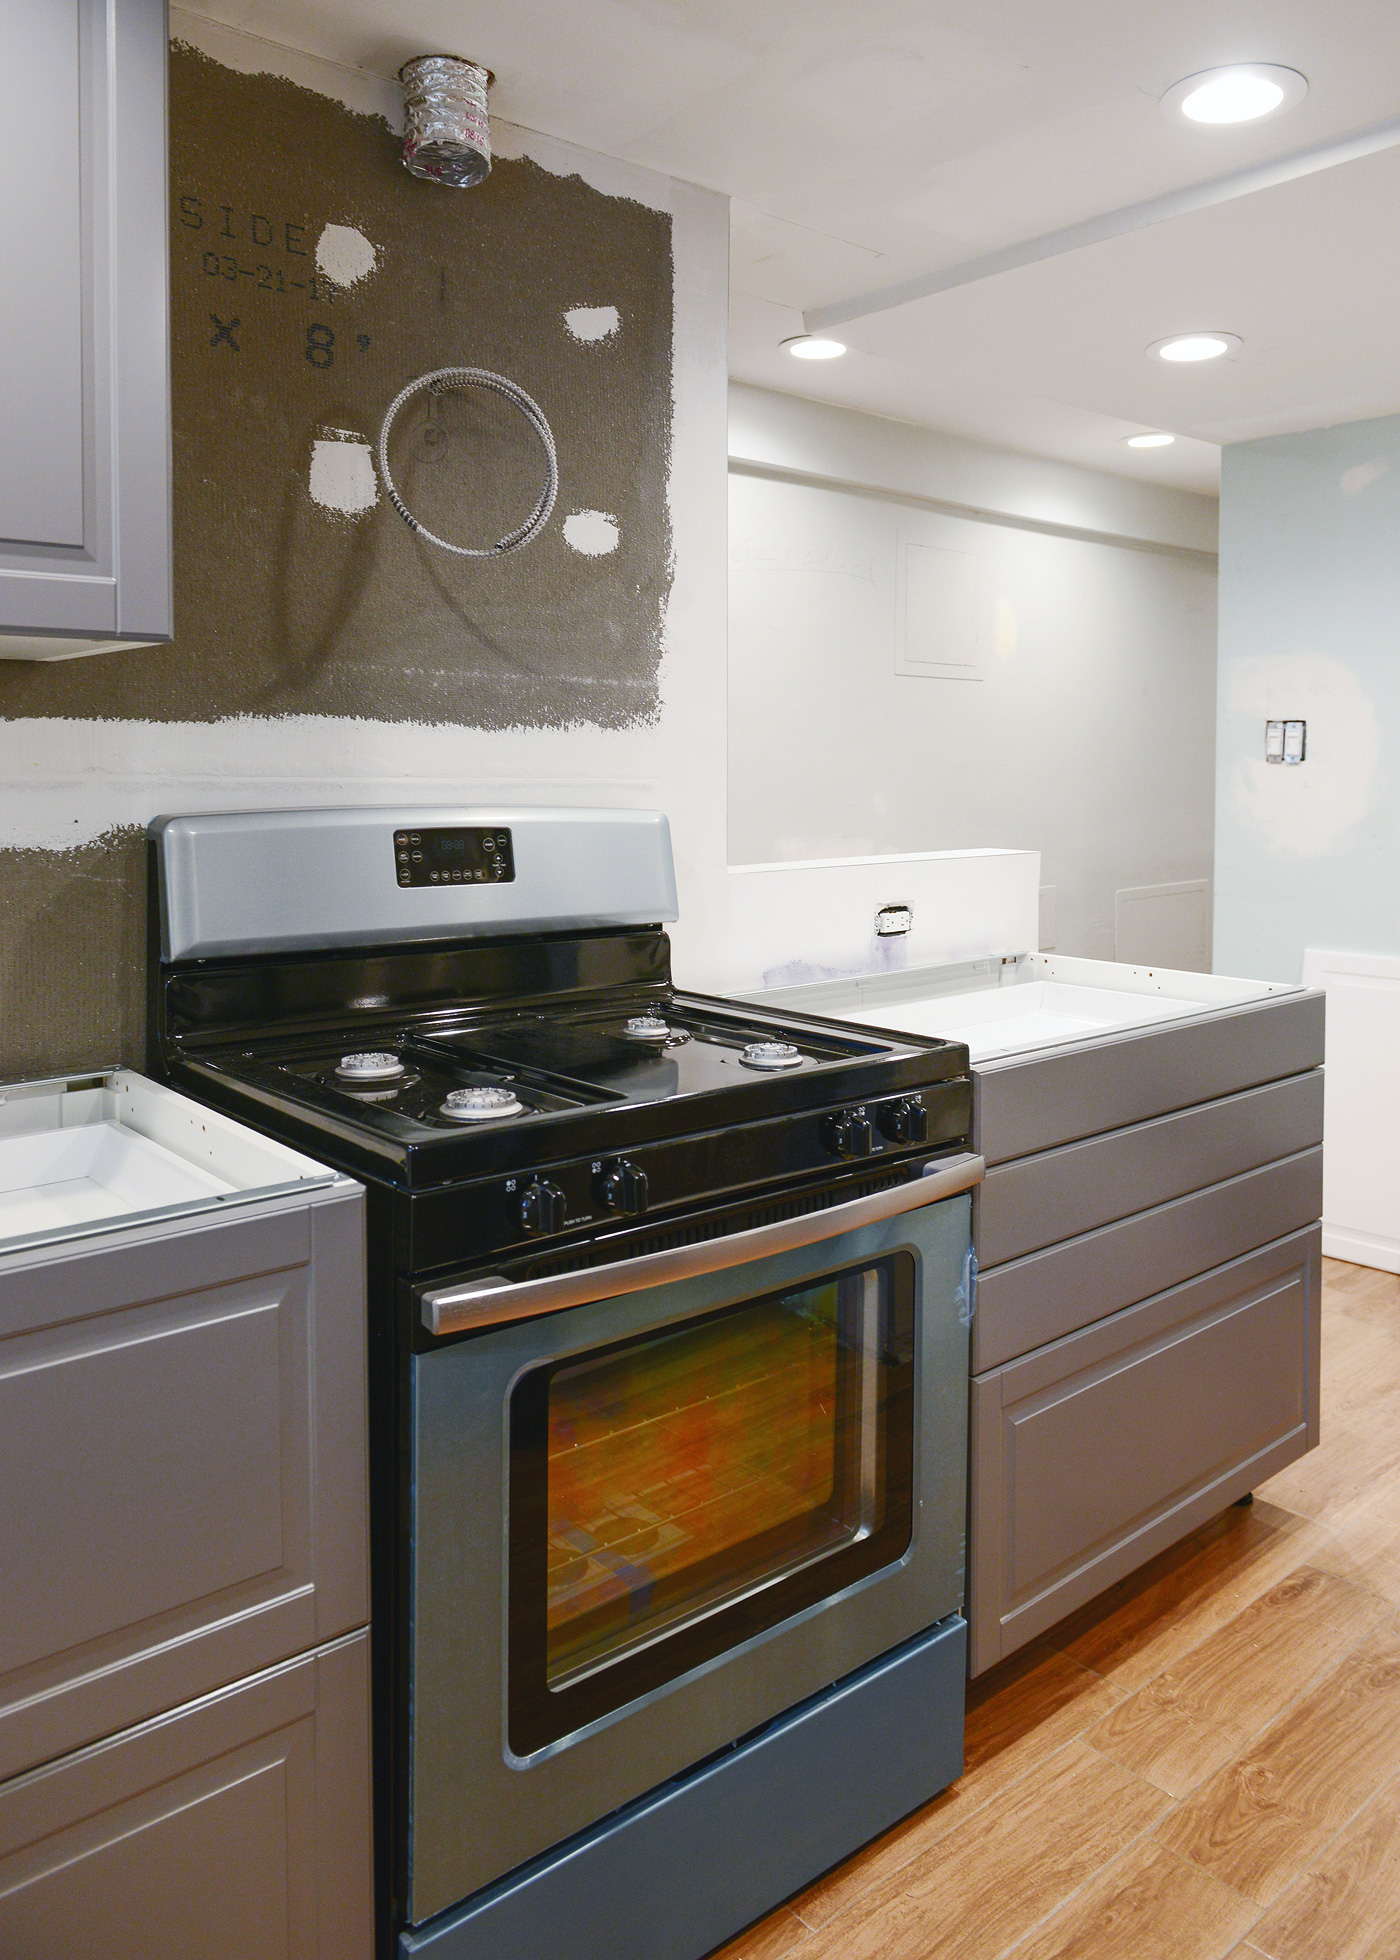
The stove wall might be our favorite; the lower drawer storage is an absolute dream. Each of these cabinets are a full 36″ wide, and we can only imagine how many pots, pans and rows of silverware can be stowed away!
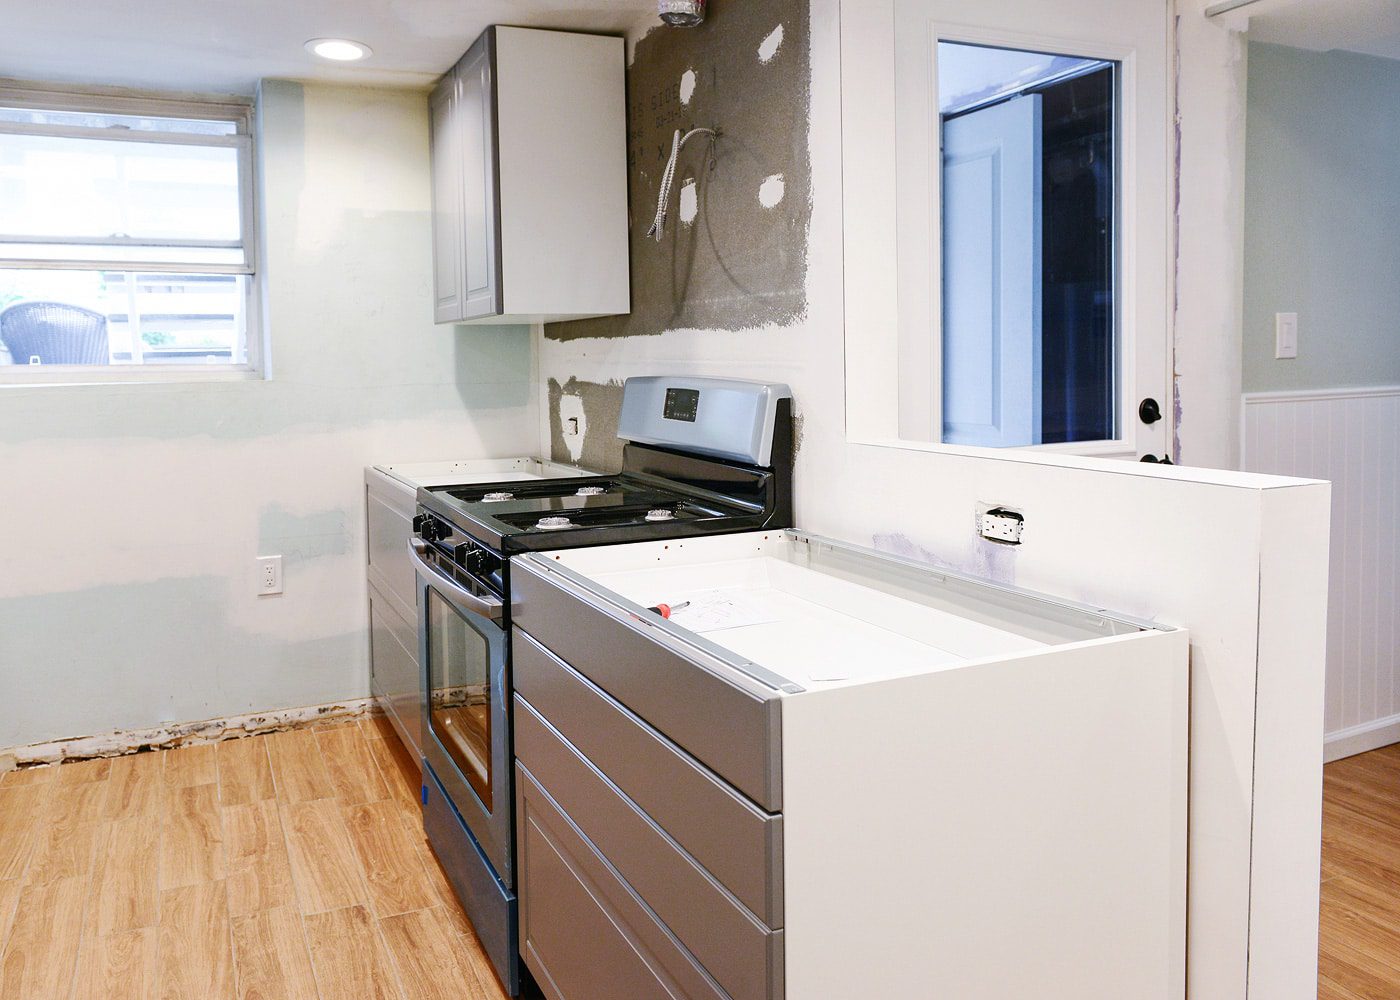
The half wall has turned into the sweetest detail. I’m shooting the photo below from the laundry room, but you can see here how it keeps the galley kitchen feeling open. Not for one second does this room give off the feeling of being too cramped, rather, it really feels as though we’ve squeezed out every last ounce of functionality into this small space.
We still need to install the pantry and add in the gray fillers, cover panels and toe kicks, which will hide away every last bit of exposed white cabinetry. Afterwards, it’s on to countertops, tile and hardware!
For anyone else who’s installed an IKEA kitchen, what were some of the challenges you’ve faced? I told Scott that the hardest part was assembling the drawers (yowza!), but overall, we felt like IKEA really has their system down to a science. What do you think? Any tips or tricks to share?


That looks amazing! You guys always do such detailed and great posts.
We’ve been in our house for 7 years and I’ve been on the fence about using an IKEA kitchen. With the high use and potentially low maintenance of a rental kitchen, what made you decide to go with instead of a more “traditional” build?
Thanks, Eric!
We considered a lot of options, everything from a traditional and/or custom build, off-the-shelf from the hardware store, R-T-A cabinets and IKEA. We’ve used R-T-A in our laundry room and love them, and we have a more custom build in our kitchen. If we were to do the cabinets in our kitchen all over again, we probably would have incorporated more base cabinet drawers, and we would have definitely upgraded to all soft close hinges. When weighing everything we’ve done in the past, we decided to take this opportunity to use IKEA cabinets, since we know people that use and love them! IKEA’s standard – such as soft close hinges – isn’t an up charge in any way, and it’s definitely one of those things that they seem to do really, really well. Of course, time will tell, but we liked their variety in drawers and organizational systems, soft close and door options.
I am loving following along with the garden apartment renovation! The kitchen looks amazing so far. I can’t wait to see the halfwall with finishing details!
We’re happy to hear this, Karen! We can’t wait either! :D
This is going to look so great! I can’t wait to see the finished product. Also, this is something I’ve never thought of, but how do you paint walls the sides of cabinets are against? Also, are you putting in a tile back splash? I sure hope so!
I’m not sure what you mean about painting… you can just tape off the cabinet and paint the wall! And yes, definitely tiling everywhere you see the exposed cement board.
I guess I mean places where there is spaces between the wall and the cabinet/appliance like down the left side of the fridge.
Ah, I see! That’s the only place where we’ll need to pull the fridge away from the wall to get that. Everything else will have filler pieces all the way up to the wall, so taping off the cabinets/fillers should be just fine.
Oh this post came at the perfect time. We spent 3 hours at IKEA last night looking at the kitchens. We’re set to order this week! Your pictures and detailed post are great! Thanks!!
Looking great so far!!
My husband and I are also doing an Ikea kitchen and are going with the Bodbyn door style in gray. Is that what you have used? And on a stylistic note, we are doing gray cabinets and have purchased all new white appliances. Thoughts? Will the color difference be too stark in person? It’s hard to tell with only a small door sample and a rendering to compare!
Thanks!
Hi Katie, yup, these are the BODBYN gray doors! We actually chose to use stainless appliances here to keep a more uniform appearance with the gray doors – especially since it’s a smaller space. In our kitchen, we used white appliances to keep things looking uniform with our white cabinets. It’s definitely personal preference, but you can see how we used stainless/gray above, and white/white here: https://yellowbrickhome.com/2015/09/02/kitchen-done/
Hi Kim, I certainly agree with your thinking! I love the look of the Bodbyn but don’t like the off-white door option, especially with how most appliances are more of an “ice-white” color. When we chose the appliances we did not think we would have gray cabinets because a kitchen reno was not in the plan and we have off-white cabinets now. I guess I will just cross my fingers that the white and gray work! Thoughts on a tuxedo look to help balance it out?
Thank you!
Katie
A tuxedo look could certainly help to keep things cohesive! Perhaps the uppers can be the BODBYN white, and you can give them a coat of paint. Should be relatively painless since it will just be a handful of doors! It’s something to consider. We’re actually doing the white BODBYN for the pantry doors, but we had our friend paint them bright white to match our trim and lacquer them. We asked her because she’s a pro furniture refinisher, so thank goodness for talented friends. But! I bet you could just as easily use a foam roller and apply Polycrylic to protect them further.
Thanks again for letting me bounce a few ideas around! I may consider painting them, plus I could always test it with one small door or something and see how the process works. : ) Decisions, decisions!
Hi Katie – saw your question and wanted to jump in with an opinion :) I prefer white appliances as they are easier to keep clean and free of fingerprints than stainless. I think they’d look awesome with the grey cabinets, but perhaps to tie things in more intentionally, you could do white countertops and/or white pendant lights? Just thinking something to really relate to the white. Or maybe even pretty white cabinet knobs and pulls? I see lots of beautiful possibilities!
Love these suggestions, Bernadette!
I love this online community – thank you Kim for letting the conversation flow!
Bernadette – good idea! We plan on doing a white countertop, and white floor tile, but I like the idea of white lighting! Yes! I was looking for white cabinet pulls too, but there are not too many options out there.
Thanks for the comment. :)
I agree w/Bernadette – white appliances are easier to clean and they are cheaper too!
Bonus is I think they are coming back in style again. I see more kitchens being designed w/white and black appliances.
This kitchen looks amazing! You did an awesome job!
Paige
http://thehappyflammily.com
It looks so good!! I think this is DEFINITELY the best layout for the space – of course leave it to Daniel to figure it out. I love the grey finish on the cabinets and the drawers look super functional, you guys definitely made all the right choices.
One question though, does the cabinet above the fridge open all the way? In the last photo, it looks like there is a small jog in the ceiling right in front of the cabinet. I would hate for you to put in all that work, only for the door not to open all the way!
Thanks, Caitlin! And good question about that above-fridge cabinet. We had a moment of panic ourselves when we were installing it and realized it was awfully close to that weird jut in the ceiling. Luckily (and we were holding our breath the whole time), it opens all the way, it just doesn’t STAY open like the one above the sink area. It actually opens up, as opposed to a traditional door, which was our saving grace!
The garden kitchen looks amazing. The lucky renters will love it. We did an IKEA kitchen and for the life of me I couldn’t get a couple of doors to lay flat against the cabinet front. But… the blind corner cabinet is the bee’s knees.
We haven’t yet taken the time to straighten all the cabinets yet, hopefully we don’t run into the same issue!
I am LOVING all the work and detail you are doing to the apartment!
Is it weird that I wish I were single so I could live there when it’s done? LOL!
Haha, thank you!
I love the finishes in your kitchen! I am so thankful for this post-we just bought a home with a small, very dated kitchen and are trying to decide how to update our cabinets and counters. Getting to see such a detailed post helps me feel like I could tackle this successfully but also gave me realistic expectations of the challenges and time commitment. Thanks for such great content!
Our kitchen is IKEA! My parents did the renovation about 8 years ago. The cabinets are still functional, but we have horizontal ones that lift up to open instead of swing left. The hydraulics on one of them don’t work anymore which I’m sure is an easy fix though, and considering it’s been a long while since they were installed I think that’s not too bad for IKEA.
Oh, that’s great to hear! We have 2 cabinets that flip up, so good to know they’ve lasted as long as they have.
We did our kitchen in IKEA and love the look of it but our kitchen looked the same with all of those boxes! The hardest part for us was our floors not being level and adjusting the legs to it but those legs made it all the more easier, it was more our house that was the difficult part haha.
Boy, do we hear that! Even though our floors were leveled as much as possible with the new tile installation, this 130 year old house just has a lot of quirks. Those adjustable legs were our saving grace!
Hi! I have a question……we just did an IKEA kitchen We had them intall it and we used our existing stainless steel appliances. We too went with the Bodbyn style. I absolutely love it! My question, is every time I use the oven or stove, the cabinets next to it get so hot! Is that normal? It never happened with my previous cabinets. Google os not helping me much, so I am hoping you can!
Yikes, I honestly haven’t heard of that! Because this kitchen is installed in our rental unit, we don’t use it on a day-to-day basis. We haven’t heard any complaints from our tenants though. Do you think it’s the way your stove is blowing out heat, as opposed to the cabinets themselves? Maybe it’s the model of stove? I’m trying to think what might cause this.
Hi! I love this kitchen and I’m currently putting together my own IKEA cabinets!
I have a question about the rail system though. Did you put the rail at the very top of the wall knowing that you wanted the cabinets right to the ceiling without measuring the two inches they say to do? Or did you measure where the latch thingy is on the cabinet and then put the rail on the wall to match the latch? This is the only aspect of the install I’m confused about!
Thank you and incredible job!
We have just done the top cabinets and there is a space between the cabinets and wall. What did you use to fill it?
A filler piece!