

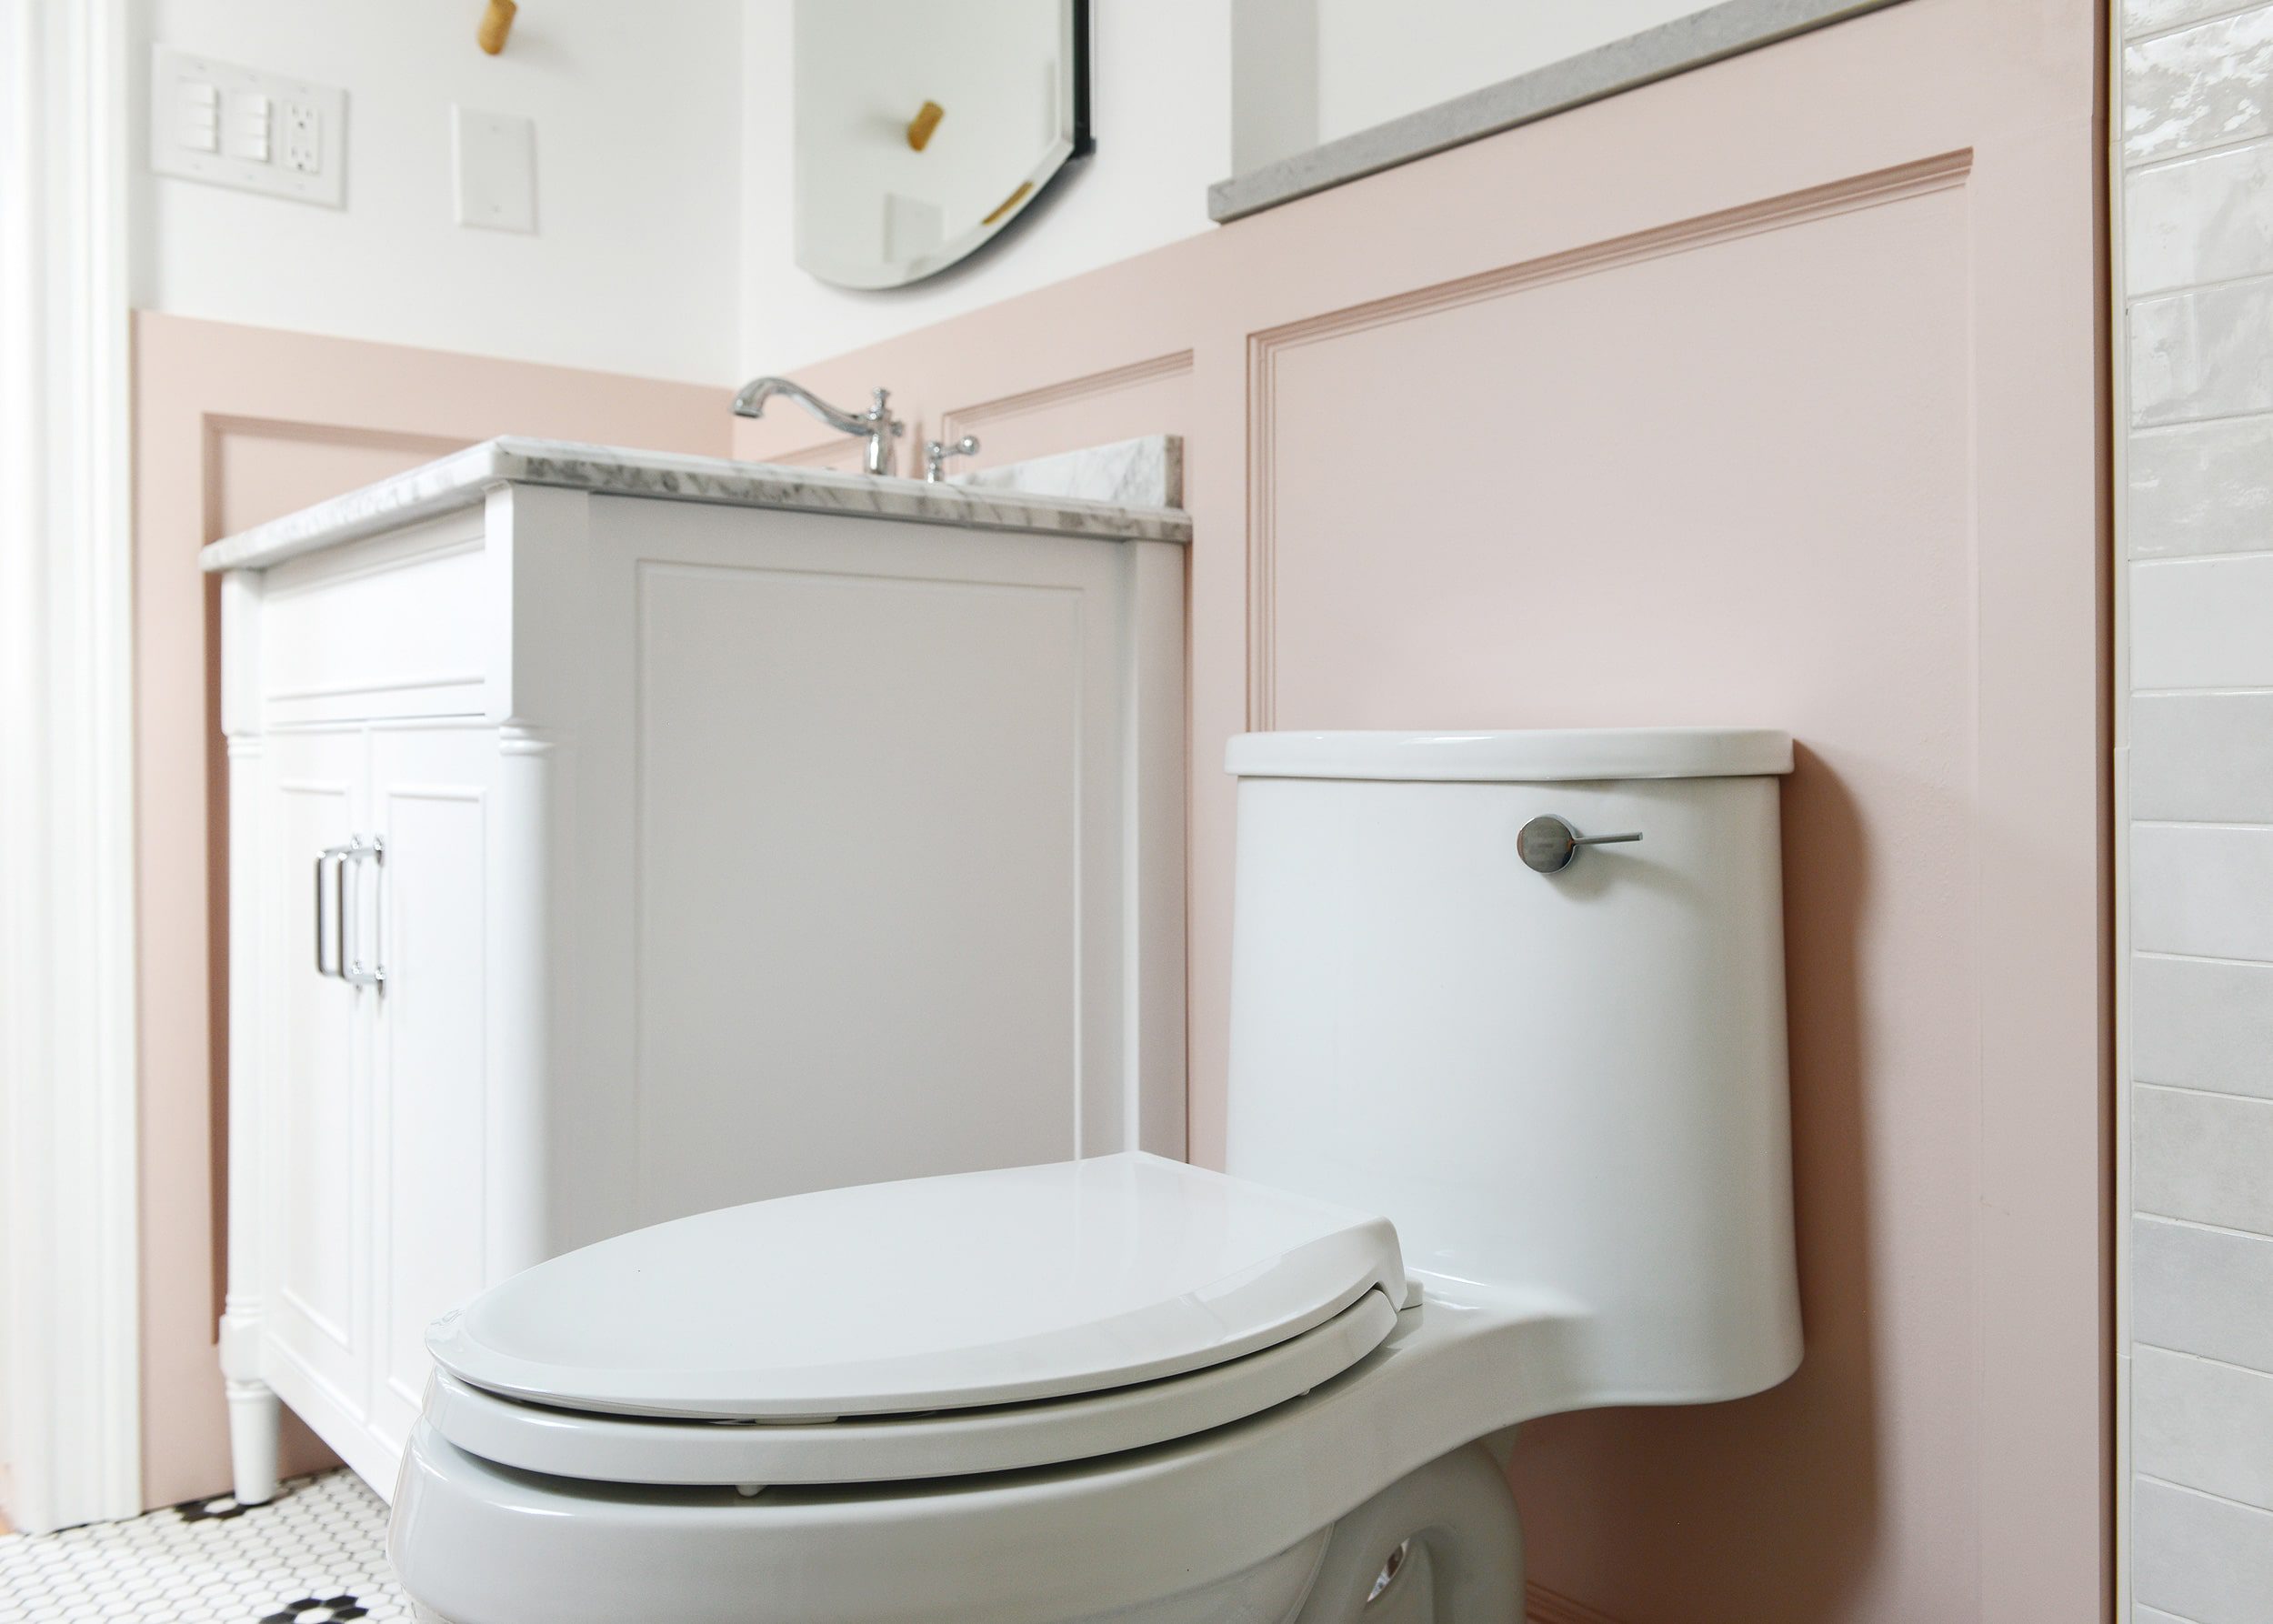
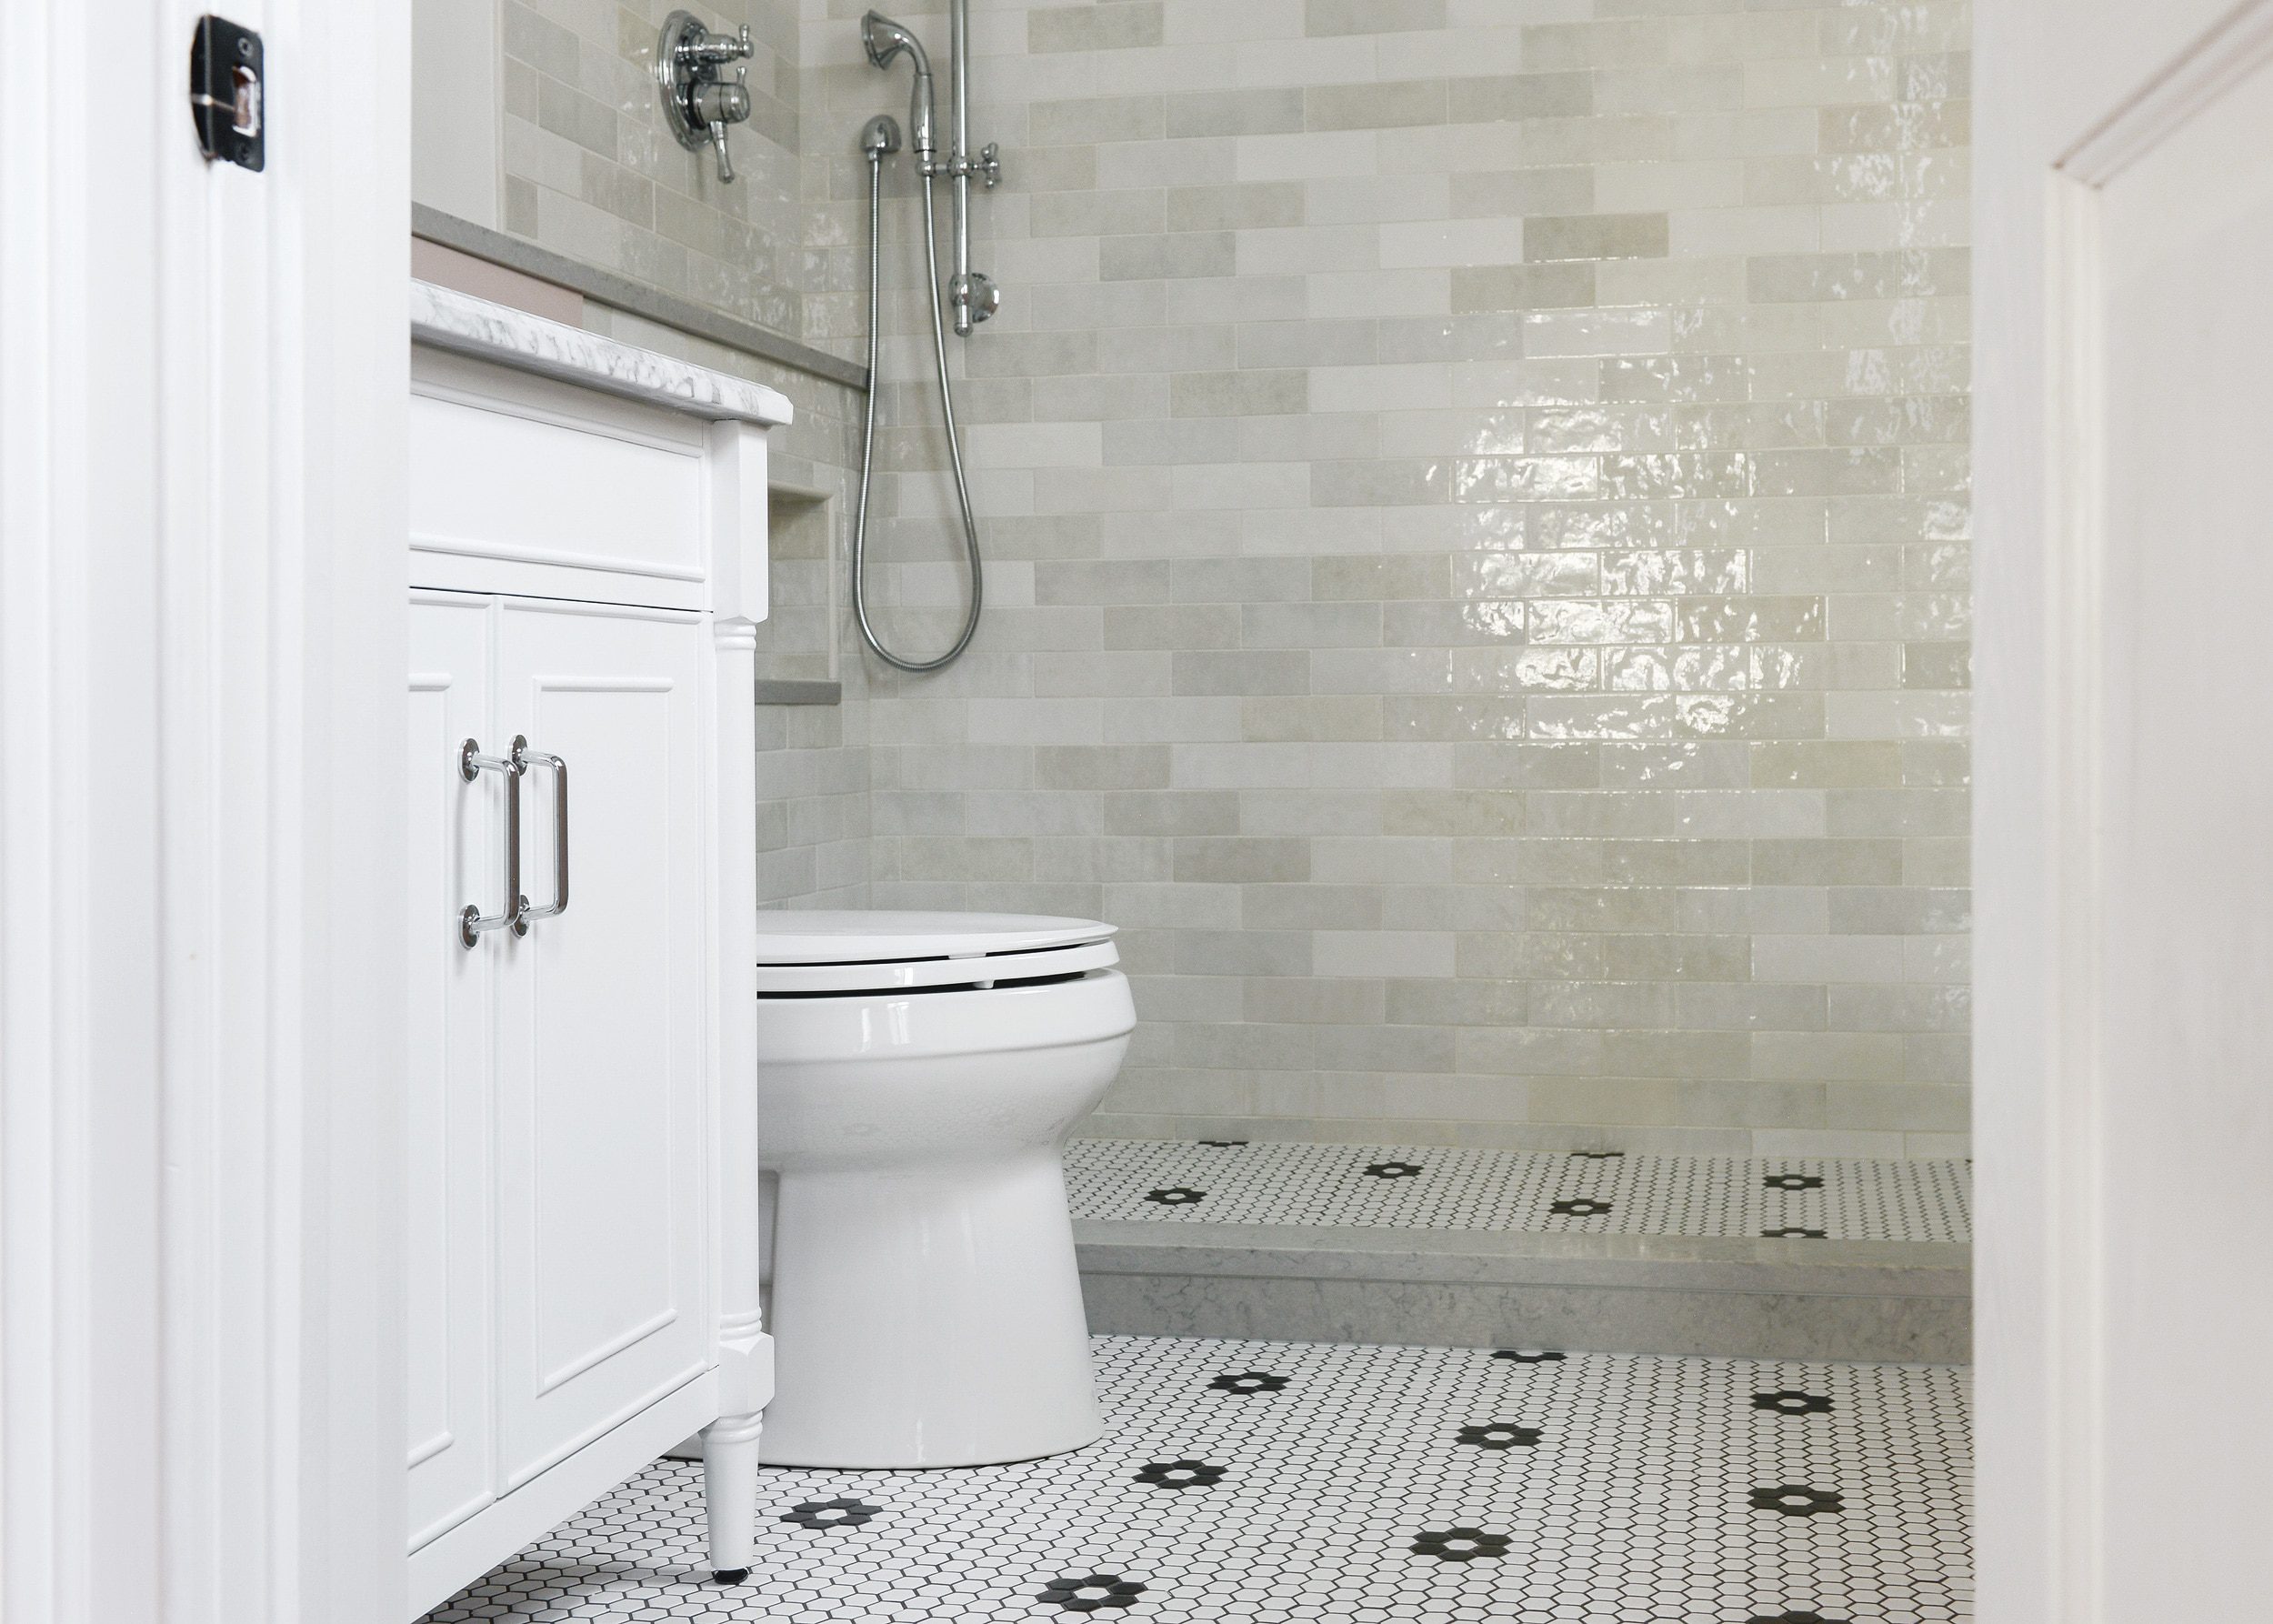
Hey! Guys! We have 2/3rds of a working bathroom!
For the first time in about six weeks, we now have a functional toilet (and faucet – more on that soon) in our small guest bath. We had a bit of a setback in which our perfectly measured board and batten work needed some, um, adjusting? And those small tweaks needed to our board and batten set off a chain of events that resulted in throwing off our timeline by a couple of days. But! We’ll get into that at another time, because today, we’re celebrating a functional, glorious toilet!
We’ve installed enough toilets that it’s second nature to us (is that weird to say?), but we’ve received a lot of requests for breaking down the steps in a renovation that are often times glossed over. You know, things like installing a toilet. You asked, we answered. We’re breaking toilet installation down to a few straightforward steps to keep it as simple as possible. Our goal is to inspire the confidence necessary to take on projects that might otherwise be hired out to the pros. You got this!
Supplies Needed
- Toilet
- Wax-free gasket
- Toilet supply line (usually 3/8″ compression fitting)
- Adjustable wrench
- Ratchet and sockets (or power drill/driver depending on toilet hardware)
1| Remove Existing Toilet
Note: If your installation doesn’t involve removing an existing toilet, skip directly to step 2! It’ll only be a 4 step process for you!
This step is only necessary if you’re replacing a toilet, as opposed to a completely new installation. Since our first floor toilet is a new installation, we’ve used photos of the toilet in our second floor bathroom for illustration purposes here. First, shut off water to the toilet at the supply valve. Next, flush the toilet to remove water from the tank.
Once shut off the water and emptied the tank, pop the small plastic caps off of the base of the toilet and remove the screws or nuts holding it in place. The toilet is now ready to be removed! Simply lift it off of the drain, being careful to not tip it too far forward or backward. Tip: Place the base of the toilet directly into a contractor bag to keep any remaining water from spilling.

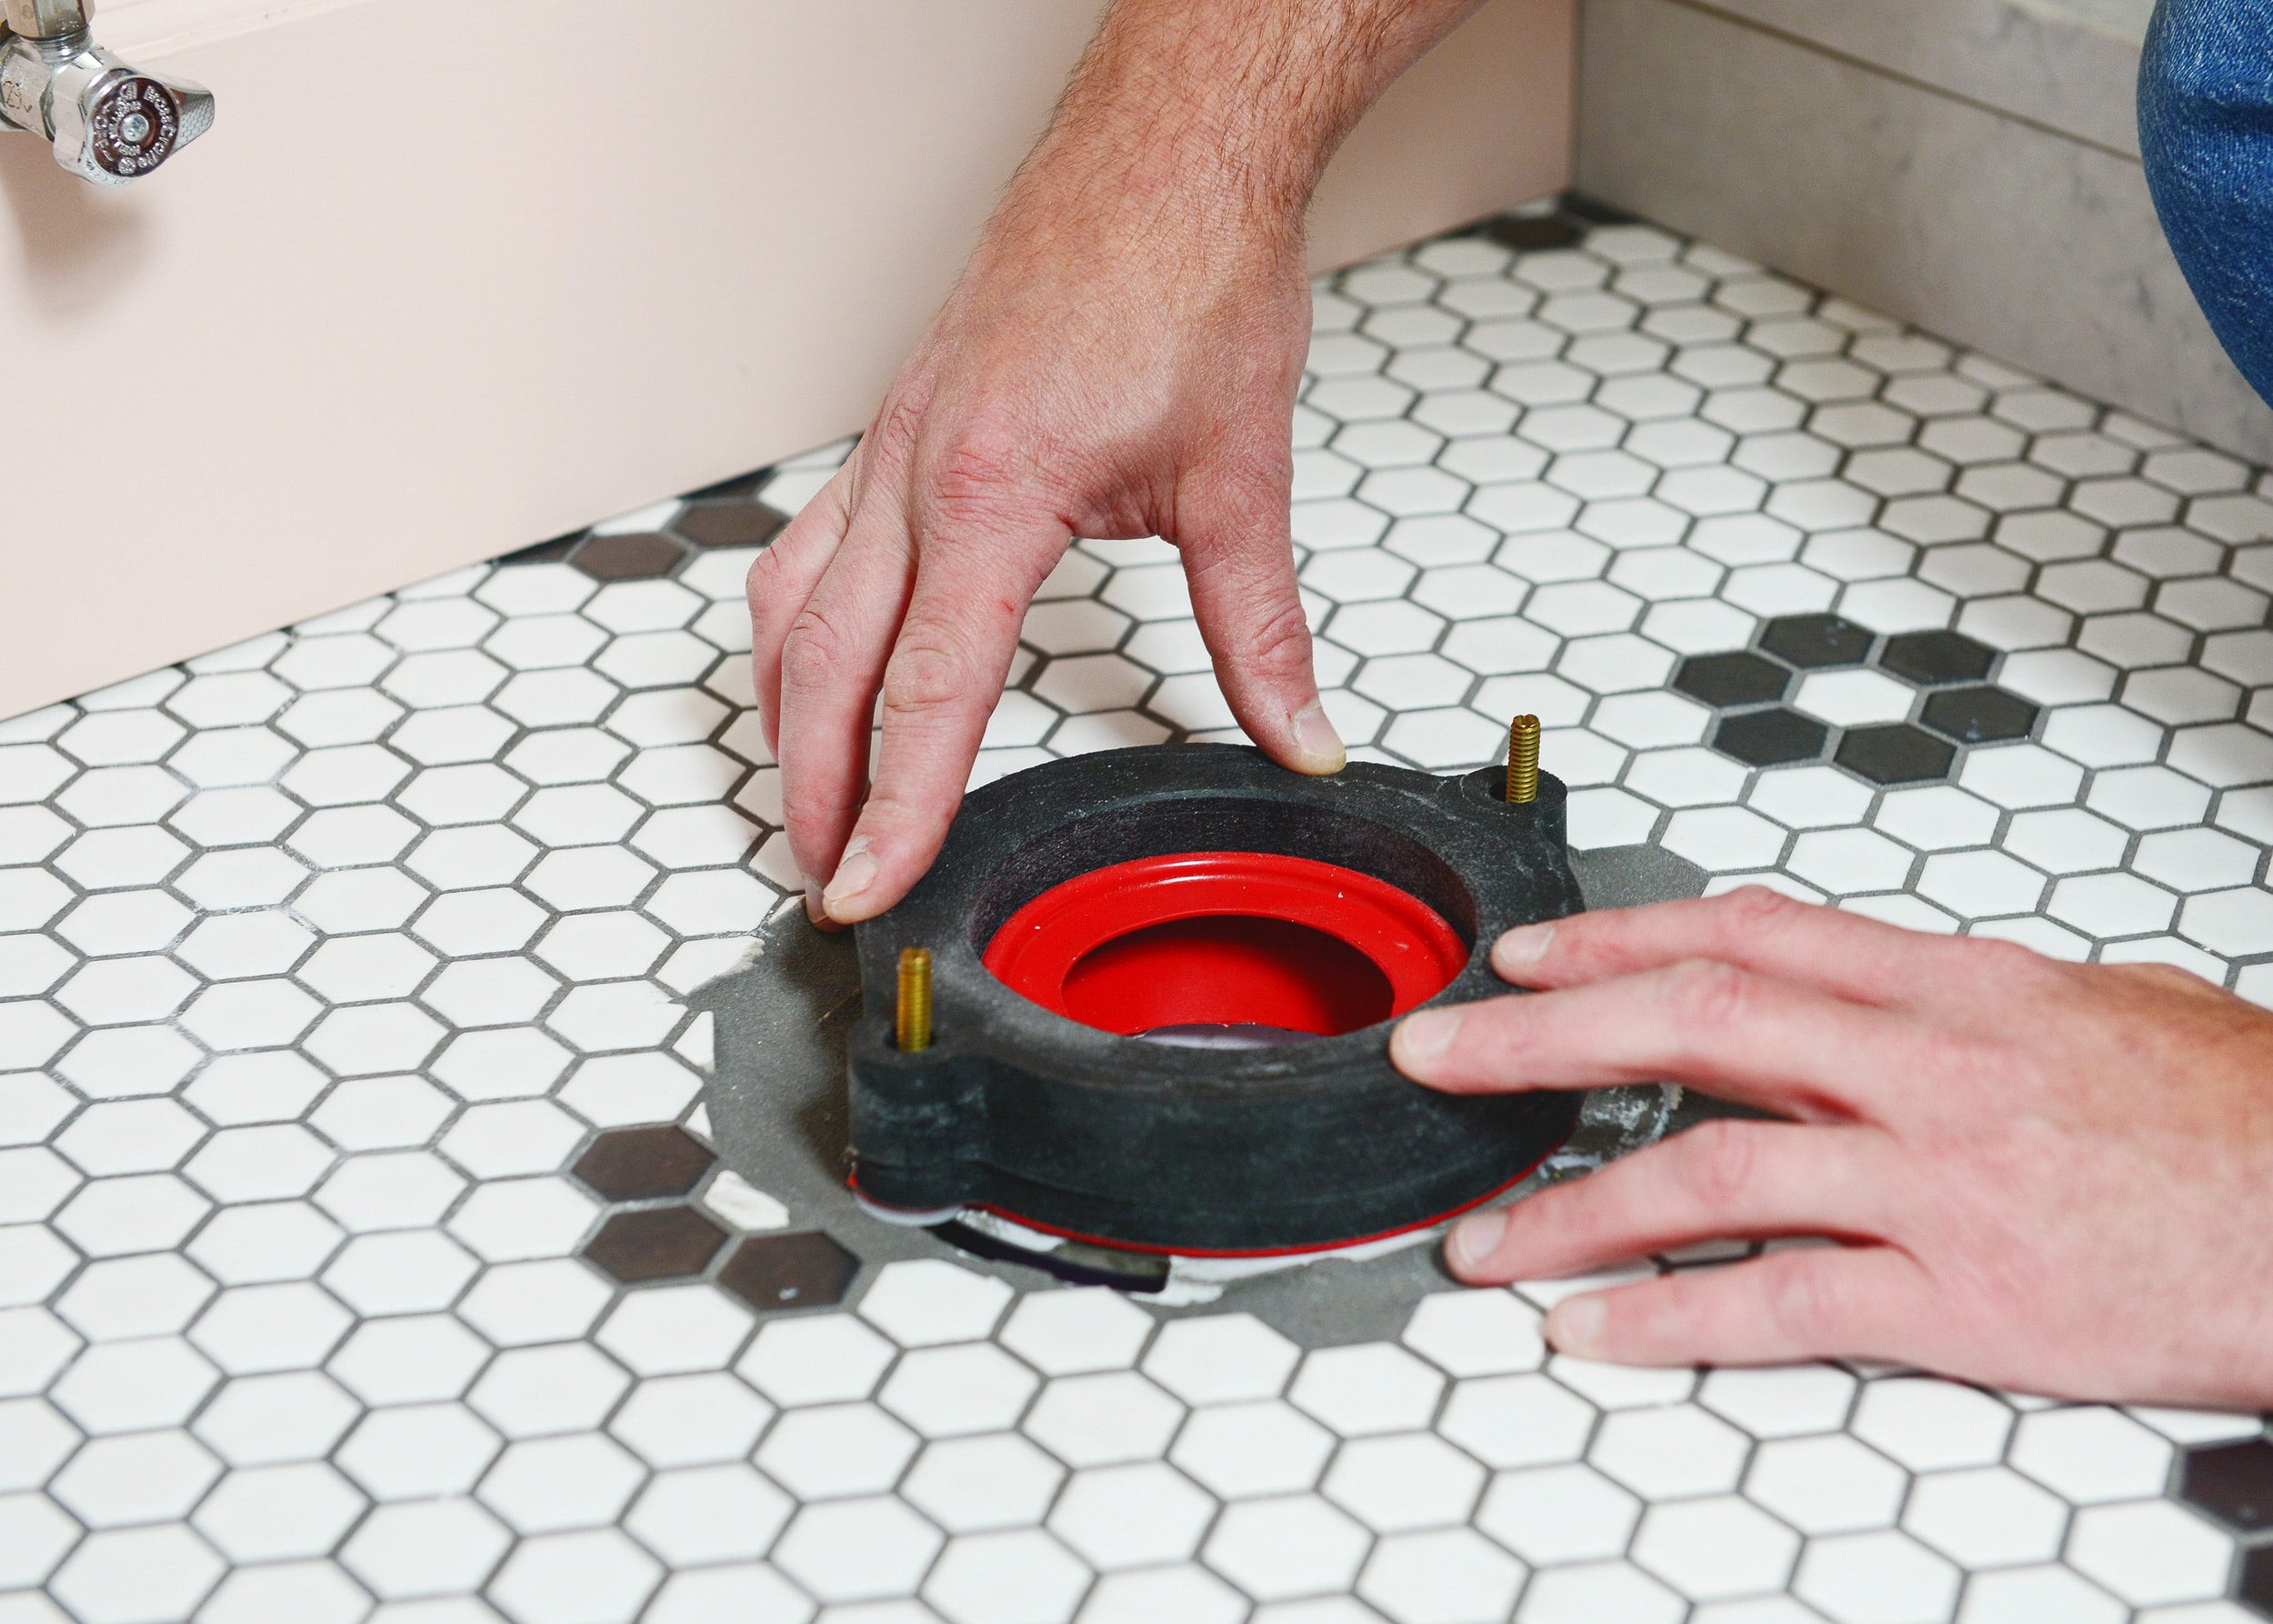
2| Prepare Drain & Install Gasket
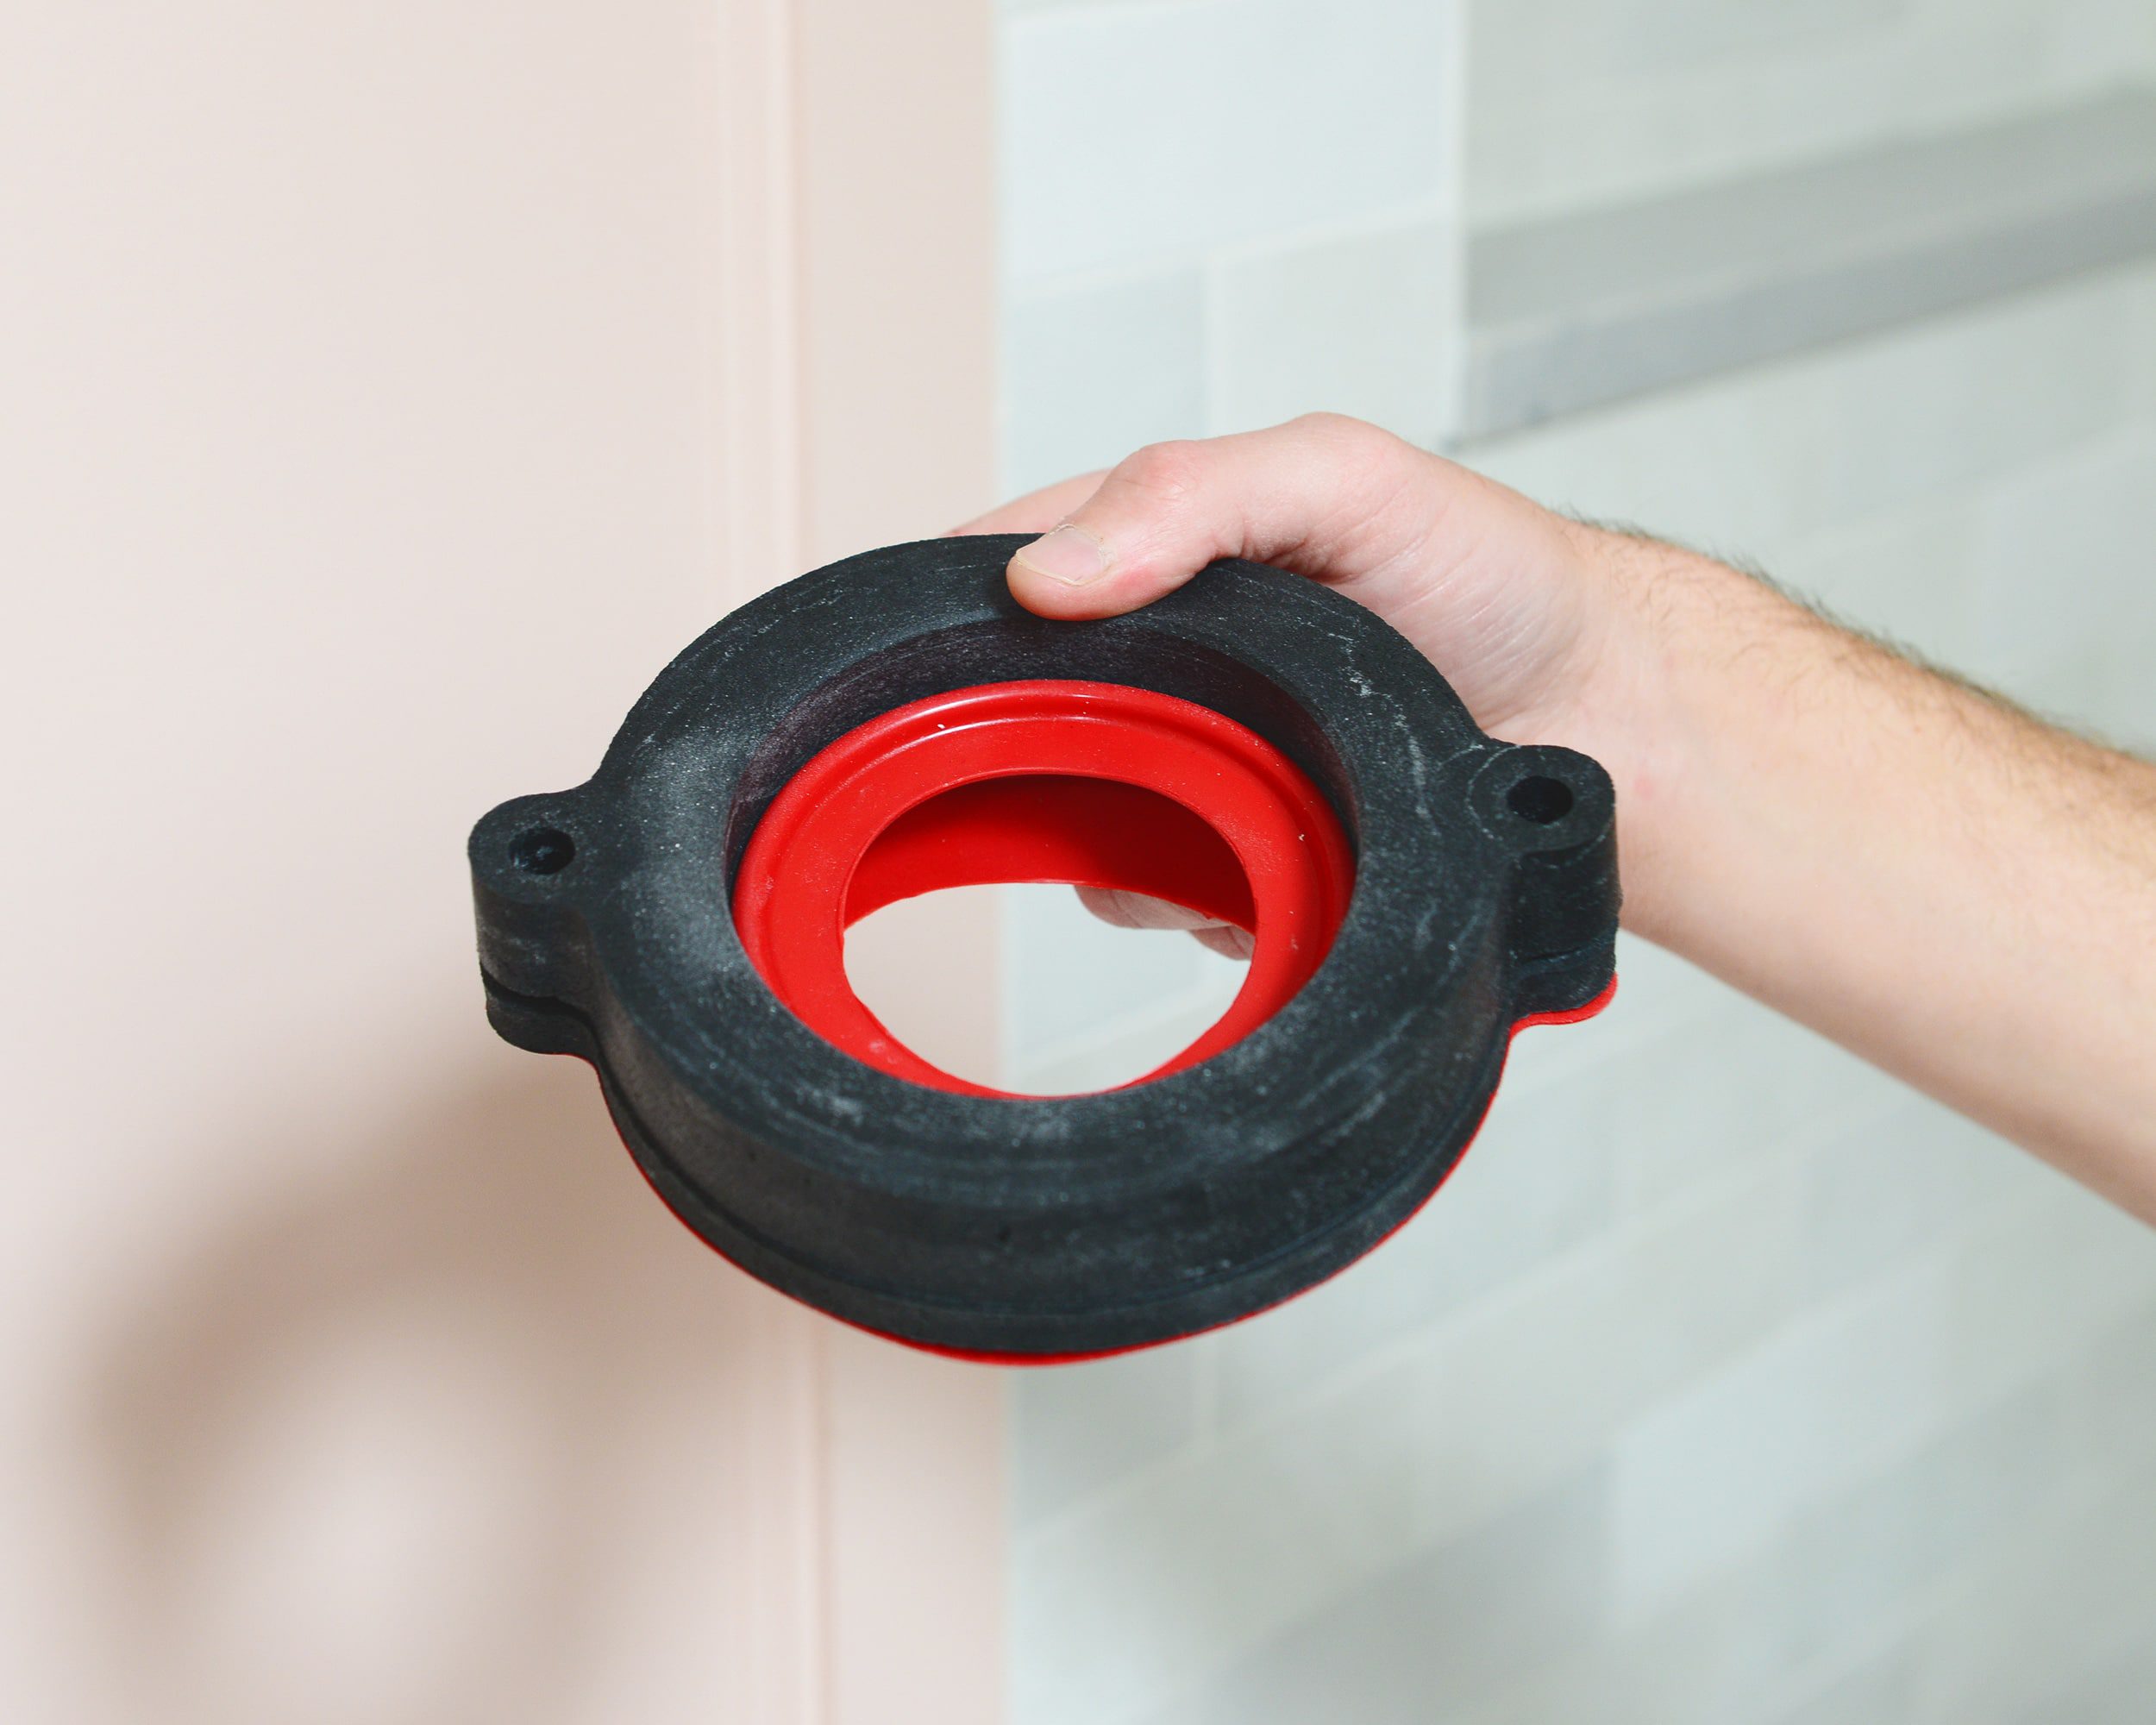
Many moons ago, toilets used a wax ring as a gasket to create a seal to the floor drain. They worked fine when installed properly, but only allow for one chance at setting the toilet perfectly into place. Recently, repositionable rubber and foam gaskets have come along to allow for more adjustment and test fitting. Trust us, you’ll want to spend the extra few bucks and avoid a ring made of wax. We used this Korky model and were very happy with it!
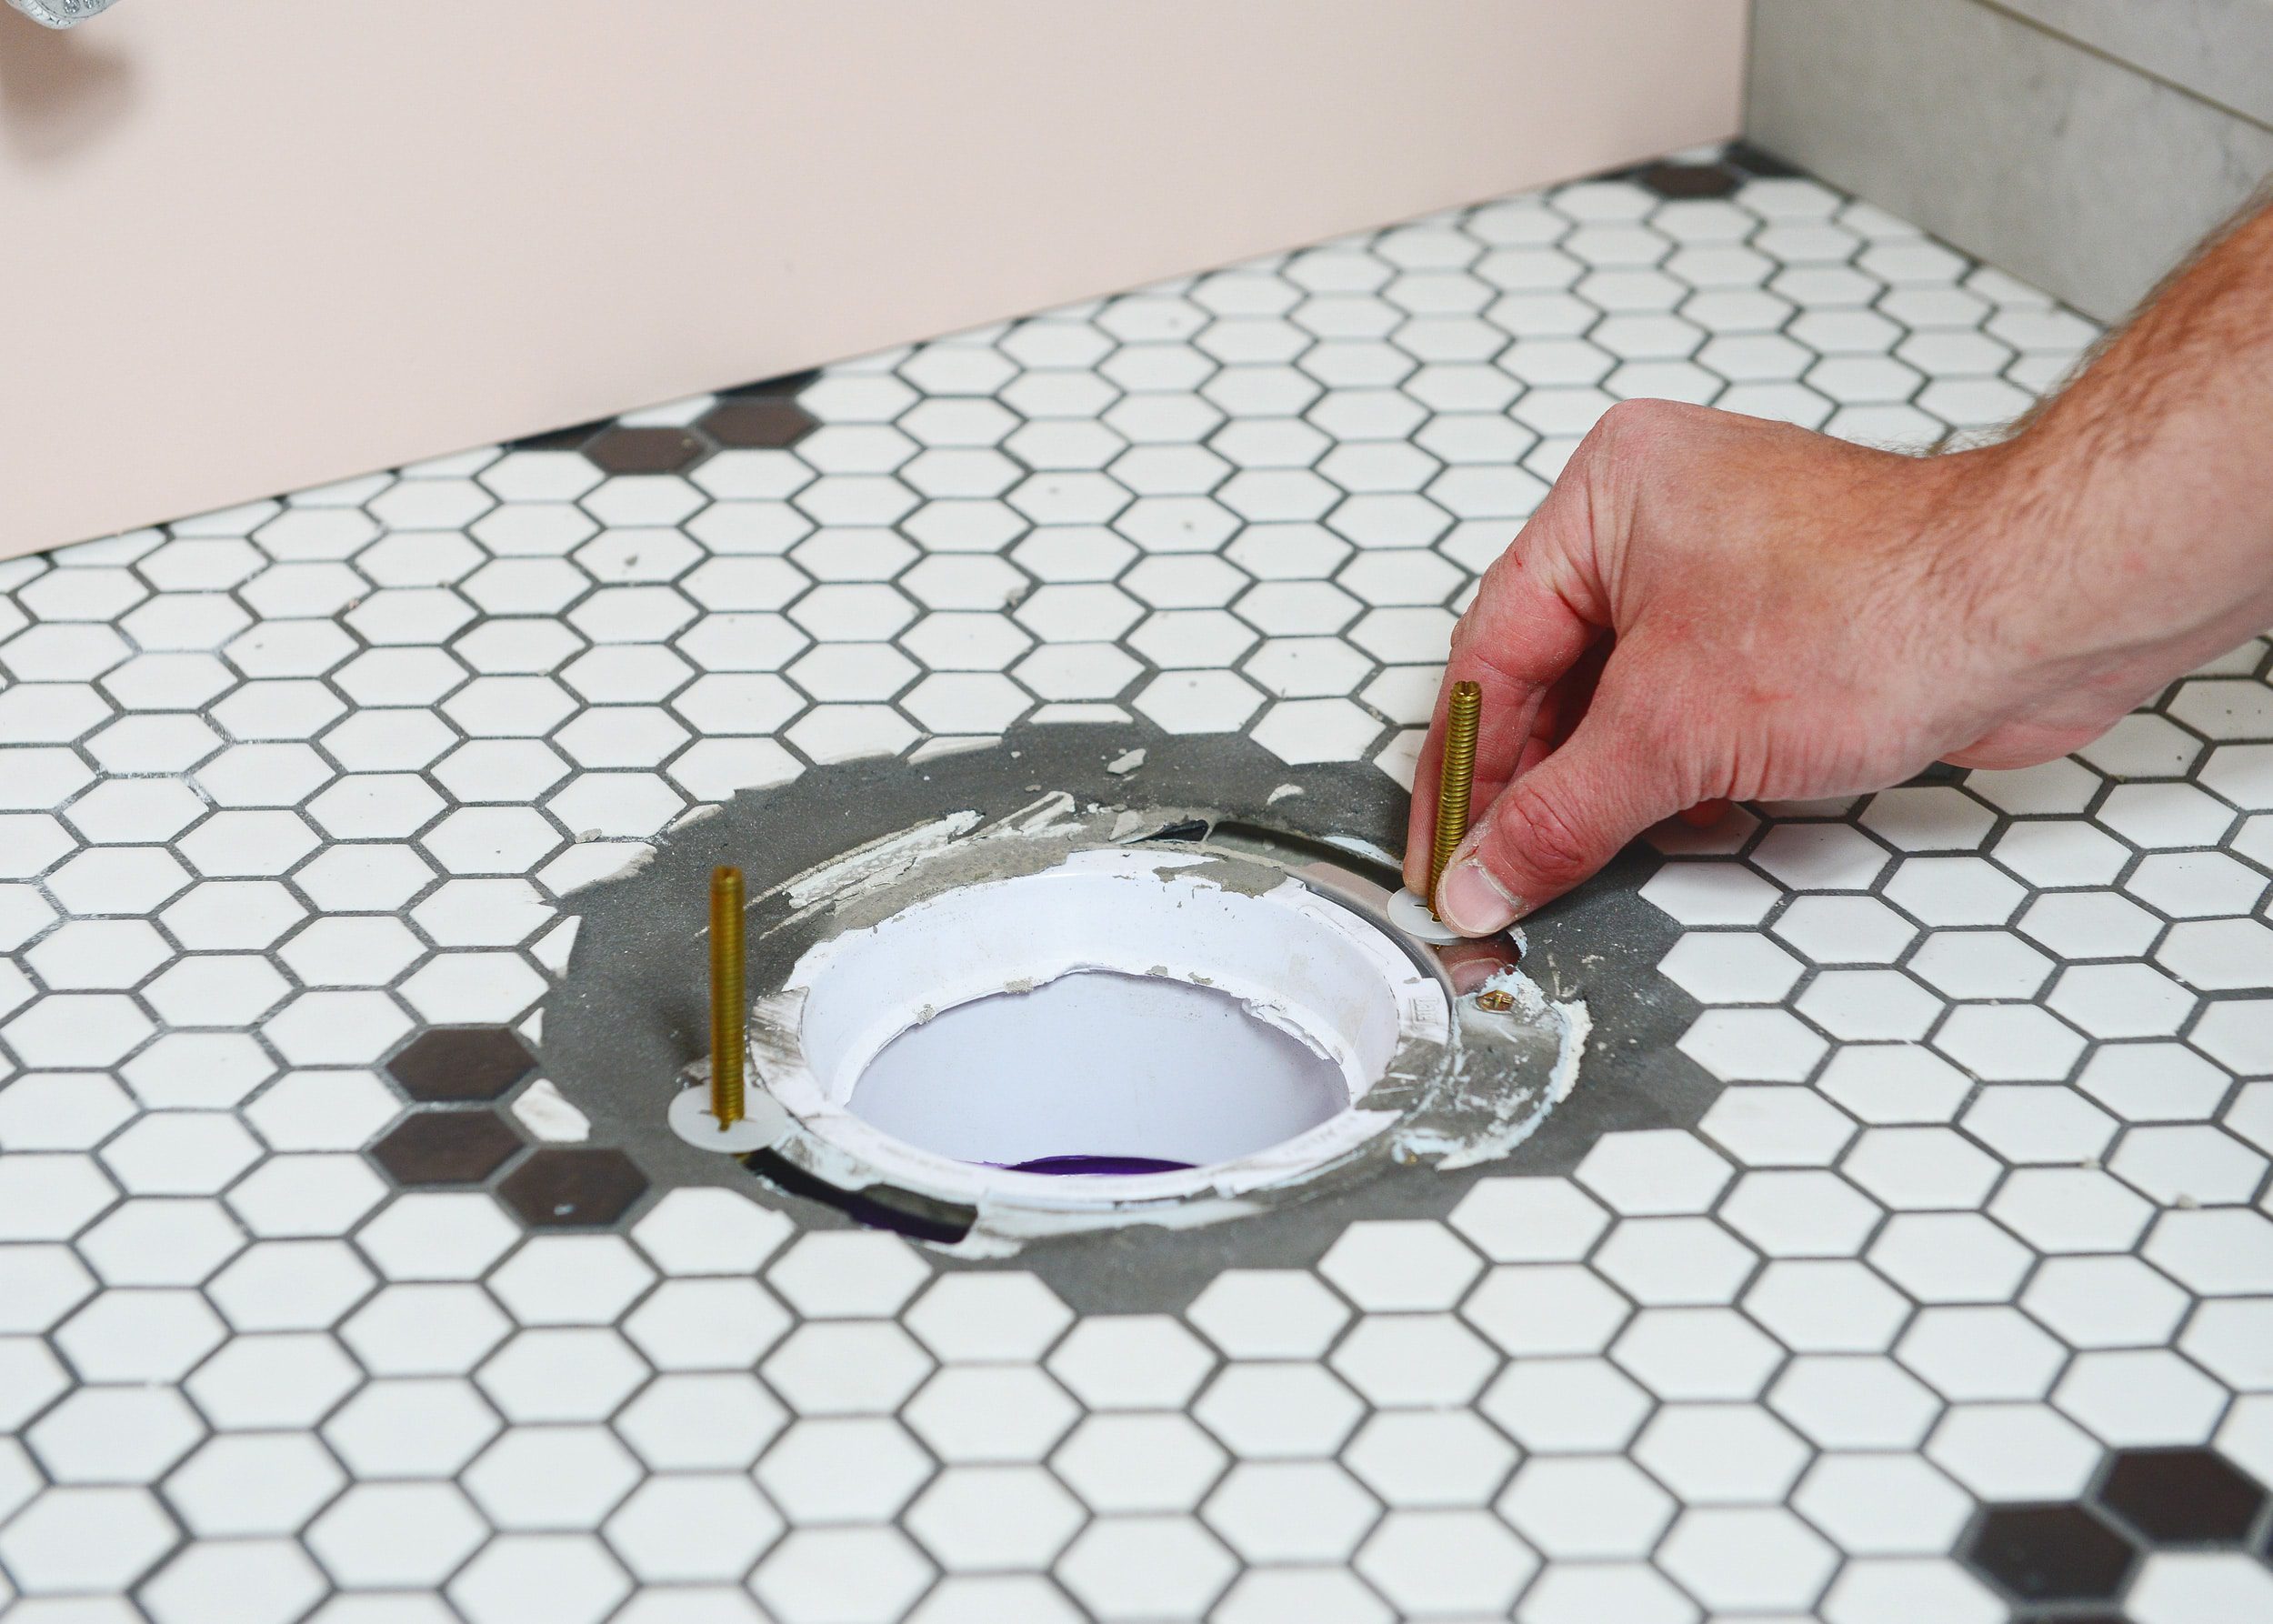
If you’re replacing a toilet that formerly used a wax ring, you’ll need to do some scraping and cleaning of the flange to ensure a proper seal. And if you’re installing a new toilet, you’ll need to knock out the protective cap on your new floor drain flange. A few gentle taps with a hammer will break it loose. Fair warning, once the cap is gone, you’ll smell some sewer gas here as there is no P-trap below the toilet. The unpleasant smell will provide motivation to work quicker!

Next, we installed the mounting bolts and gasket. The bolts drop through the large part of the slots in the flange, then slide into place. The ring sits right on top. Be sure to refer to the specific instructions for your ring here. Ours included multiple thicknesses of rubber that allow for mounting to flanges of varying depths. Since our flange was mounted flush with the tile floor, we followed the instructions and used all included rubber pieces.
3|Install the New Toilet!
Now the new toilet was ready to be put in place! We lowered the toilet carefully onto the gasket from above, ensuring that the bolts lined up nicely with the holes in the toilet base.
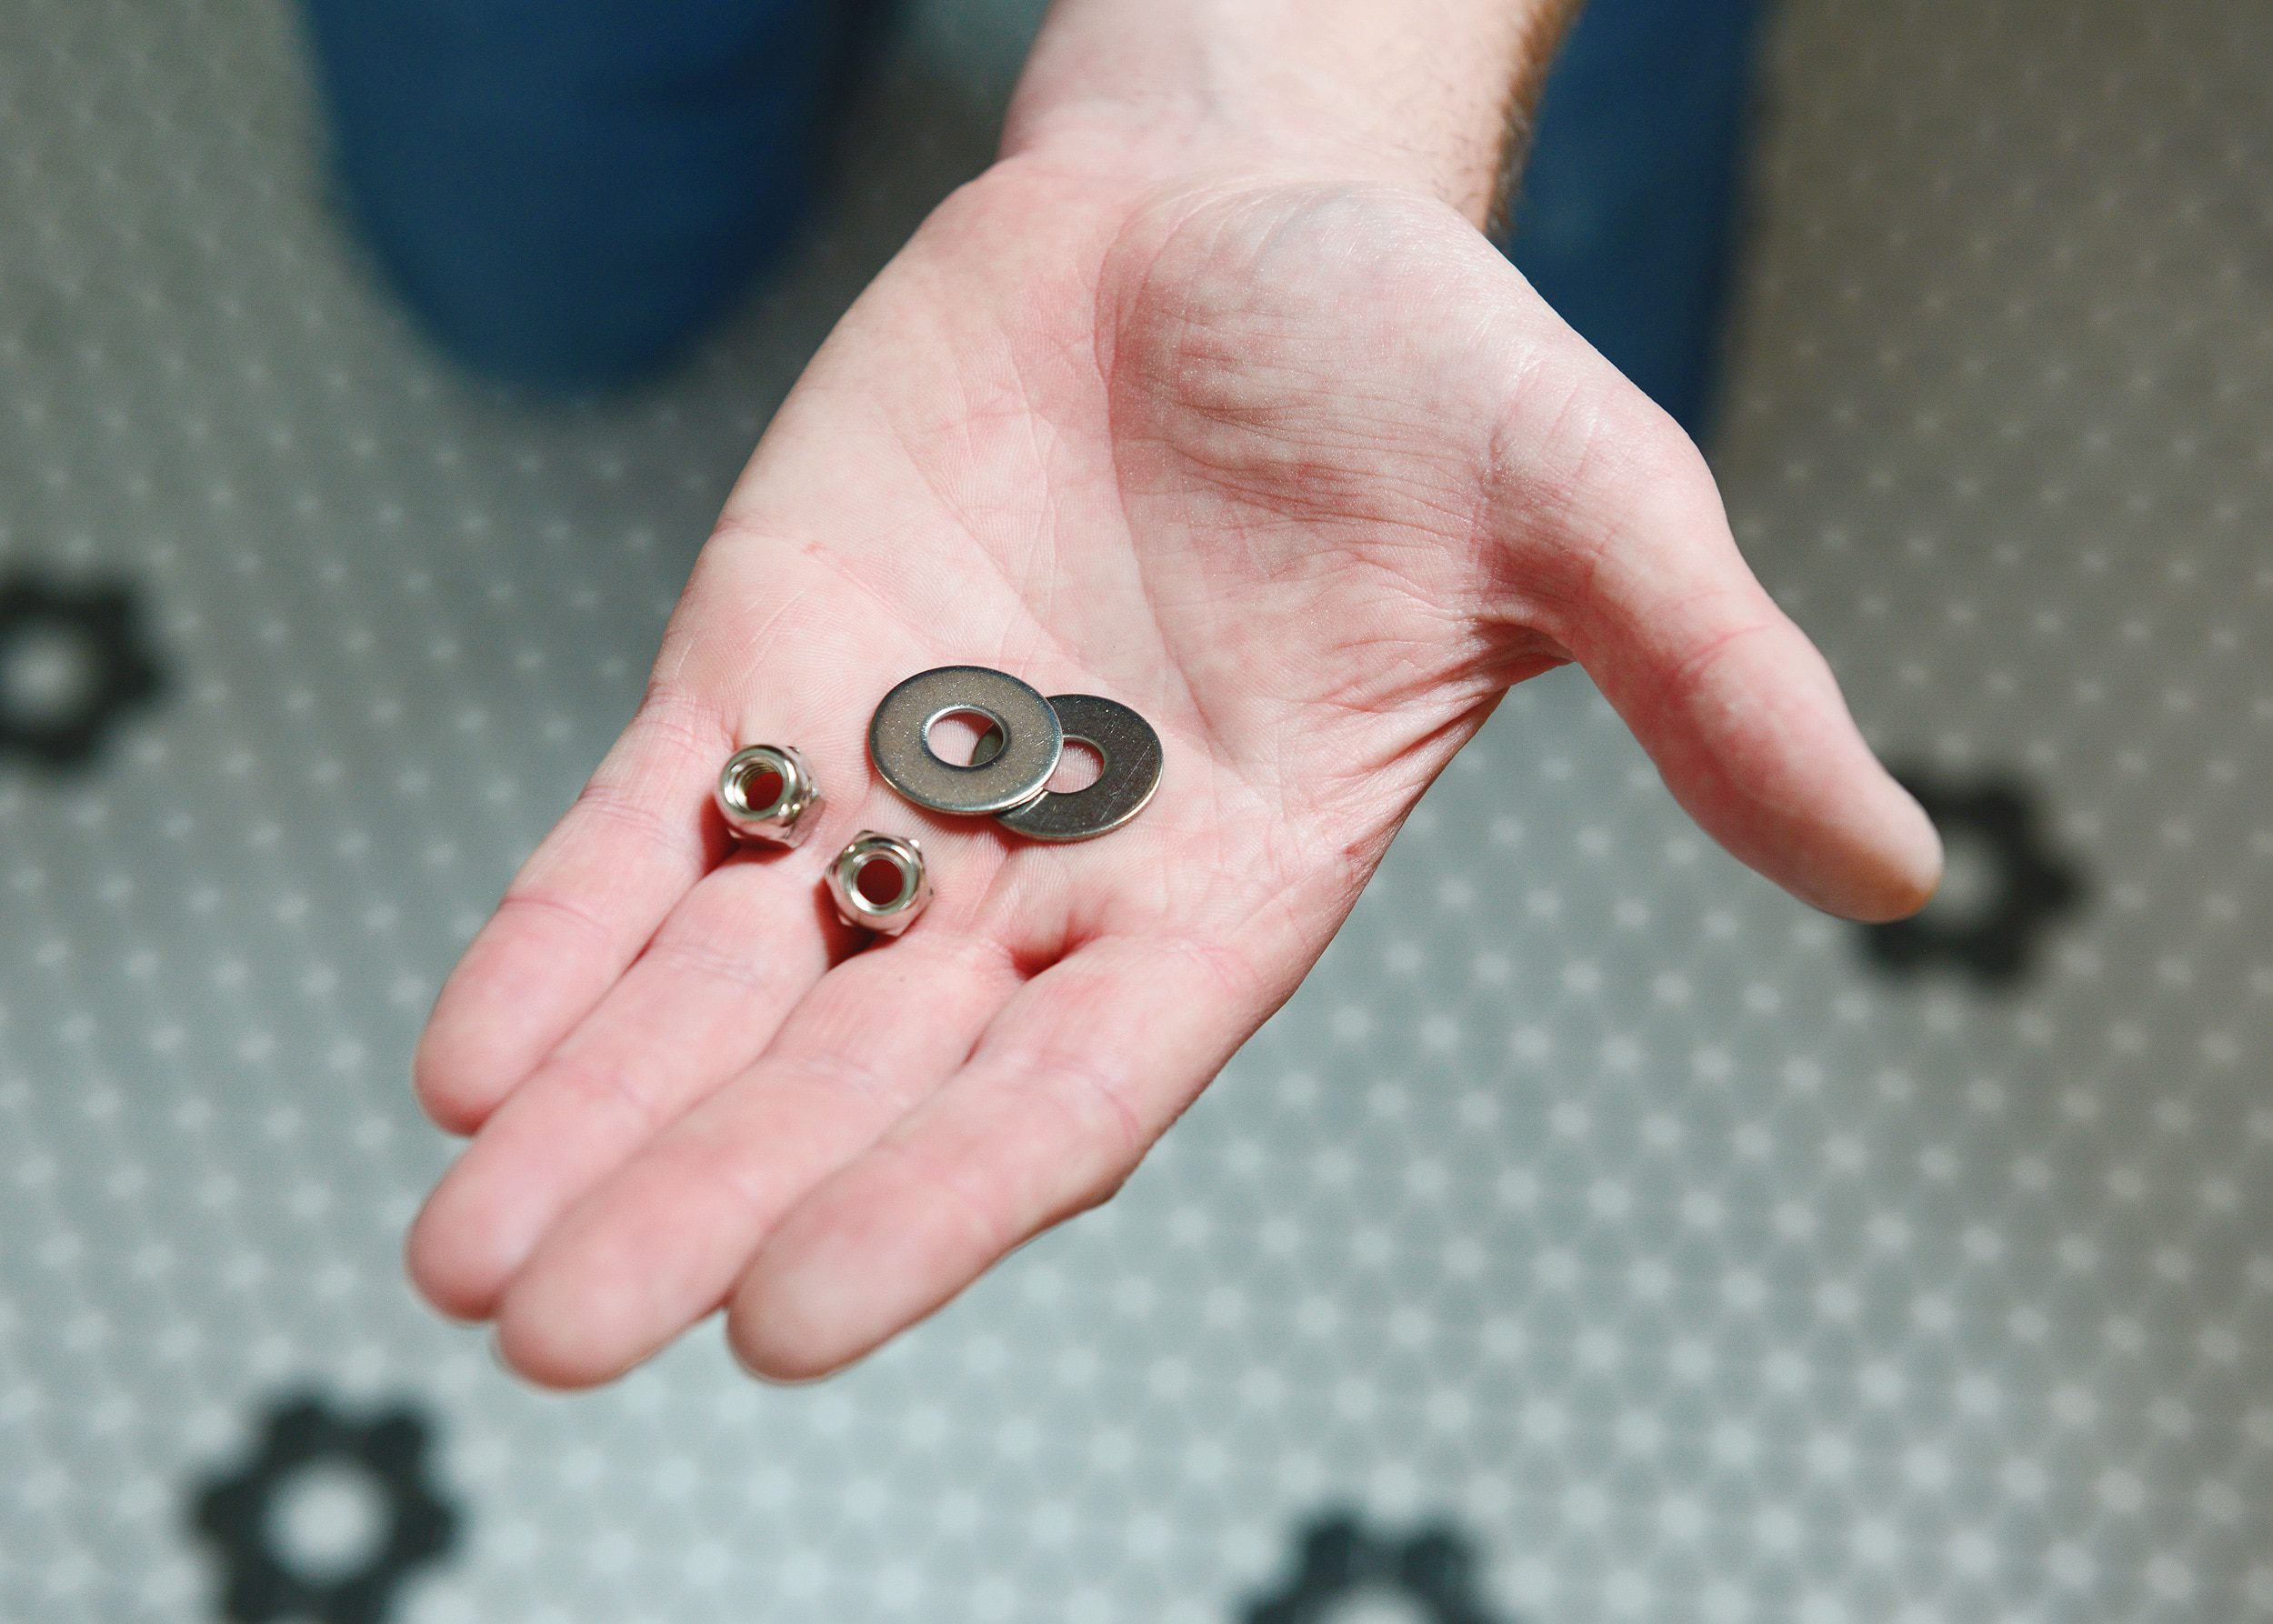
The kit included high quality stainless washers and nuts, which we tightened down with a small ratchet and the appropriately sized socket. To keep the toilet as level as possible, apply downward pressure while tightening and use shims as necessary.
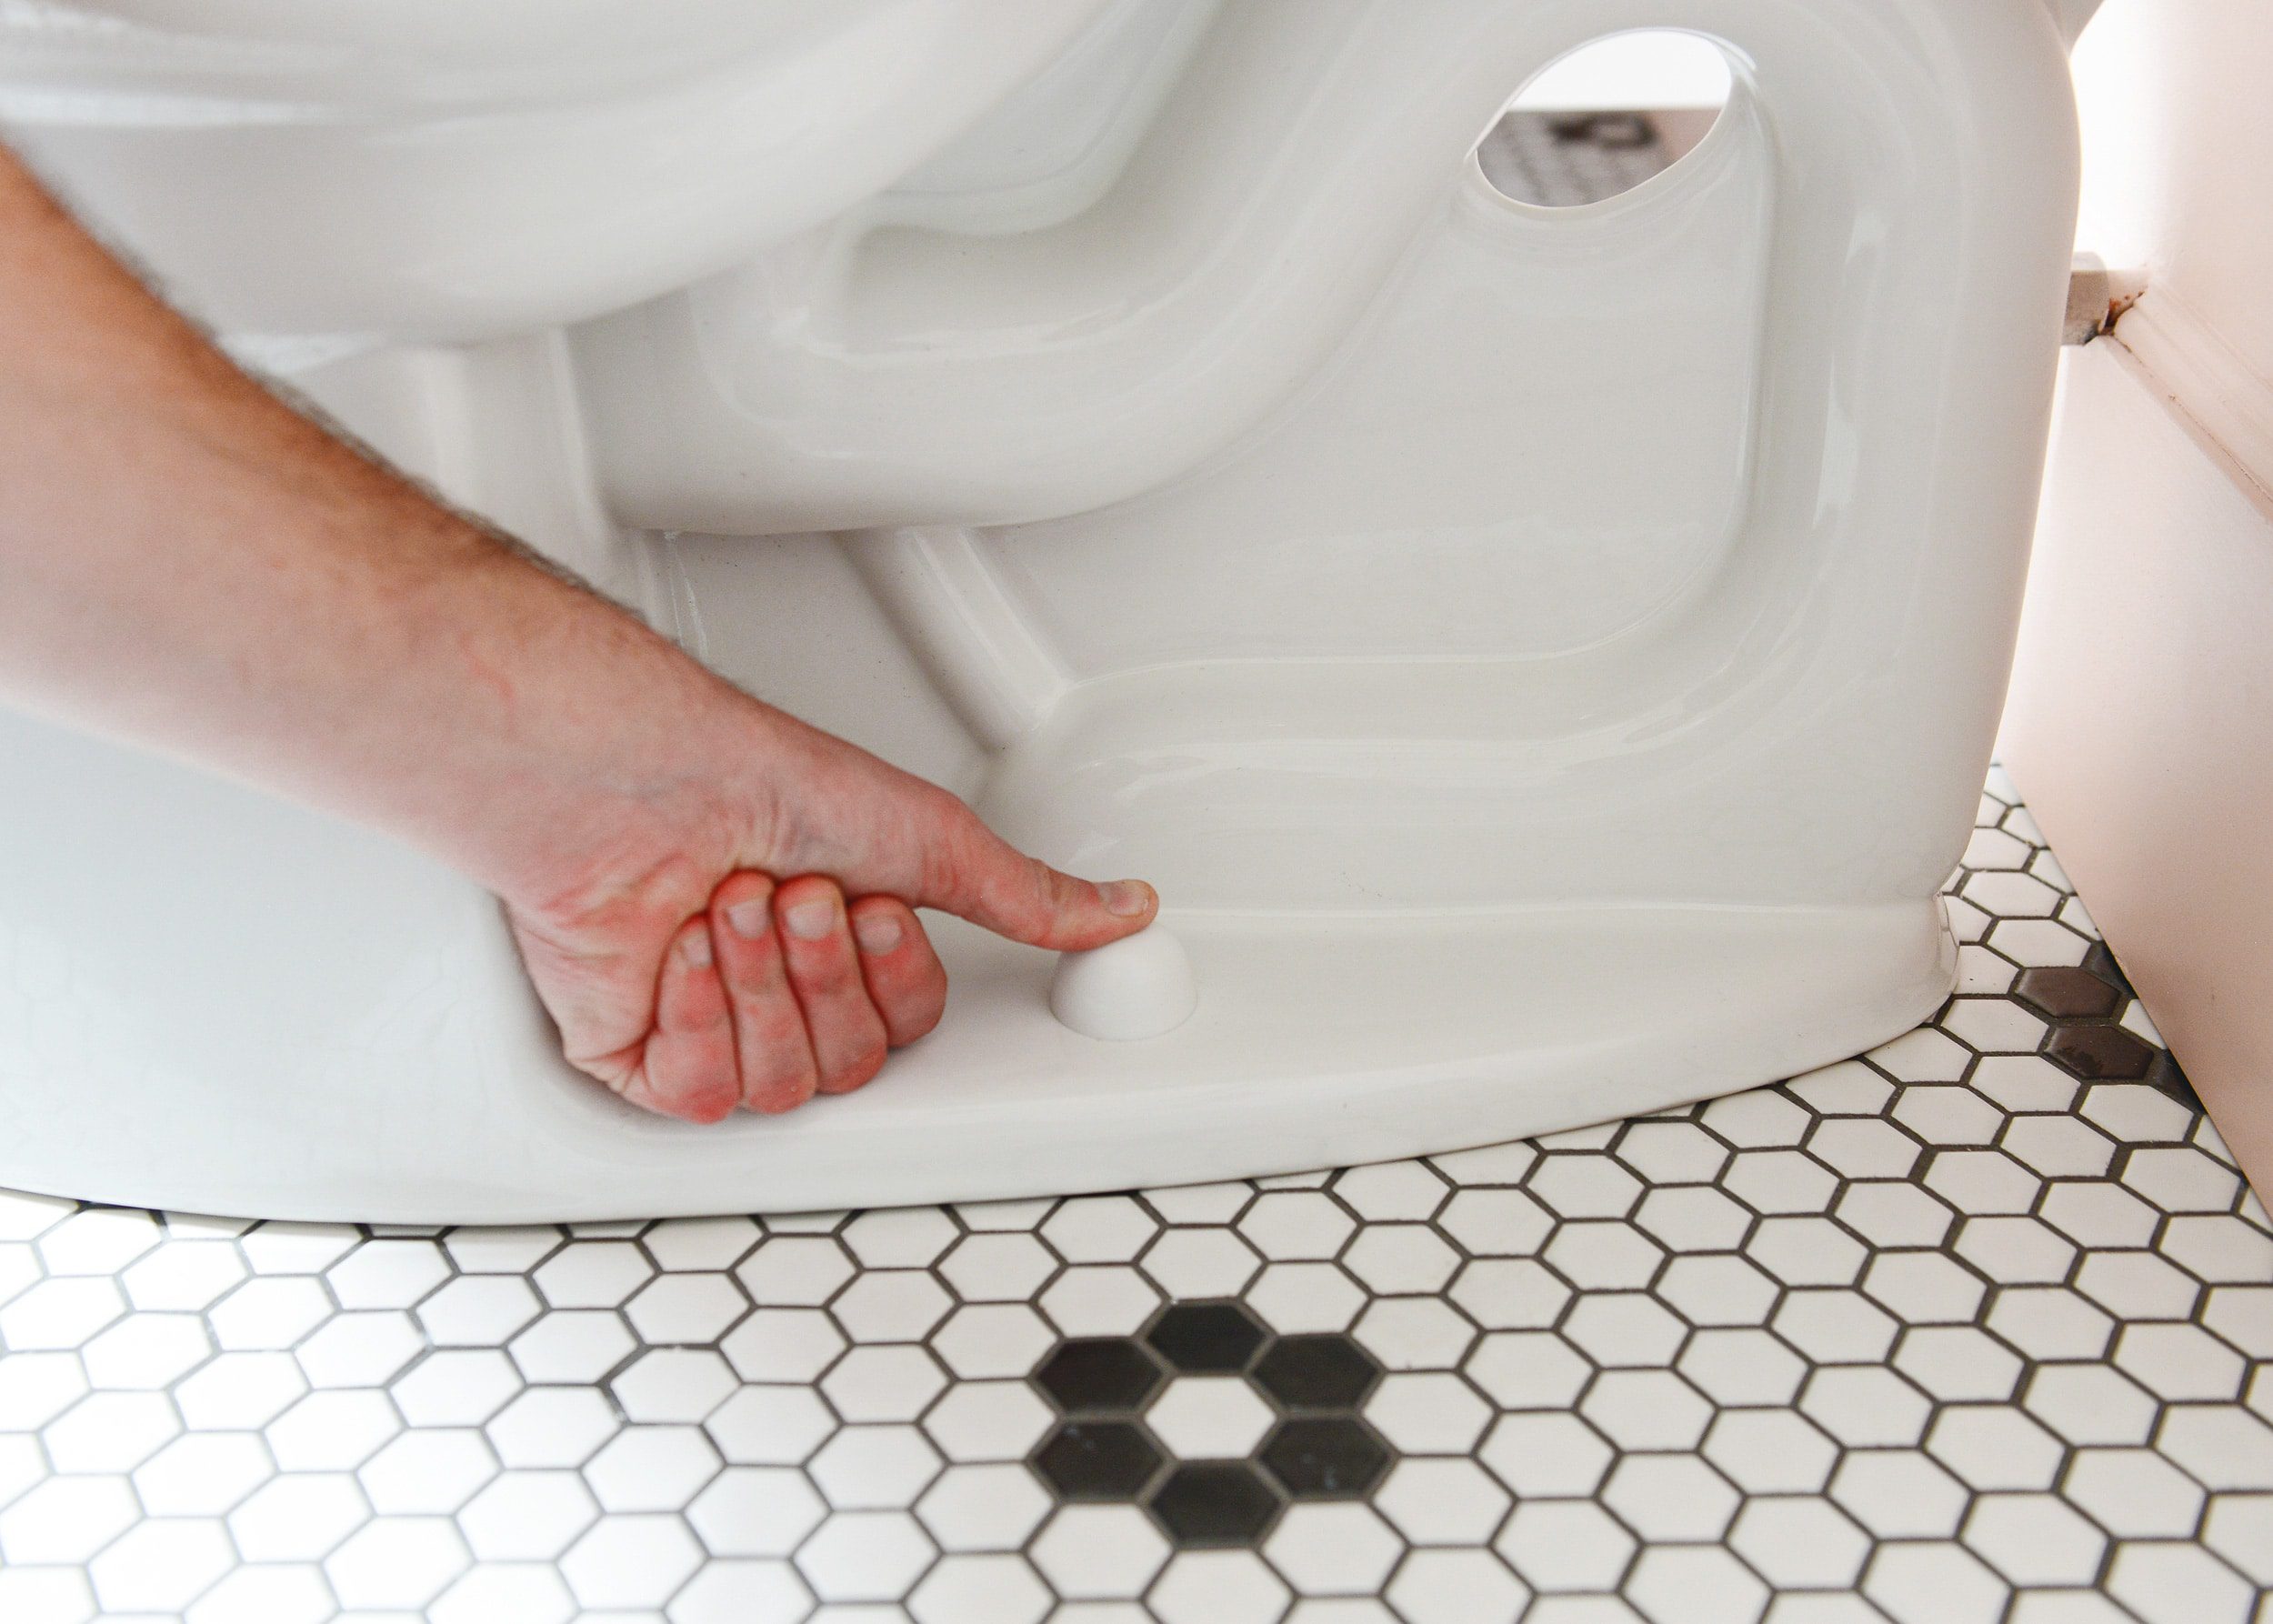
Our toilet included a plastic washer that allowed the bolt covers to snap securely in place. We installed this below the stainless washer and nut then snapped on the cover. This will be different for everyone depending on the model, so be sure to read through any instructions that come with your new toilet!
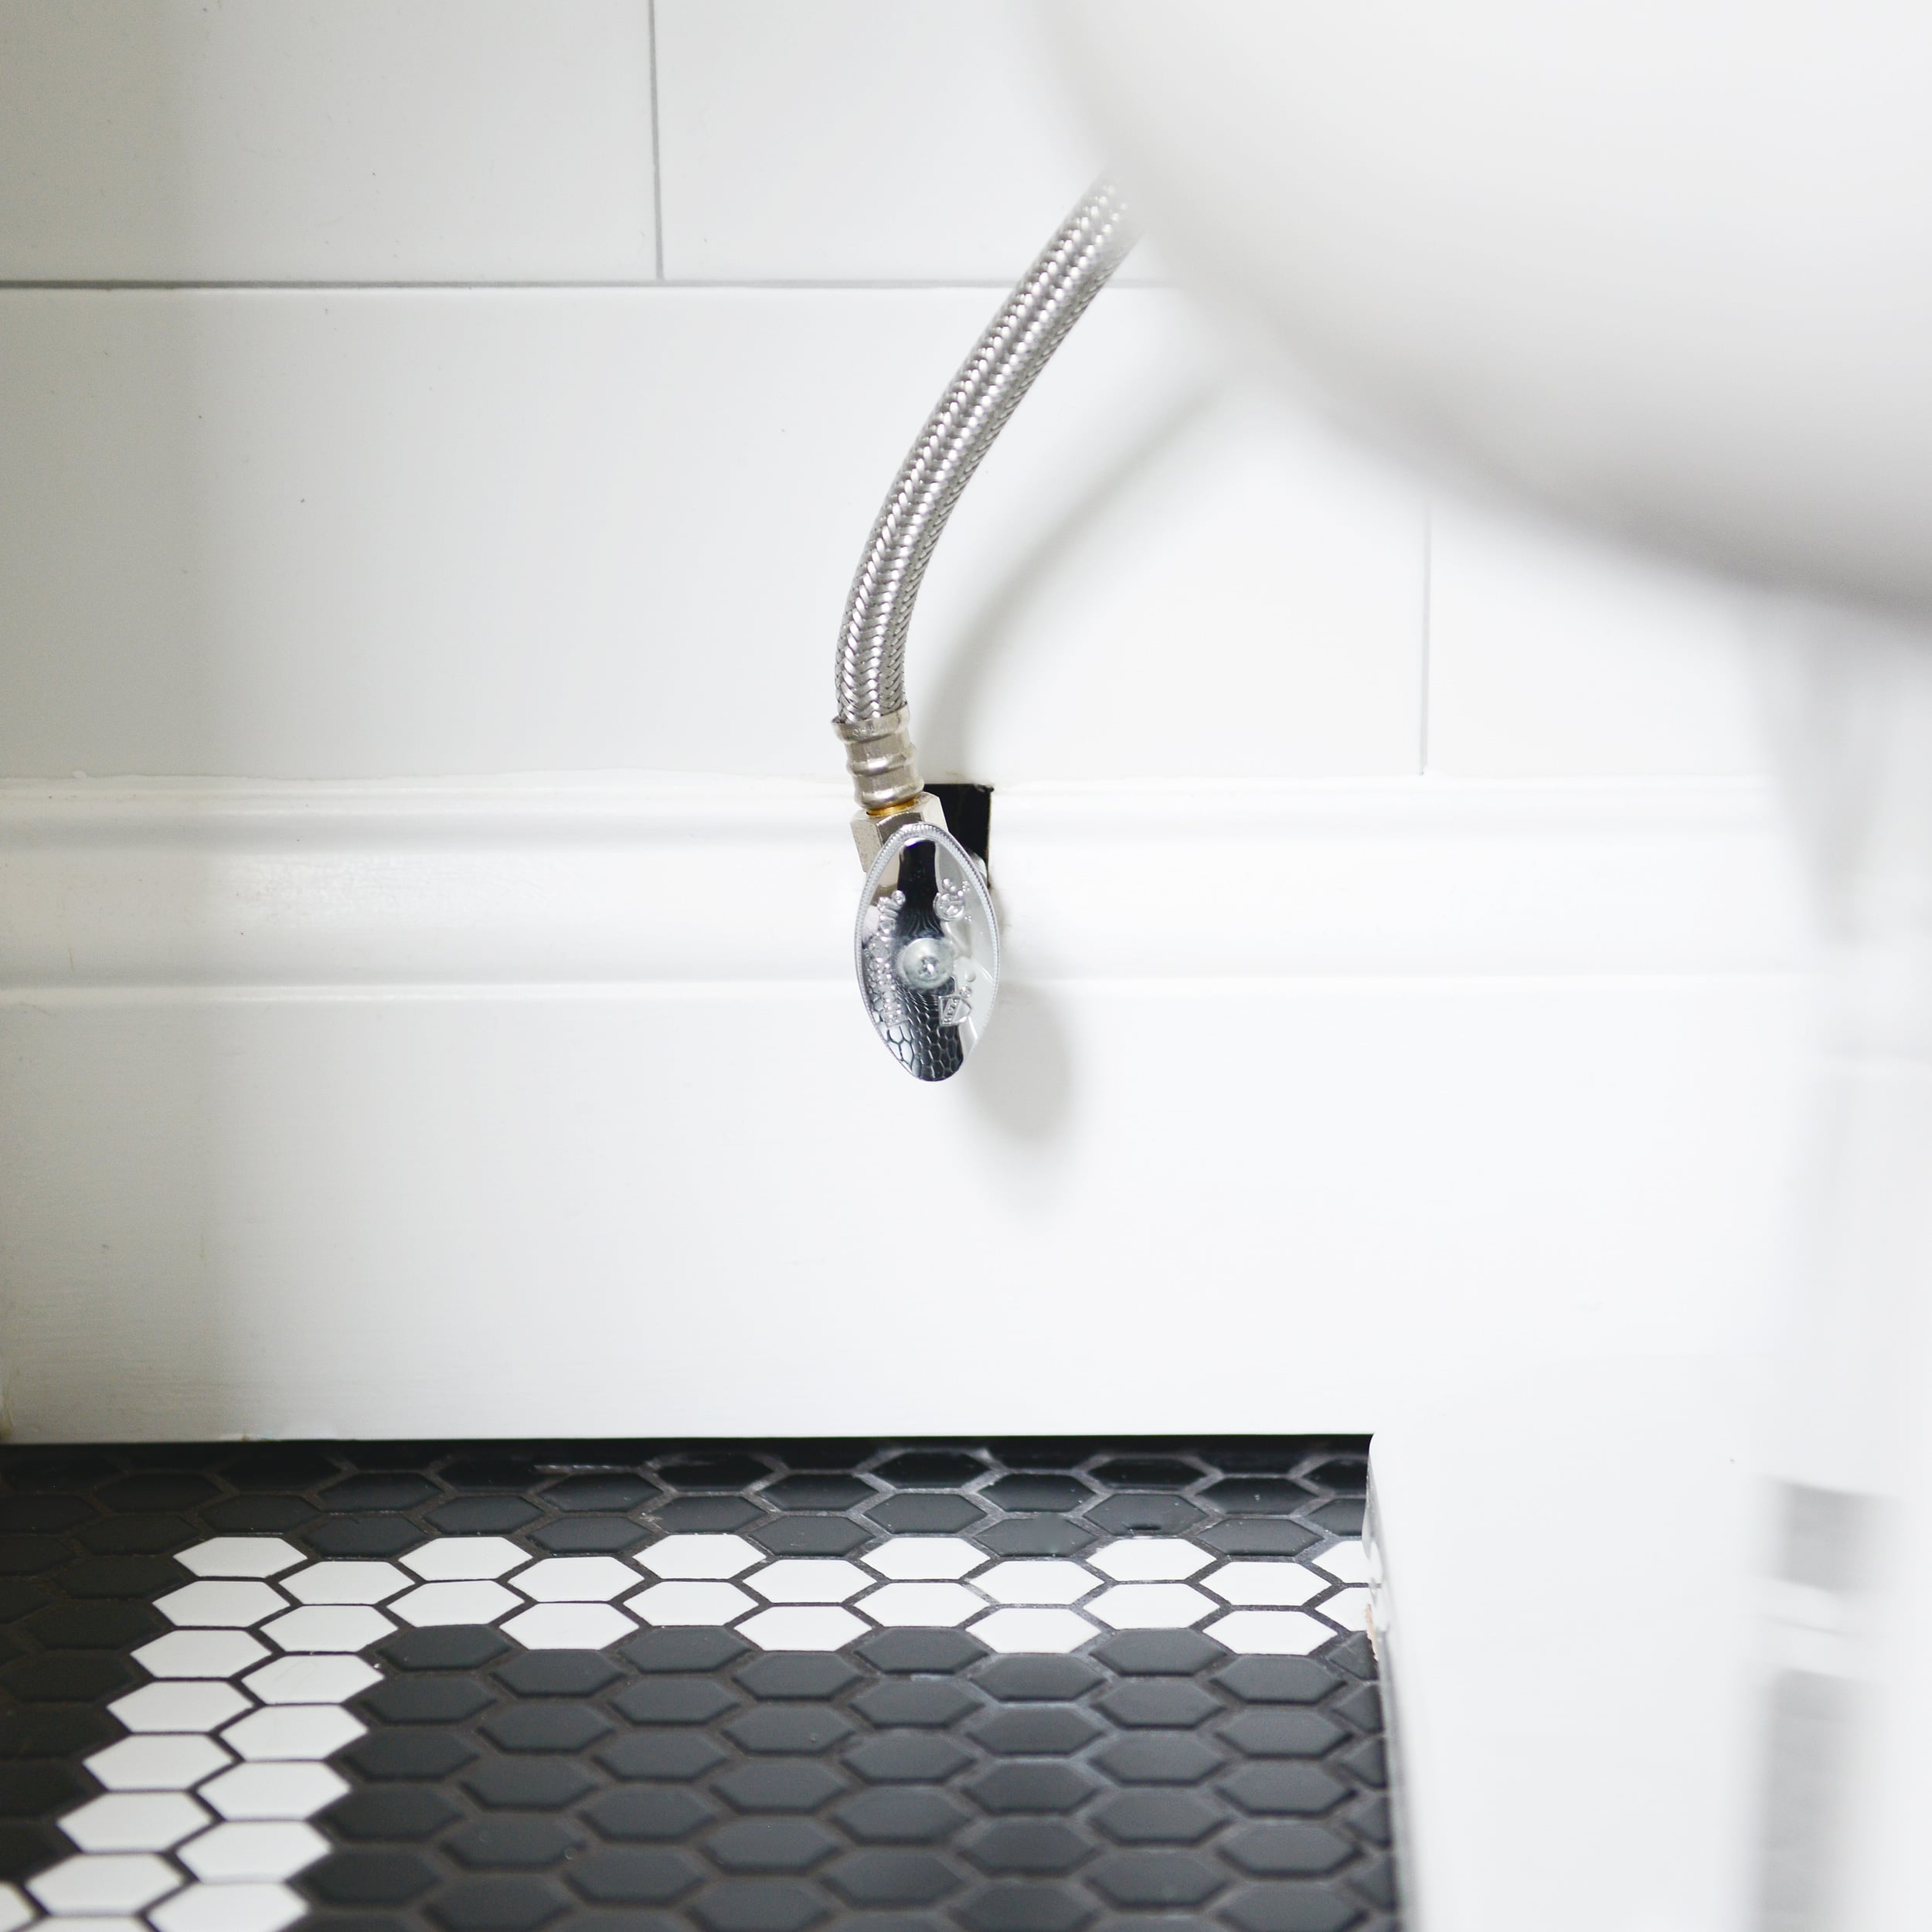
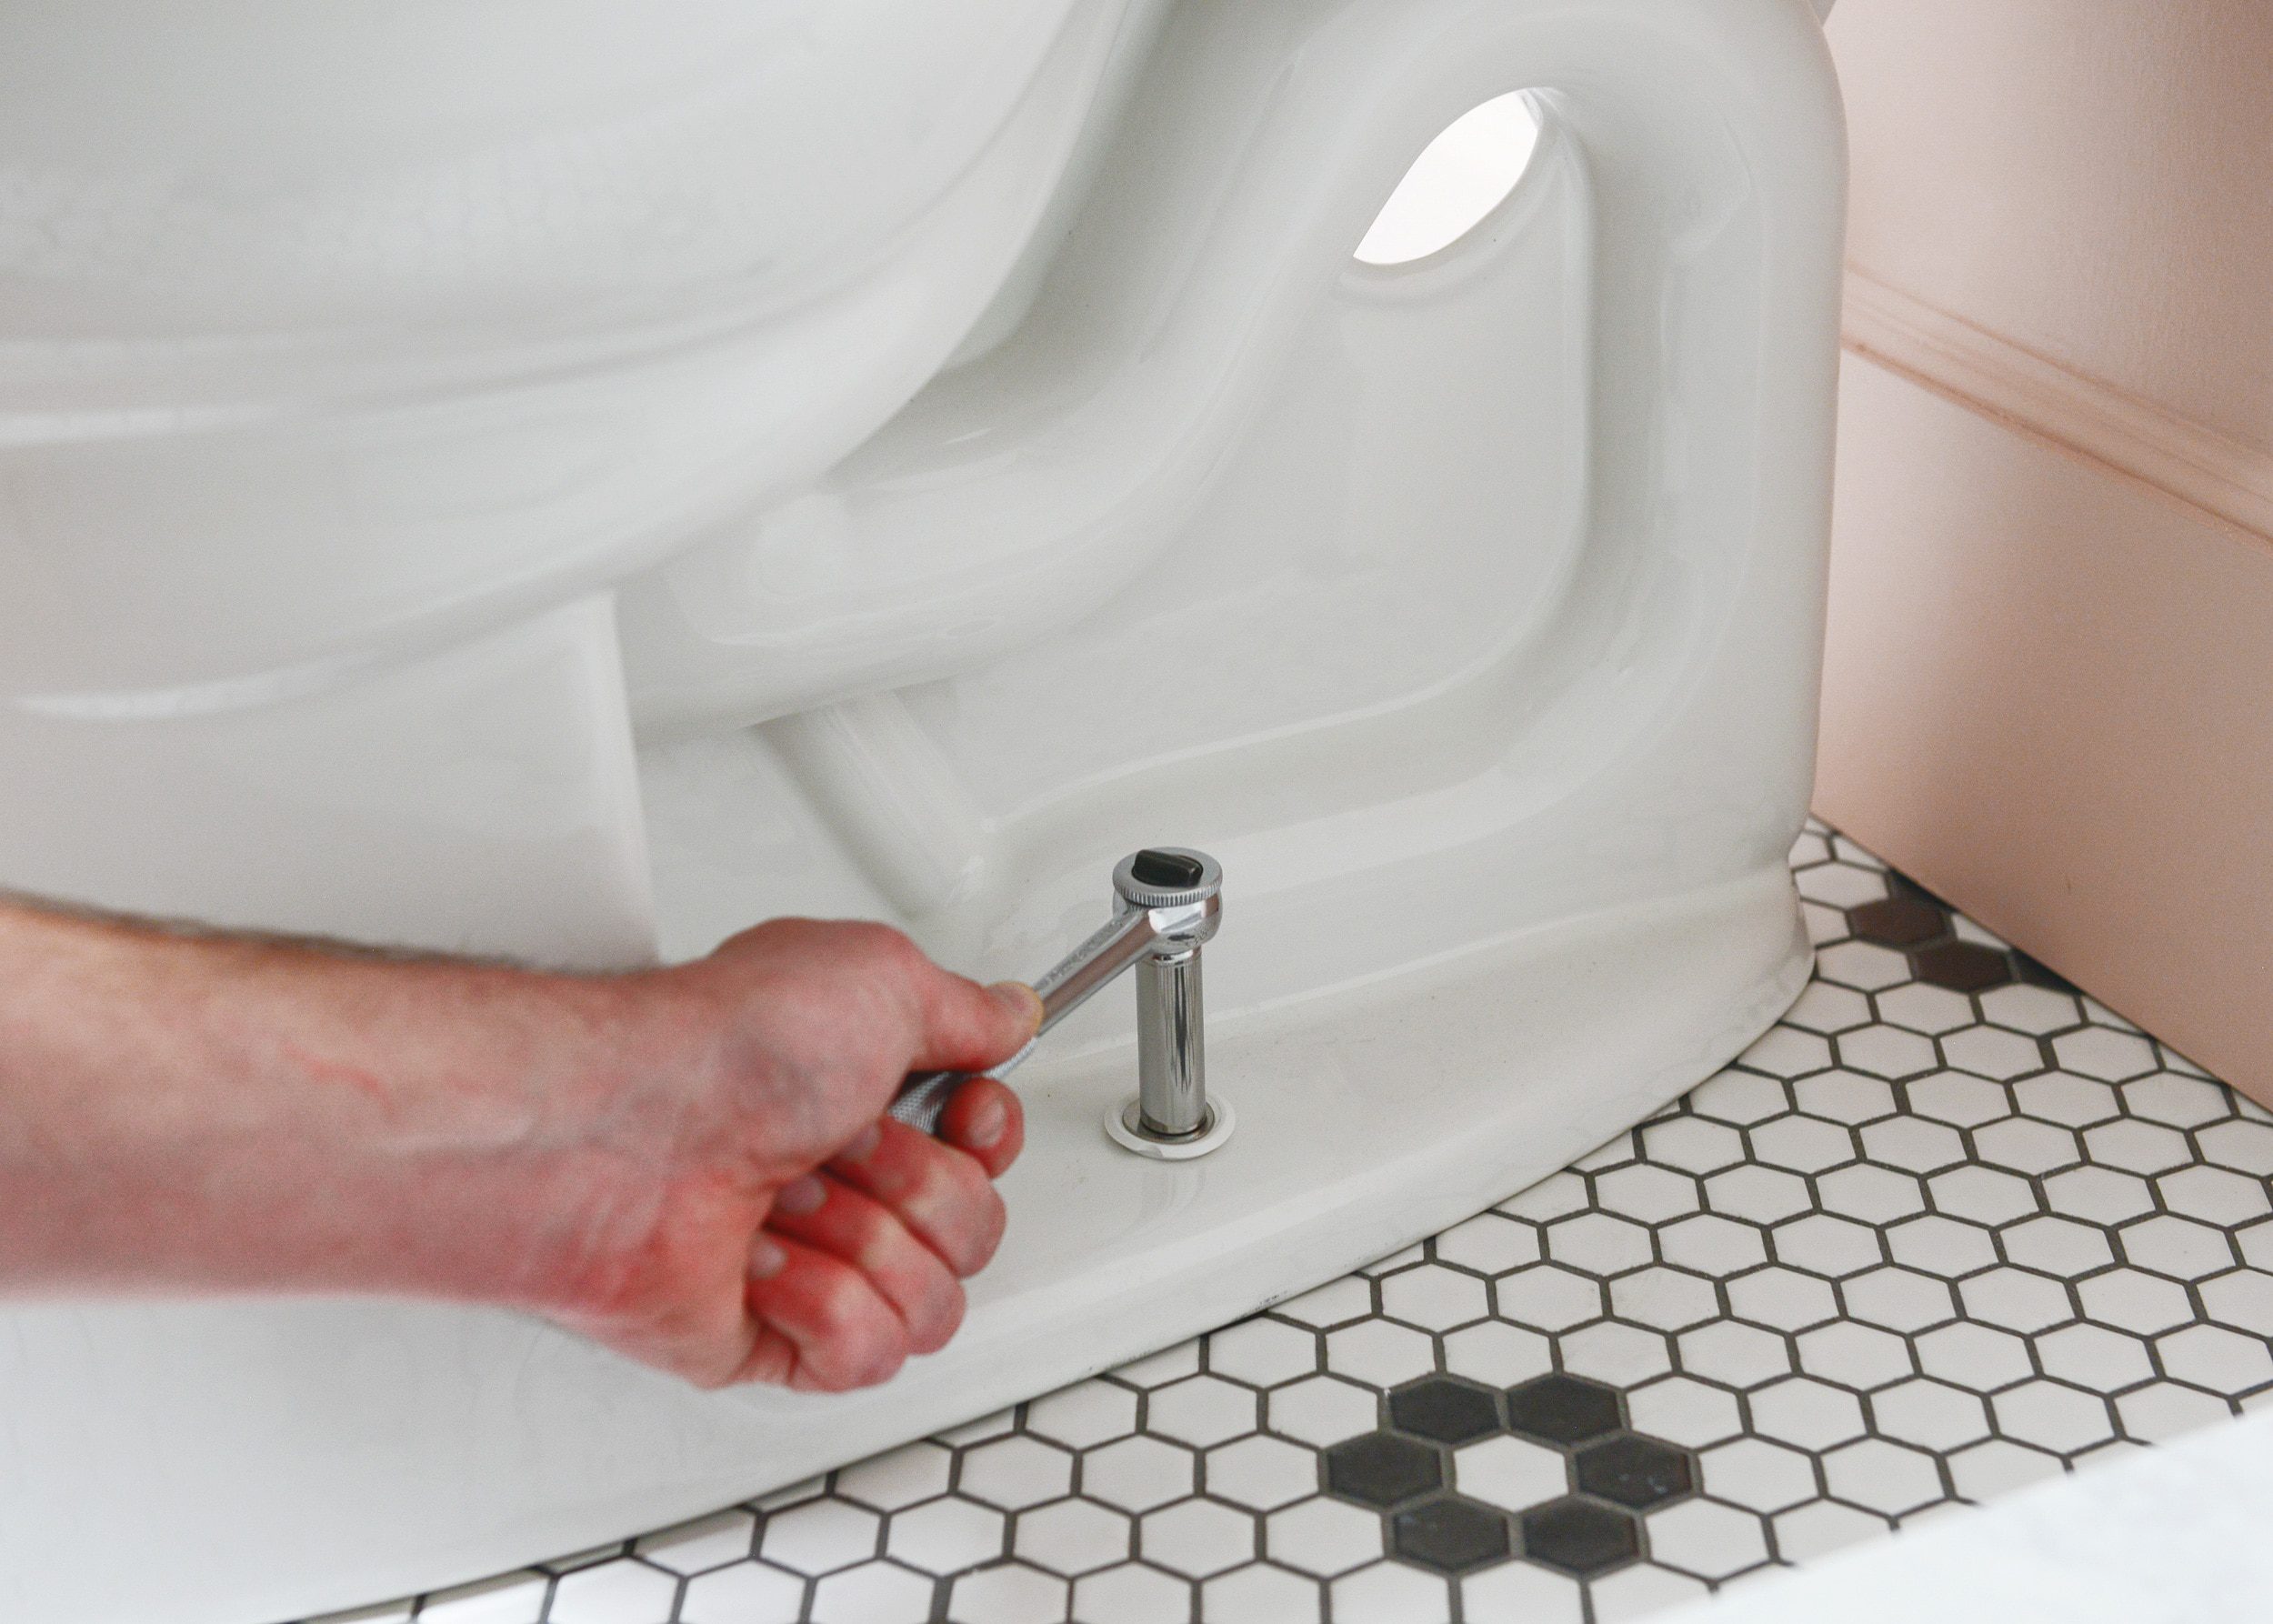
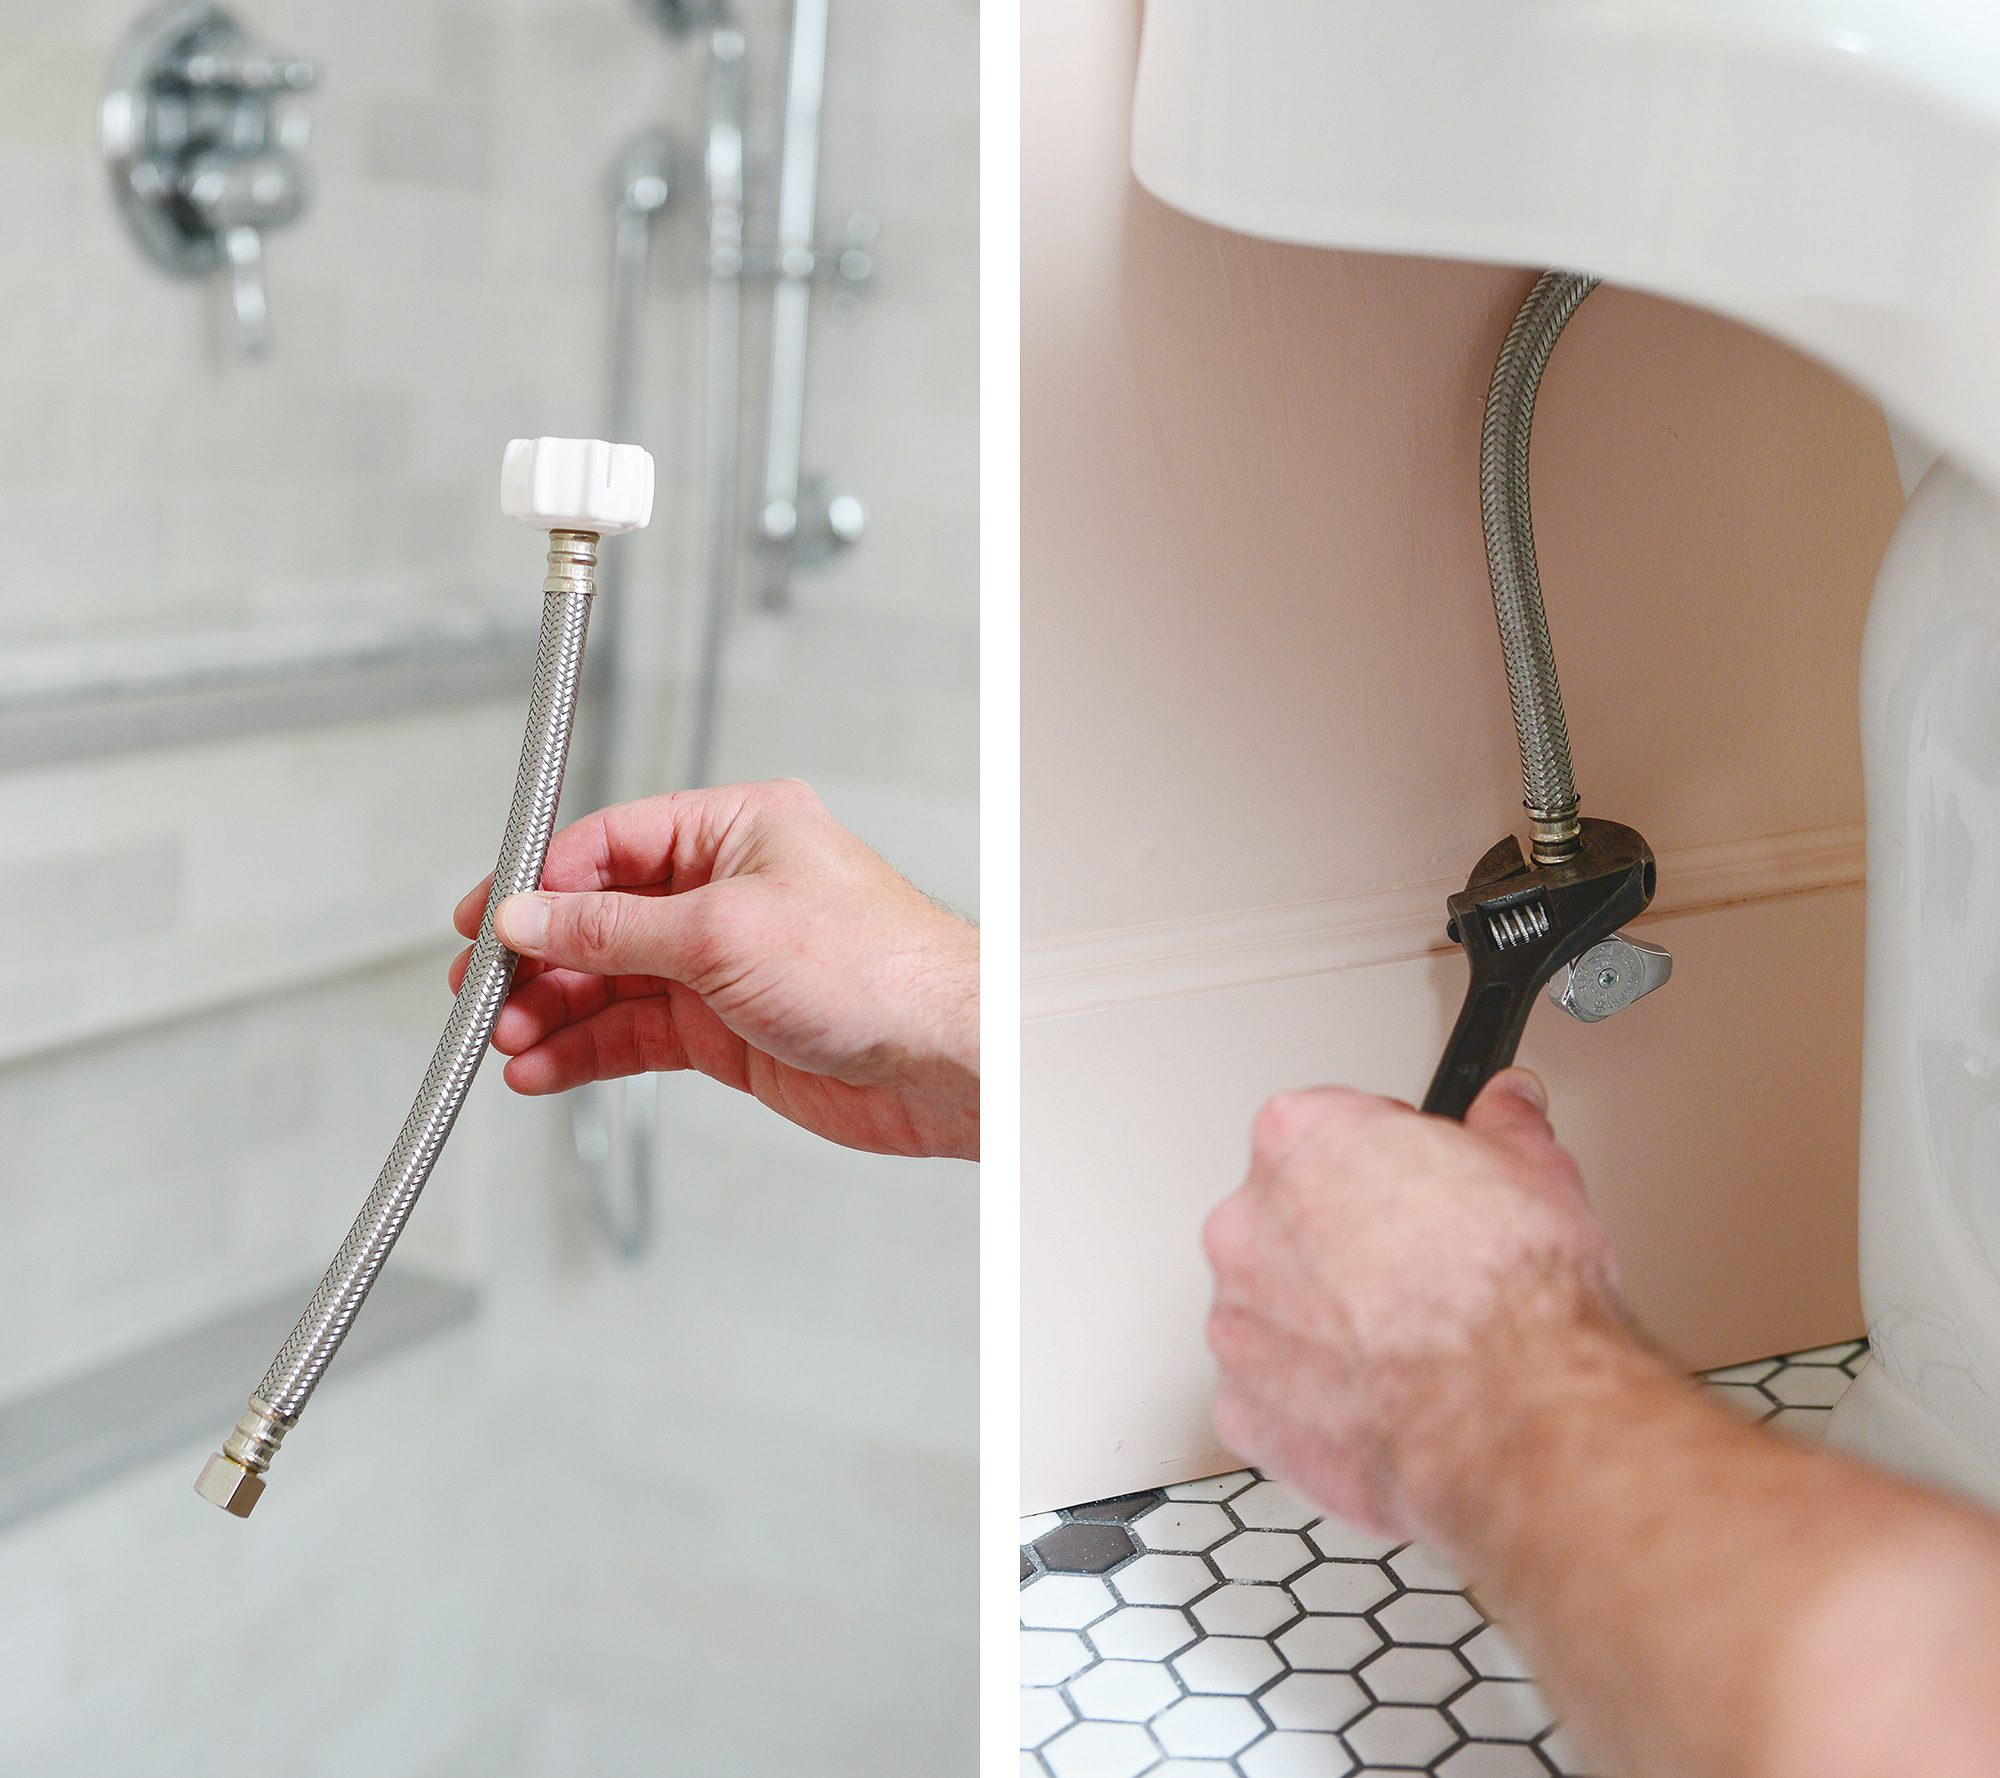
4| Connect Supply Line
Once the toilet was in place, it was time to connect the water line. We used a braided stainless unit that connects to the toilet without any tools. Handy! It works like the gas cap on a car in the sense that it does not allow for over-tightening and clicks when it’s fully tightened. The 3/8″ fitting attaches to the supply line with a simple compression fitting. Hand tighten this connection, then finish with the appropriate wrench.
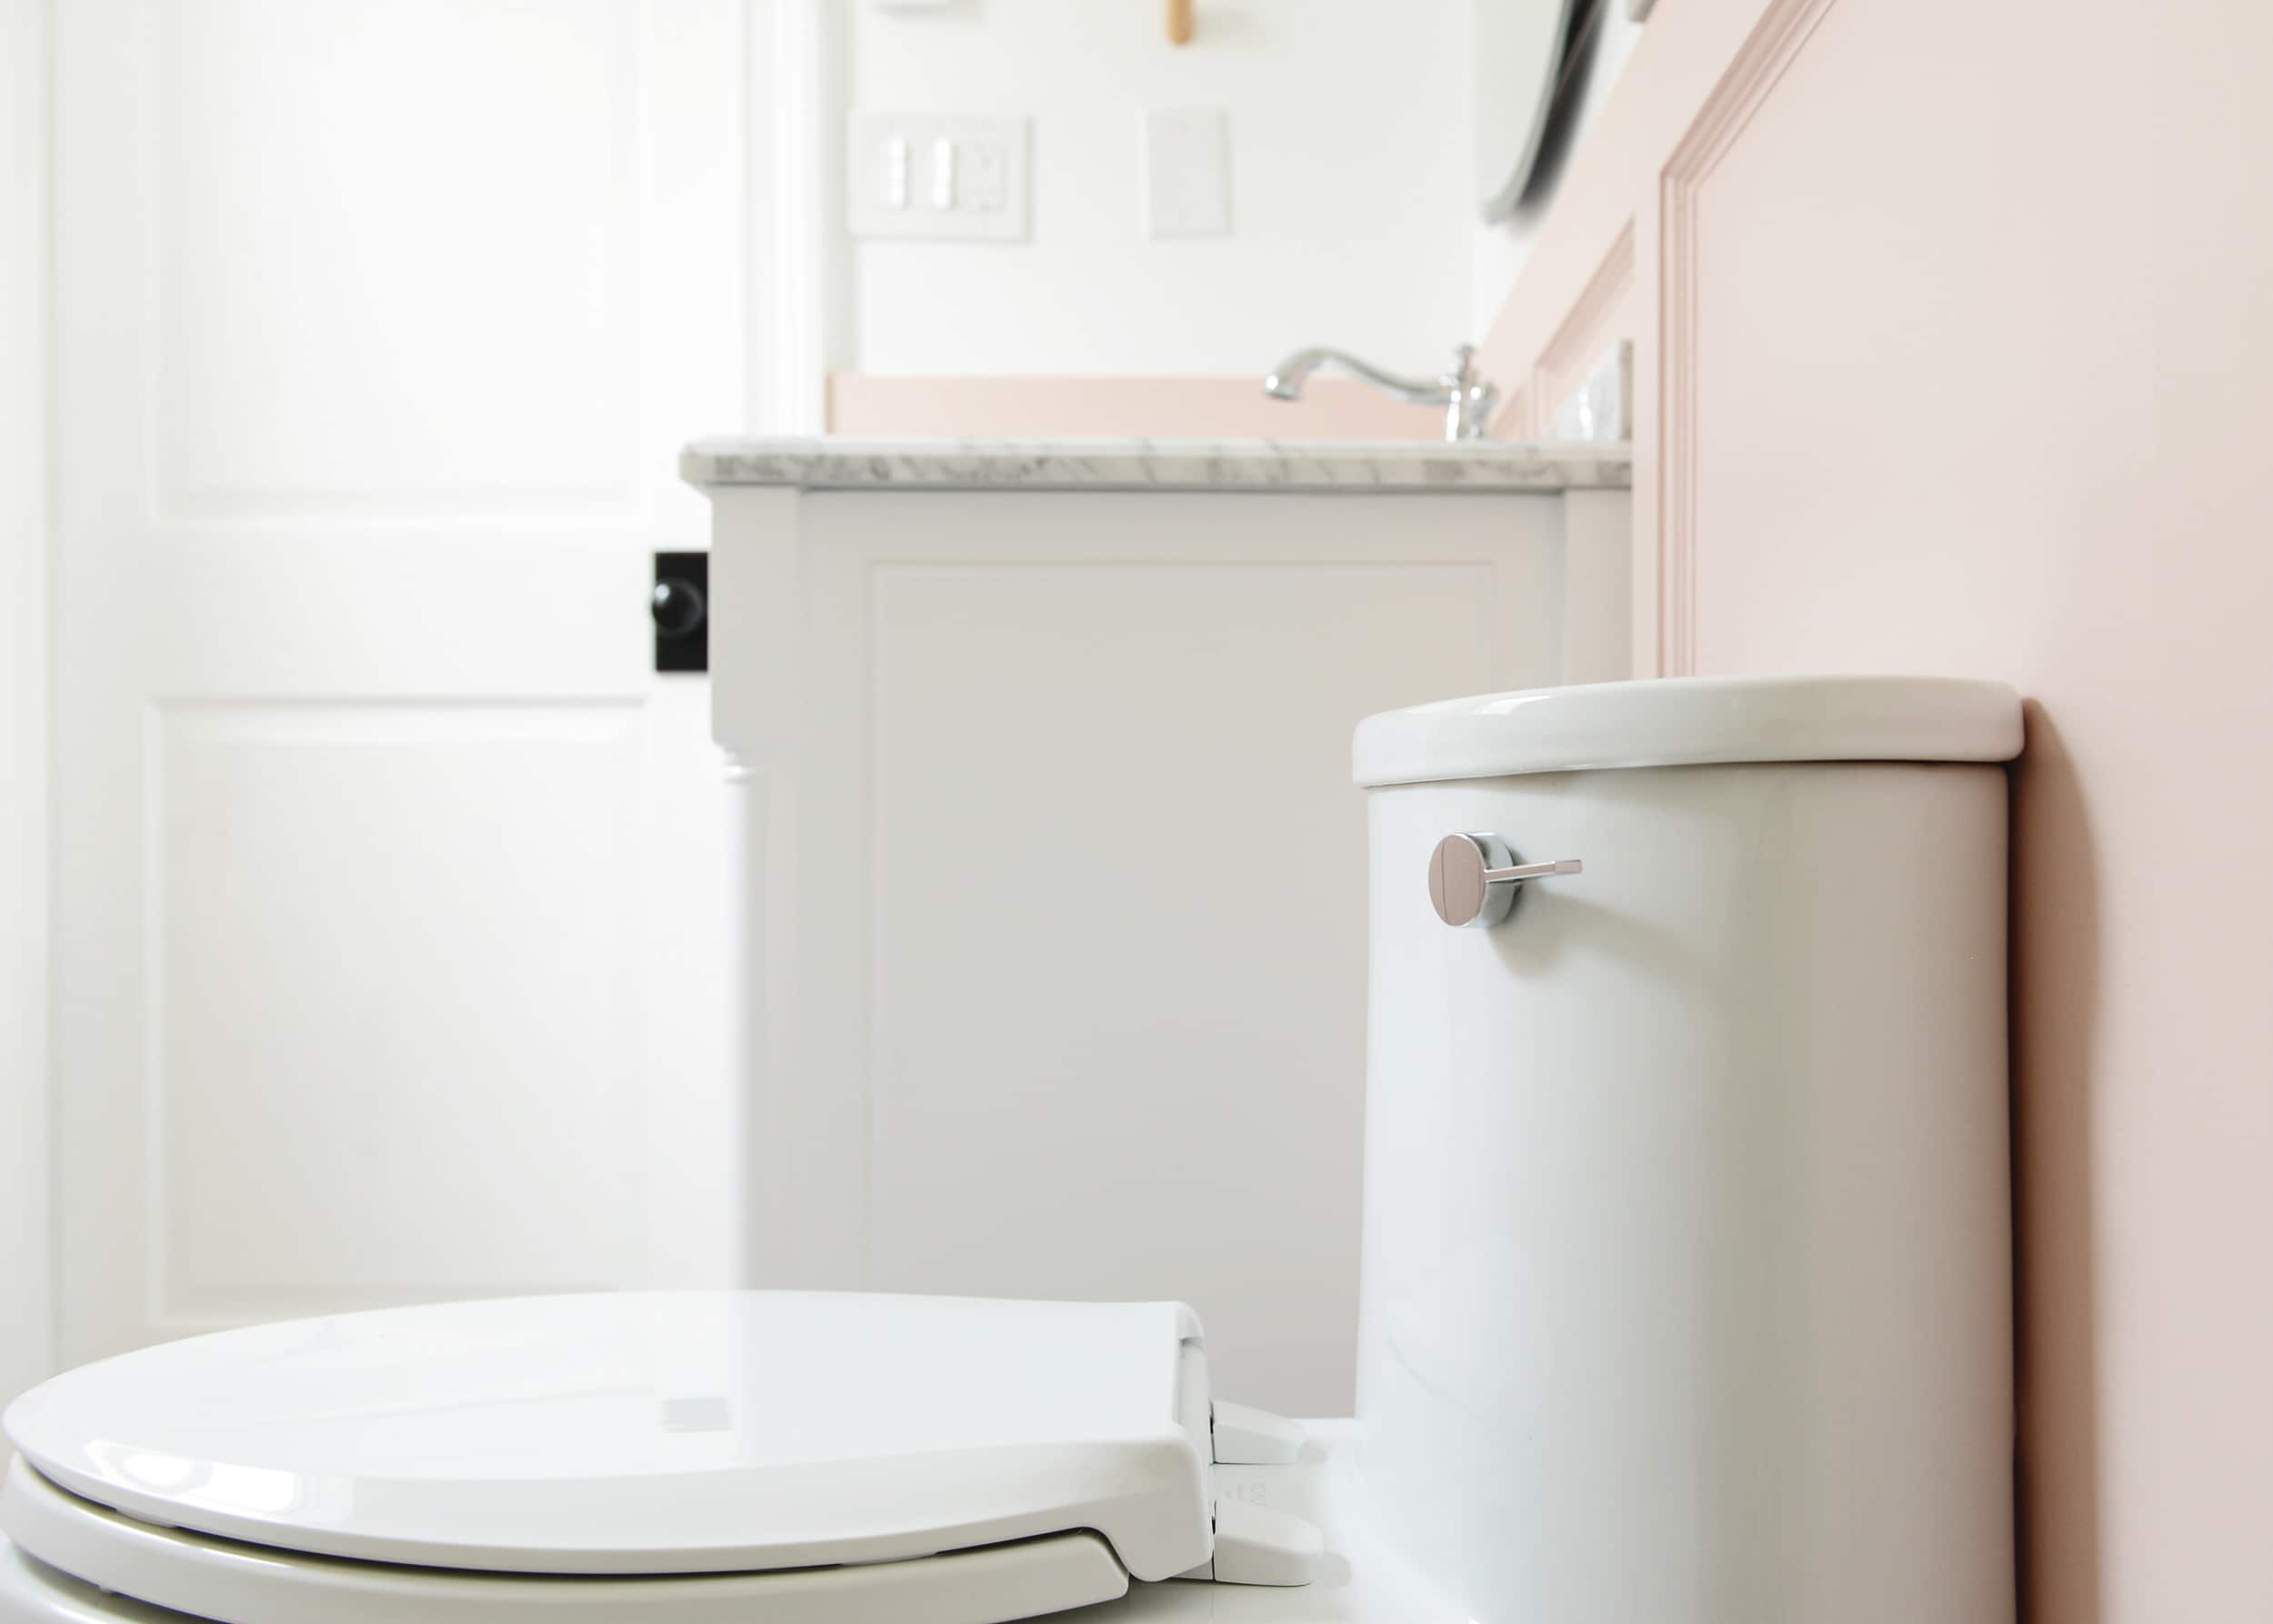
5| Turn On Water & Check For Leaks
Now that the toilet was in place and the water line was connected, it was time to open the supply valve and ensure that all of our connections were tight. Once the valve was opened, the tank filled with water and we gave it a few test flushes. Success! No leaks! Isn’t she a beauty?
Installing a toilet isn’t complicated. It can certainly be intimidating the first time, but it’s surprisingly simple! With just a handful of tools and connections, a handsome new fixture can be in place in an hour or less.
We hope this step-by-step was helpful! As this bathroom nears completion, keep an eye out for a simple vanity installation tutorial as well. And as always, if there’s a post you’d like to see, let us know and we’ll try to make it happen!


Is there a reason you mounted the bolts after removing the cap non the flange? It looks like you could have done it before to prevent having to sniff those gases any longer than necessary!
Hi Natalie! The bolts drop into the slots, then slide into place in a matter of a few seconds. We chose to drop them in after removing the cap so the bolts wouldn’t be in the way when hammering the cap seal. Hope this helps!
Tell us about the ordering and installation process for your stone in the bathroom (the shower pan edge, the shelf in the shower and the transom window ledge). Want to do in my bathroom and want to know what materials you considered and any considerations to make :)
Hi Caitlin! We reached out to the stone fabricator that helped us with our kitchen countertops a few years ago. Since this project was relatively small, we had them set aside a few remnants that could fit the style of stone we were looking for. This kept costs significantly lower than if we had purchased an entire stone slab. Once we selected the remnant that we would use, they set it aside. Our then contractor took final measurements and we sent them to the fabricator and the finished pieces were ready in about a week. Our contractor then returned to install the stone. We chose a quartz stone for durability and stain resistance. The best starting point is to research fabricators in your area with good reviews to ensure they’re willing to take on small projects like this. Hope this helps!
Any link to the toilet used? I like the low profile
Here’s the toilet we used, and you can see our entire bathroom moodboard (with all sources linked) right here!
Thank you!
Are you going to put sealant around the base of the super cute toilet? Or just leave it as is?
As-is. I know that there’s a bit of a debate around this topic (with pros on both sides), but who knows, we may caulk it down the line…