

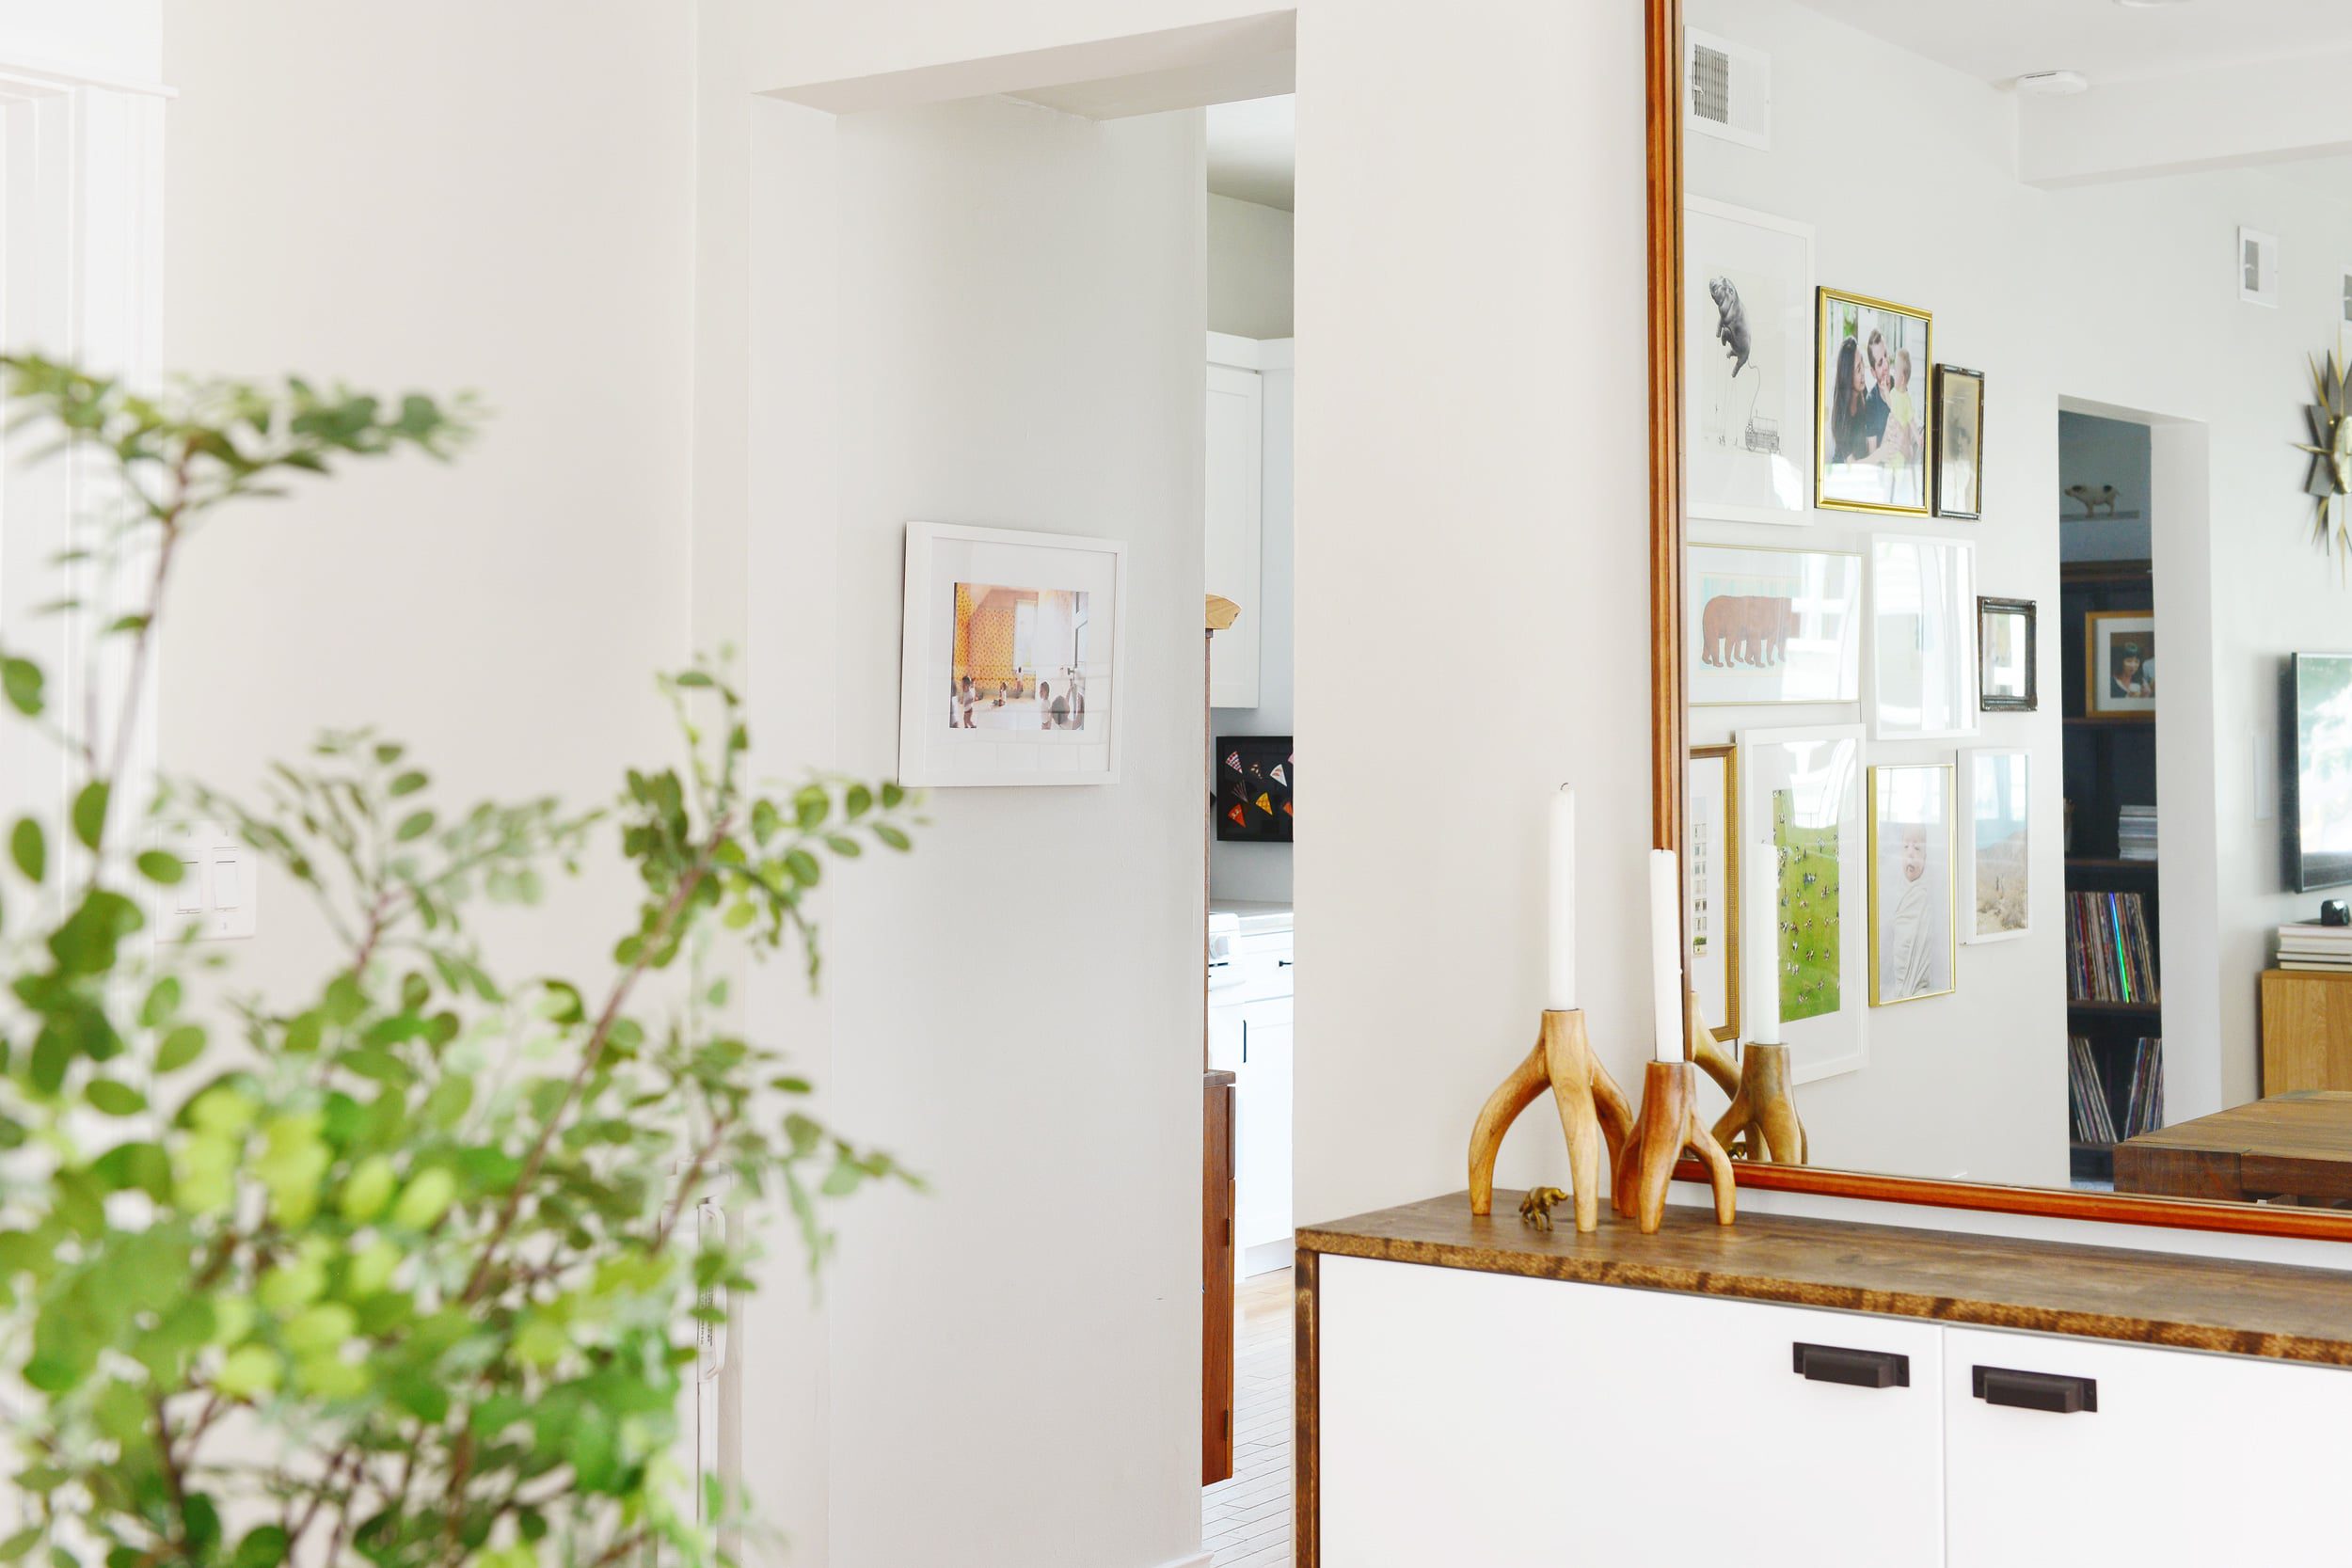
A few weeks ago, I shared an Instagram Story of the composite photo I made of 1, 2, 3, 4… 7 Lucys! I had my image printed and framed with Framebridge, and now we have it hanging prominently in our kitchen. It makes us smile as we walk by, and I’m so happy we took the time to put it together, from photoshoot to completion.
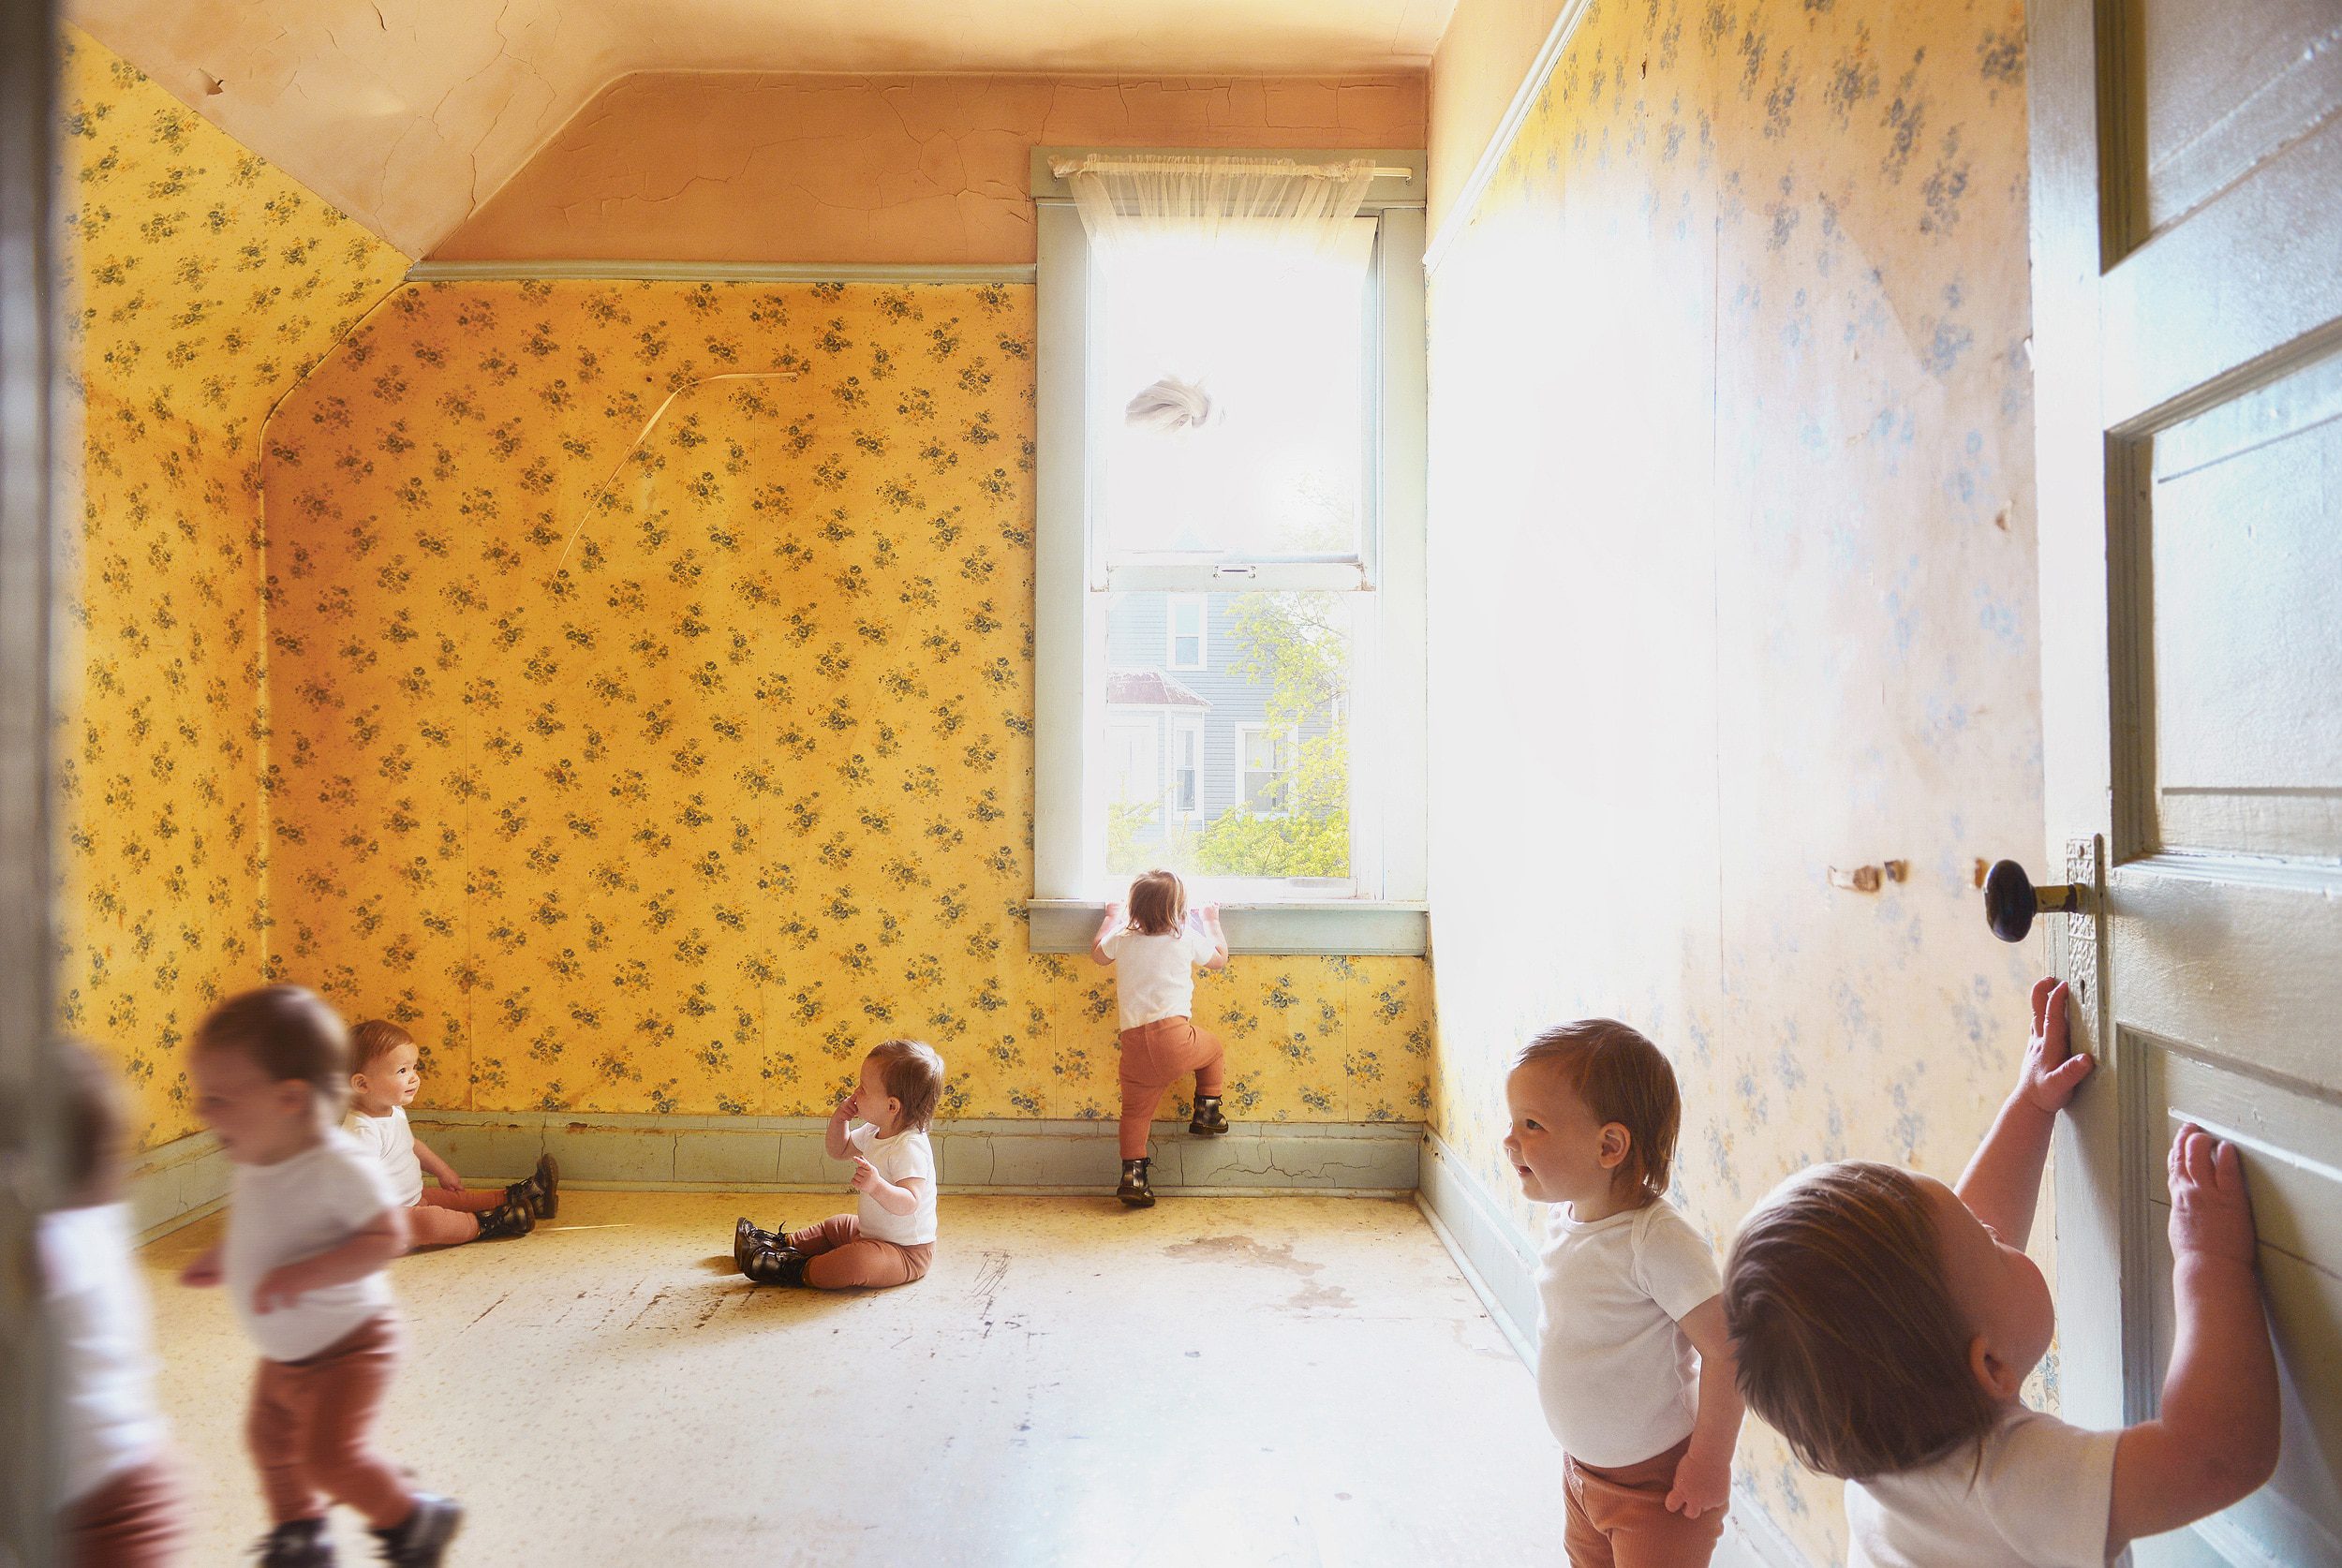
When I first shared the photo with you, I asked if you’d be interested in an extended blog tutorial on how it was done, and you overwhelming voted yes, please! Aside from The Great Wallpaper Debate, I can’t remember the last time we received such enthusiastic feedback. Thank you! This photo of Lucy in the Two Flat was our way of commemorating our next big project, while also capturing our sweet girl at this moment in time. It’s cute and quirky, just the way we like our art.
I’ll be completely honest and start this tutorial by saying that I feel especially vulnerable when offering photography advice. As a bit of background, I have a degree in photography, and to this day, taking photos and capturing memories is one of my absolute favorite ways to spend my time. I live with my DSLR attached to my right hand. You’d think this would give me the confidence to share editing tips, but here’s where I’ll show my age: My 4 year degree took place in a darkroom. Photoshop was still in its mainstream infancy – as in, I only took one course in my final year, and we used version 5.0(!), long before the days of Photoshop CC. Truth be told, I learned photography through manual settings on my mom’s old camera, and I watched the magic happen right before my eyes to the soundtrack of trickling water and the scent of fixer. (Ahh, my heart!) So although photography is a topic that’s requested often (and I’ve been meaning to pull together a crash course on a few topics – I will, I will, and soon!), when it comes to the technical details, so much of what I’ve learned, I’ve learned on my own over the last 15 years – hence my vulnerability.
There are several ways to create a composite photo, some more complicated than others, some easier and some that simply don’t cooperate (Photomerge, I’m looking at you!). All of this to say, I’m sharing what works for me! In this post, I’m breaking down – in the simplest way possible – how I captured and stitched this photo of my 7 Lucys using Photoshop CC. Let’s go!
What You’ll Need:
- DSLR camera | this is my camera
- a wide lens | I use this lens for ev-er-y-thing
- a reliable tripod | I have and love this one
- Photoshop CC + a basic of understanding
- Lightroom CC (optional)
Start With a Camera + Tripod
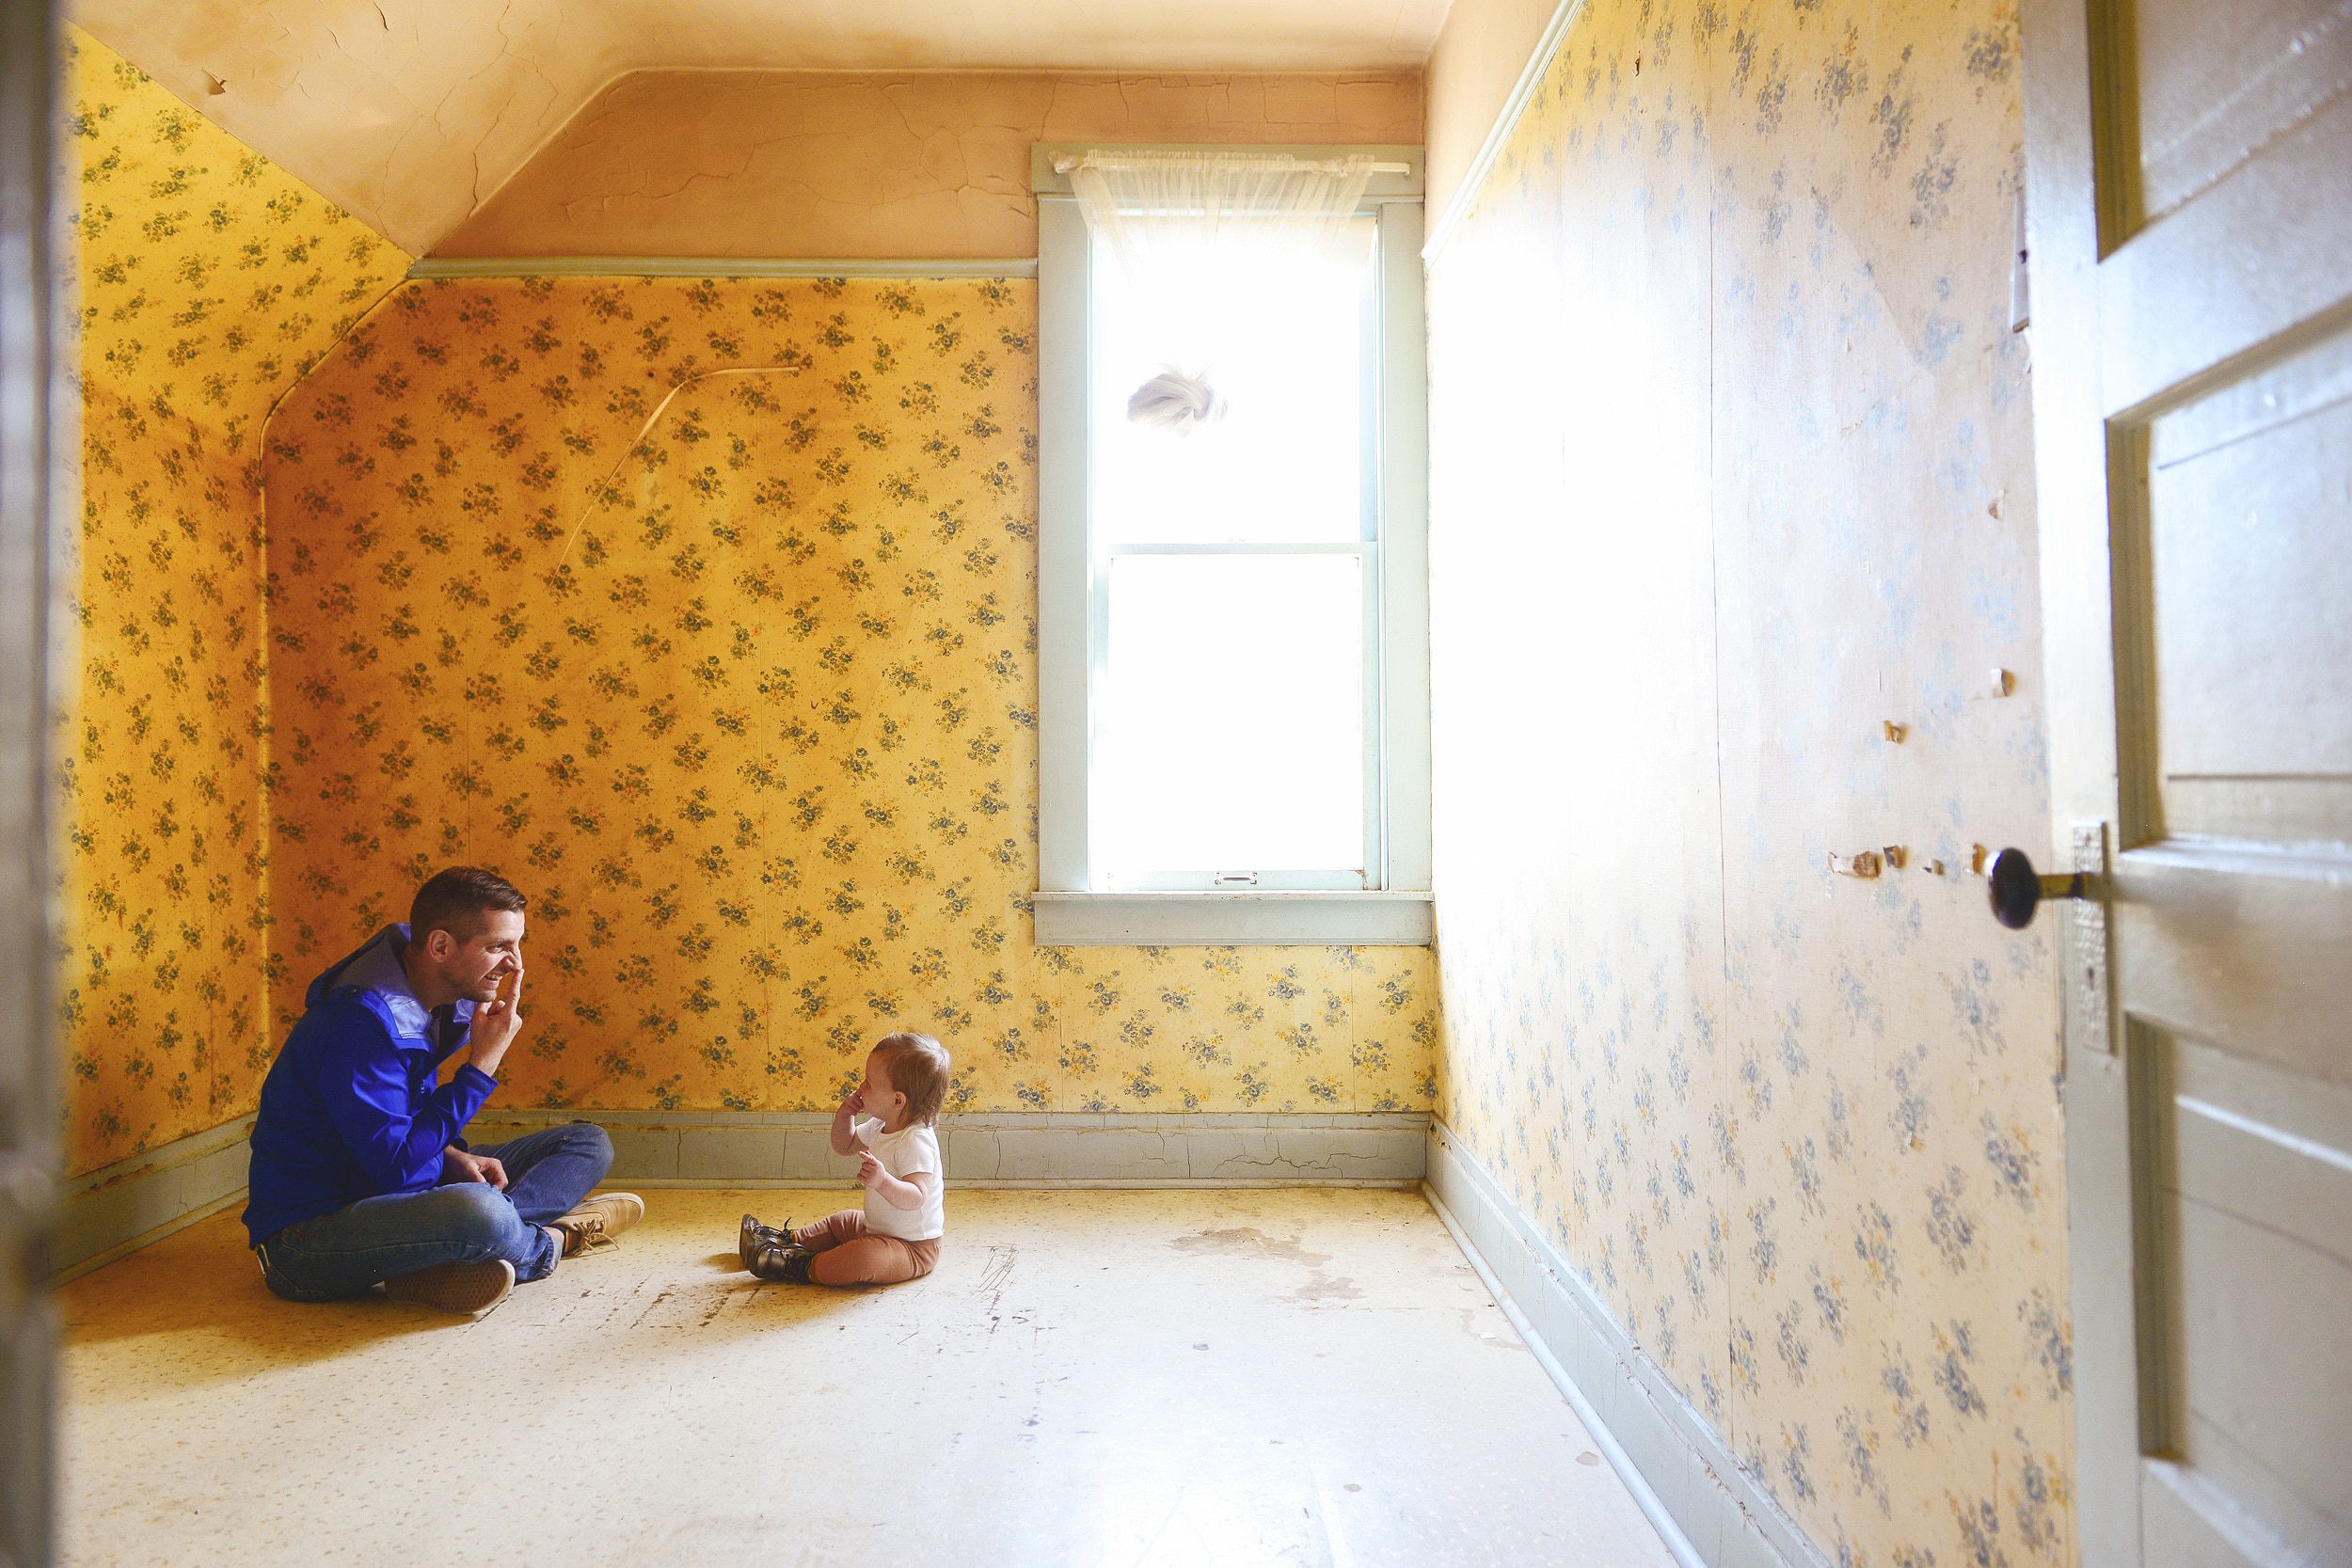
I knew I wanted to do this in the Two Flat’s wallpapered bedroom, with it’s blue trim, gauze-y curtain and yellow walls. We dressed Lucy simply, in a white onesie, blush leggings and silver boots. As soon as we got to the Two Flat, I ran up to the room, set up my camera and tripod, and framed up the image exactly as I wanted it to appear. Tip: Look at the lines of the wall. Are they skewed? Raise or lower your tripod so you have the straightest lines possible. ‘Square it up!,’ as I like to say.
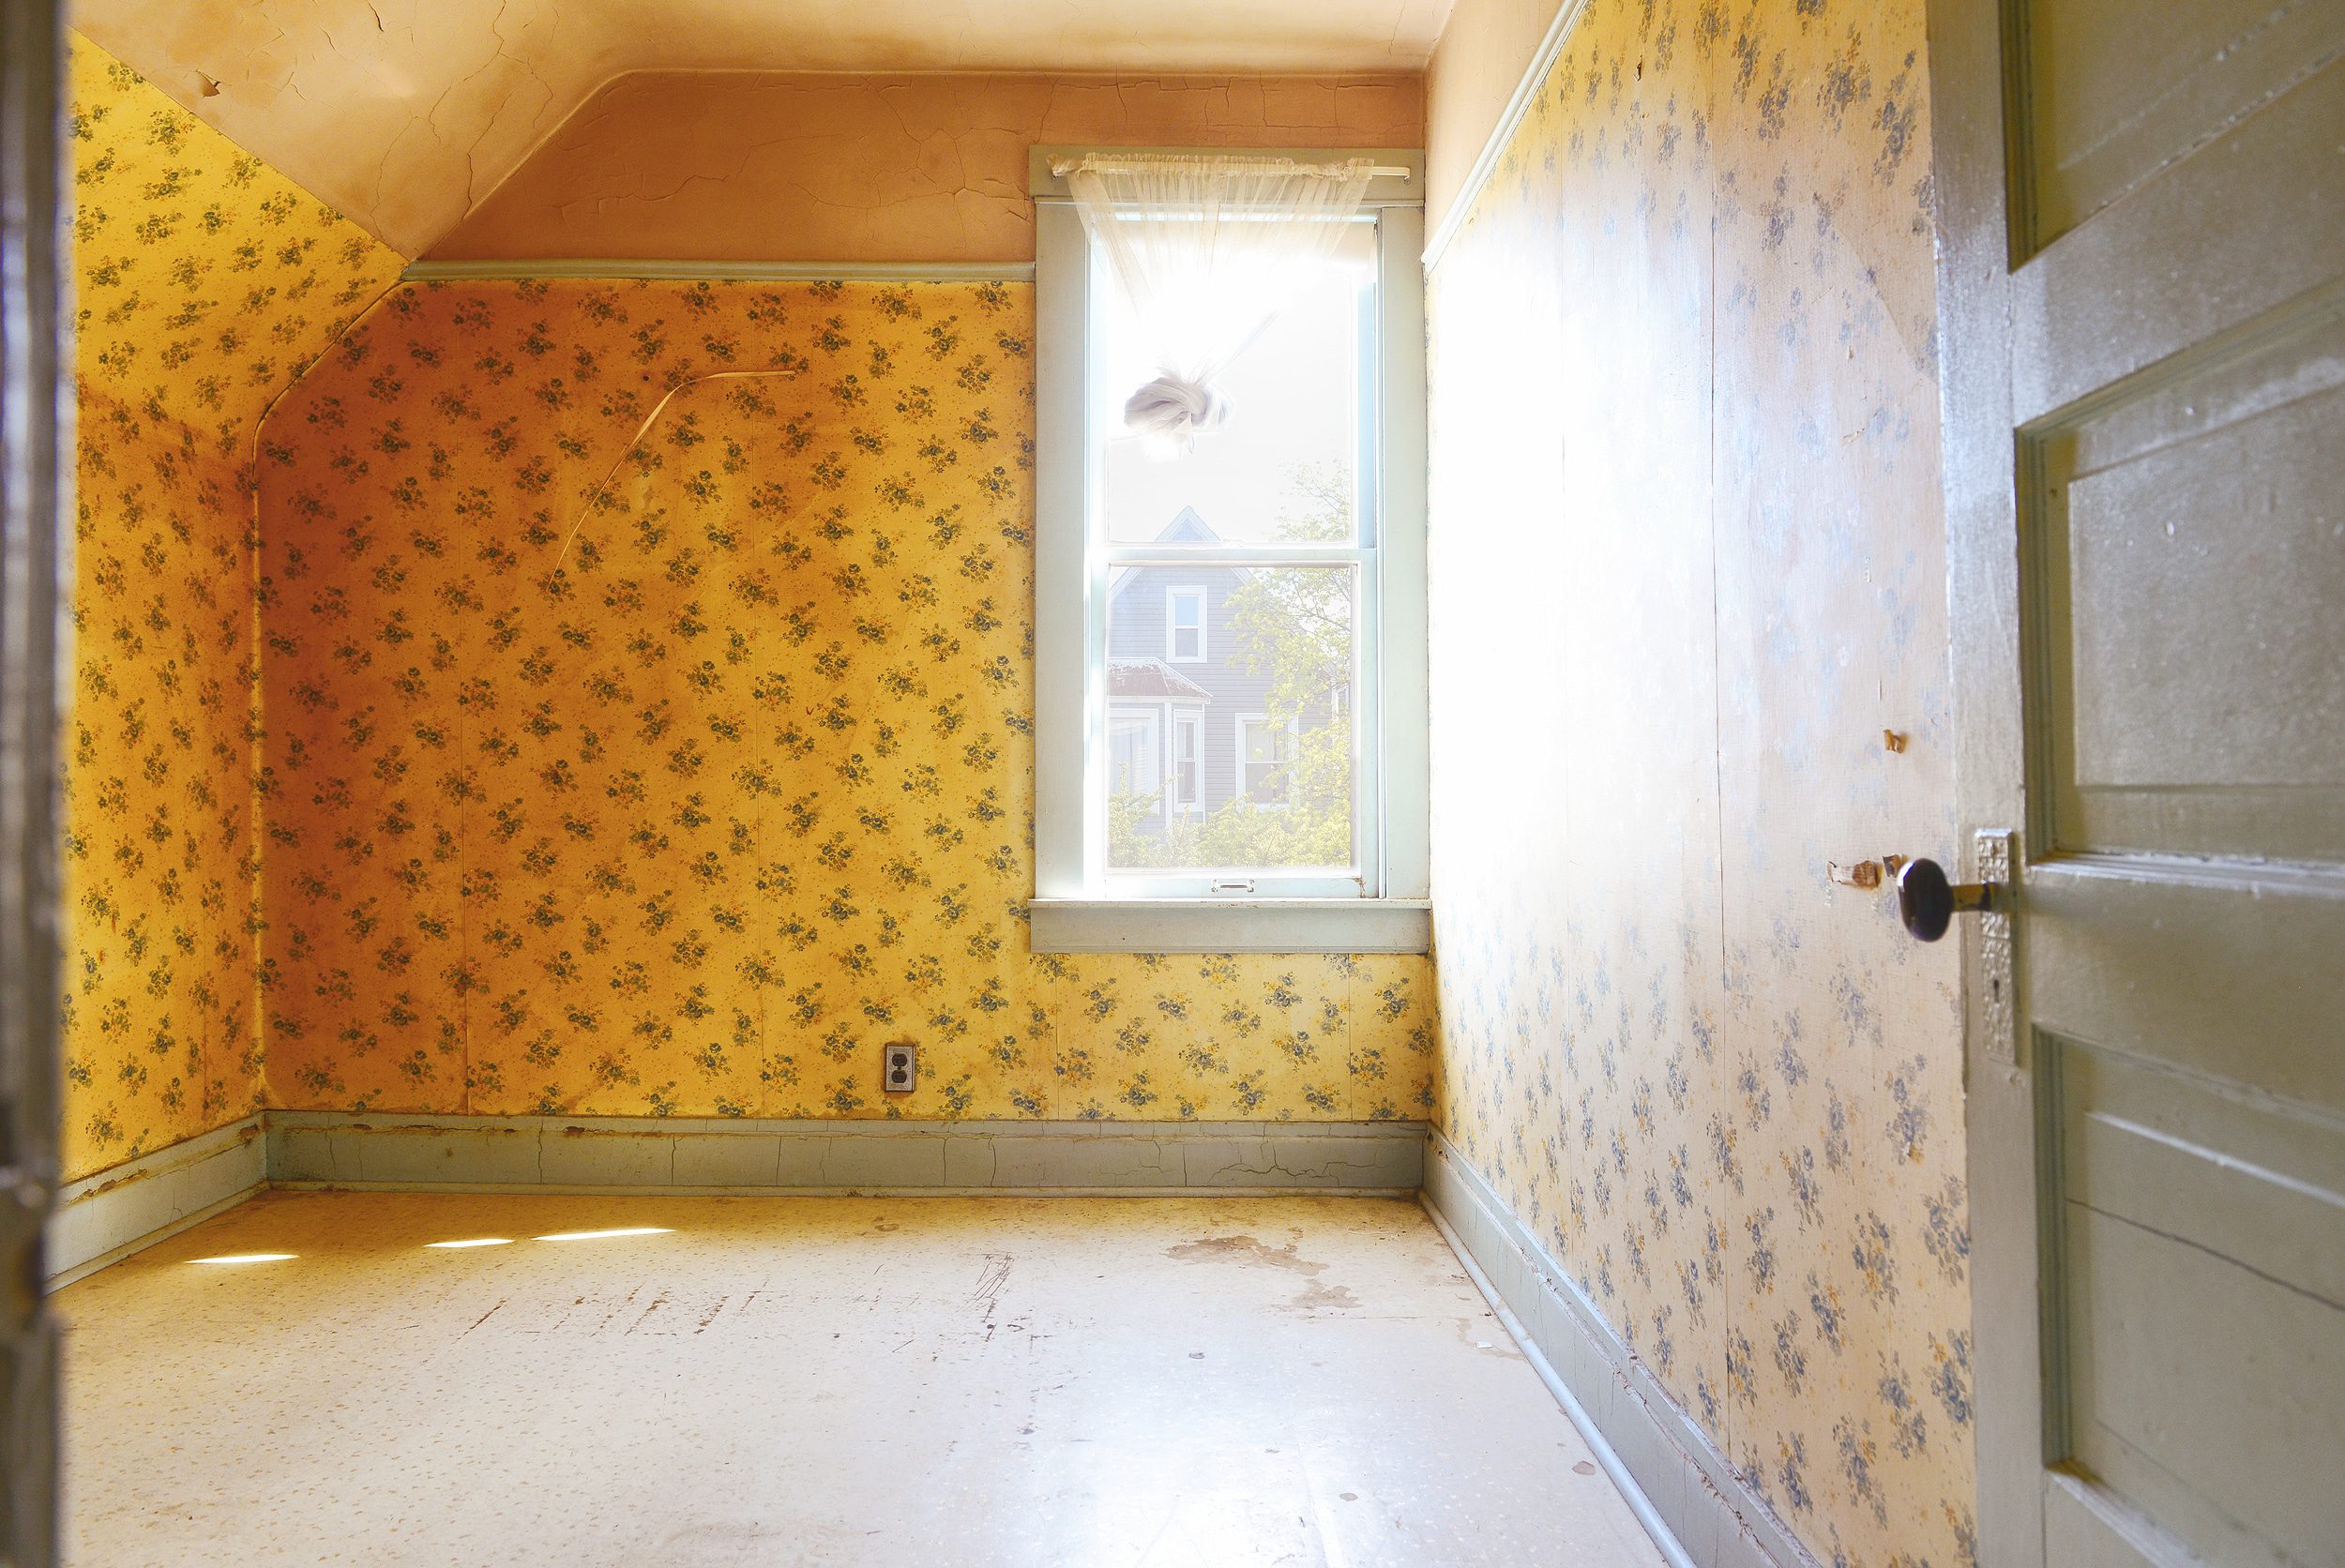
Once I liked what I was seeing through my viewfinder, I set my ISO, aperture and shutter speed manually (my personal preference, but feel free to use your camera’s auto settings). Next, I tightened up the tripod so it wouldn’t budge – this is very important. The final step in preparation was to take a photo of the room without Lucy in it, analyze the view and make any last adjustments.
Bring In the Subject and Snap!
This is the fun part! It’s helpful to have at least one other person to interact with the subject. In our case, Scott was in most of the photos so that Lucy would have someone to run towards, laugh at and play with! For example, Scott asked Lucy, where’s your nose? to get this shot:
Snap, snap, snap! He was careful not to touch her, which is helpful for the editing process. Knowing that time is in short supply with a toddler, I took close to 100 photos of Lucy in under 15 minutes. Tip: Don’t delete anything as you go. Just shoot.
Choose Your Favorites
Unlike the previous step, this is the hard part! I narrowed it down to my top 10ish, and to keep things easier on myself, I was careful to choose Lucys that wouldn’t overlap (too much).
Bring the Photo Files Into Photoshop
Optional: I use Lightroom first to sync up all the levels and adjust any distortion from my wide lens. Then I export those files and bring the final picks into Photoshop to begin the layering process!
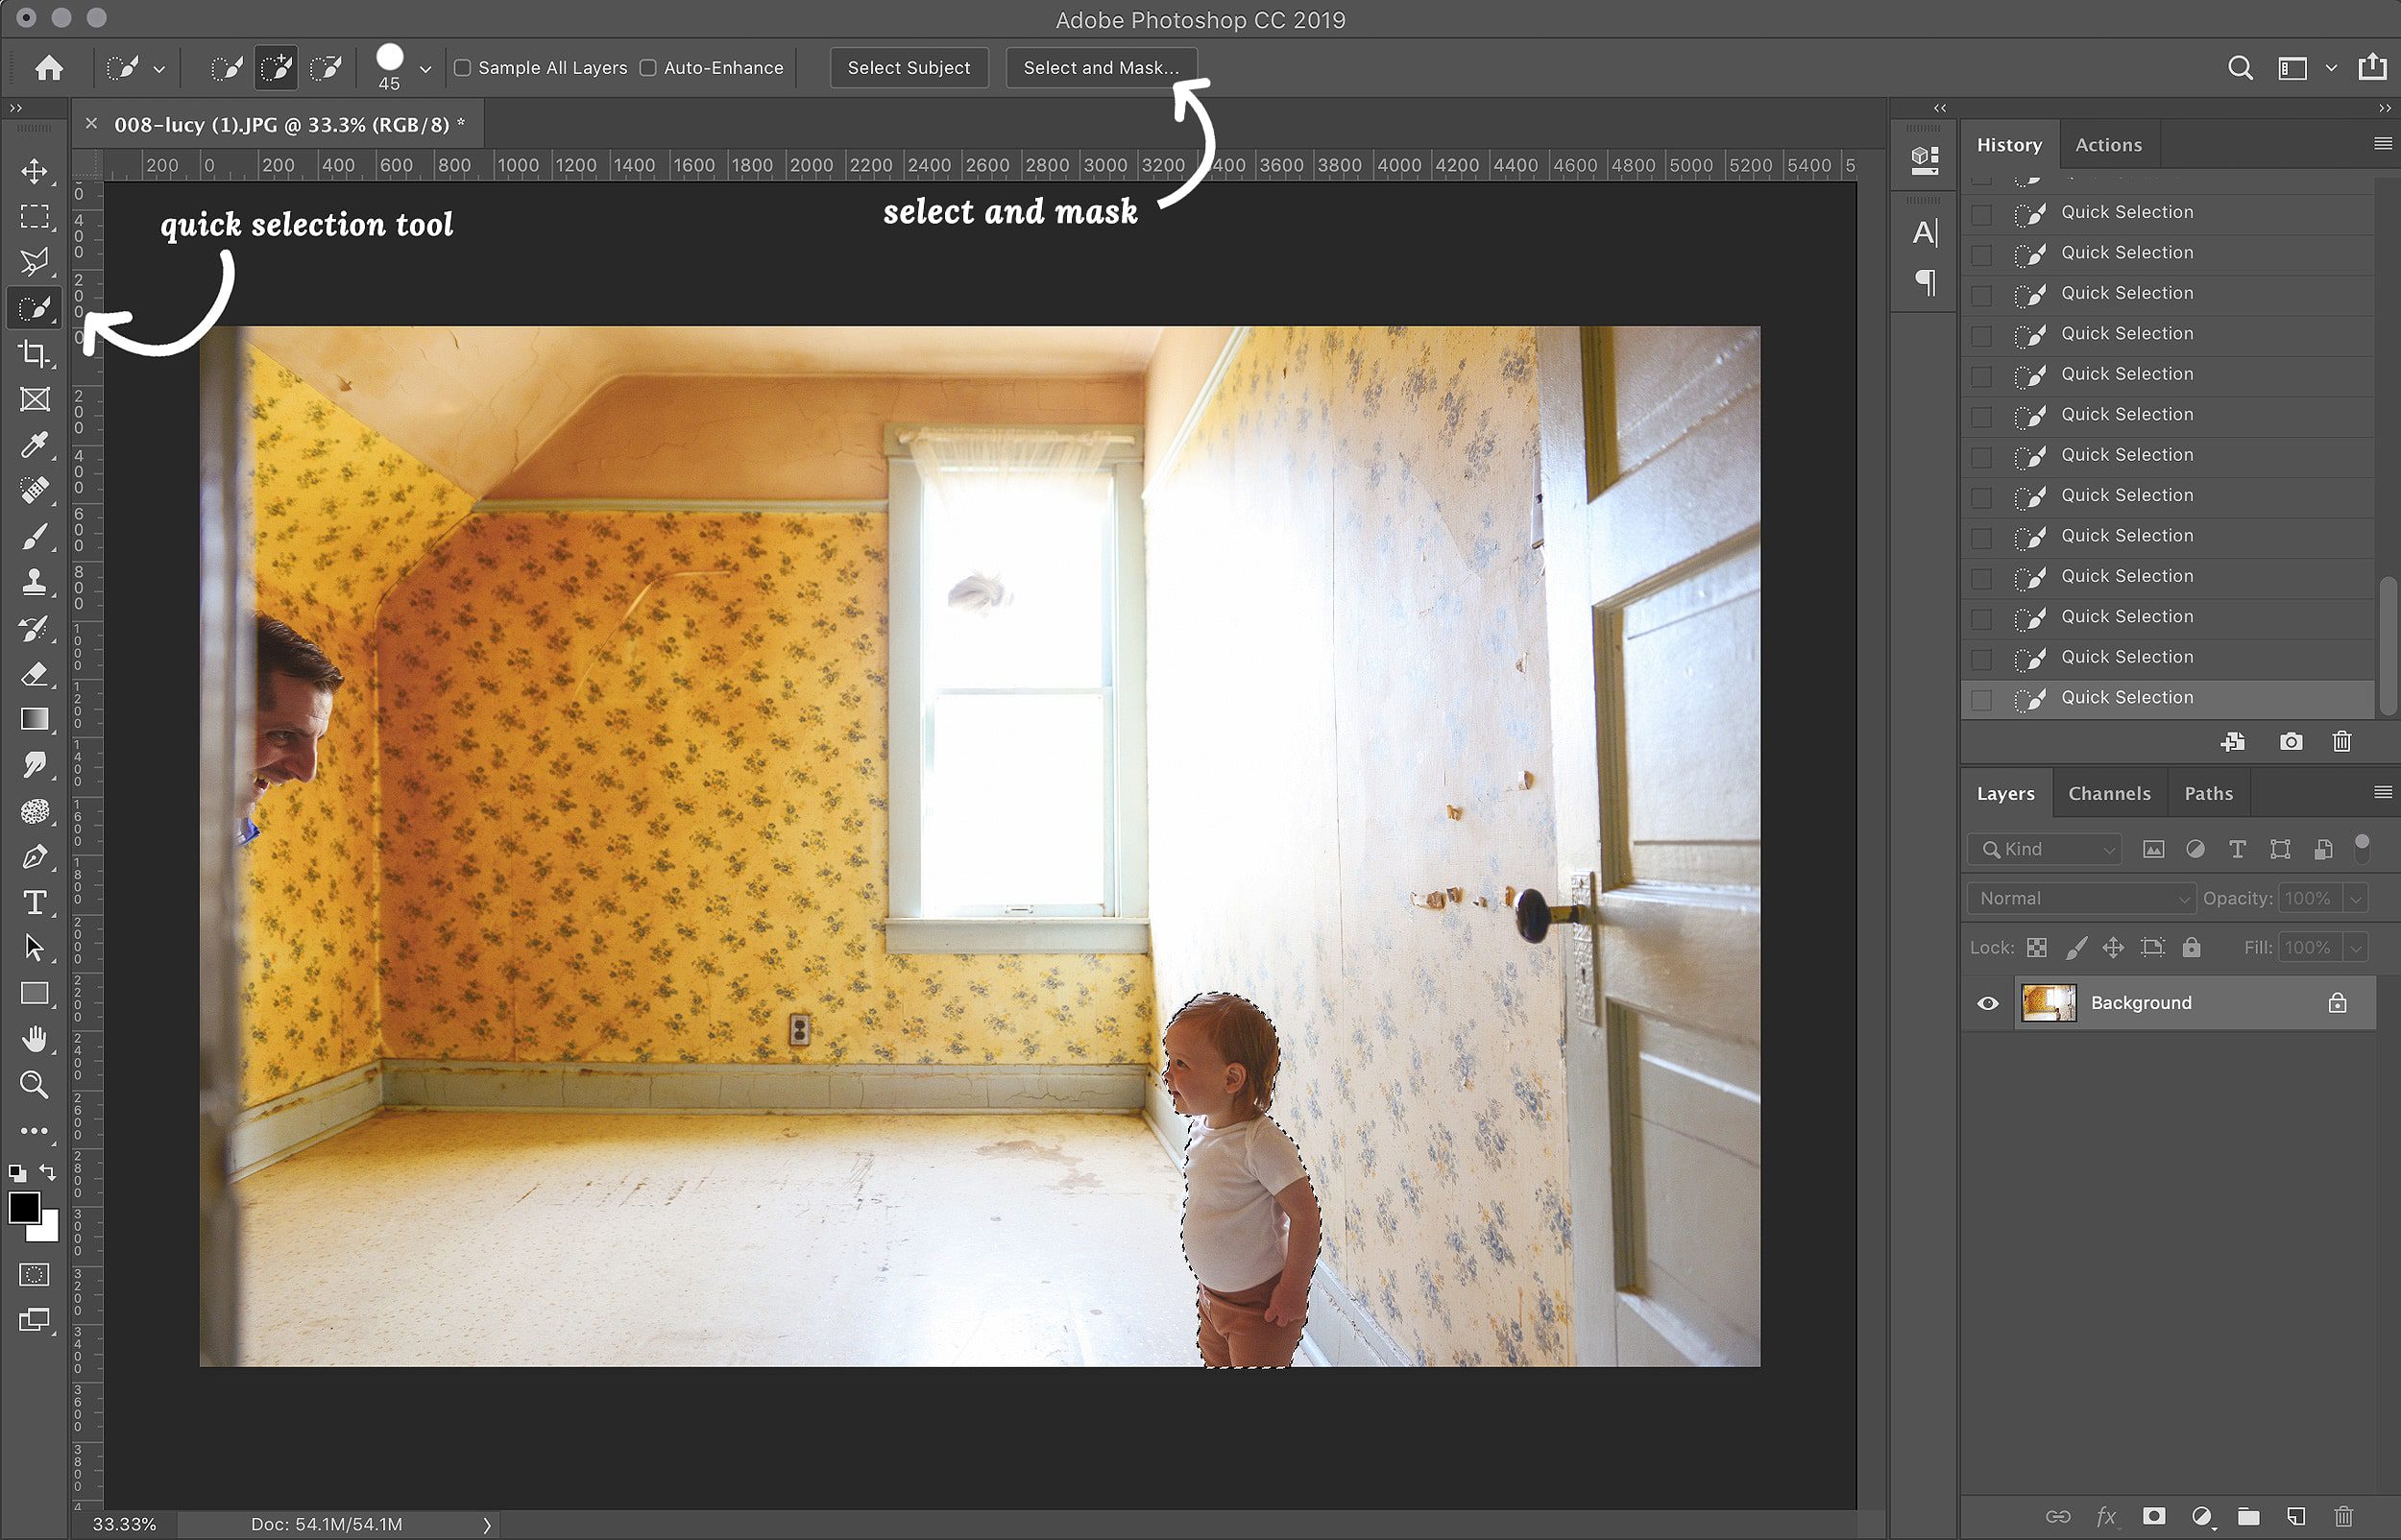
Become BFFs with the Quick Selection Tool
I started with the photo of Lucy looking at Scott (ha!) out the window as my background / base layer for the project, because this Lucy was the farthest away. Ultimately, I worked my way forward so that all the other Lucys would layer on top of this image. On each photo of Lucy, I used my quick selection tool (it’s the one that looks like a paintbrush with the dashed circle) to select the shape of her body. If there was a shadow beneath her or if she was touching a prop (like the door knob), I selected that, too.
When you click on the subject, Photoshop will do most of the work for you, selecting up to the nearest hard edge. Once I had my Lucy selected, I then chose ‘select and mask’ from the submenu.
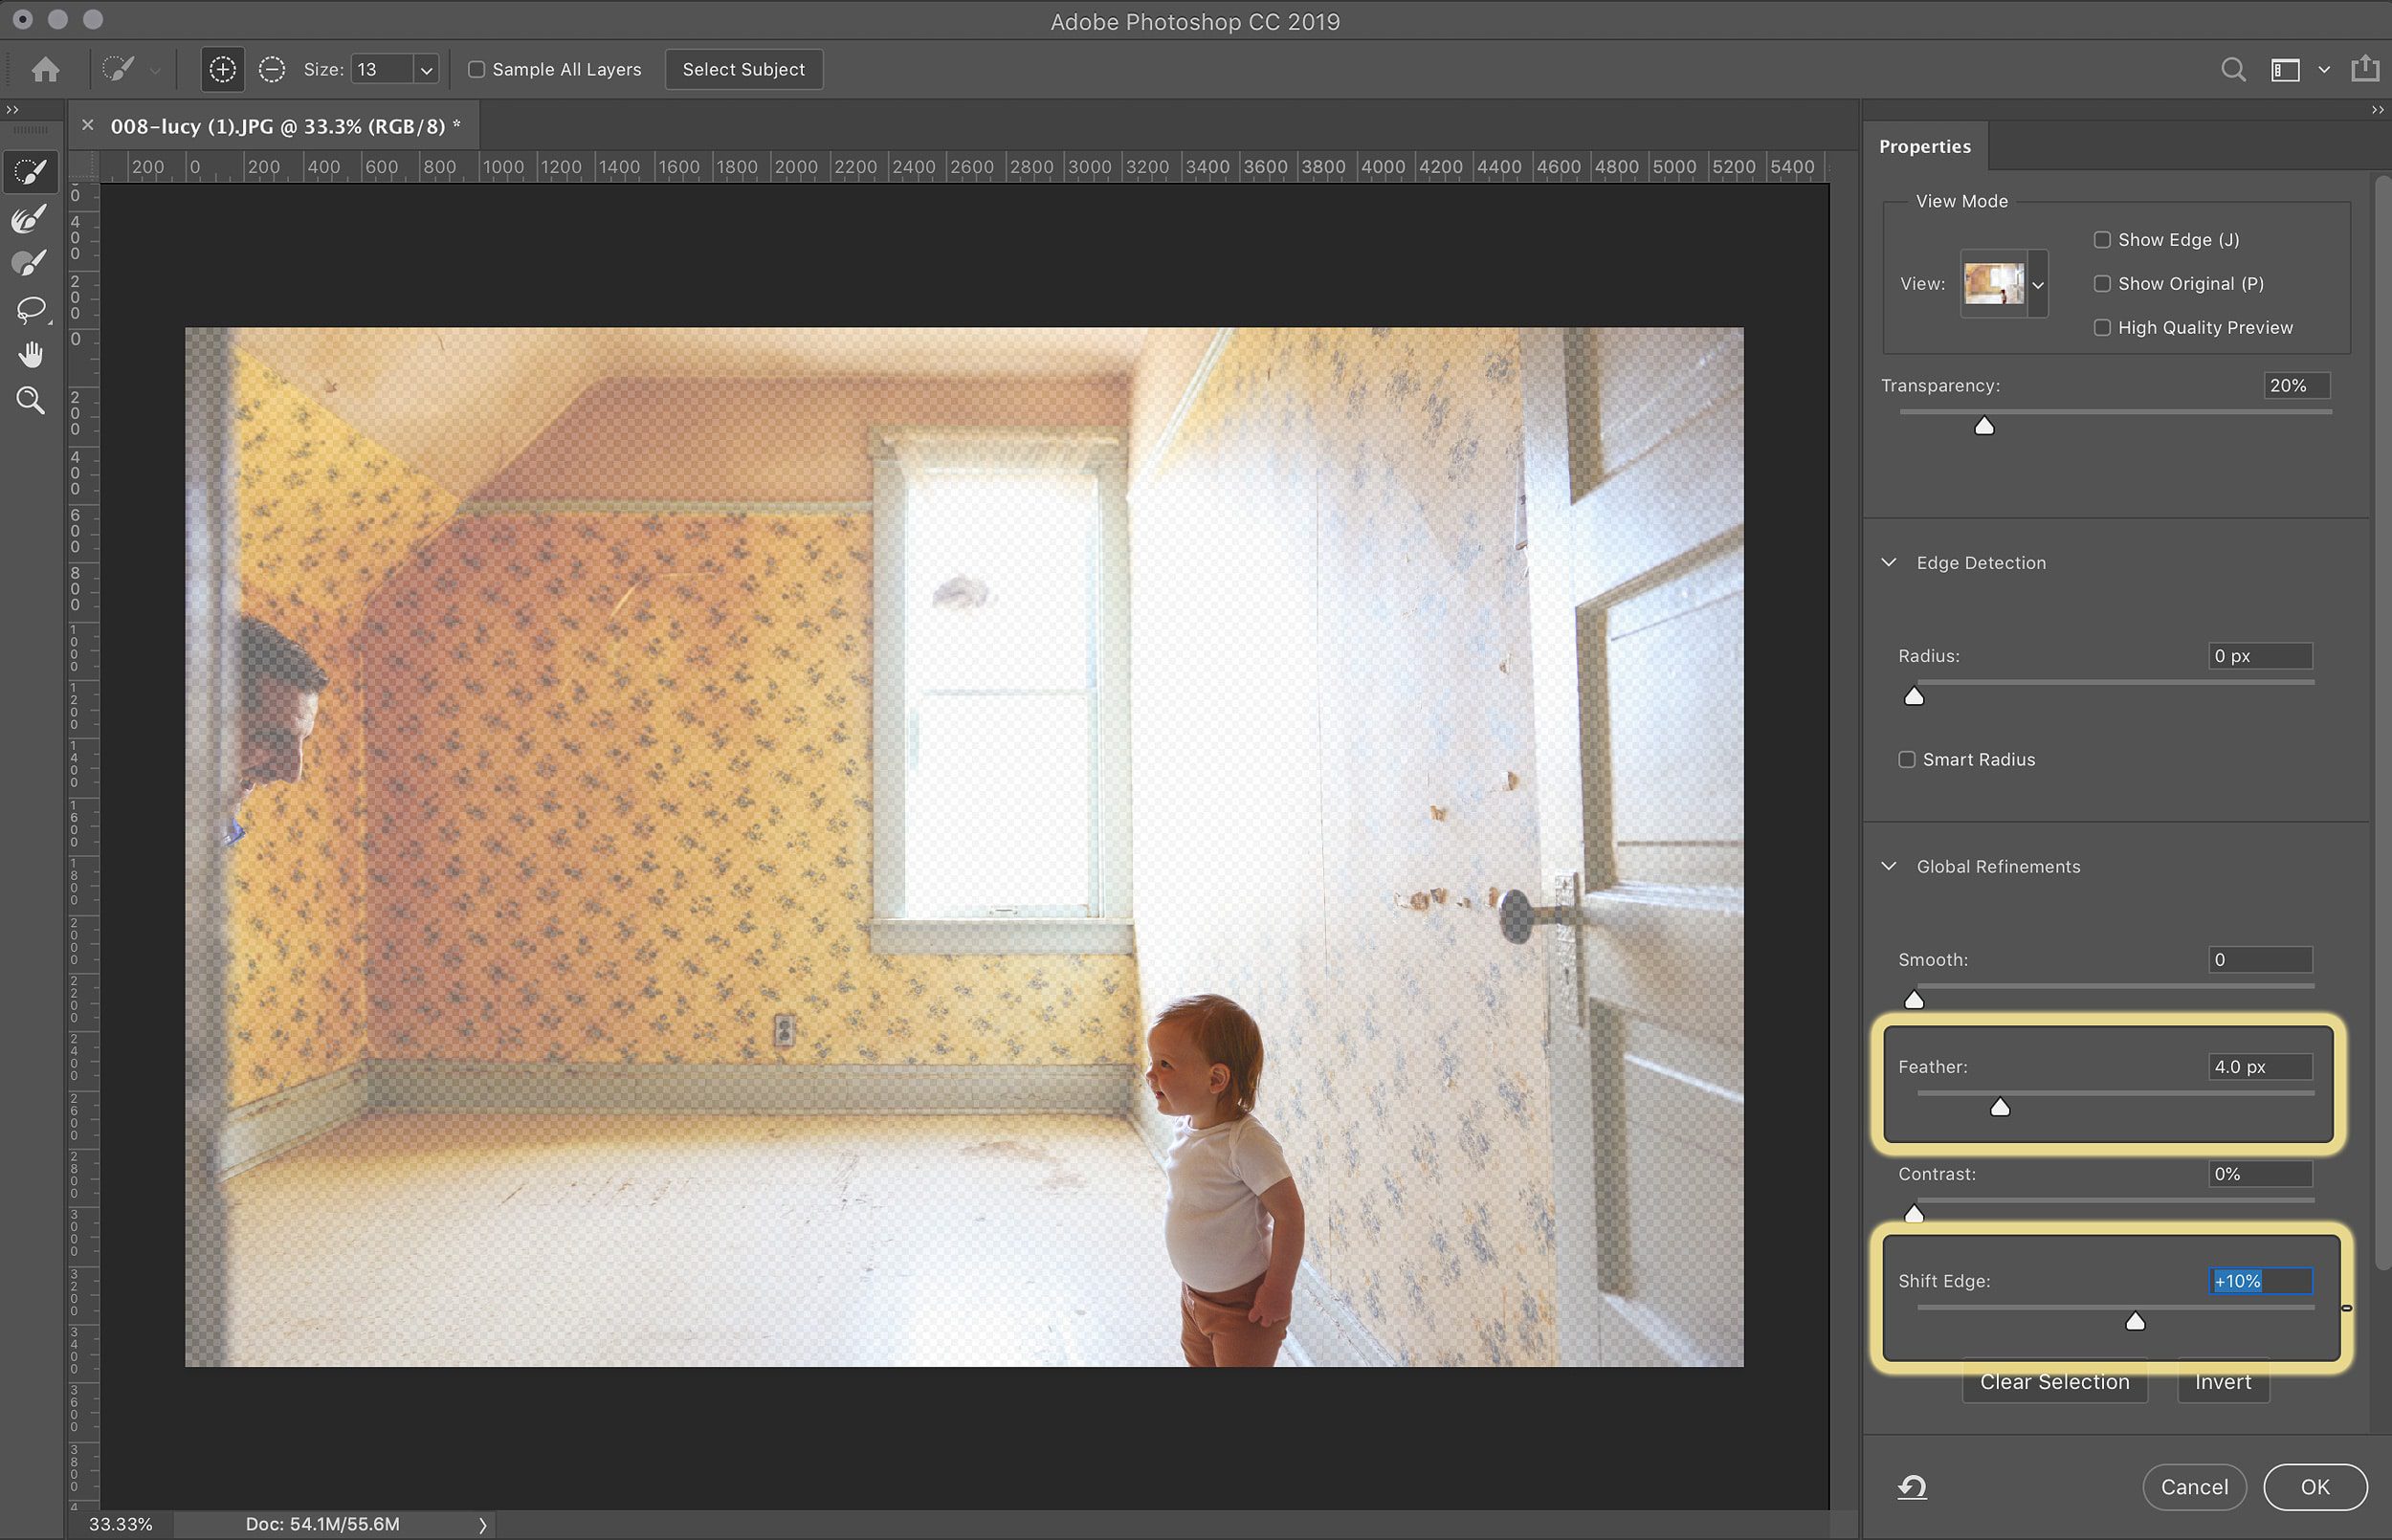
When you click on ‘select and mask,’ a list of options will pop up on the side. I always choose to feather my selection by a few pixels, shift the edge by about 10% (to prevent harsh lines), and click ‘OK.’
Copy + Paste
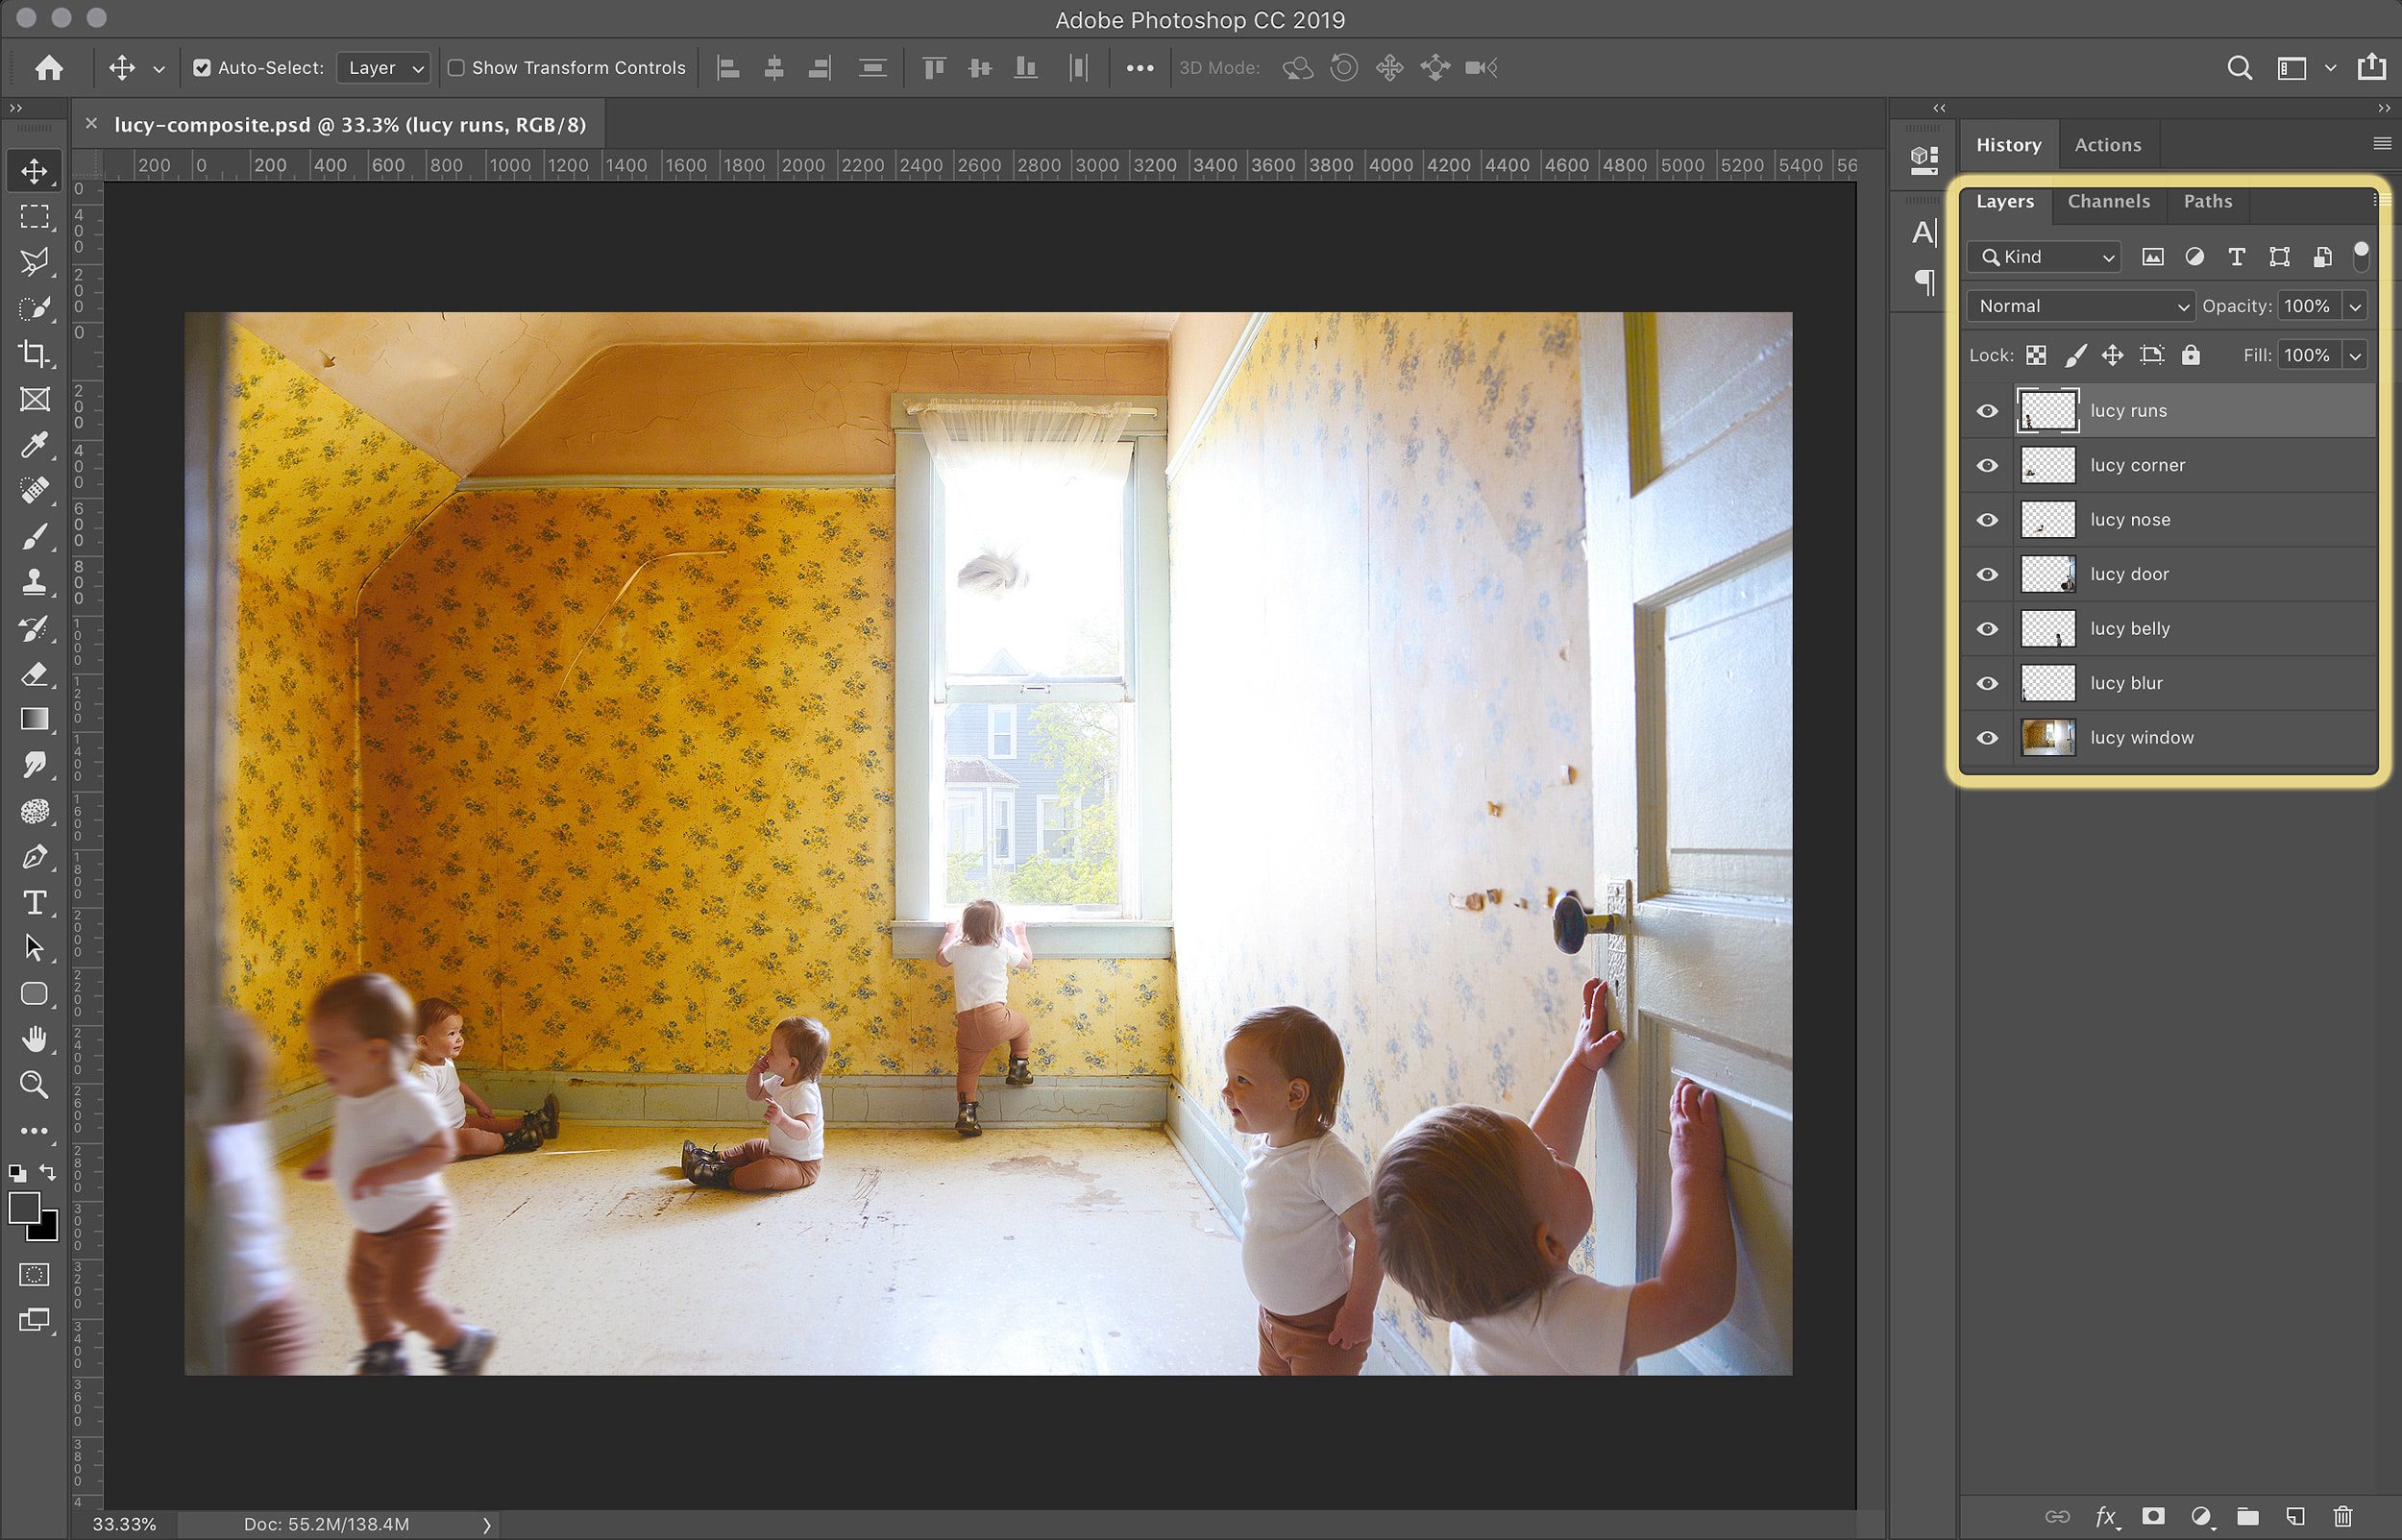
Next, I copied Lucy from the photos (command + C) and pasted her onto the base layer (shift + command + V). I did this for all my Lucys until I had a layer for each of my 7 girls, and I renamed each layer so that it made sense to my brain. Tip: Holding down the ‘shift’ key while pasting a layer will ensure that it pastes exactly in the spot it was cut from.
Fine Tune the Layers
This part can feel tedious, but the small details are what make a composite photo look seamless! At this point, I went through each layer and used my eraser tool to get rid of any excess background, as well as my ‘move’ tool to ensure that all my Lucys lined up with the baseboards, wallpaper and anything else in proximity. Tip: Make sure you’ve selected the layer you wish to customize when making edits!
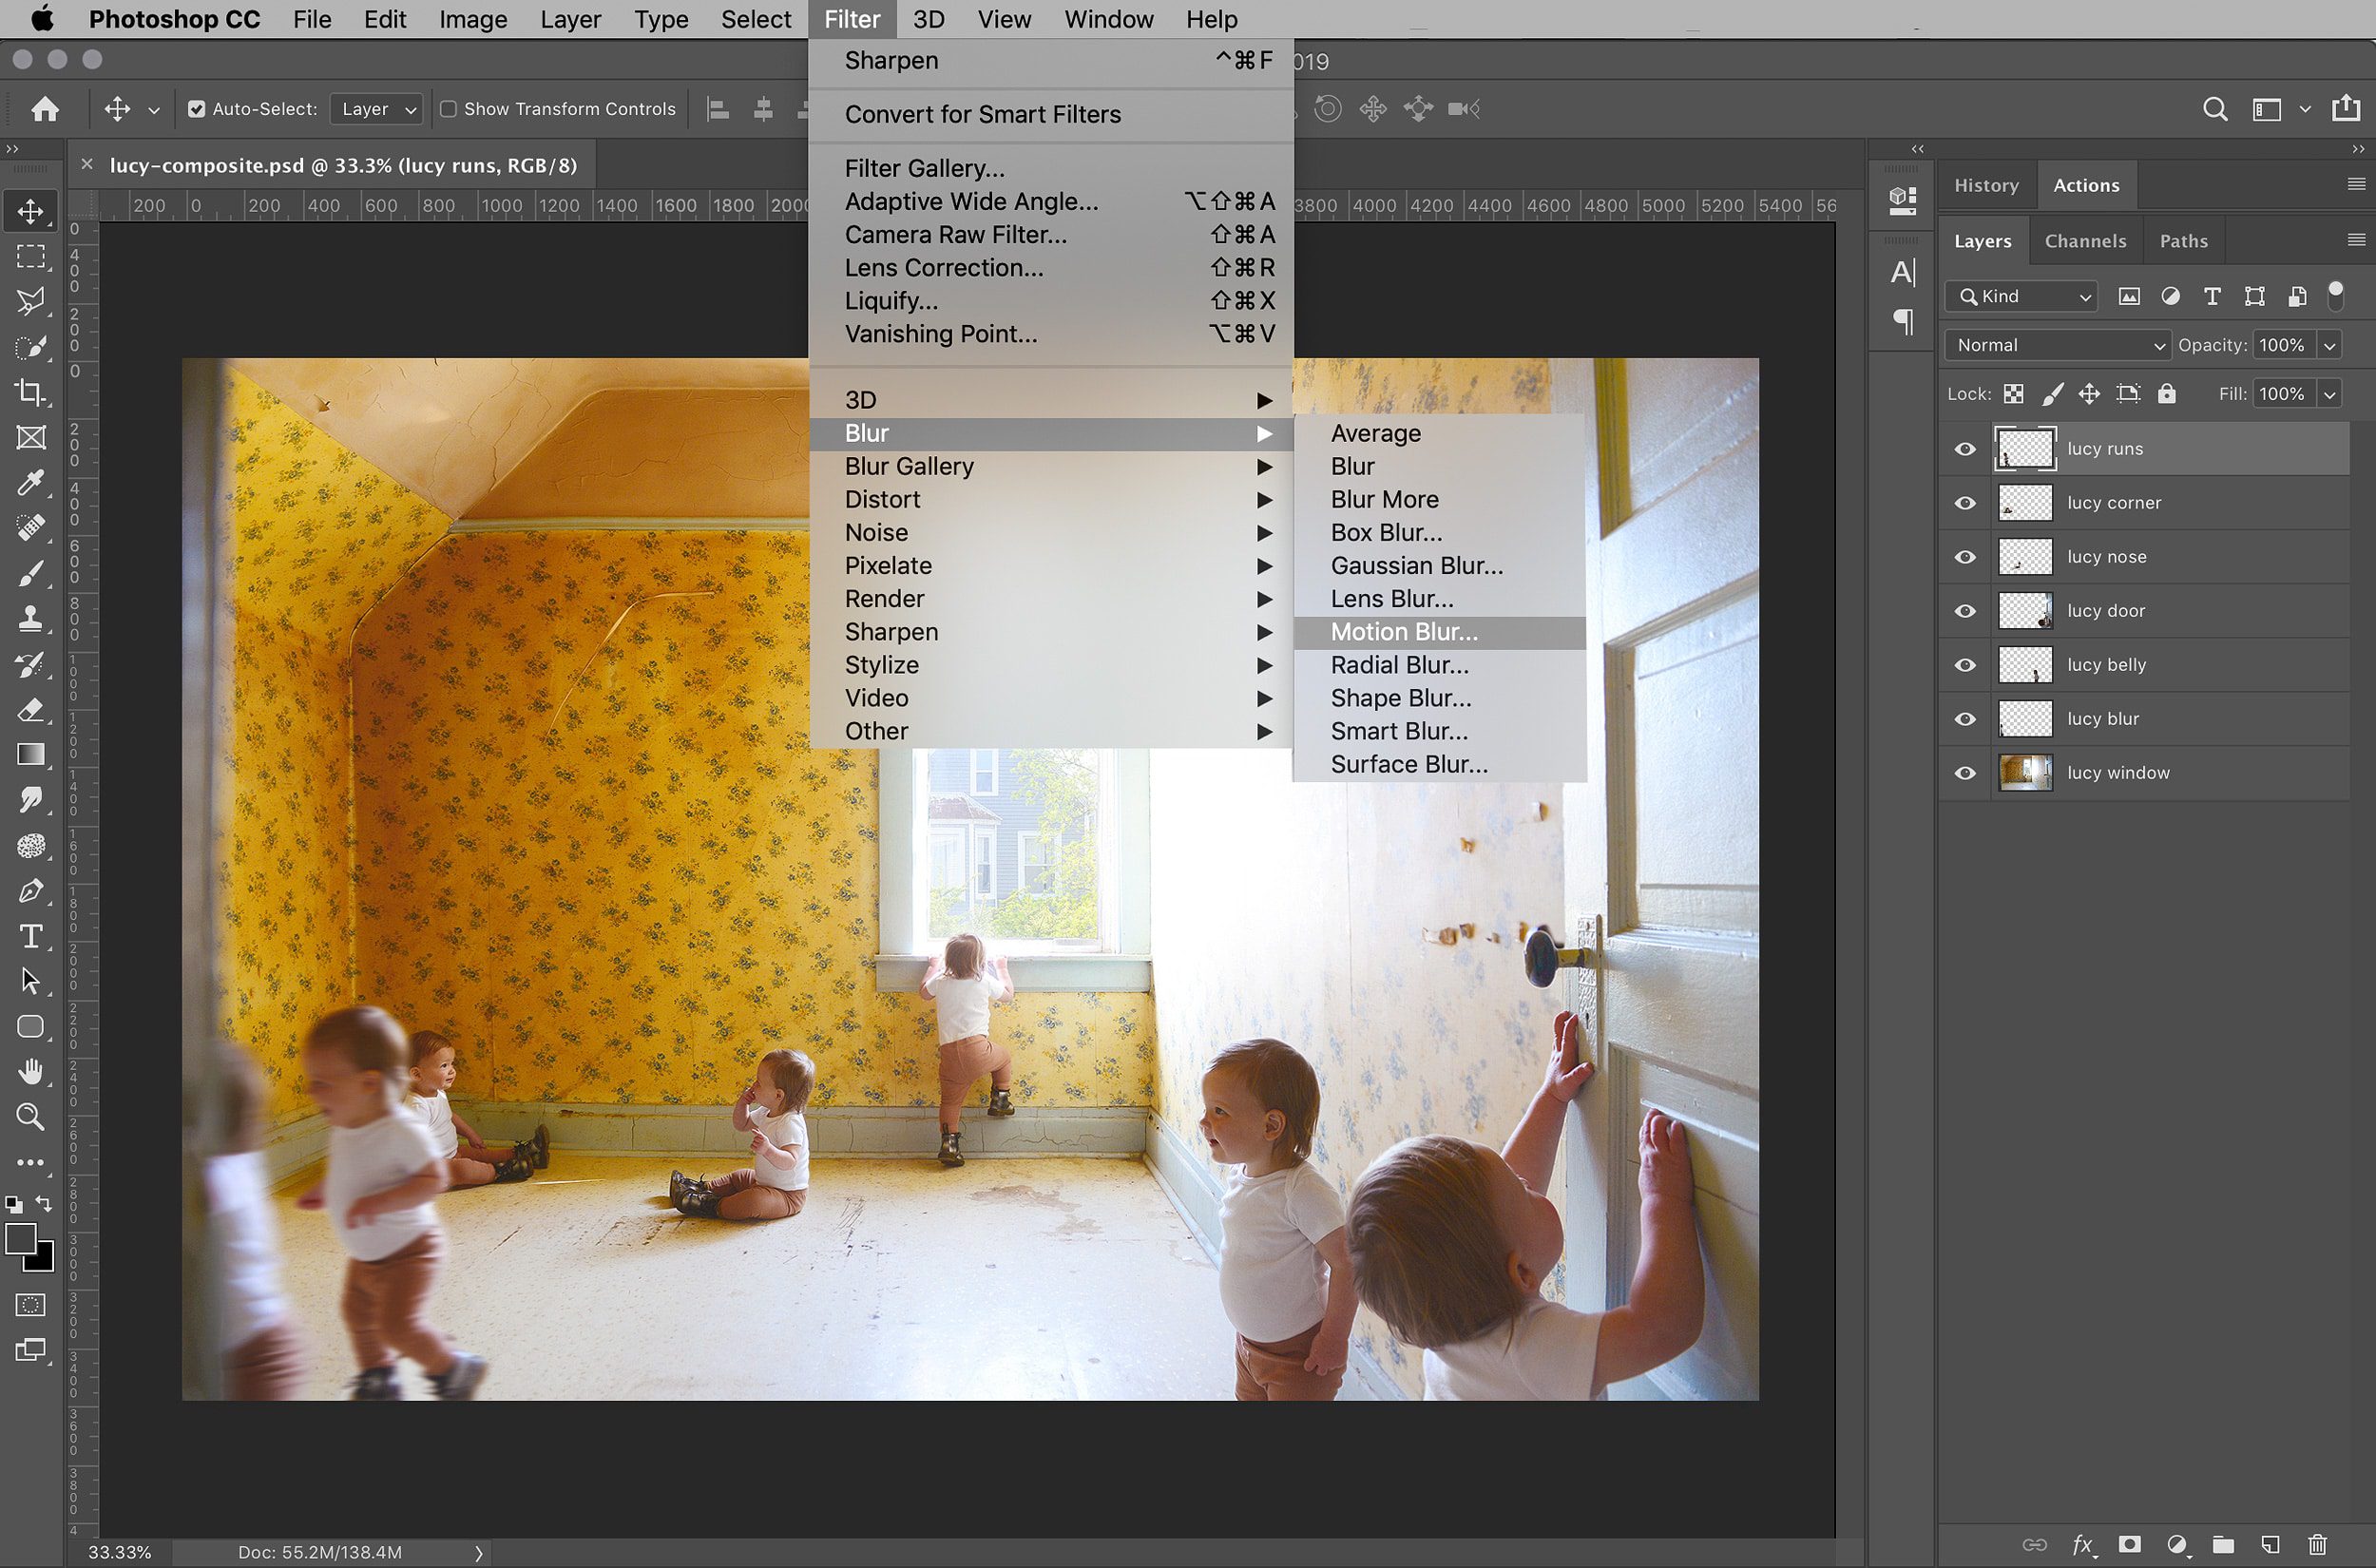
For the layers where Lucy was running, I added a motion blur (filter > blur > motion blur), which was extremely helpful in disguising any less than perfect edges where she overlapped my corner Lucy! There’s no right or wrong way to do this. Play with the blur settings (make sure the ‘preview’ is checked) until you like what you see.
Save Your Photoshop File
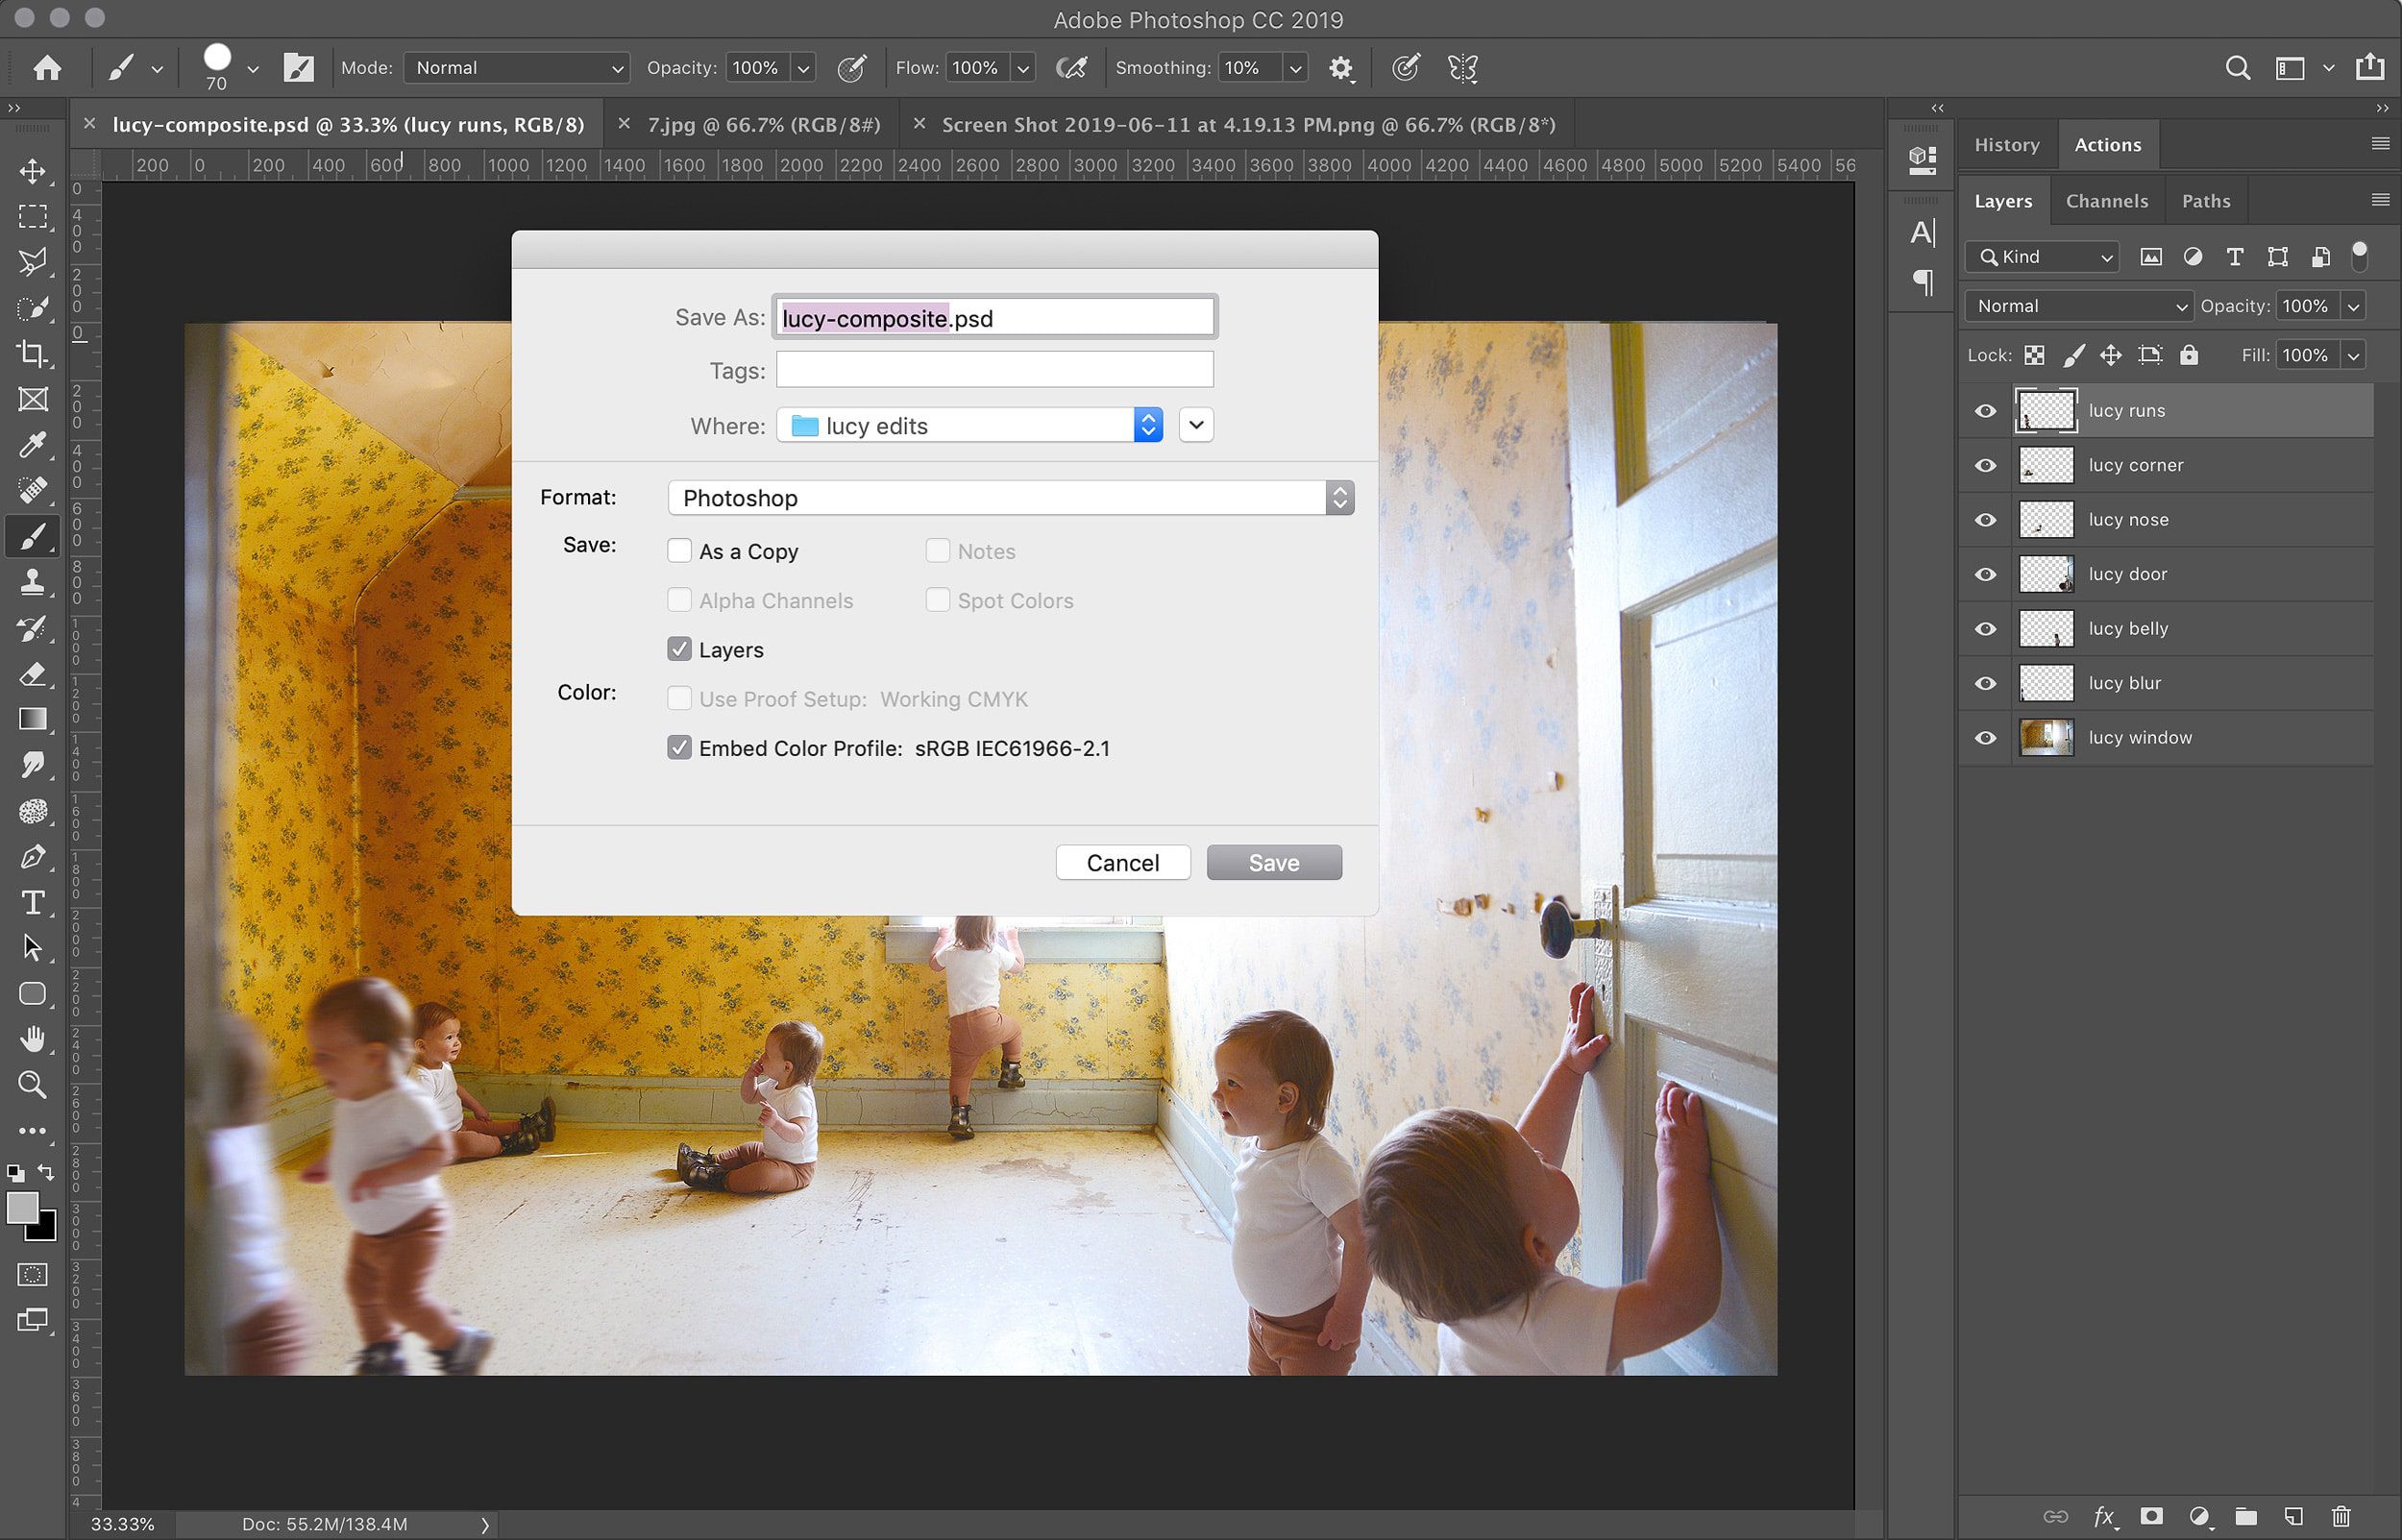
Now that you have your composite photo, make sure to save your Photoshop file as a .PSD! If you ever, ever want to go back and make changes, a Photoshop file keeps all the layers for you. Keep this file in a safe place.
Merge the Layers
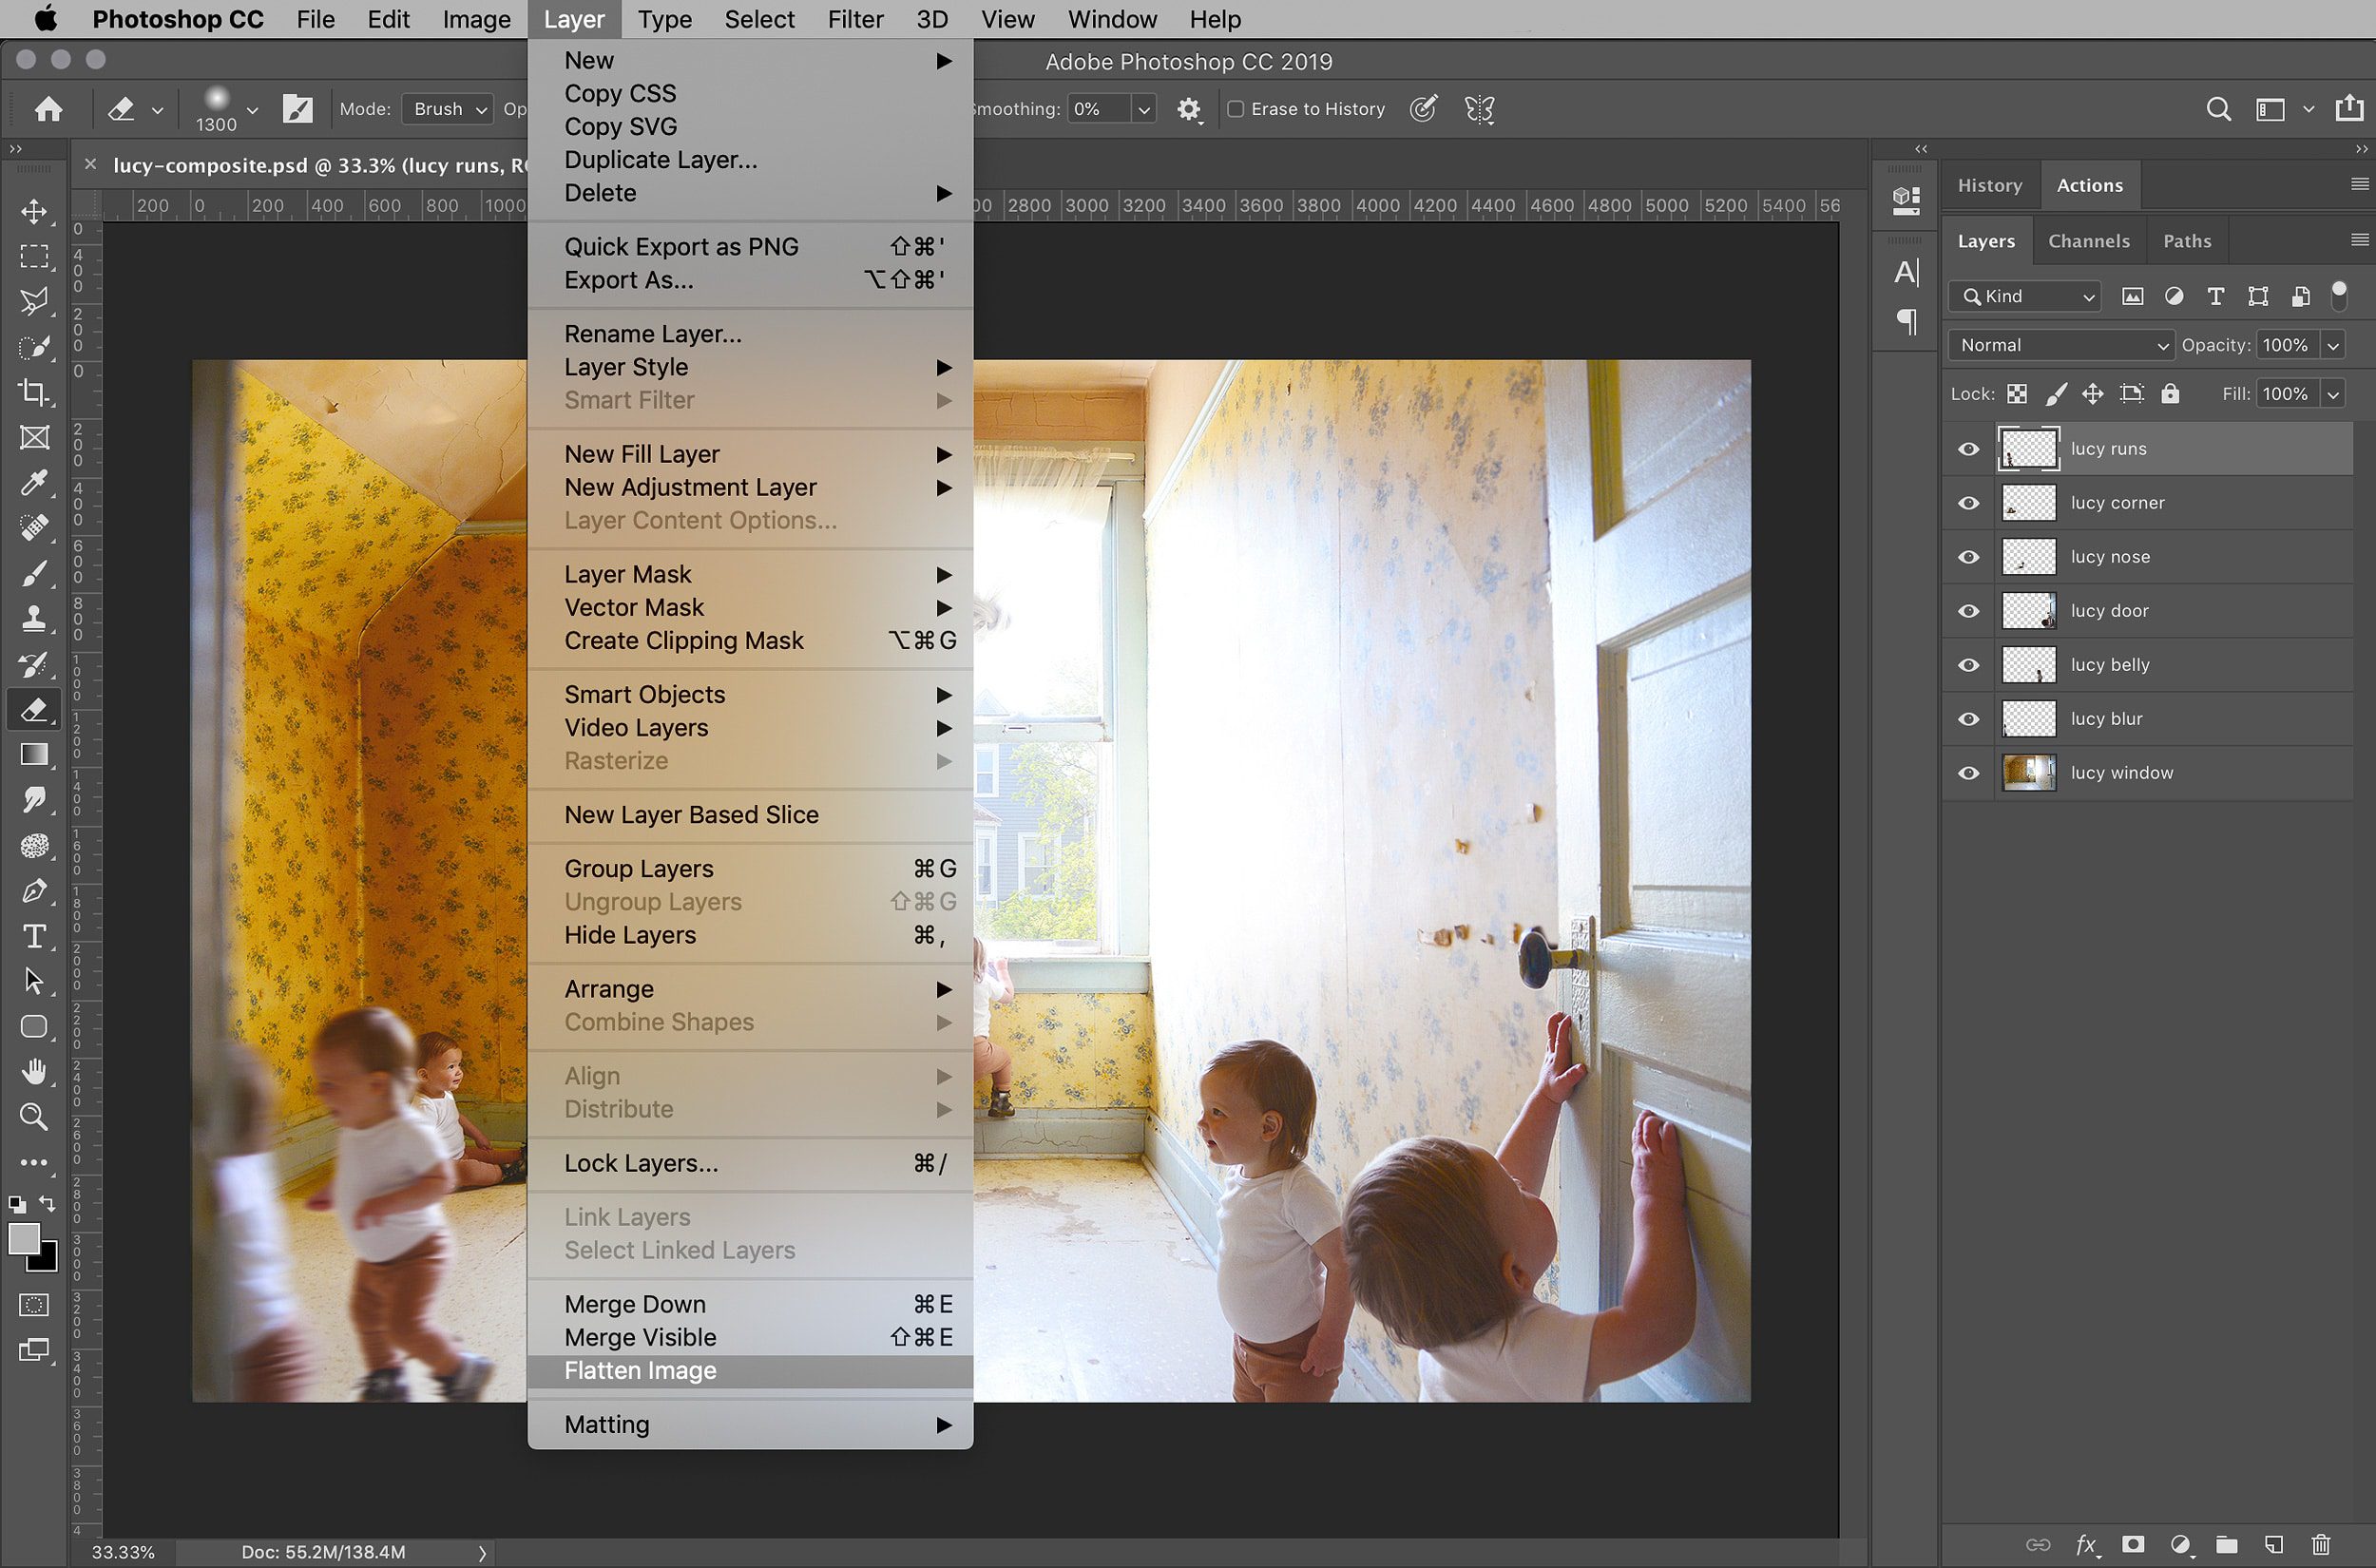
After I’ve saved a .PSD and once I’m happy with the composite image, I like to merge all my layers before any further editing (layer > flatten image). This way, any changes made moving forward – like brightening, saturation, etc – will effect the entire compressed photo as opposed to only an individual layer.
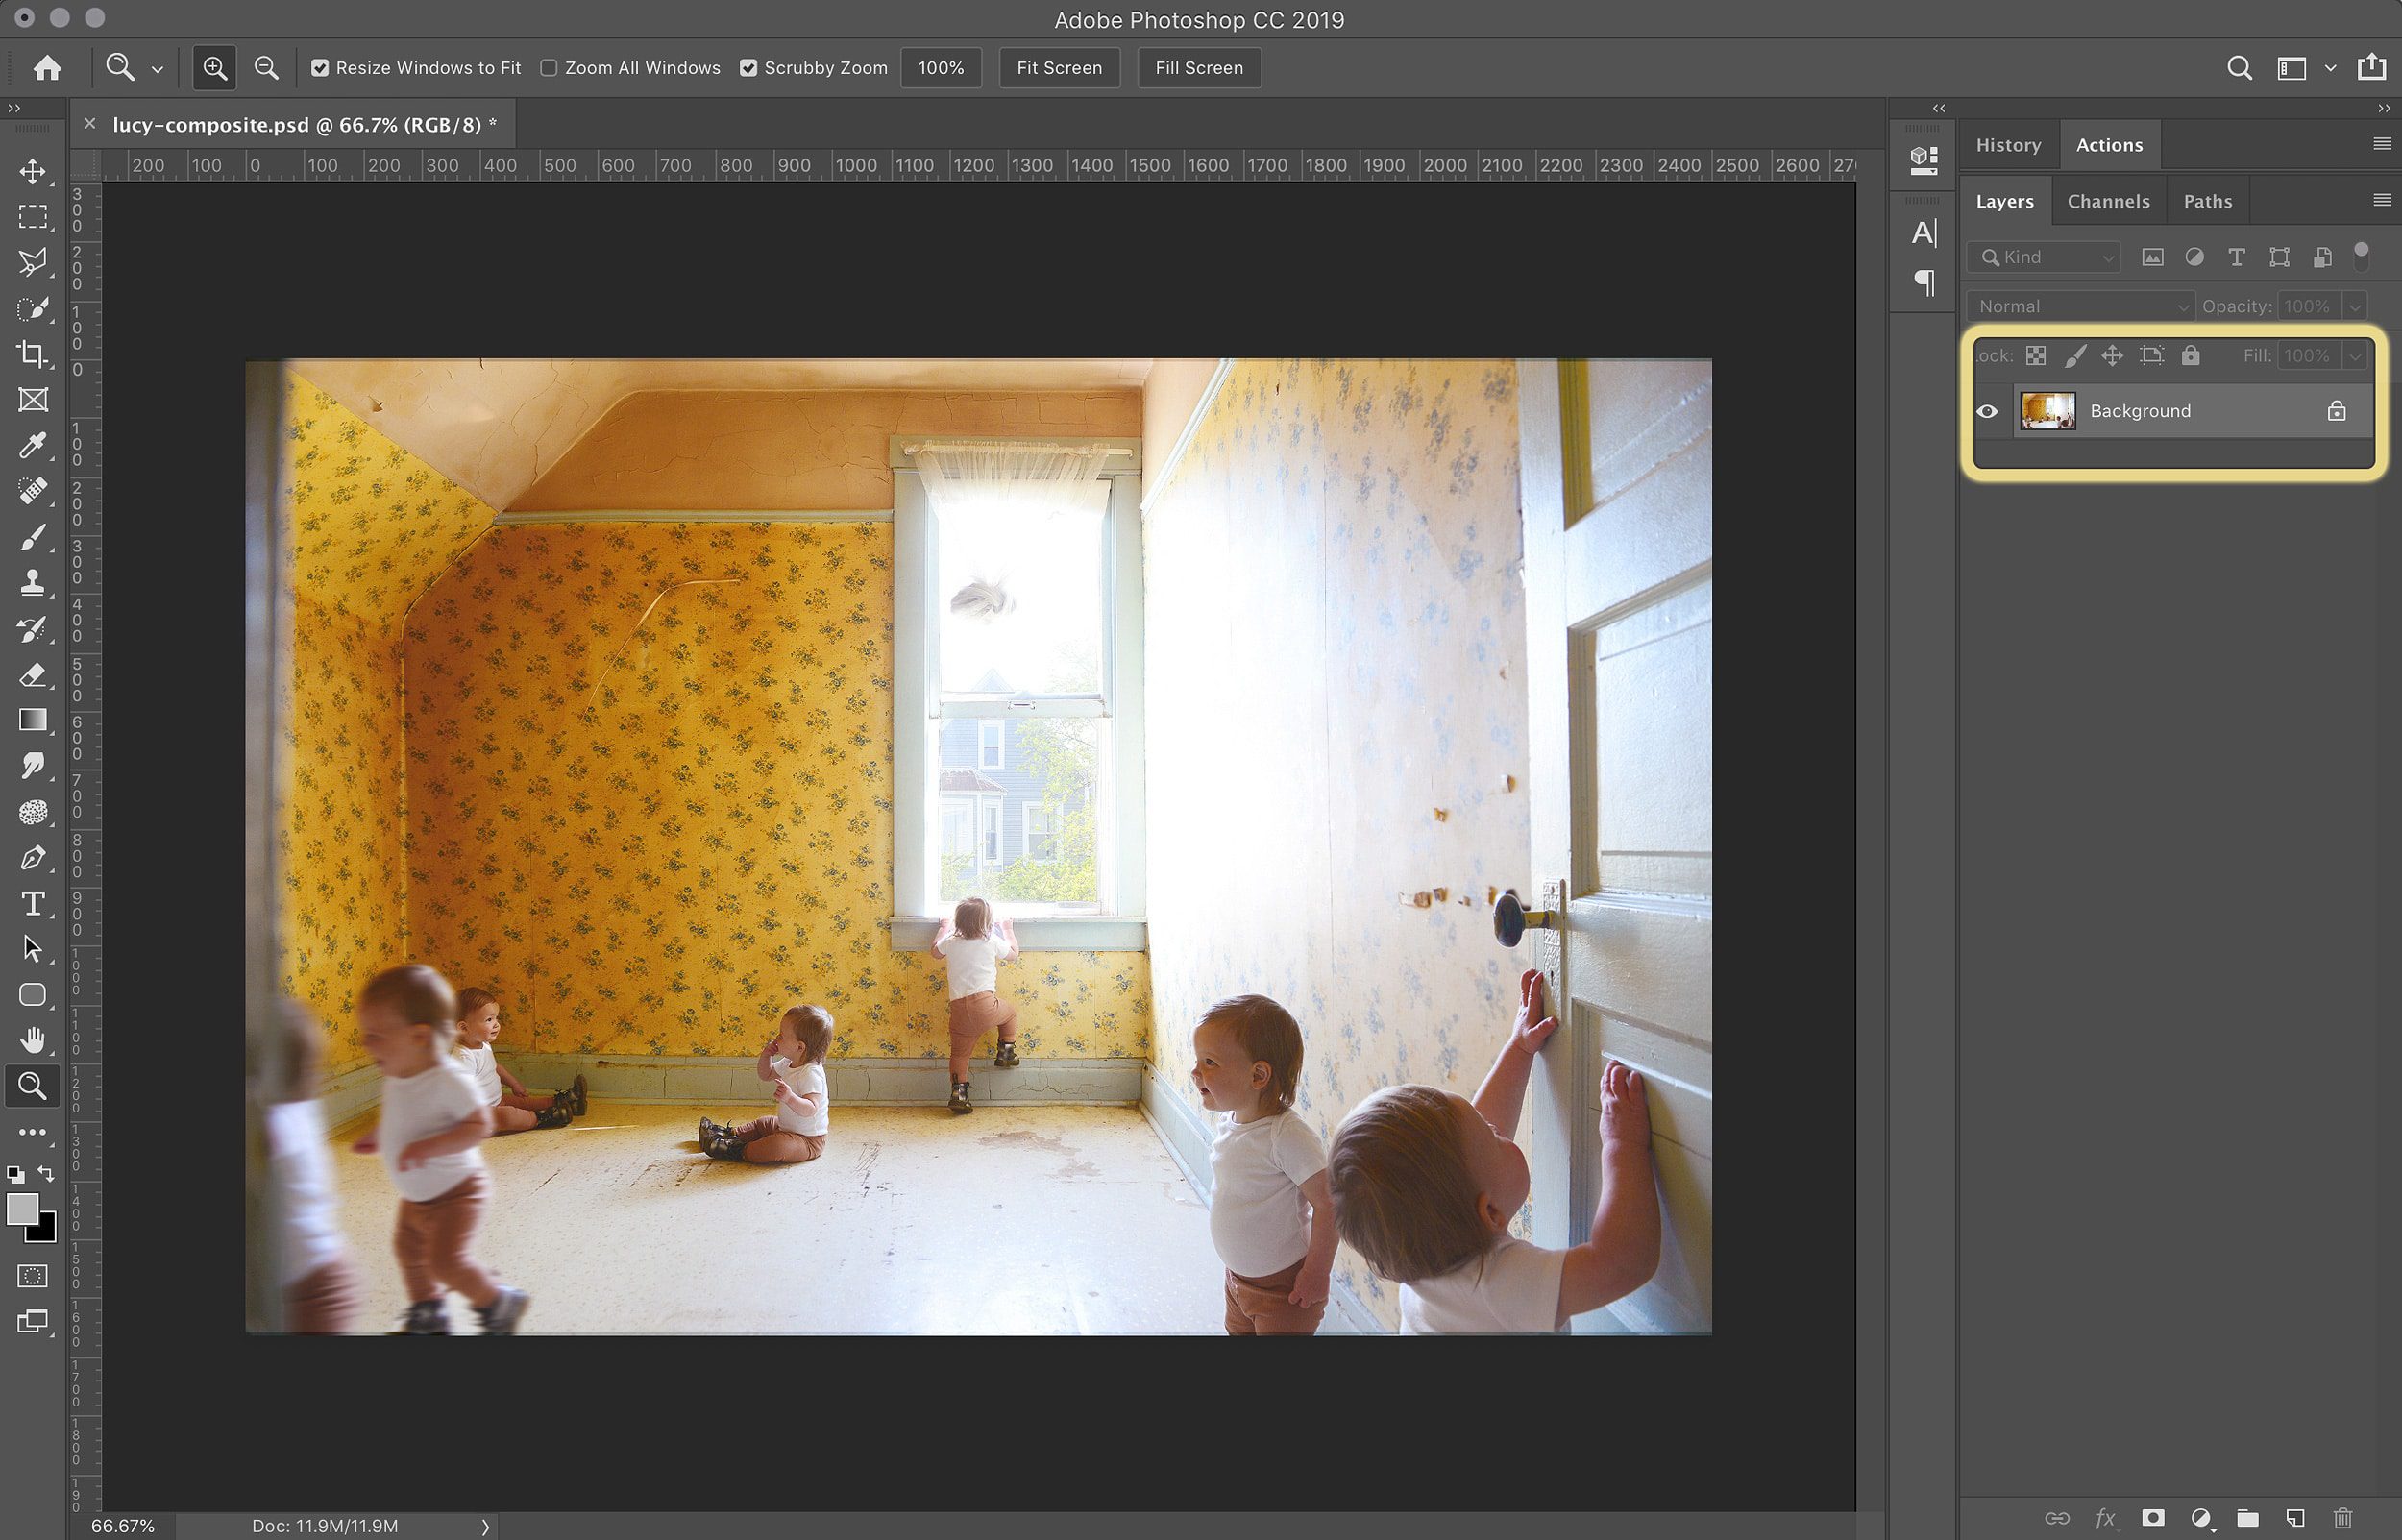
Once merged, you’ll see that the composite photo will now have one layer (or ‘background’ as seen below), and this new compressed image should be saved as a .JPG. That step is very important, as you wouldn’t want to continue to make edits and accidentally save your compressed photo as a .PSD, in turn, losing your layers. (Not that I’m speaking from experience, or…)
At this point, you’re technically done! But if you’re like me, you’ll want to gussy up your rad composite image so that it shines! On my .JPG file, I touched up some excessive peeling wallpaper and a few rogue Lucy hairs. I also have a handful of favorite Photoshop actions that I like to use, and I layered on a few until I was happy with the warm, pinky glow that’s now hanging on our wall. If you’re new to Photoshop actions, this will be so fun for you! There are so many available, and Etsy is a great place to start.
Save (Again) and Print!
I tried a handful of editing techniques and saved them all separately. If you’re undecided on a final edit, it’s always best to save your JPGs with a different filename (i.e., Lucy-composite-1.jpg, Lucy-composite-2.jpg) for each style of edit. But whatever you do, hold on to that precious Photoshop file with all the layers! With my photo complete, I chose to have it printed and framed in the Irvine Slim through Framebridge (I’ve always been impressed with their print quality!), but here are some other options:

And here’s that final edited version so you don’t have to scroll up again:
A Little Bonus
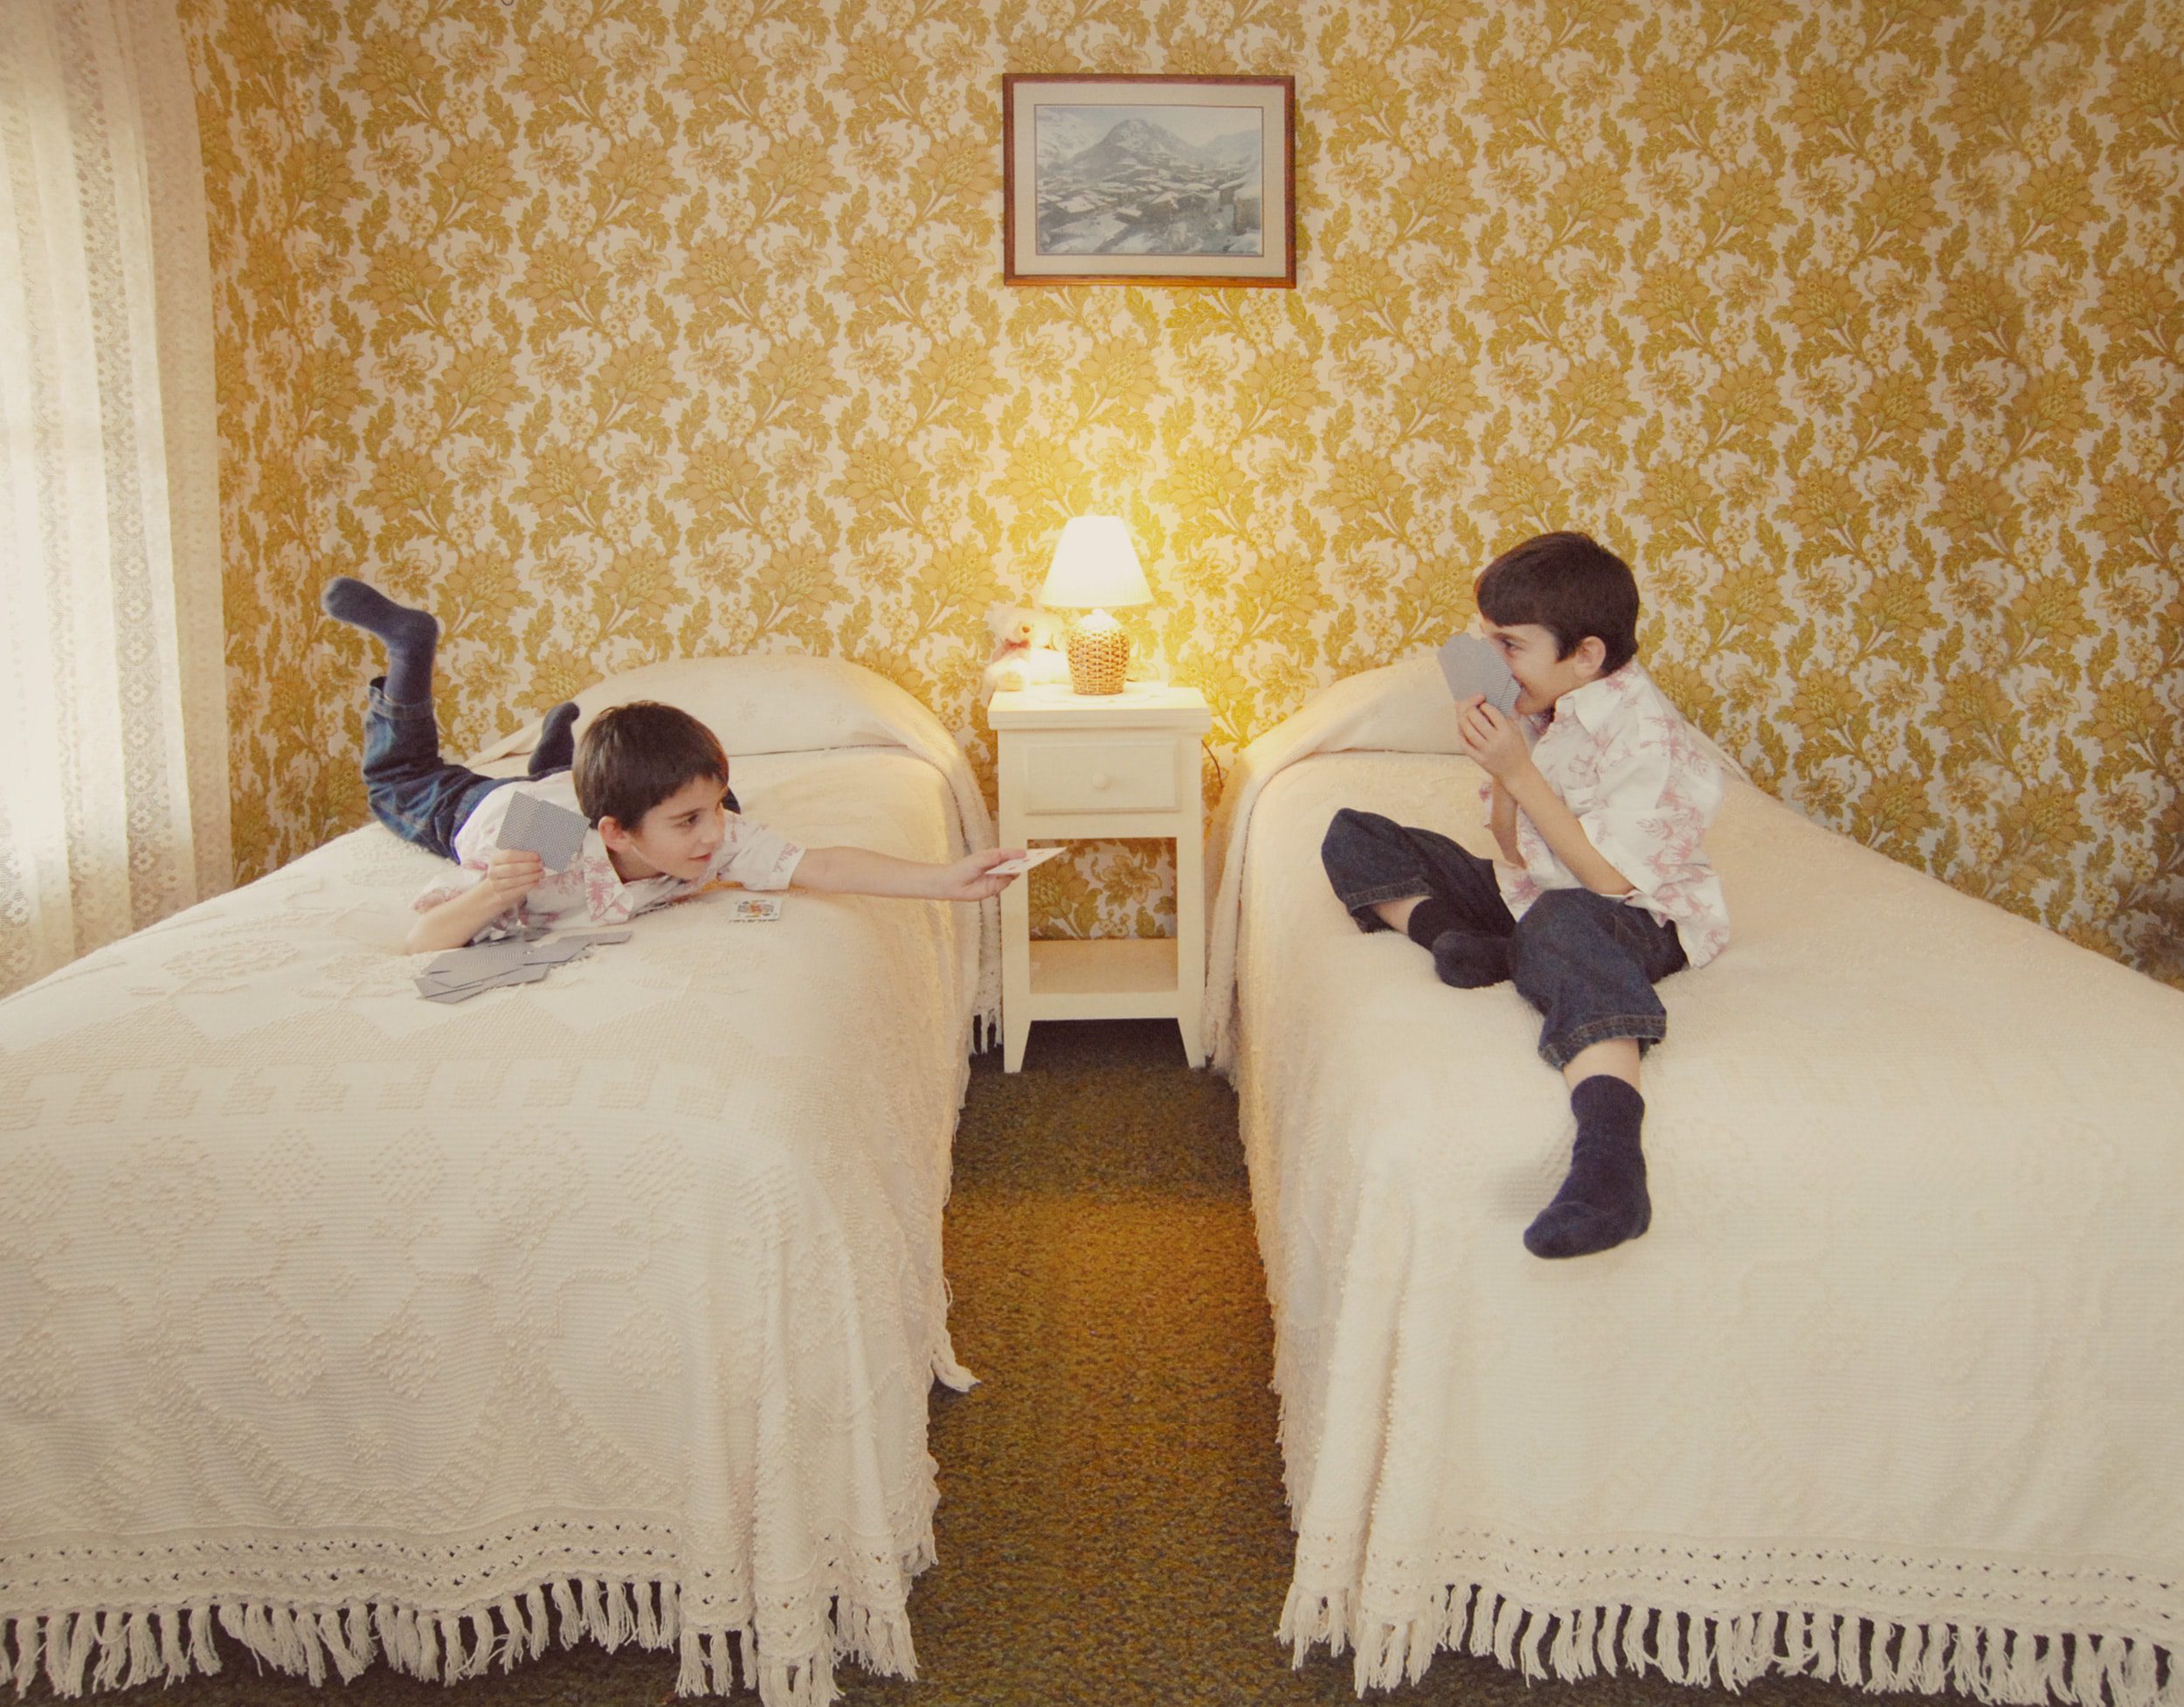
The idea for this composite photo came about years ago, when I did the same project with my baby brother Josh! When he was 4 (this was 15 years ago, crazy), I went through all the steps above in my grandparents’ house. They had a spare bedroom with perfectly worn-in quilts on a pair of twin beds and the most amazing wallpaper (also yellow – I’m sensing that my subconscious had something to do with my Two Flat room selection!). I wanted to remember that room – and my much younger baby brother – just like that. What you can’t see is that Scott was sitting on the other bed, interacting with Josh the entire time.
I sincerely hope this was helpful for you! If you have tips and tricks to add, please do so in the comments below. And if you enjoyed this and there are other tutorials you’d be interested in, drop that in the comments, too! It’s incredibly helpful for me to know if you’d like to see more on this topic. I absolutely love geeking out about photography, even if I am a bit shy to initiate the conversation. xx


This was so great (and helpful)! I would love to see more photography posts – editing, actions, general tips, etc. Thank you for sharing your talent with the world :)
Appreciate this so much, Nikki. Thank you!
That photo with the many Lucy’s manages to be very cute, funny, and a little bit creepy (in a Twilight Zone sort of way, not in reality) all at the same time!
Seeing your grandparent’s spare bedroom in the photo of your brother makes it clear where you got the inspiration (conscious or unconscious?) for the loft bedroom in your vacation home.
Haha, I feel you! Creepy in a good way. :)
This is such a cool idea! I will read anything you post about photography. I’m fascinated by all of it and love to try new things with my camera :)
Thanks for the feedback, Amanda! Any tutorials in particular?
This makes me think of photographer Jamie Beck–I follow her on Instagram and she gives a lot of peeks into how she does similar processes. I highly recommend following her if you’re interested in stuff like this! Plus, she’s living abroad in the south of France right now and her life looks so dreamy! https://www.instagram.com/annstreetstudio/
Wow, such a stunning feed!
Reasons I want to have kids:
#2 all the reasons people have children
#1 so I can take a photo just like this of my small human
I’m absolutely gushing over this photo and you did such a killer job. #momgoals
*hot tip: Try command+j instead of command+c and command+shift+v. it does it all in one fell swoop for ya.
WHAT. Amazing. Thanks for the tip!
Wow so cool! I’m making a mental note to try this with my daughter when I have a camera again. Can I ask, do you think it would be better to buy a secondhand DSLR that’s high-end or would it be better to get a new but more affordably priced camera? I’ve been borrowing a camera for the past year and just had to give it back.
Buy a nicer secondhand camera, but spend your money on the LENS. The lens is so, so important, but you can often find a good price on a refurbished or gently used lens on eBay or Amazon!
Thanks Kim! Can’t wait to have a camera again and try making composite photo.
Totally going to try this! Now I just have to find a good location a wait until baby girl can at least sit up, haha. Thank you! More tutorials and ideas please. ????
Aww, might be fun to do a composite photo of your baby just rolling around on the floor! It would celebrate that phase in her life.
This is such a cute idea! I love how you captured her toddler energy. I’m sure you’ll treasure this for years to come. My 4 year old son Don is my favorite subject to shoot, but sometimes I have to talk him into it! I usually like to set up the shot and give him a little toy to play with, or something that’ll capture his attention while I take my pictures. If worse comes to worst, I’ll bribe him with a cookie and he’ll sit still for me. I’ll definitely put a composite photo of him on my to-do list while he’s still little.
Haha, a composite photo with a bunch of little Dons and cookies sounds awfully sweet. :)
This was really good! I have an idea to try this out with myself (self timer & my 11 year old Sunpak tripod!) – I’ll be somewhere cool with an interesting story to tell (soon – August). If you take your own photos for Instagram, I’d say you’re a hell of a photographer! I like this *topic* – hoping to see more!
Ooh, this would make for such an interesting self portrait. Love that. If you end up creating something and sharing, please tag @yellowbrickhome!
Love the pictures of Lucy! I have to try this when my daughter gets more mobile. Do you know if Photoshop CC has has to be purchased on a month-to-month basis or can I buy it one time.
I think it’s officially switched to month-to-month, which ensures you’ll get all the updates along the way. You may be able to buy an older version (pre-CC) one time through eBay, maybe?!
You just inspired what I think I’ll do for monthly photos for baby #2! Thanks for this!