

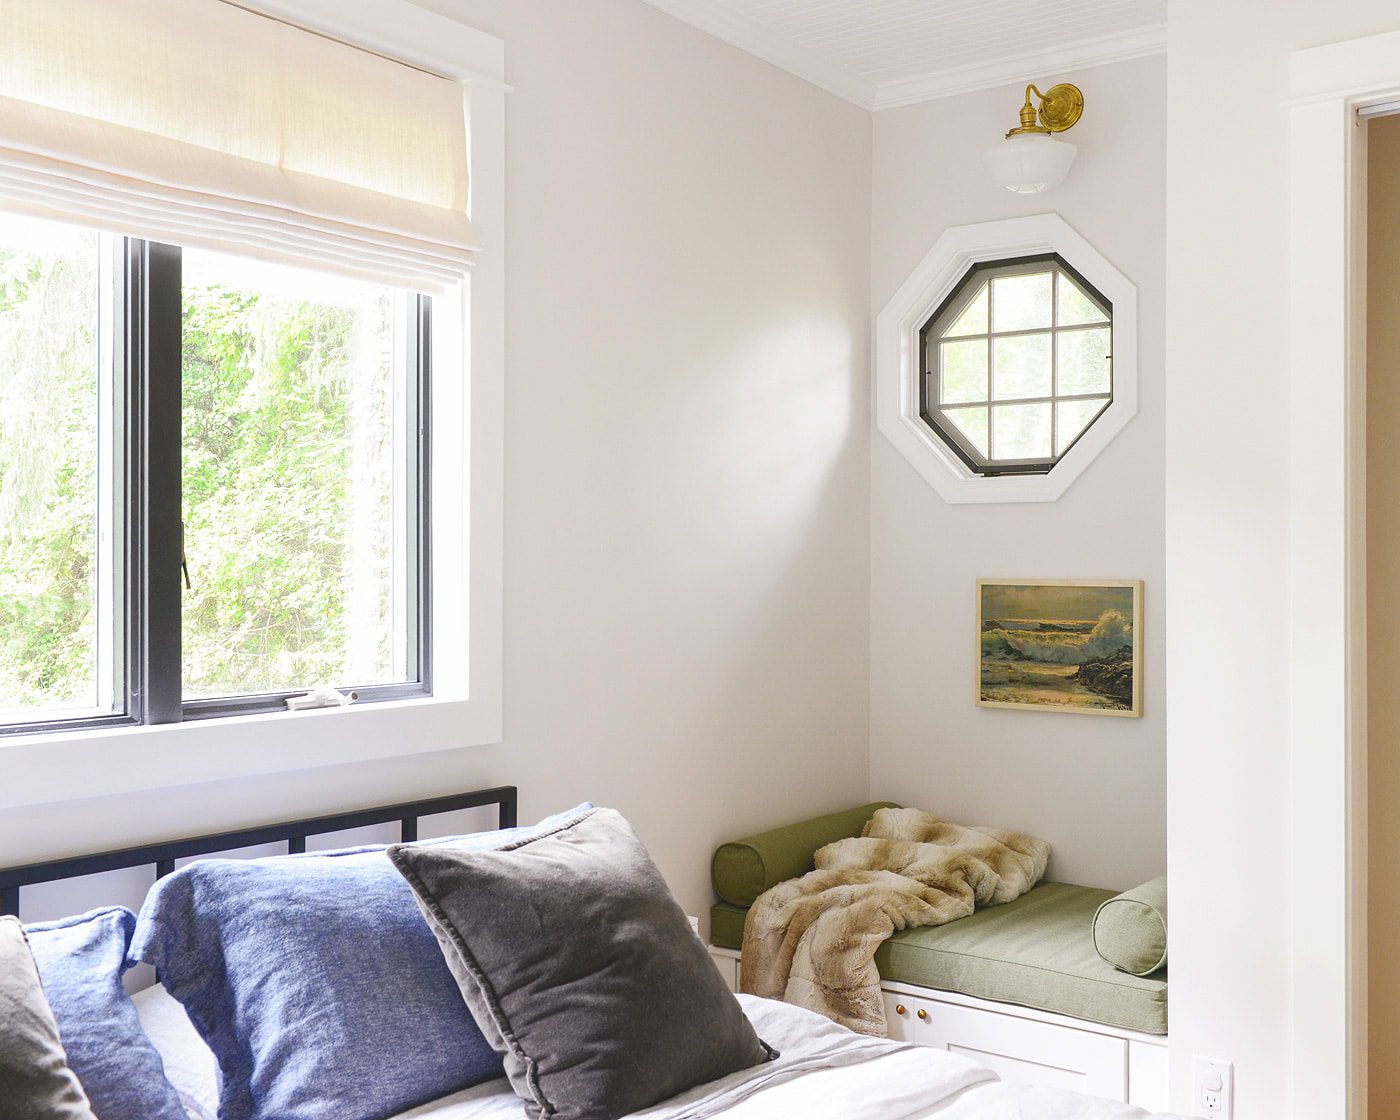
bed frame | chambray shams | velvet pillows | throw | bench cushion | vintage art (similar)
A few weekends back, we were thrilled to host our good friend Daniel for an overnighter at our Tree House. So thrilled, in fact, that we made not just one, but two vlogs about it! In vlog #1, Daniel spotted this old light fixture, and it was determined that someone needed to purchase it. He eventually decide against it, and although we weren’t 100% sure where we could use it, we ultimately threw caution to the wind and brought it home anyway for the cool price of ten dollars. (I’m reminded of the time almost ten years ago when Kim spotted a vintage light at the flea market. We – I? – gave it a hard pass, and to this day, she still talks about it. Ten years ago, friends. For ten dollars, this one was worth the risk!)
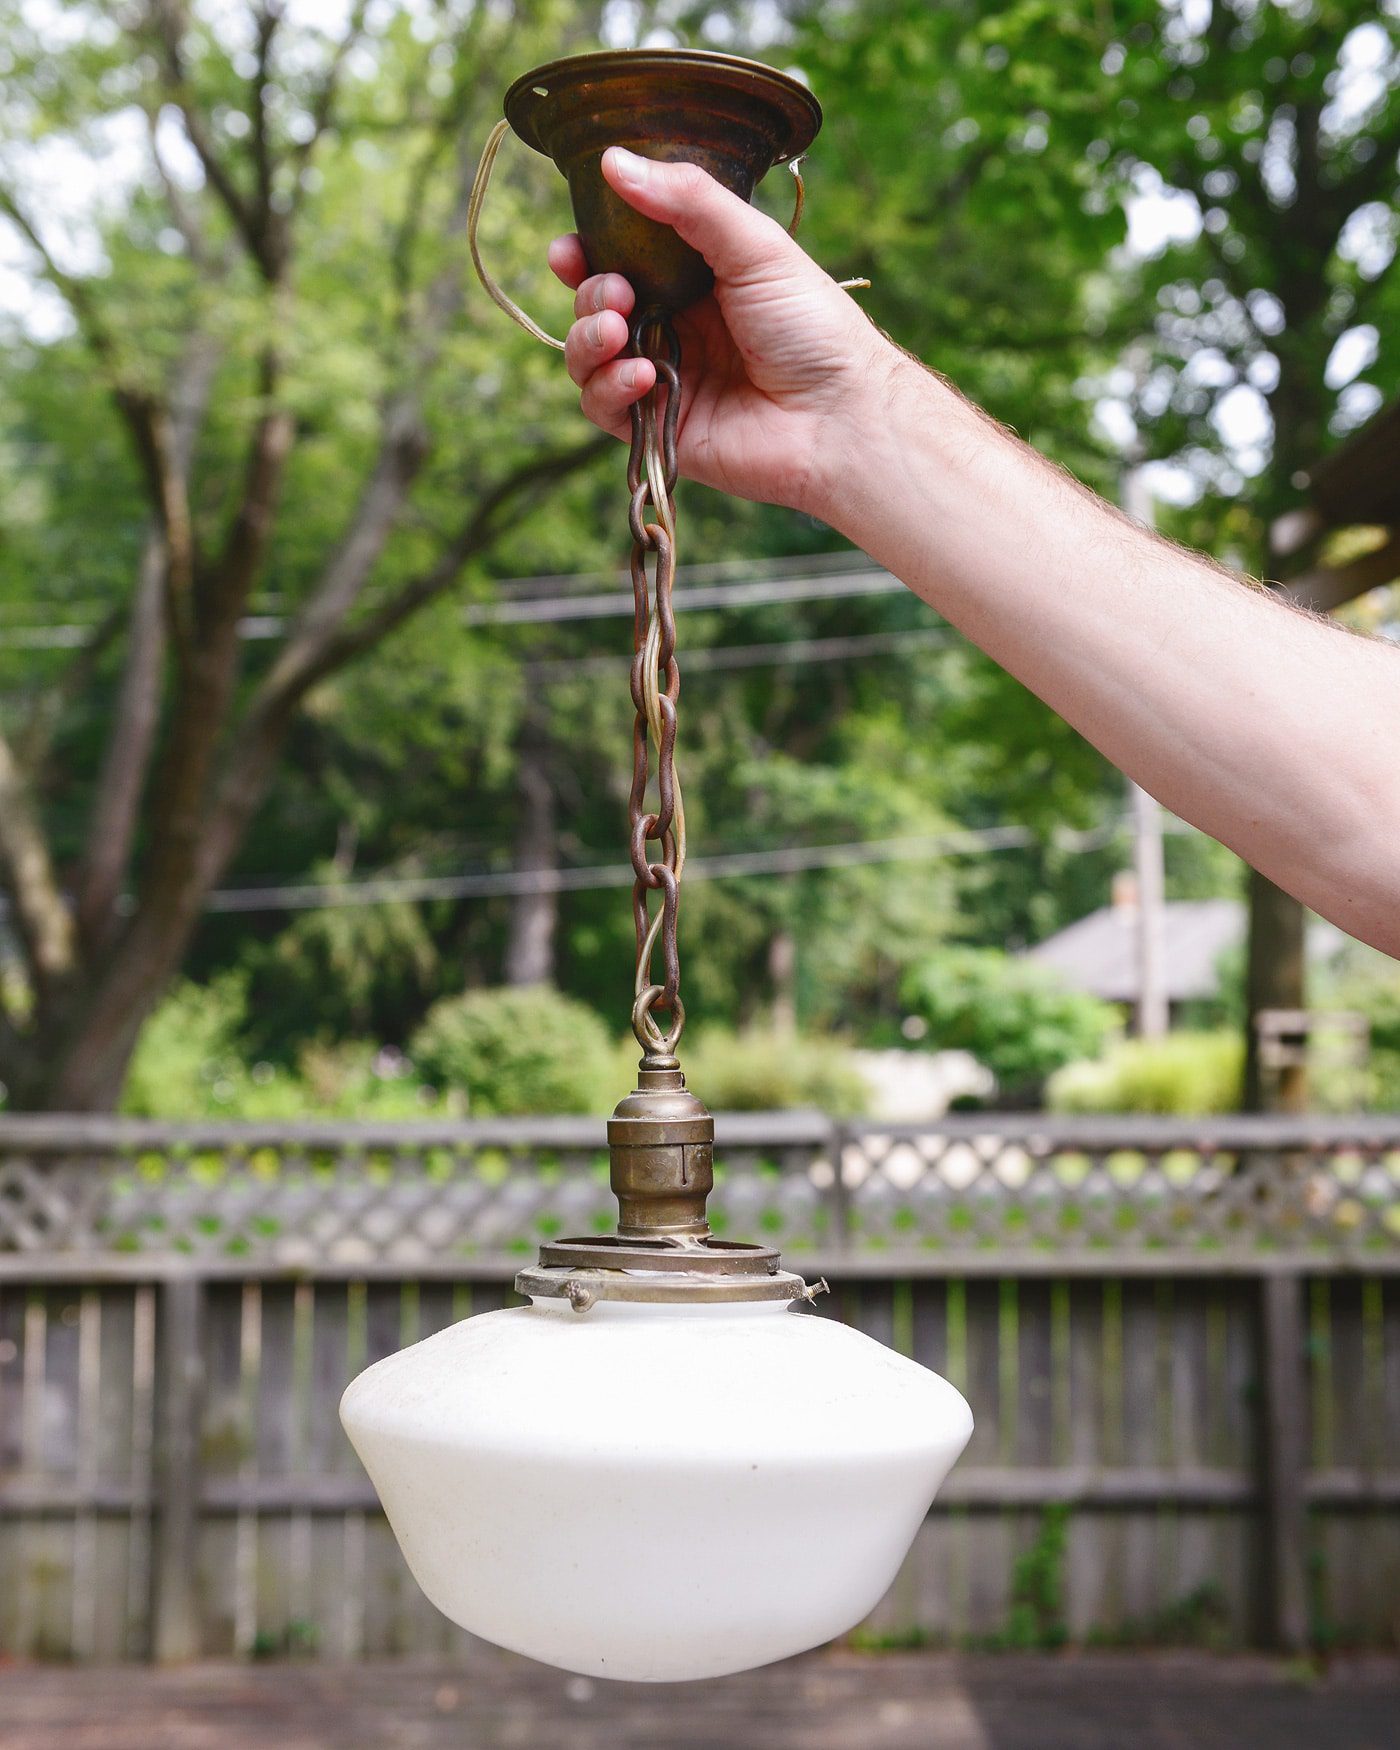
Once we brought it back to Tree House, we realized that with a few simple modifications, it would be the perfect fit for the funny little space in our master bedroom that has very recently become the Dog Nook (more to come on that soon!). There’s just one small challenge with the space in which the light is mounted – the junction box is on the wall, almost touching the ceiling. It’s an odd space where everything is left of center, so to speak.
Prior to investing any effort into the fixture, we did a quick test with a magnet to ensure that the fixture was solid brass. This test involves – you guessed it! – holding a magnet against the brass. If it sticks strongly, your fixture is likely brass plated steel or similar. If it doesn’t stick strongly or at all, you likely have solid brass on your hands. In our case, we had slightly flimsy stamped brass, but brass nonetheless.
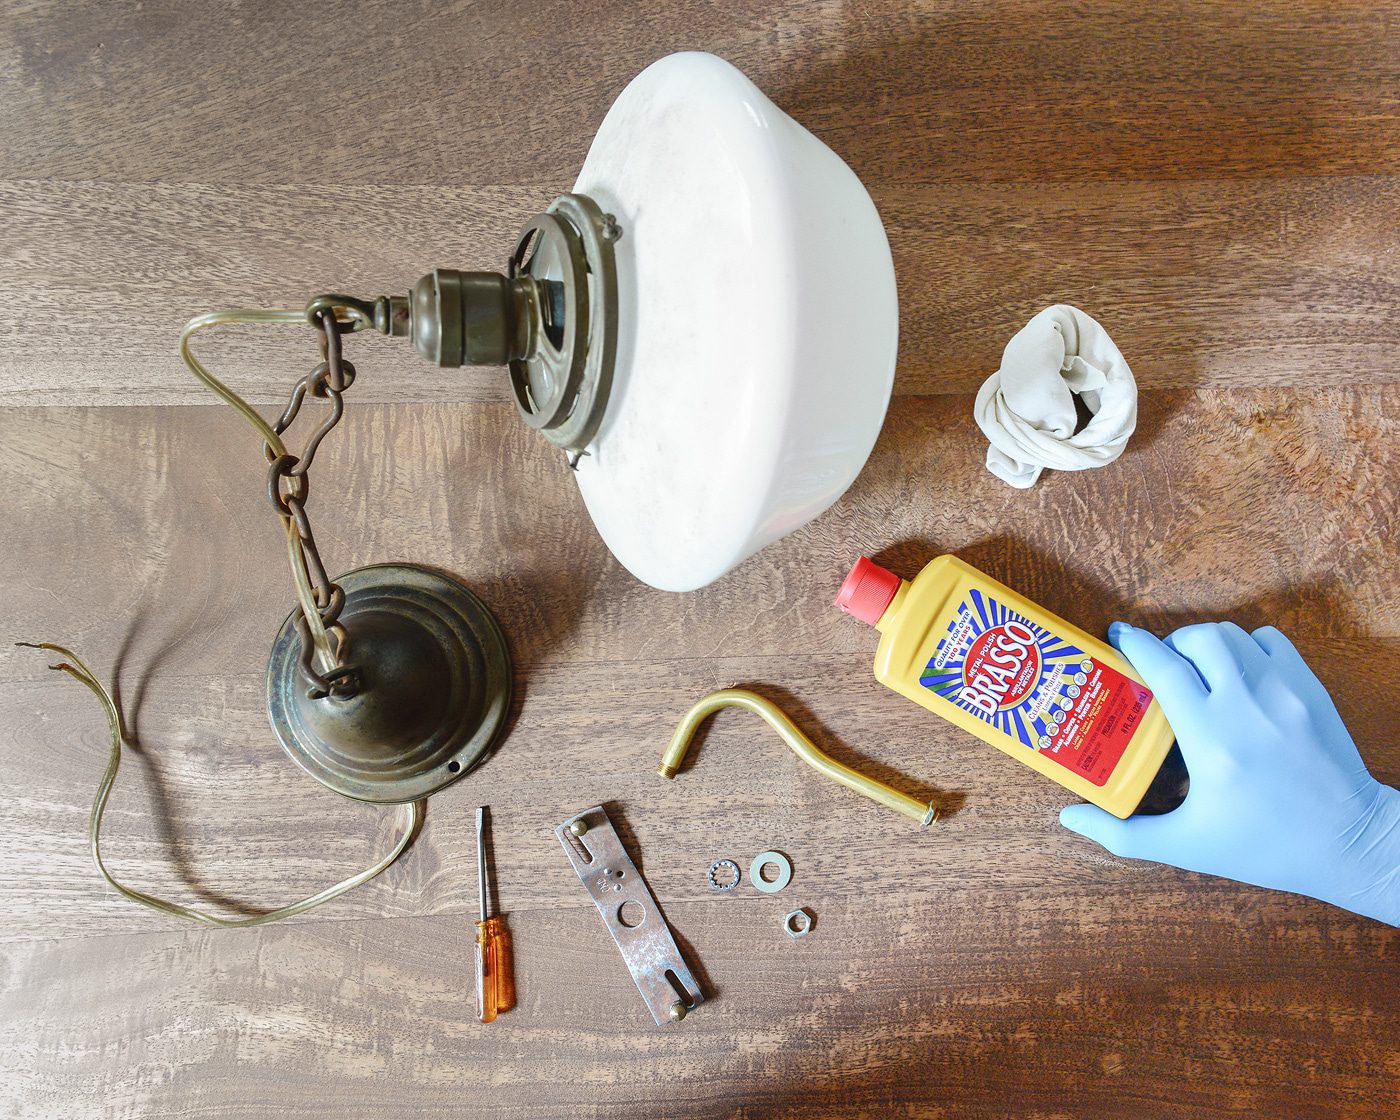
In order to modify the fixture to suit our placement, we replaced the chain with an arm and gave it a really good cleaning! Here’s how.
Tools + Supplies Used
Vintage brass light fixture
Unfinished brass arm
Crossbar, nuts, washers
Acorn cap nuts & Studs
Small screwdriver
Brasso
Clean rag
Gloves
Drop cloth or cardboard to protect your work surface
What We Did:
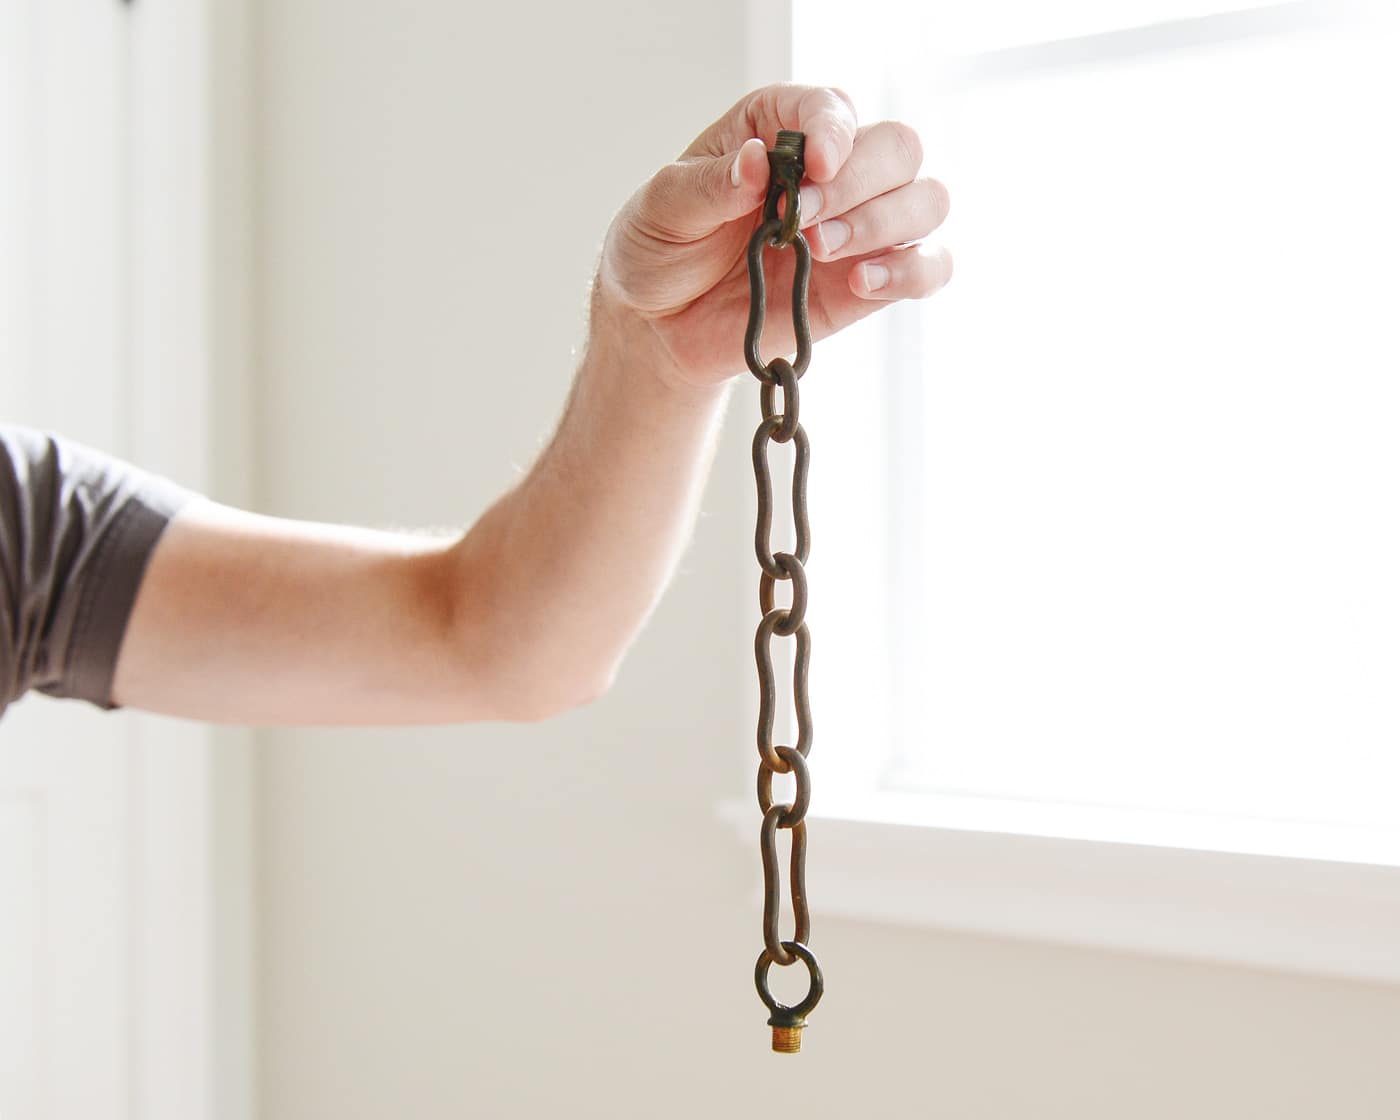
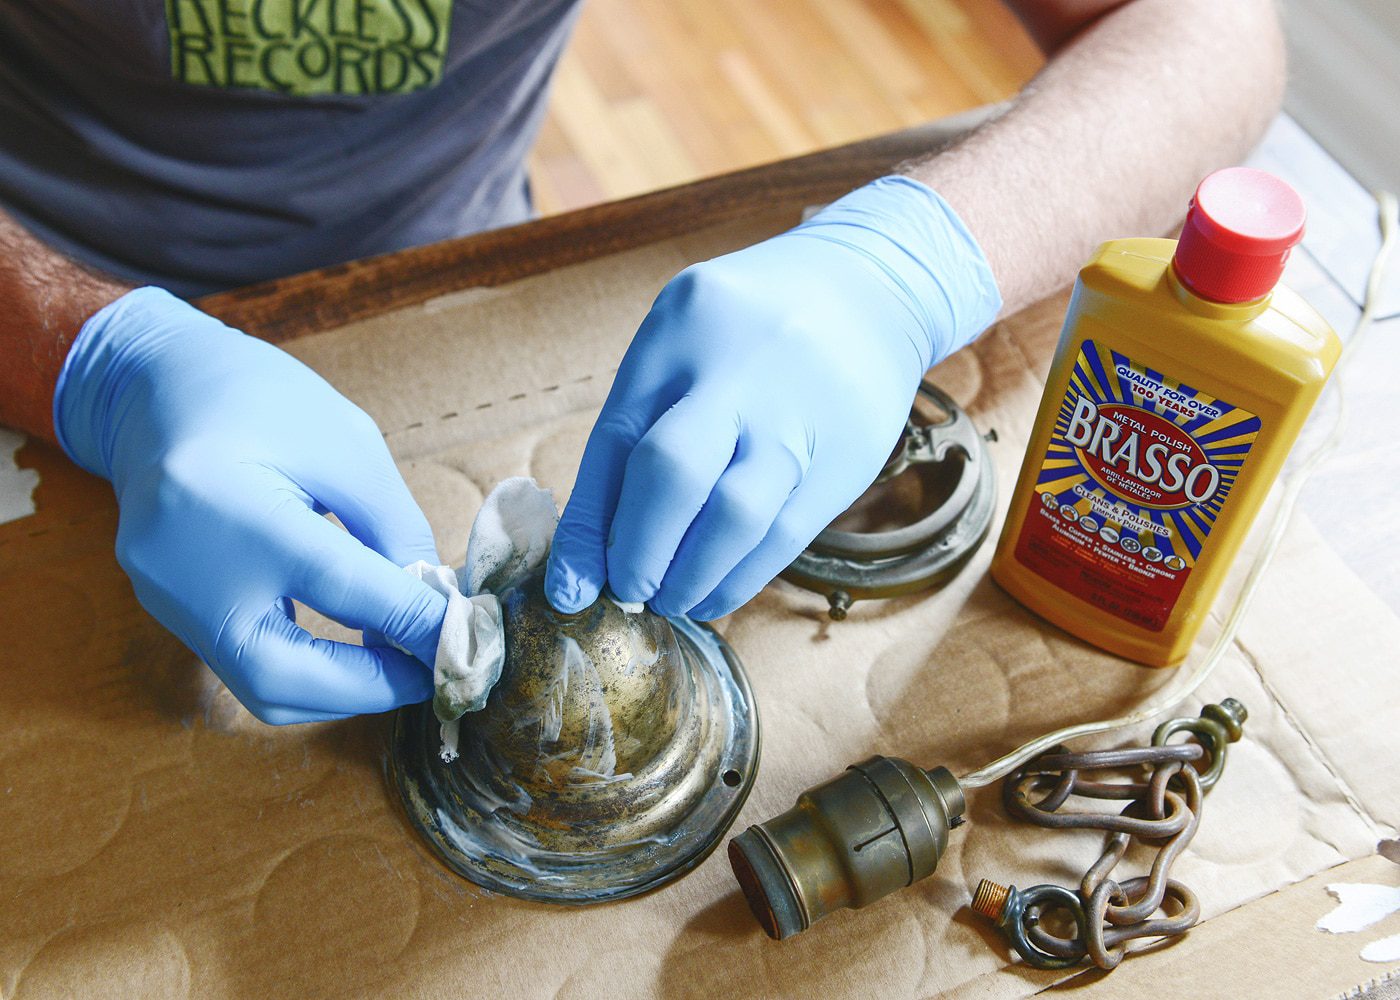
We began by unscrewing the chain on both ends since we wouldn’t be needing it for our application.
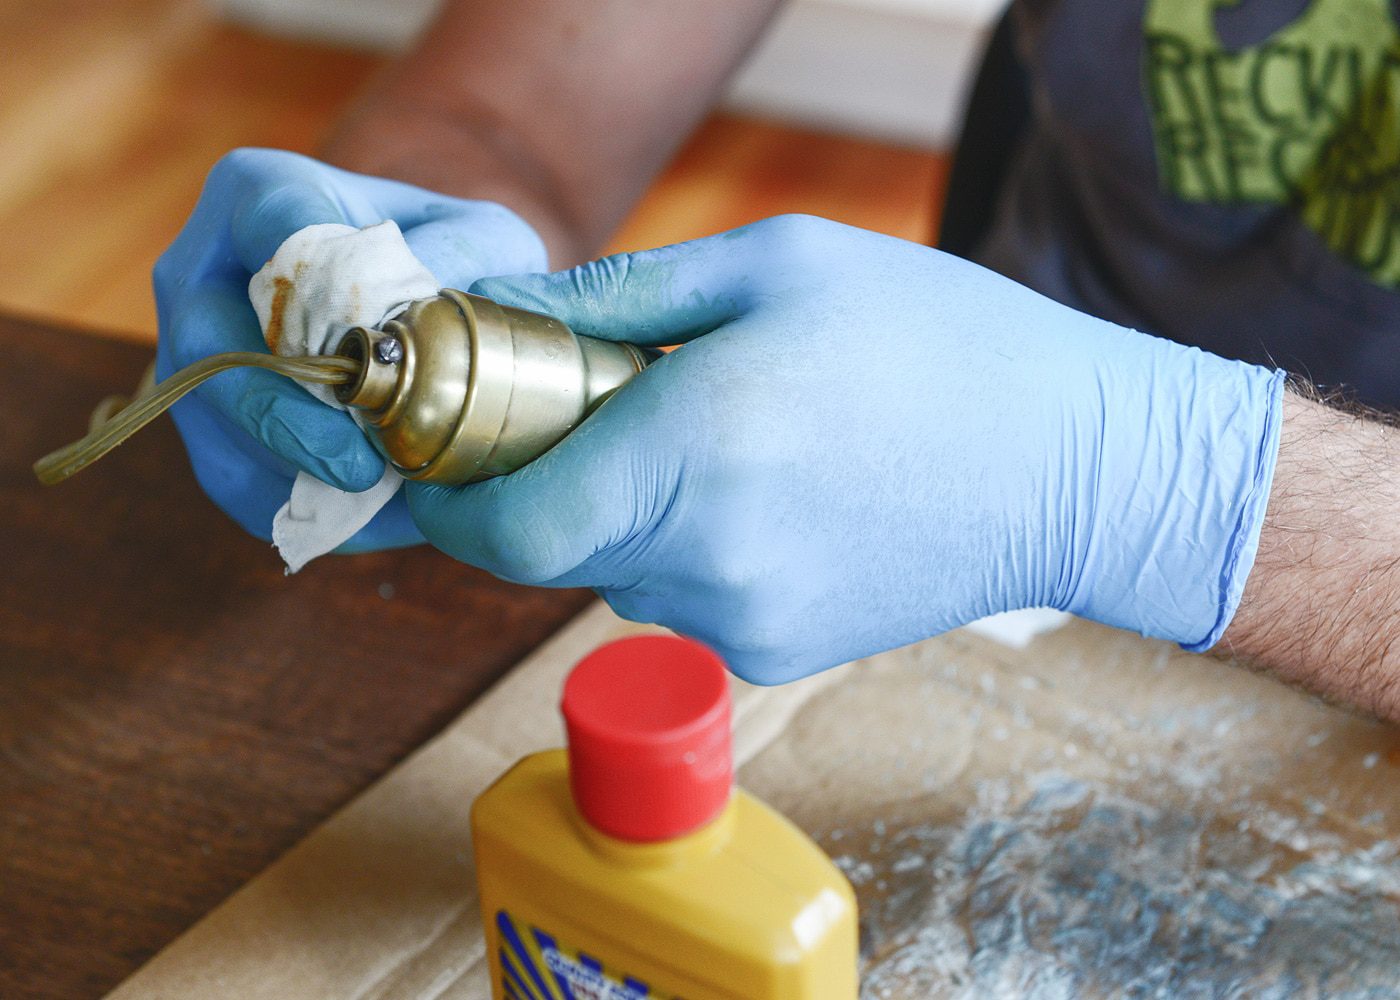
The remaining parts got a healthy dose of Brasso. There are certainly more natural ways to polish away decades of grime and tarnish (such as lemons and ketchup, among other home remedies), but we find Brasso to be fast and cost-effective. The downside is that it has a pretty powerful odor, so remember to wear gloves and crack a window. Tip: For stubborn tarnish build up, we find that allowing the Brasso to sit on the surface for a few minutes will save some elbow grease.
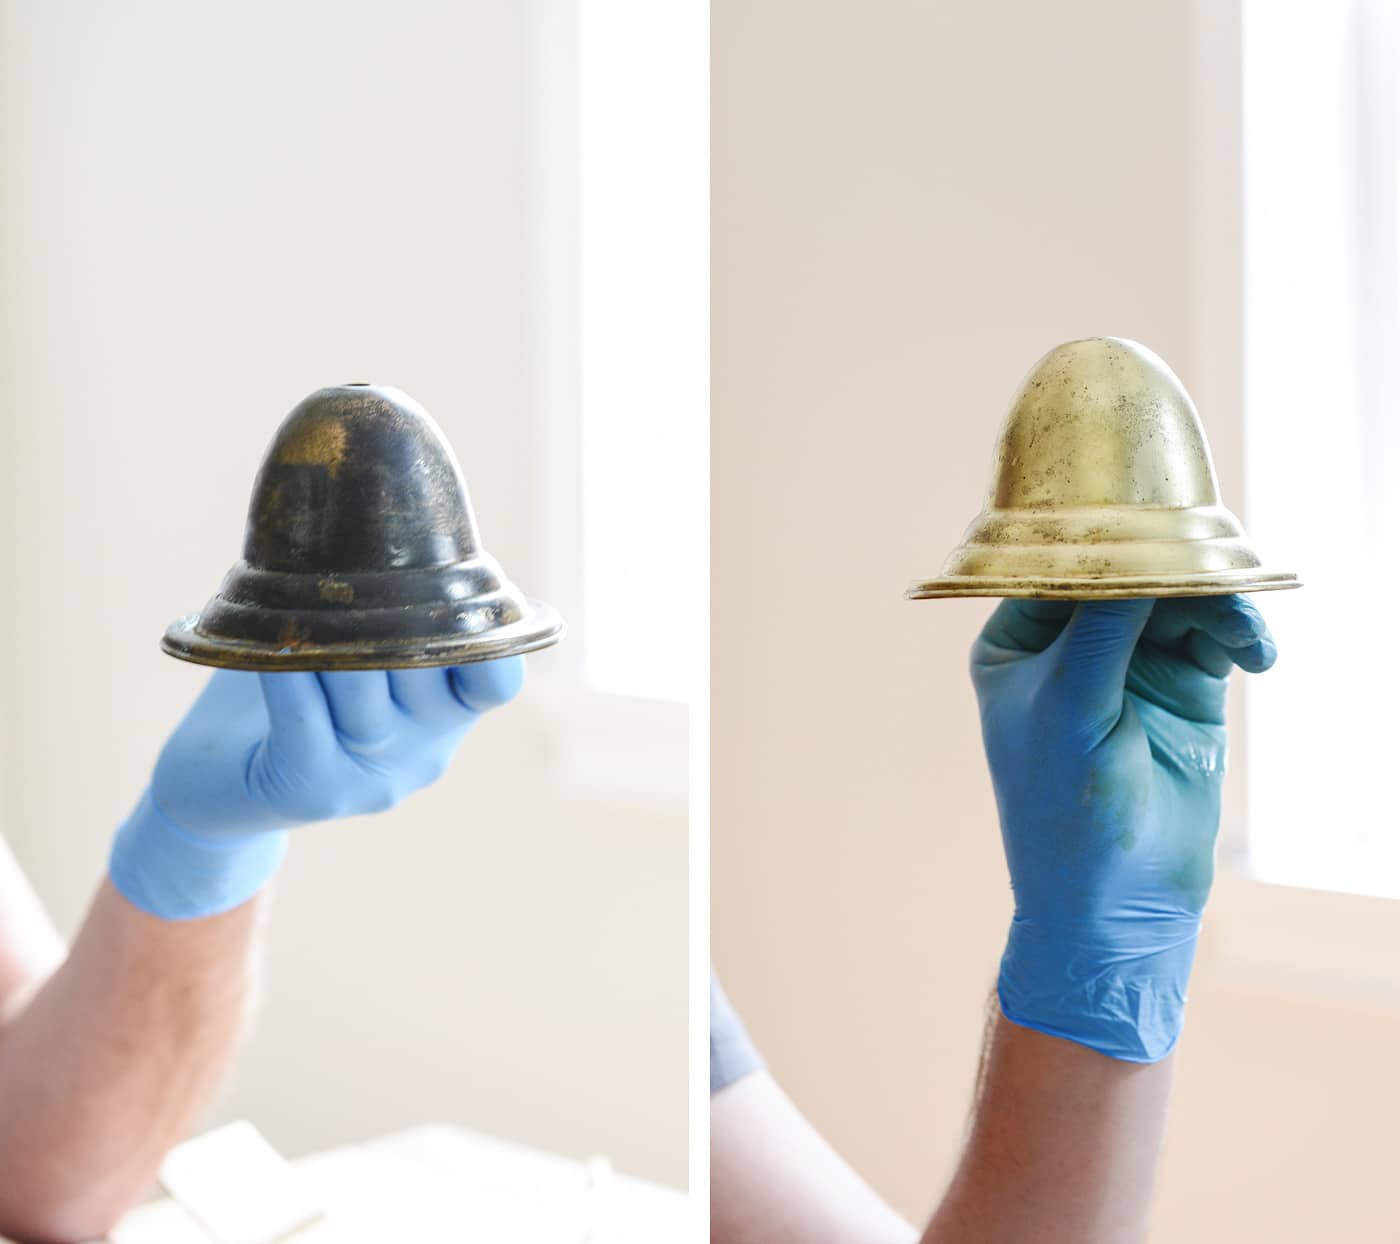
It’s certainly not perfect, but what a difference! We dig the charming semi-shine.
Before | After
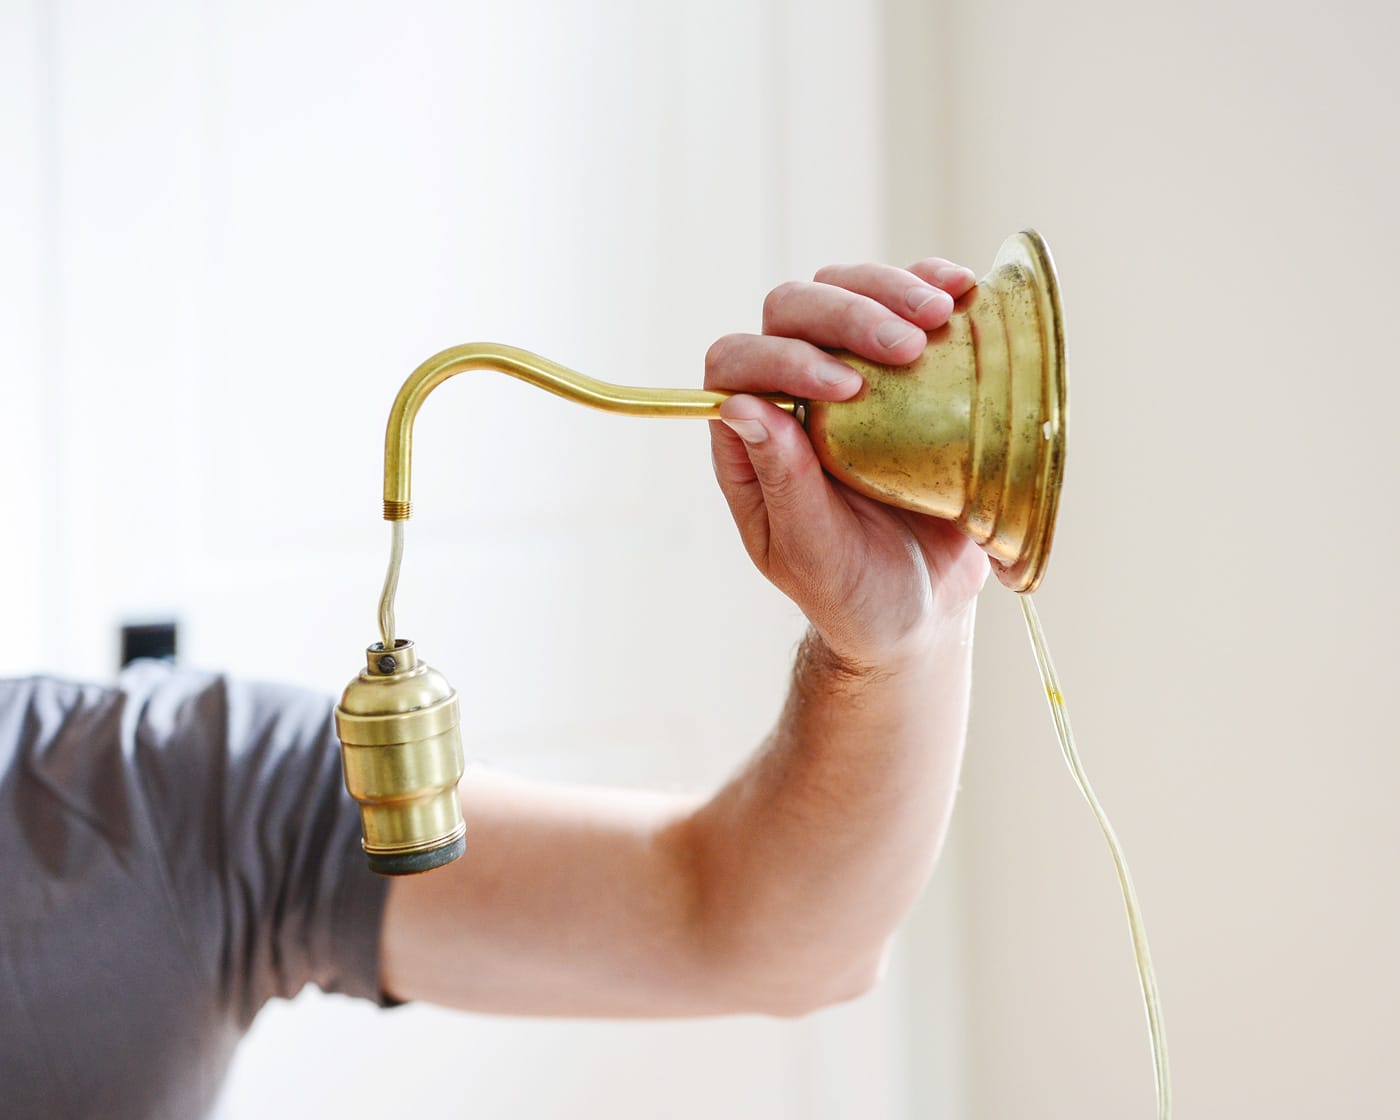
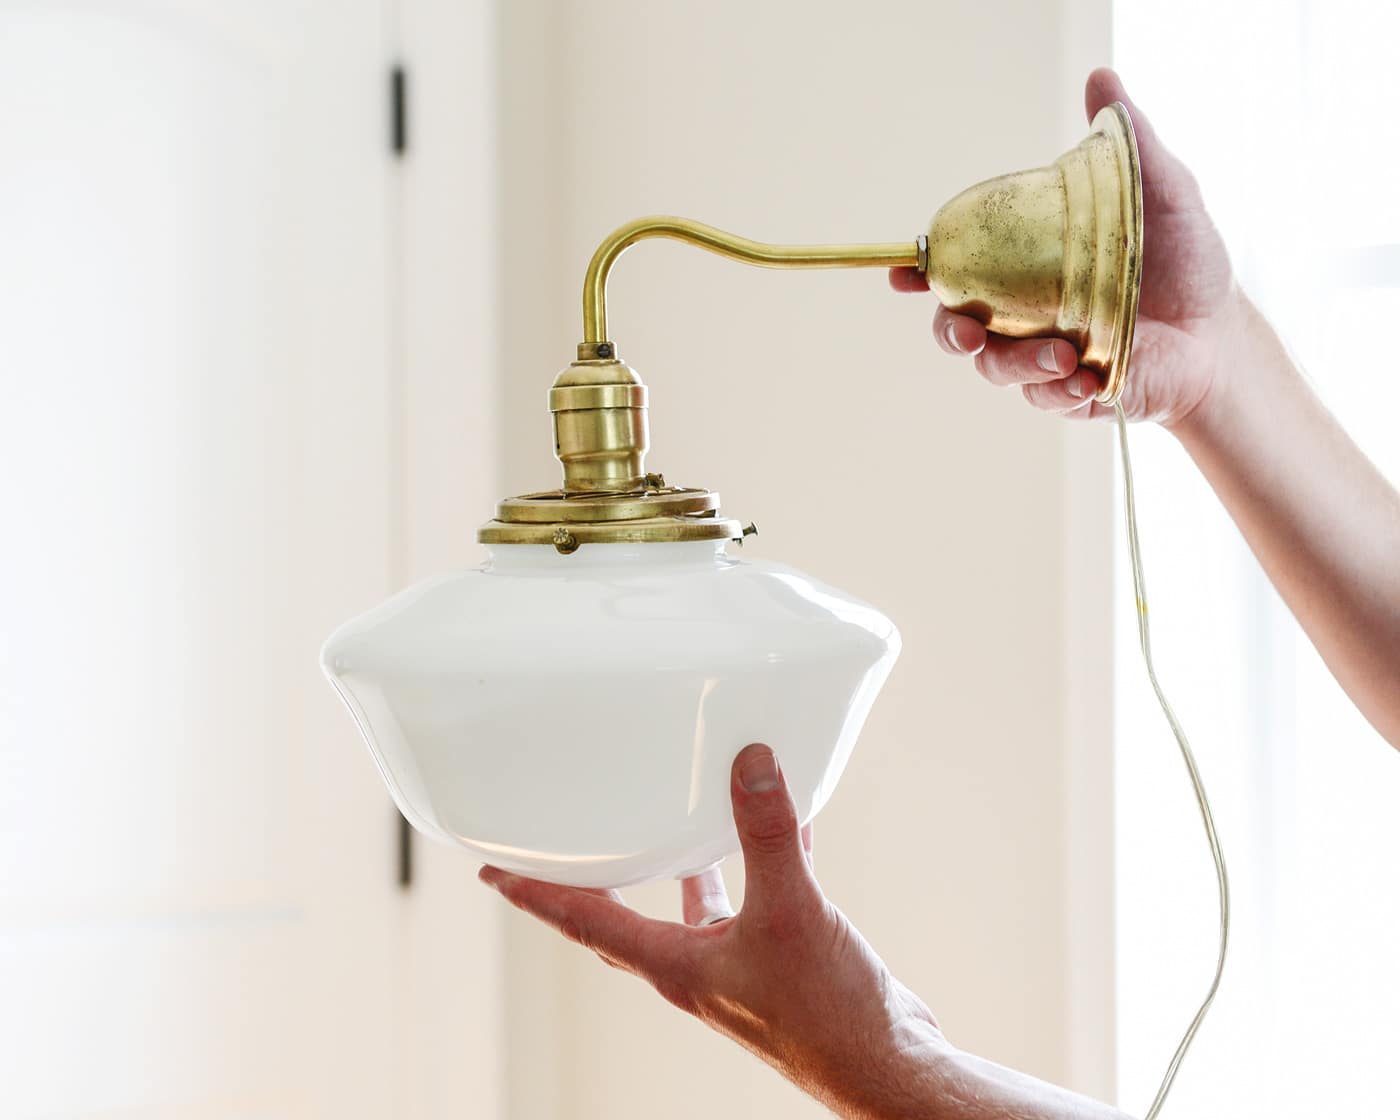
Next, I used a couple of nuts to attach the arm to the canopy in place of the chain. We found the arm on this site, although we were torn between all the options. In the end, we liked the soft curve of the bent arm:
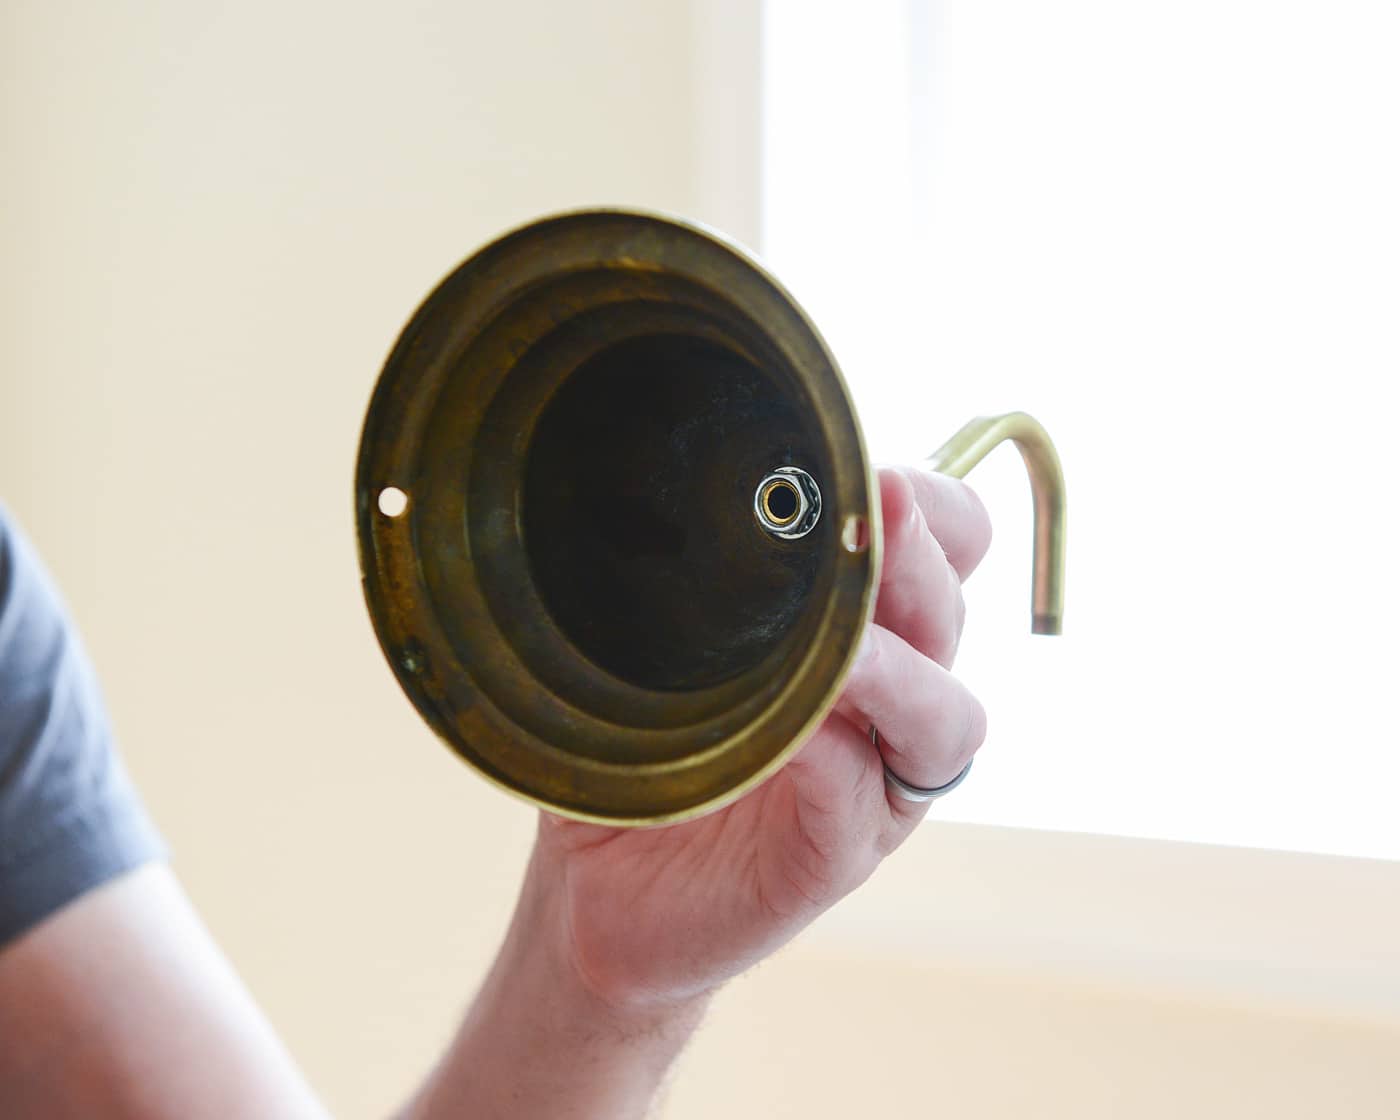
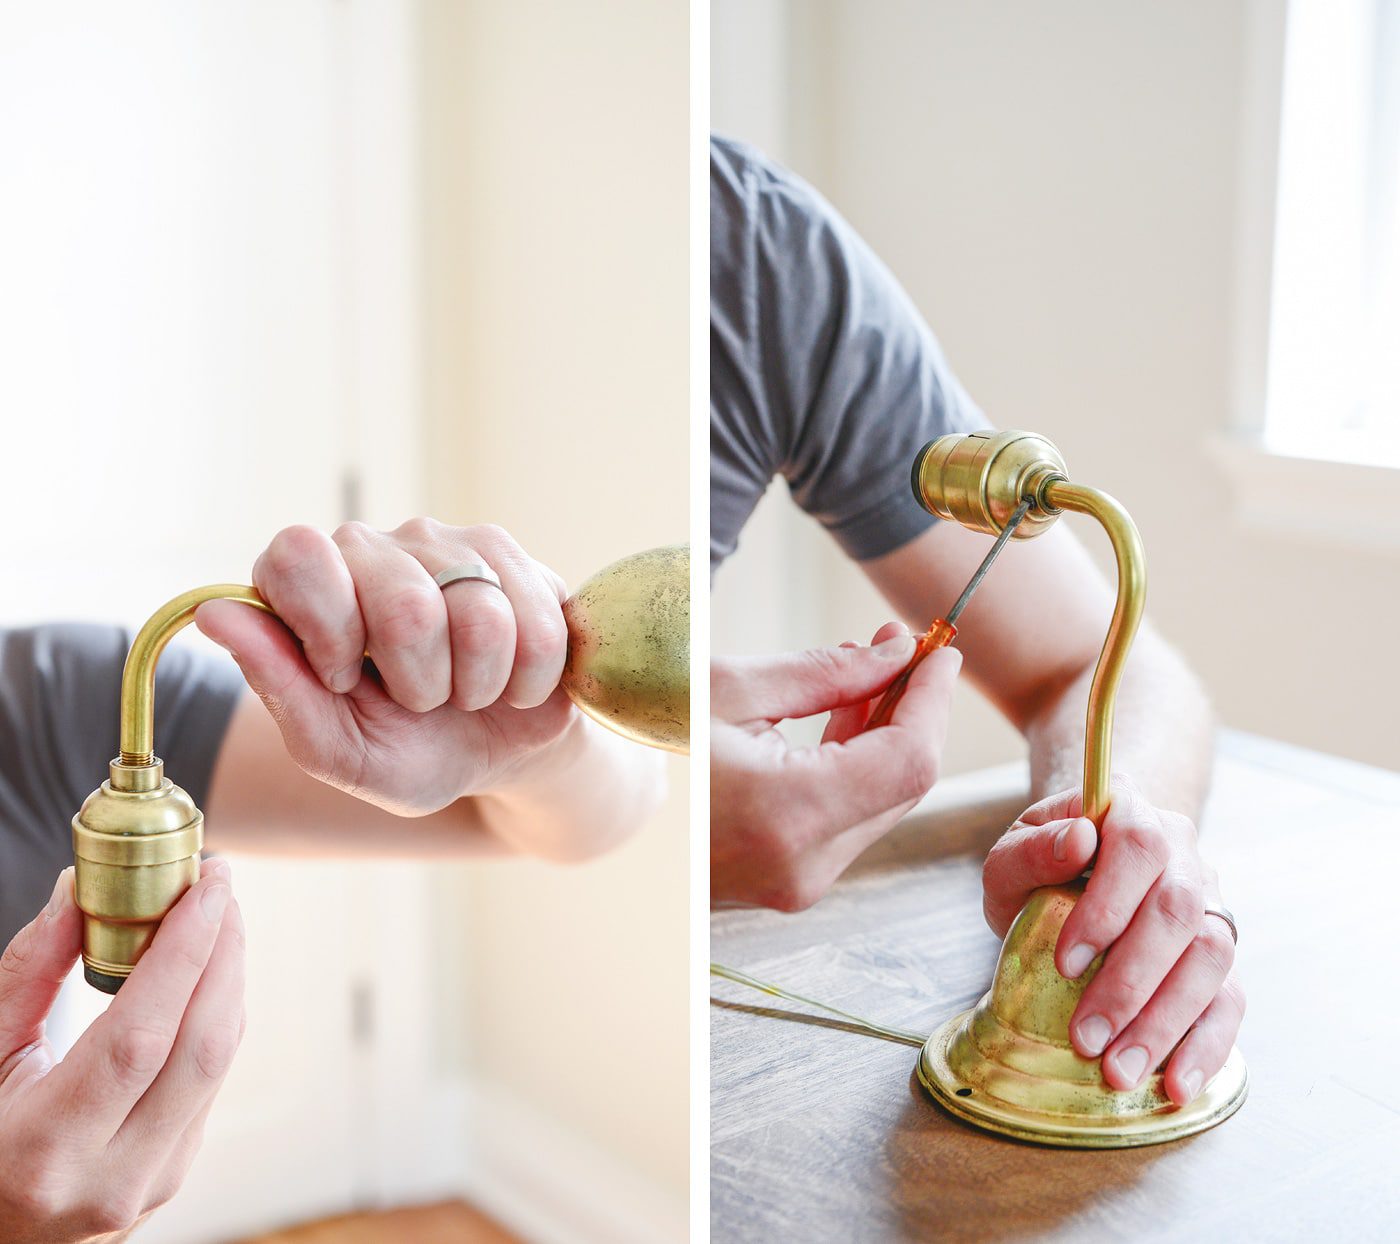
Using the original cord, I worked it through the canopy and hollow arm …
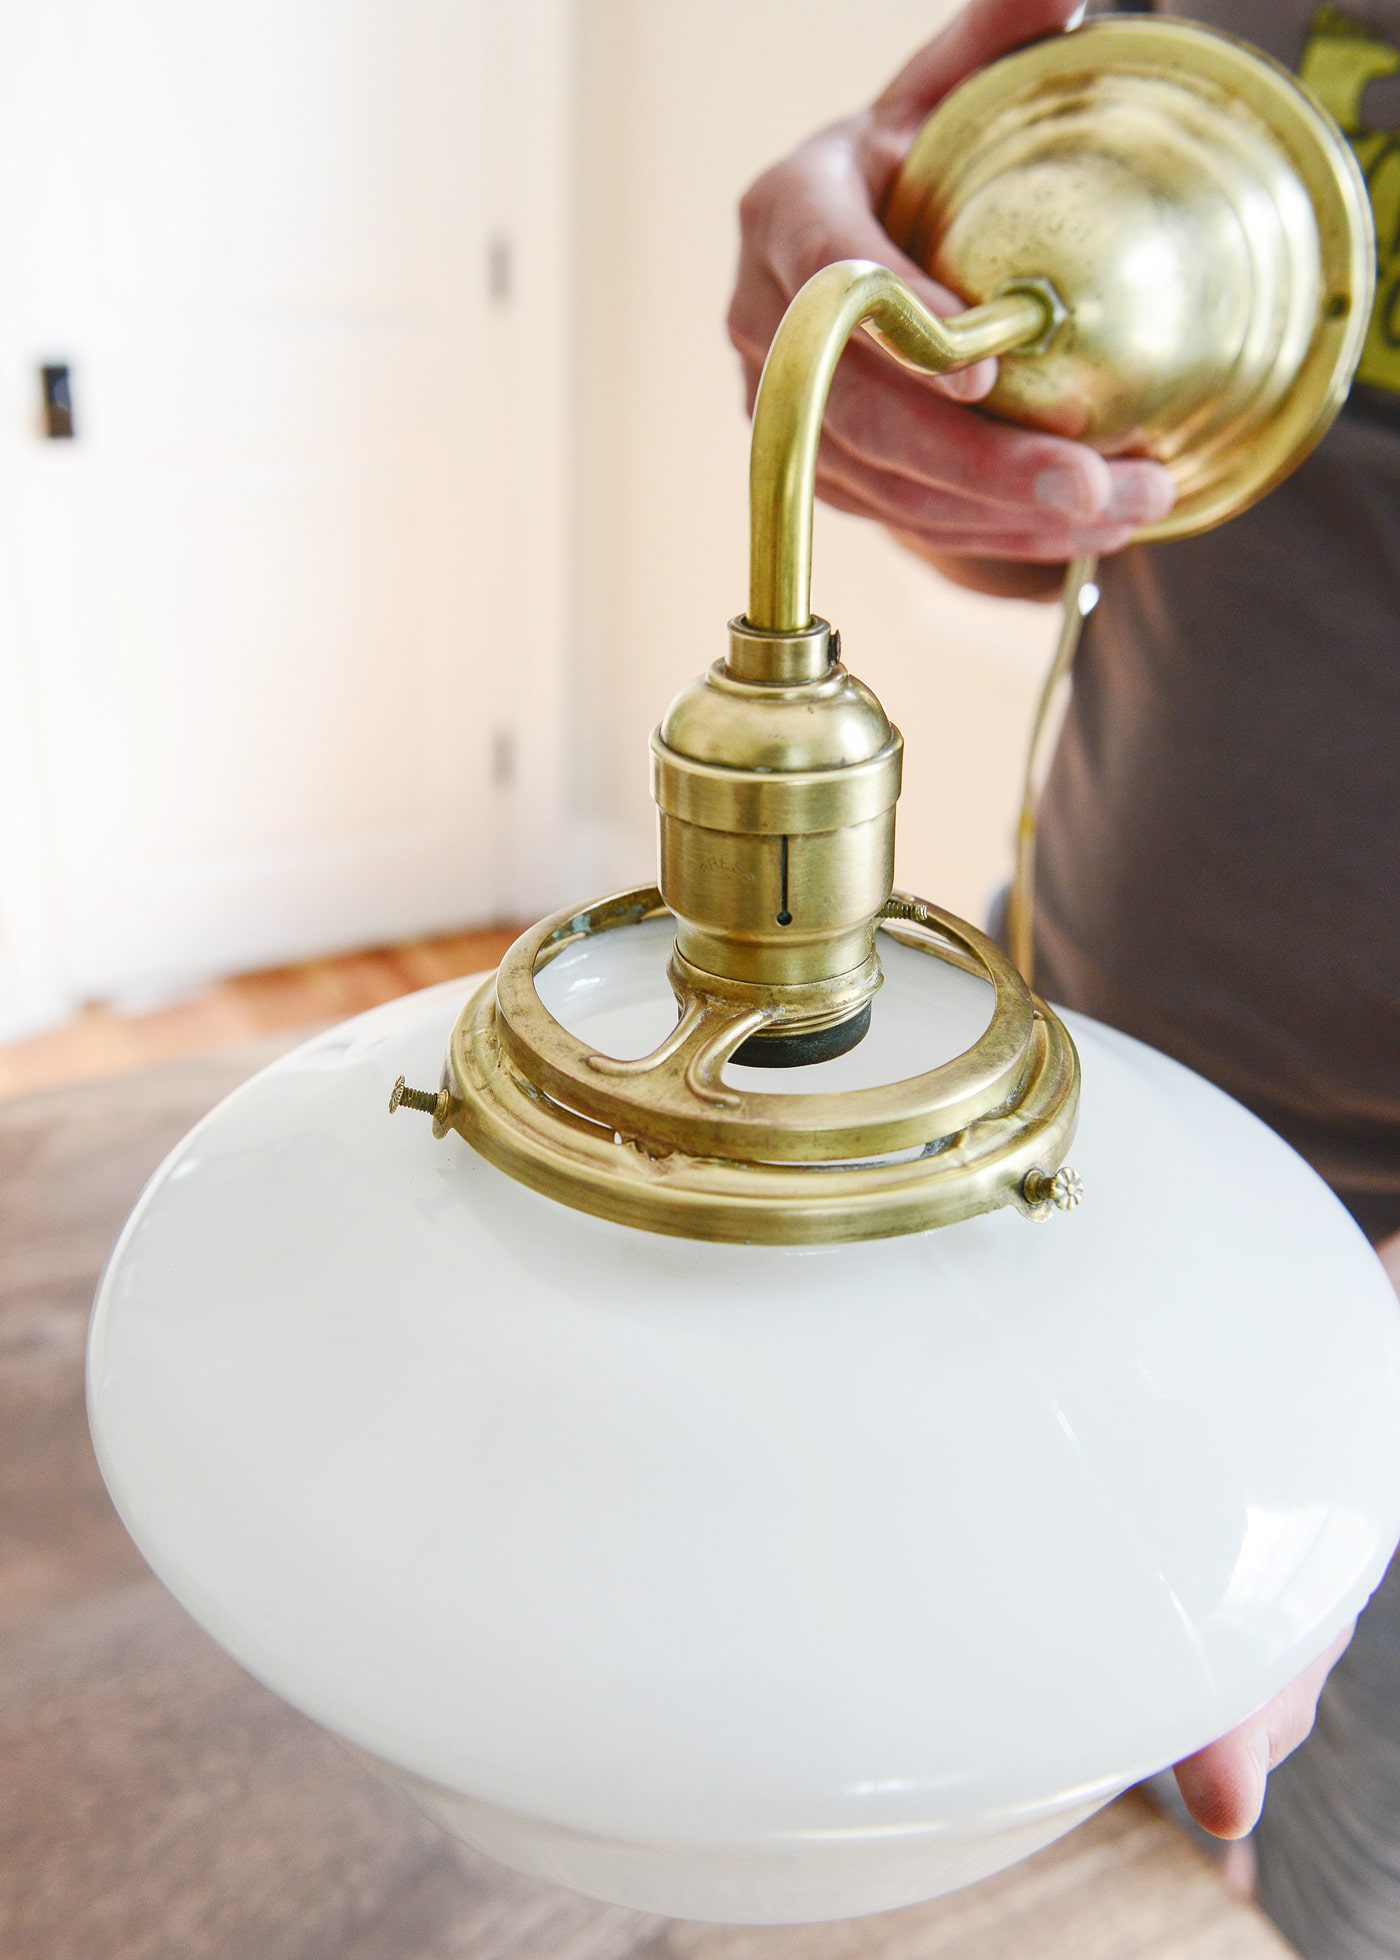
… and I threaded the socket onto the arm by tightening down the tiny set screw. At this point, I could reattach the fitter and shade, both with set screws. Done!
Brass Light | Before with Chain
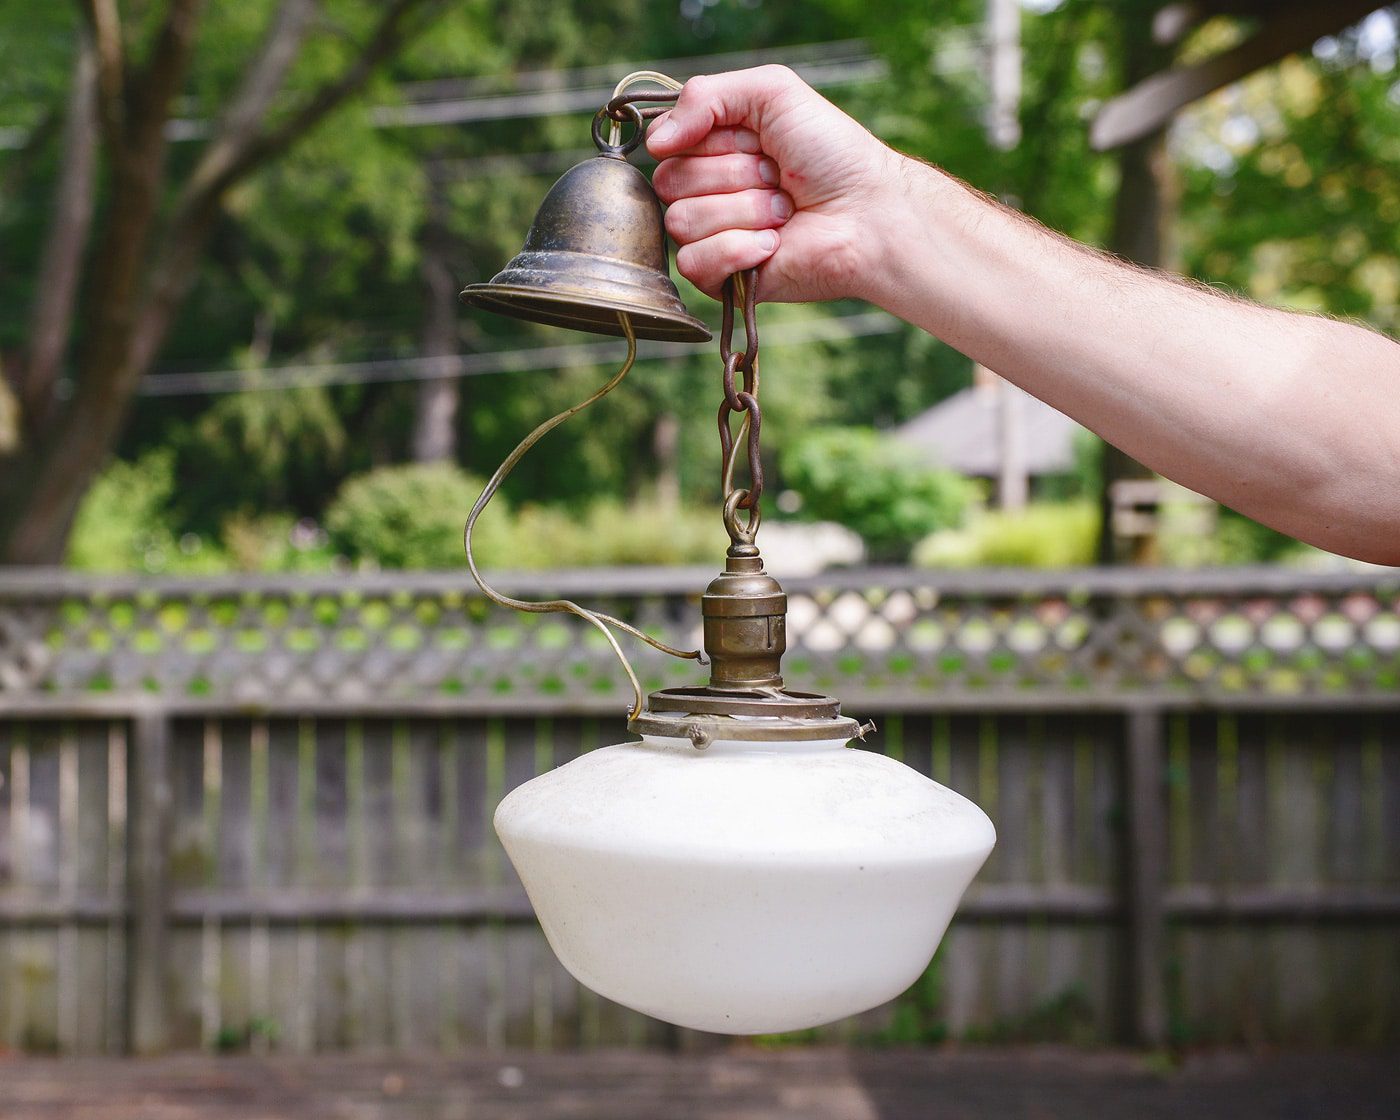
Brass Light | After Restoring + Reconfiguring
Lesson learned? Don’t judge a light by its cover. Often times, they can be re-worked to fit your needs and your space with a little bit of finesse.
We love the shape and the new configuration! Now that it’s mounted in place, it feels much sturdier and we like how it ties back to some of the other brass details in the room. CC was so excited about her new light, she immediately went to sleep. (Snooze. What else is new?)
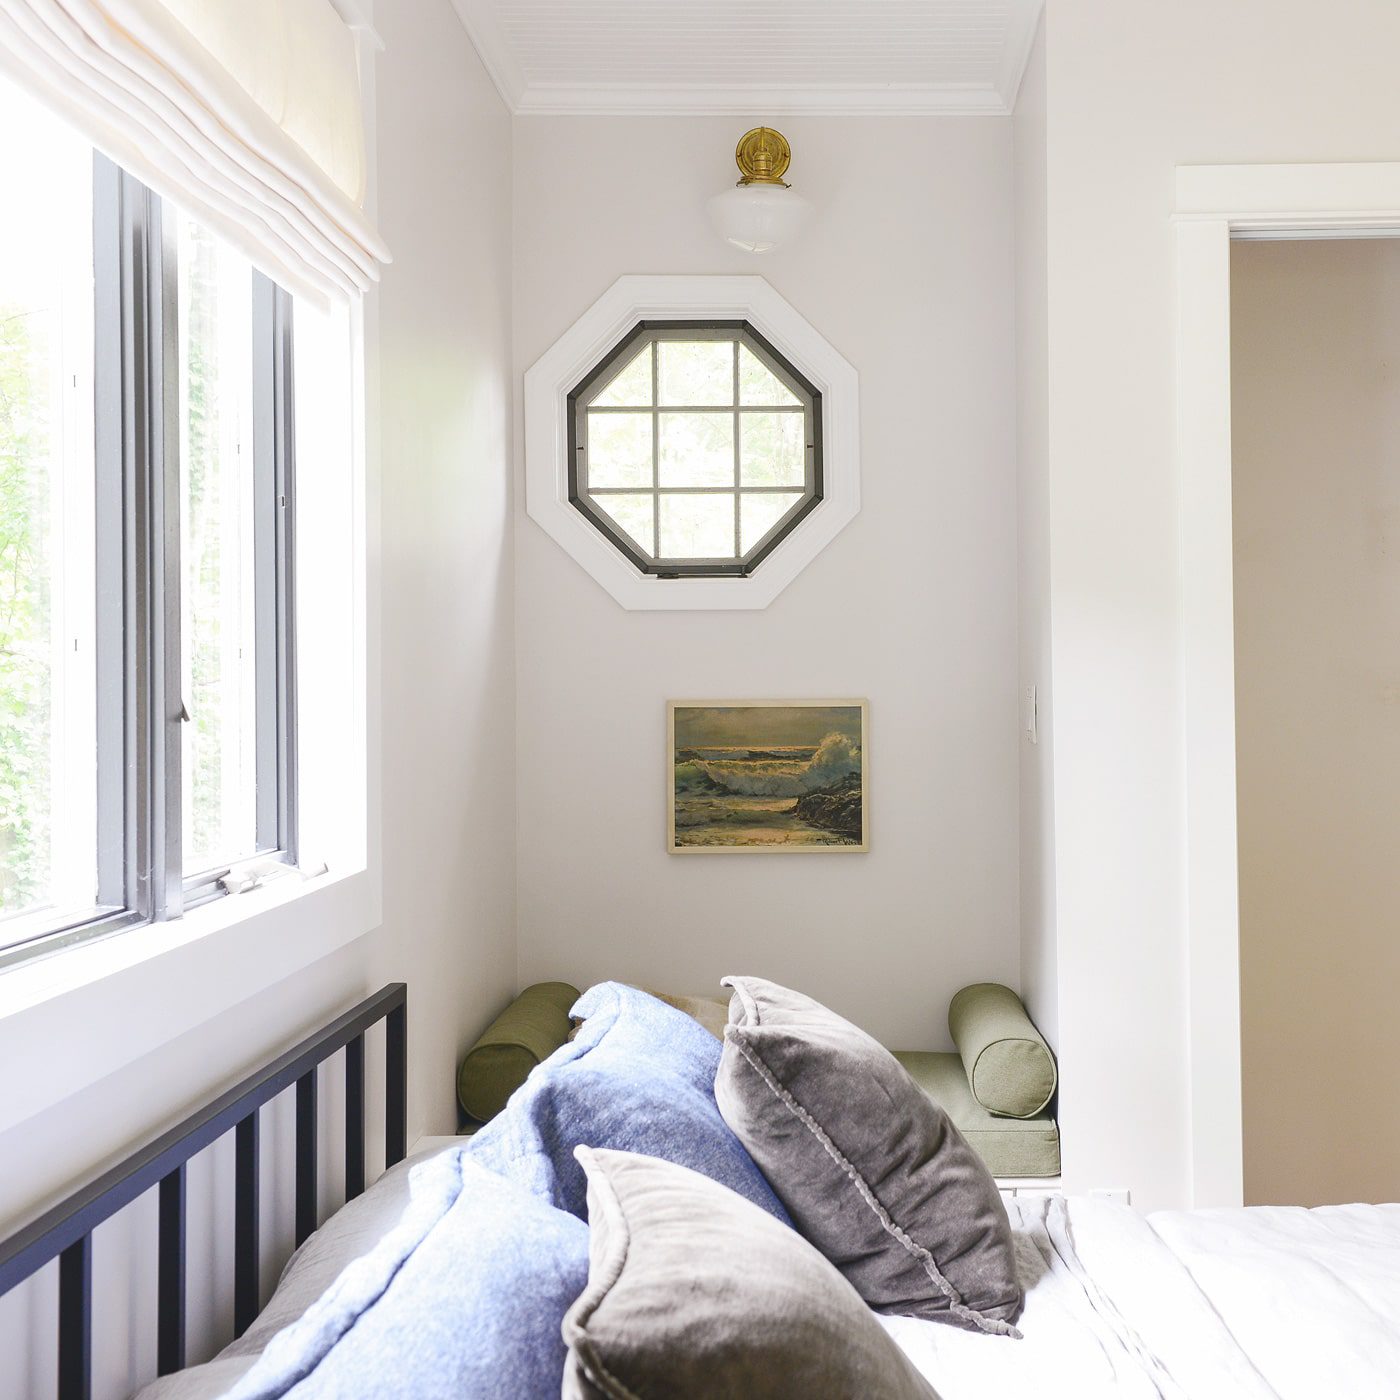
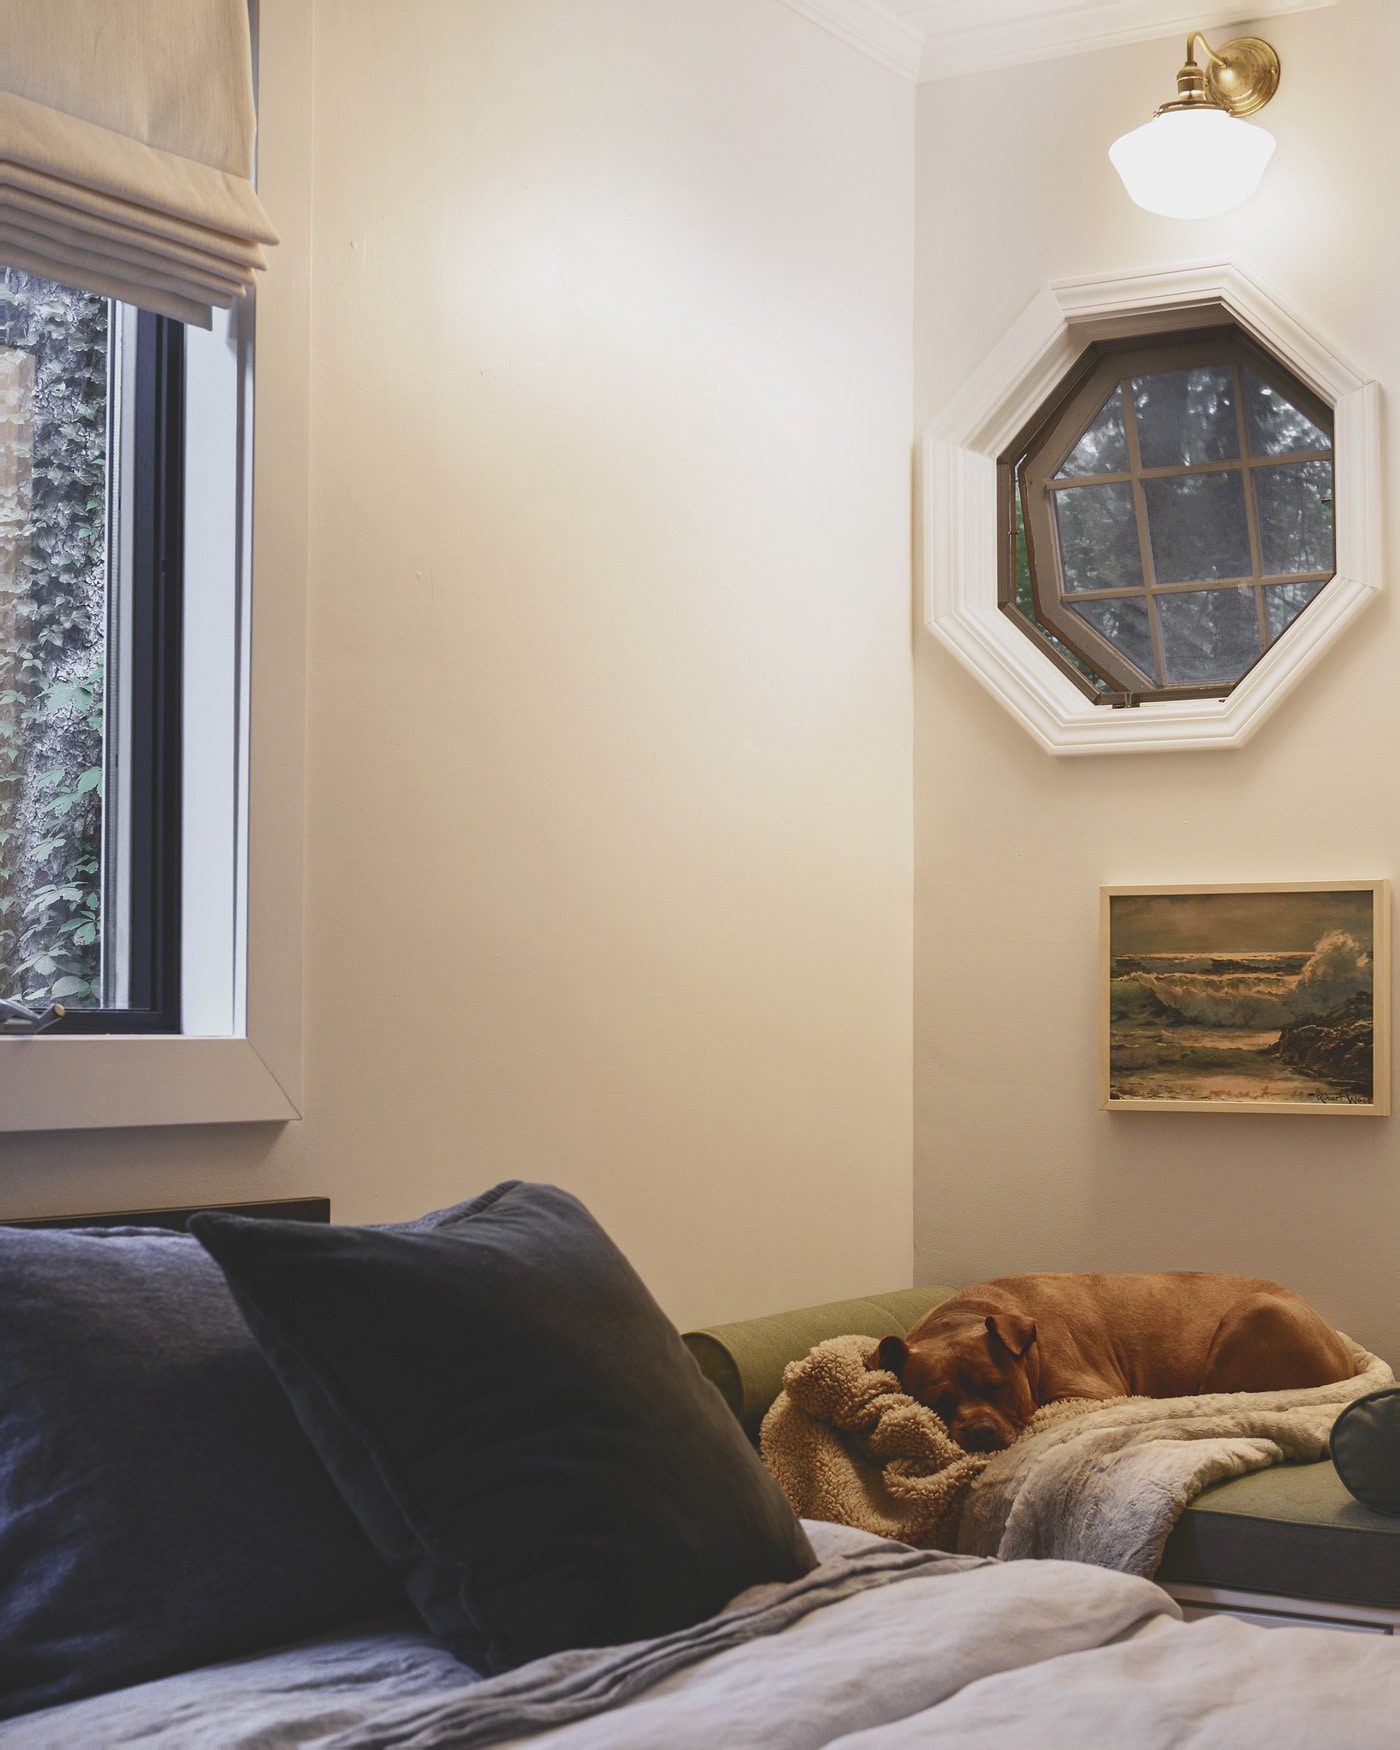
This corner of the bedroom went from an awkward dead space to a pretty cute perch in a couple of days. We’ll be sharing how we created the rest of this storage nook in the coming days!
Psst: Our cushions were created with the Patio Lane Cushion Builder and Sunbrella Renaissance Heritage Leaf fabric. Use promo code YELLOW at checkout for 15% off your order at Patio Lane!
In This Post:


Looks great, I recently found an old post of yours detailing how to make a light with an old milk glass globe. I was so excited, as I am replacing two hanging kitchen lights and loved what you did. Keep up the great work on this blog, I love learning all the skills and tips you guys offer. I have referred my sister to your blog as she is redoing a cottage in up north Michigan, she was so impressed with all your ideas and workmanship! I believe I am now capable of reworking a light and tiling a backsplash!!! Thanks again!
This made our day, thank you!
Love this! What a great transformation! laura
Thank you, Laura!
You might want to check Restore it on YT.
https://www.youtube.com/channel/UCYSAWDQnoz0uIBRYlophvNw
Ooh, that’s mesmerizing.
What a comfortable room. Love the light refurbishment. One question, what color is on the walls? It’s soothing.
Thanks Molly! The color is Heirloom Pink by Valspar.
And I love to painting in the dog nook!
Grand Brass I miss you! So glad you gave a shout out to them. They used to be a on Grand Street in Chinatown in NY. If you check out the about us page you can see the old store, a jammed wonderland. Forced out by raising rent and gentrification like all the wonderful, funky mom and pop businesses in NY.