

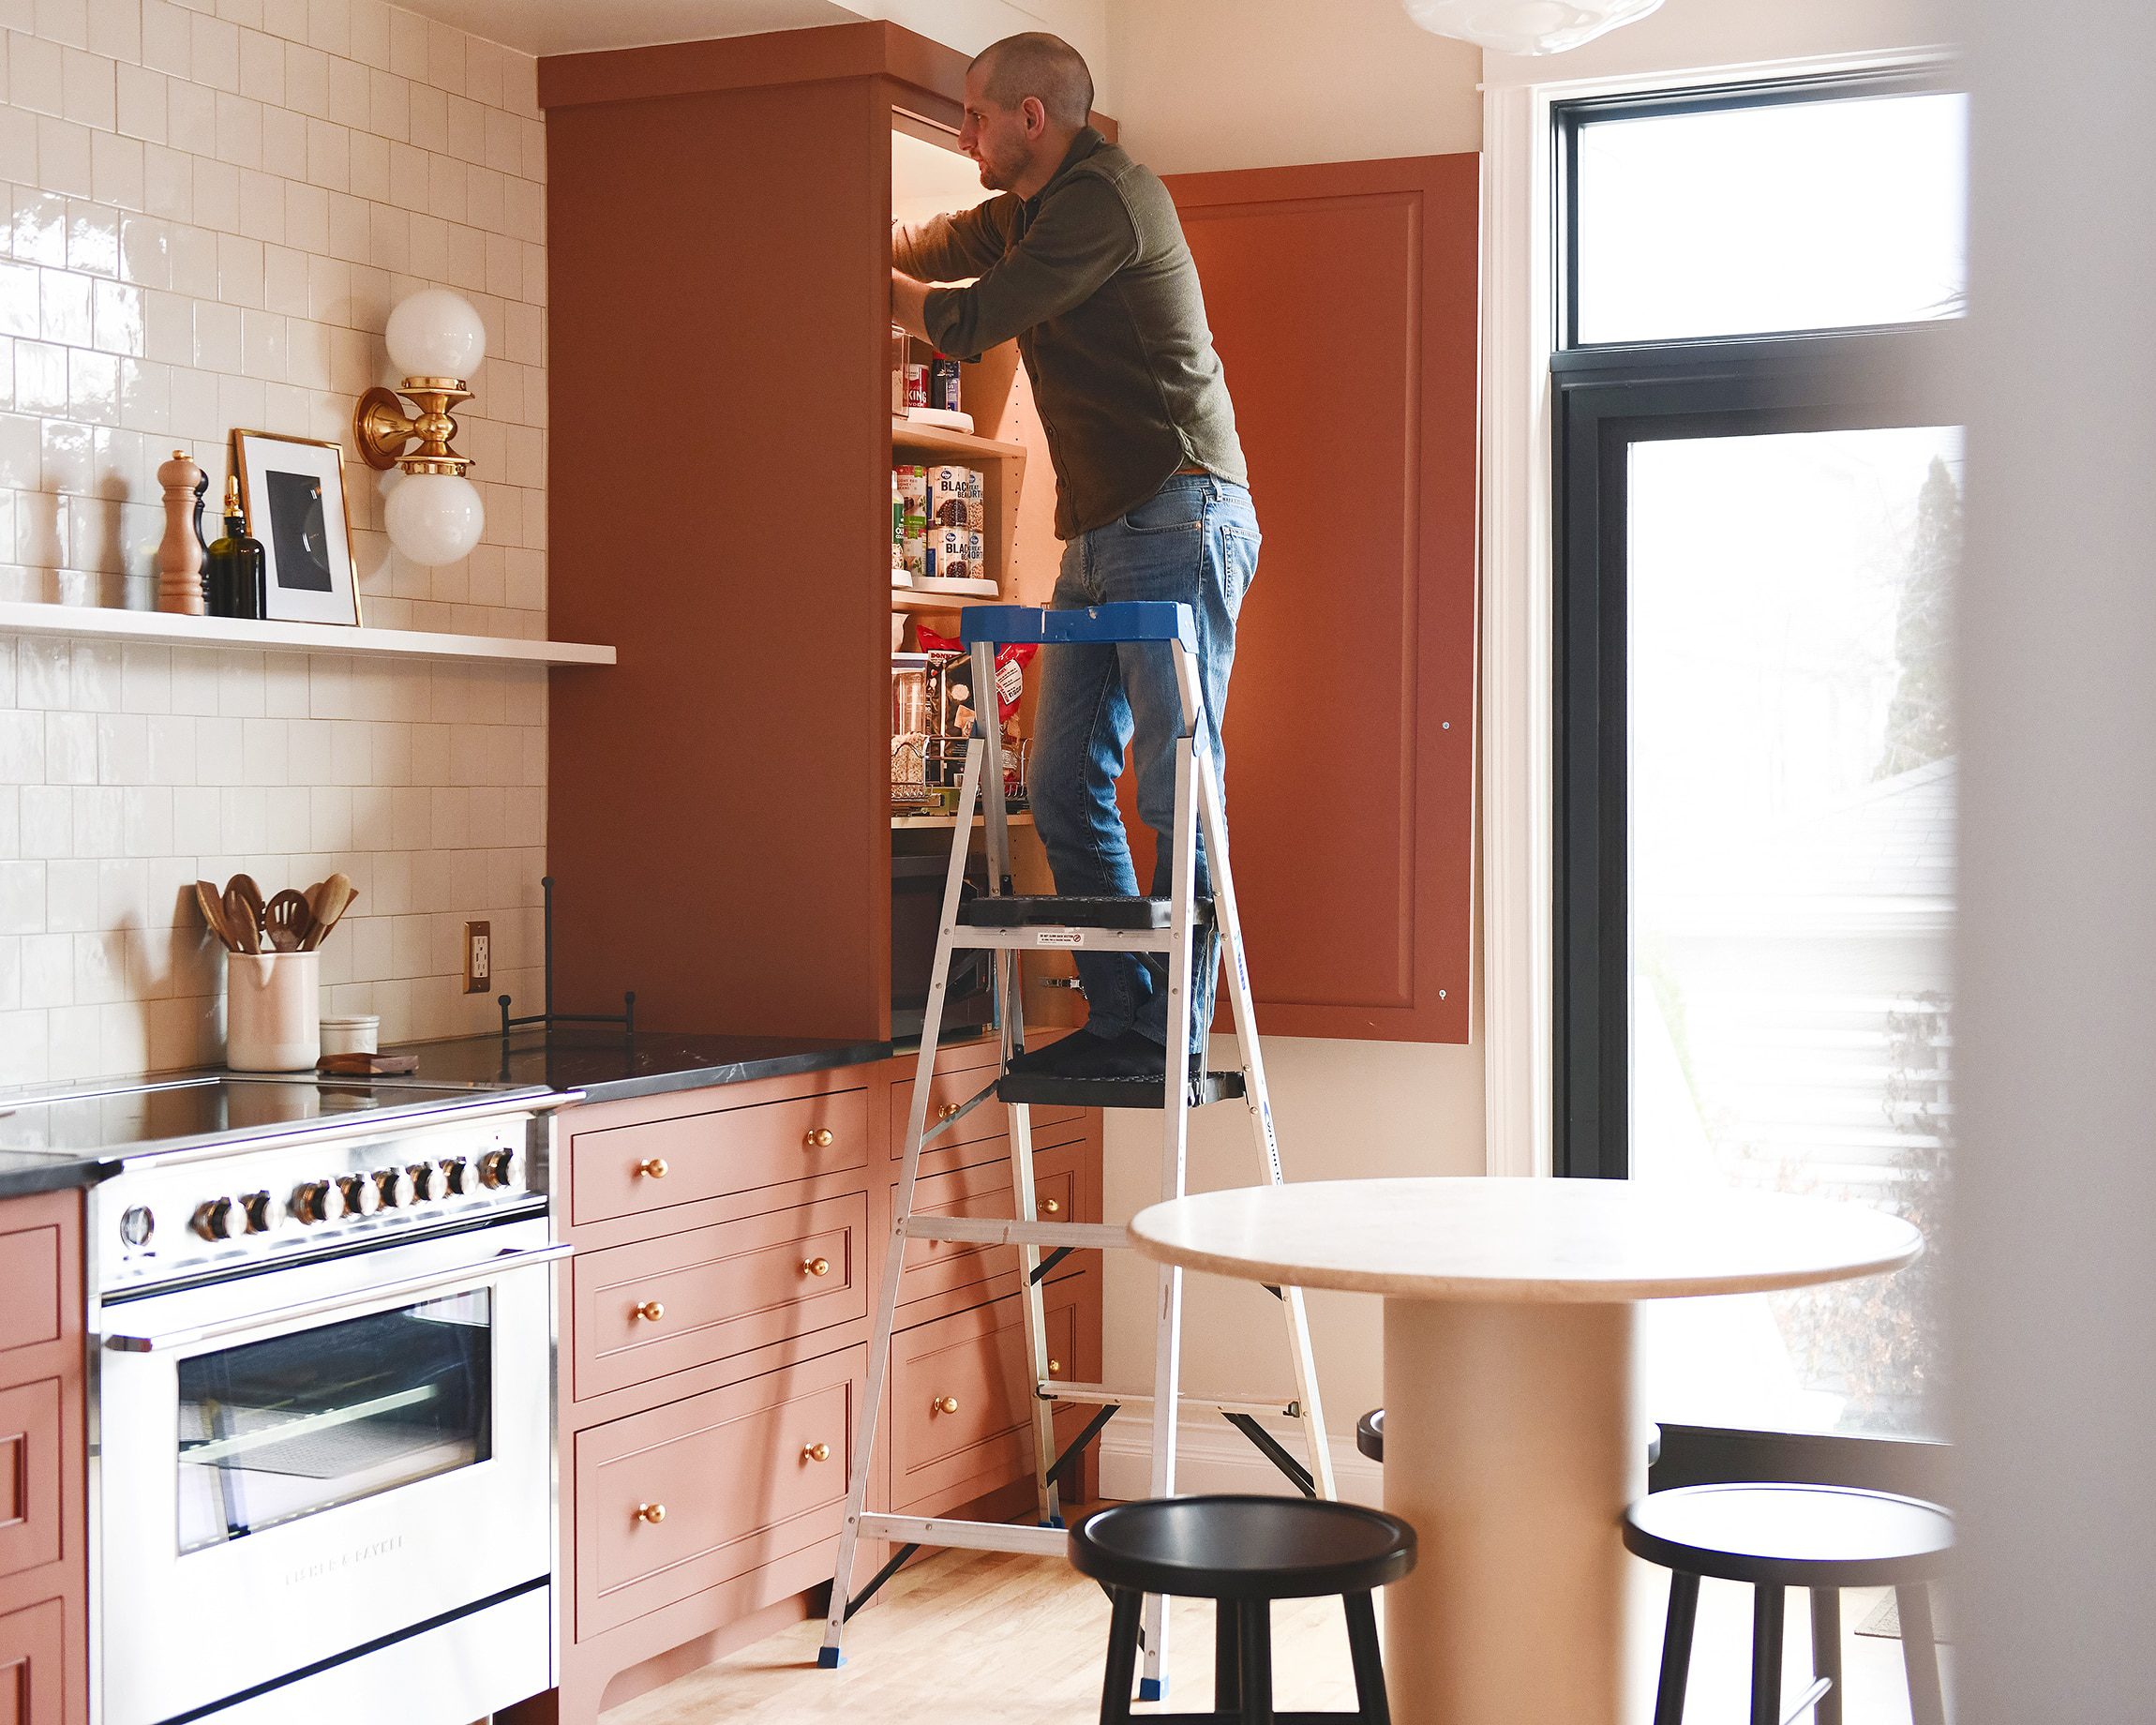
Today, we’re talking through the simple process of adding motion-activated LED lighting from IKEA to our big new pantry cabinet.

When designing our new kitchen, we wanted our pantry and food storage spaces to feel organized and ‘shoppable’. We figured that since lights automatically come on when we open our appliances, why shouldn’t the same be true for our pantry? The process was straightforward and the results are exactly what we hoped for!
Here’s what you’ll need:
- ÖVERSIDAN LED wardrobe light
- ANSLUTA LED driver w/cord
- Double-stick foam tape (or use the screws & hardware included with the kit)
Step 1 | Measure + Purchase Components
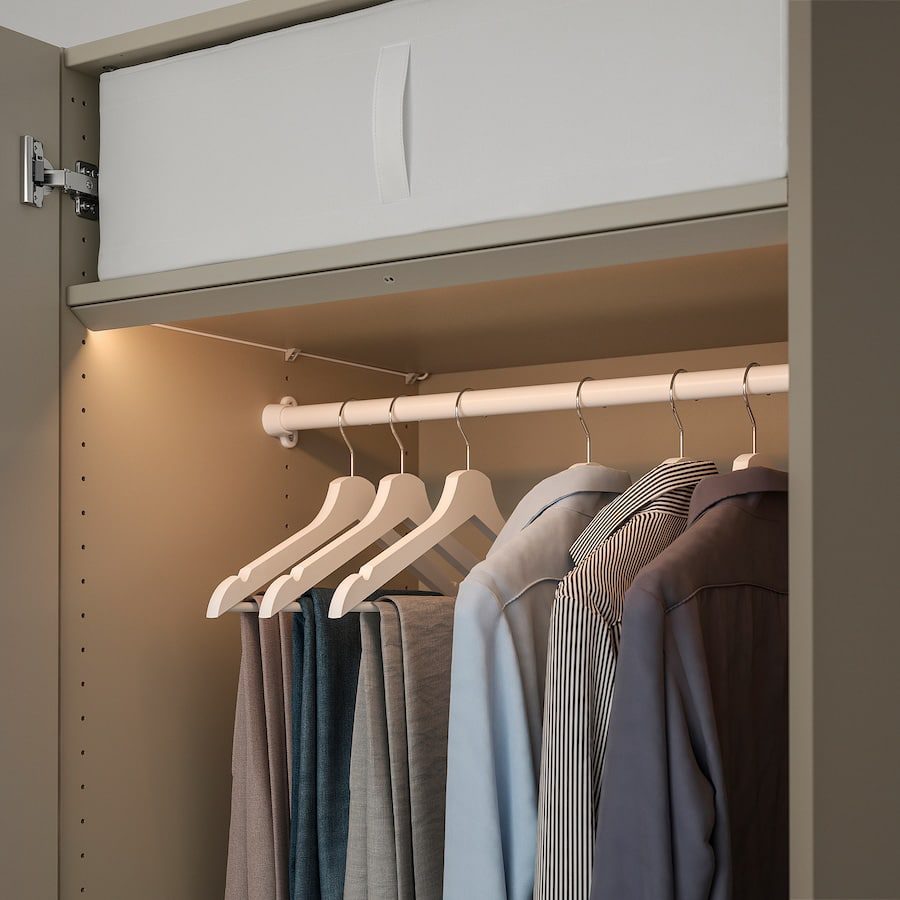
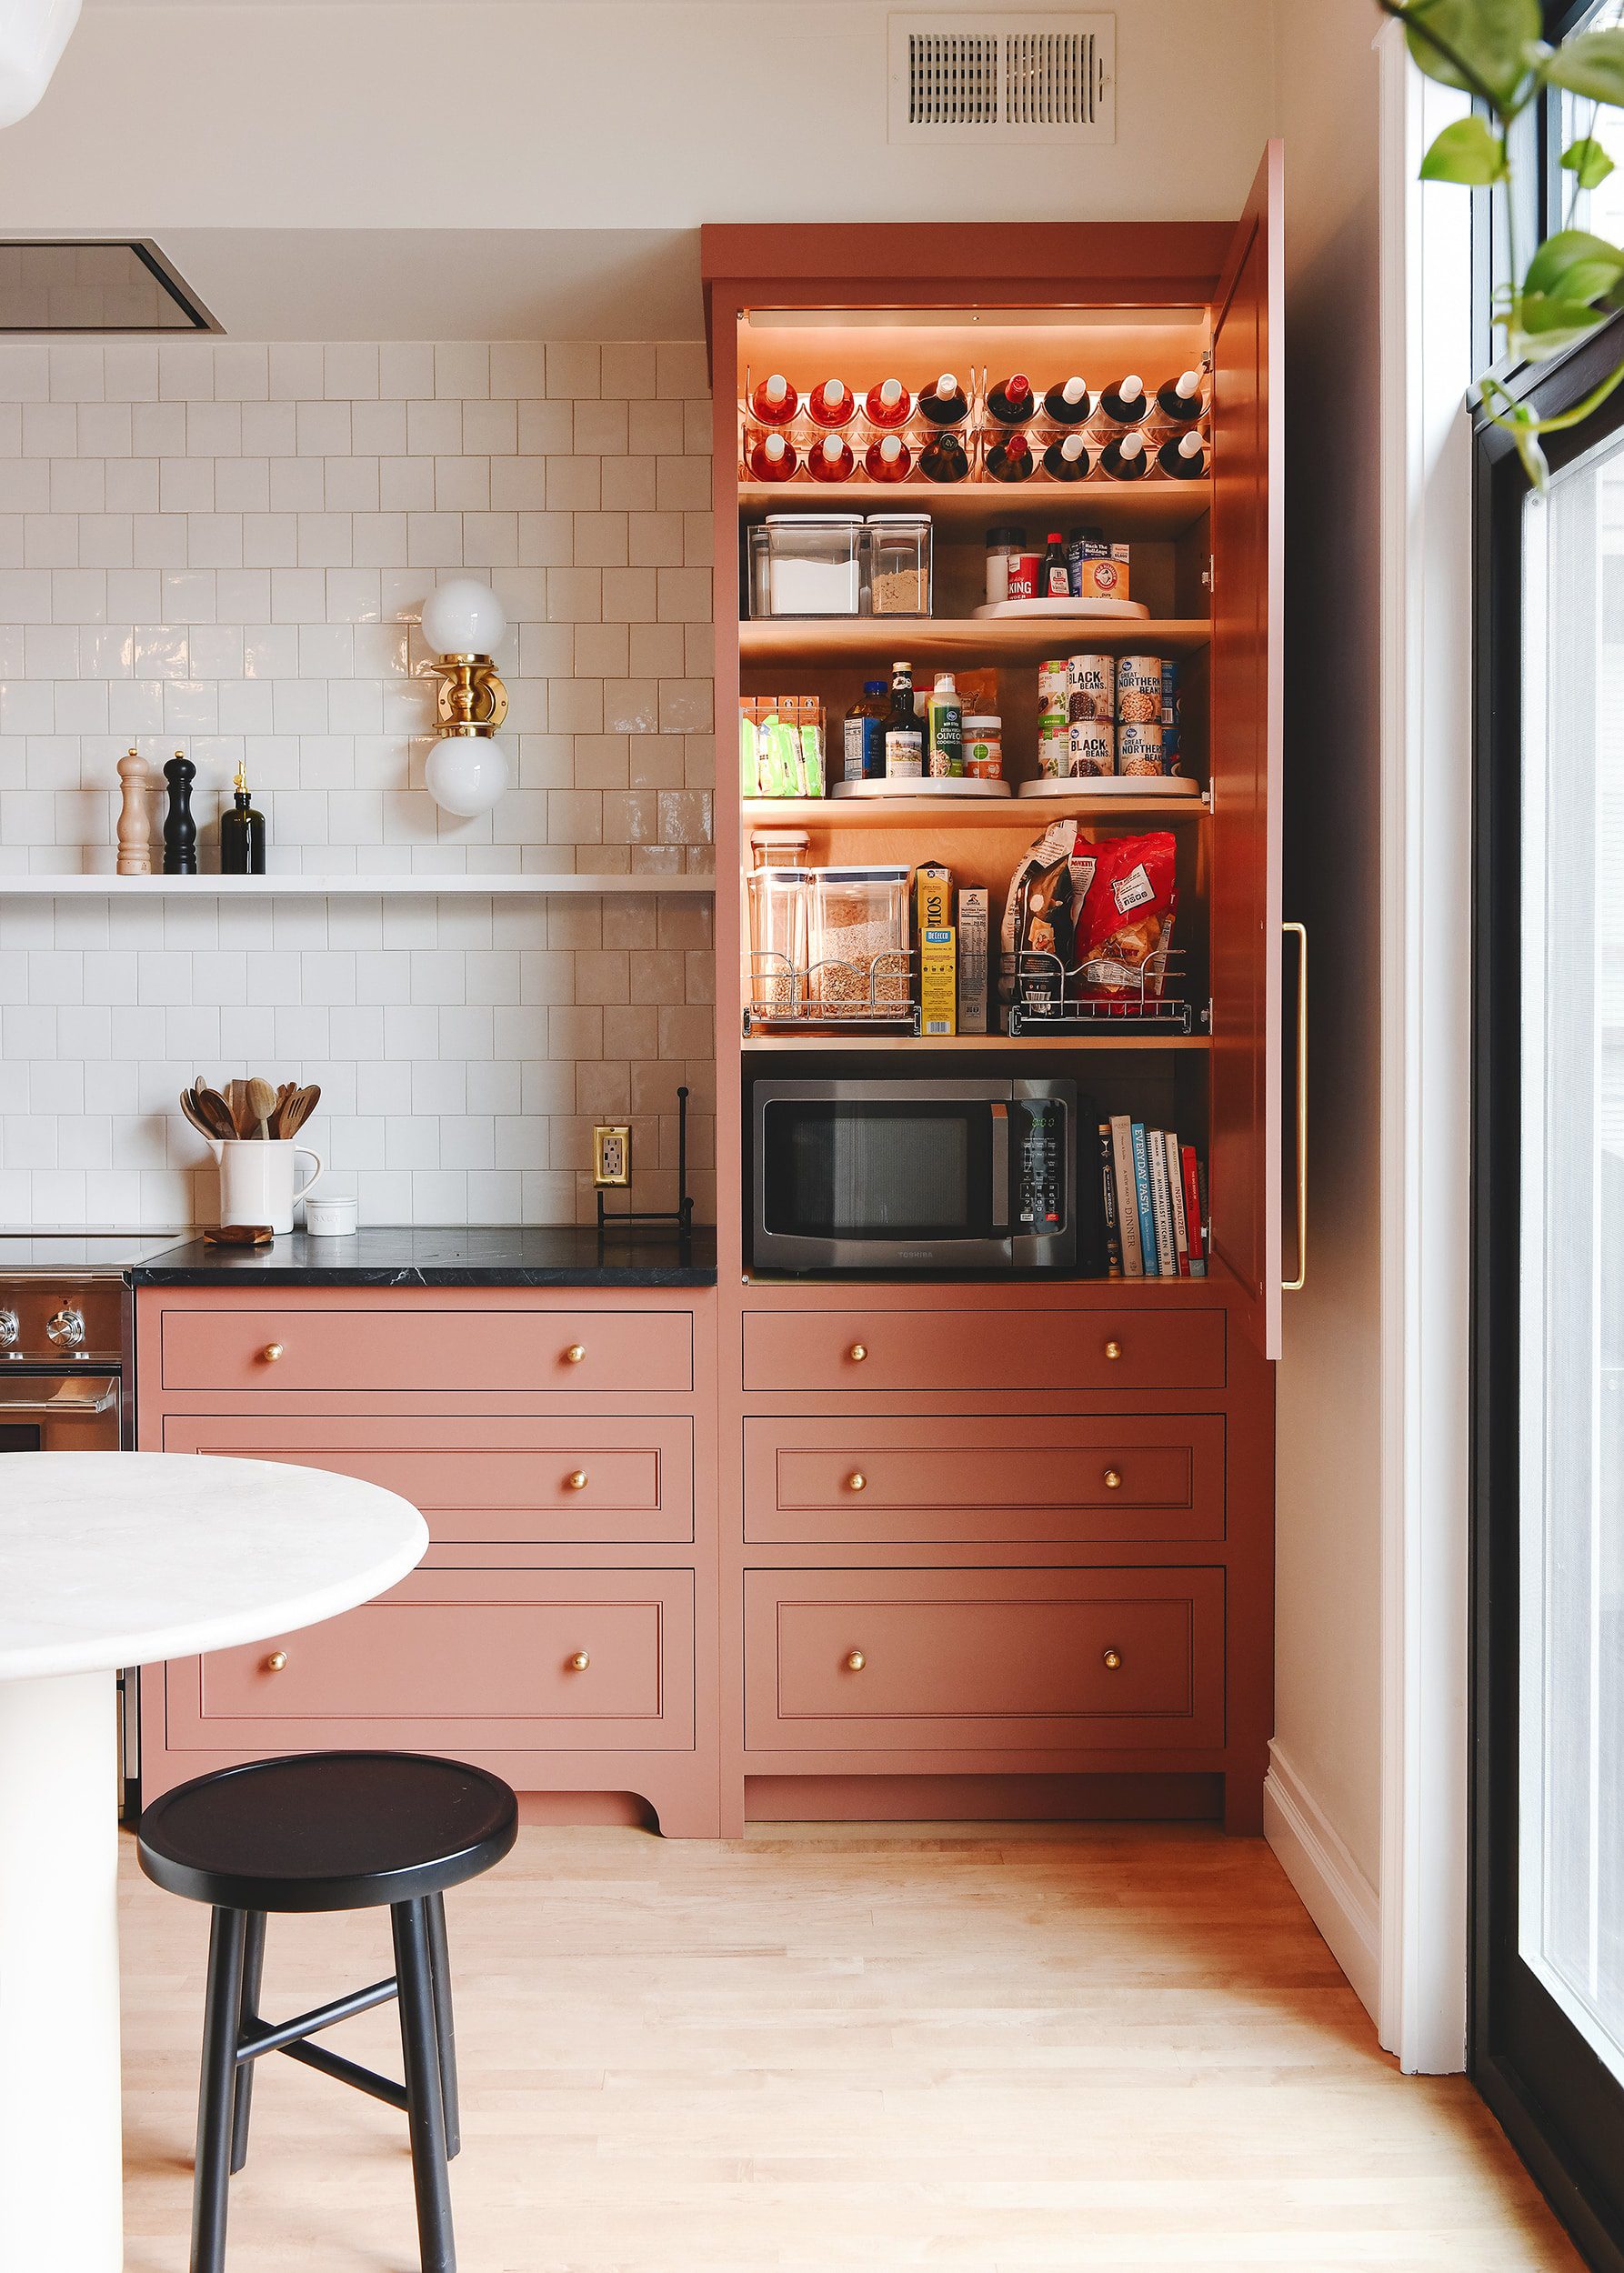
We’re using the ÖVERSIDAN LED wardrobe light with built-in sensor, as seen here. They’re available in a few colors and sizes, and we’re using the ‘beige’ for a more seamless look in our pantry.
The ÖVERSIDAN lights from IKEA are an updated version of a similar LED strip that we used in the PAX custom wardrobes in our primary bedroom. We love the auto on/off functionality and the near-invisible look, so we figured they would be a perfect fit for the pantry.
There are two necessary parts to the system – the LED strips and the driver that they connect to. We simply measured the overall widths and heights that we wanted to cover and purchased accordingly. In our case, we bought two lights – a 28″ and an 18″. Both are beige in color to best blend with the maple interiors of our cabinets. The necessary ANSLUTA LED driver can support up to 6 individual ÖVERSIDAN lights and each can still operate independently. This means that one electrical plug can support up 6 separate cabinet lights. We ordered ours online, but they’re also available in-store. Purchase what’s right for your cabinets then wait patiently. It’s the hardest part, ya know?
Step 2 | Make Connections and Install
Once your parts arrive, the process should be straightforward and quick. Technically, these lights are designed to integrate perfectly into the PAX wardrobe system with a clever set of pin connectors that can be attached to the ends for easy installation and adjustability. Since our cabinets aren’t IKEA brand, we had to get a little creative. To keep things as simple as possible, we used the same 3M double-sided foam tape that we had on hand from installing the cabinet fronts. The LED strips are very lightweight, so we had no concerns around sticking power.
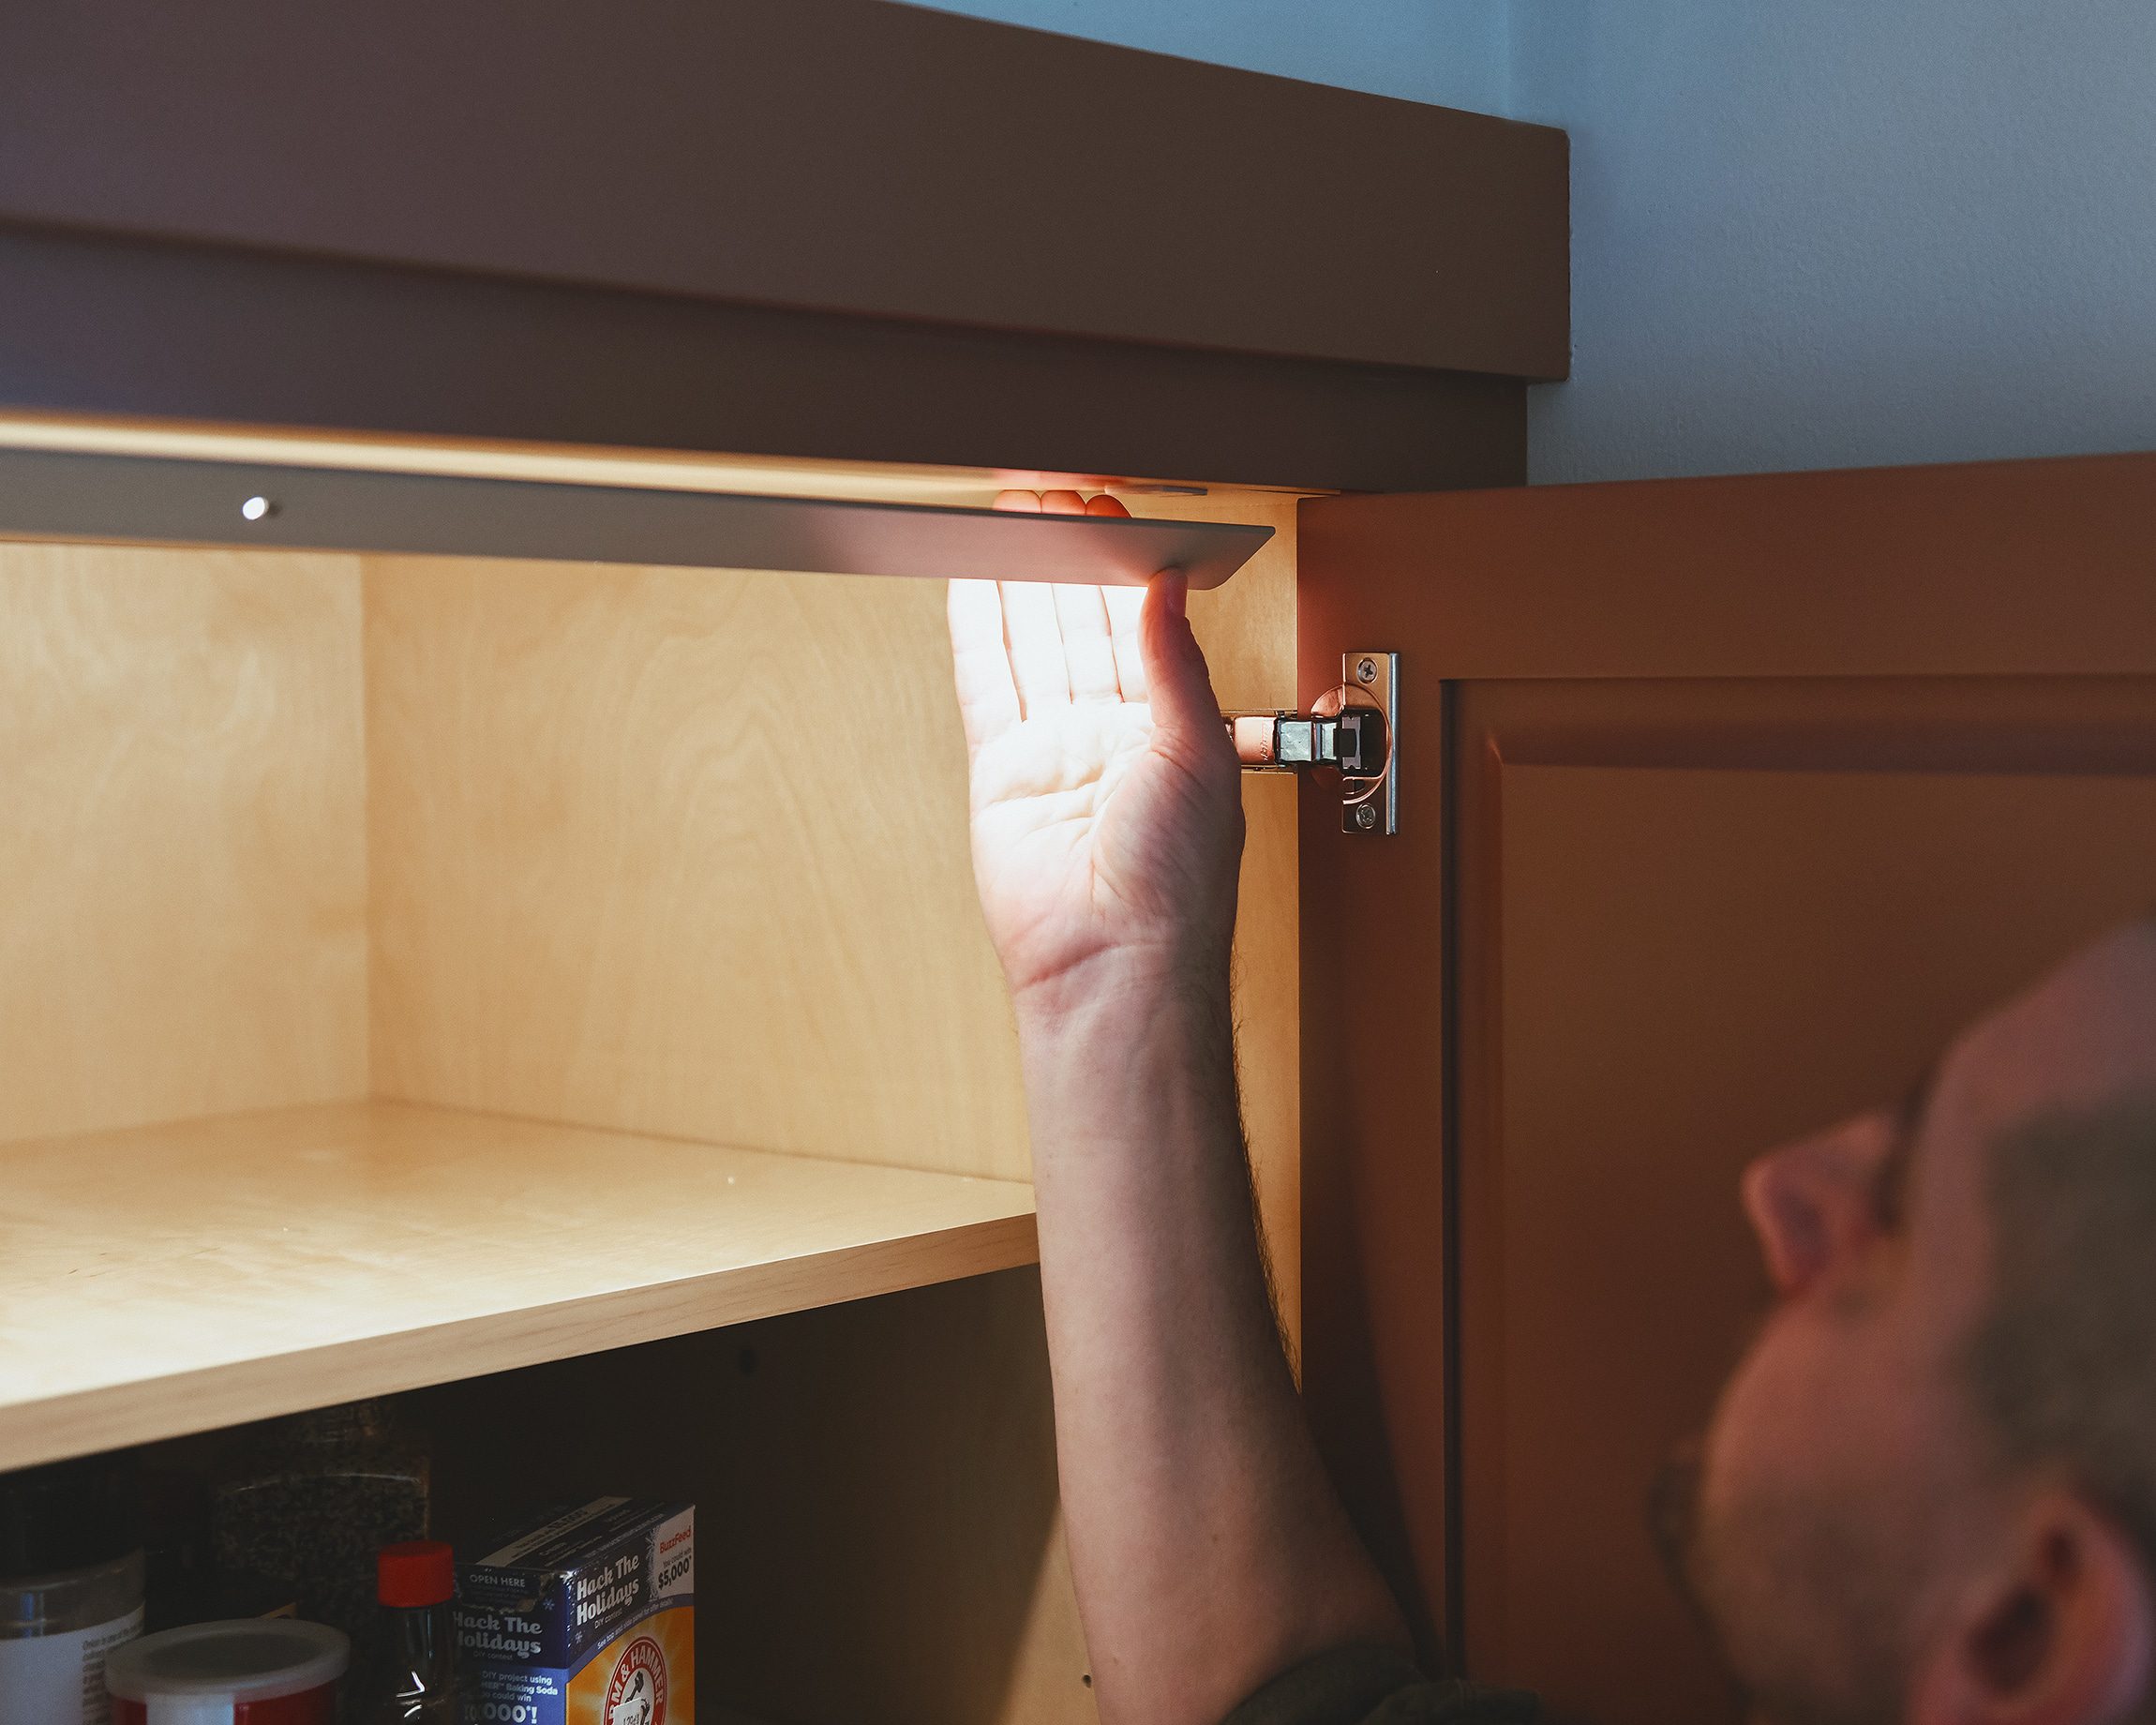
One thing you’ll want to test prior to final placement is that the motion sensors are close enough to the doors so that they’ll activate properly and turn on when the doors are opened. In our case, this meant orienting them just inside the face frames, but each style of cabinet is a little different, so there may be a bit of trial and error.
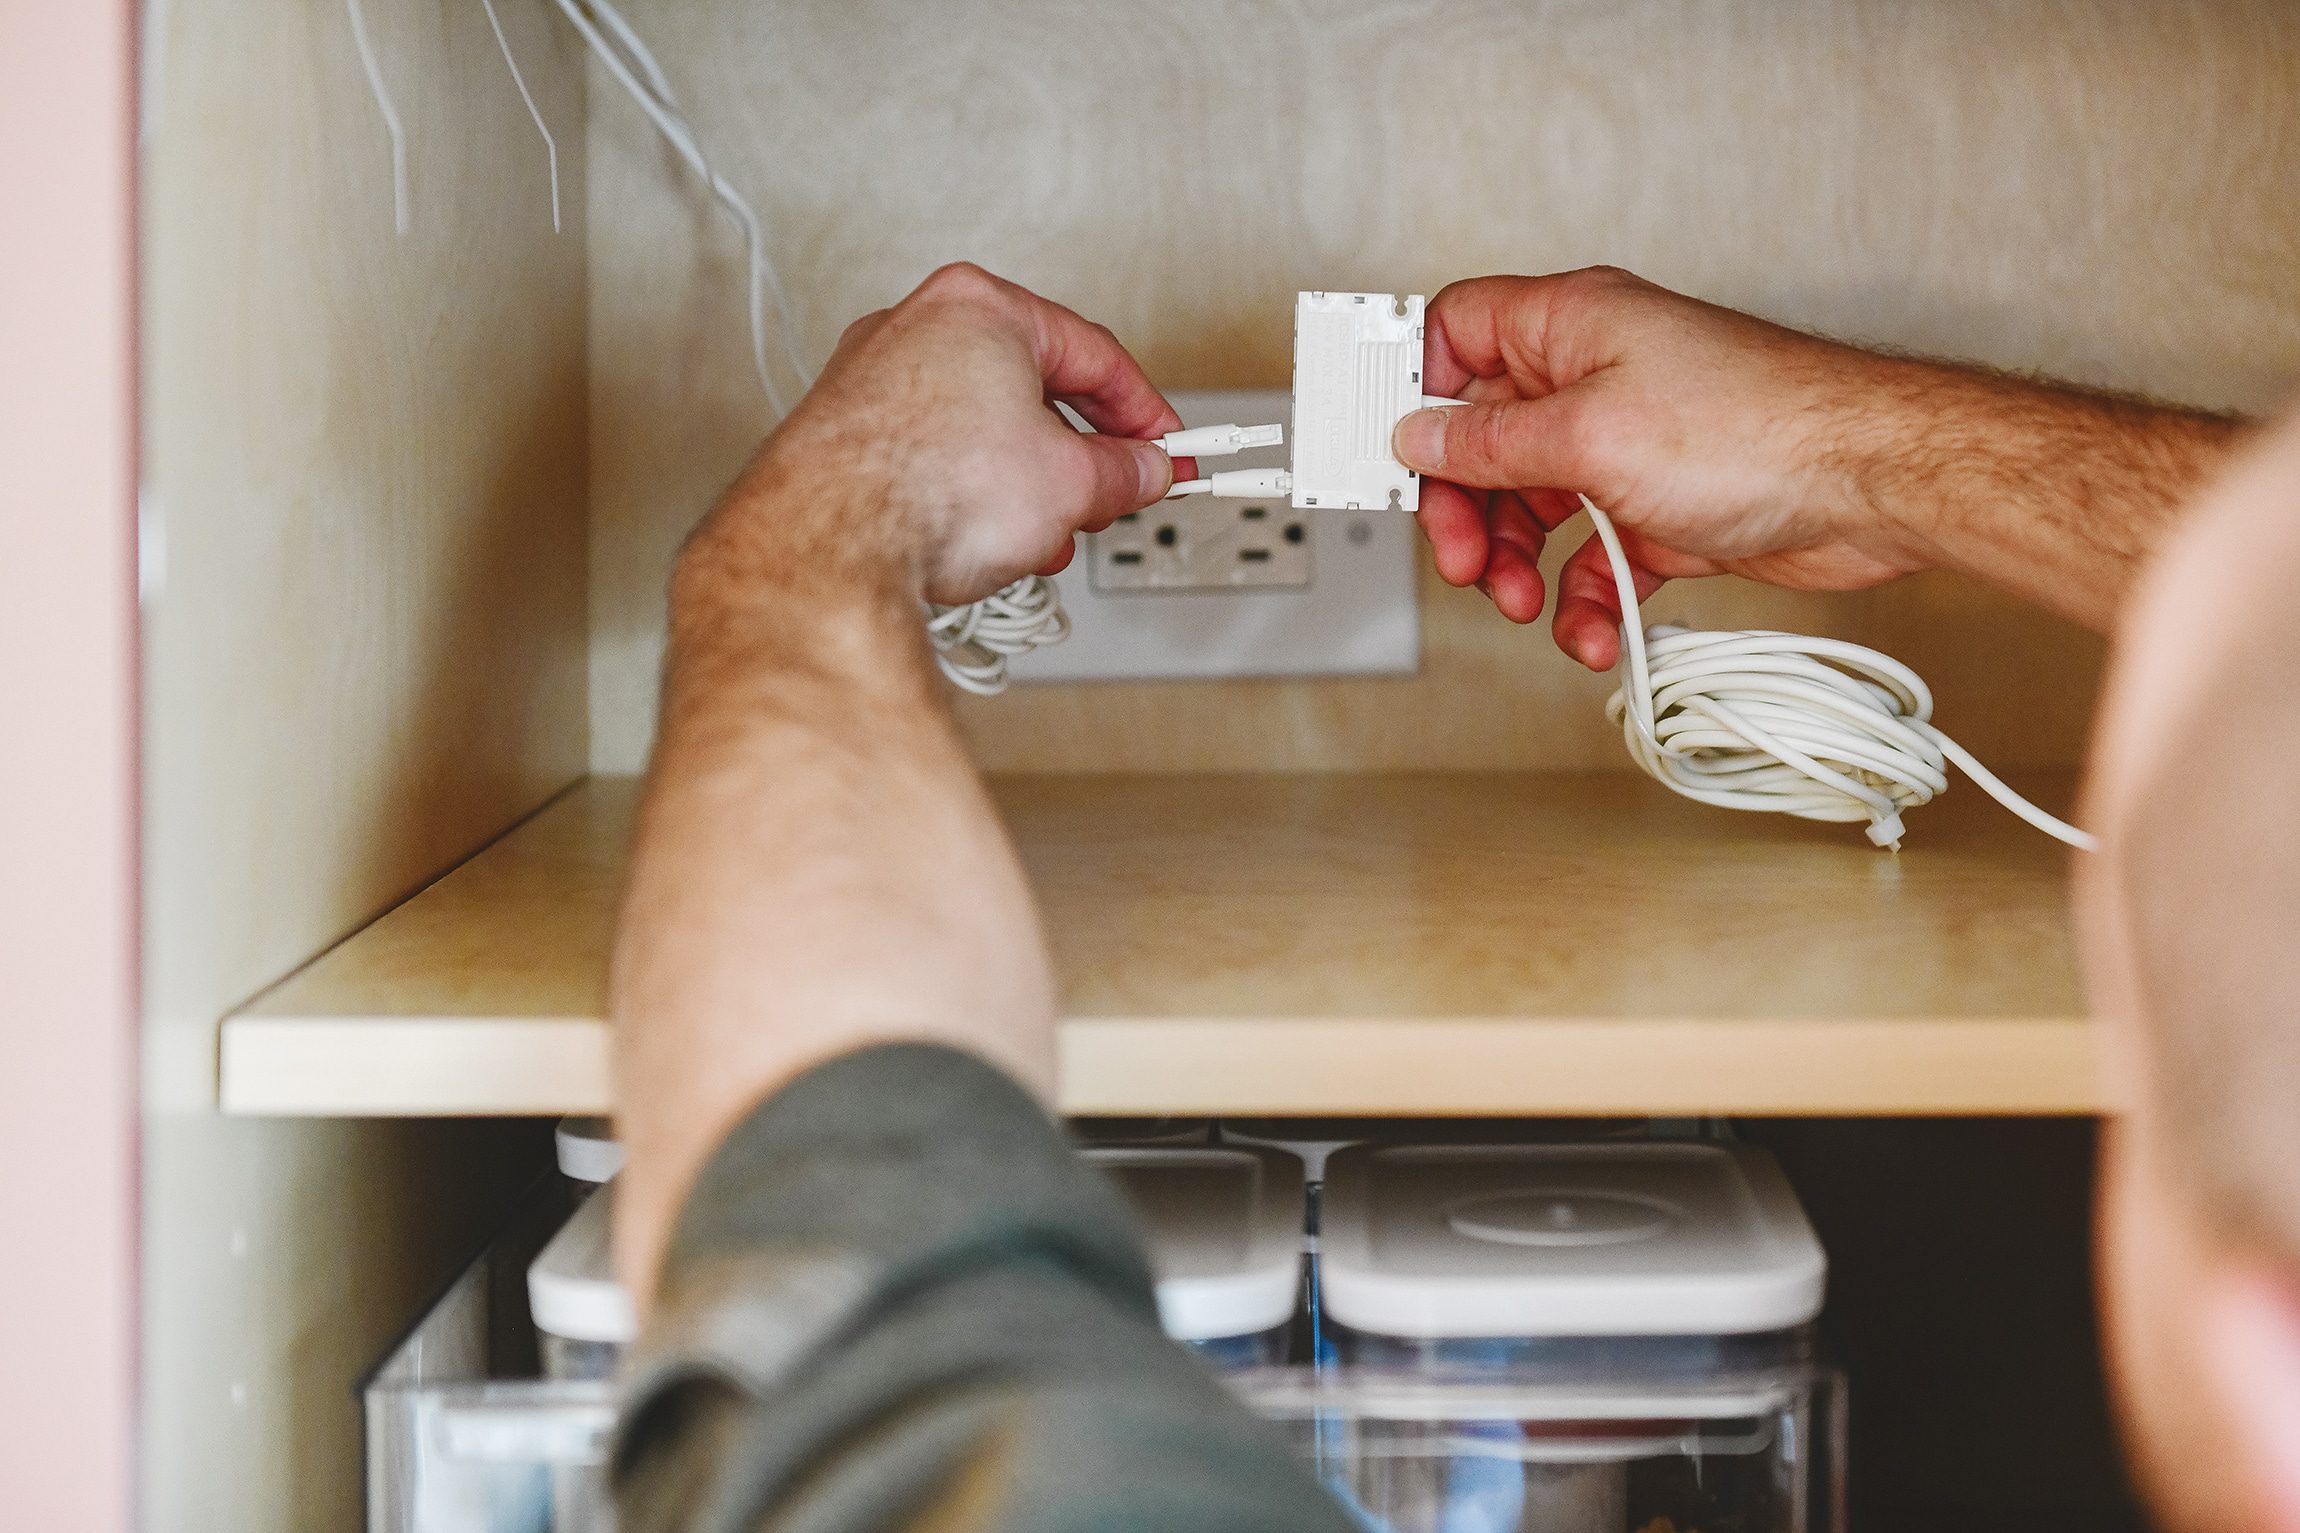
Once the LED strips are in place, connect the plugs from the lights to the ports on the driver, then plug the driver into the outlet. A quick reminder that each driver can accept connections for up to 6 LED lights, so each driver can potentially accommodate multiple cabinets. Or one very, very bright cabinet. Your choice!
Step 3 | Cable Management
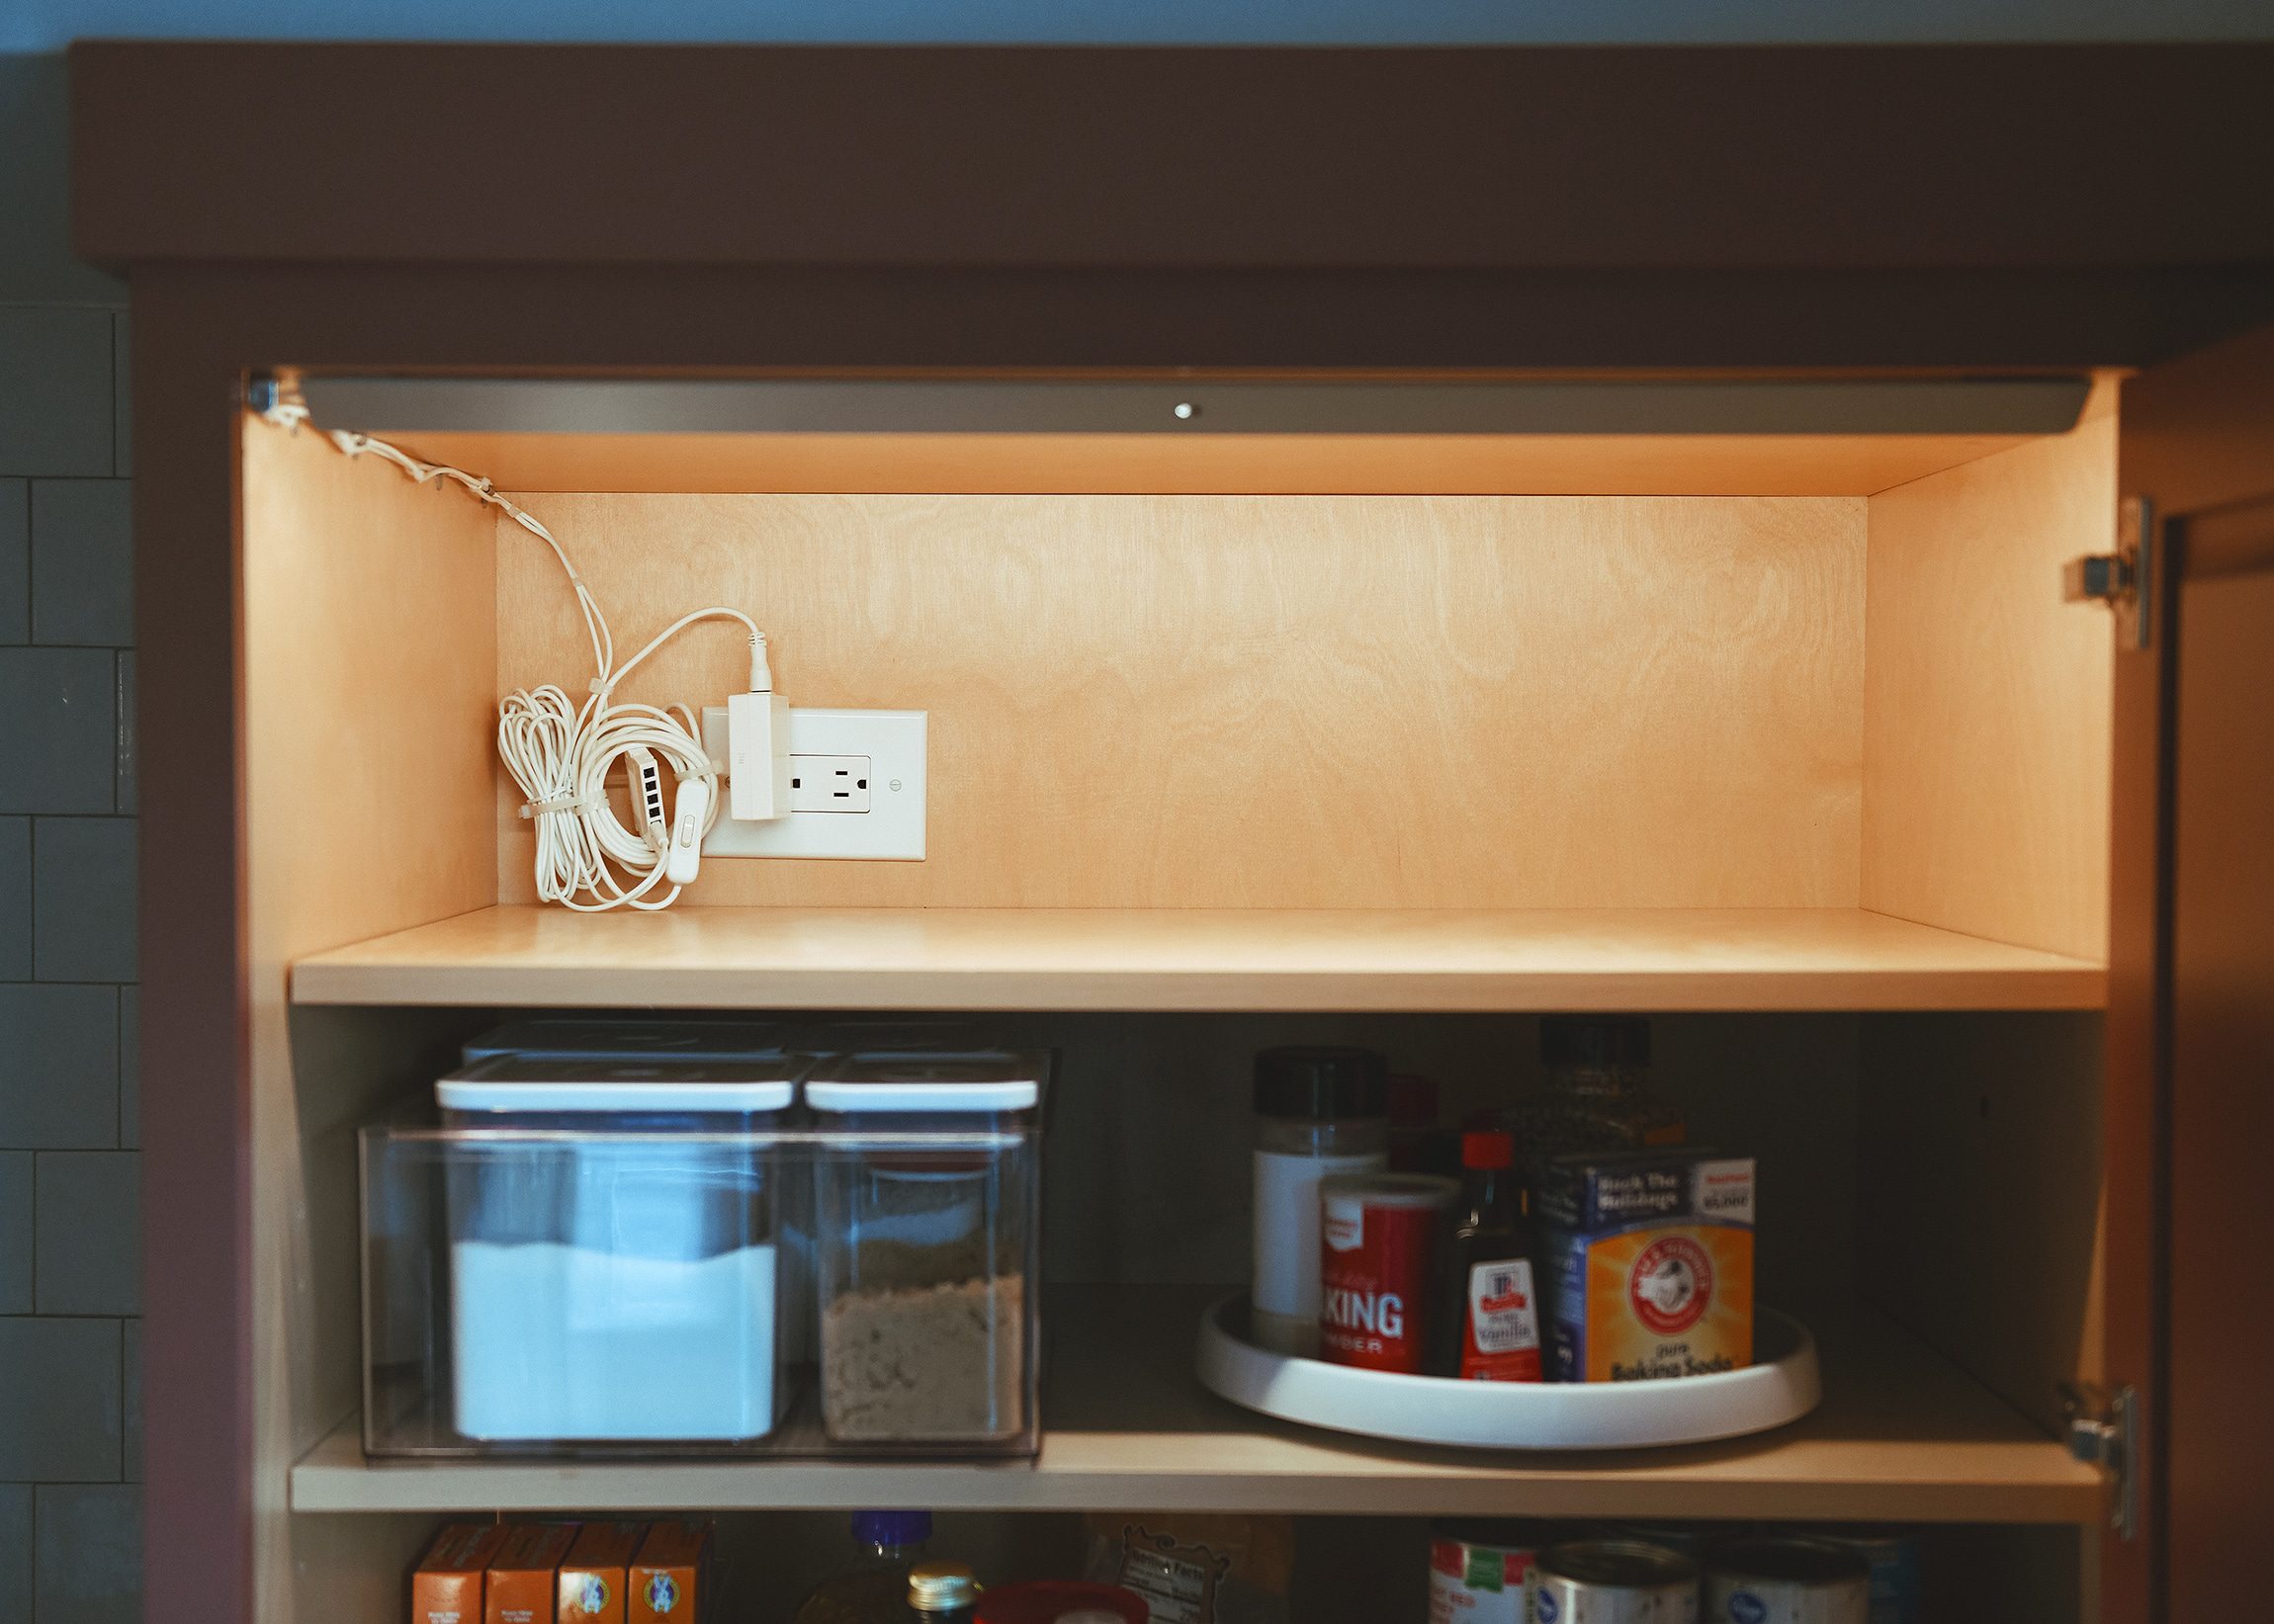
In our case, both the outlet inside the cabinet and the lights themselves are located high enough up that they’re not visible, but we couldn’t possibly leave the cables in an unruly mess! Each light comes with a handful of the small grey stick-on cable clips seen in the photo below. We also used a handful of zip ties to keep things as tidy as possible.
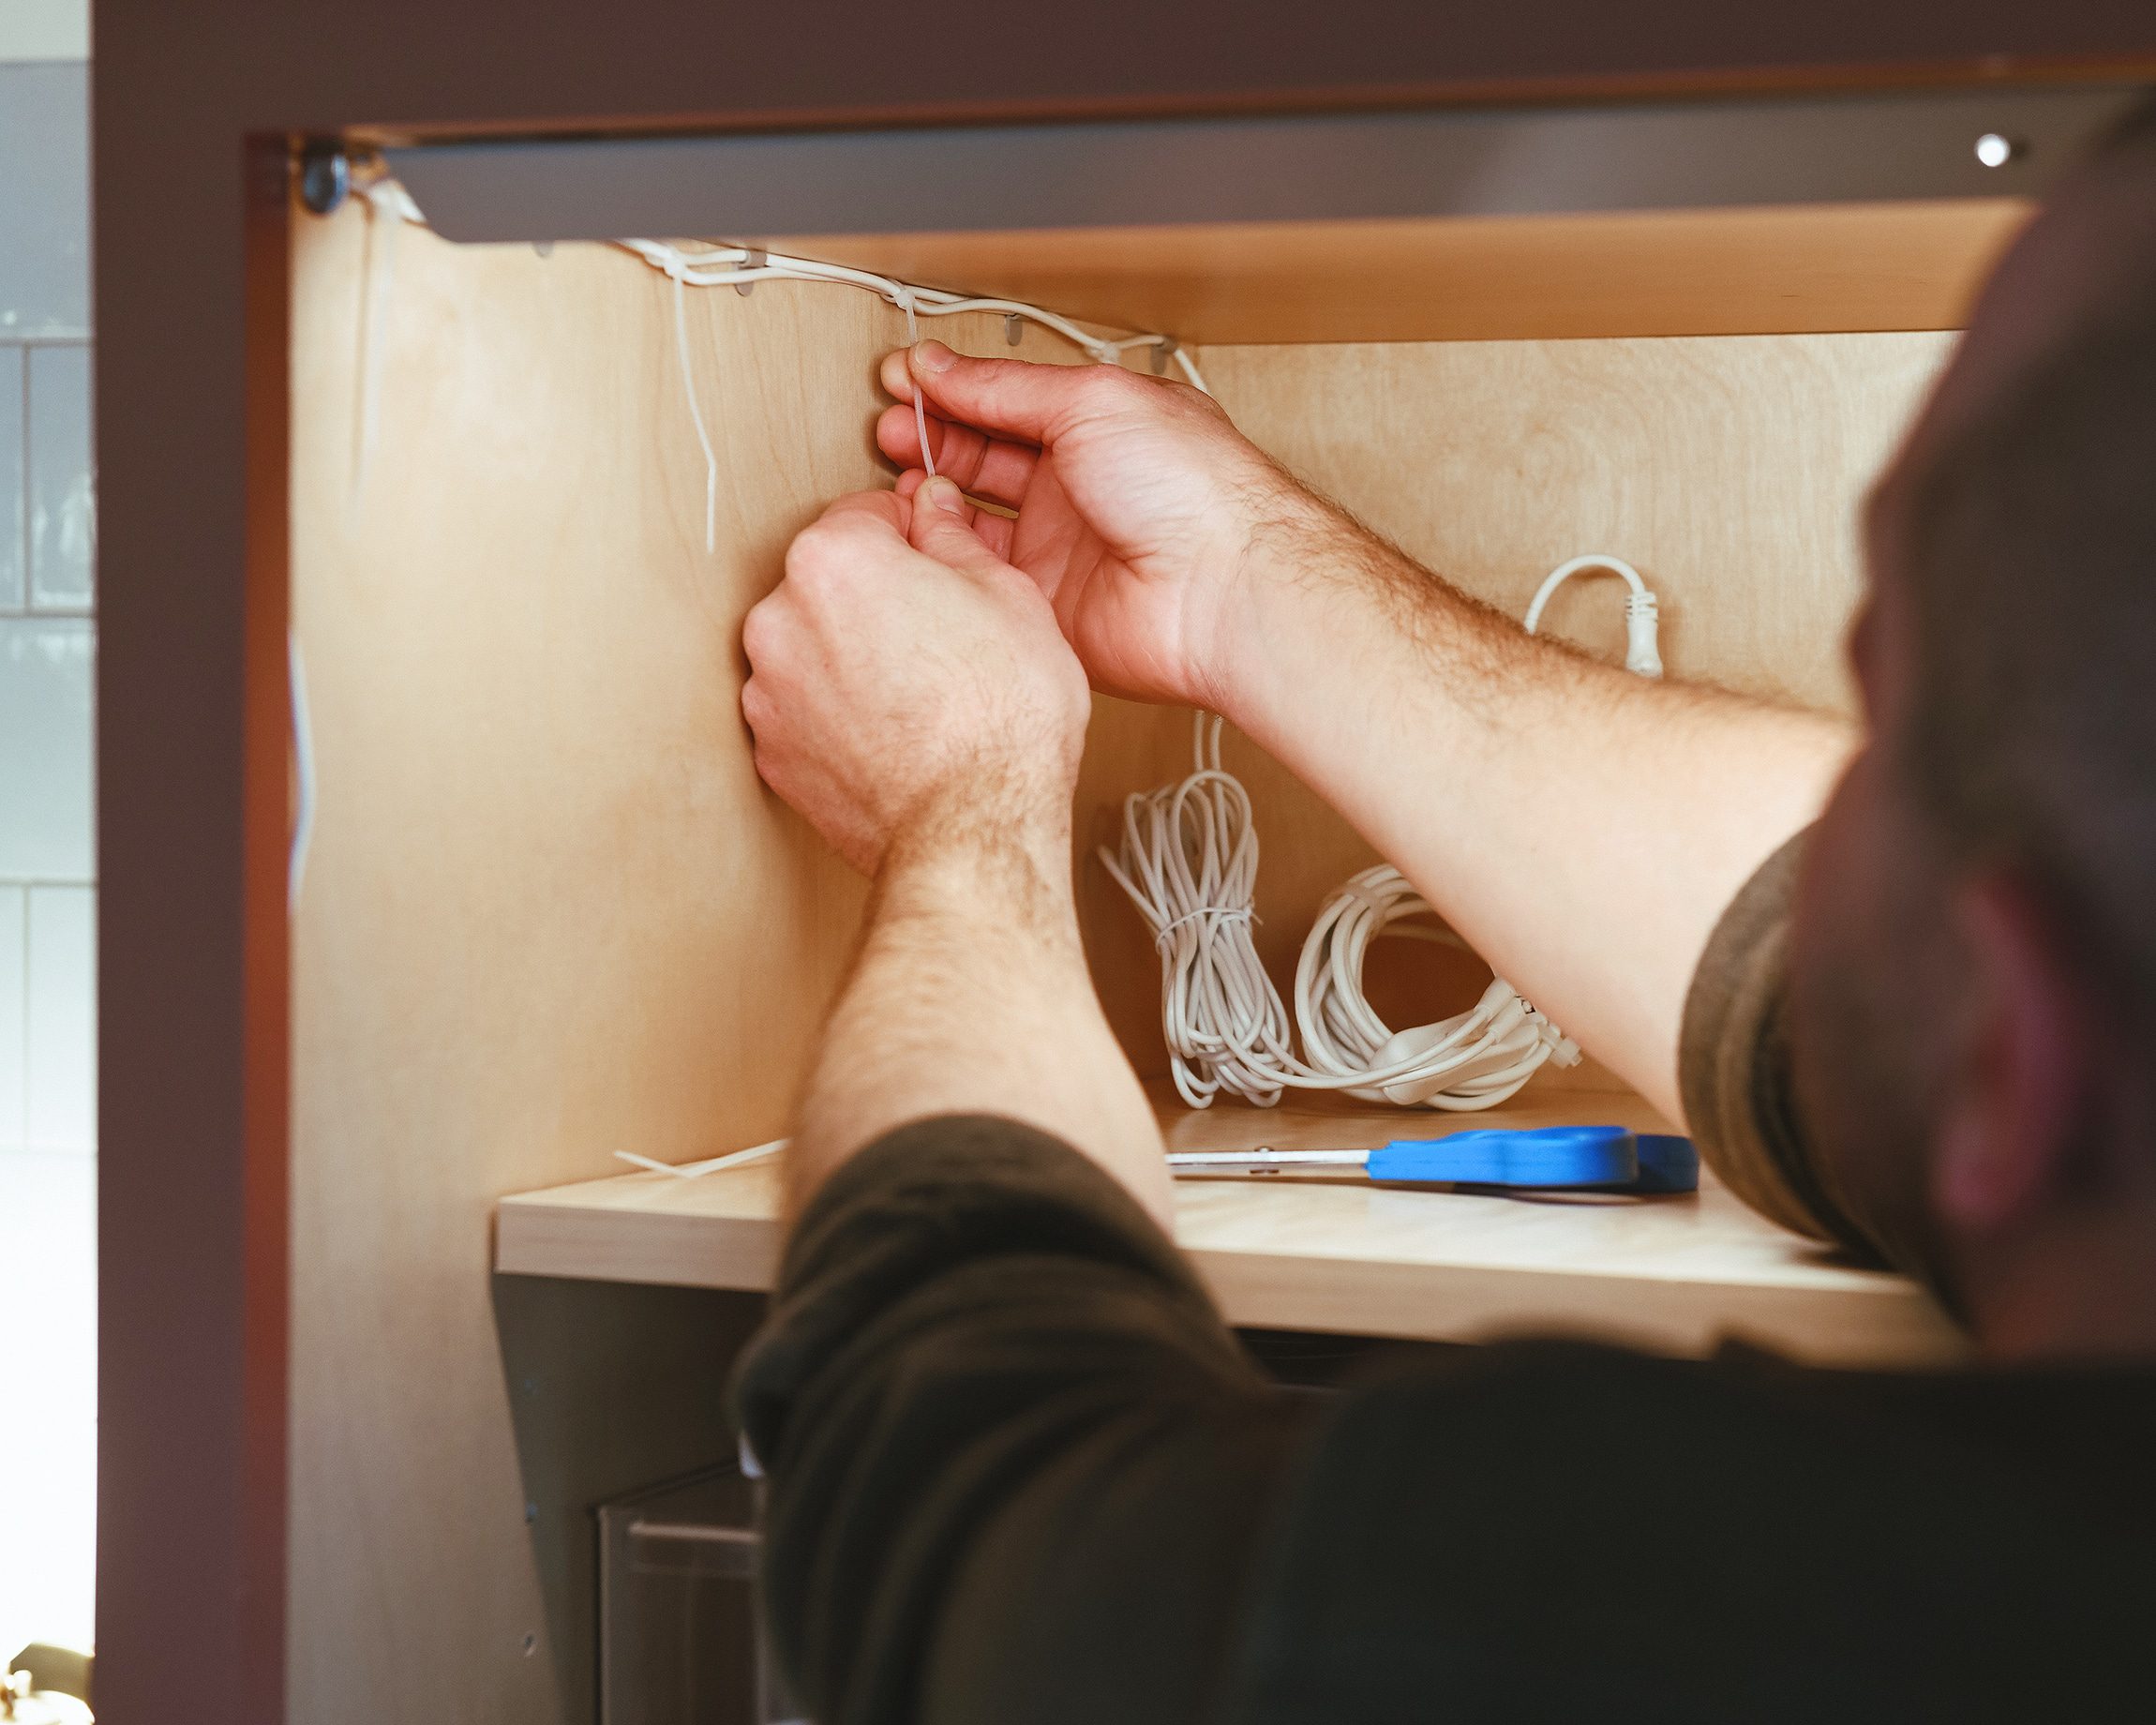
The finished product is below. Even though this shelf is too physically high for us to ever see, it would haunt us forever if we knew the wires weren’t properly contained. We might have a problem.
That’s pretty much it! The entire kit cost less than $60 and we no longer fumble with kitchen light switches when we want to see inside the pantry. Now, since the pantry, fridge, beverage drawers and dishwasher all illuminate when we open them, we’re able to dial in the perfect amount of dim kitchen lighting in the evening. It’s quite the vibe.
Don’t Have An Outlet Inside Your Pantry?
- If you have an outlet near your pantry and feel comfortable drilling a small hole through your cabinet, you can follow all the same steps as above. The driver connections are fairly small, so creative locations could help them almost disappear. When possible, we prefer plug-in for the simple reason that we never, ever (EVER) have to worry about batteries or charging.
- There are many LED rechargeable options available! I’m sharing some of my picks below:

- Motion Sensor Cabinet Light, $40/2 pack
- Rechargeable Closet Light, $26
- LED Puck Light, $24/6 pack
In This Post:
PS: We love sharing how-to posts in a simple, straightforward way! Here’s how to add a rotary dimmer to a sconce, how to remove a kitchen splash guard, how to paint anything, and how to get a perfect caulk line, among many others!


Lovely! I see the 2nd from top shelf has the 28″ light mounted. Where did the 18″ strip go – or did I just miss seeing it in the photo?
We installed that one along the side. It’s almost invisible!
Yay for putting electrical outlets in cabinets and closets and everywhere!
Love this! The possibilities are endless. ????
Amazing!! I was gazing longingly at the Ikea sensor lights for a closet but found the options of what goes with what to be a little inscrutable. YBH to the rescue! A Q: Can the Oversidan lights be daisy chained/connected to each other? Or do the wire lengths of each light need to each reach back to connect back to driver/plug?
That’s a great question! Not sure if they can be daisy-chained or not and unfortunately can’t access the ends without completely disassembling our setup. I will say that the cord on each light is fairly long though. Hope this helps!
Hi! What color of pink is that?🩷
Sherwin-Williams Reddened Earth