

This post is sponsored by Walmart.
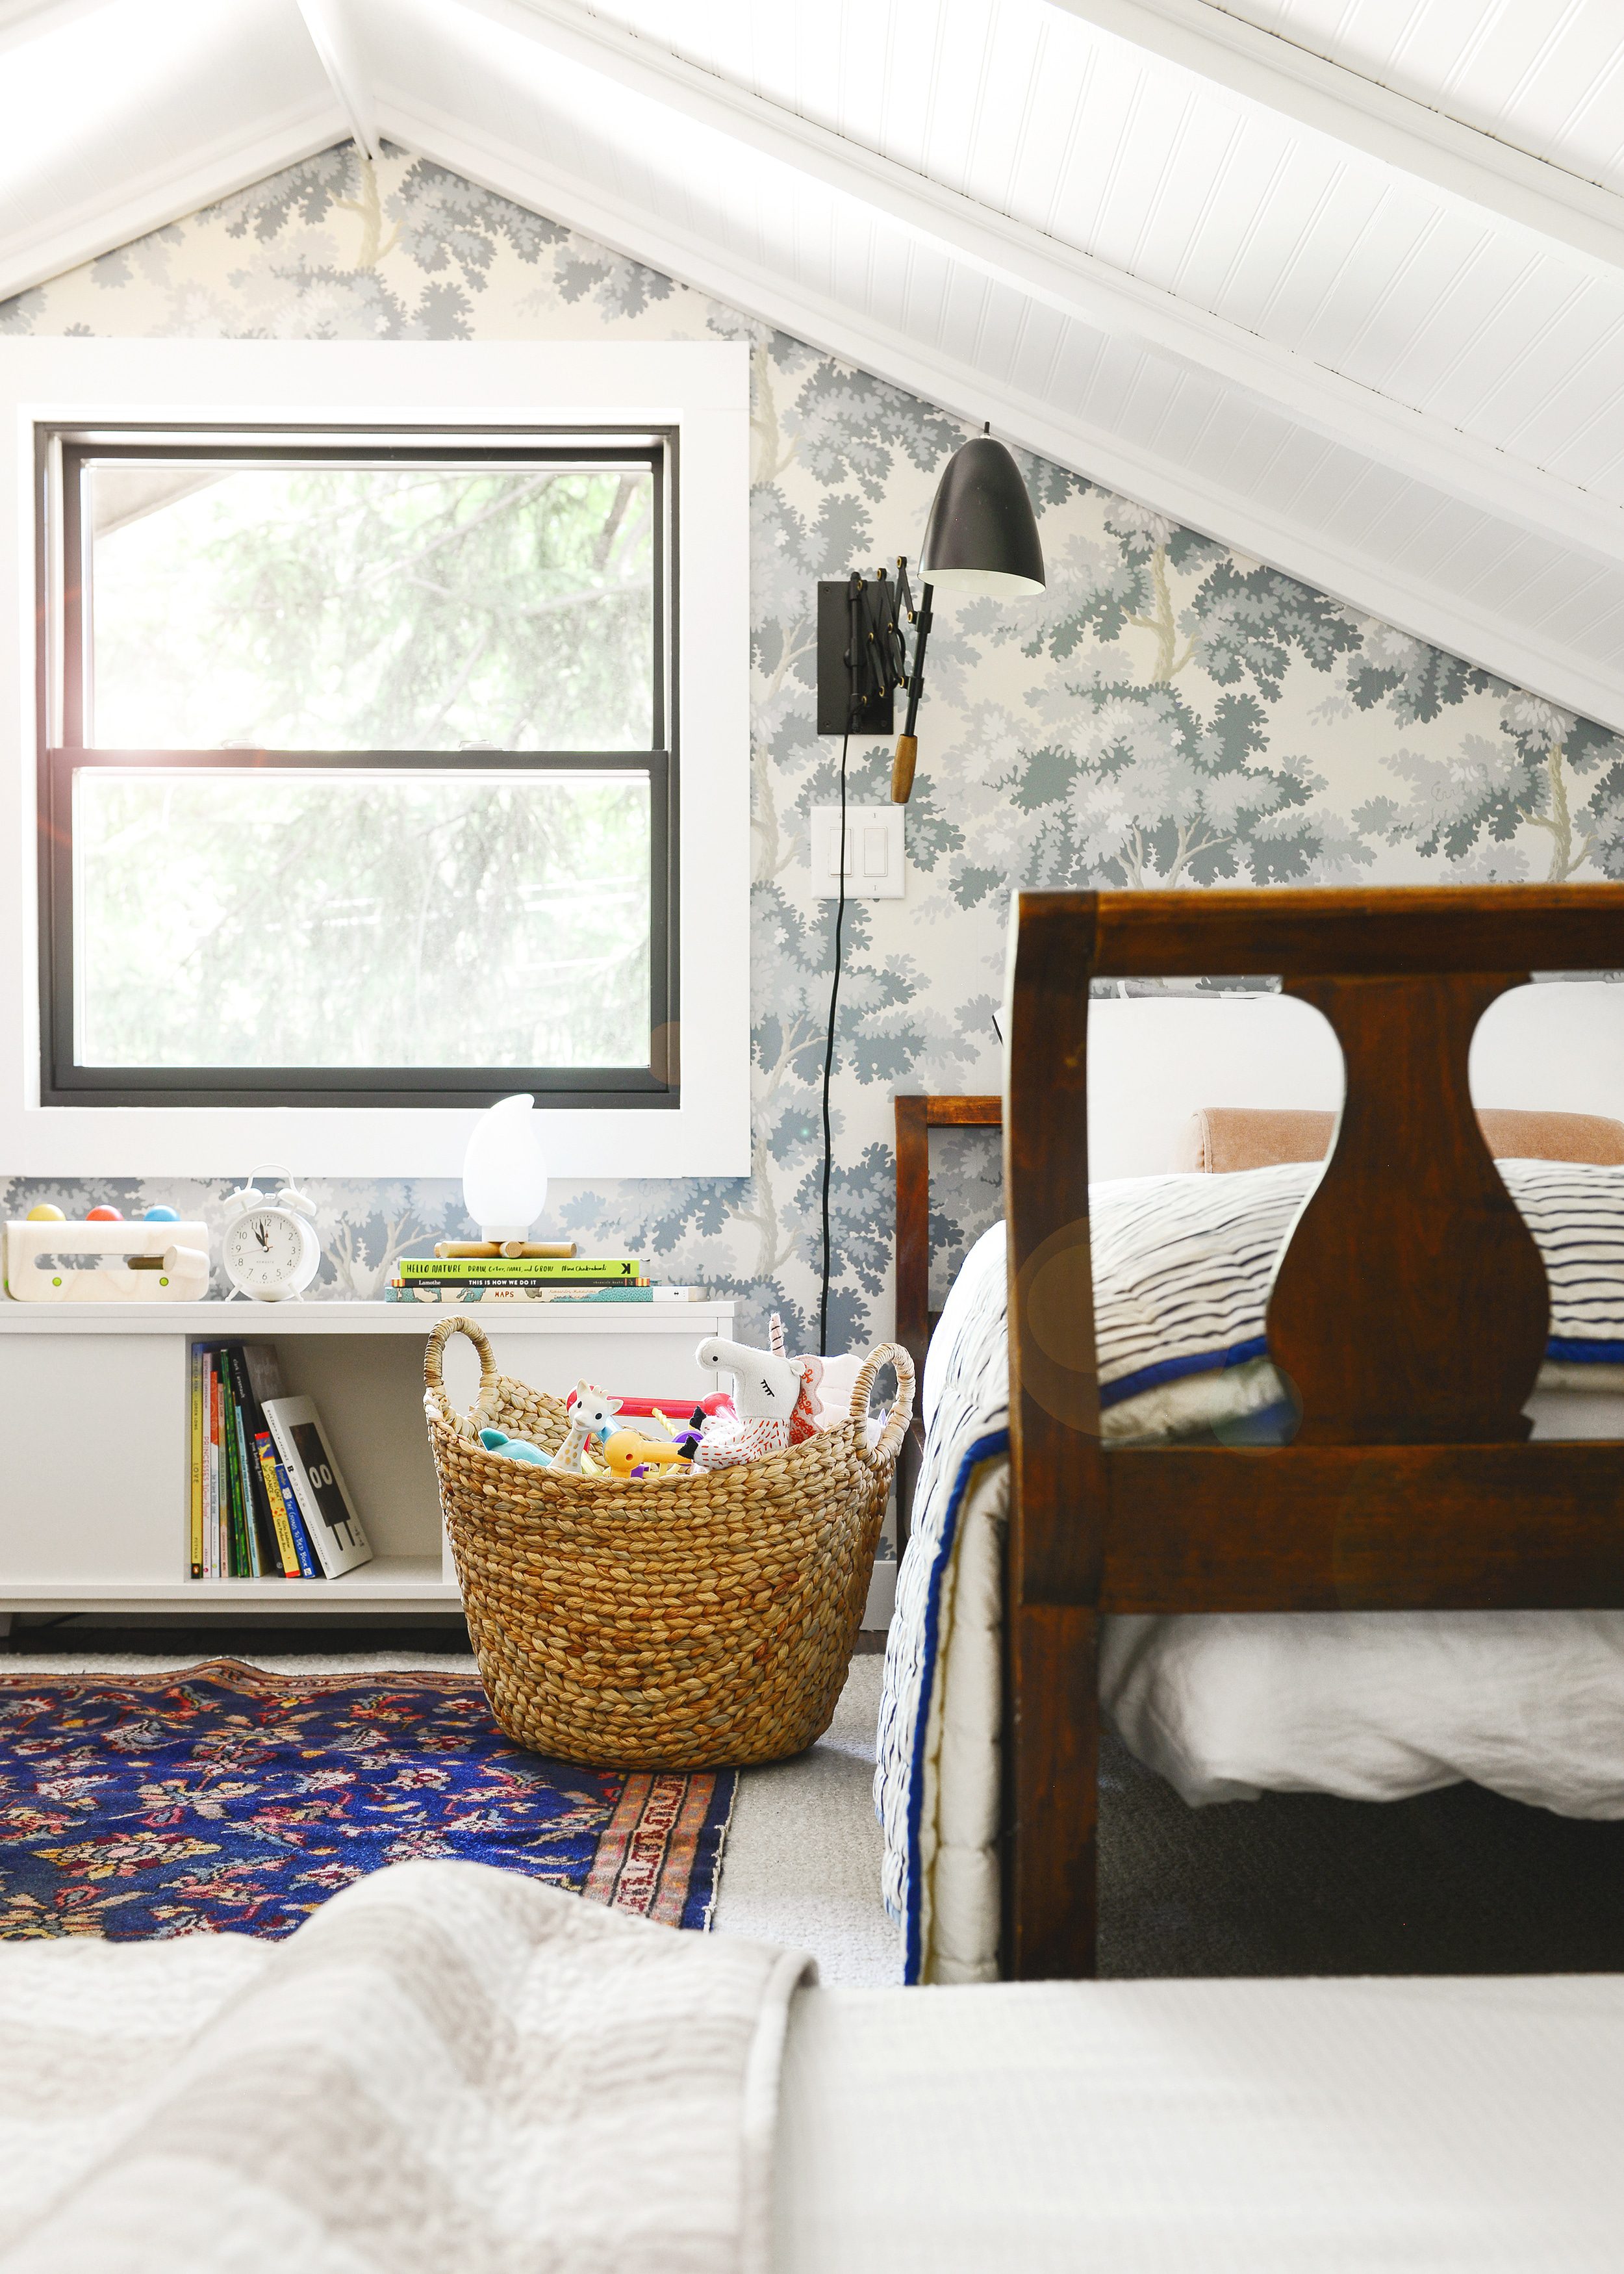
Our little Tree House is a two bedroom, 1 bathroom cottage-slash-cabin-slash-lake-house, but the real start of the show has always been (and probably always will be!) our hidden gem of a sleeping loft. Situated right above our living room, we can lower that heavy wooden ladder and have instant access to two additional beds and extra play space. And now? We’ve added a third bed to the loft by introducing a cot-sized trundle!
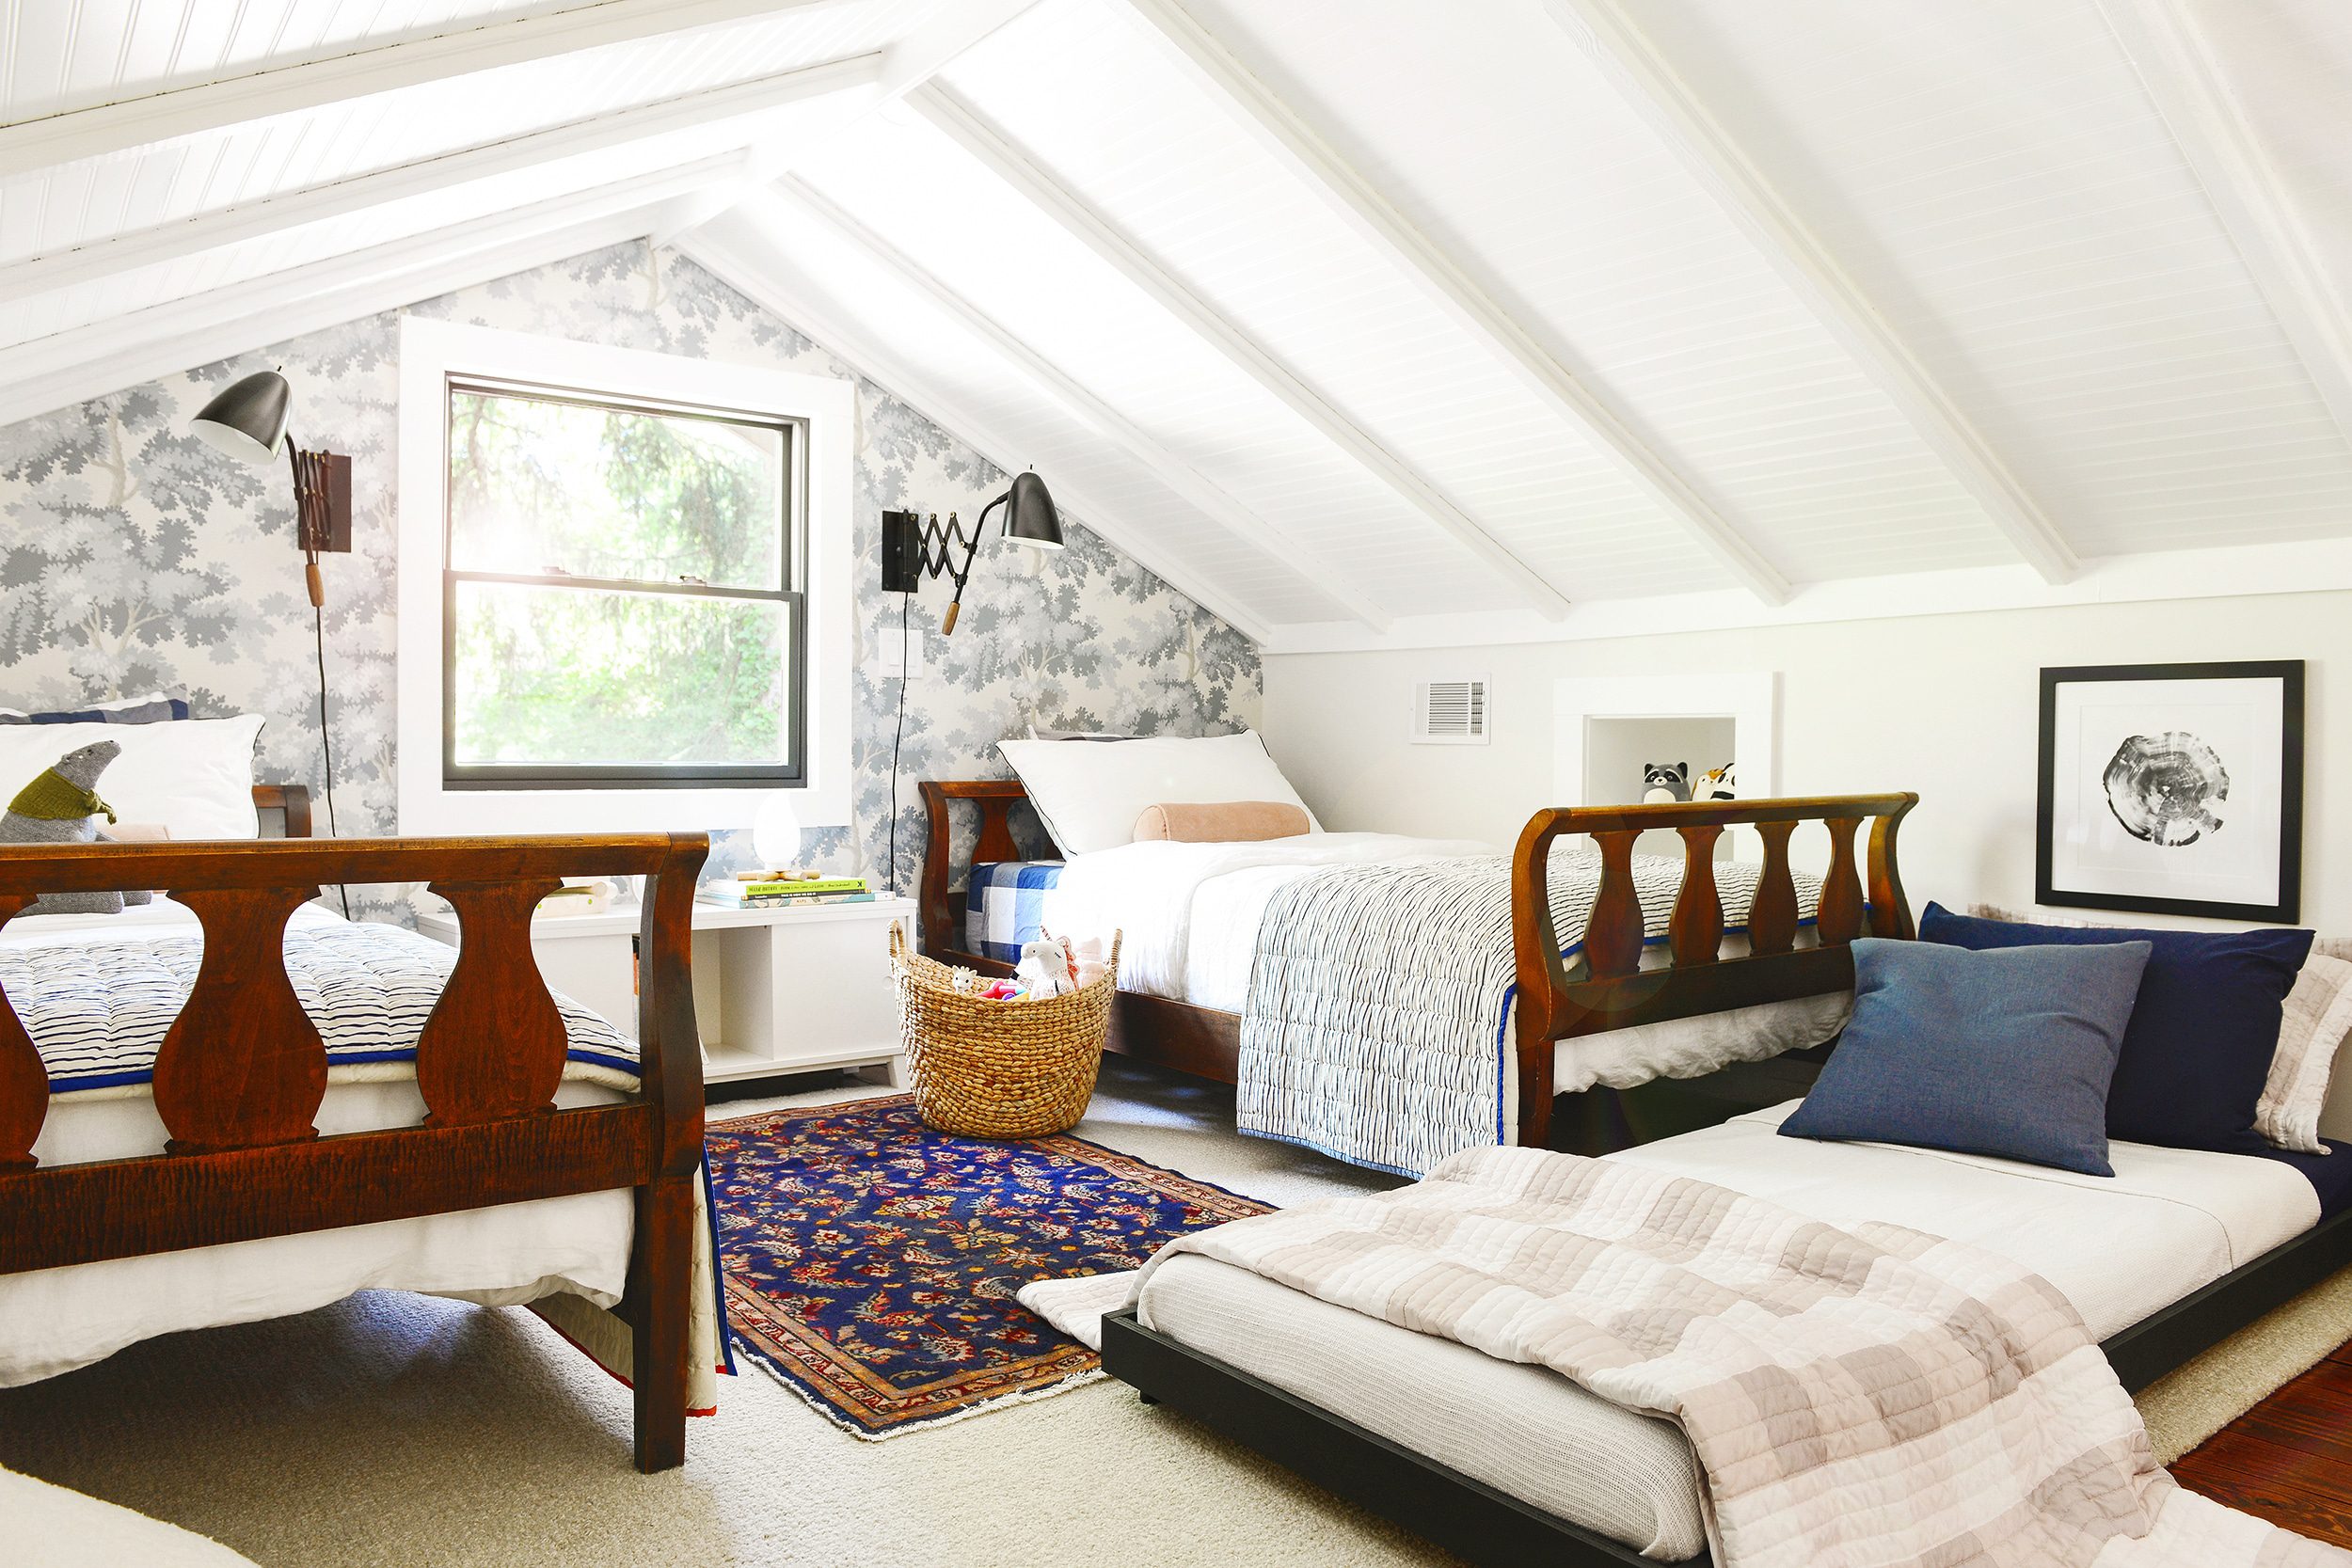
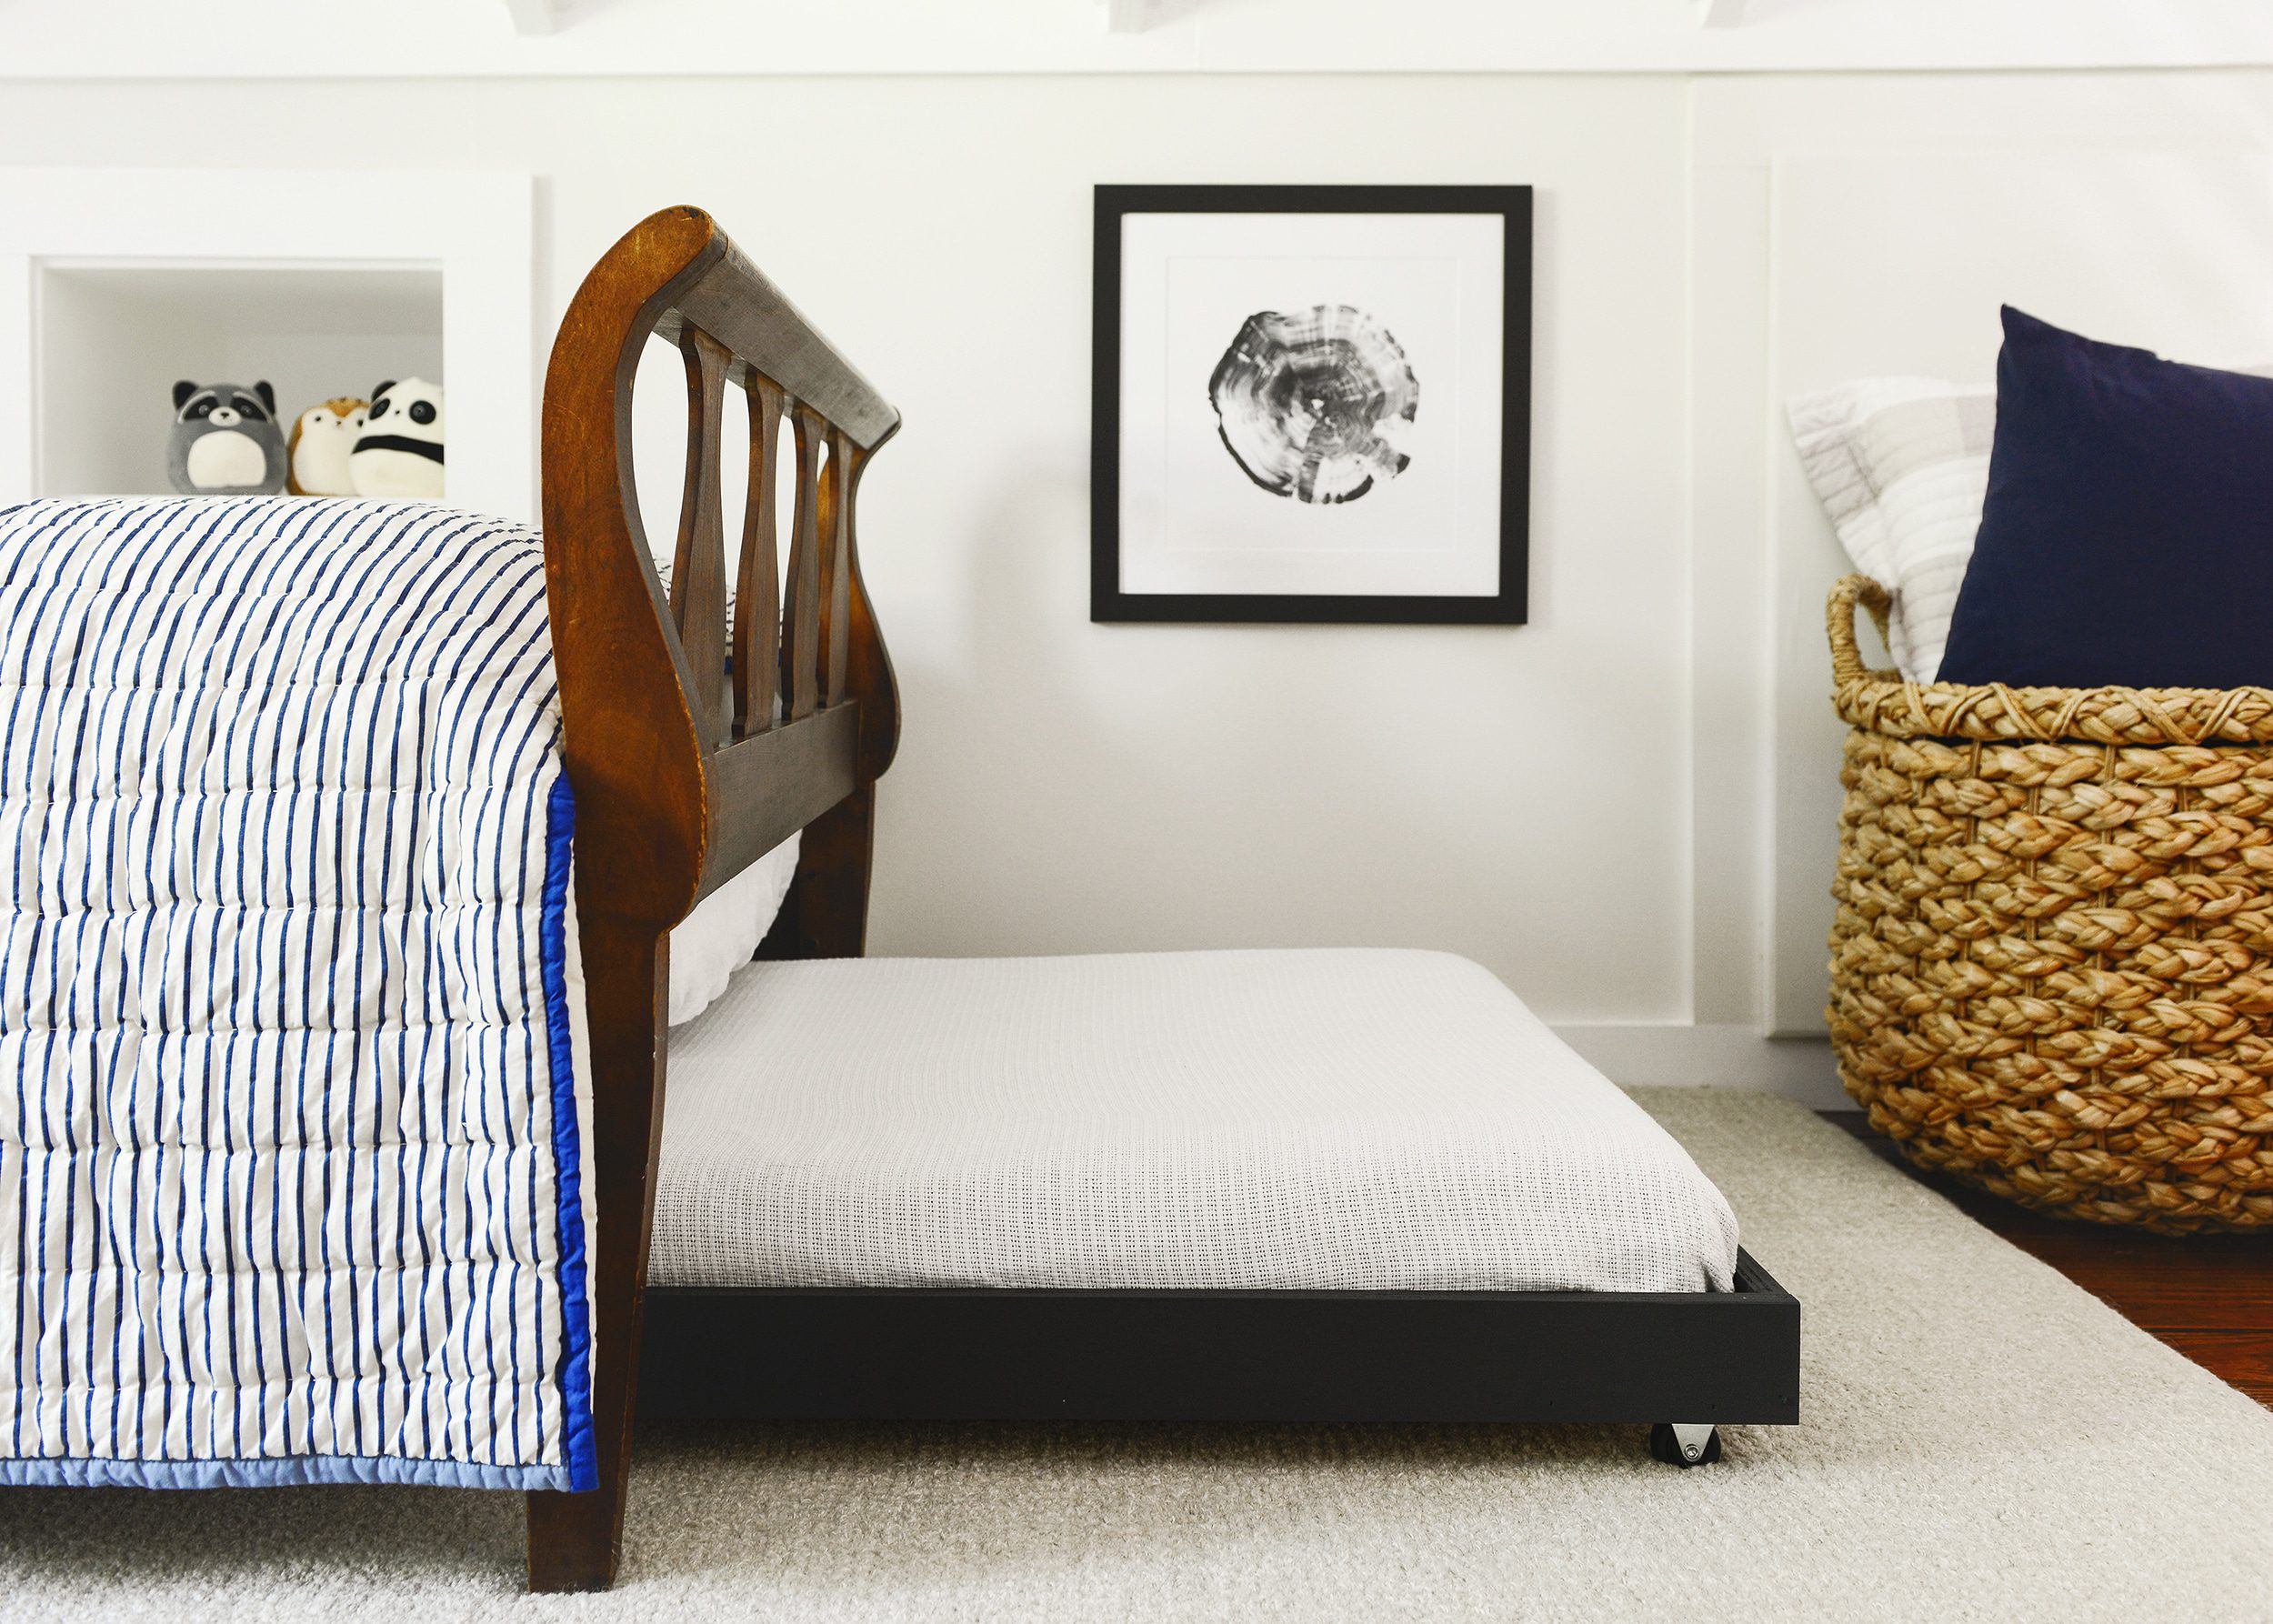
It was always in our plans to include a third sleeping option in the loft, but most readymade trundle options were too tall and wide for the antique beds we inherited with the sale of our home. Those antique beds are practically worth the price of the house alone (kidding, kind of!), but they only offer 9″ of leg height for a rolling bed underneath. Since those beds weren’t going anywhere, we knew we’d need to DIY our own solution, and we did so for $35 – the cost of 1 sheet of plywood.
Tools + Supplies for a 1-Sheet Trundle Bed
- 4′ x 8′ furniture-grade plywood
- table saw
- miter saw
- paint (optional)
- 4″ foam roller (if painting)
- wood glue
- nail gun / brad nailer + 1.5″ nails
- drill
- 6 x heavy duty casters
- measuring tape
- pencil
What We Did:
We selected a $35 sheet of furniture grade plywood from the hardware store (this can run anywhere from $30-50, depending on the finish), and we had it cut it in store to the exact length and width we wanted. We would be using a thin 30″ x 75″ cot mattress, and we chose to have the base of the trundle cut to 31″ x 76.” We asked to keep the leftover plywood, and we brought everything home.
The mattress we chose is 4″ thick, and we wanted the sides of the trundle to simply keep it in place. Keeping in mind that the thickness of our plywood was 3/4″, we decided on a height of 2 3/4″ for the sides, which would give us a 2″ lip around the perimeter of the trundle base. Scott ripped the excess plywood to the 2 3/4″ widths on the table saw, and then he used a miter saw to cut them to length. There were no fancy cuts here – just simple straight cuts on the corners:

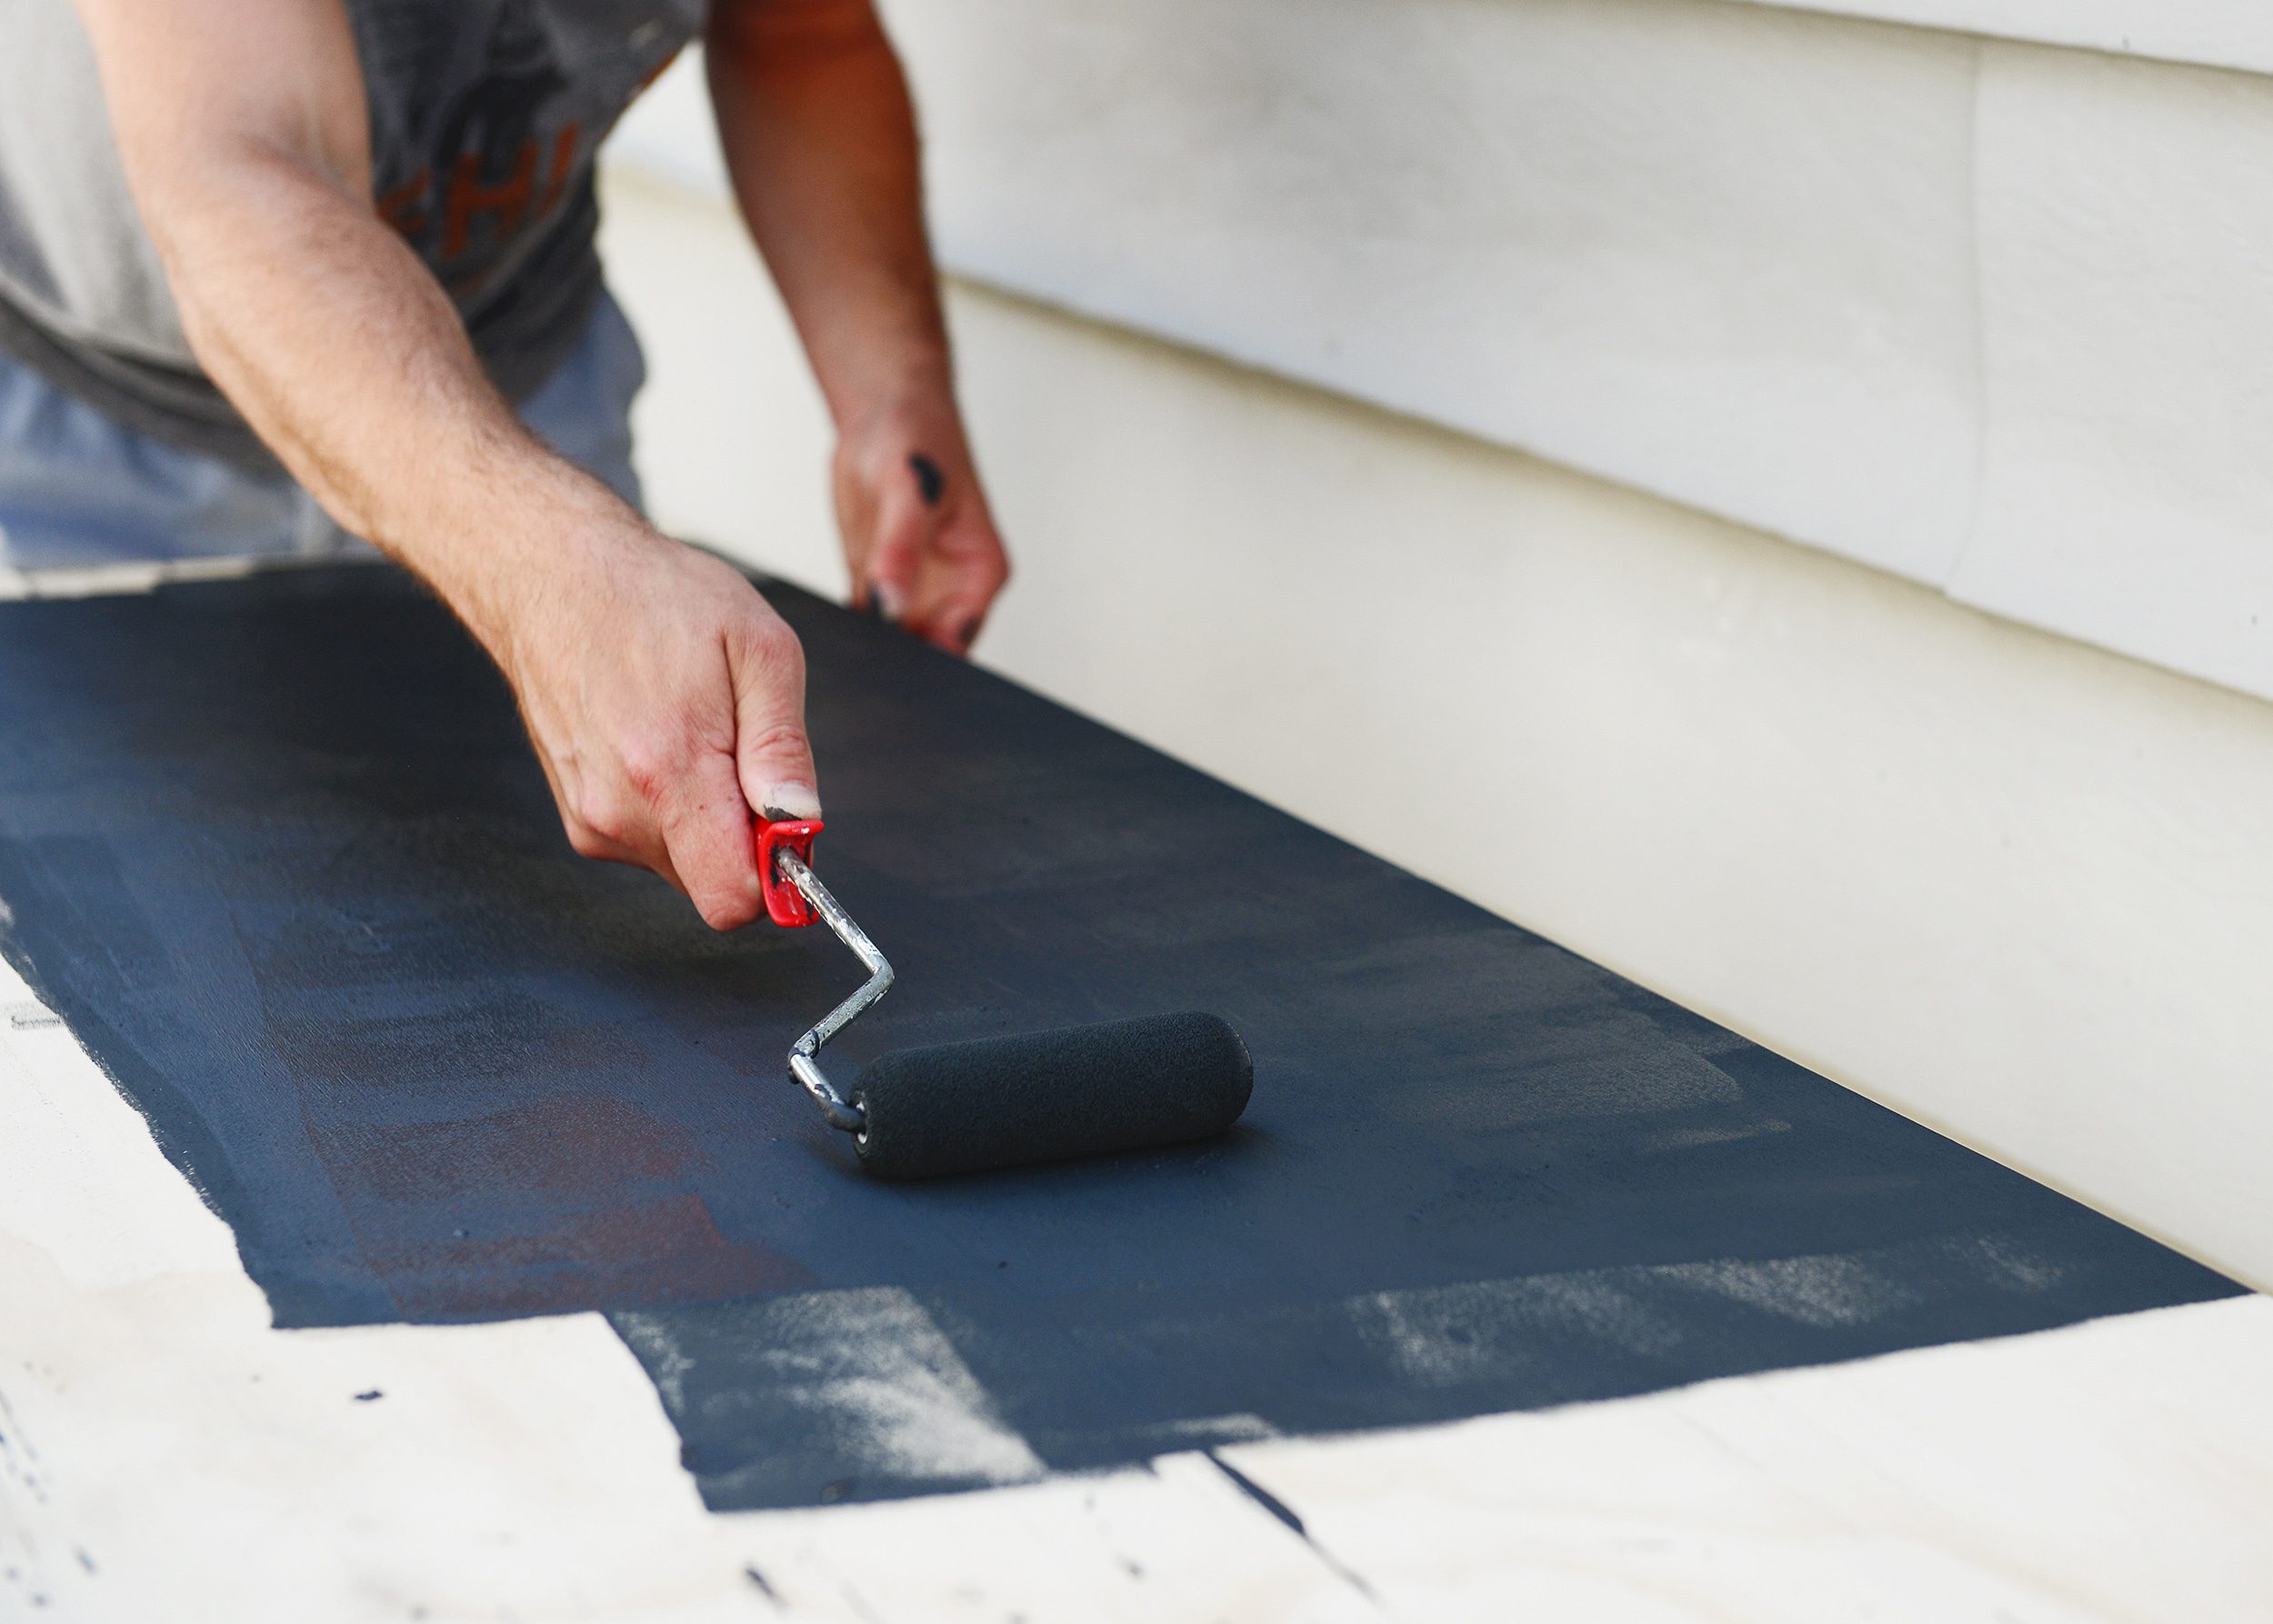
Before putting it together, we painted the four sides and base with black paint using a 4″ foam roller. We debated a multitude of colors, but when it came down to it, we wanted the bed to remain undetectable when tucked away, and we knew that black would achieve that for us.
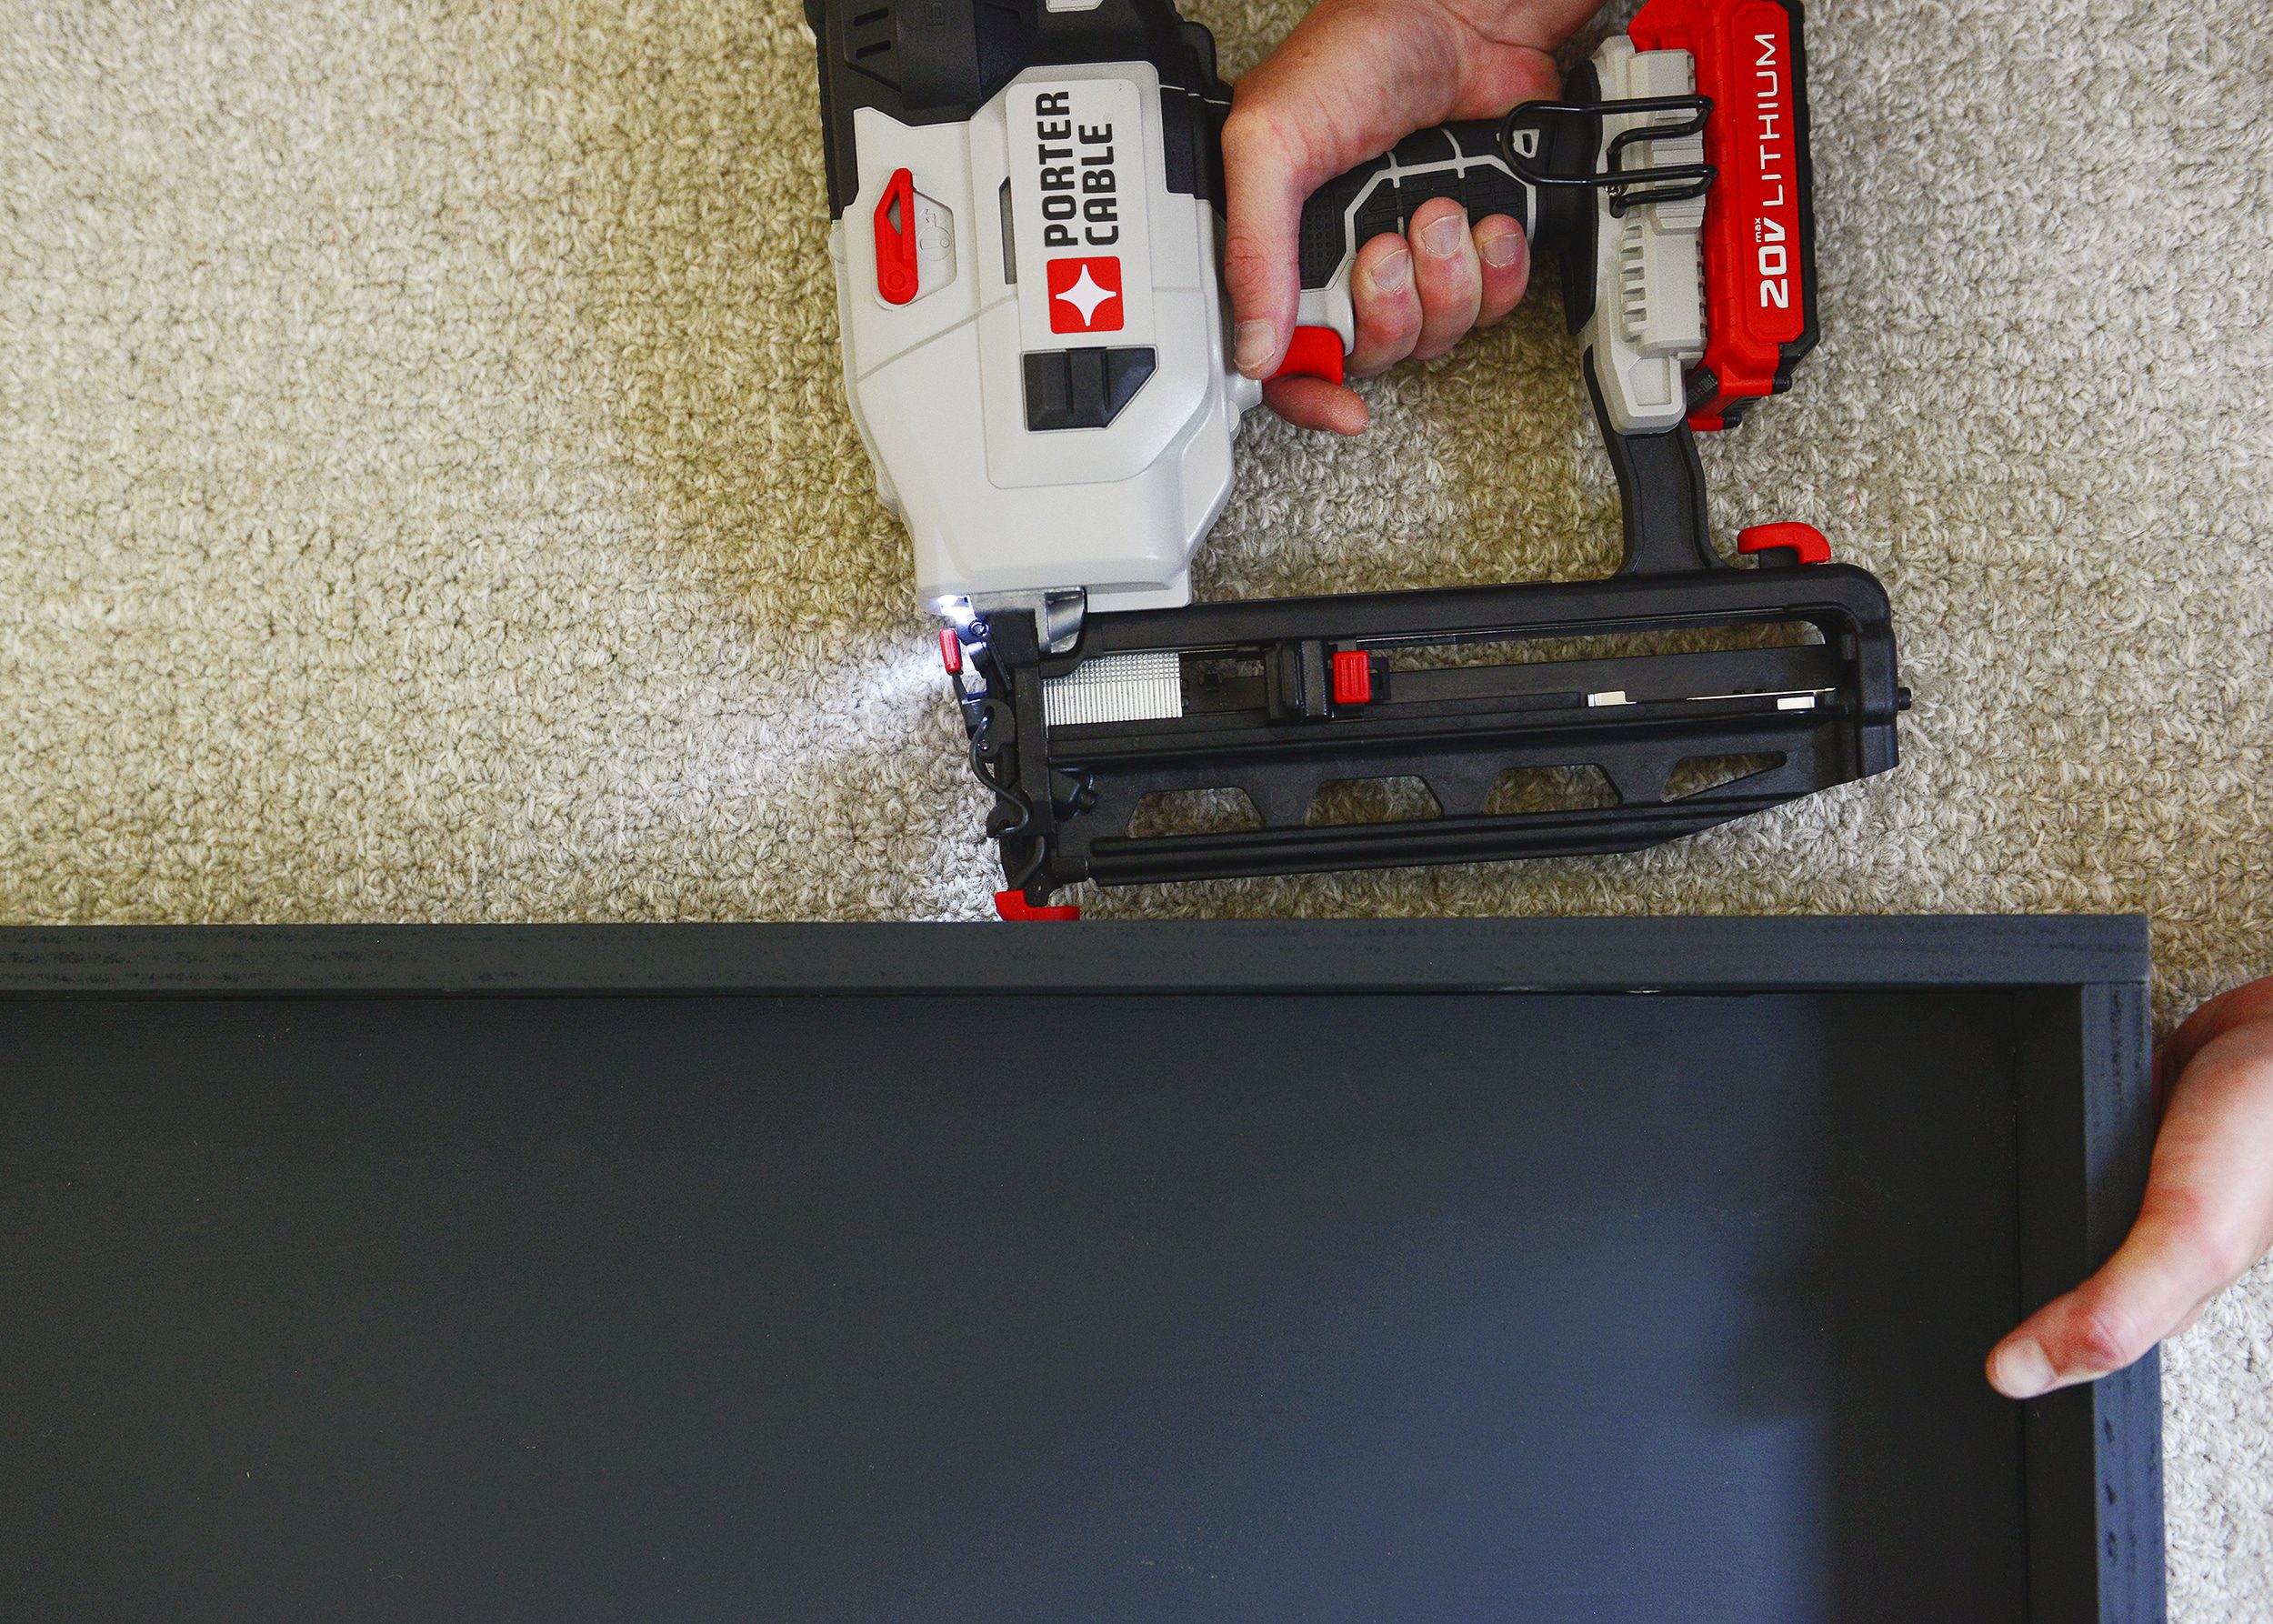
We hauled the bed components to Tree House, and once we were in the loft, we were ready to put it all together! We started by applying a thin bead of wood glue to the side, and Scott used our nail gun loaded up with 1 1/2″ nails to pop it into place. He placed nails every 10″ (or so) along each side.
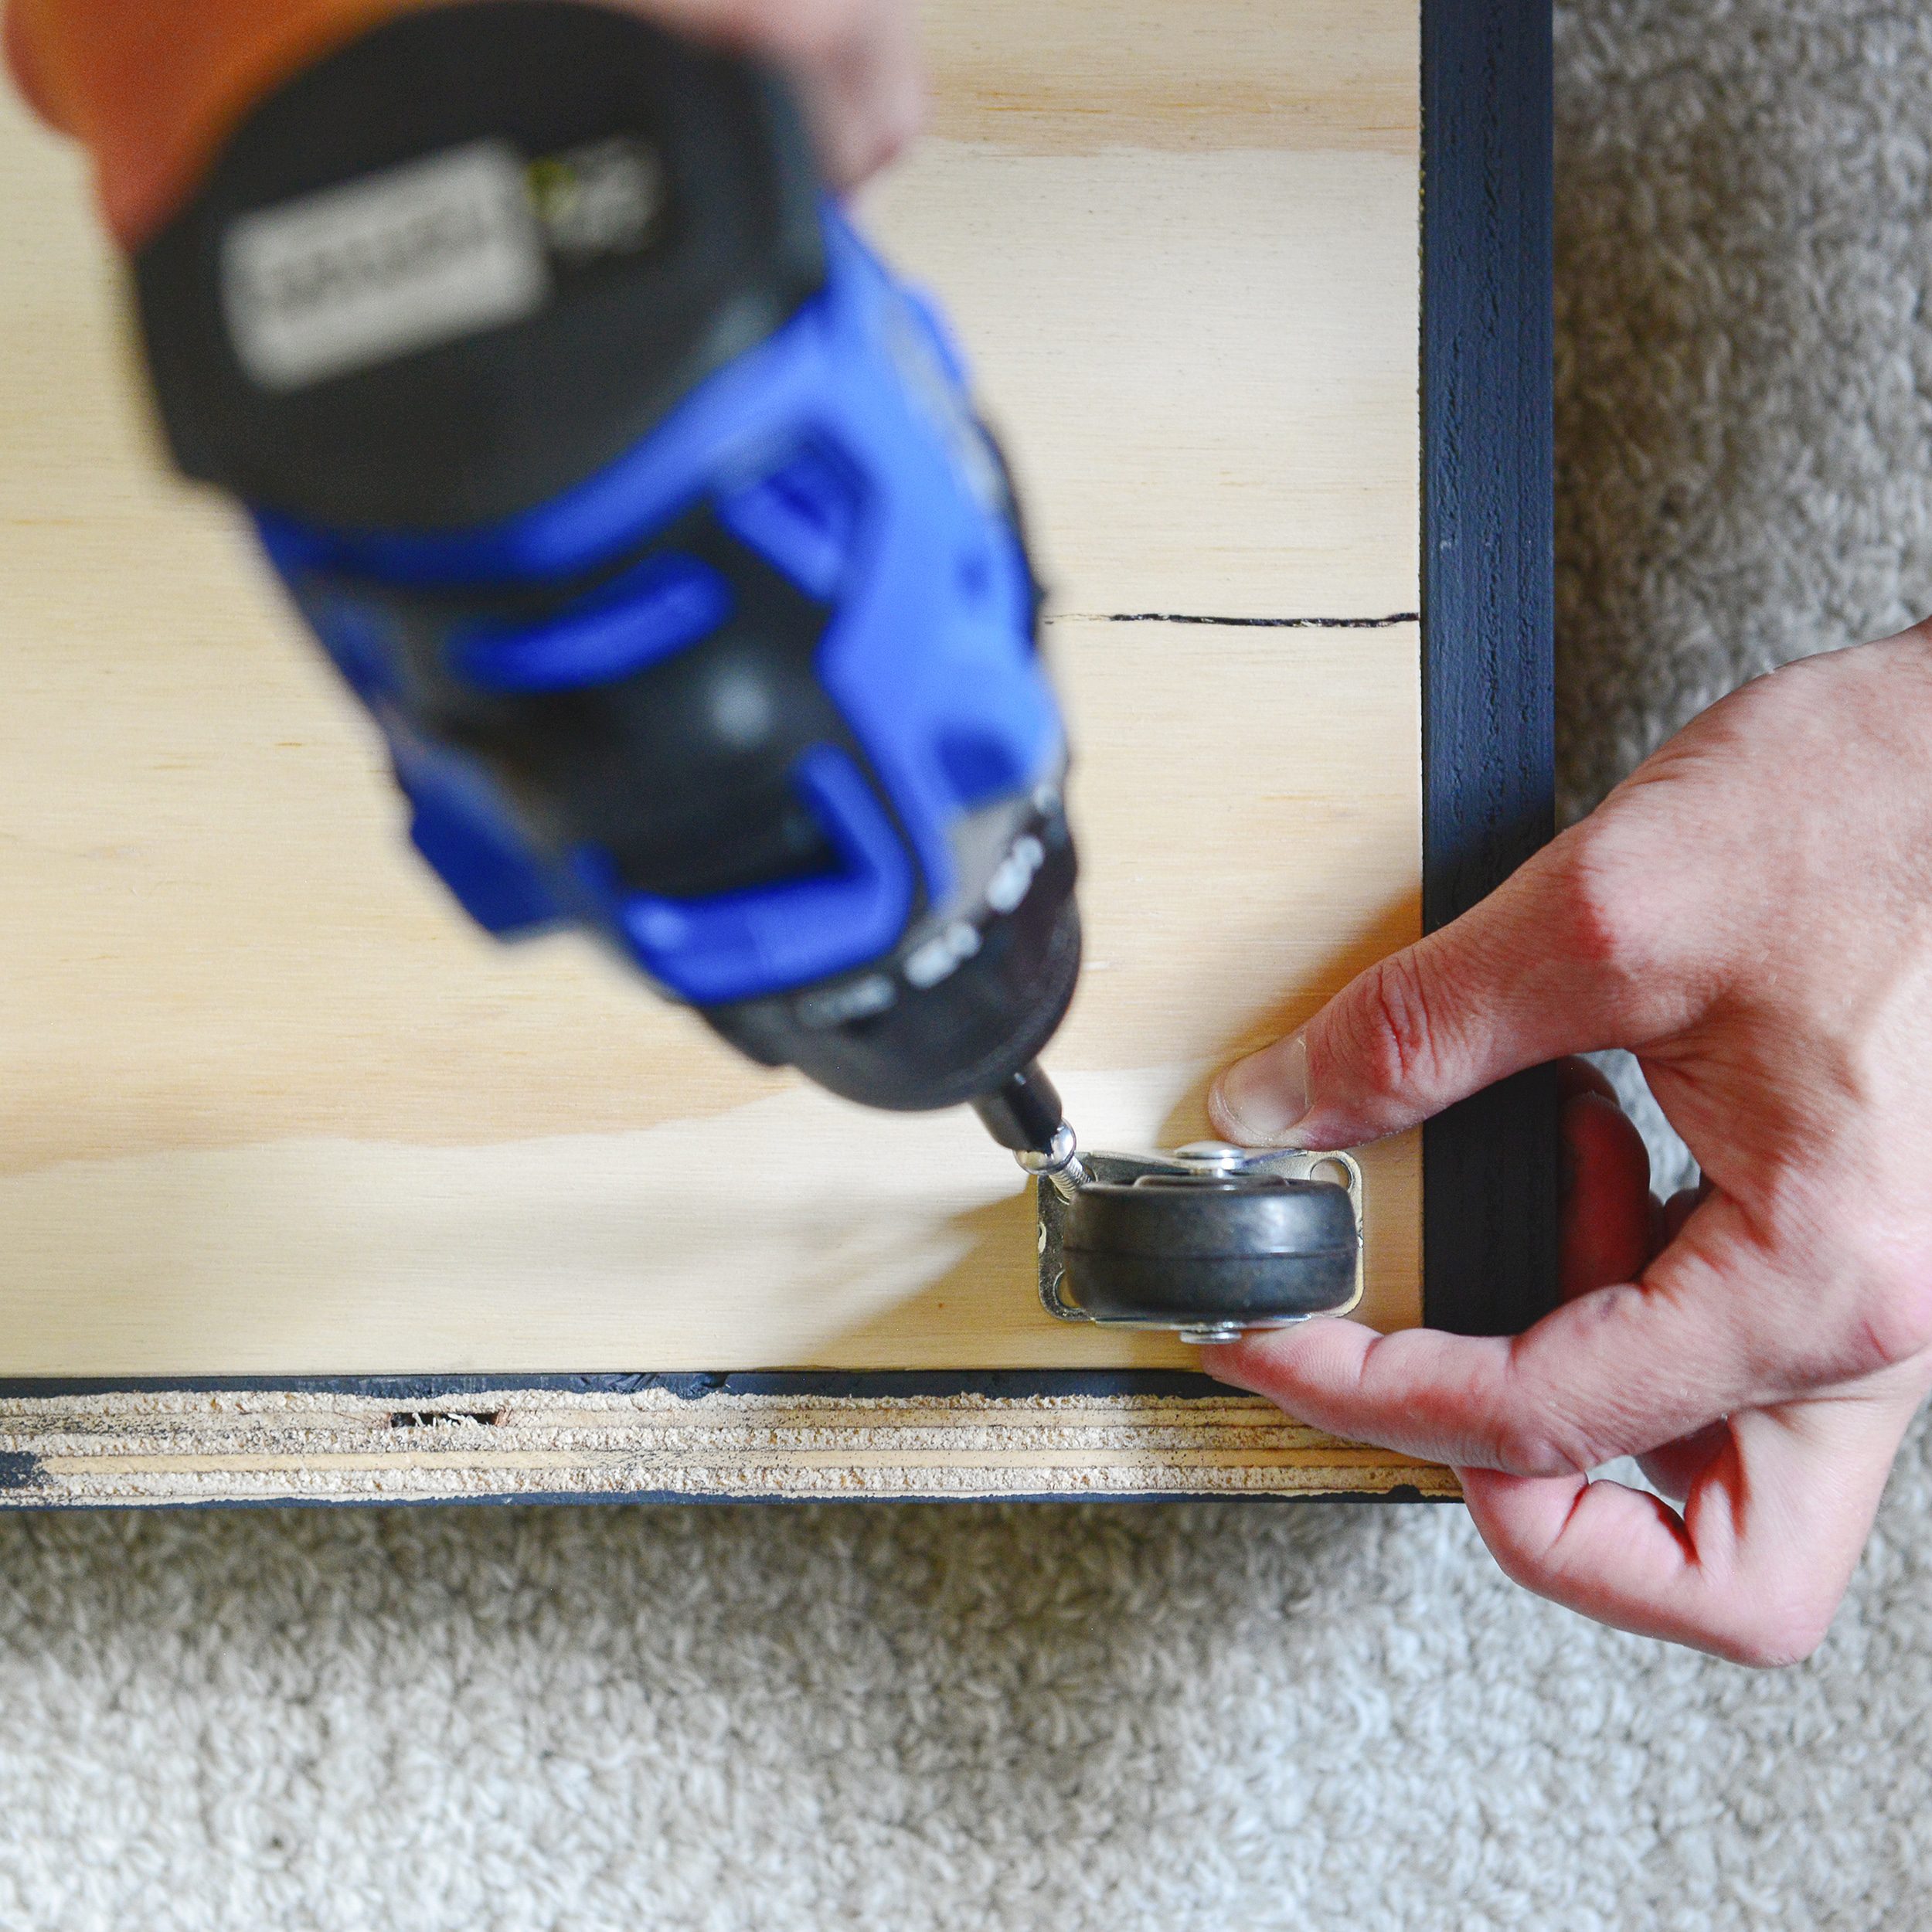
Then we flipped the whole thing over, and we added 6 heavy duty casters to the base – one for each corner, and two along the sides in the middle. When we turned it back over, I took out the black paint once again to touch up any scuffs and pock marks.
Making the trundle was a snap, and it’s so nice having an additional, no-fuss bed to pull out when needed! I made the bed with a fitted sheet, top sheet and extra cotton coverlet, and the whole thing tucks nicely underneath the bed (with a 1/2″ to spare!). We wanted something that didn’t have to be ‘set up’ each time, and this is it. Nearby, I stuffed the bed pillows and a soft quilt into a basket we had on hand.
In the end, we were going for a coastal vibe, with that cozy Midwest, Michigandinavian feel. It’s what you might expect from a little house near the lake – fresh white layered with cool navy and warm neutrals. Buffalo check. Pinstripes. Basketweave textures and soft lighting to set the mood.
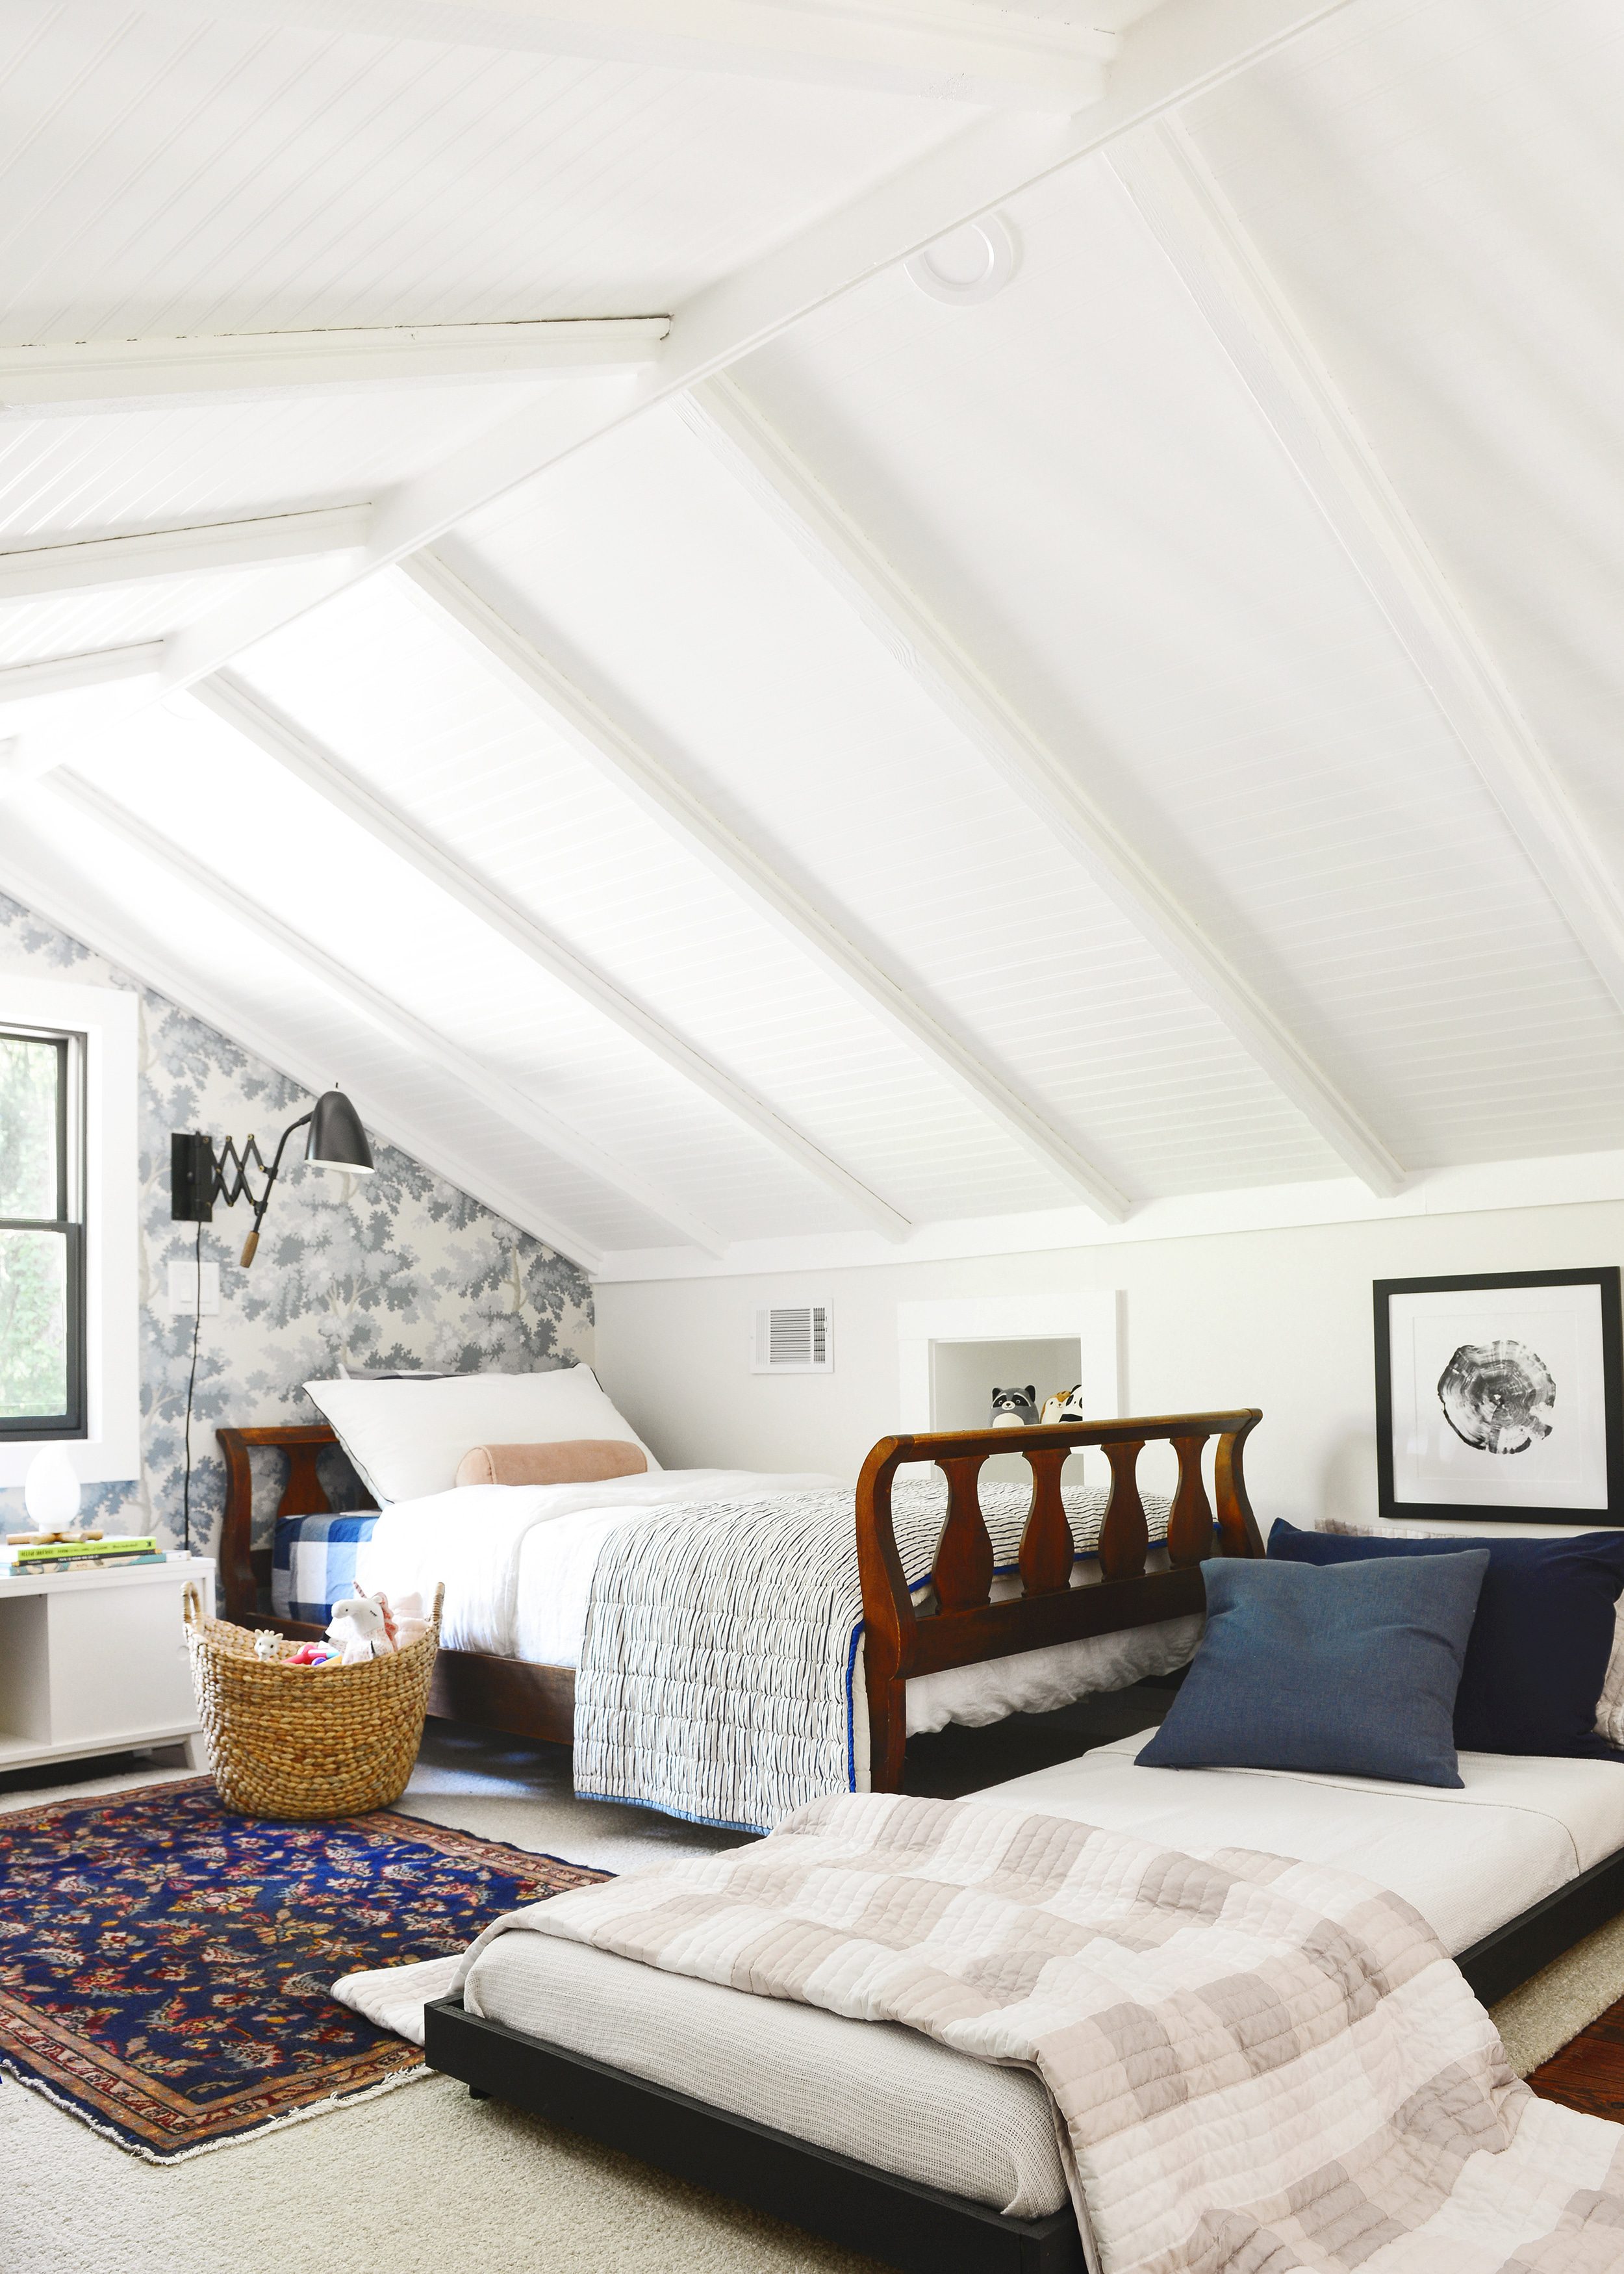
We dressed the bed with all items found from Walmart Home, down to the denim-look indigo throw pillow! The cotton coverlet I used as the top bedding layer is the quintessential cabin blanket – just like your grandmother might have. (It gives me all the feels, and it comes in all the colors, too.) And you know I couldn’t resist piling on the plaid khaki quilt; it’s a must for chilly nights!
A Coastal Cabin Sleeping Loft
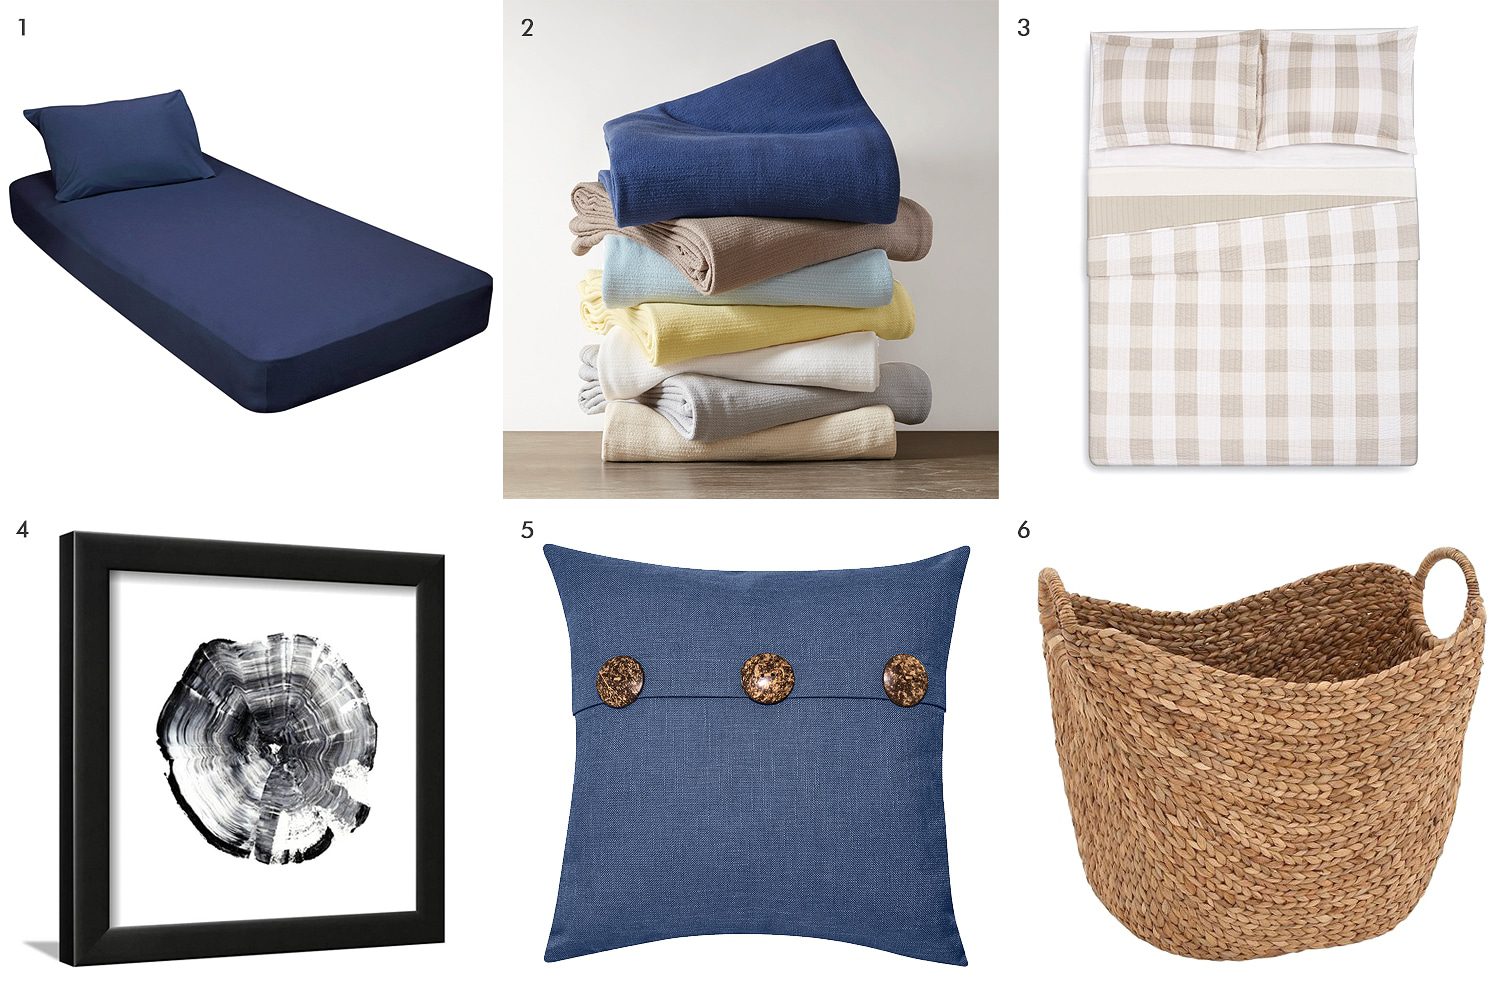
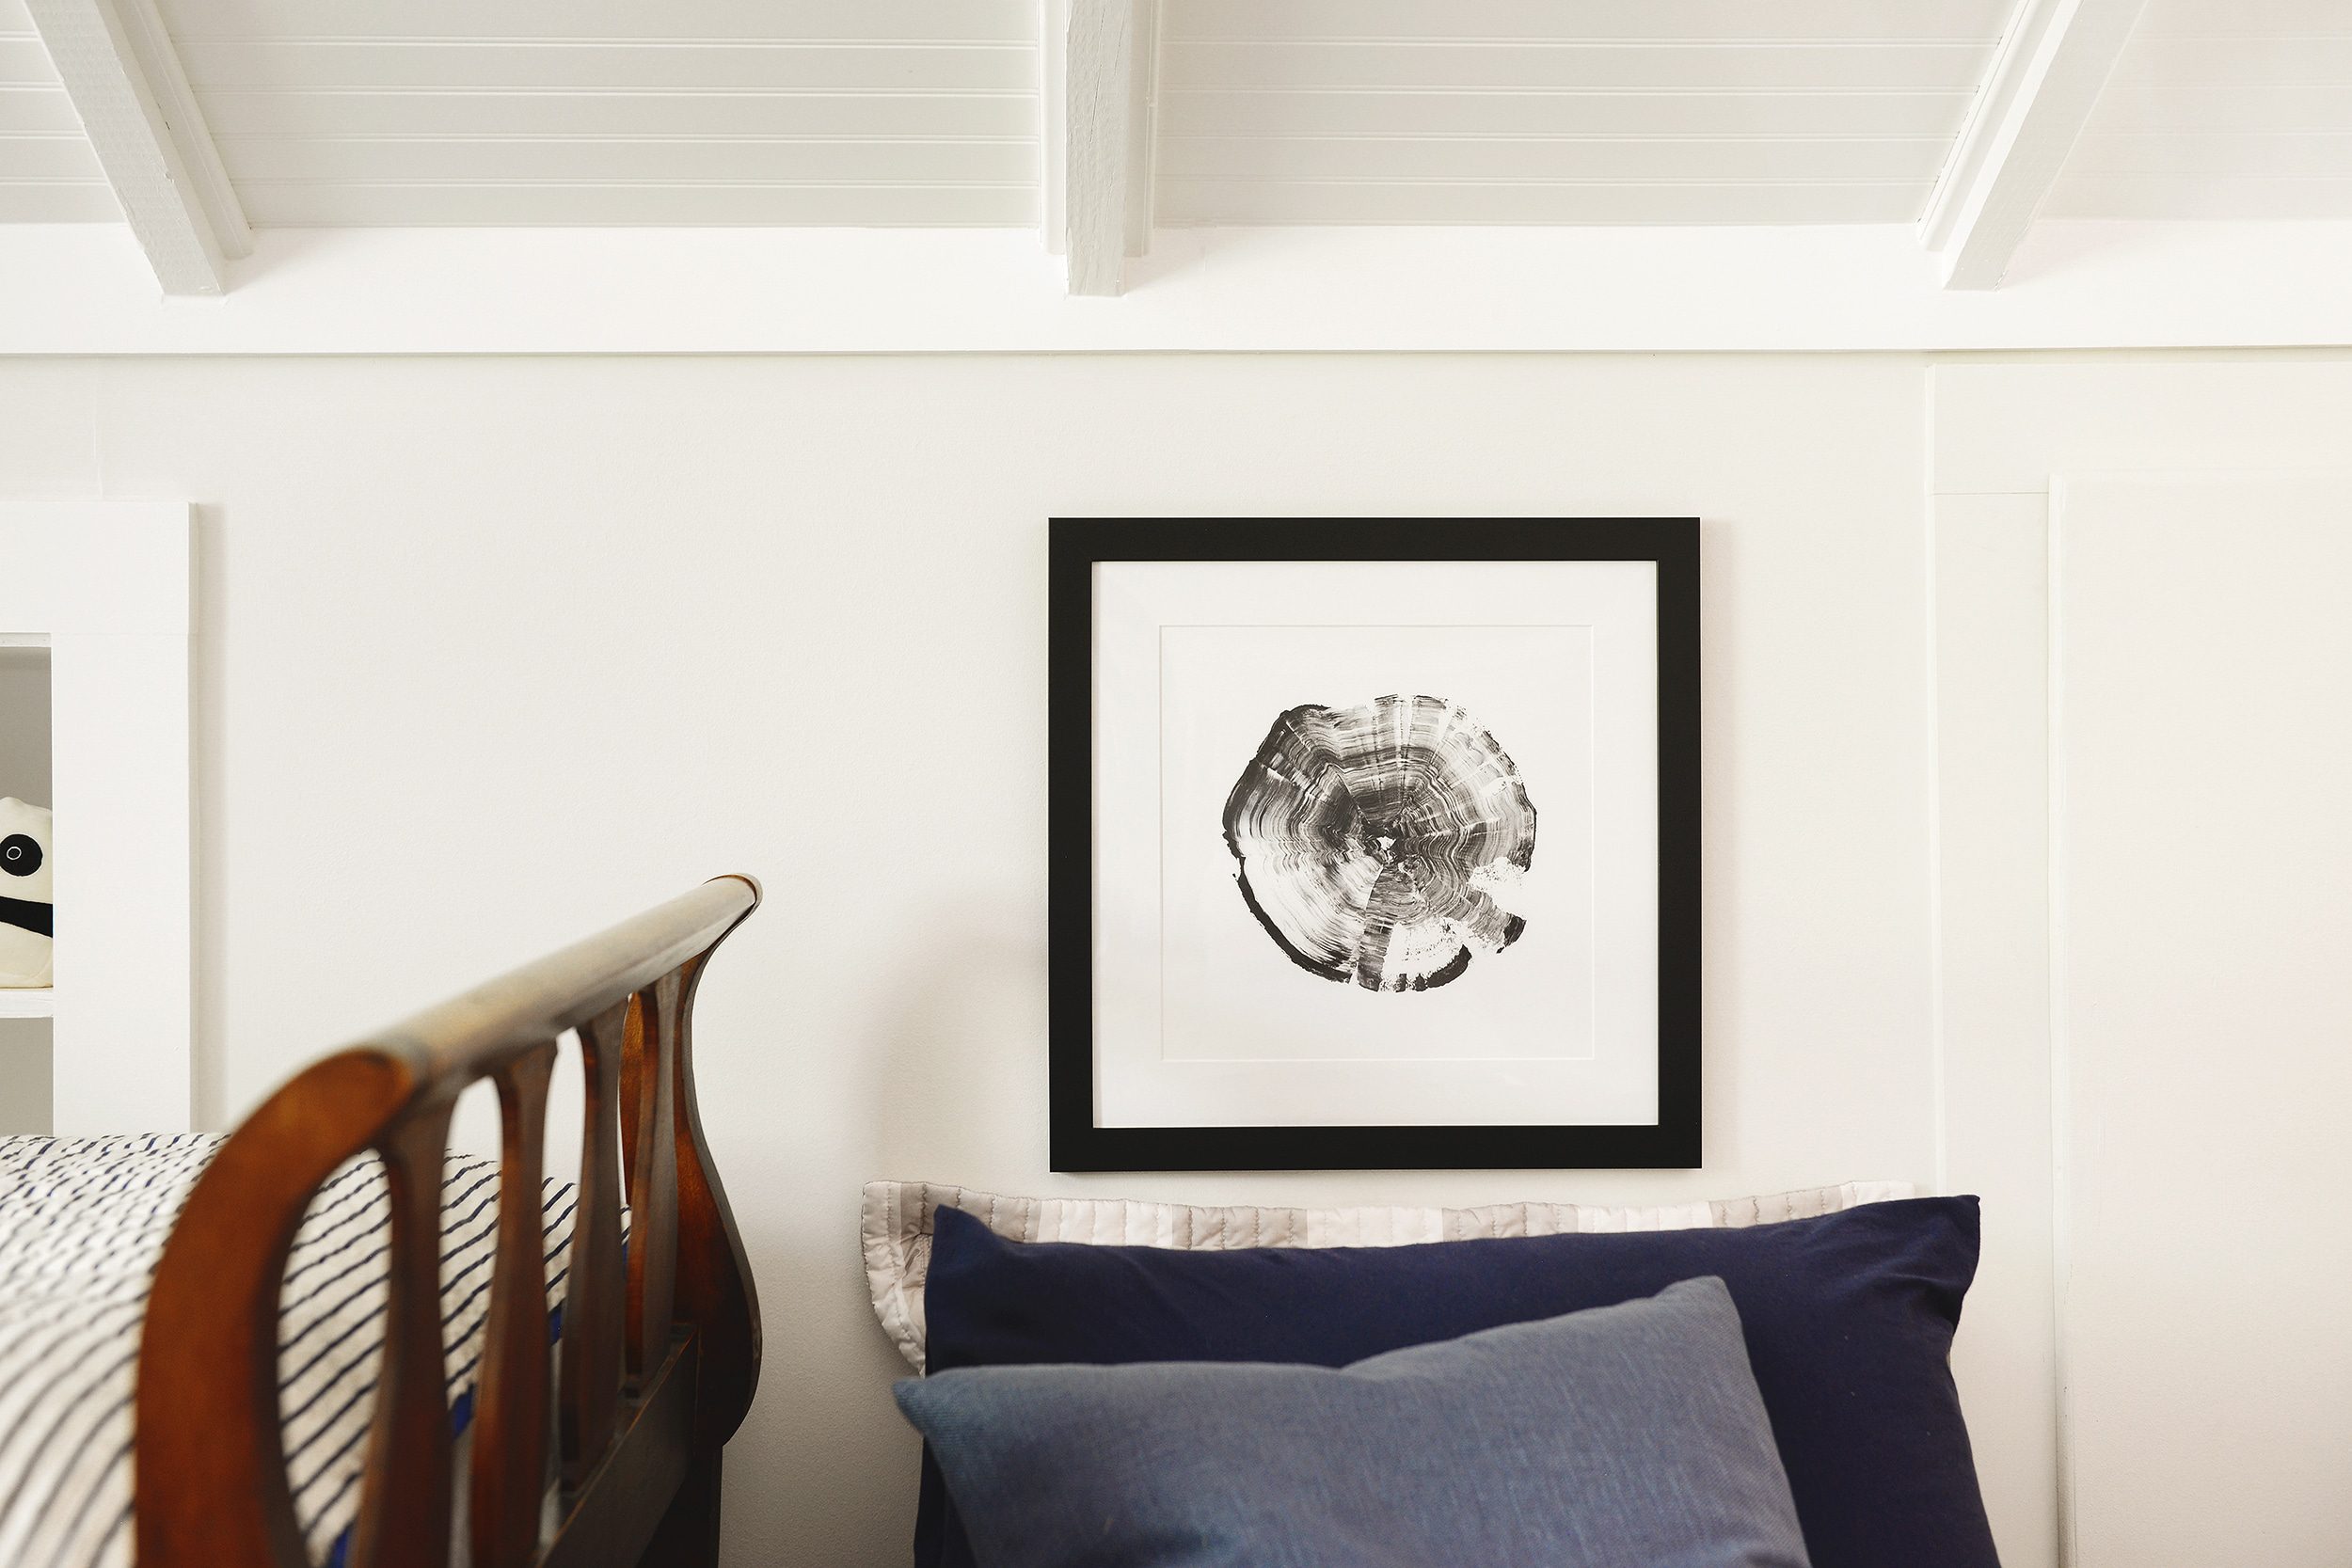
1. jersey cot sheets | 2. freshspun basketweave cotton blanket | 3. buffalo plaid khaki quilt | 4. botanical cross-section framed art | 5. feather filled 3-button pillow | 6. woven seagrass basket
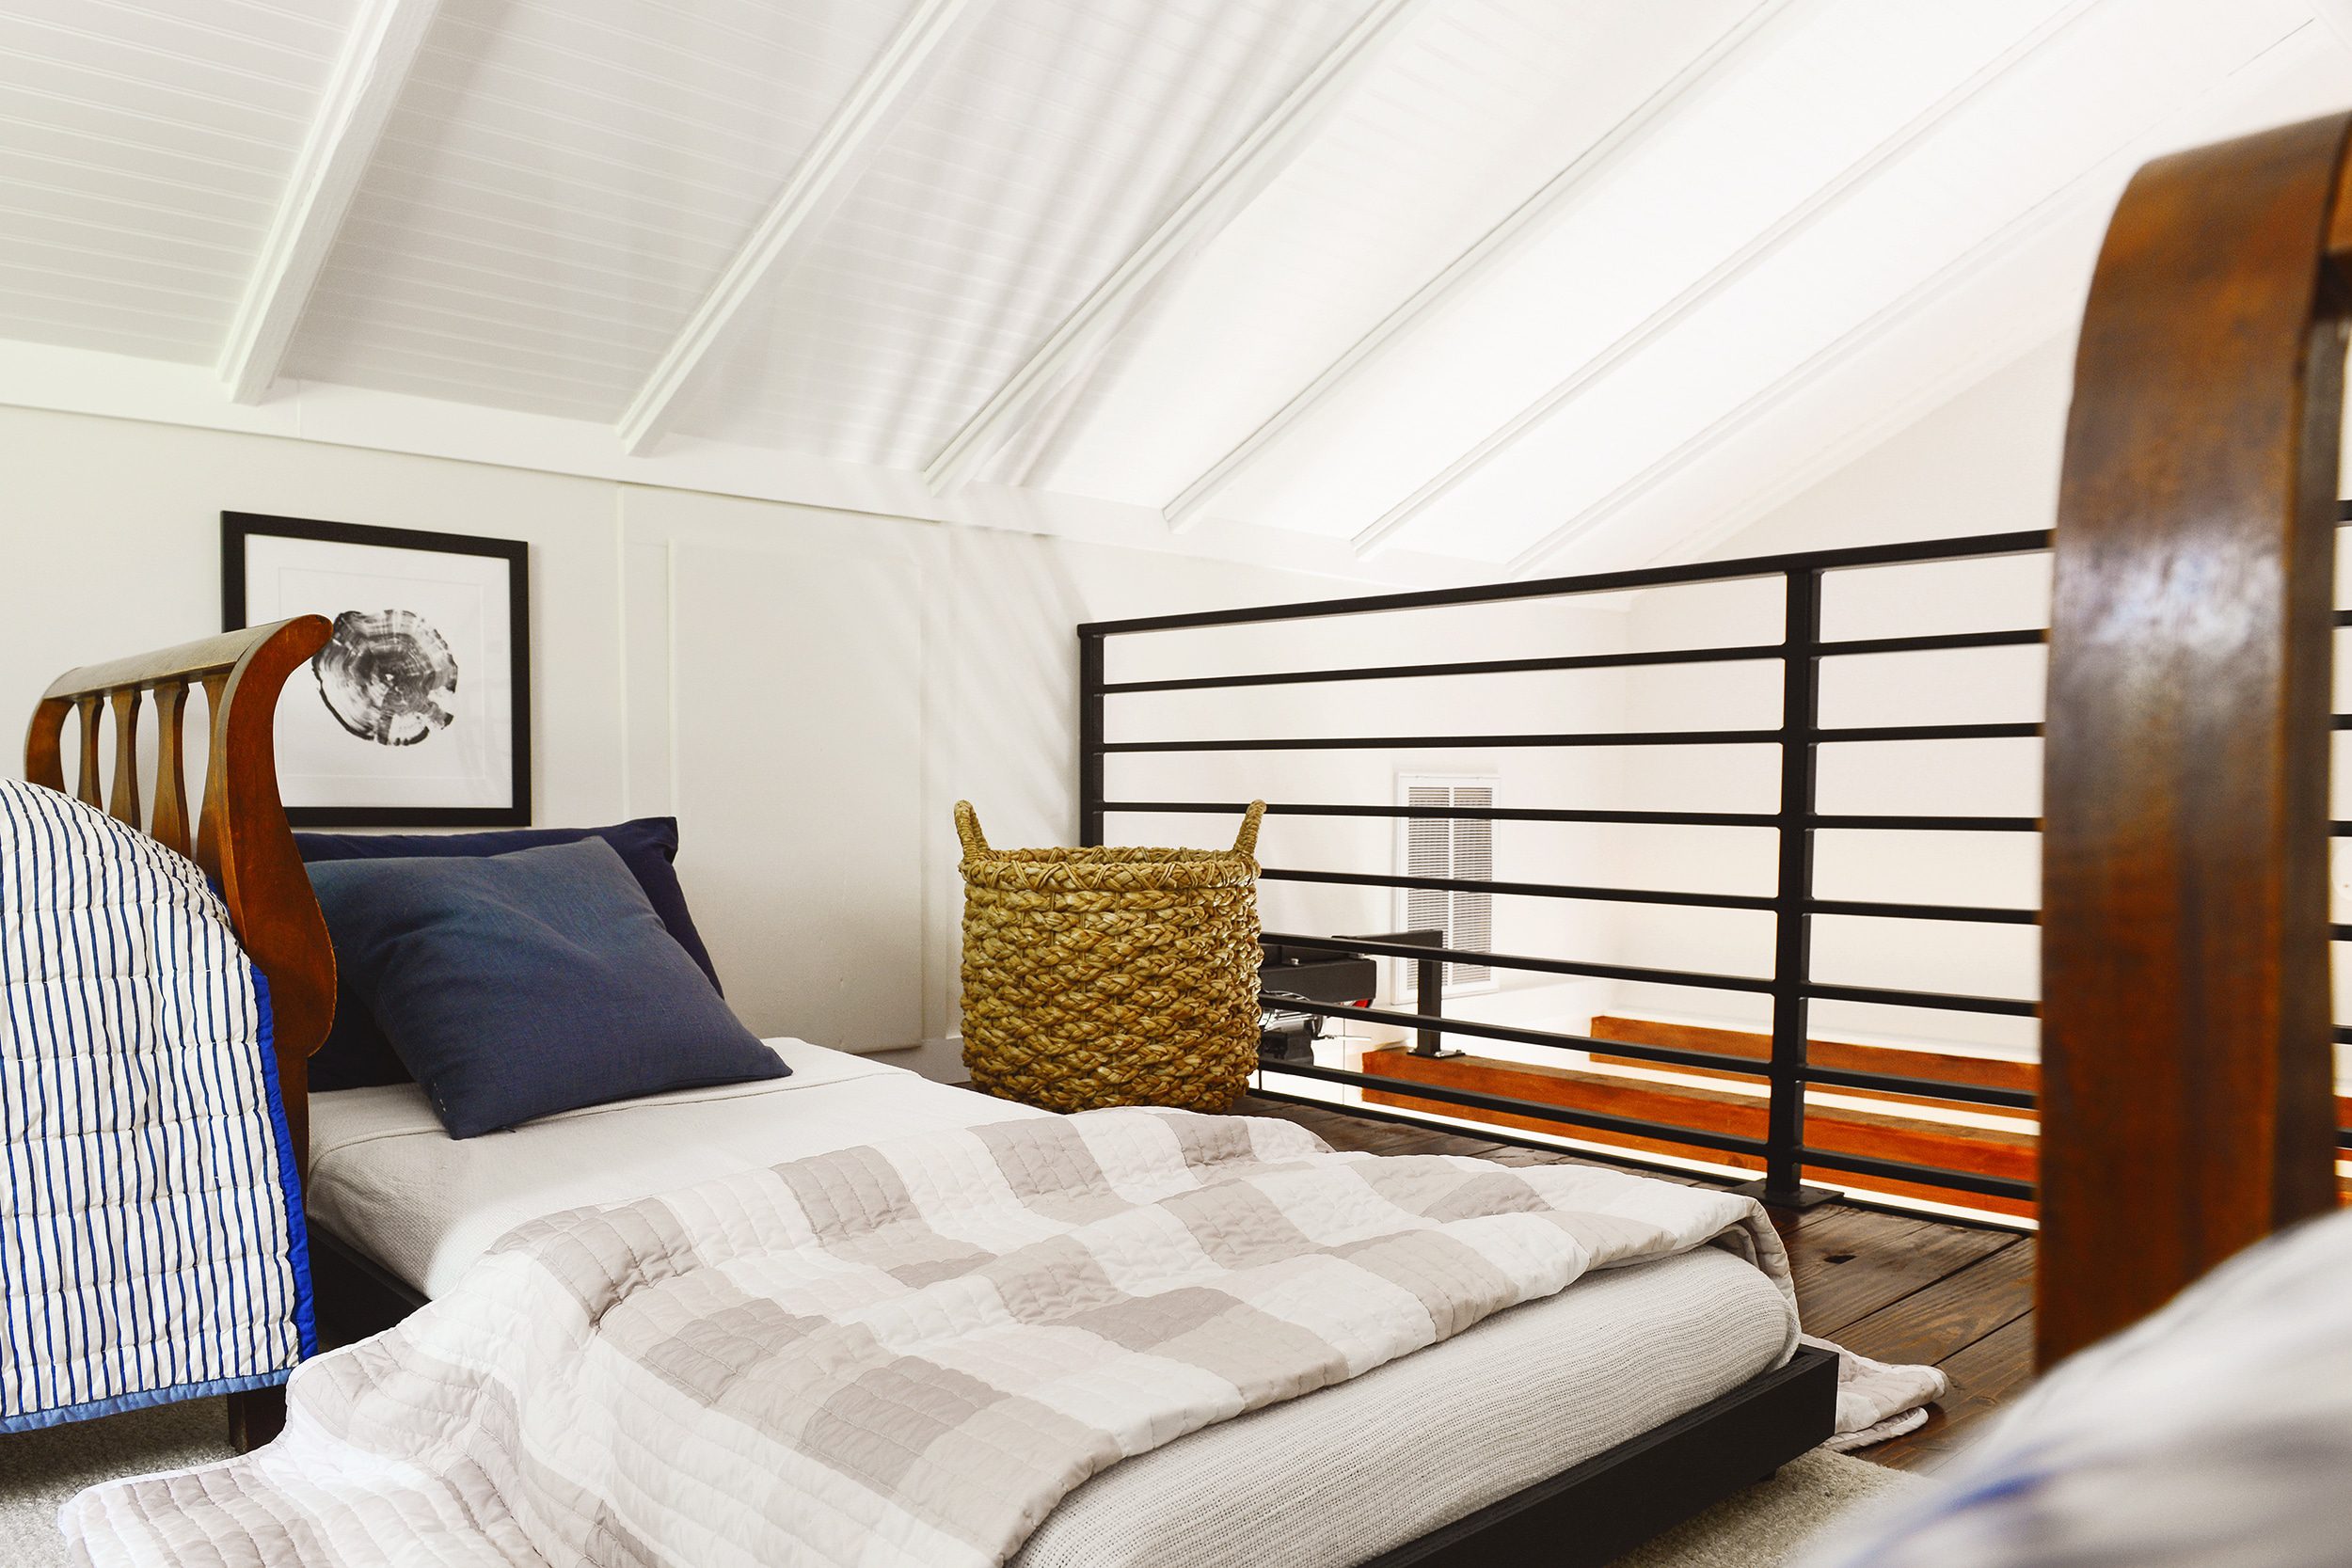
When we found this framed tree ring art, we both agreed it was meant for the loft! We don’t like to be overly theme-y, but we felt like it was abstract enough to play off of our modern railing, and honestly, it’s just so, so cute. When the trundle is pulled out and turned on its side, it creates a headboard-esque vibe that substantiates the bed itself – like, the bed is no longer an afterthought. (And yes, we secured it tightly to the wall with these 3M velcro strips!)
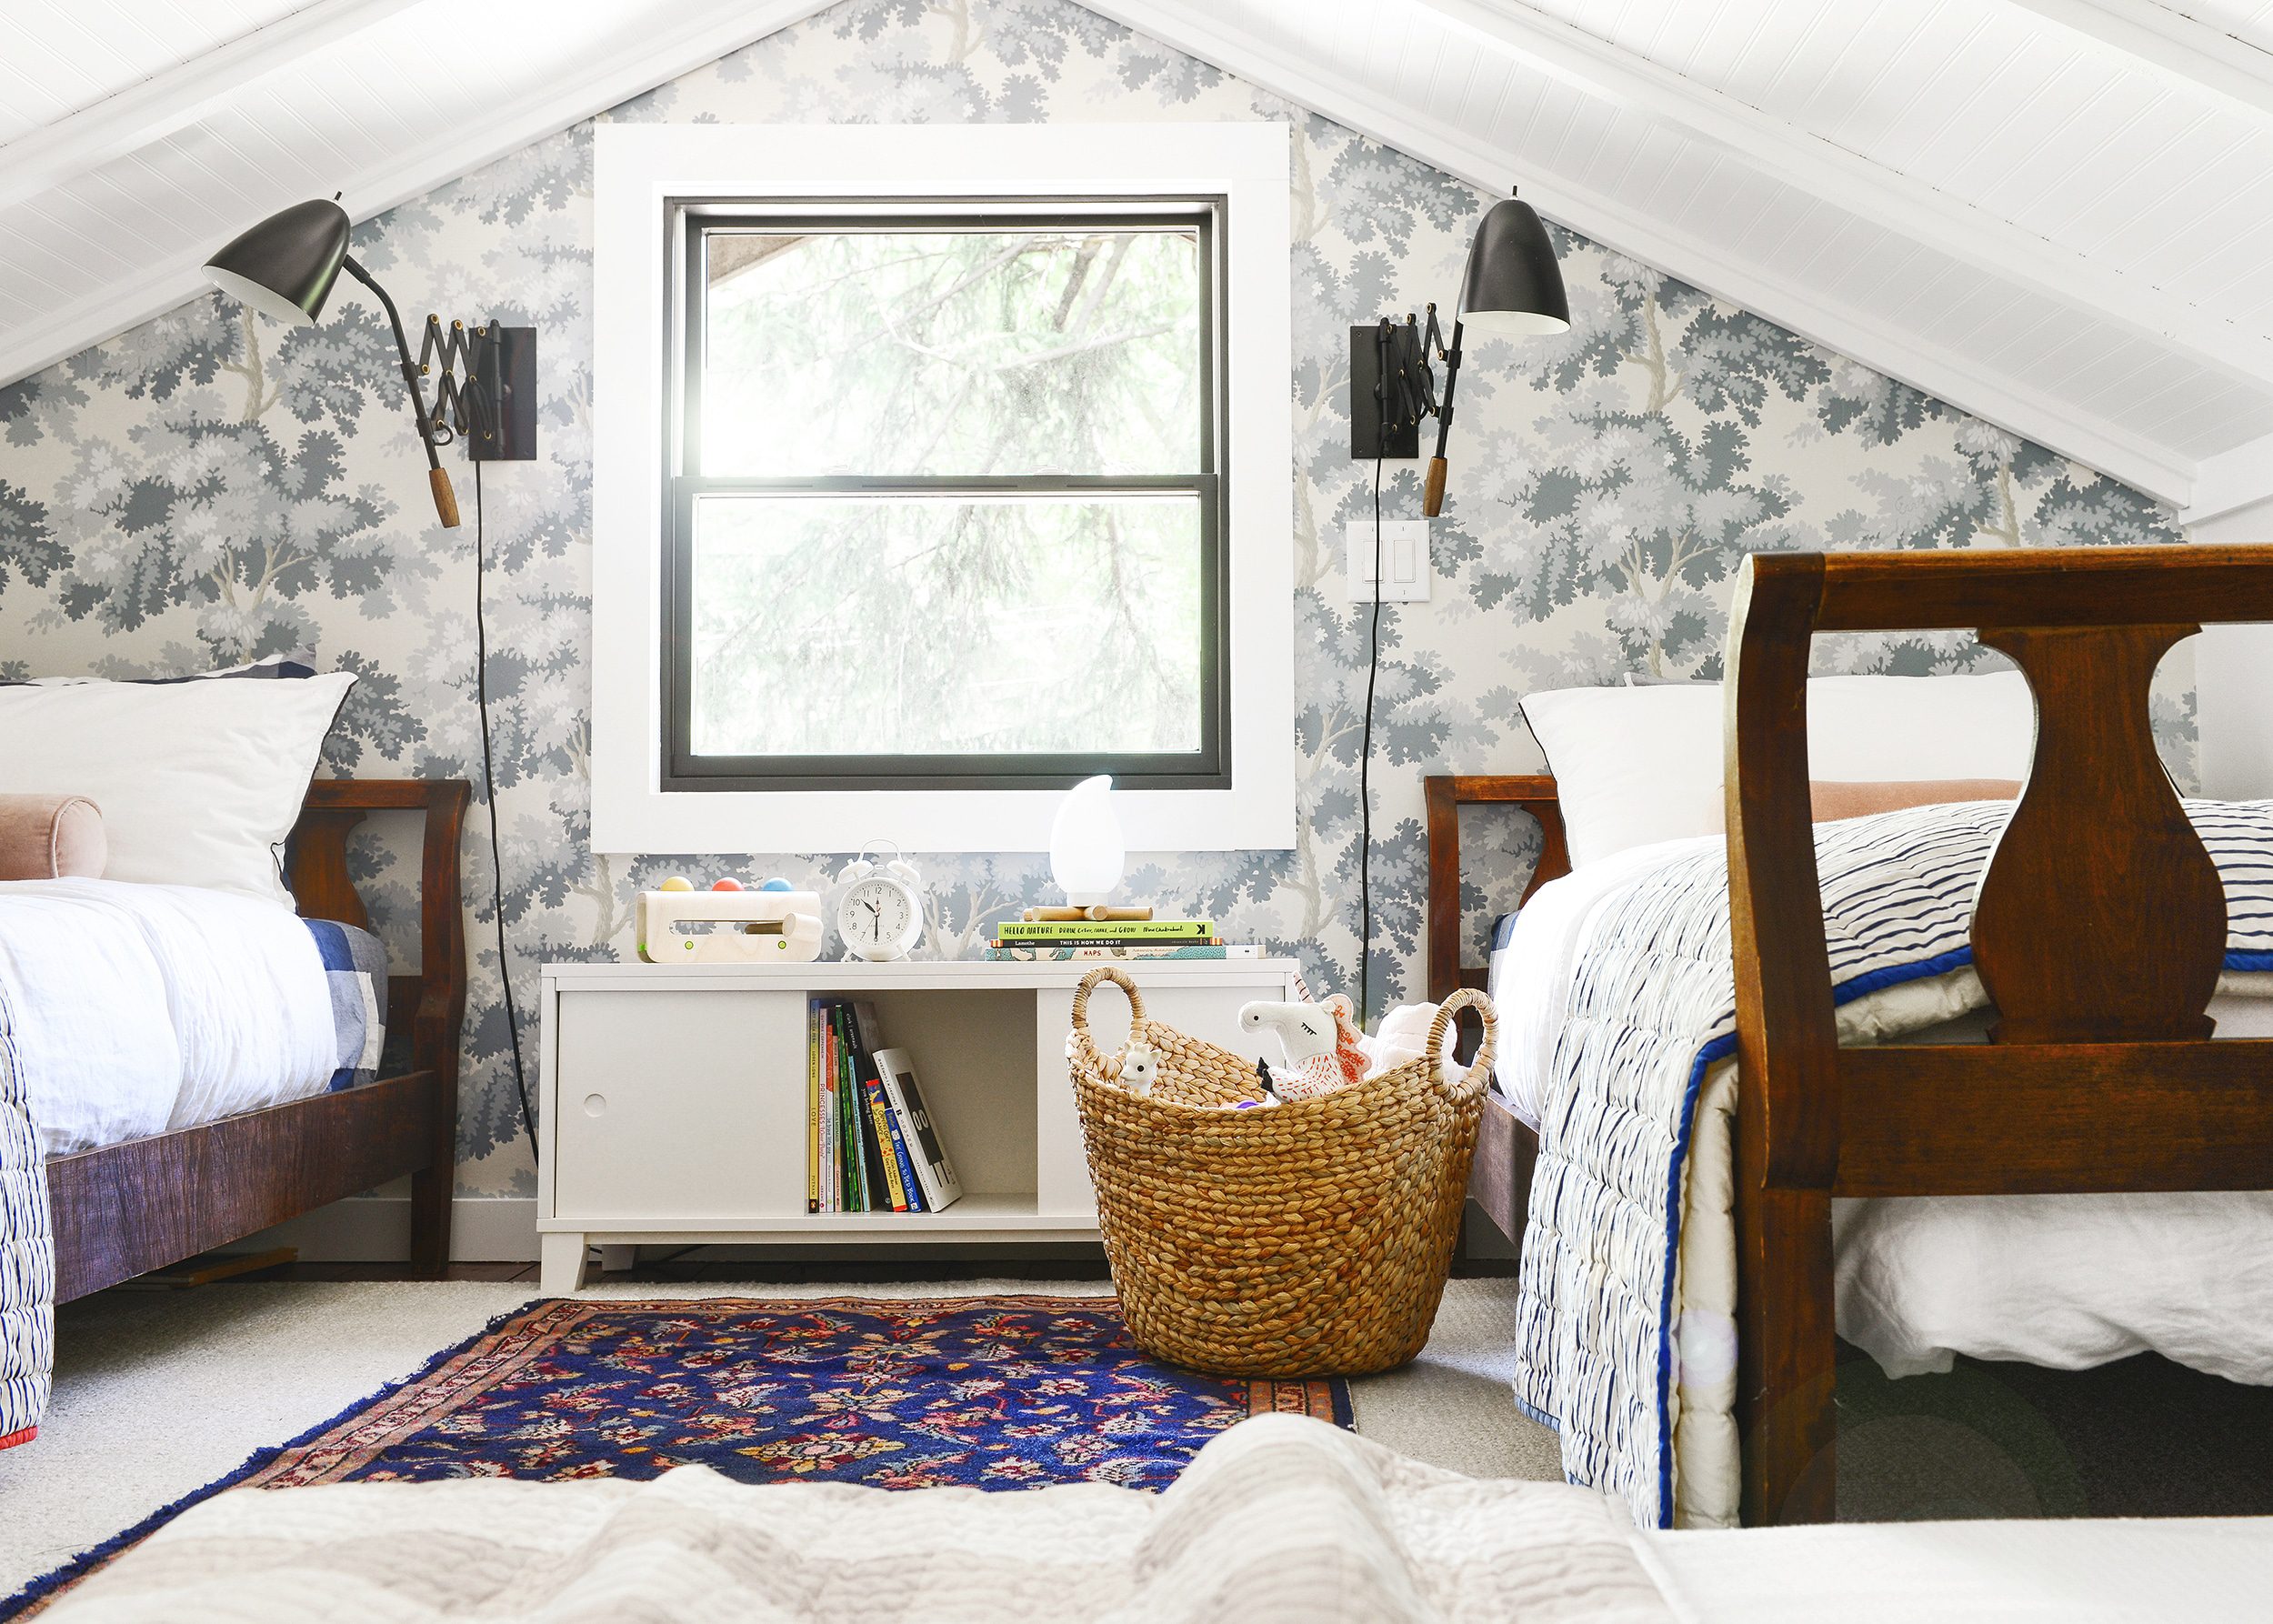
I tucked this pretty woven basket next to one of the vintage beds, filled with Lucy’s smaller toys and stuffies. It’s the perfect size to wrangle all the loose bits while being low enough for Lucy to access easily. I’m all about a good basket, and right now, I can’t get enough seagrass. (I was about to say that it’s becoming a problem, but is there ever a problem with layering more seagrass into a room?) The additional warmth and texture cozies everything up, don’t you think?
Do the warm summer months make you feel like injecting fresh, clean coastal vibes into your decor like it does for us? Whether you live near water or not, we think this can be done with a color palette, additional texture or just lightening things up. Below, you can find some of my other Walmart favorites to give your home the lake-inspired feels!


You guys! This is just so cute!!! I love it.
Thank you, Monica!
So cute! When I was a kid we just used sleeping bags and it felt so special and fun since it wasn’t a bed. My Aunt and Uncle had a lake house with a loft and the mattresses laid right on the loft floor and was also so sweet and special.
I LOVE this. We are so excited for the day that Lucy has her first sleepover up here with all her friends! The sound of their giggles… I can already imagine it.
i’m really bummed to see that y’all accepted this sponsorship from walmart after a series of posts about ethical consumption. walmart engages in dubious ethical practices, pays employees poverty wages, engage in union busting, provide little to no supervision of their factories abroad (they made their products in that bangladeshi factory where 112 workers died), and have been sued multiple times for gender & sexual discrimination. this is sad because i’ve always been inspired by your blog & commitment to ethical brands.
Hi Fae, thank you for your feedback. We give all of our partnerships a lot of consideration before we share anything on this blog. That has always been a high priority, and will continue to be one. That will never change. While we do love and appreciate ethical brands, we also think it’s important to share products from a wide array of retailers in a range of price points.
How does the trundle pull out from the end of the bed? Is there enough room to maneuver it out?
Hi Cici, yup, you can pull it out straight, and then angle it over how we have it shown here! Then when it’s time to put it away, we stash the pillows in the basket and angle back under the bed again. :)
This is the cutest cutest trundle ever! And I’m digging the whole vibe of treehouse.
Thanks for this awesome, simple diy. I think you may have just solved my guest room vs office dilemma! Okay, this is possibly a dumb question, but how do you decide when to use nails and when to use screws? Like for the sides of the trundle bed— were you concerned that screws would split the plywood?
By the way, the tree house always gives me a wave of strong homesickness for the Midwest (but in the best way ;).
Happy to hear it! Great question – we were actually worried that screws would split the plywood because of all the condensed layers, and we didn’t want to risk it coming in from the side! Also, we chose nails because the sides bear no weight.
This is great! Thanks for sharing! I’m definitely pinning this one. :) Would like to know what type of mattress you recommend as I would imagine mattress height matters somewhat. Did you opt for foam because it’s easier to lift and manouver when putting on bed sheets? Do you have any lessons learned in terms of what mattress you prefer / don’t prefer?
Hi Maria! We chose a foam mattress with a 4” height because it was the lowest height we could find (that wasn’t just a mattress topper ????). It’s actually heavier than a traditional mattress but we’re super happy with it. Most of our mattresses are Leesa brand (which we loooove) which is foam. So comfortable!
I love your blog and have been reading along for several years. Bummed that my first comment is this, but…I am super disappointed that you guys collaborated with a brand like Walmart :( I totally understand and respect the need for sponsored content, and it seems like you usually support brands that are socially conscious. I’ve found some great stuff via your blog! Walmart seems like an odd and incongruent choice with who I’ve observed you guys to be. I hope this isn’t too offensive for me to mention; I just wanted to leave a little feedback. Thanks for sharing your lives and lovely spaces!
Thank you for the feedback, Joanna. We appreciate your thoughts and carefully consider all of our partners, keeping in mind a range of budgets and designs.
This loft has come together in such a charming, layered way. I truly appreciate that you’ve taken your time with it and shared along the way. Not just a “finished ” space (is anything really finished though?) but a growing and developing space. It’s been a joy to see the details you continue to add.
I love that you didn’t have to compromise with function or style. This is such a great project! You really nailed the coziness of the space, and it shows in all your choices of details. I think putting love into a room’s design makes all the difference. Thank you for sharing!
Thank you, Ashley!
This DIY may be the guest bed answer I’ve been looking for! Wondering about the “furniture grade” plywood, does that support a good amount of weight? Could a heavier adult use this or is it crafted just for kids?
I could use it just fine, but probably the max would be 150 or so. It’s verrrry strong, but this intended use is for kiddos. :)
Hi Kim,
Just wanted to know is there a way to add a popup mechanism to the trundle?
[…] yellowbrickhome […]