

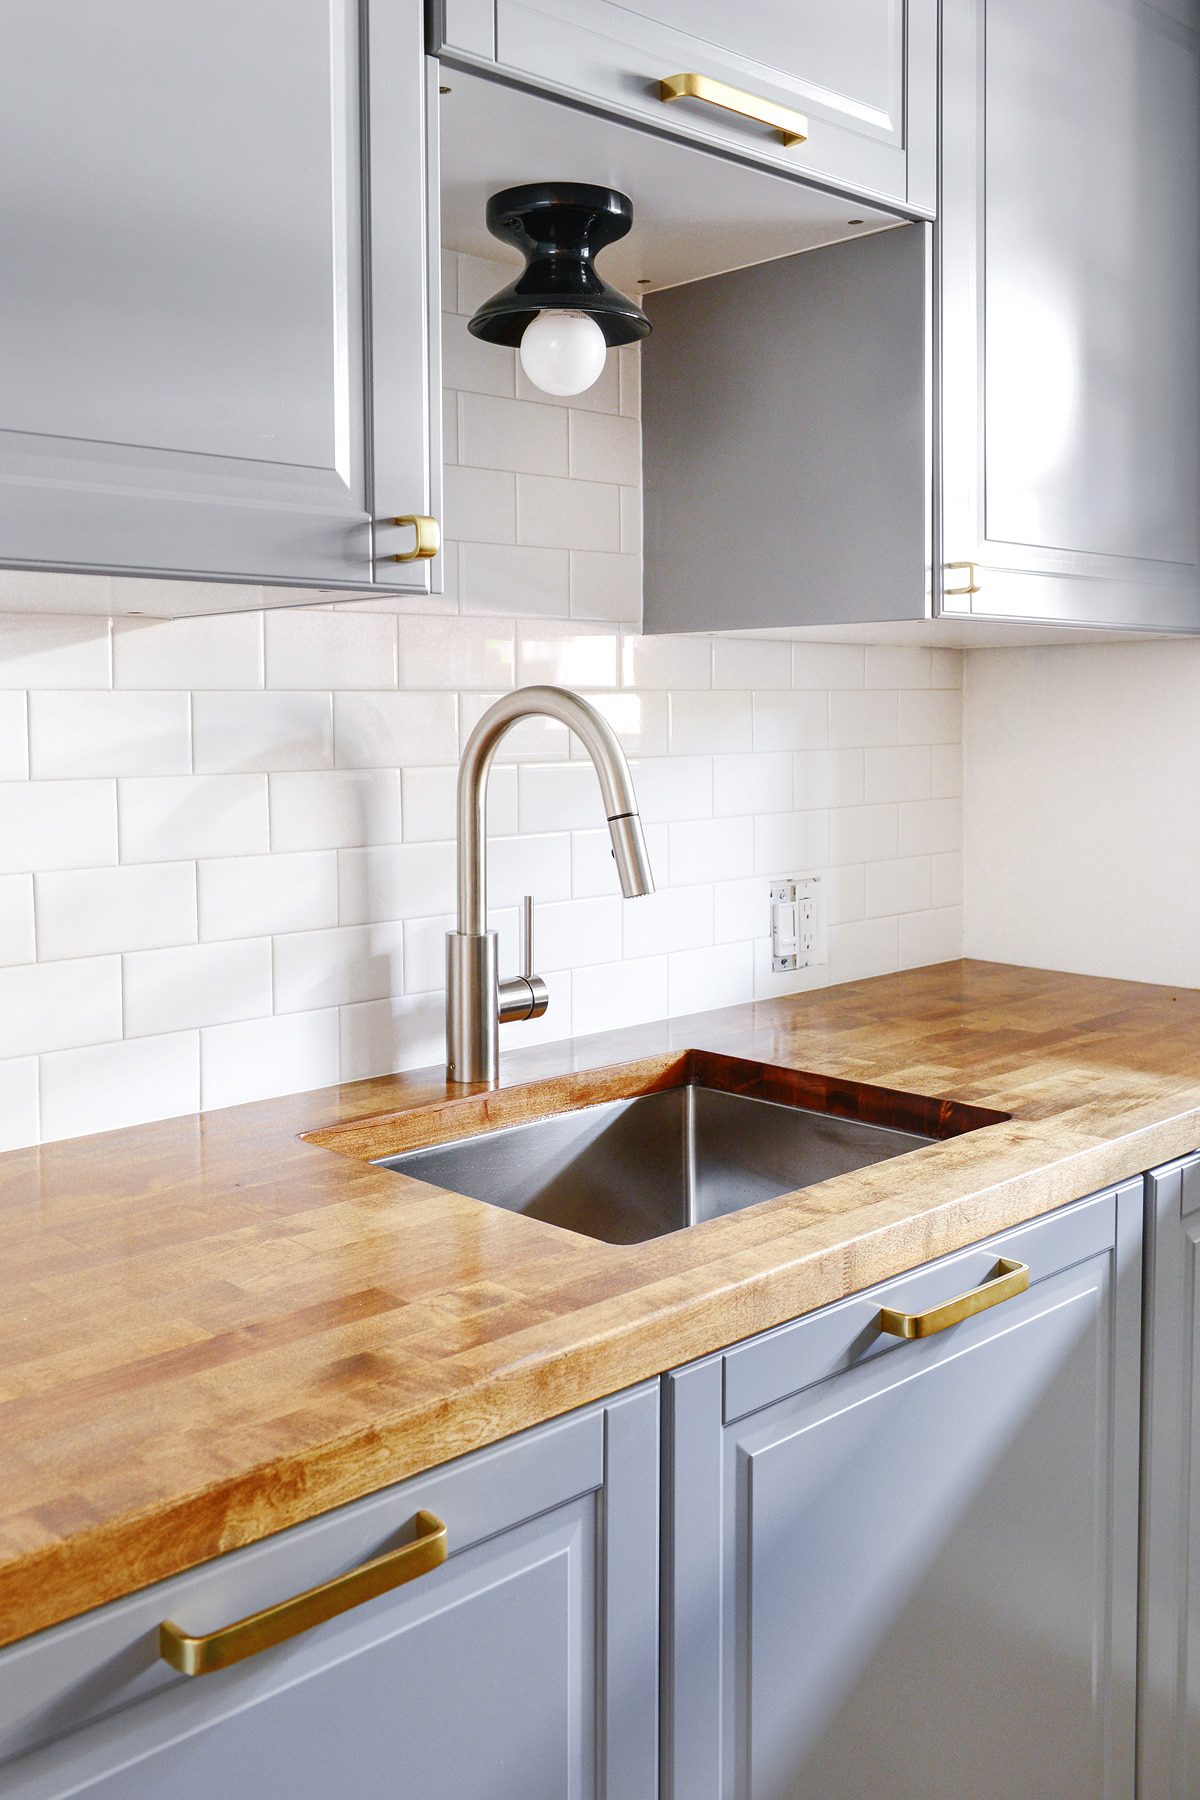
IKEA cabinets | brass pulls | brass finger pulls | faucet | tile | butcher block | sconce
Over the weekend, we celebrated the end of our 20-plus-hour working weekends, because our part of the garden renovation is, mostly, complete! I say mostly, because we still have a few hours of loose ends – light fixtures, outlet covers and a final deep scrub – but those tasks feel so insignificant compared to the mountainous terrain we’ve grown accustomed to. We actually have painters showing our walls, ceilings and trim all the love right this second (for which we could cry in joy), and over the next few weeks, we’ll be sharing the final room reveals and, eventually, tying it up in a bow with a farewell vlog to the garden!
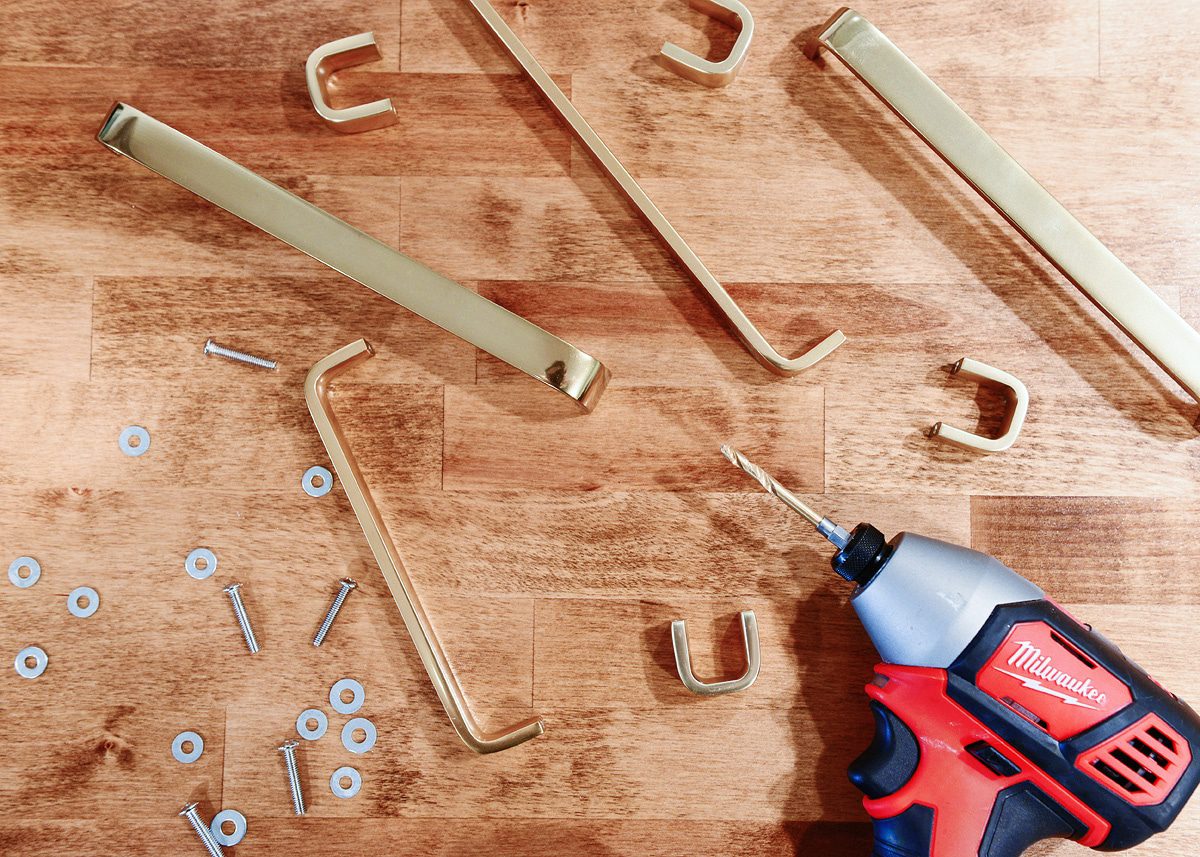
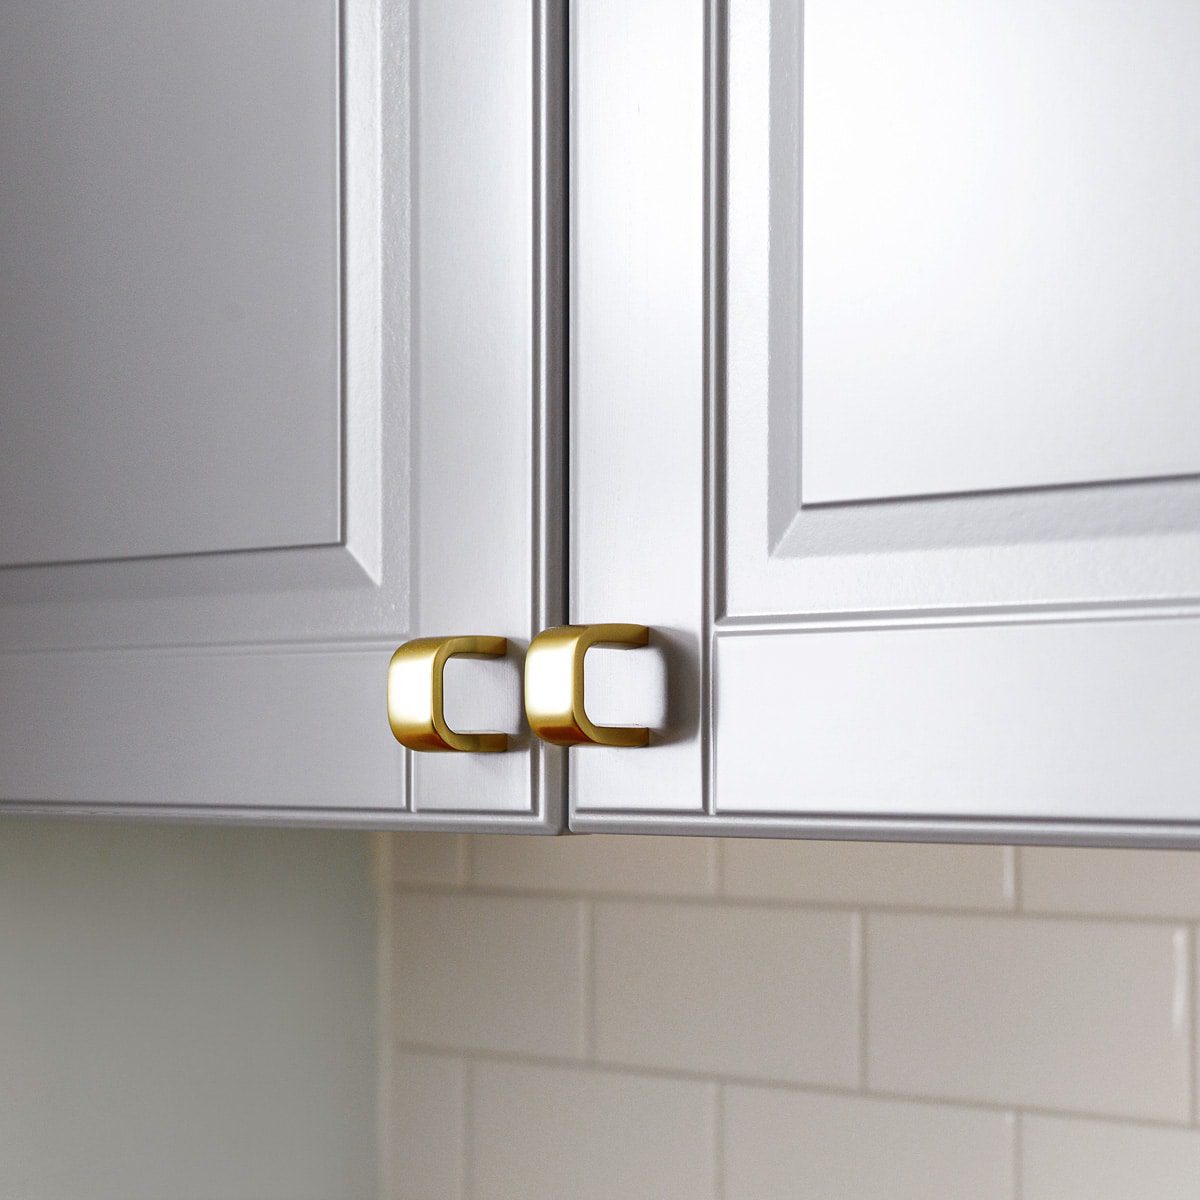
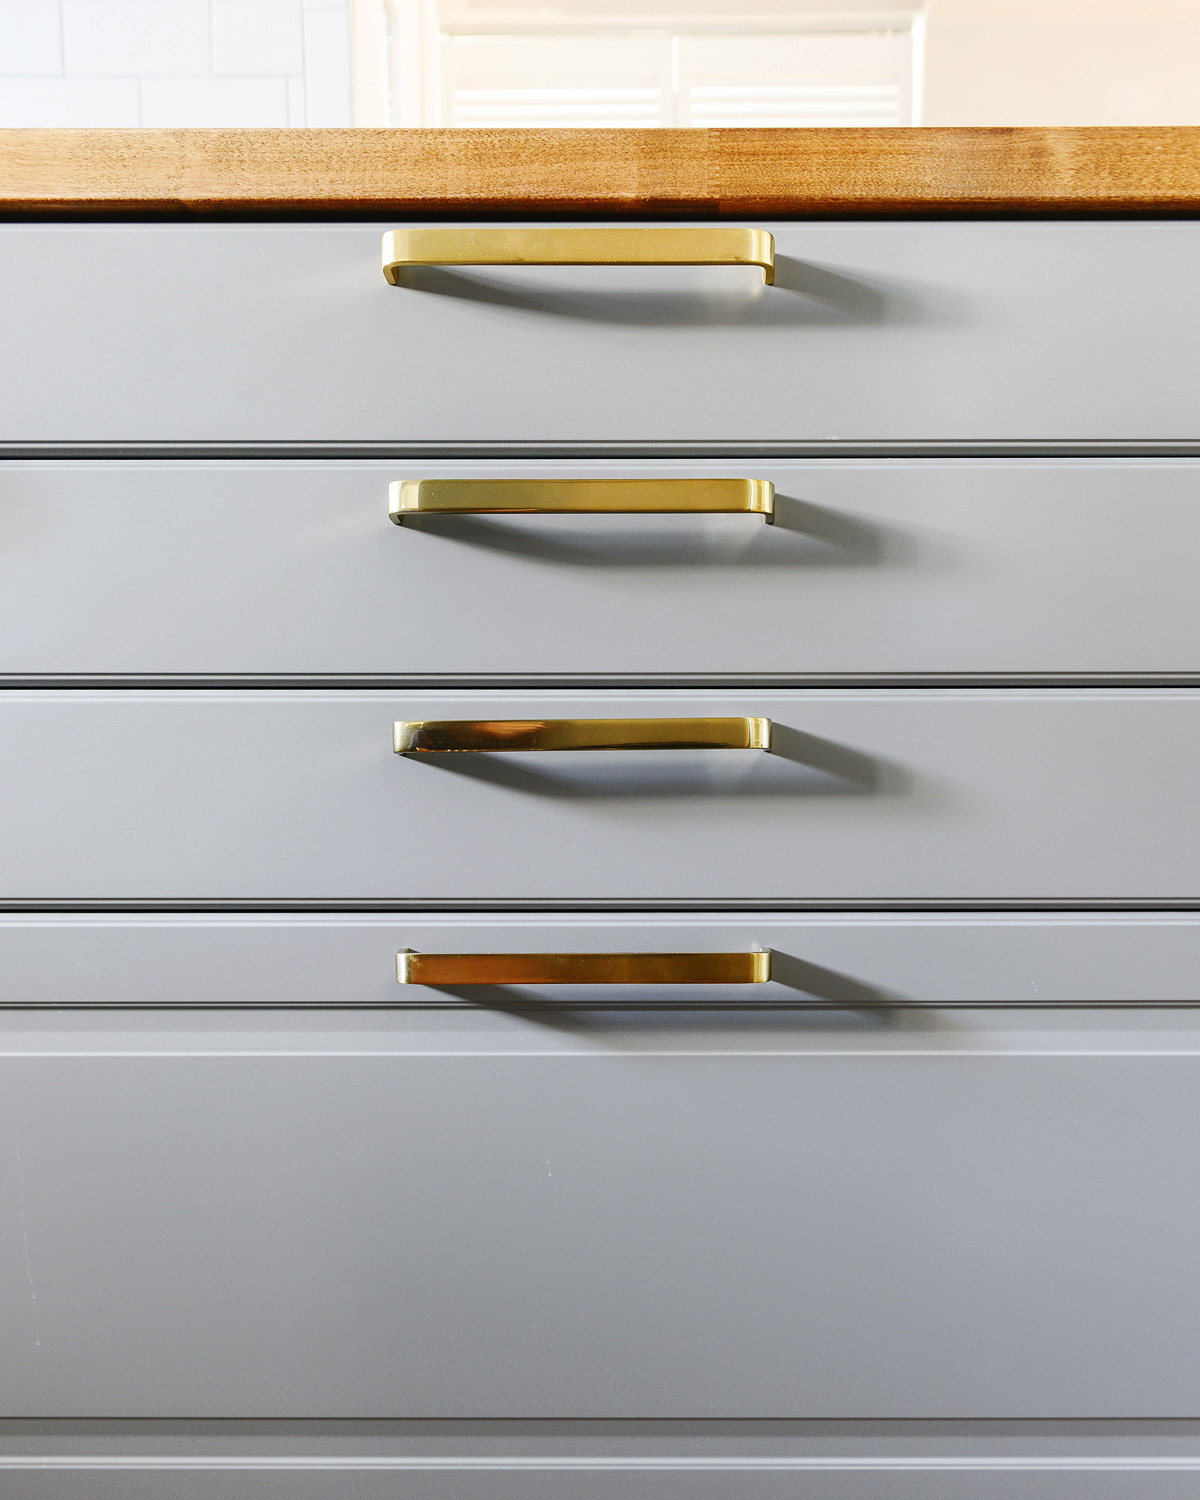
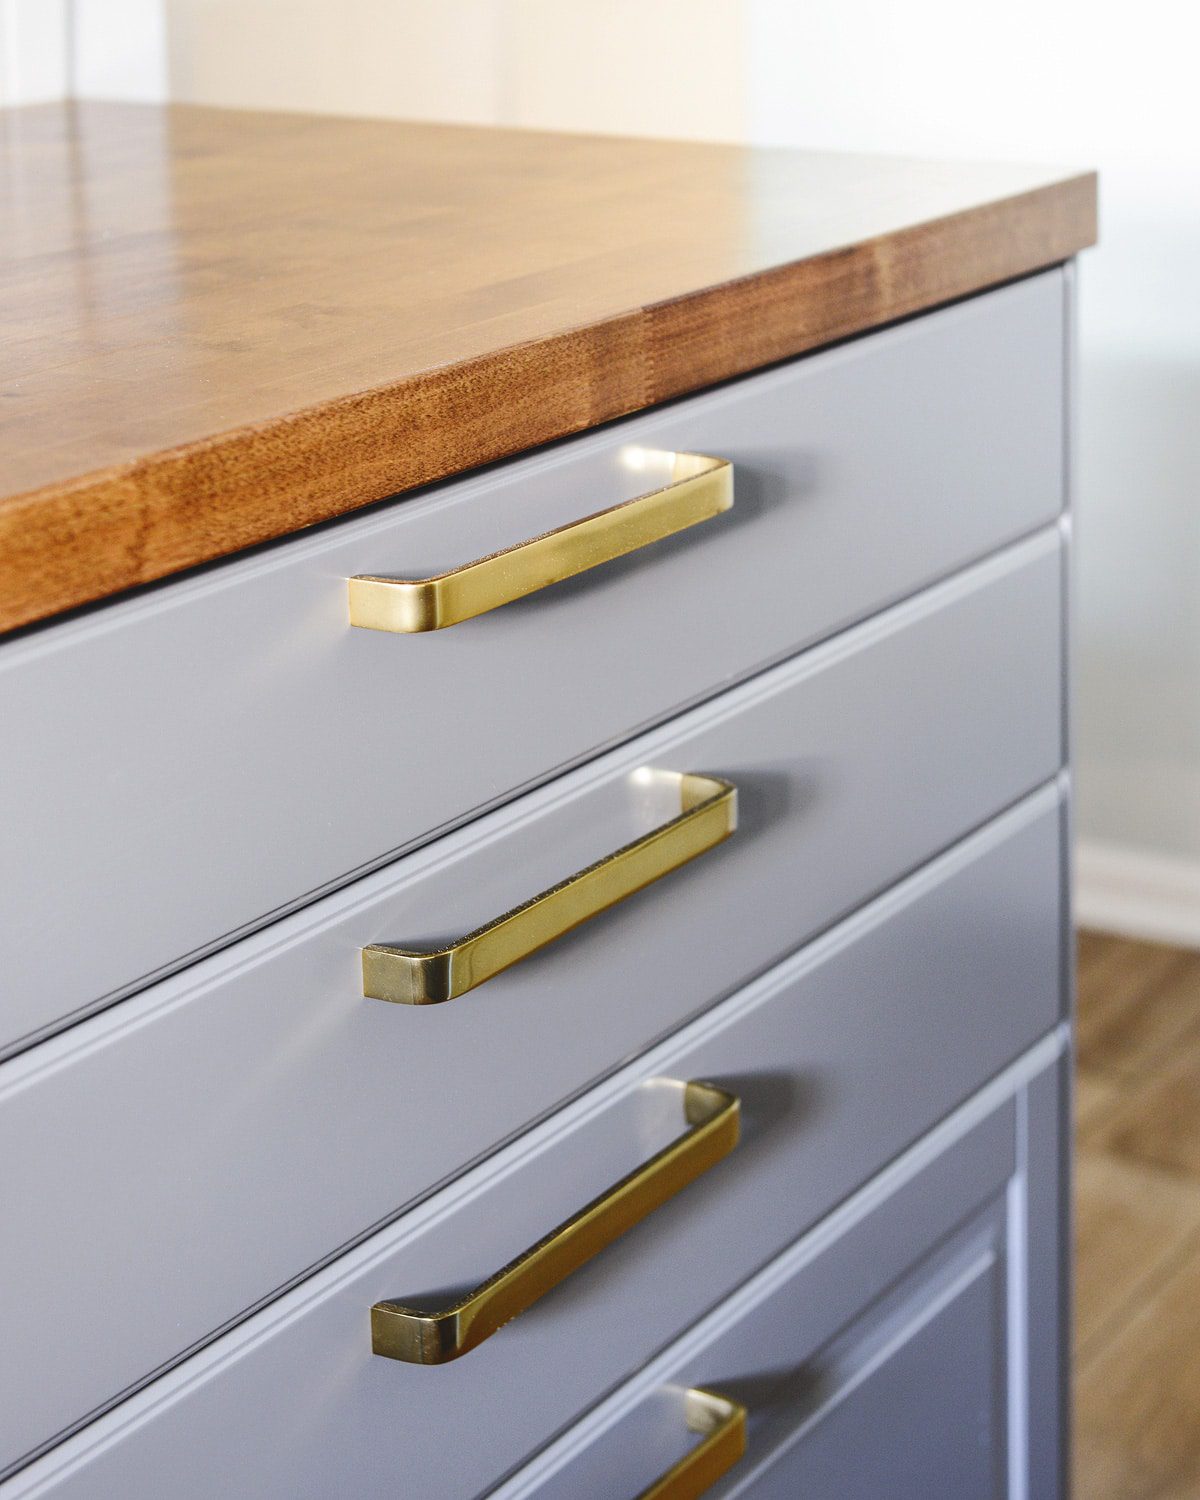
In the meantime, we wanted to share one of our recent small victories, but one that made a massive impact in the garden’s galley kitchen overall – the shiny brass hardware! We had 17 doors and drawers to tackle, and our biggest challenge was finding a hardware template that would accommodate our oversized pulls. We ended up with three different sizes of hardware: 1) 8″ pulls, 2) 6″ pulls and 3) 1″ finger pulls. Cabinet hardware templates (like these) make the install infinitely easier, preventing you from having to measure every last door, but the largest templates we could find could only accommodate 4.5″ pulls. IKEA sells a drill template that looked promising, but their metric system made every hole off by a 1/16.”
So, we made our own! It took less than 10 minutes to make, and it saved us hours of frustration. Measurements will be unique to you, of course, but the general idea remains the same.
Tools + Supplies Used:
Scrap wood (aprrox 2″ x 20″)
wood/drywall screws or nail gun
Pen or pencil
Small ruler
Tape measure
Drill/bit sized for hardware
Washers
Clamp(s)
Painter’s tape
Cabinet hardware!
What We Did:
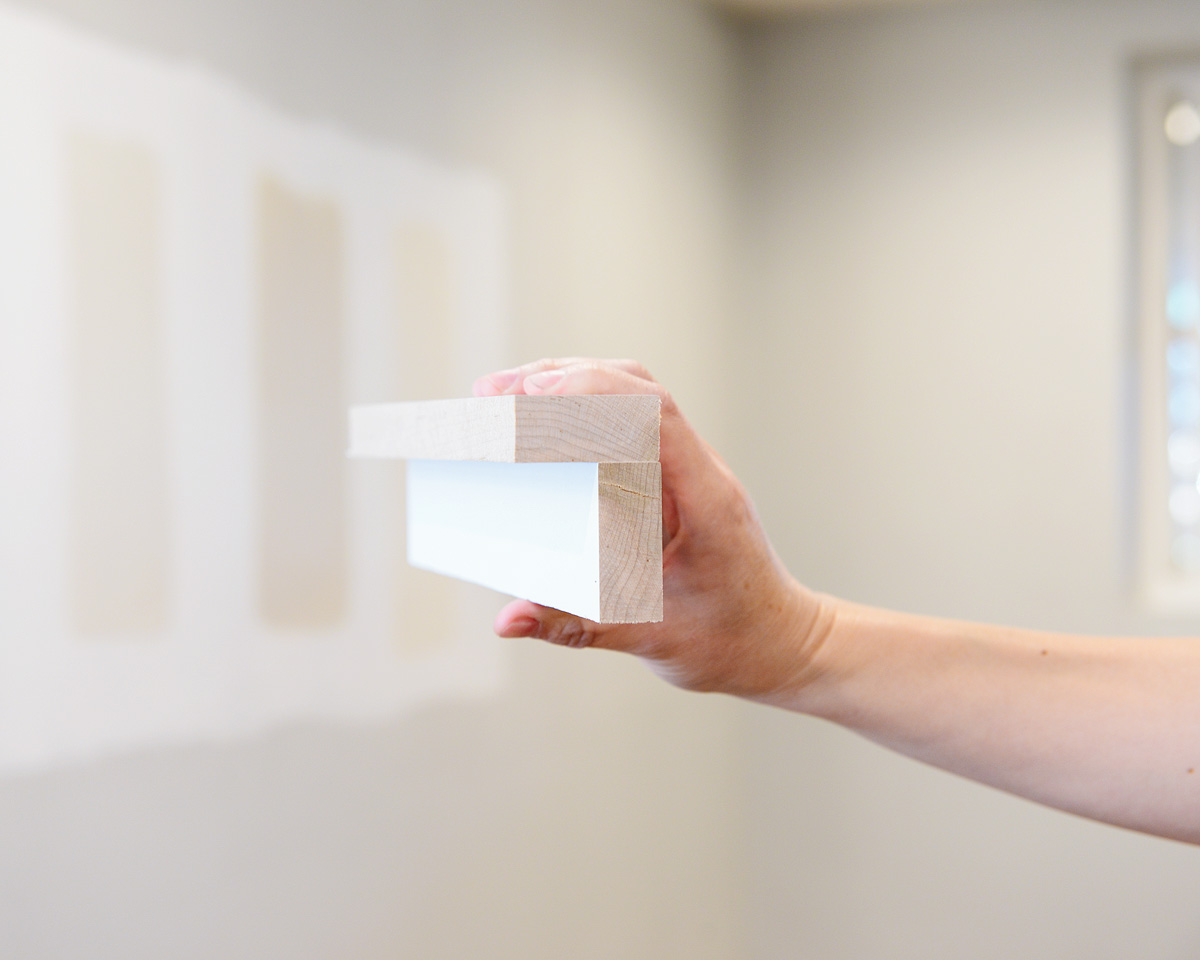
I scrounged up scrap wood from the garage, landing on a 1-by that was about 2″ wide. I cut it into two 10″ lengths (at least 2″ longer than our widest hardware pull), and using our nail gun, Scott helped me secure the two pieces together so that it made an L-shape, like this: (Side note: You could also use wood/drywall screws to secure the two scraps together, but make sure to drill pilot holes first. This will prevent the slim wood from cracking, saving you a lot of frustration!)
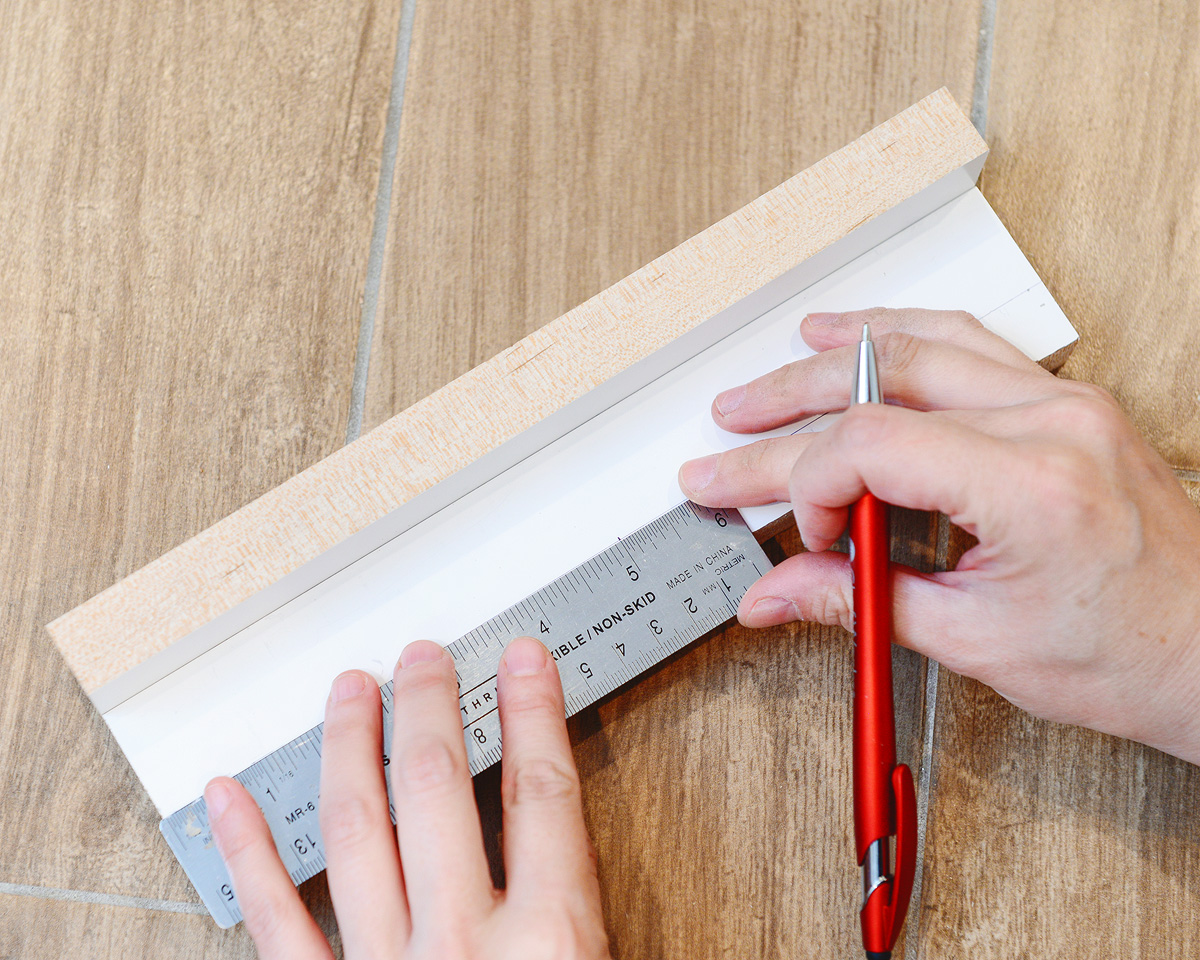
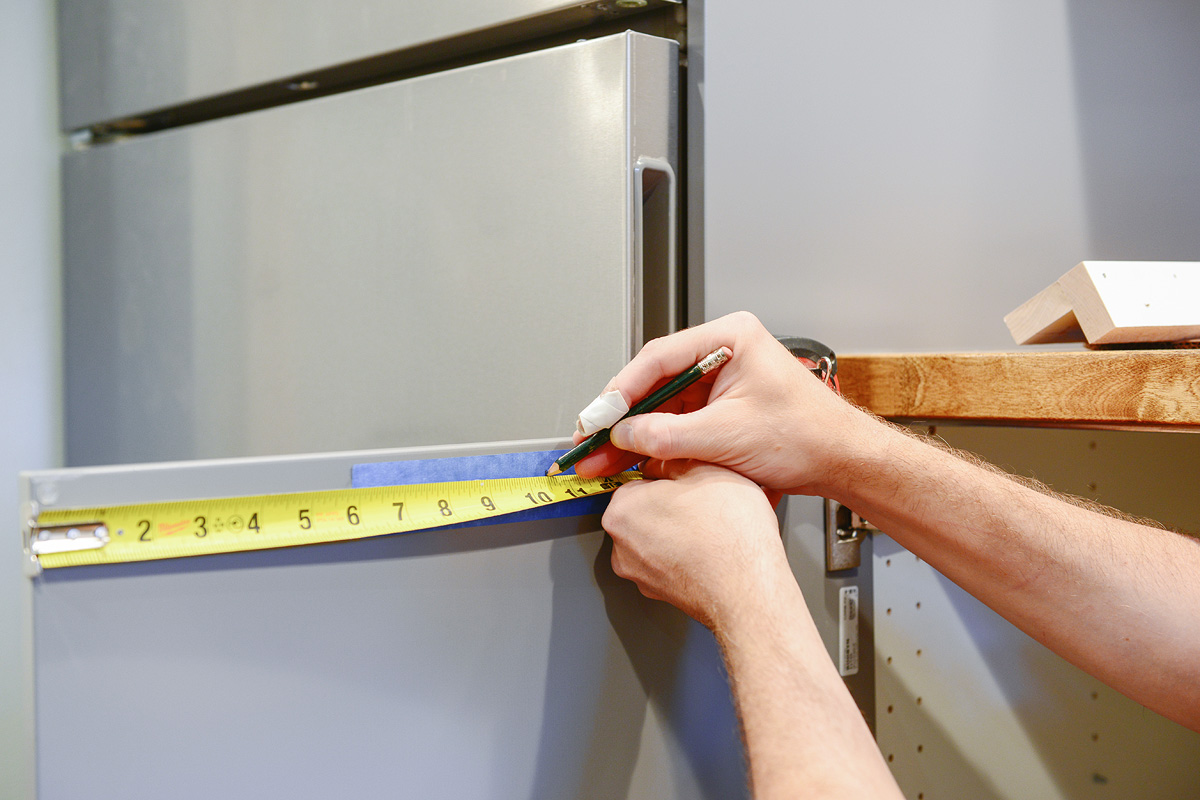
With the widest side down, I first drew a straight line across, 1 1/8″ from the top ledge. (You can use a square to do this, but I just made three dots at 1 1/8″ from the ledge, and connected them with my ruler.) This was based off of the top of a door/drawer to the center of the shaker panel trim. Again, this will be unique to you!
Next, I marked my center point at 5″:
From the center, I made two marks on each side – one at 3″ (for the 6″ pulls) and one at 4″ (for the 8″ pulls):
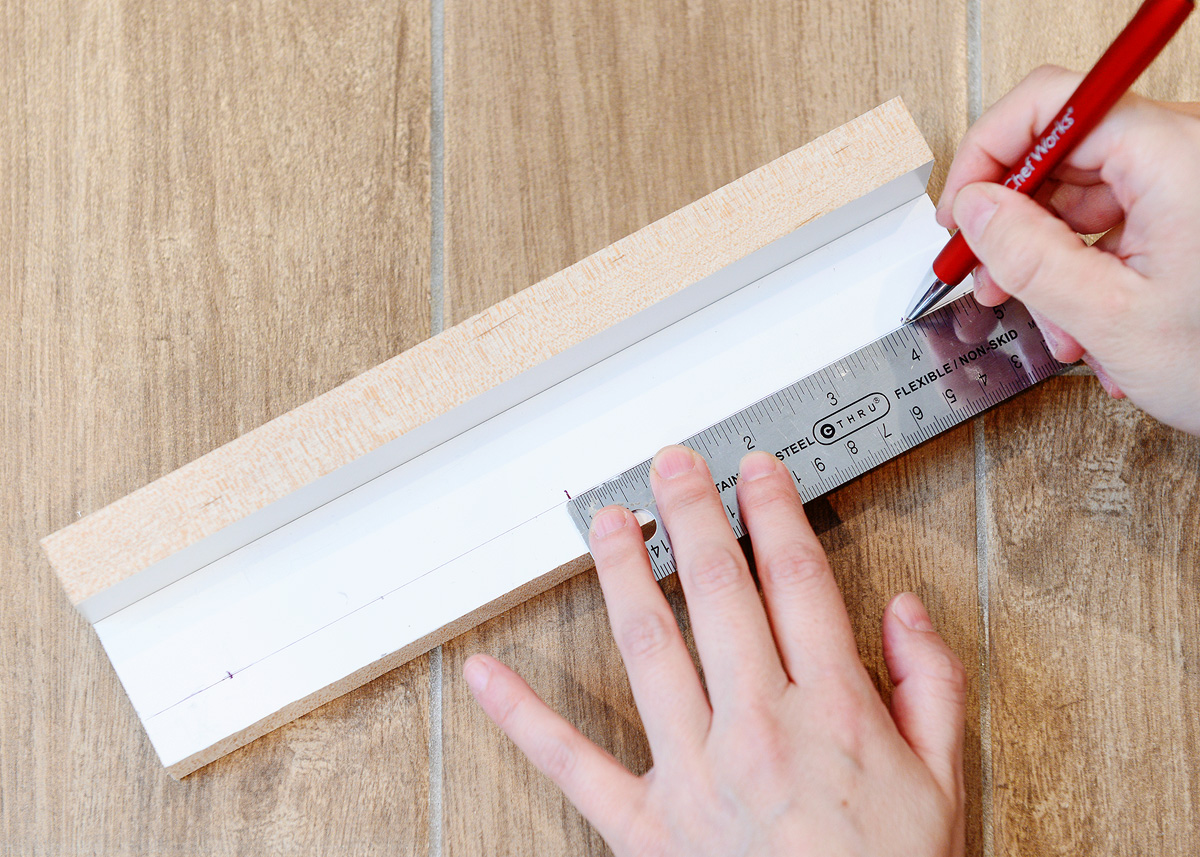
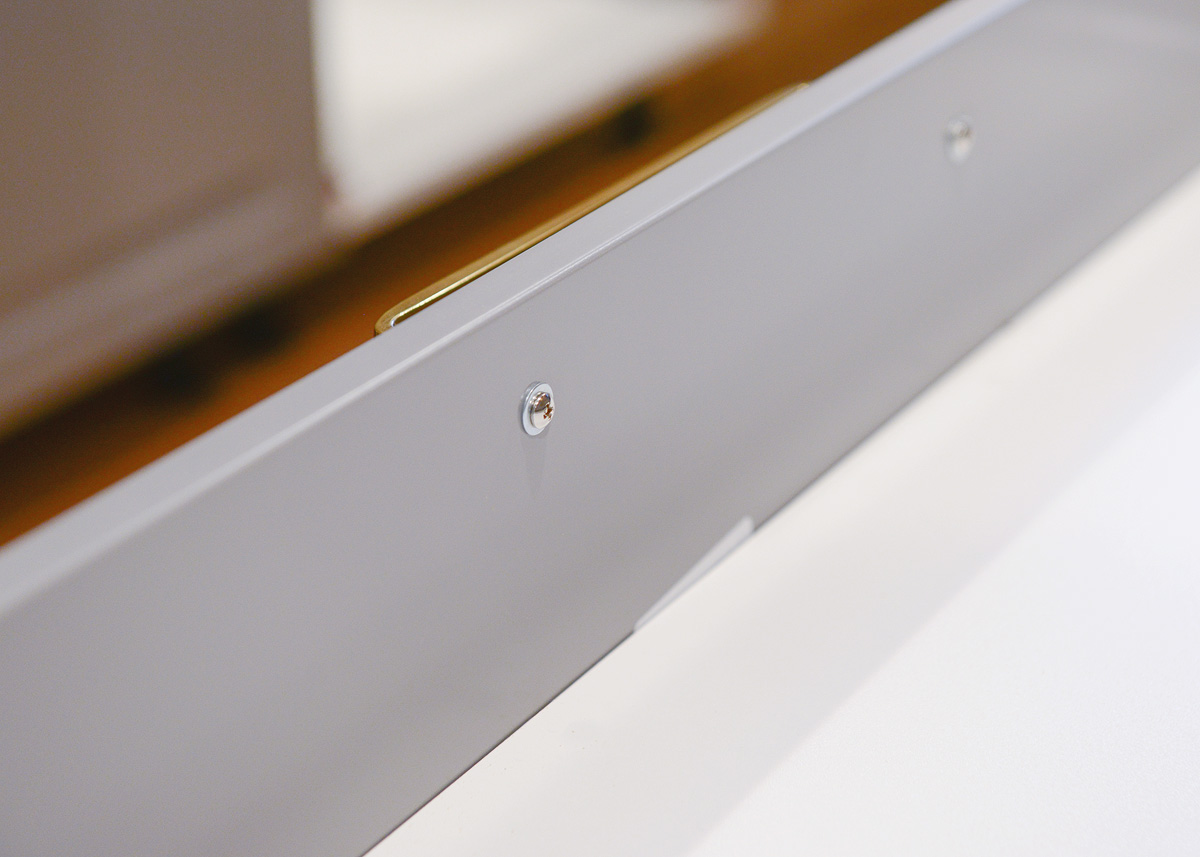
Our hardware came with instructions to drill pilot holes using a 3/16″ drill bit, so I used that bit to create my holes in the template. I made a note on each of the holes (and on both sides of the template) with my measurements, so that I wouldn’t accidentally – eek! – drill through the wrong hole on the cabinet doors/drawers.

With my template made, it was time to start installing our hardware! Psst: The oversized 8″ pulls are still on clearance for 1/2 off, and the oil rubbed bronze and polished nickel are on crazy sale, too!

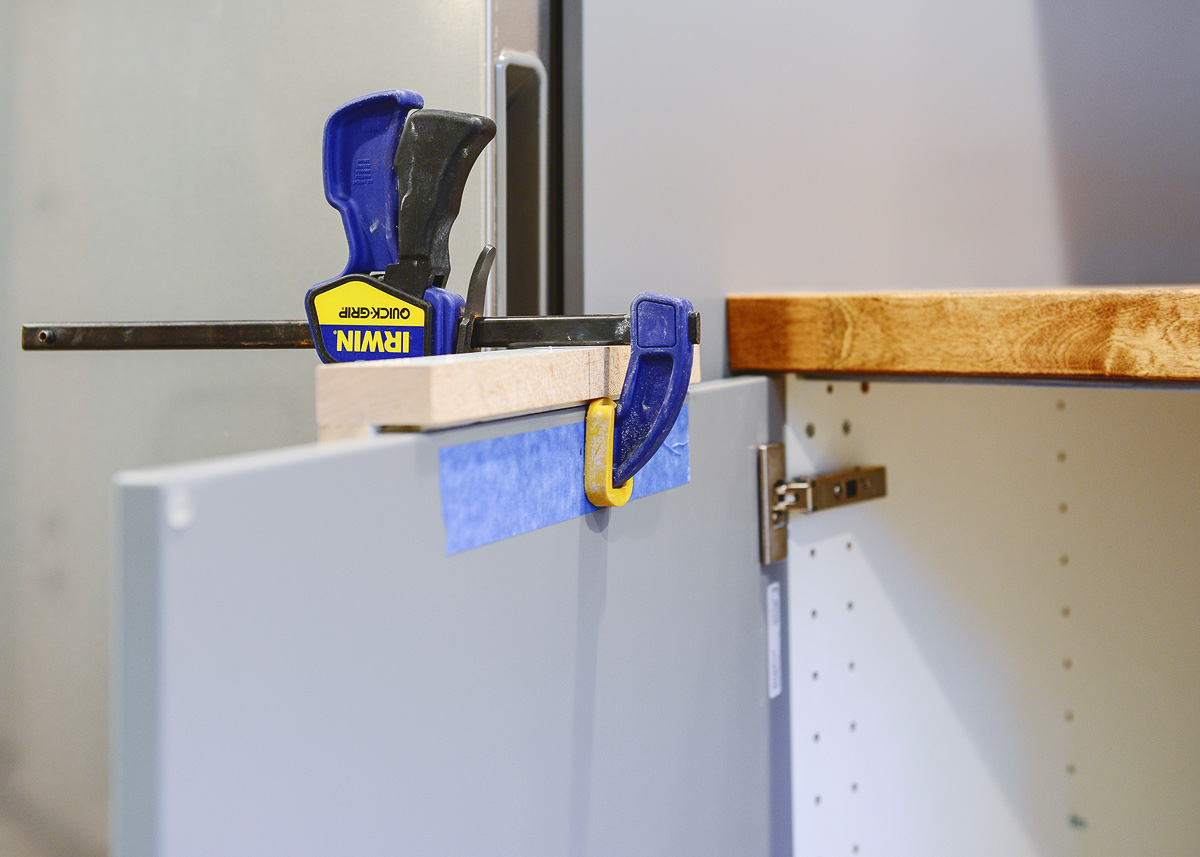
On the inside of the cabinet, we applied a strip of blue tape, which helps to prevent the wood finish from chipping while we’re drilling. (Don’t worry if you still get flaking, it’s easily remedied with washers!) We made marks for the center of each door and drawer…
… And we aligned the center of the template to the center mark on the door, using a clamp to set it firmly into place (we use these clamps for ev-err-y-thing):
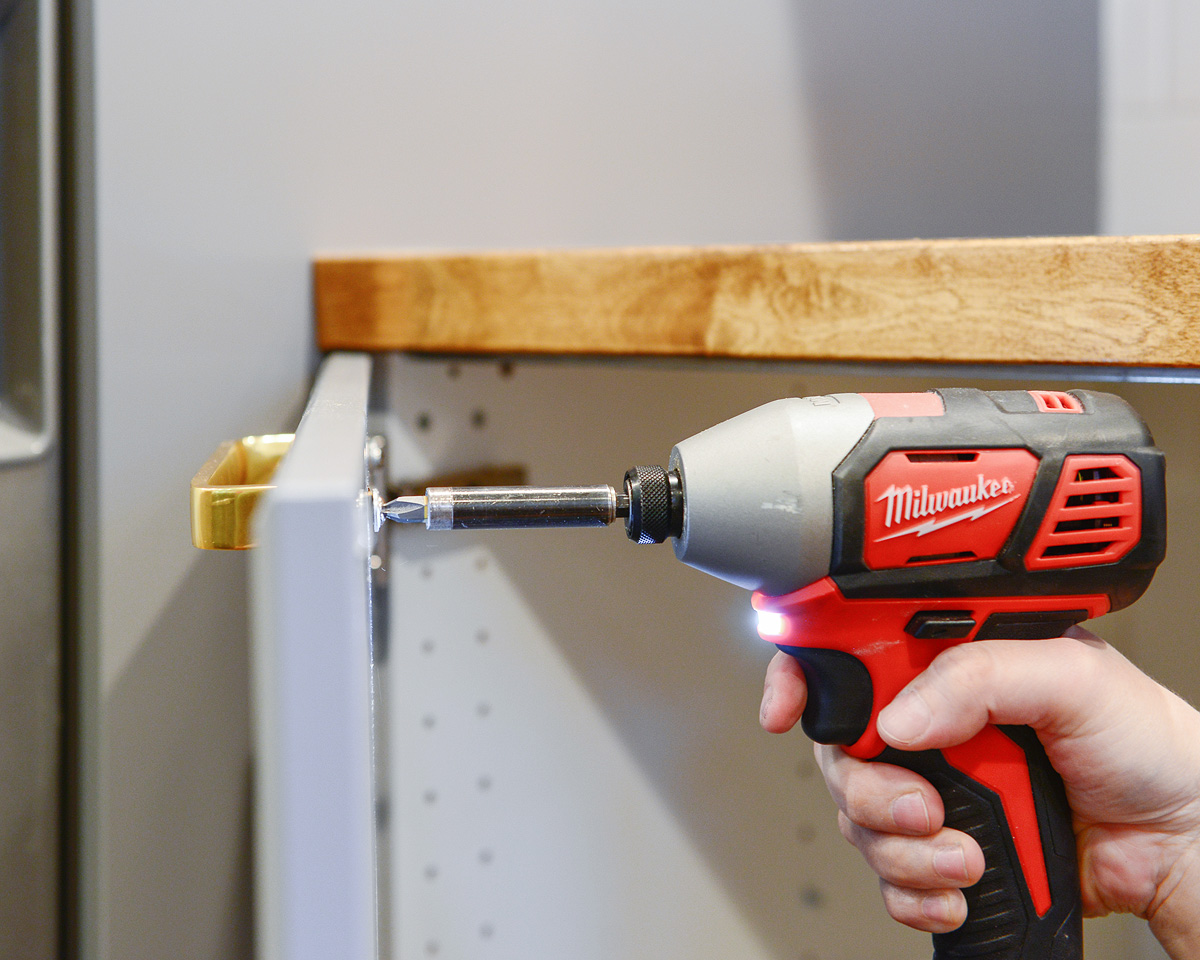
A big advantage of our DIY template is that we can use it as a pilot hole guide! The 1-by template allows for our drill to go as straight as possible through the cabinets, which alleviated any fears I had about going in at a slight angle. I drilled all my pilot holes with the same 3/16″ bit directly through the template:

After removing the clamp, template and blue tape, I could install the hardware! Despite using blue tape, there was still a small amount of flaking from the gray finish (in most cases, there will be), so to conceal any imperfections completely, I used washers on the back side.

I worked my way around the room, first completing the oversized pulls before moving onto the finger pulls. Each of the finger pulls get two screws, spaced 1″ apart. For this, I used a plastic hardware template we already had (this only allows me to make my marks), but you could also add a cap to the end of your DIY template to create a perfect door template, too.
This little kitchen-that-could has shaped up to be the most handsome room in the house, we think. (It’s hard to believe we started here!) Updates are going to keep coming, so let this garden party begin!


I love everything about this kitchen!! Can’t wait for the big reveal!
This is awesome! My husband made something similar when we changed up the hardware in out home this winter!
Paige
http://thehappyflammily.com
Sometimes it can be far easier than hunting down an elaborate system to work with for oddly sized hardware! :)
That’s some seriously beautiful hardware!
How do you decide which length pulls to put where? I love you used different sizes and am getting ready to buy new hardware for my new kitchen, and am trying to figure out the process of which cabinet/drawer gets 8″ or 6″ or even the finger pulls.
Thanks for your help!
We knew we wanted something a little wider than standard, so figured 6″ was the way to go. But on the oven side of the kitchen, those drawers are 36″ wide! So we upped it to 8″ on that side so that we could mount them in the middle, which would give the tenant better control with those wide, heavy drawers. On the other side, we used 6″, and we couldn’t resist those fingers pulls on all the doors. :) It really is personal preference, but consider the widths of drawers! Something else you could do is put two fingers pulls or two smaller handles on a wide drawer.
I love the warmth of the brass with the wood of the countertops! I can’t wait to see the full reveal. You guys are amazing!
Gorgeous! I love grey and brass, such an elegant combination. Love your step by step as well, will have to save it for when I tackle my kitchen :-)
xx
Neelam
All the ikea parts as well as your measuring tools use metric. Curious why you did not just use that for measuring out where the pulls should go? Not just to be able to use the template but easier math too LOL