

We’re breaking down how we made strong open shelving using an unexpected material. See the step-by-step in this tutorial!
An Alternative to the Floating Shelf
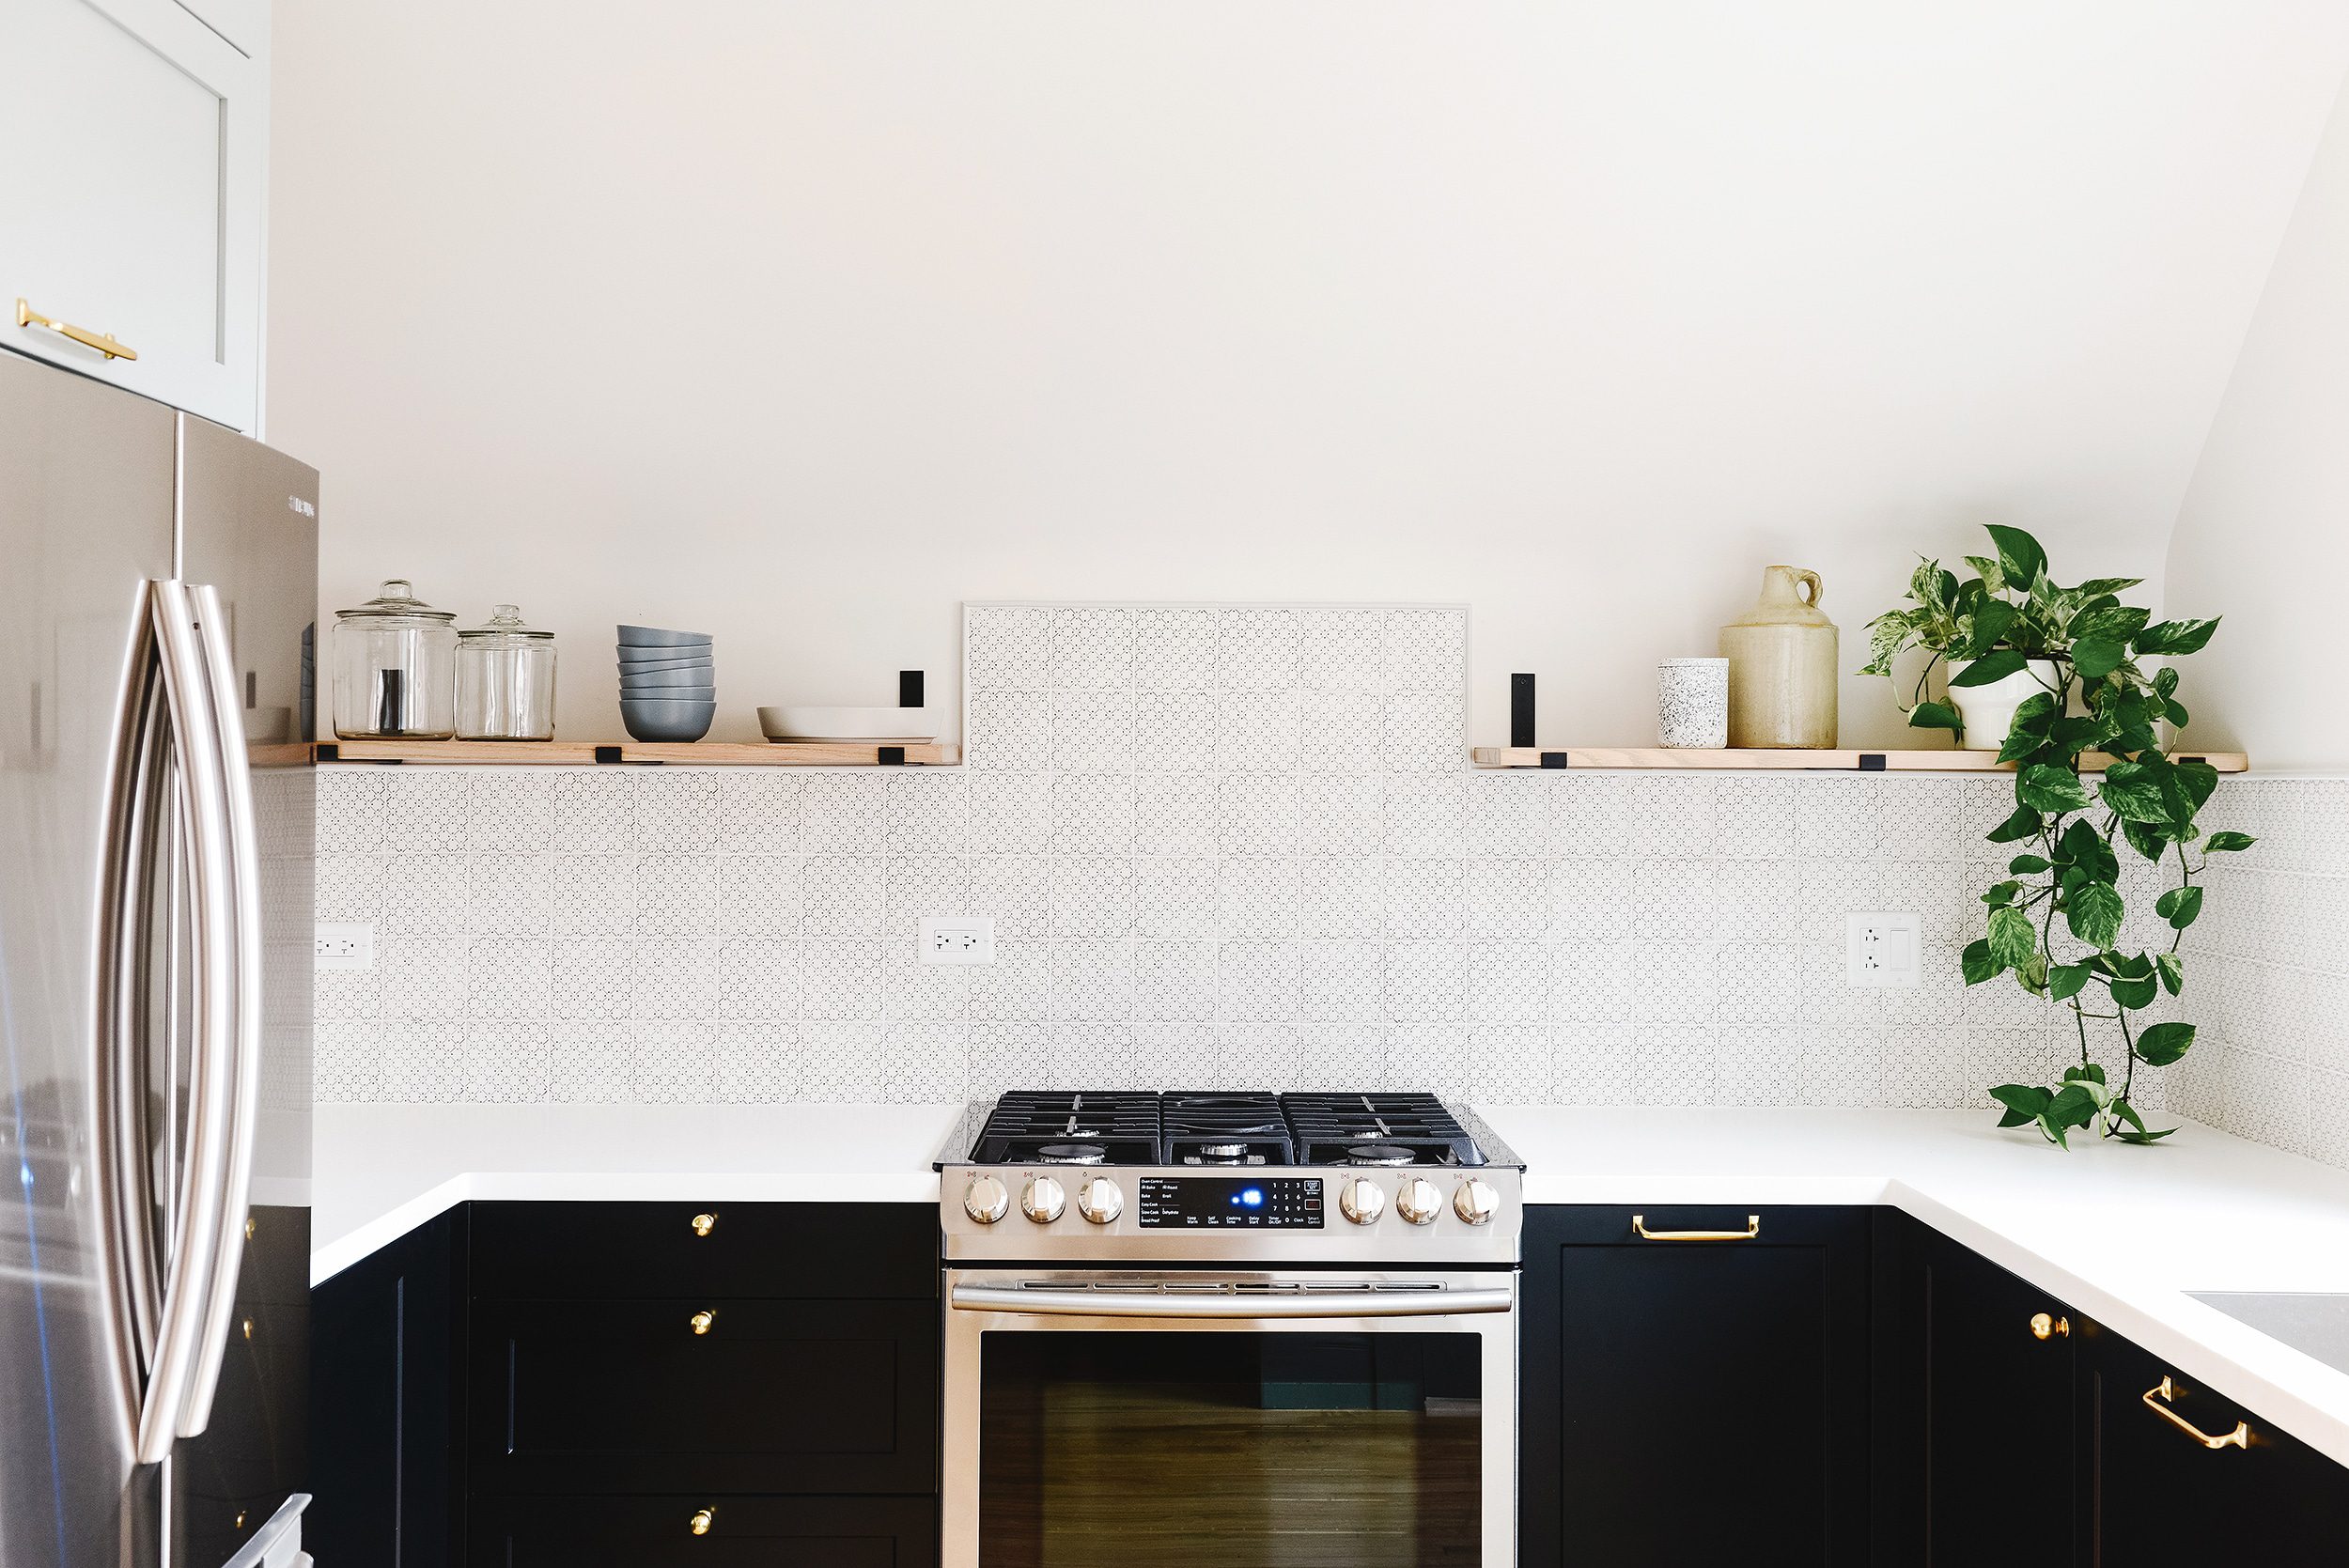
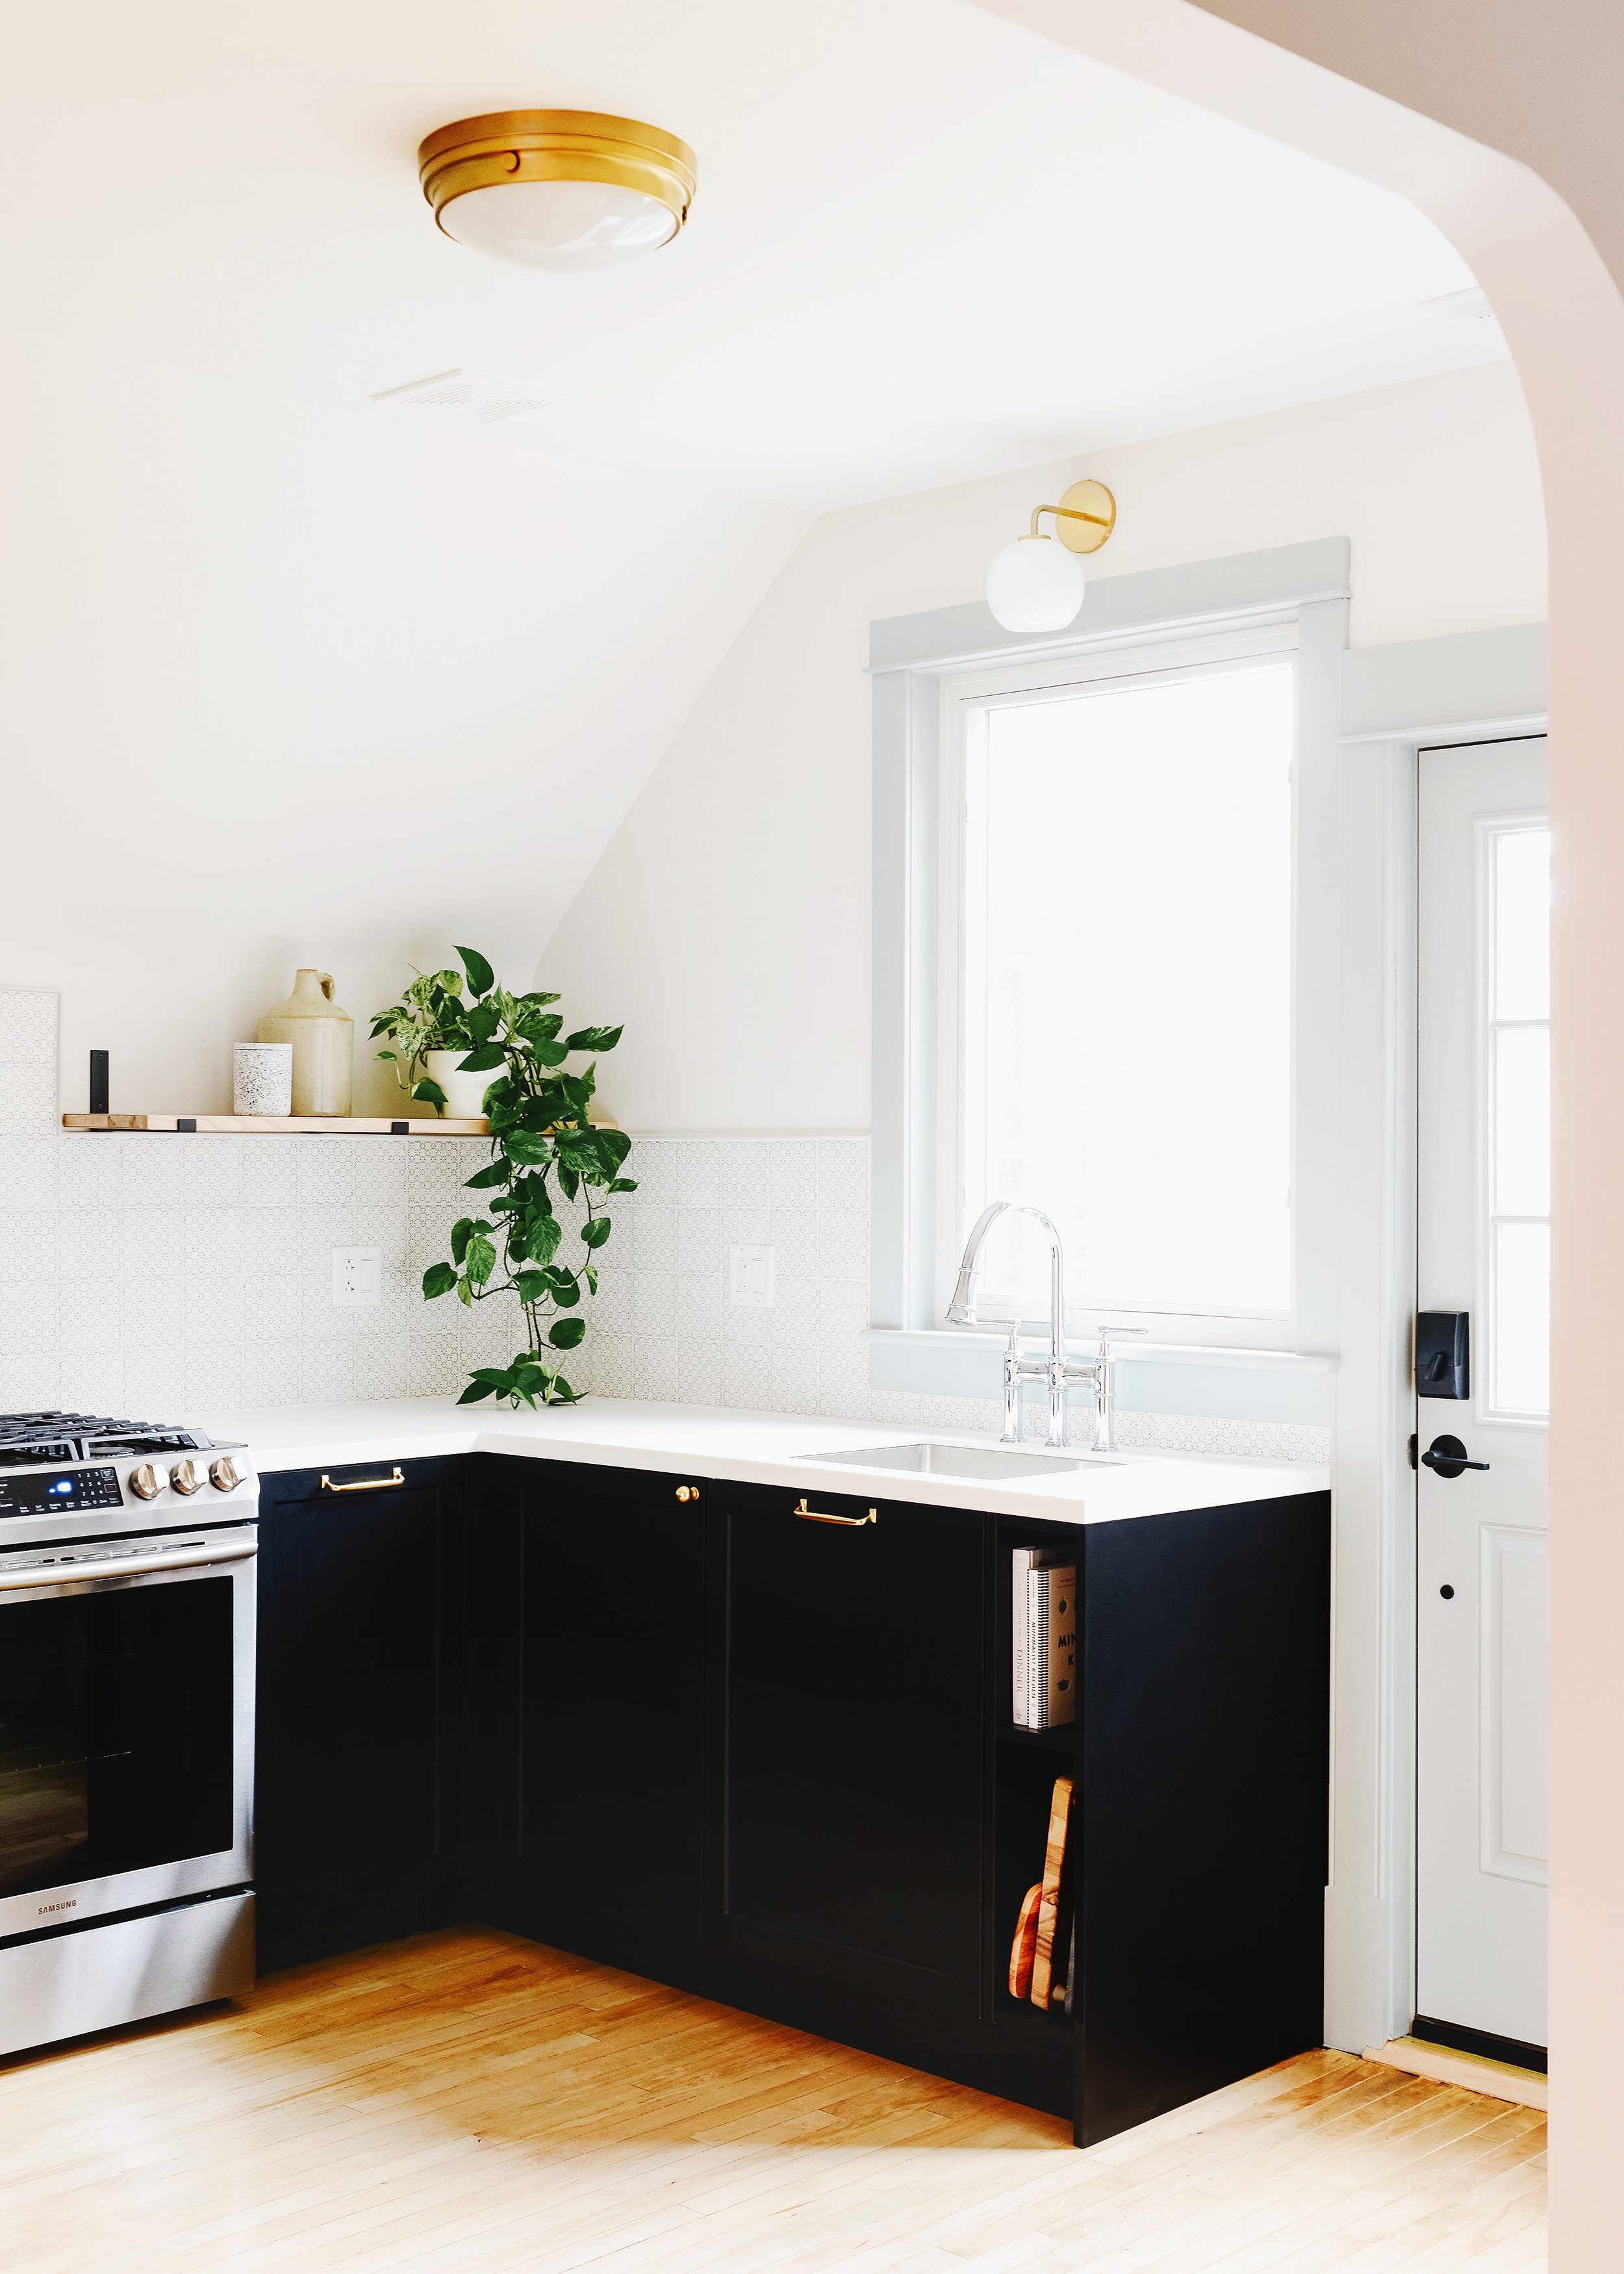
May I suggest an alternative to the floating shelf? (Not to be confused with my love of the floating shelf, but sometimes, change is good.) Same idea, less complicated and equally as strong – if not more so! The shelves we recently added to the Unit 2 kitchen took us less than a day to complete, making it a quick DIY that can be done in a single weekend with time to spare. But don’t let the fast pace of this project fool you; they’re handsome, can be tailored to your aesthetic, and really, really sturdy. The secret is in the twist!
So, What’s the Twist?
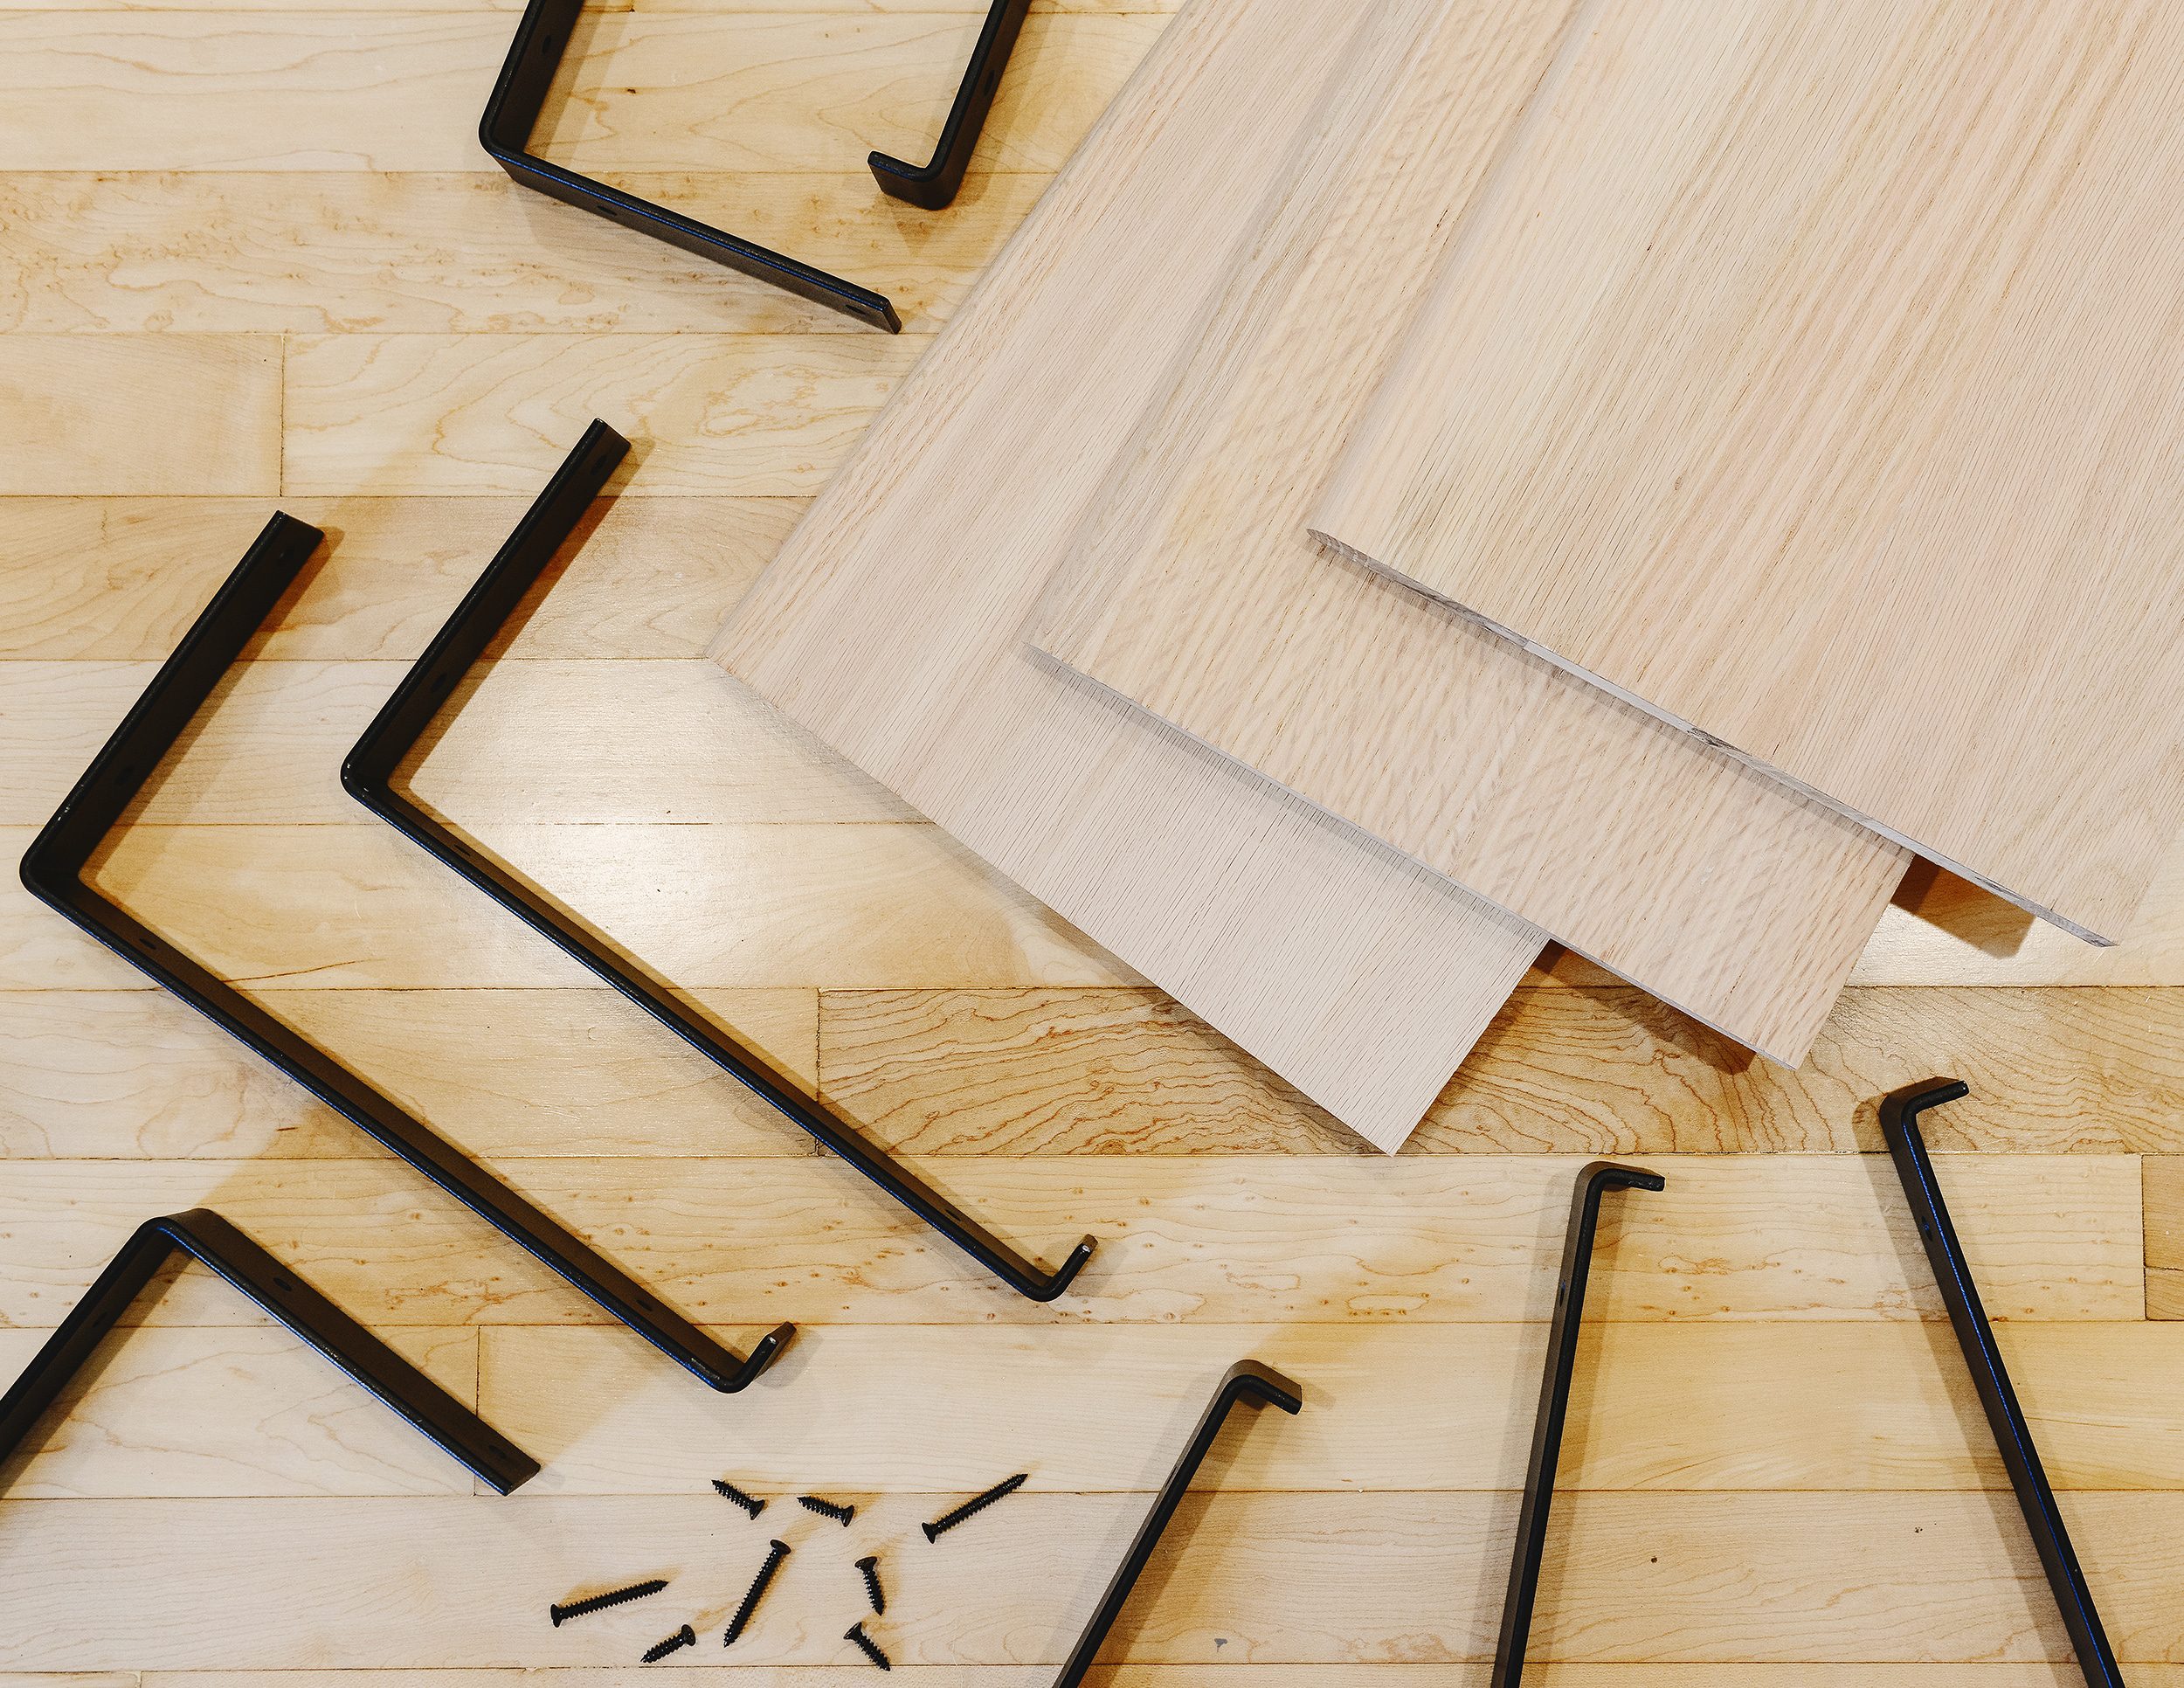
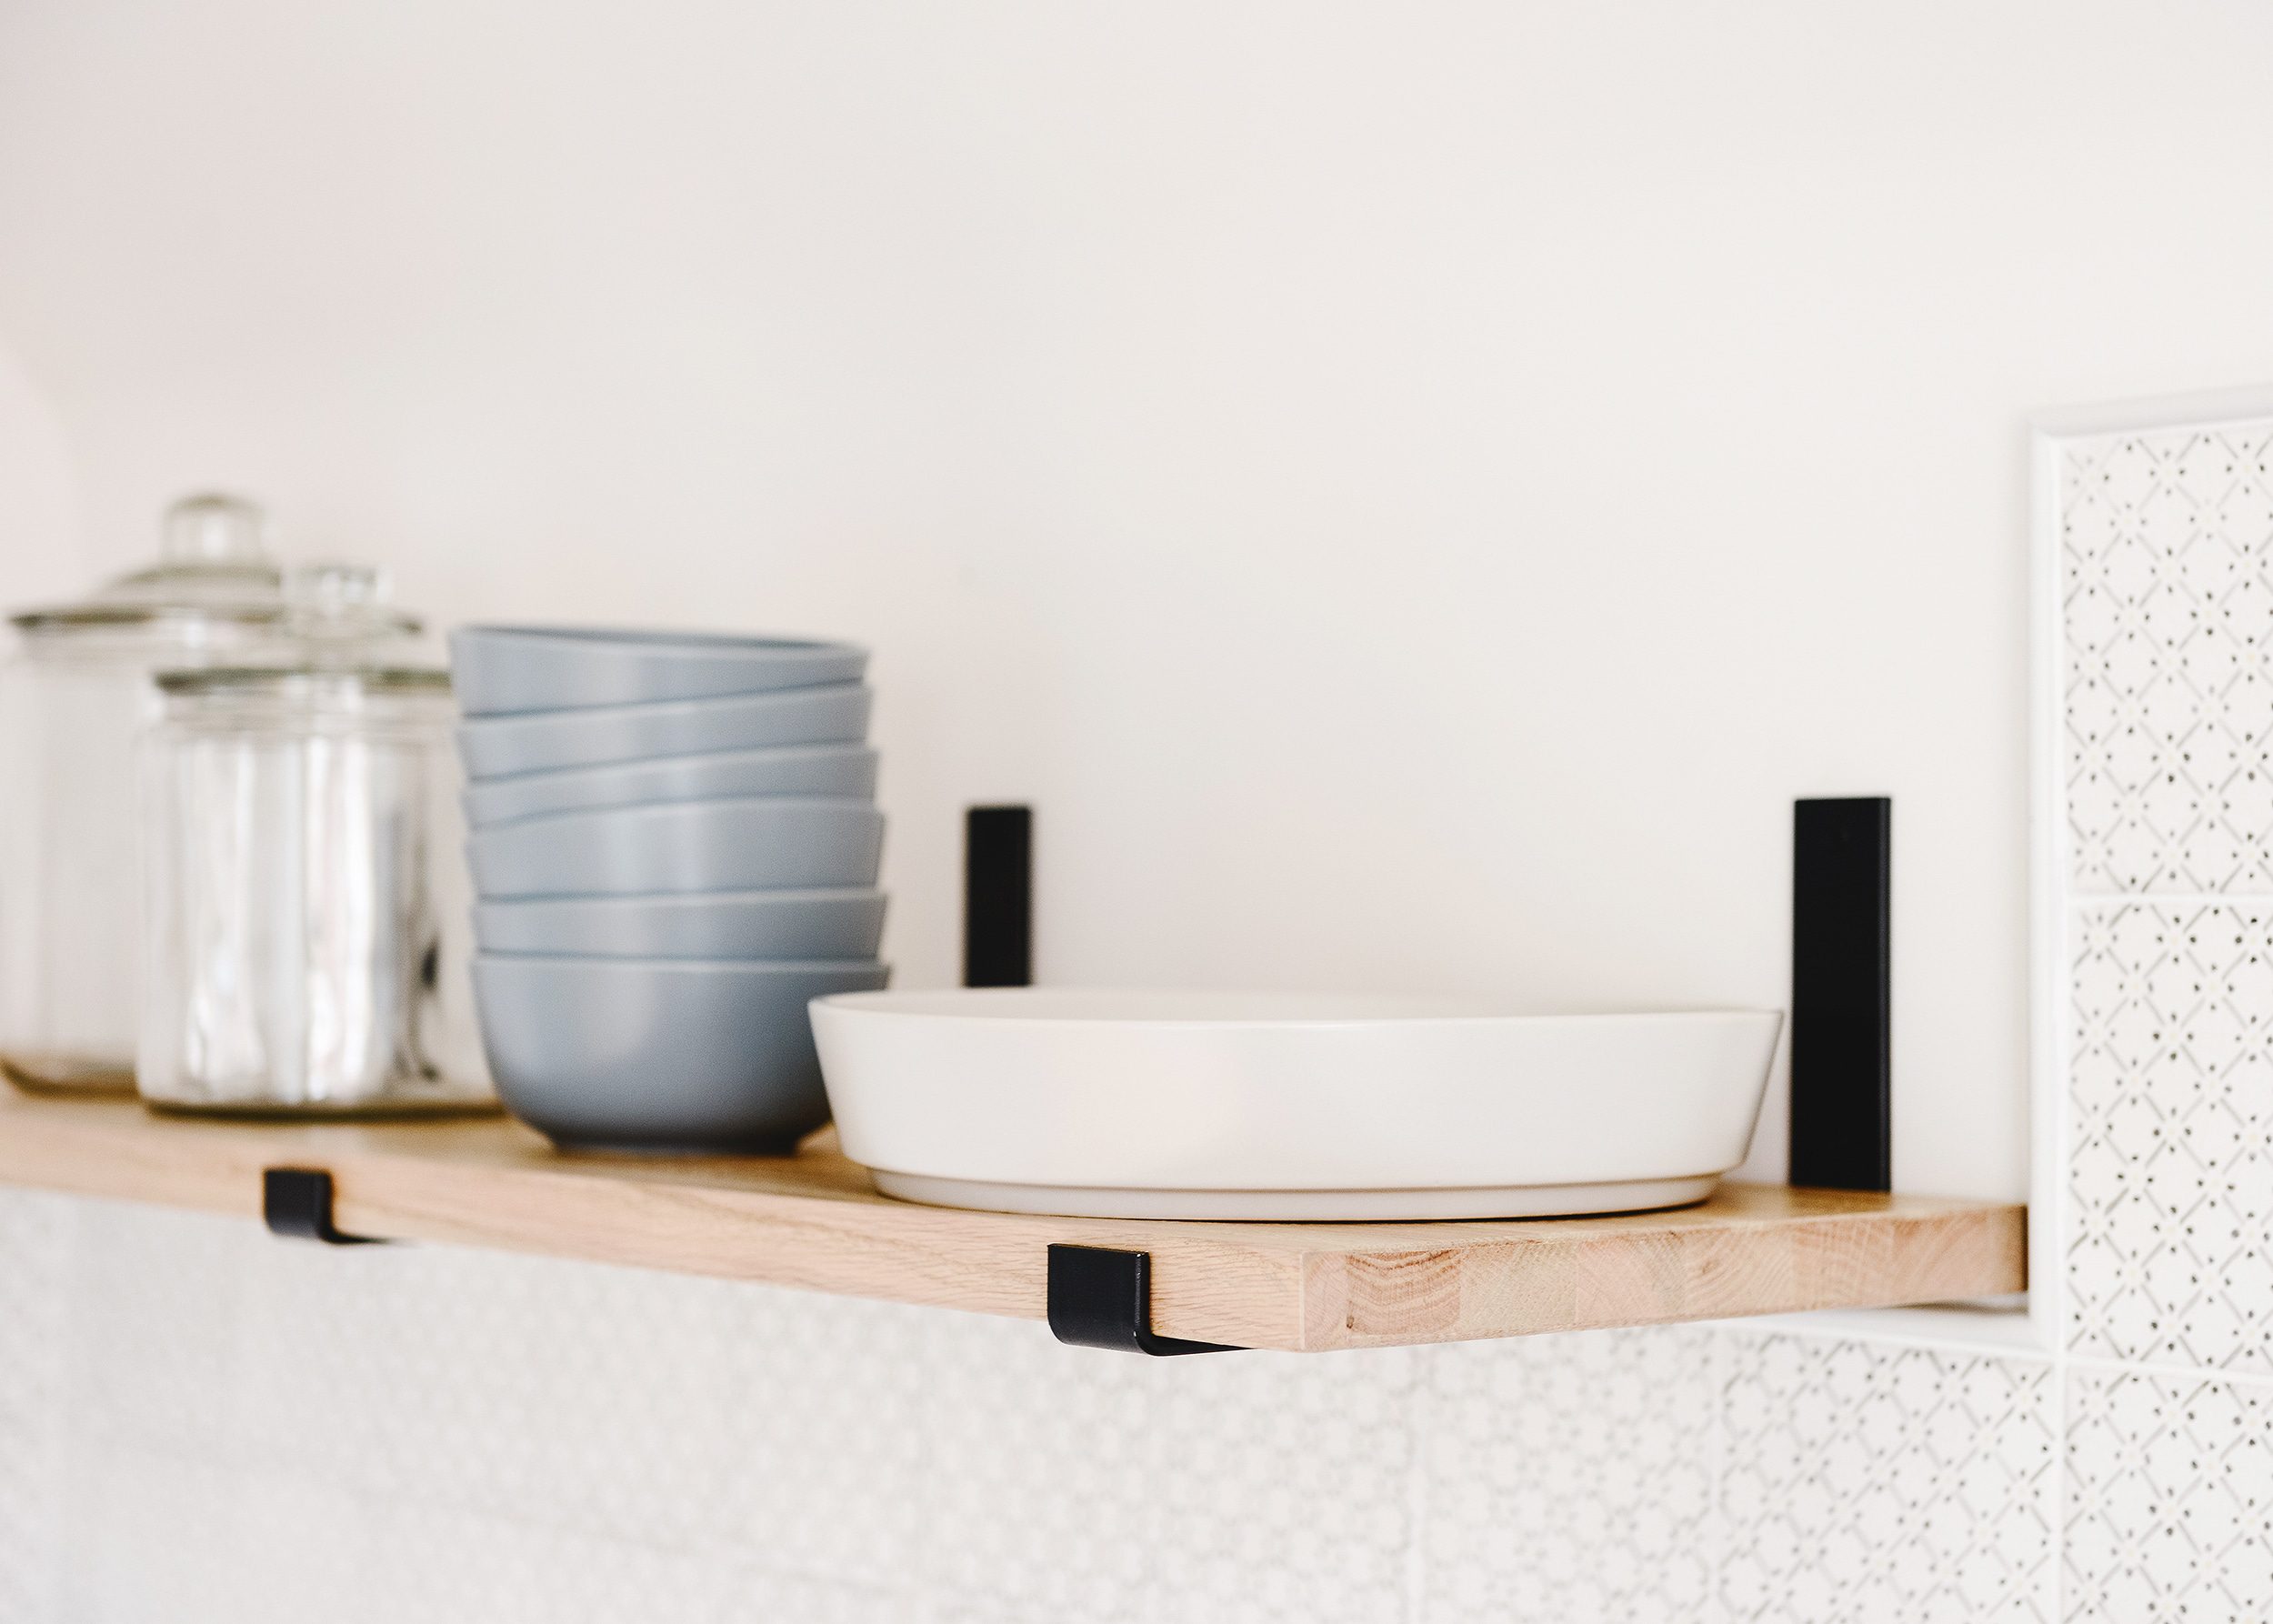
Instead of using (inexpensive) knotty 2-by lumber or (more expensive) select wood planks, we made these shelves out of stair treads! Oak stair treads are a few dollars more than common lumber, but they have a smooth, finished appearance, less noticeable grain and knots, and oak is a more durable, hard wood. In addition, they’re an inch+ thick, making them the perfect companion for these budget-friendly metal shelf brackets we’ll be using in this tutorial!
Tip: You can purchase 36″ – 48″ stair treads in most big box hardware stores. In this tutorial, we’ll be ripping off the bullnose with a table saw. If you do not have a table saw, 2″ x 12″ common lumber would also work (with a little extra sanding for a more uniform appearance).
Tools + Supplies Used
- 12″ x 36″ – 48″ oak stair treads
- 12″ metal shelf brackets
- table saw (for ripping length)
- miter saw (for cutting to width)
- Kreg Pocket Hole System
- stud finder
- drill
- orbital sander
- fine grit sanding block (220 or 320)
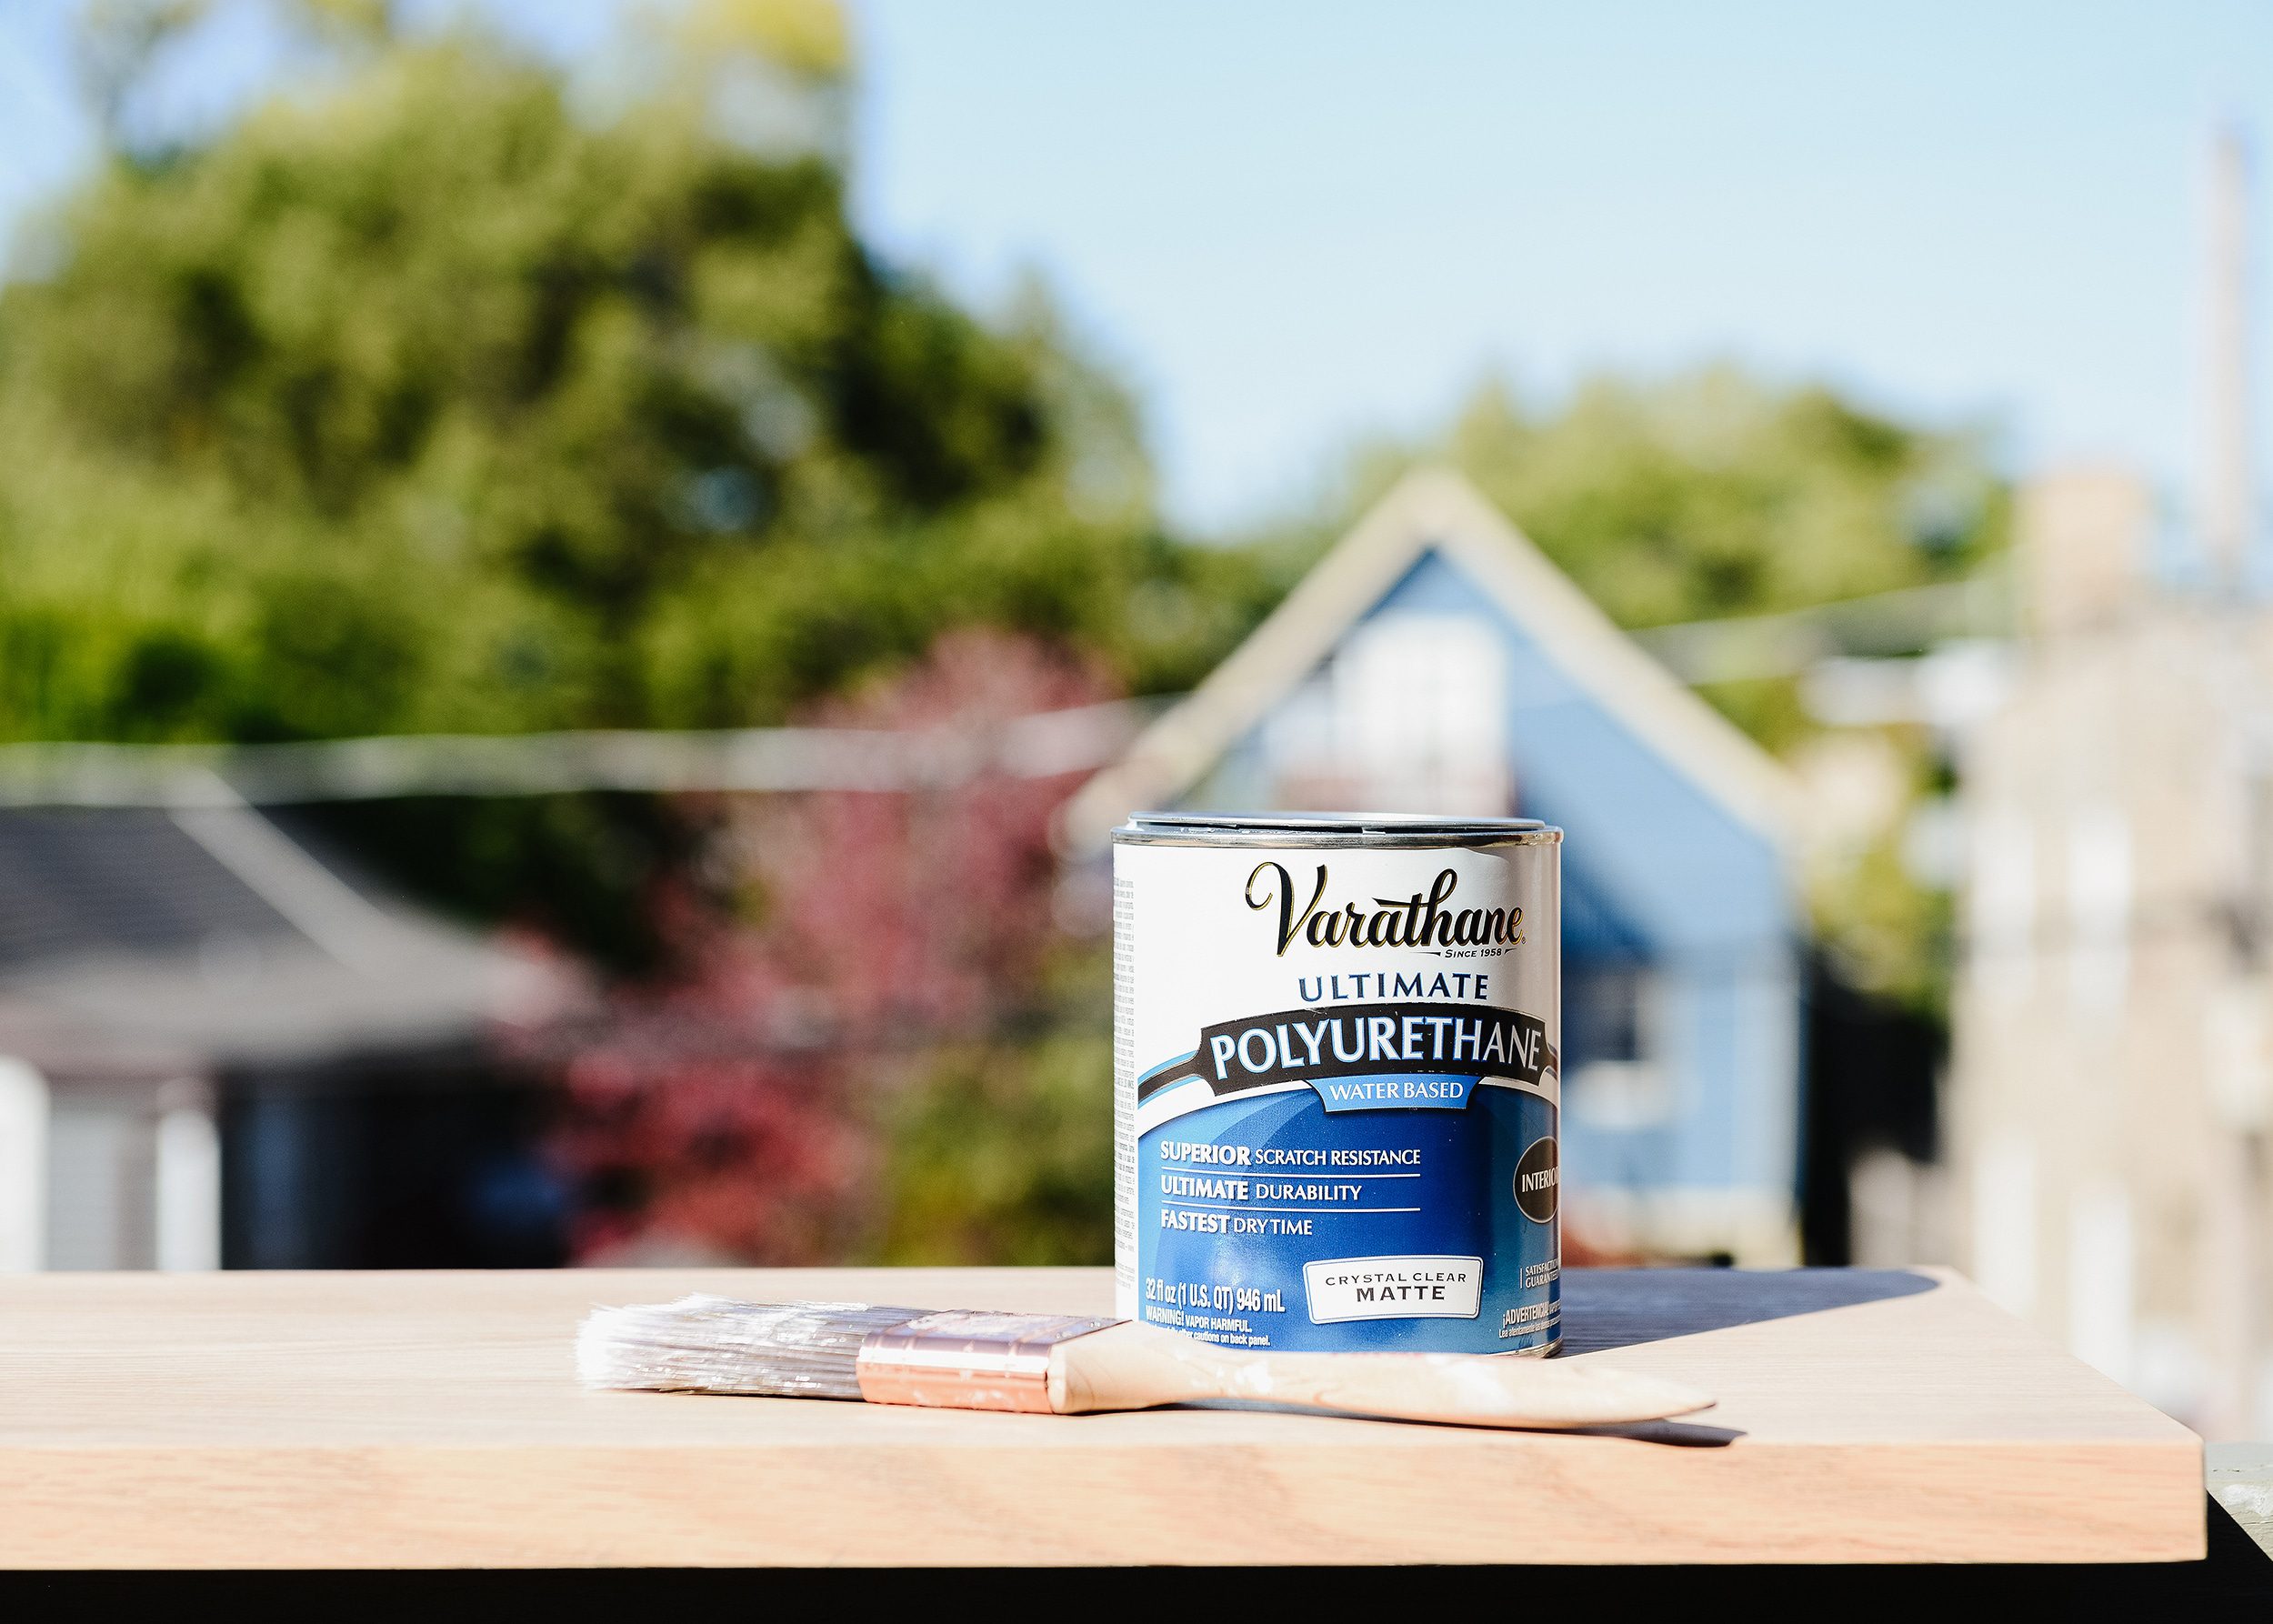
- wood stain
- water-based polyurethane
- black touch-up paint
- paint brush
- toggle bolts
- measuring tape
- painter’s tape
- level
- pencil
What We Did
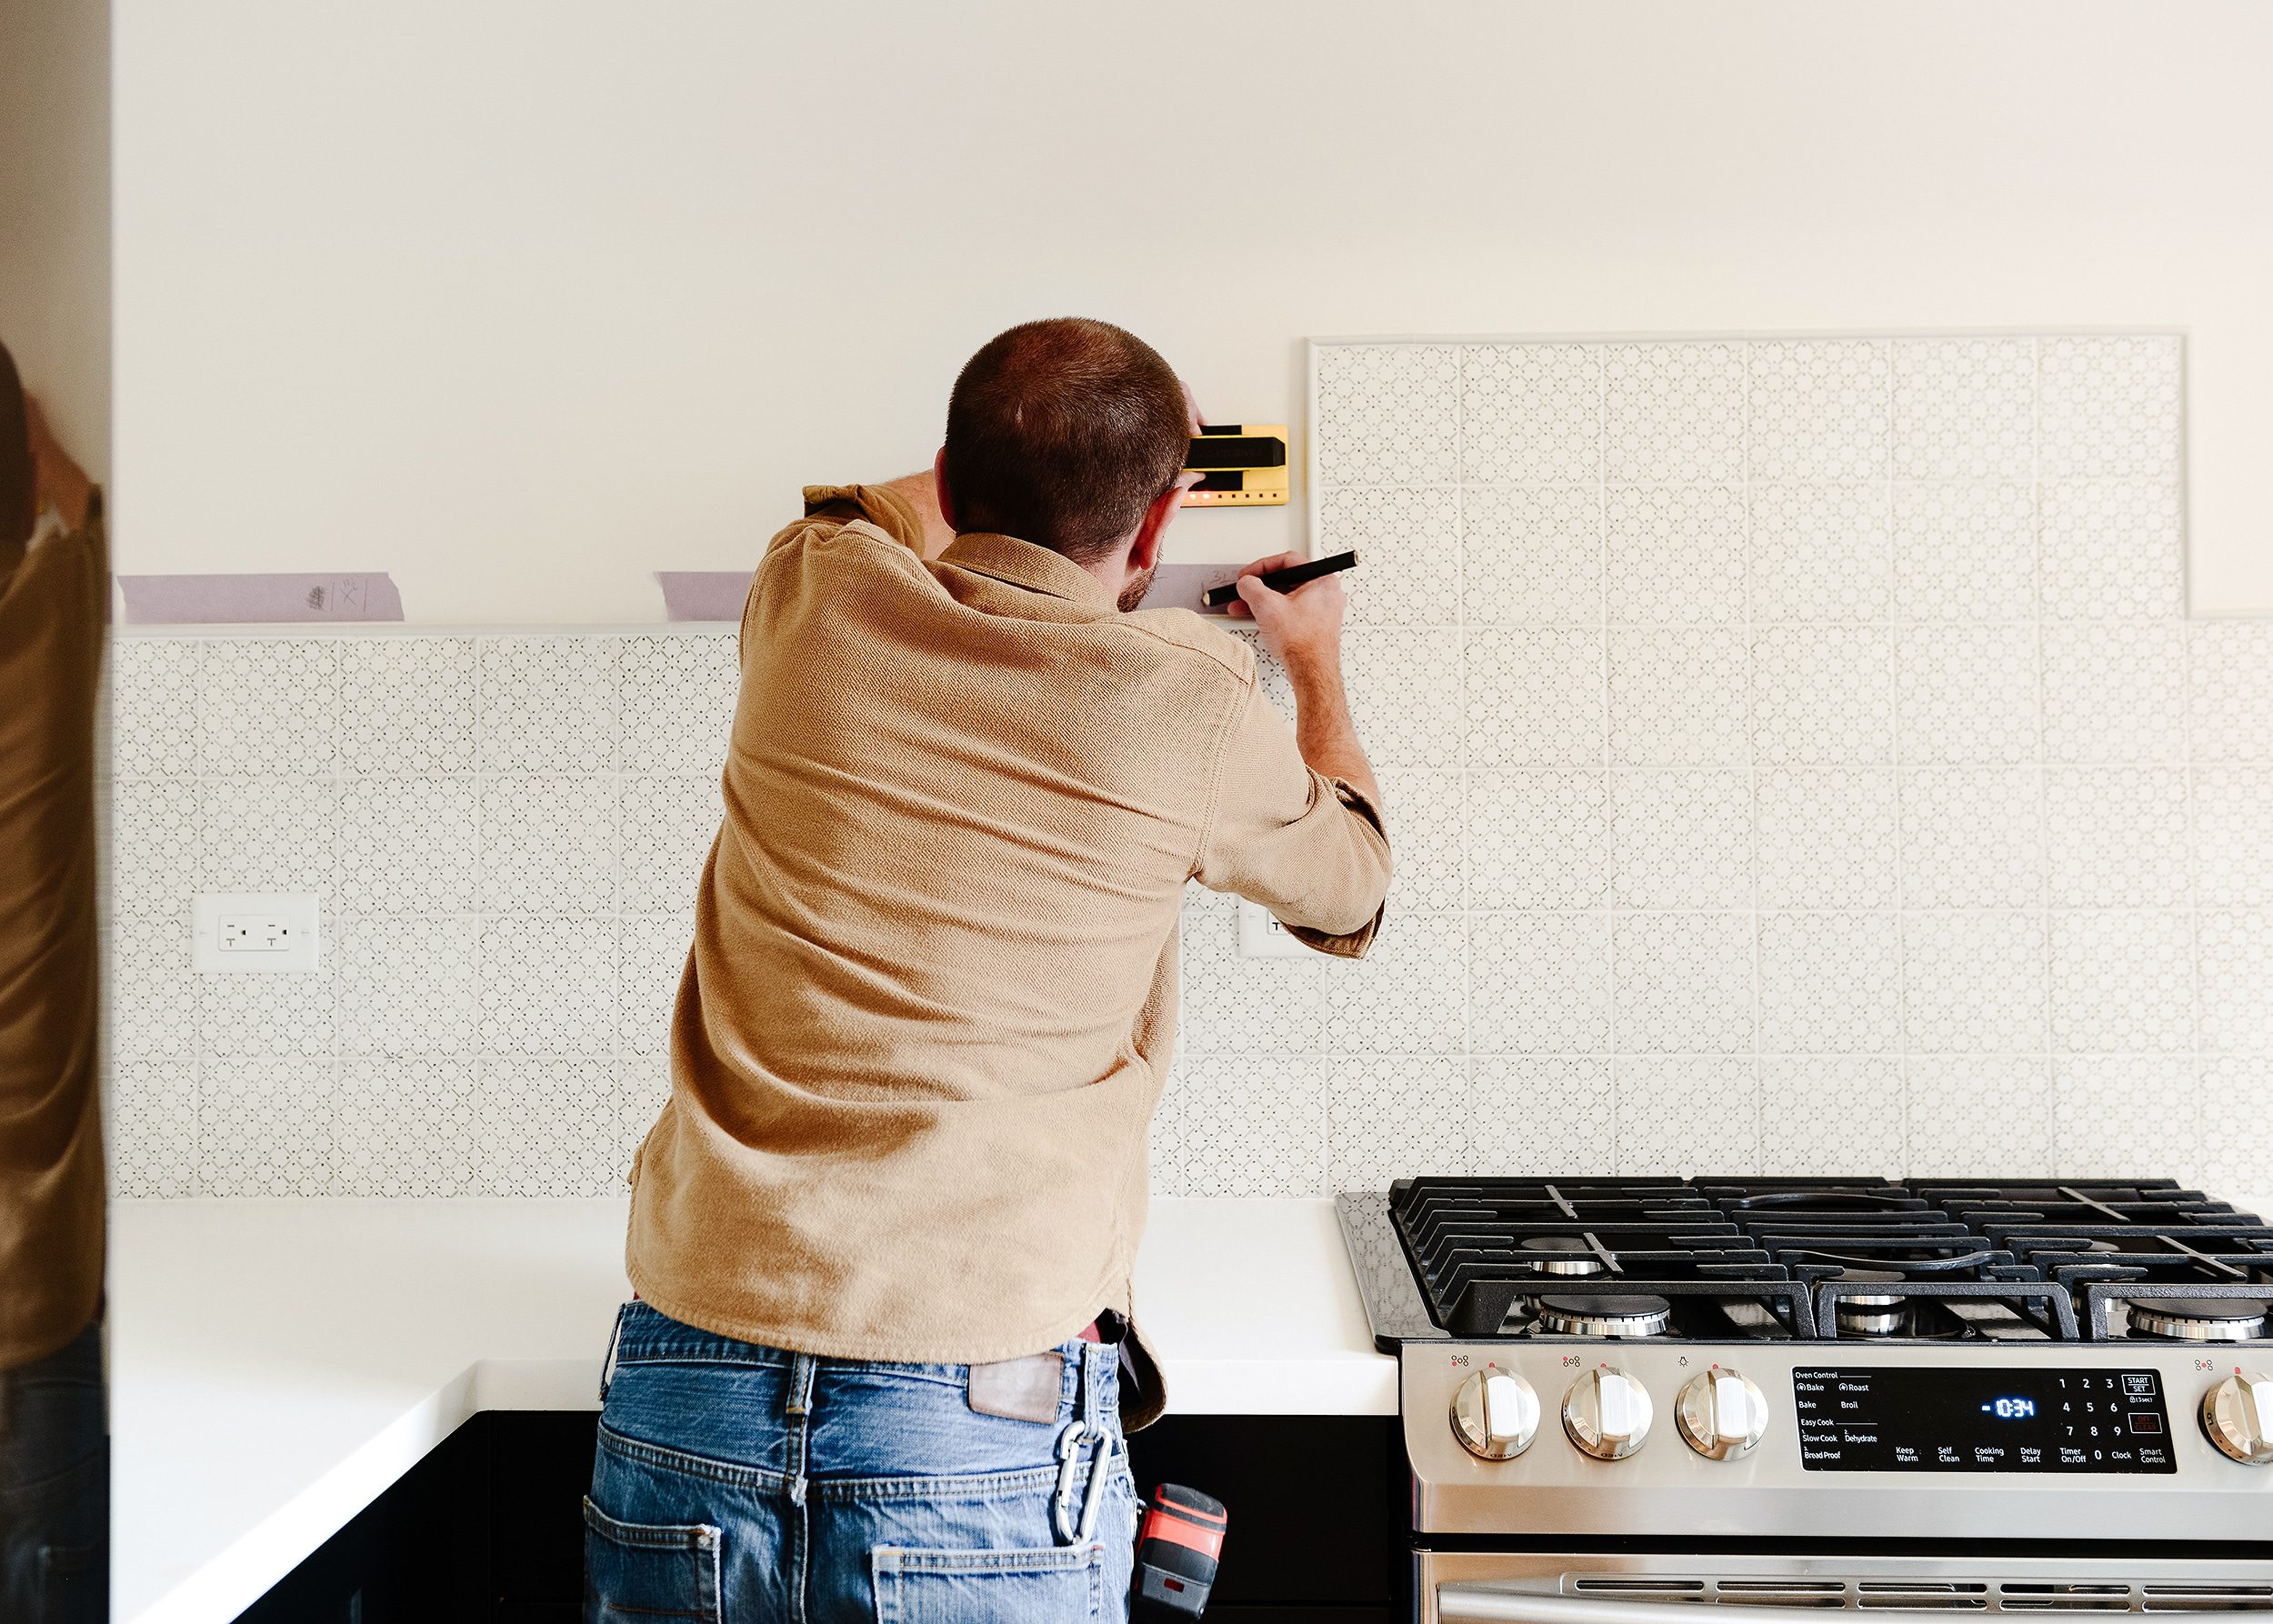
1| Find + Mark the Studs
Our first step when hanging shelving is to look for studs. To prevent marking up our freshly painted walls, we use painter’s tape and a pencil to make a mark wherever there’s a stud. Sometimes we can utilize a stud during install (which is ideal), but sometimes we can’t for visual purposes. I’ll share what we do in the latter situation further along in this tutorial!
2| Rip the Bullnose + Cut to Length
Our brackets can accommodate a shelving depth of 11 1/4″, and our stair treads are 11 1/2″. Using our table saw, Scott took 1/4″ off the bullnose on our stair treads, which gave us a pretty square edge. Afterwards, we cut the lengths with a miter saw.
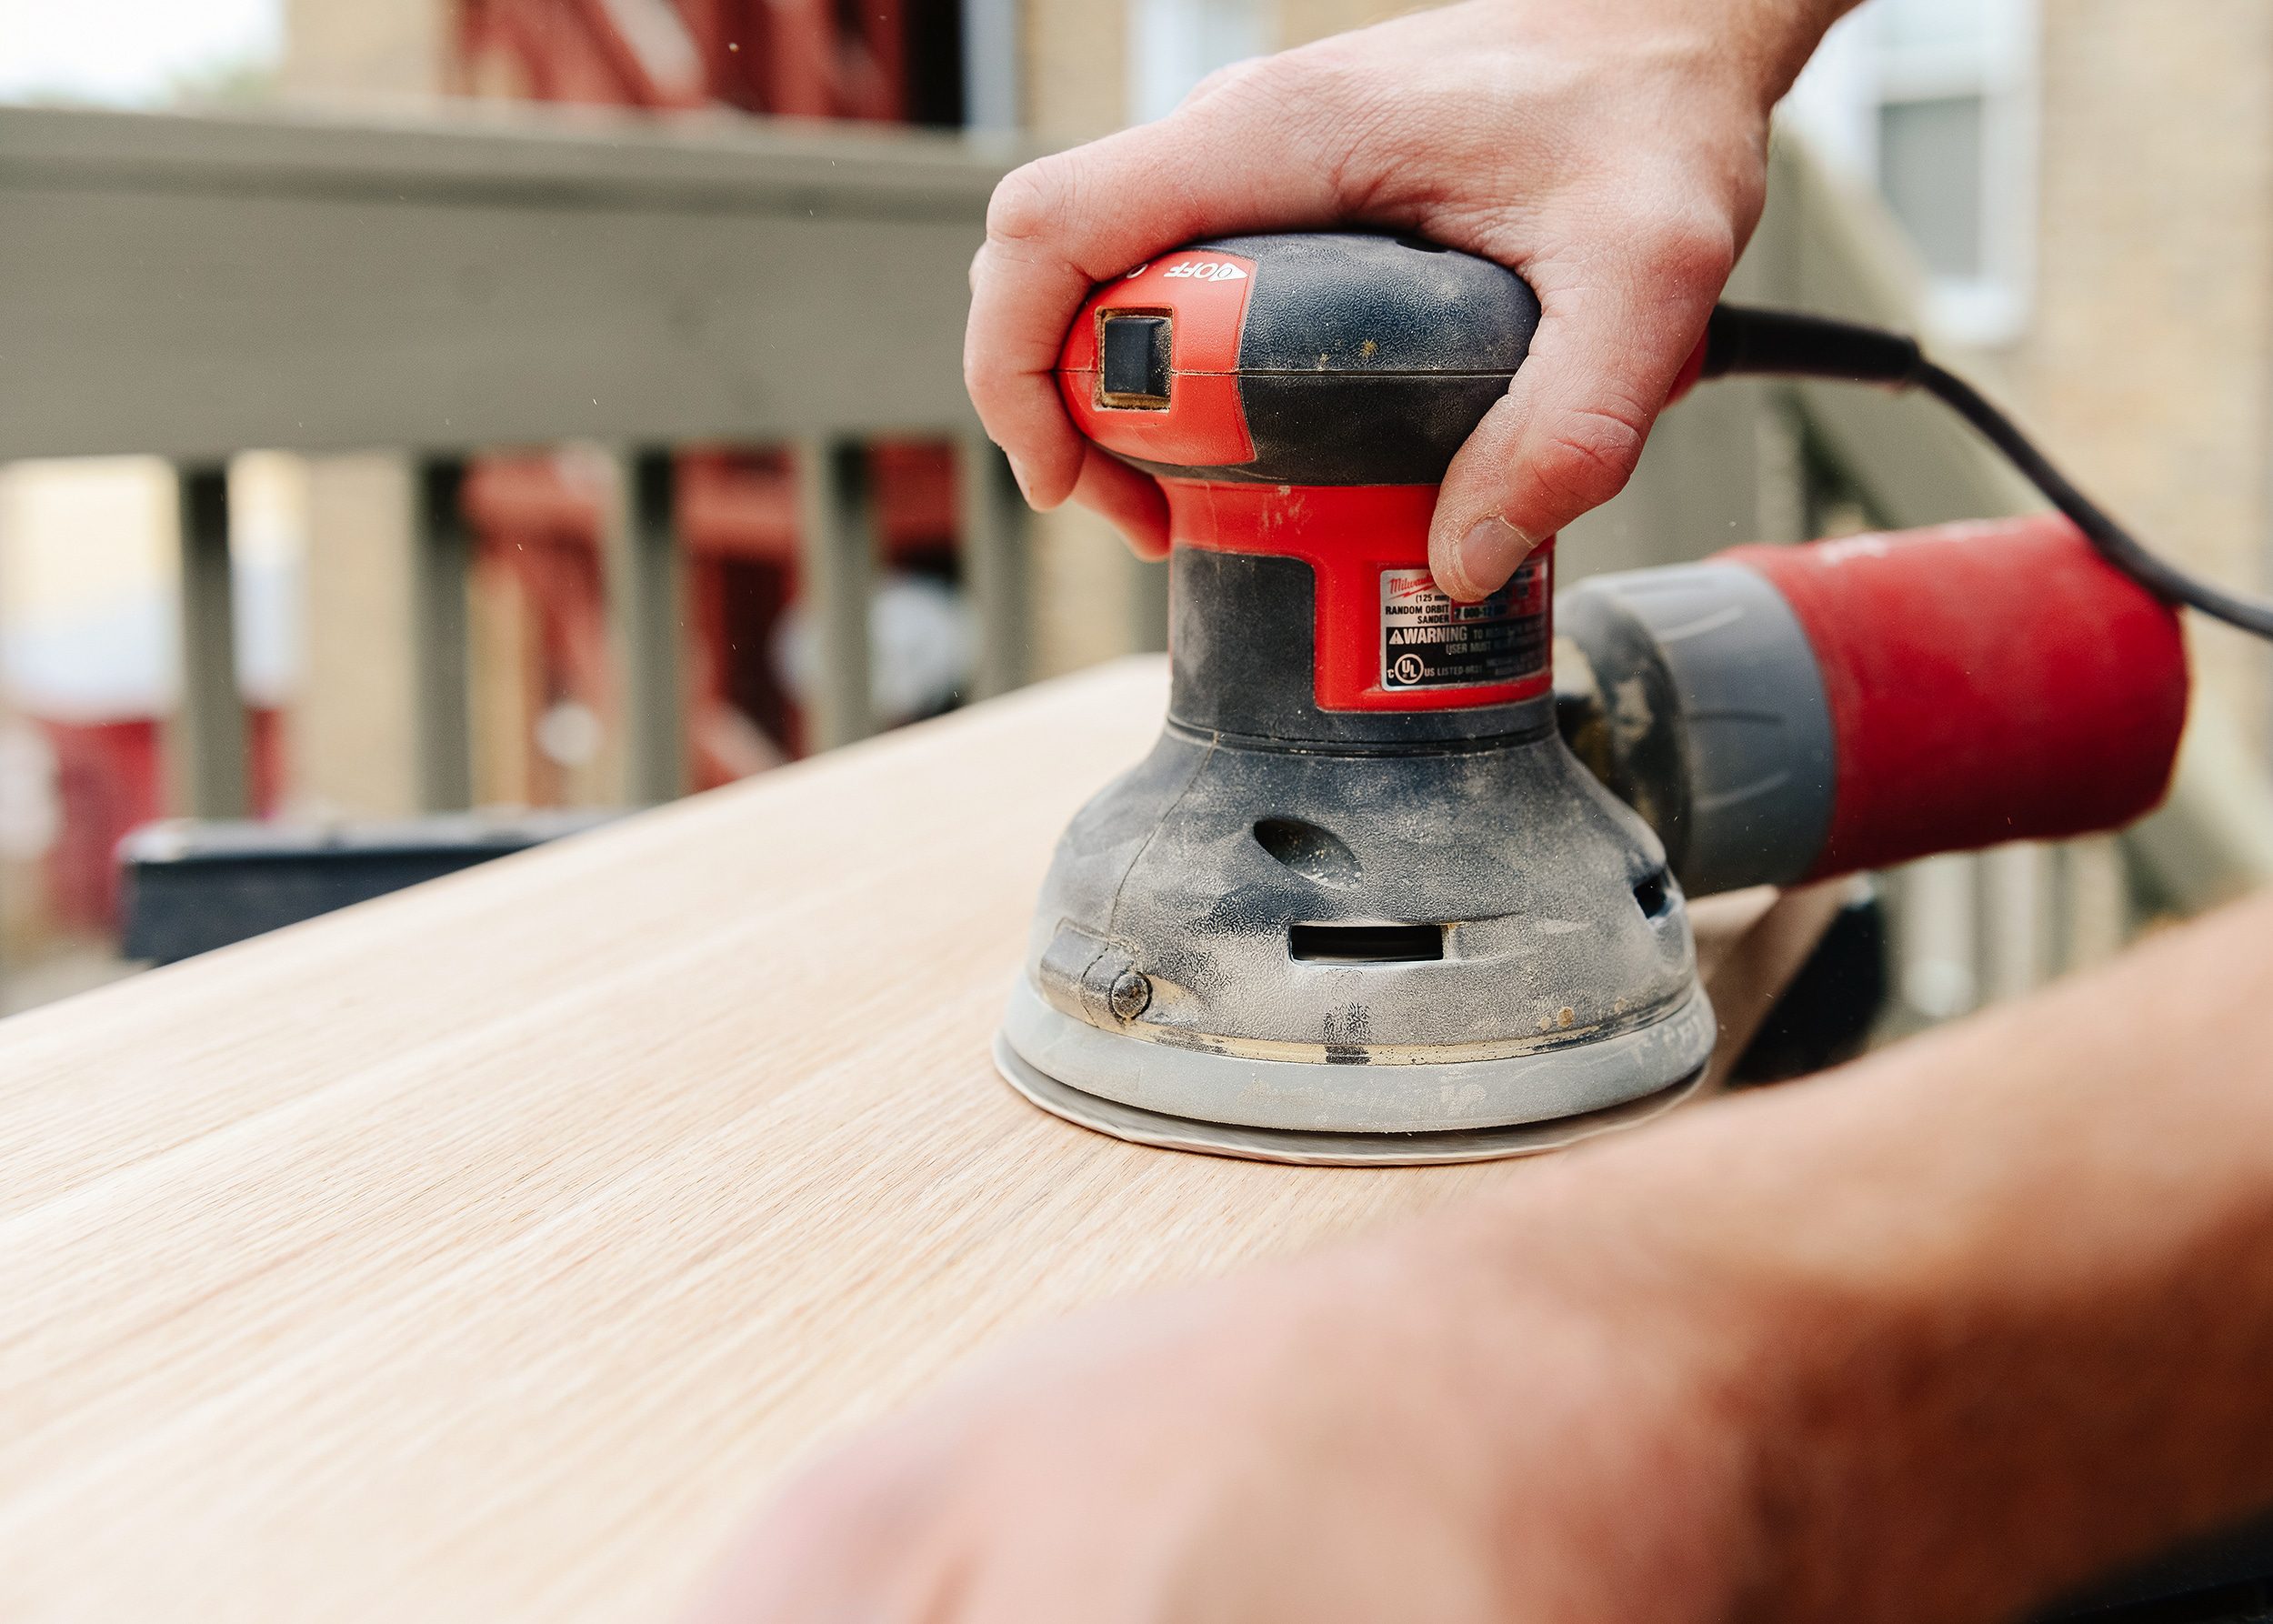
3| Sand the Oak Stair Treads
We used our orbital sander to sand down the top, sides and bottom, which helps to remove any rough texture from cuts. Sanding the top and bottom will also allow for a more even stain application. We typically start with rough 80 grit sandpaper, and then we move up to 120 grit and finally, 220 grit. The higher the number, the more fine the grit and more smooth your surface will be!
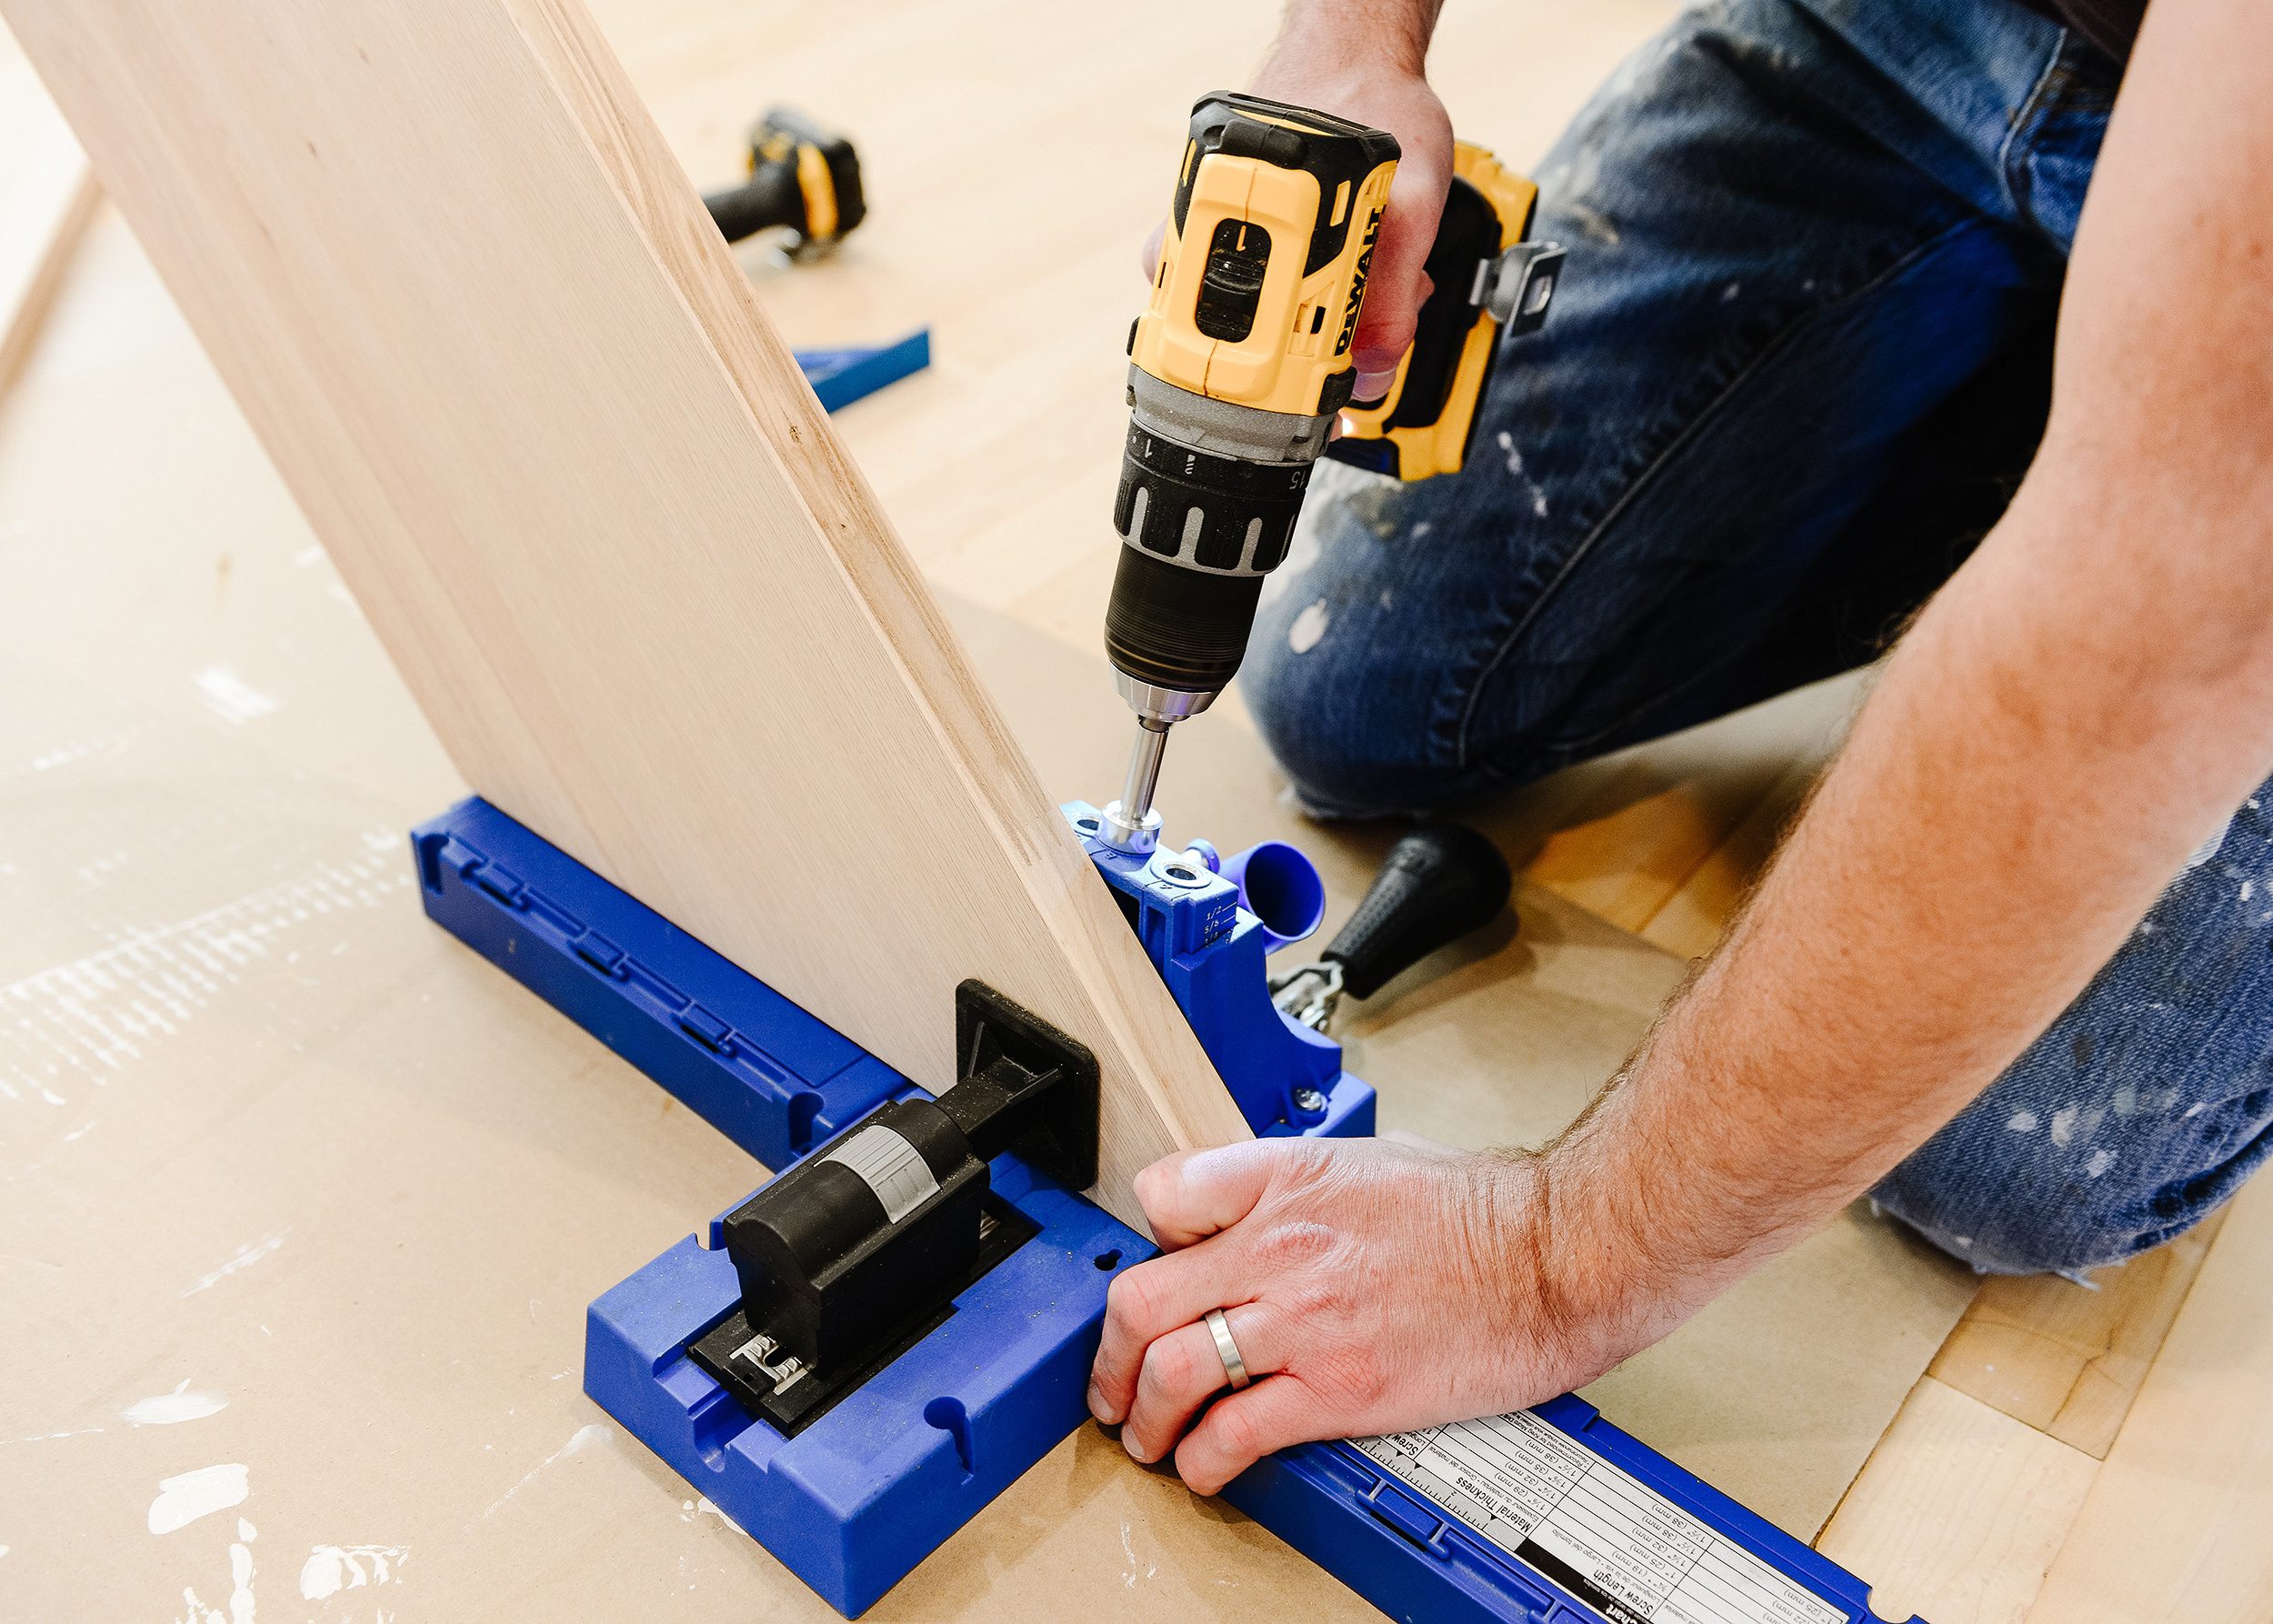
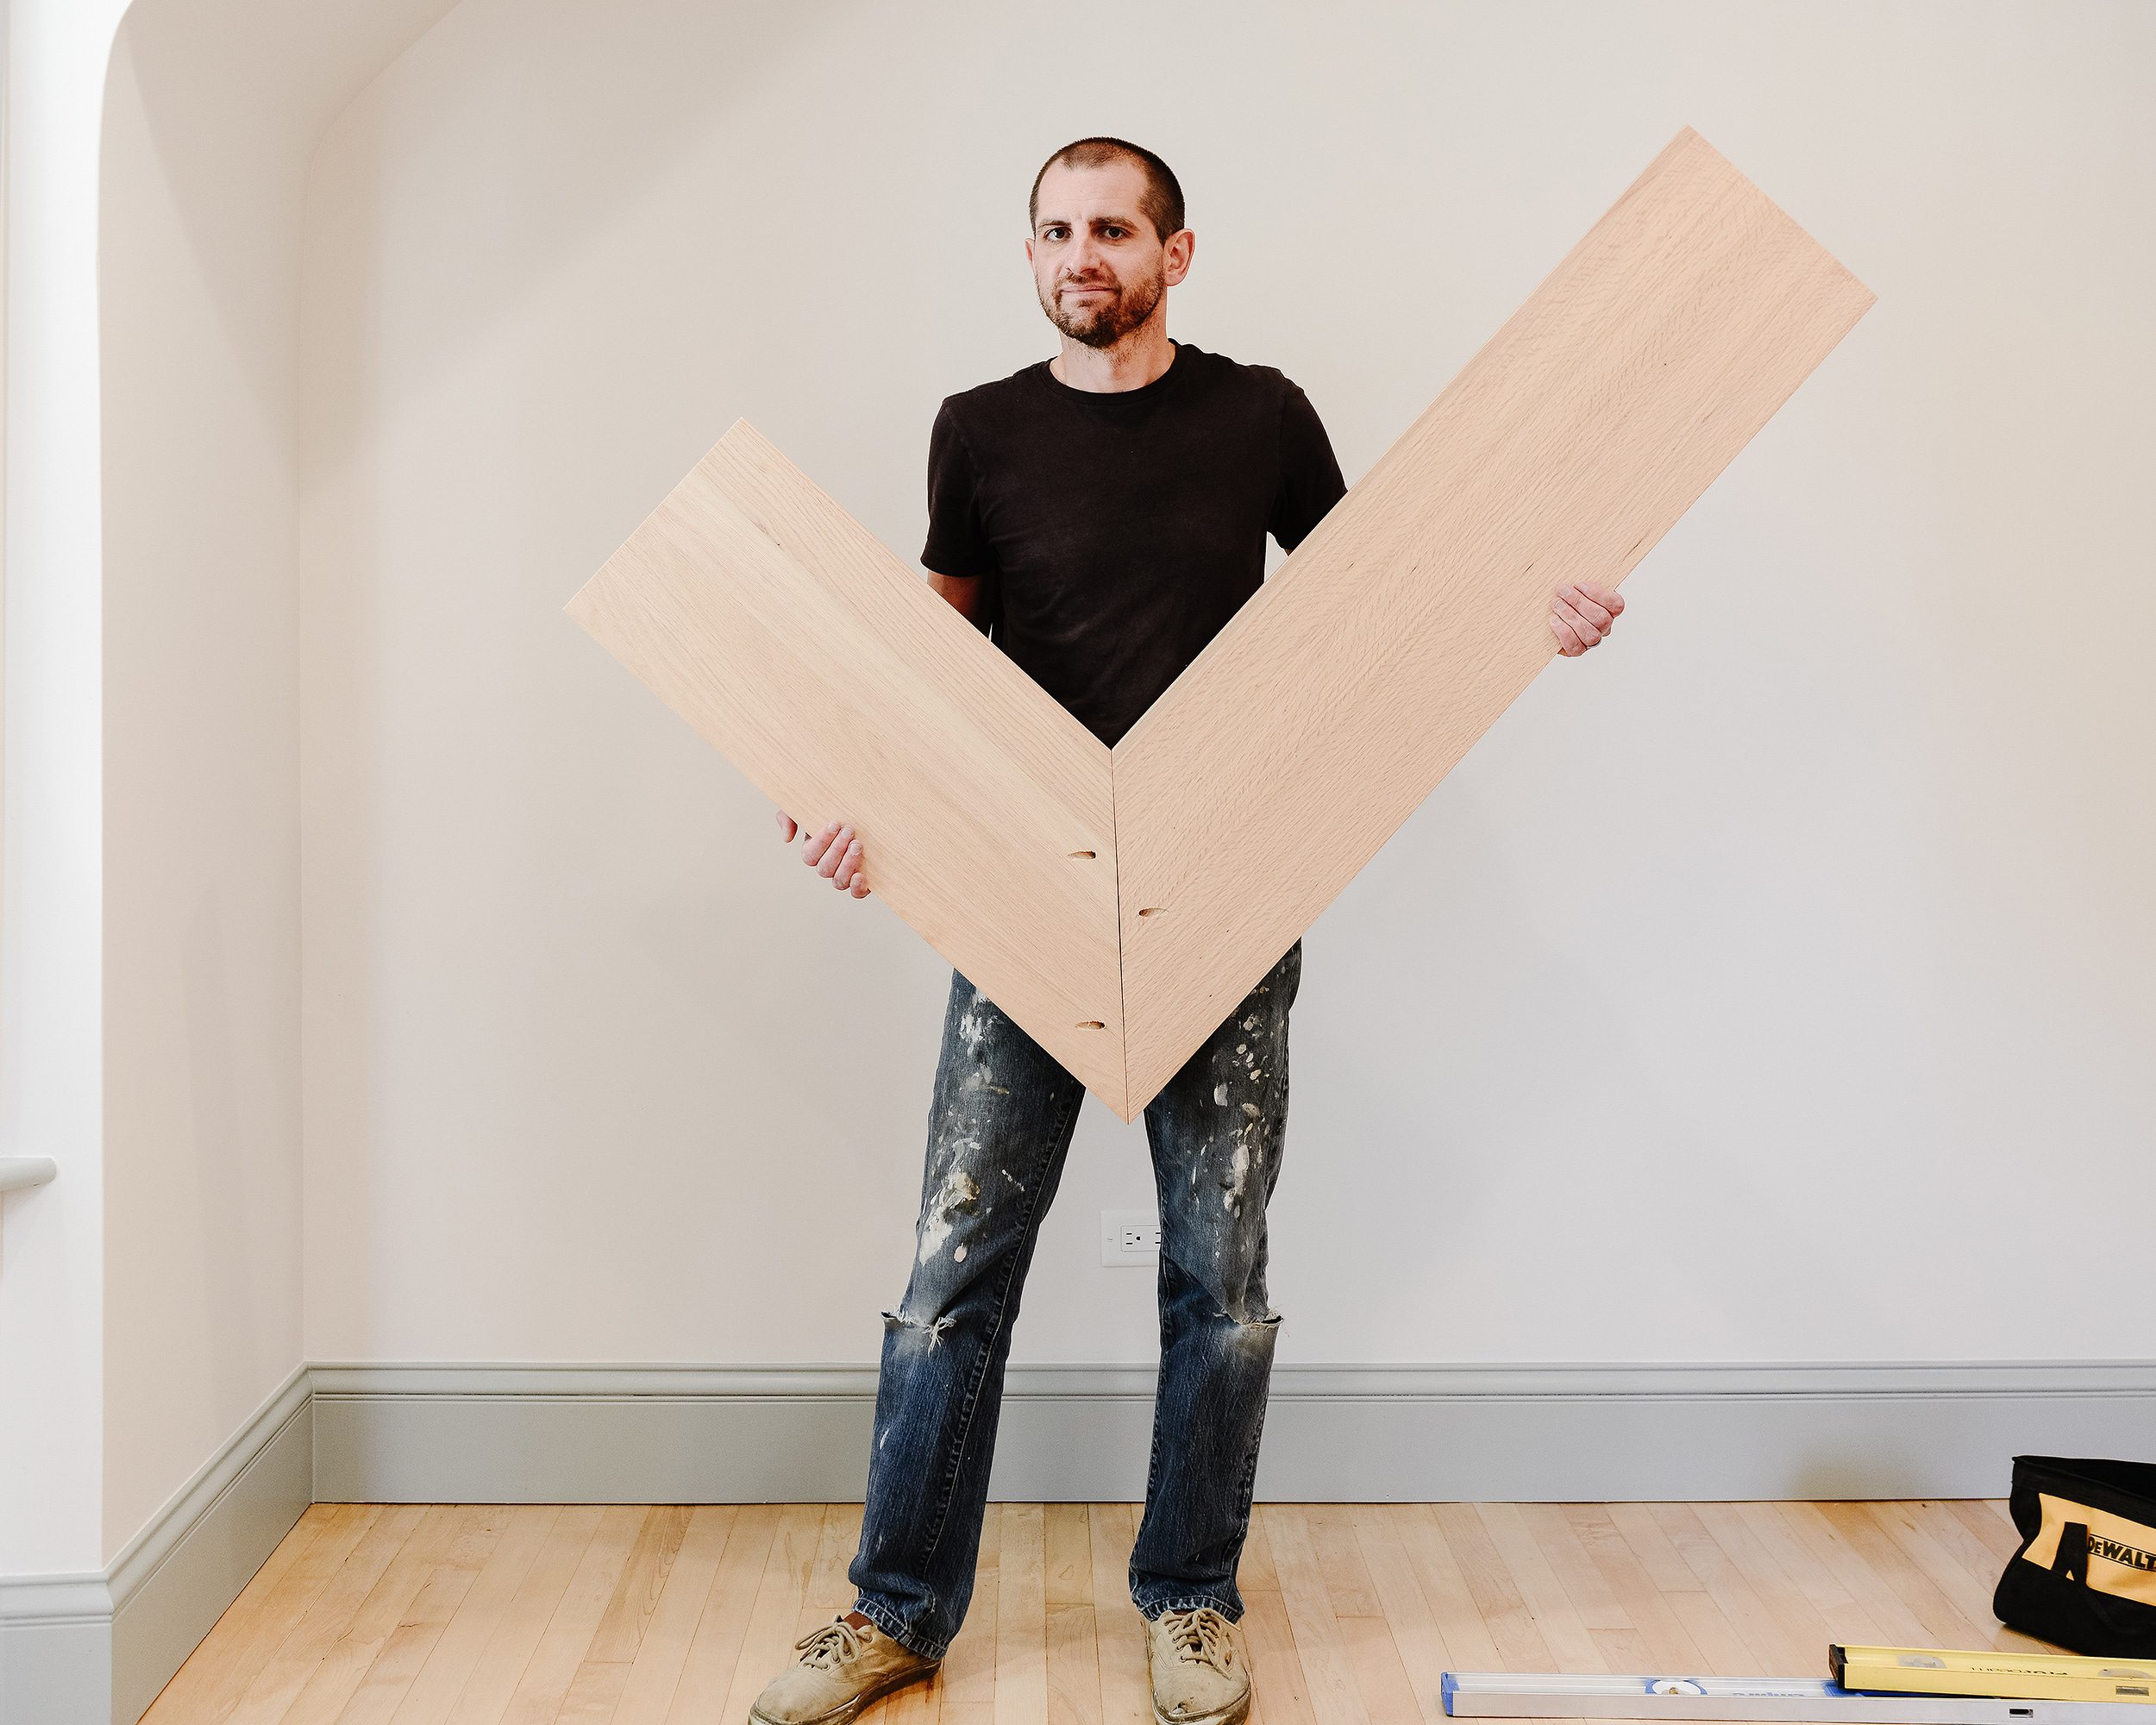
4| Join Any Corners
We designed our shelves to hug an inside corner, and although straight cuts would do the trick, a mitered cut always looks better! We used Kreg Pocket Hole System to create 3 pocket holes that would allow us to join the seam tightly.
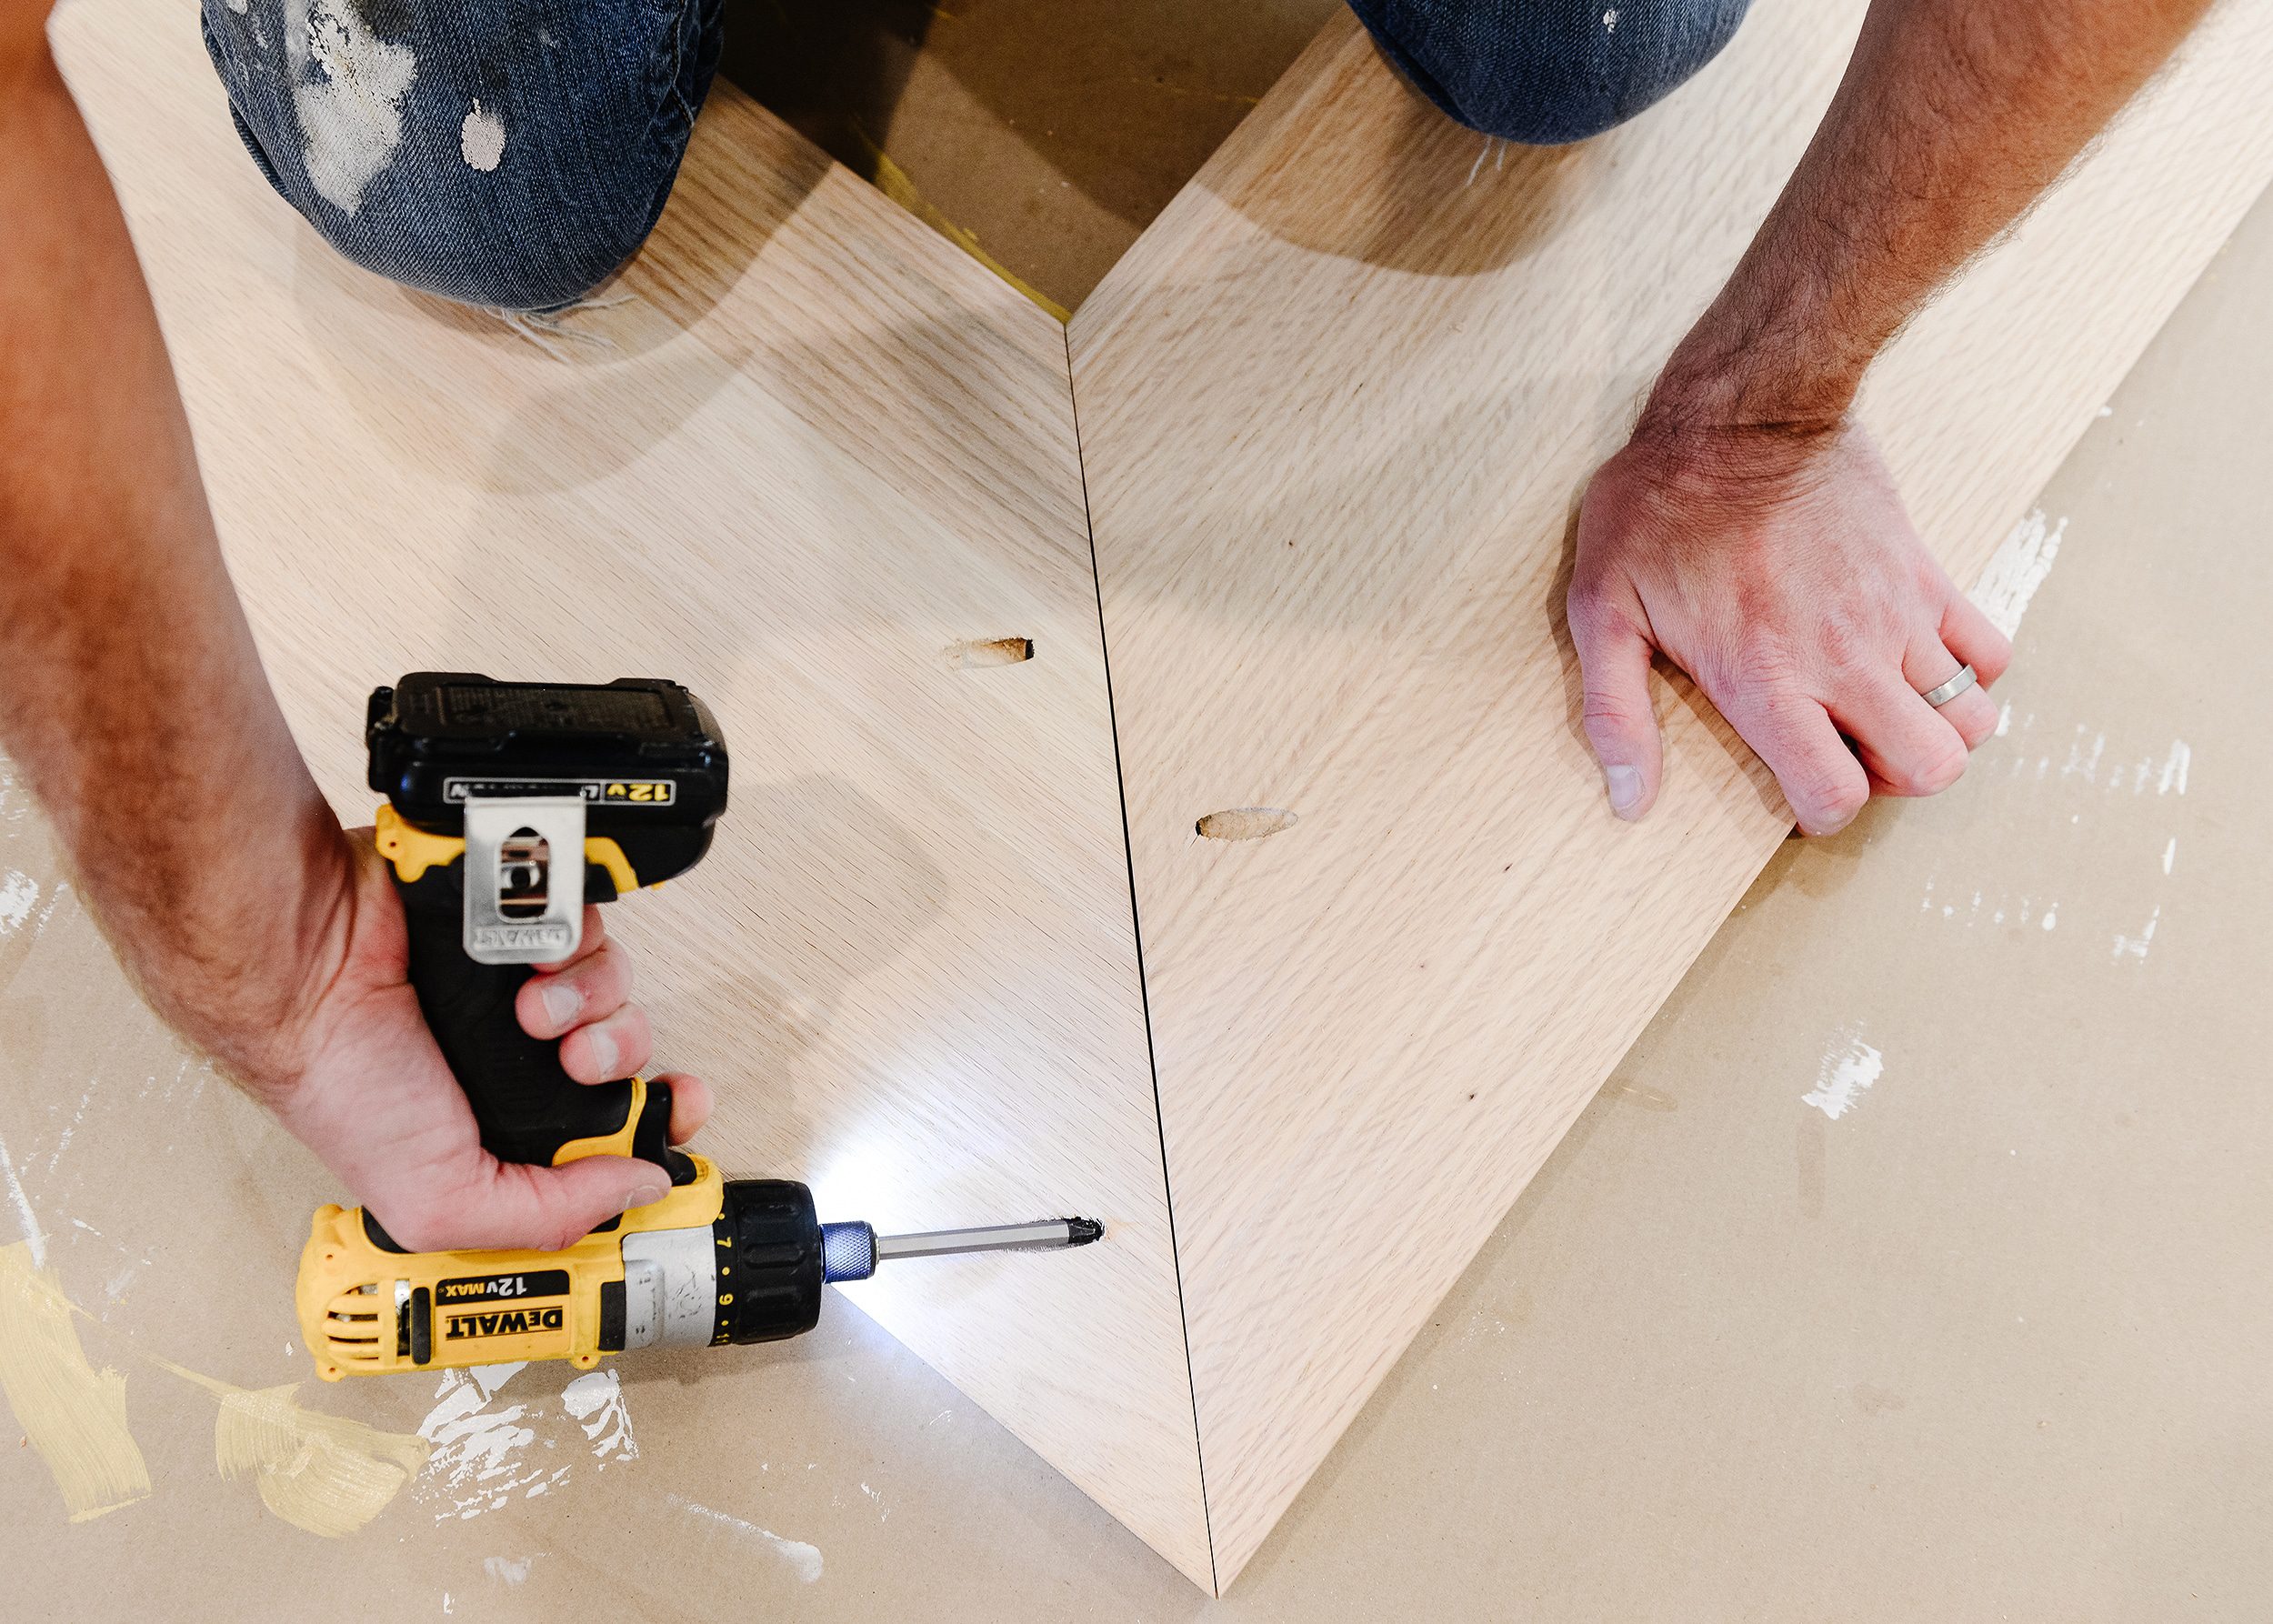
We added two pocket holes on one side, and a third on the other. By staggering our pocket holes, the screws will pull the two pieces together nicely while also being hidden! You can also wood fill the holes if there’s a chance they’ll be visible. (We skipped this step, since you’d need to be an ant on the countertop to see those holes!)
5| Stain + Protect
As Scott completed cutting, sanding and joining each stair tread, he passed it along to me for staining! Oak stair treads have a slightly reddish hue, and the floors throughout the apartment are maple, showing no redness whatsoever. It was up to me to knock down the red as best as possible, and I was able to do so with stain!
Taking a cue from our floor staining adventures, I found that a very light layer of Minwax Weathered Oak stain applied with a rag helped tone down the red tremendously! Afterwards, I applied 3 coats of water-based polyurethane with a paintbrush to protect the wood. Between each coat of stain, it’s best practice to give the previous coat of poly a light sanding with a 220 grit sanding block.
Tip: With every layer of polyurethane, you may notice raised wood grain. Sanding with a 220 grit block between layers will help to knock that down, and a final sand with 400 grit sandpaper will polish up the top layer.
6| Install the Brackets
While we waited for our stain and poly to dry, we got right to work on installing the brackets! We were lucky that two of our brackets were able to go right into a stud, but for the rest of the placement, we used toggle bolts:
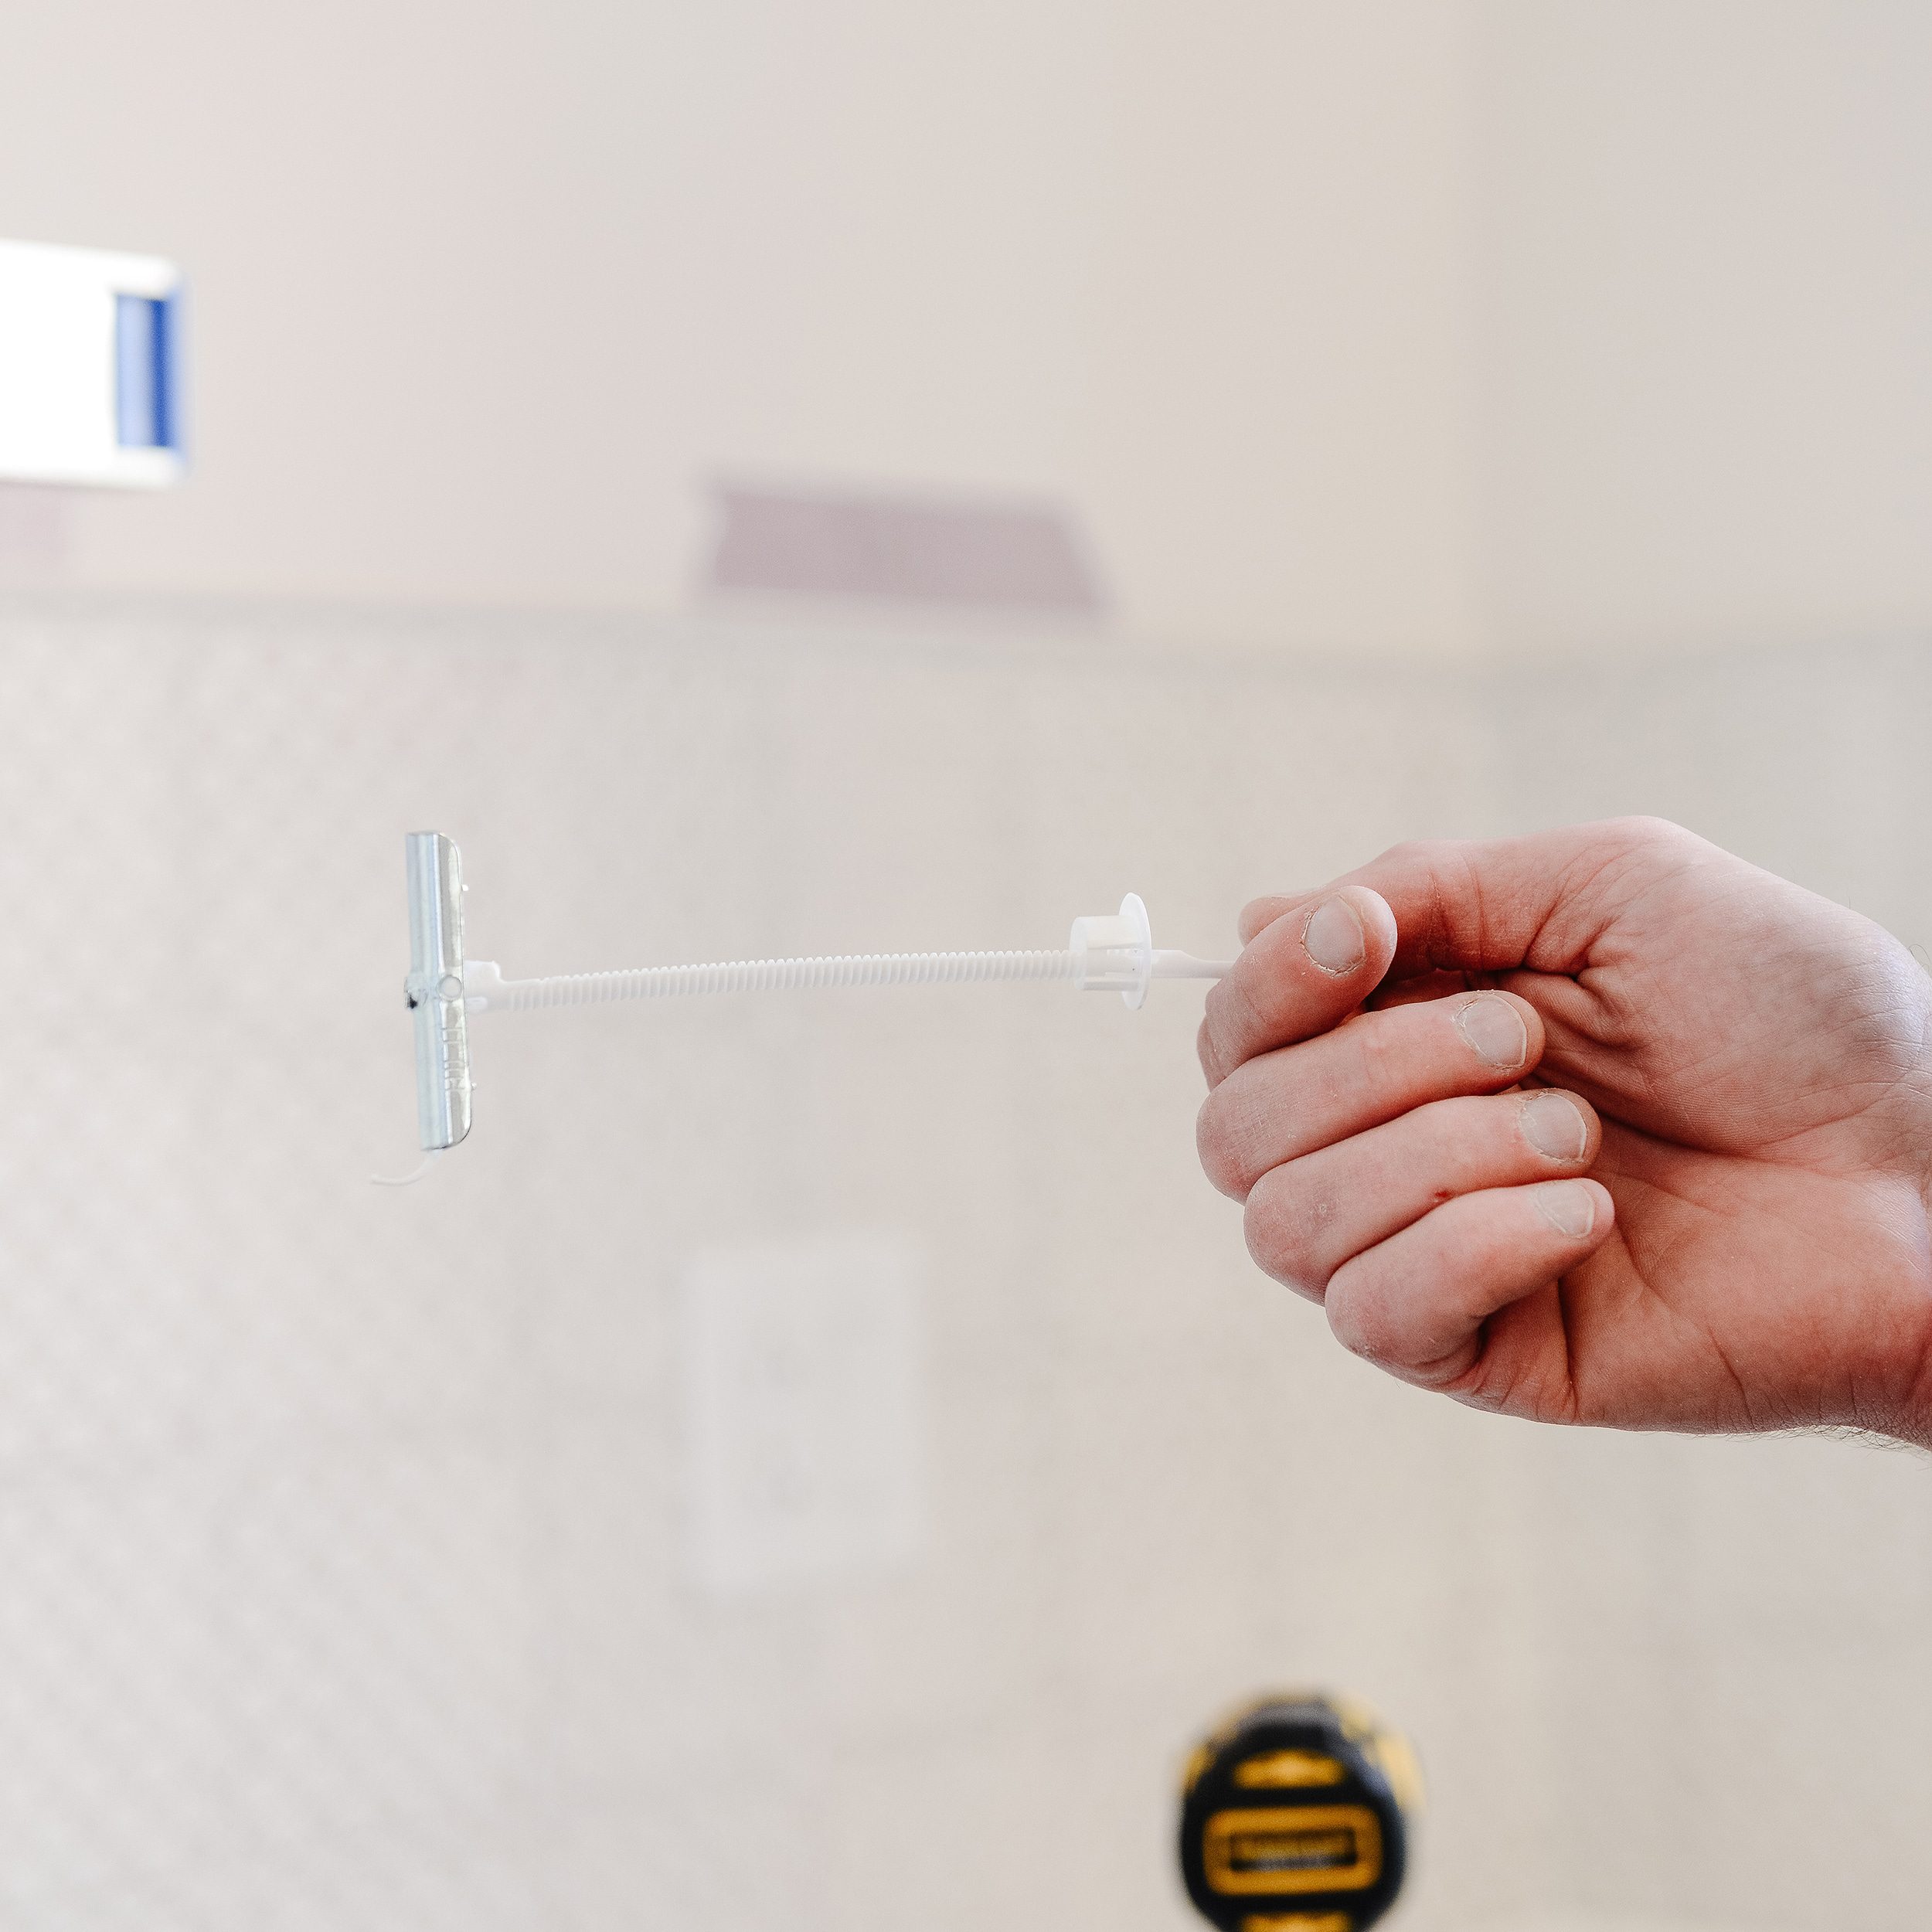
Toggle bolts are not as scary as they may look! After drilling a large pilot hole (every pack of toggle bolts will let you know which size drill bit to use), you push the metal part in, ‘zip’ the strap flat against the wall, and ‘snap’ it off! Most toggle bolts are capable of holding up to 100 lbs. of weight or more, and they’re able to distribute the weight evenly. Win-win!

We leveled along the way, and installed 3 brackets per shelf. We never had a span more than 18″ apart, which felt like a safe bet knowing that our future tenants will be piling heavy plates and glassware on these shelves.

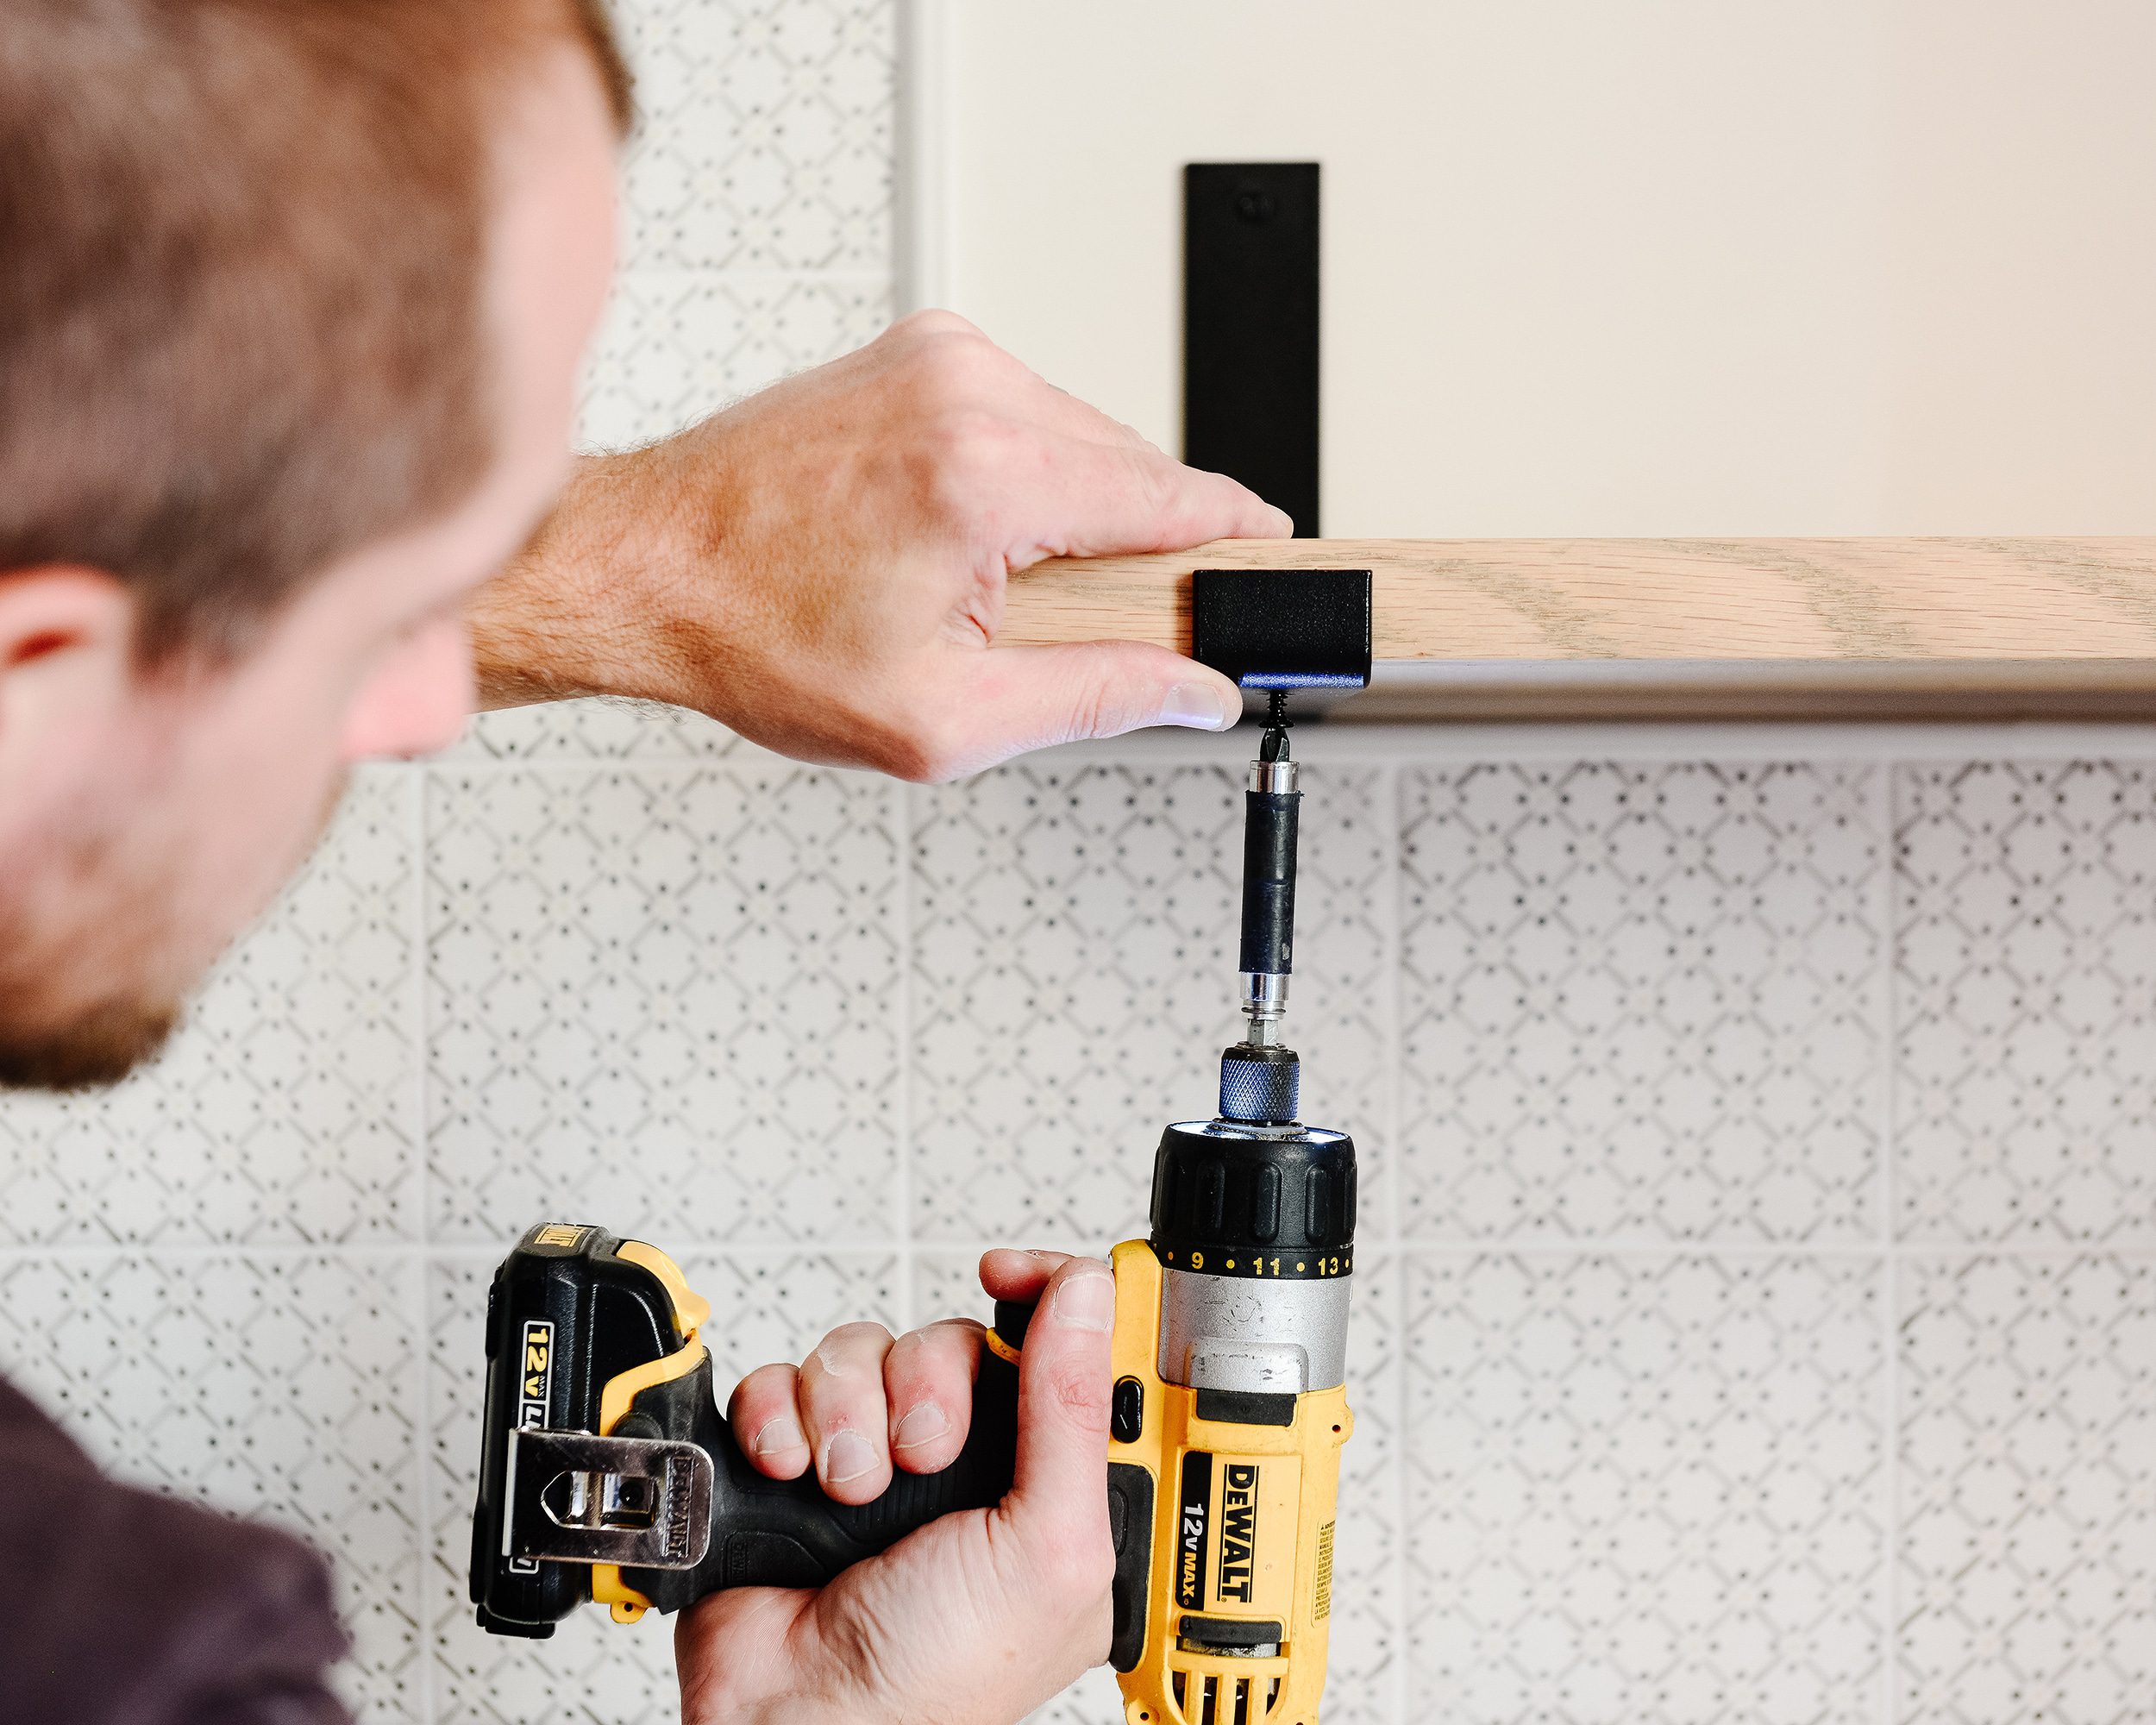
7| Attach Shelving to Brackets
Finally, we brought in our shelves and attached the brackets using the included screws! All the brackets that required toggle bolts had a silver screw head, so I touched those up with a dab of black paint. Literally any black paint will do! I used leftover from our exterior doors.
8| Enjoy!
Of course, there’s no need for me to load up these shelves since we’ll be leasing this unit, but what fun is a tutorial without a little styling?
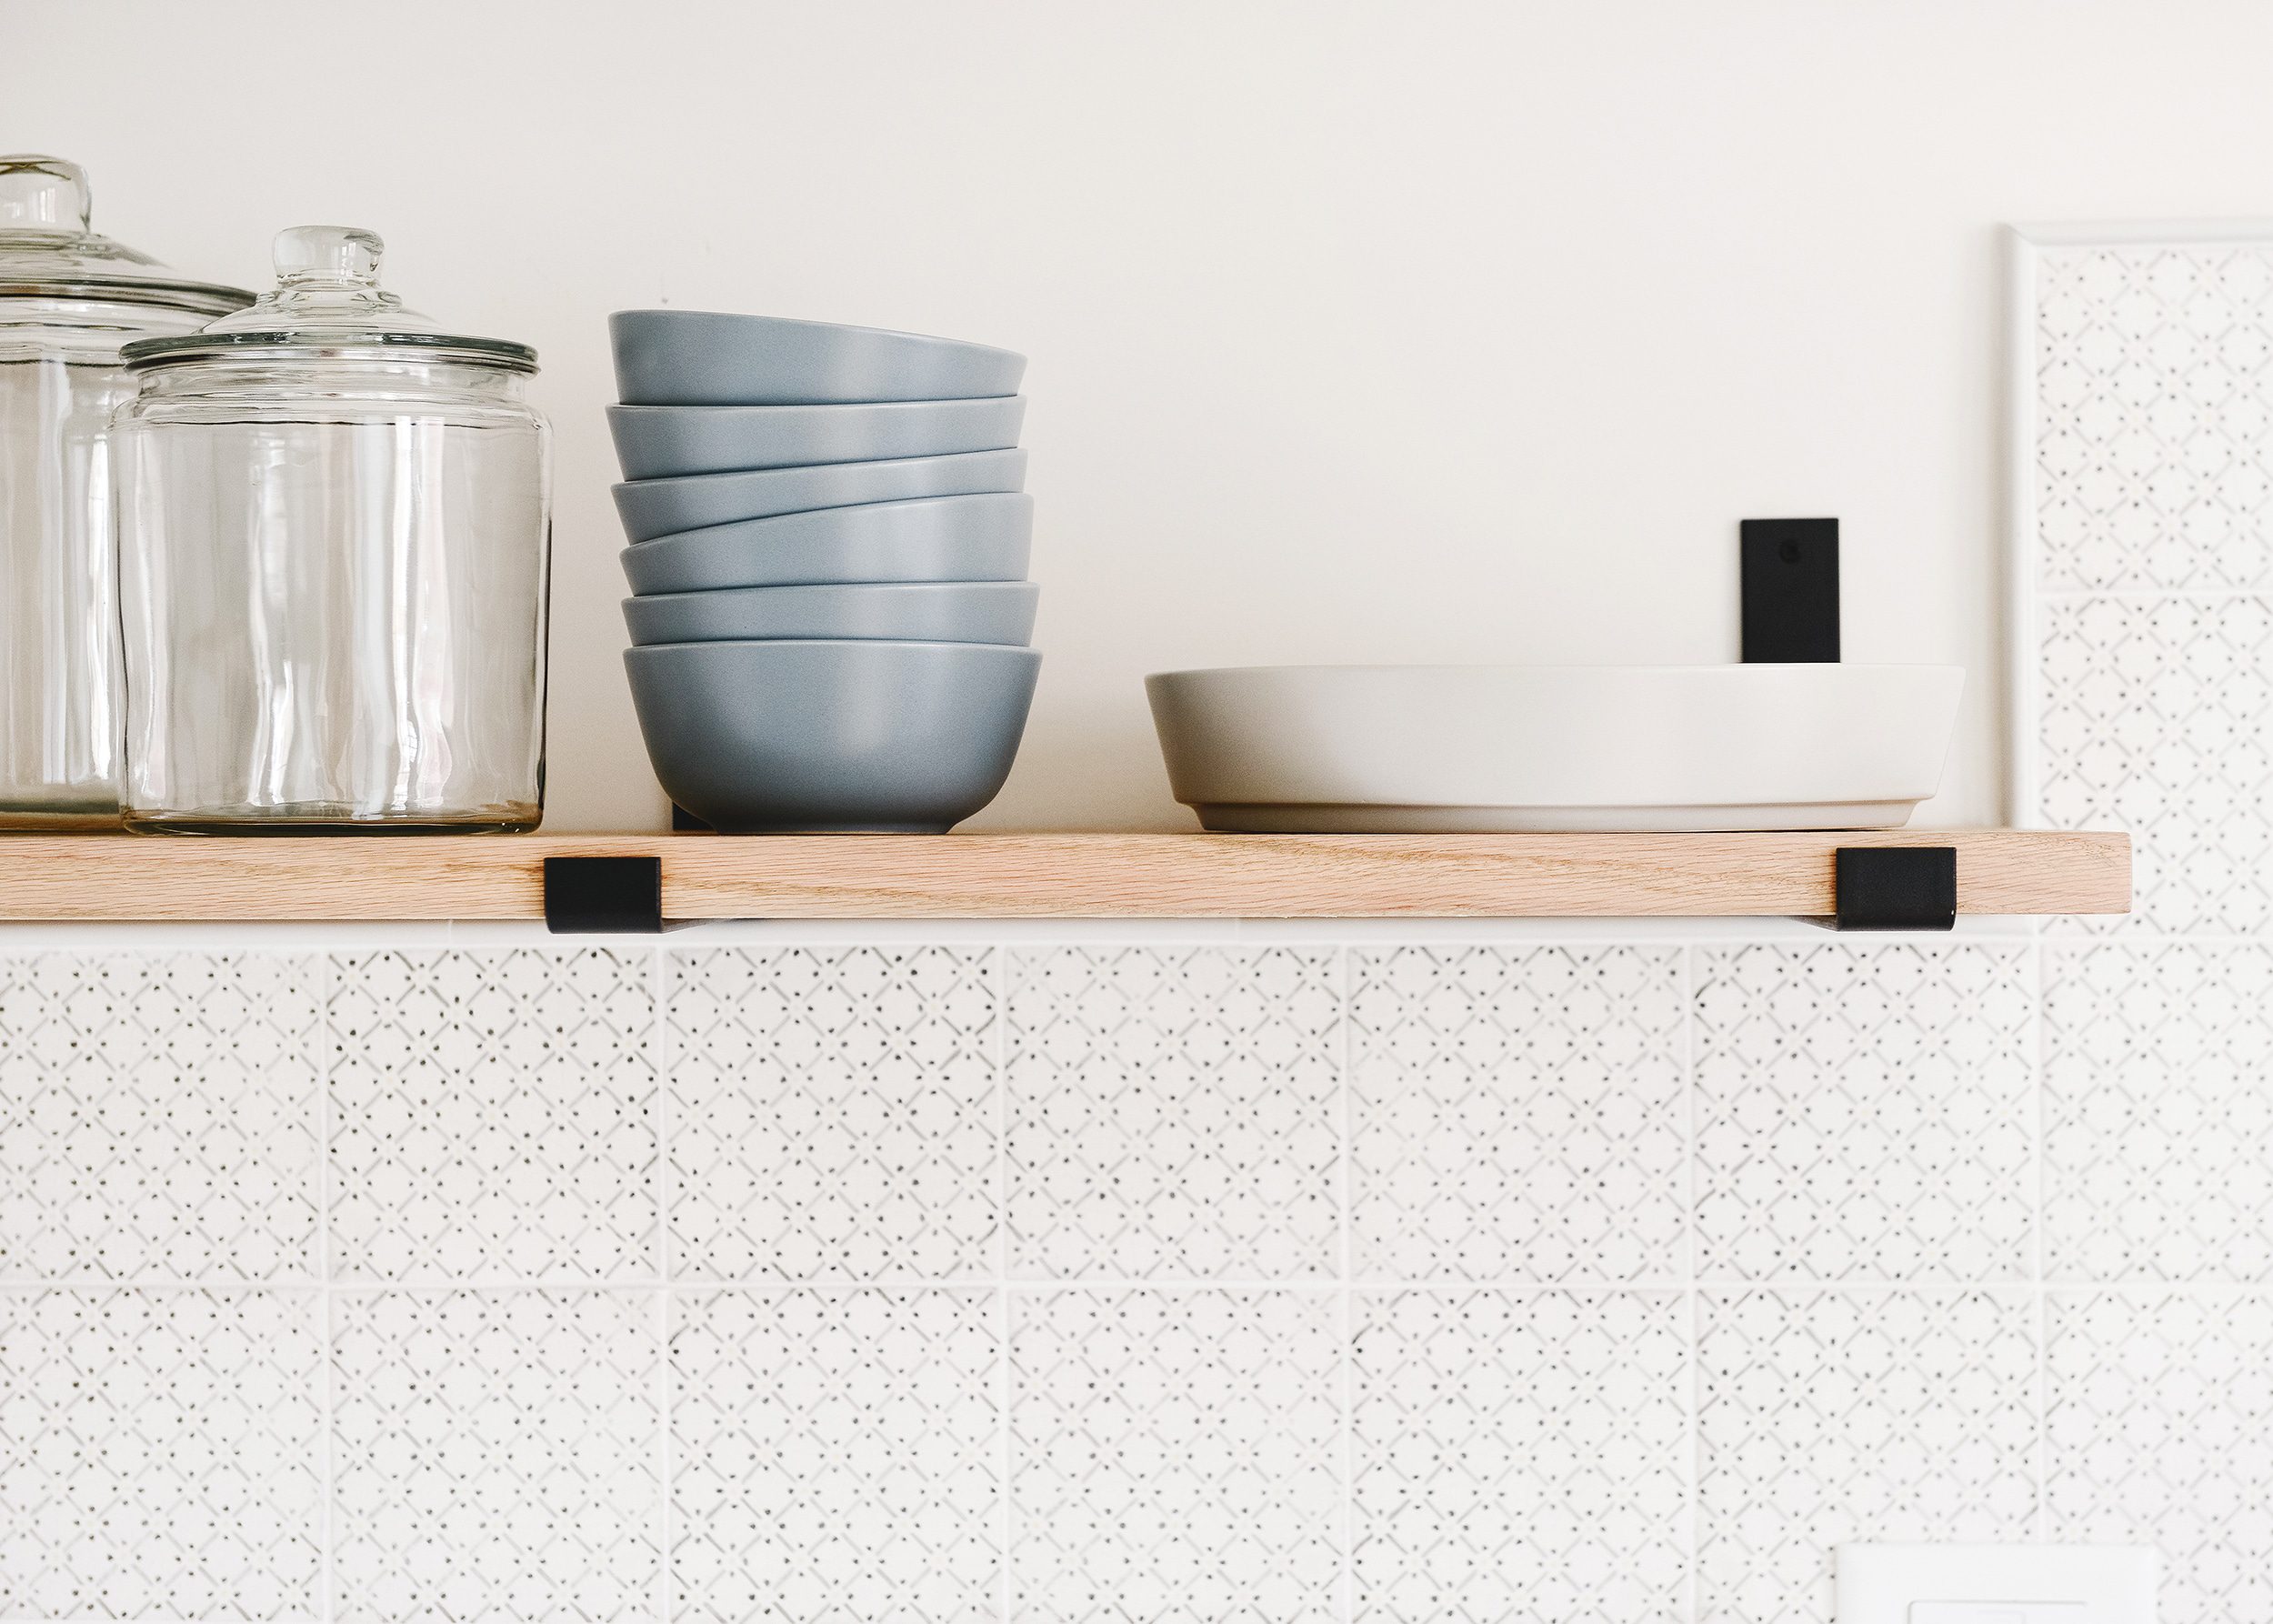
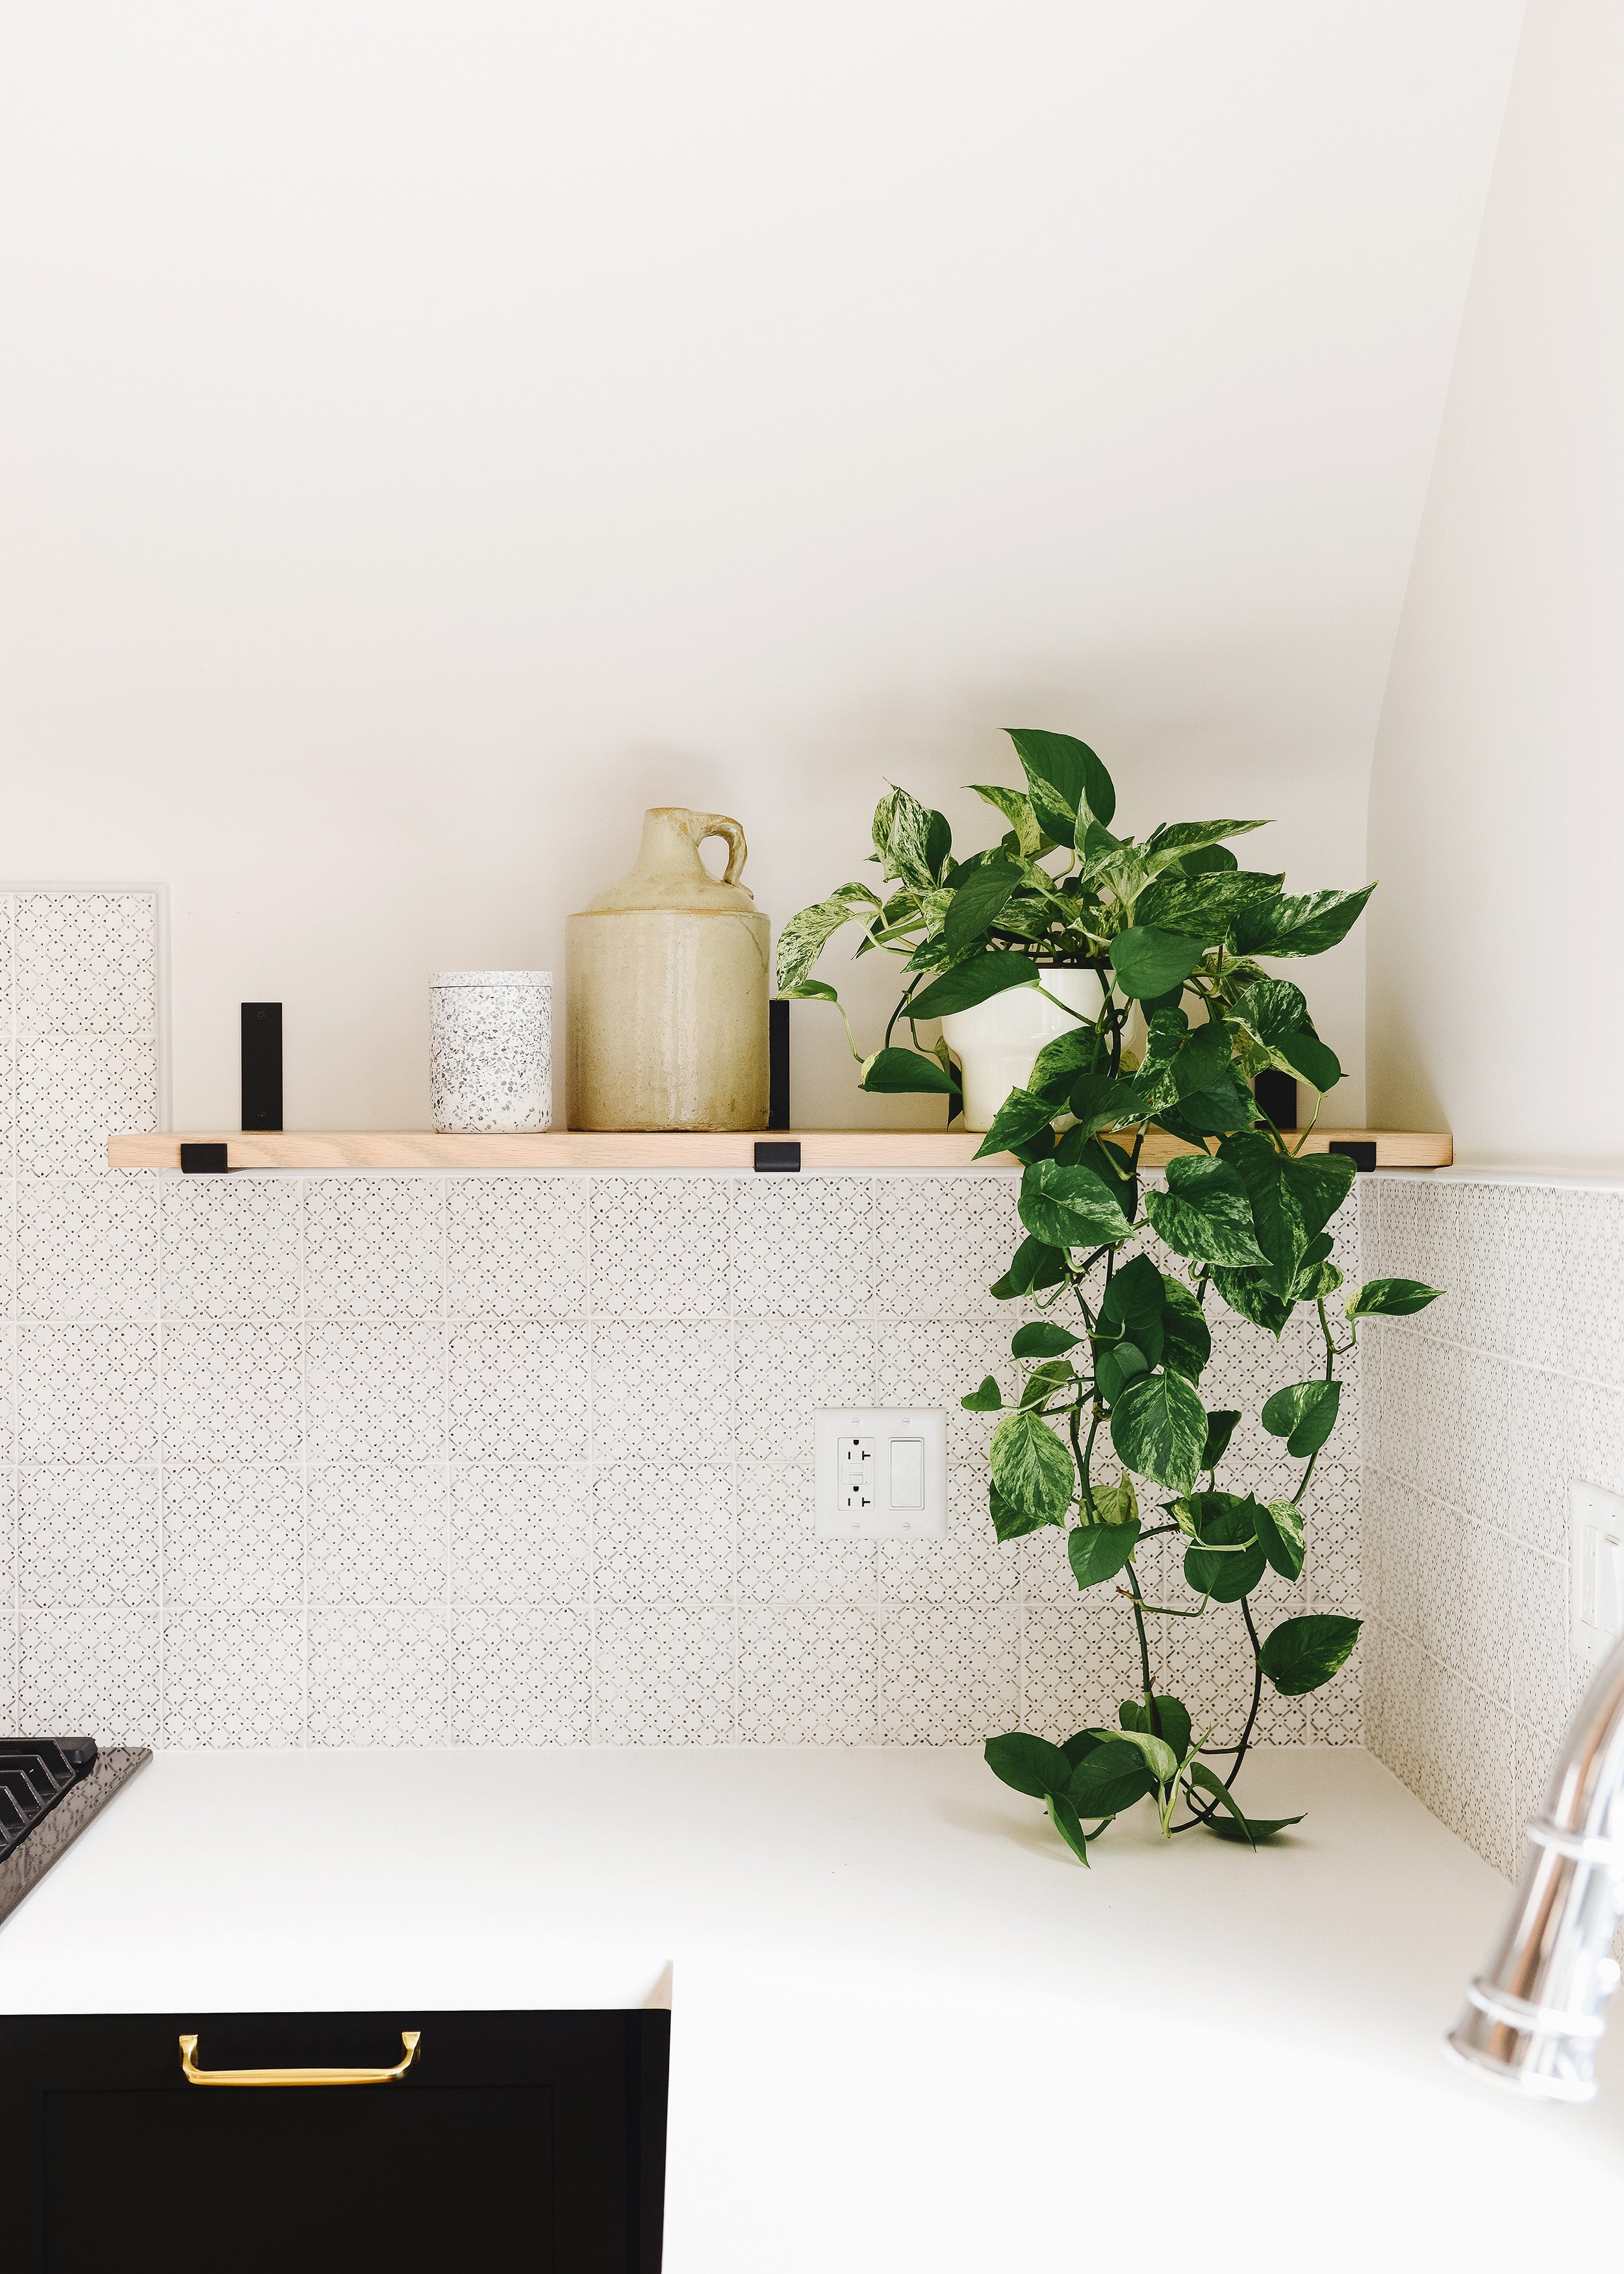
We imagine that these shelves will be filled up with mixing bowls, cookware, everyday dishes and tumblers. With all the brackets, we have no concerns about weight distribution! These shelves aren’t budging.
Let us know if you give these a try! We’d love to see them in your kitchen – or office, playroom and more!
PS: How we built wall-to-wall workshop shelving (one of our most popular tutorials on the blog!), how we built thick floating shelves, and a case for open shelves in the kitchen.
Unit 2 Kitchen Sources
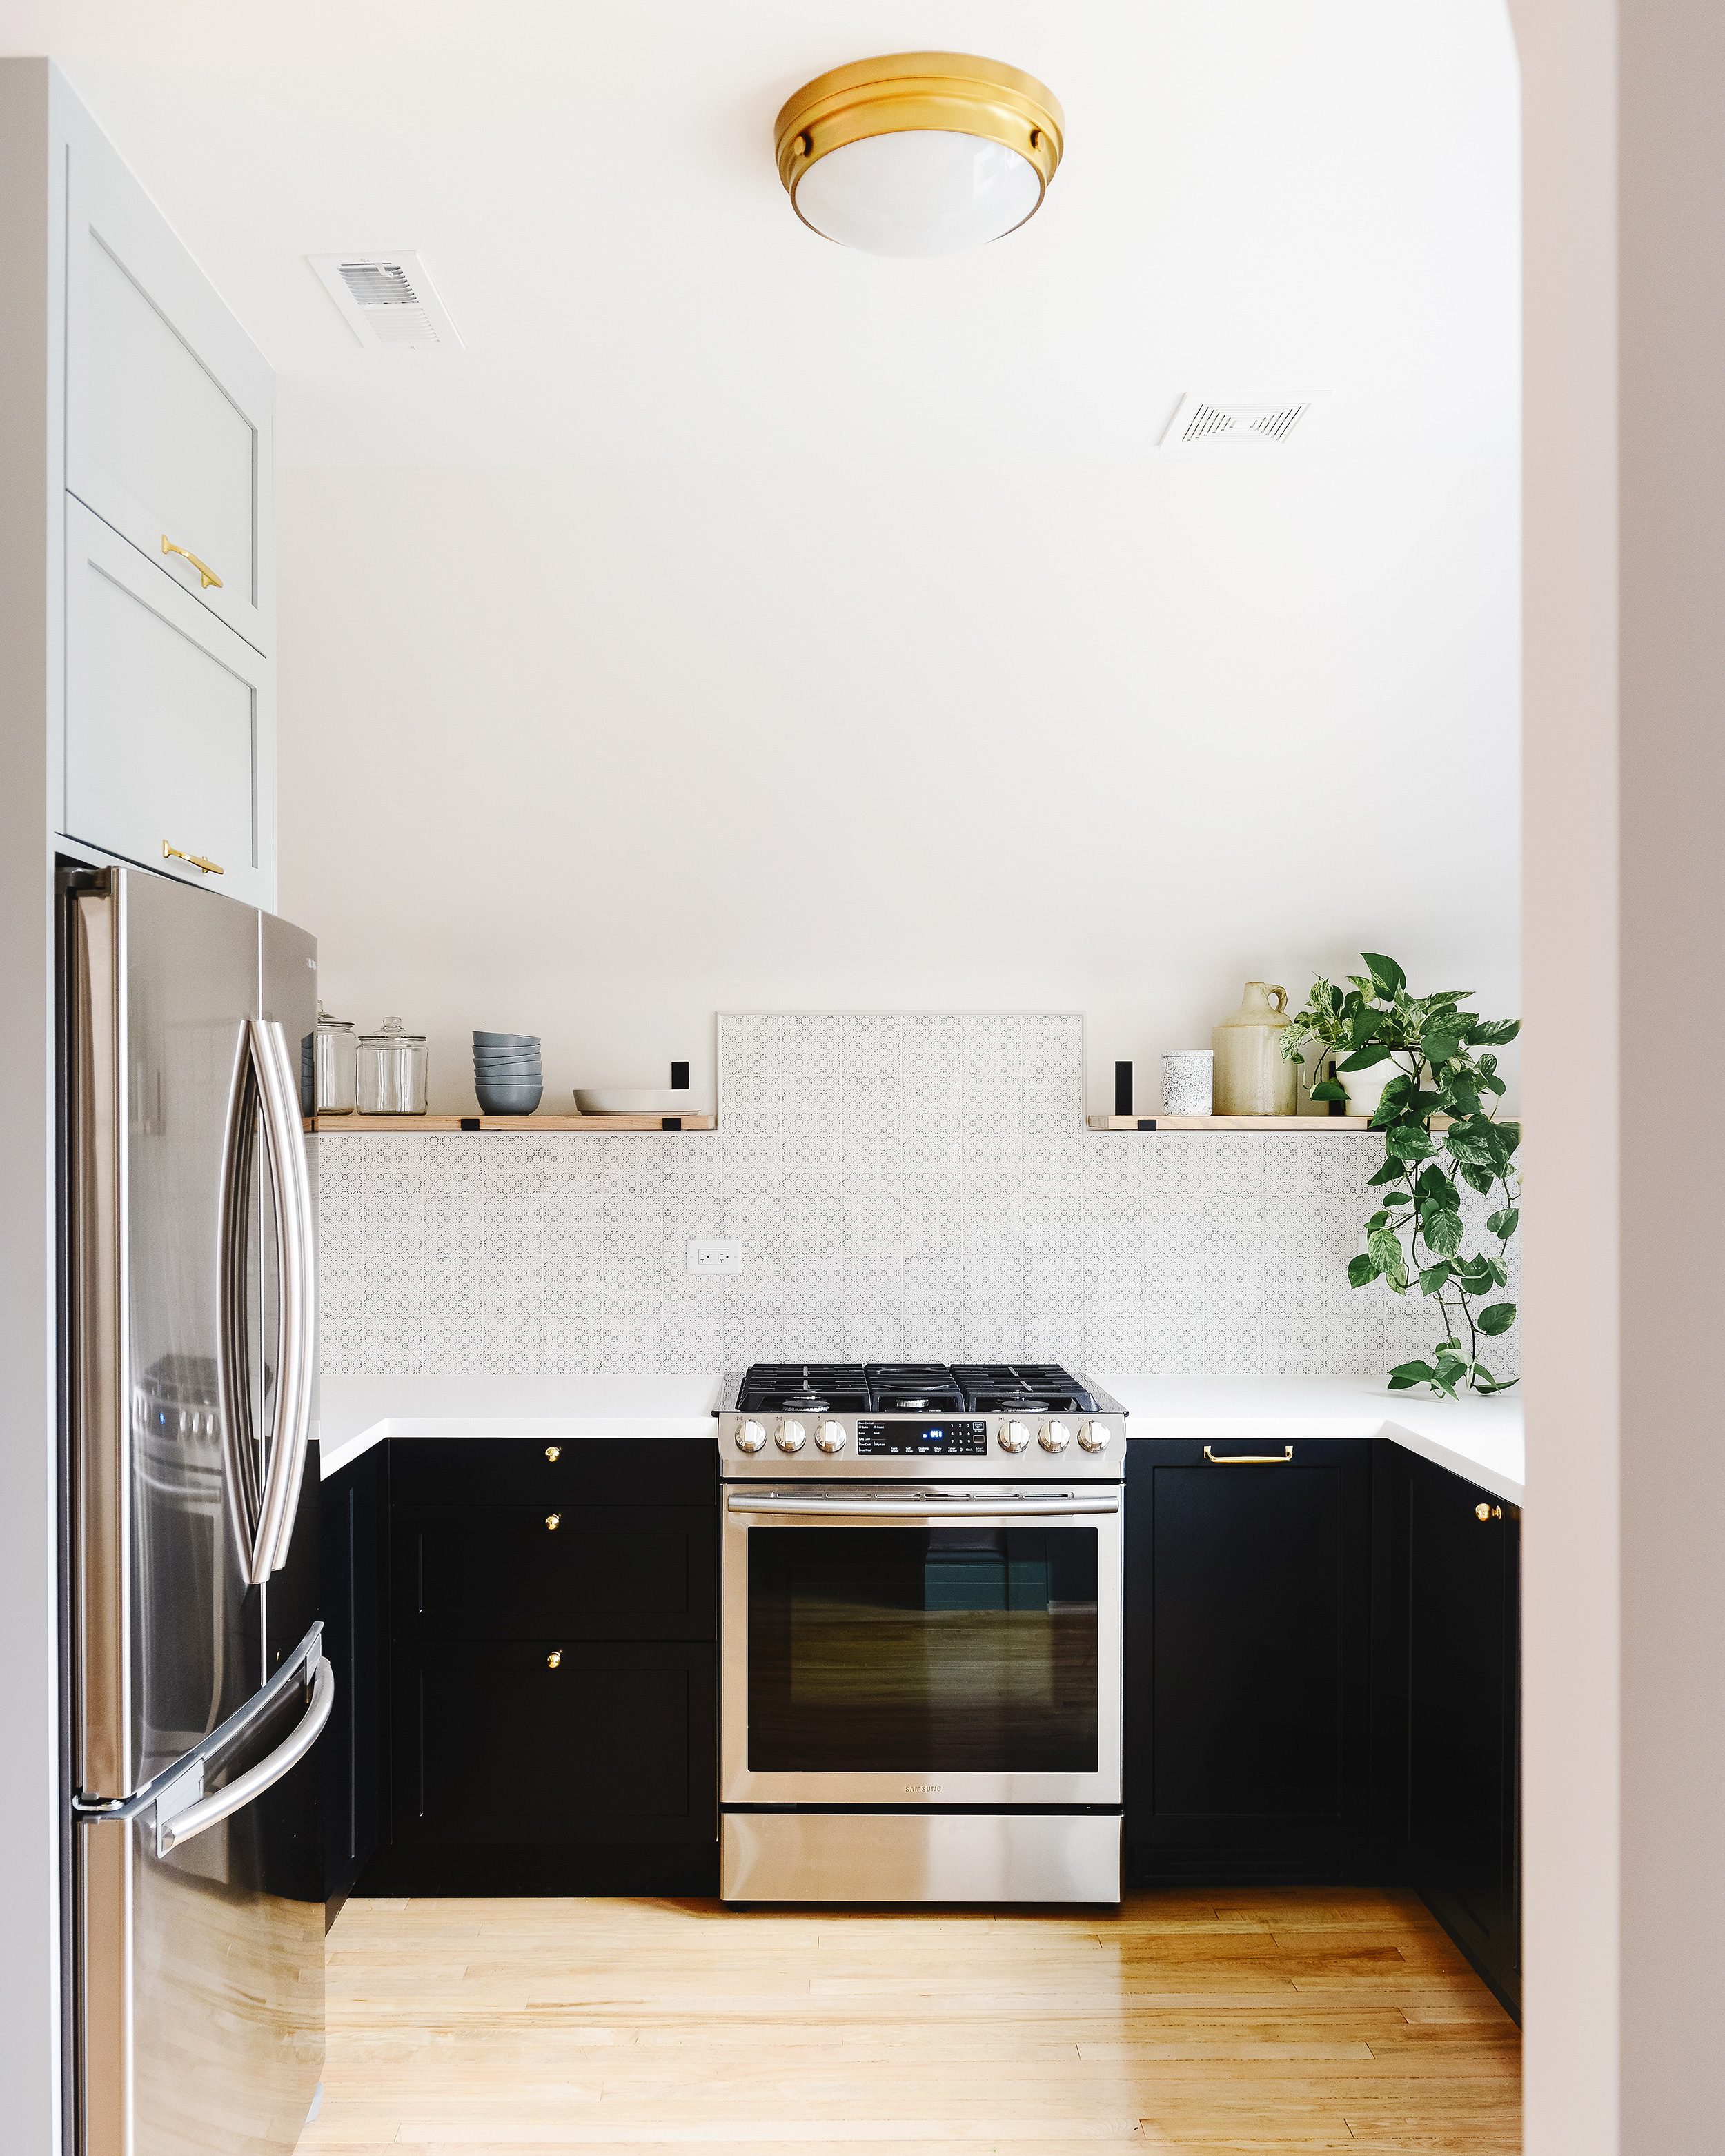
Wall color: Sherwin-Williams Heron Plume SW 6070 | upper cabinet color: Sherwin-Williams Magnetic Gray SW 7058 | shelf brackets | base cabinet shaker panels | Stitch Indigo 5″ x 5″ tile | Grey High pencil liner | gas range | counter-depth refrigerator | brass ball knobs | brass pulls | ceiling flush mount light | wall sconce | bridge faucet


YES! Exactly what I’m wanting to do in our kitchen — saving to refer to in the future. I only with those stair treads came in 60″ (granted, that would be a crazy wide stair!).
Ok, so toggle bolt math – if you have a toggle bolt with a 100lb weight limit, but then you use two toggle bolts, is your weight limit now 200lbs? Or is it like SPF where just because you used a moisturizer with SPF 30 and a CC cream with SPF 30 you still only have SPF 30 (NOT 60 as an uninformed person like me might think) on your face? These are the real questions.
The shelving looks great either way :)
Honestly, every brand is different and I would refer to the packaging! I don’t want to lead you astray ????
Love the shelf! Thank you for sharing the post!
What a great idea to use stair treads – I’m definitely going to use them in the future! Just another question – where is the range hood?
Hi Julie! Due to the slant of the ceiling, there was no way to accommodate a range hood. In its place, we installed a standard vent In the ceiling.
I was hoping you guys would show the corner shelf on the fridge side!
Just ordered these in gold for some shelving in our bathroom! I am SO excited about getting them up!
Yay! Send pics!
[…] laminated together two 3/4″ pieces of MDF cut to fit the cabinets. We built the shelves using this tutorial from Yellow Brick […]
Black cabins in the kitchen looks so fresh and unike, even it they are getting more popular each day. They are my favorite <3