

The first floor bathroom renovation is one step closer to completion! Plumbing, electrical and floor plan upgrades are all complete. Our contractor also recently completed tile work and paint and handed the project over to us to wrap up the final details. We wanted to maintain a classic vibe that worked well with the rest of our home, so the decision to install a hunky (as Kim would say!) board and batten treatment was an easy one! It was a quick project that required more math than we would have liked, but it turned out exactly like the vision we had in our heads. Maybe even better.
Tools + Supplies Used
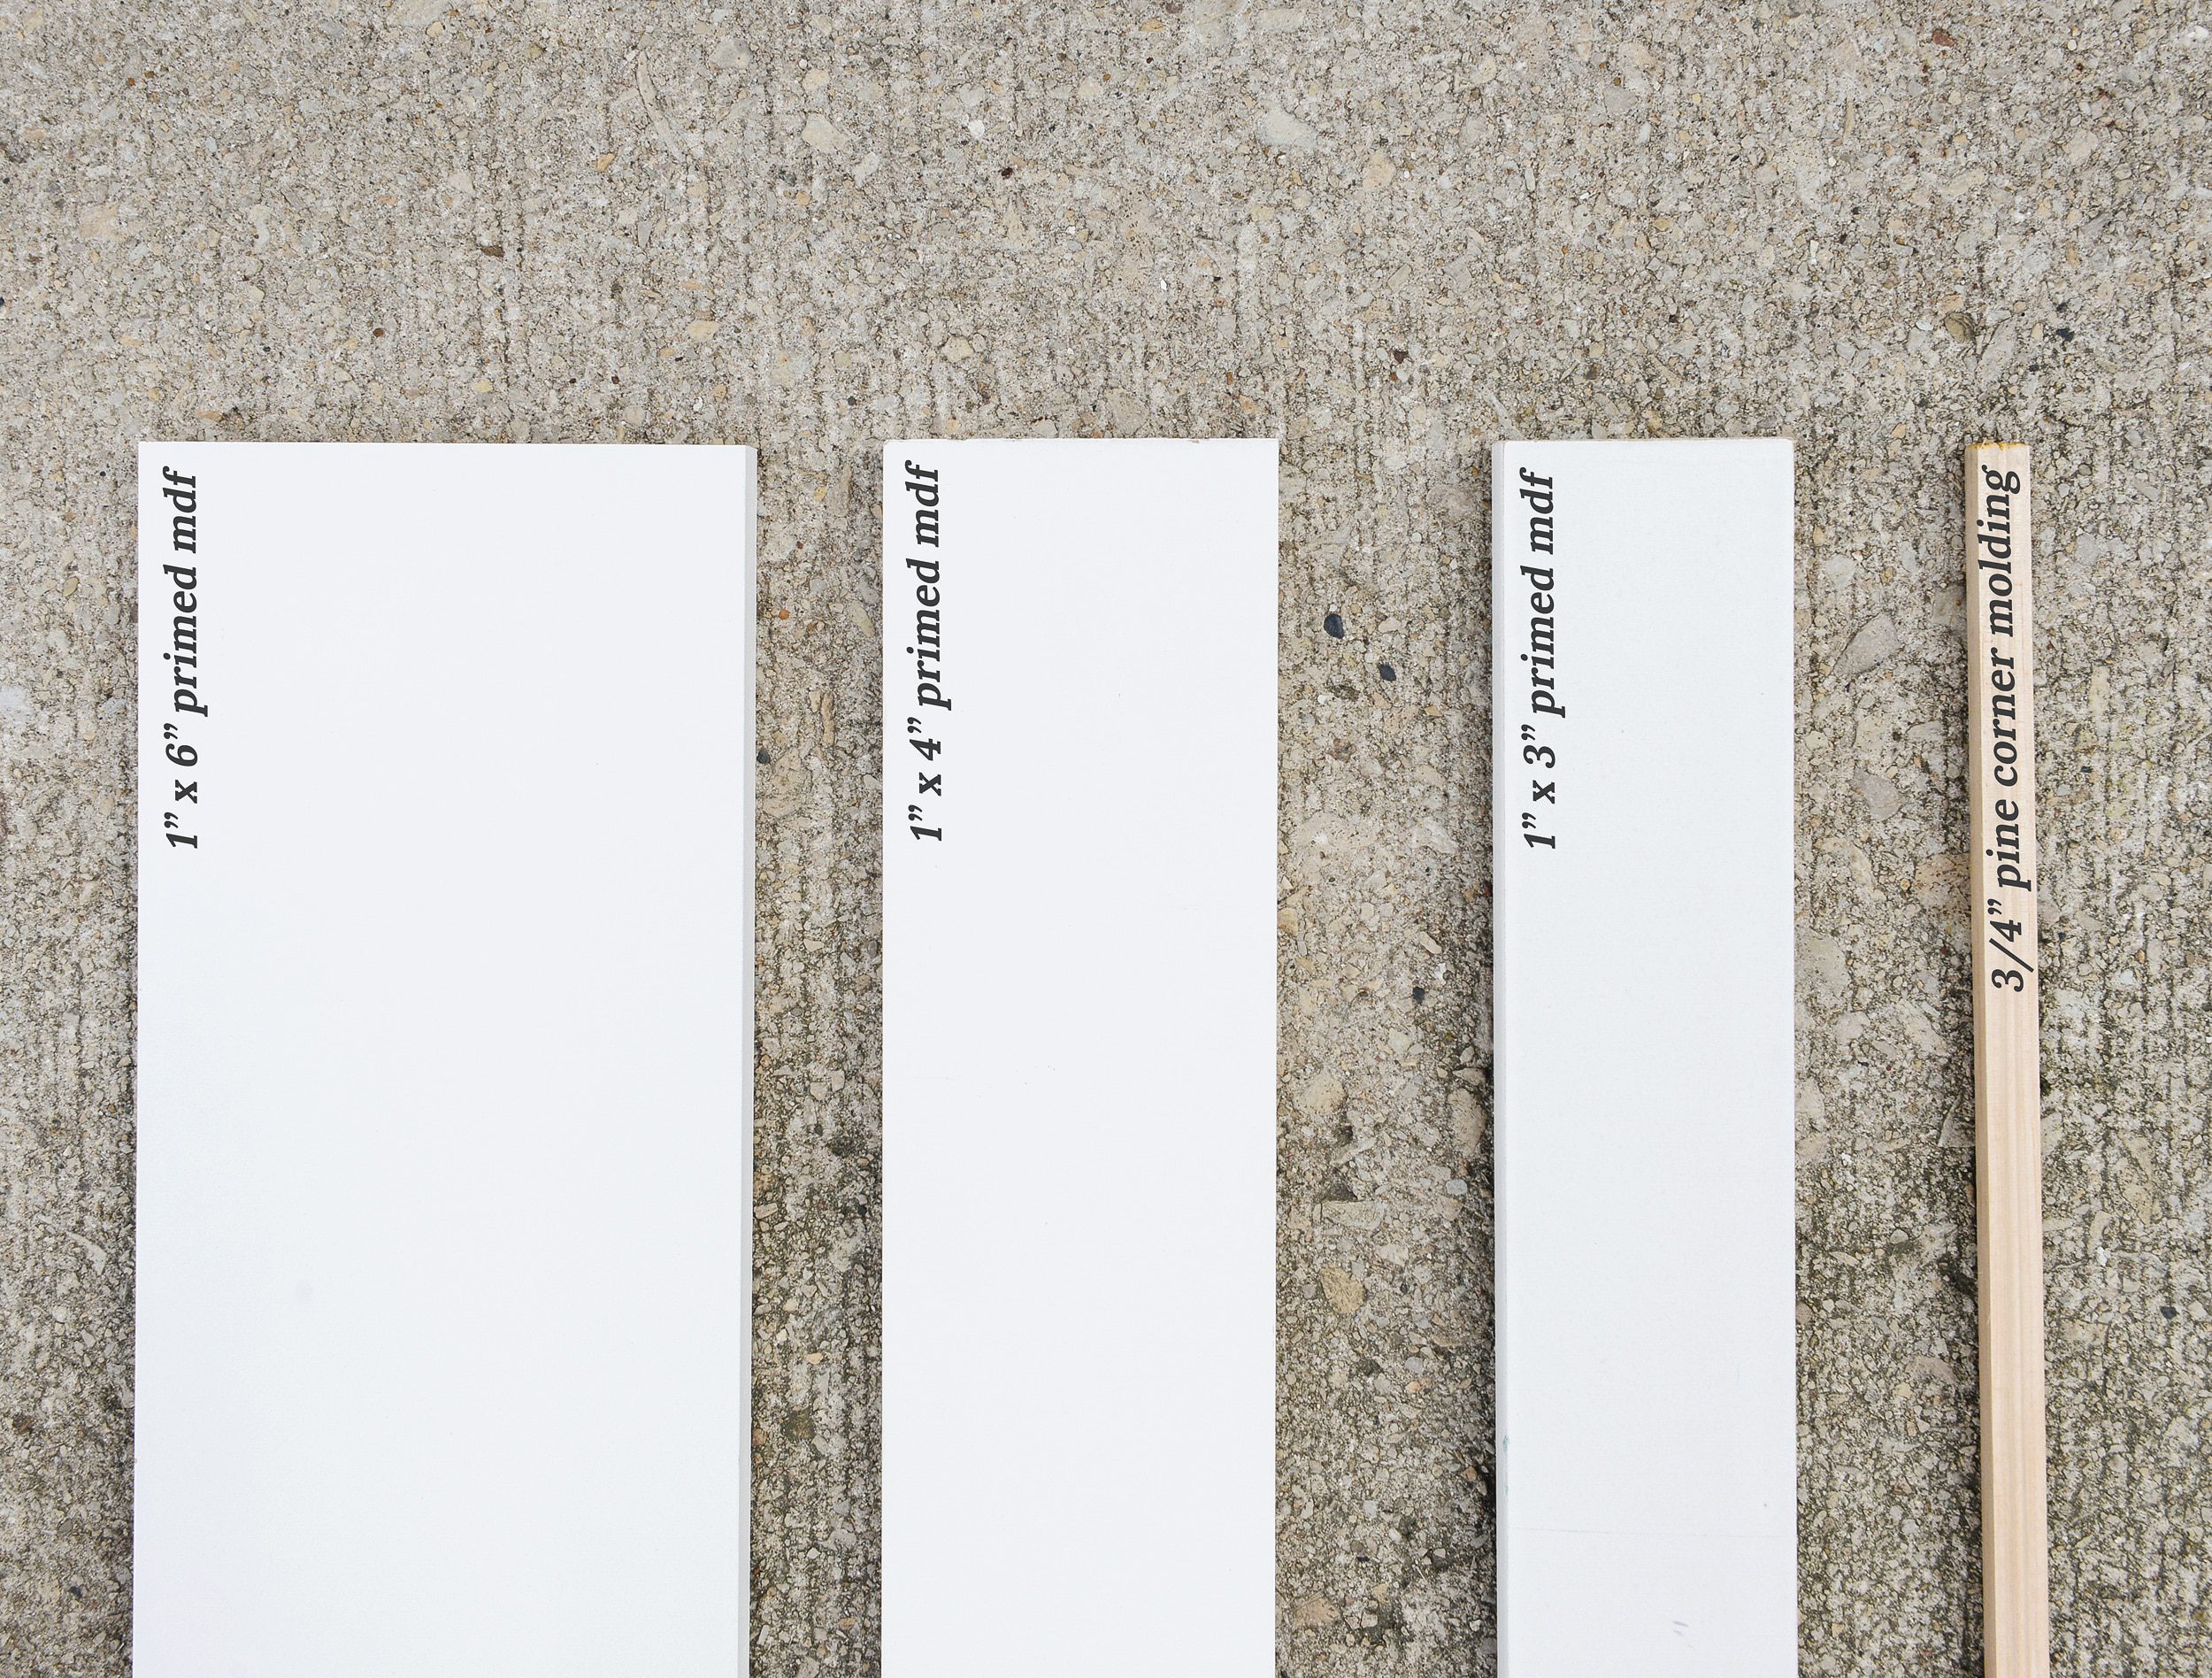
- 1″ x 6″ primed MDF
- 1″ x 4″ primed MDF
- 1″ x 3″ primed MDF
- 3/4″ pine corner molding
- Miter saw for cuts
- Nail gun or brad nailer
- Construction adhesive
- Level
- Shims
- Spackle
- Caulk + caulk gun
- Sanding blocks or orbital sander
- Painter’s tape
- Paint
- 4″ foam roller
- 2″ angled paint brush
- Measuring tape
- Pencil
Choosing the Boards
We started with three different sizes of primed MDF boards for a smooth and seamless look. From left to right, the 1″x6″ boards formed the bottom rail in lieu of a baseboard. The 1″x4″ boards formed the top rail, and the 1″x3″ boards formed the vertical stiles. The 3/4″ pine corner molding on the far right was used to trim out the interior of each ‘box’. That pine molding, while small, had a big impact on the finished look!
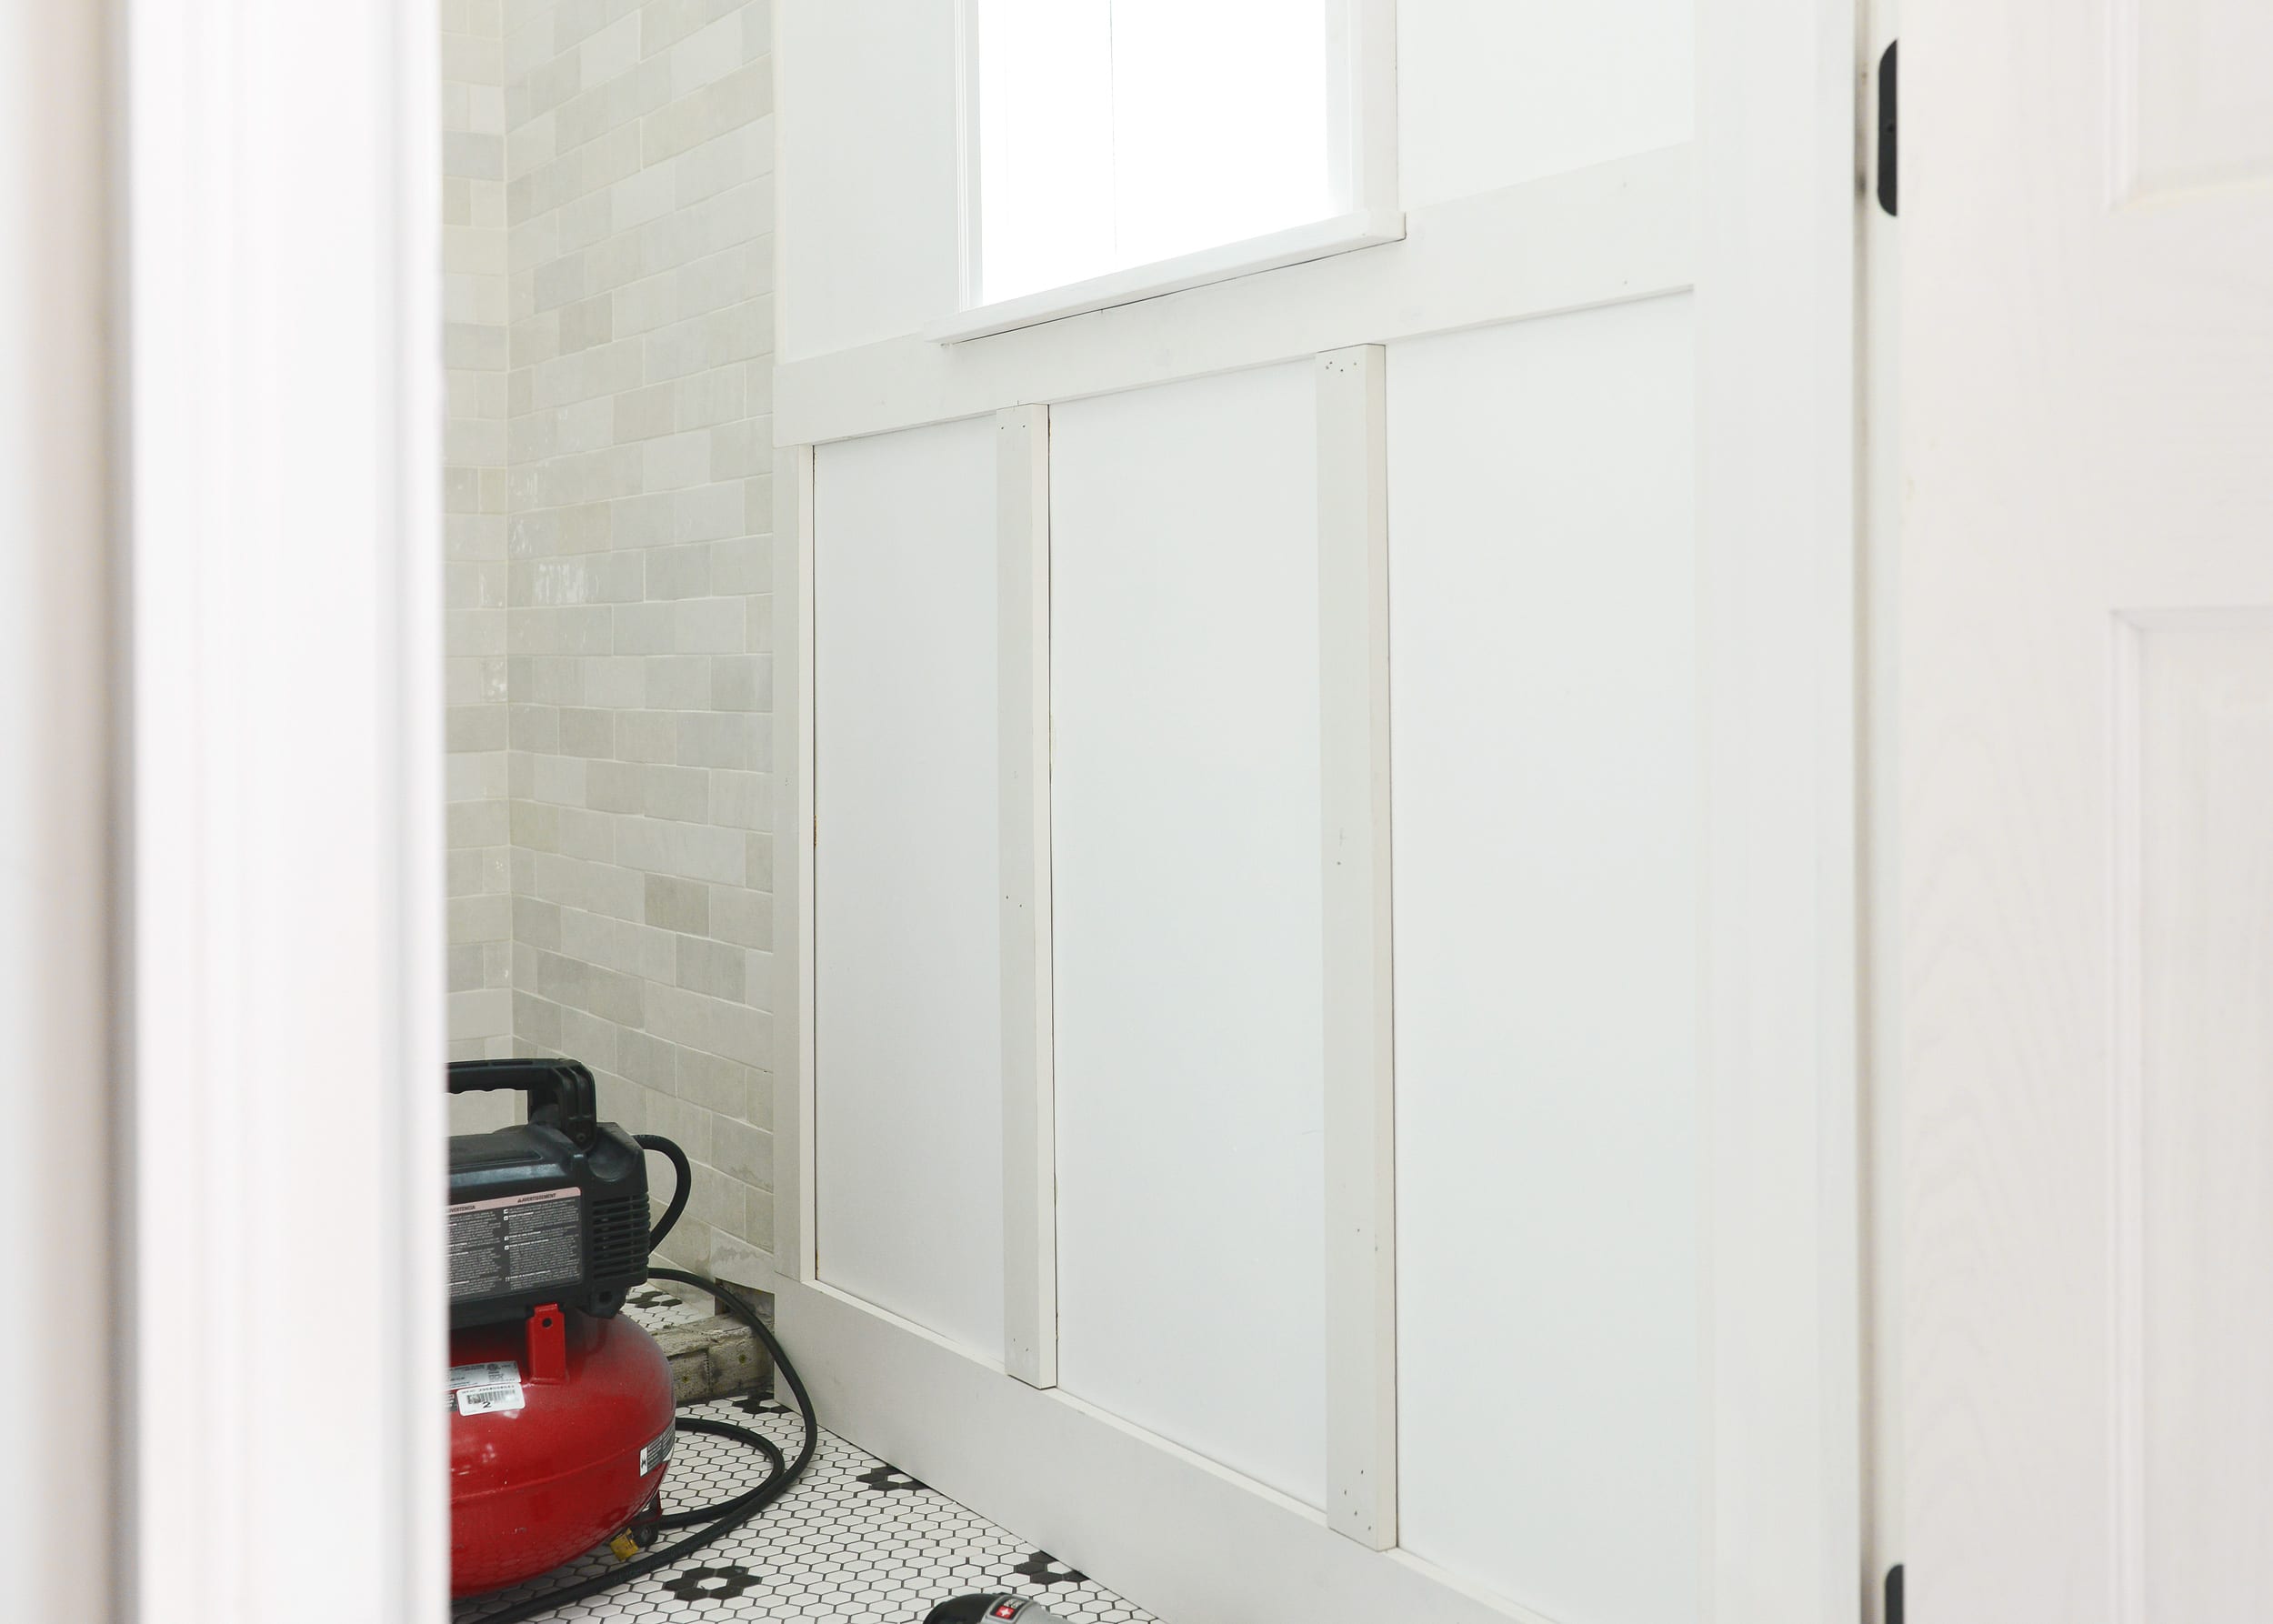
Installing the Top + Bottom Rails
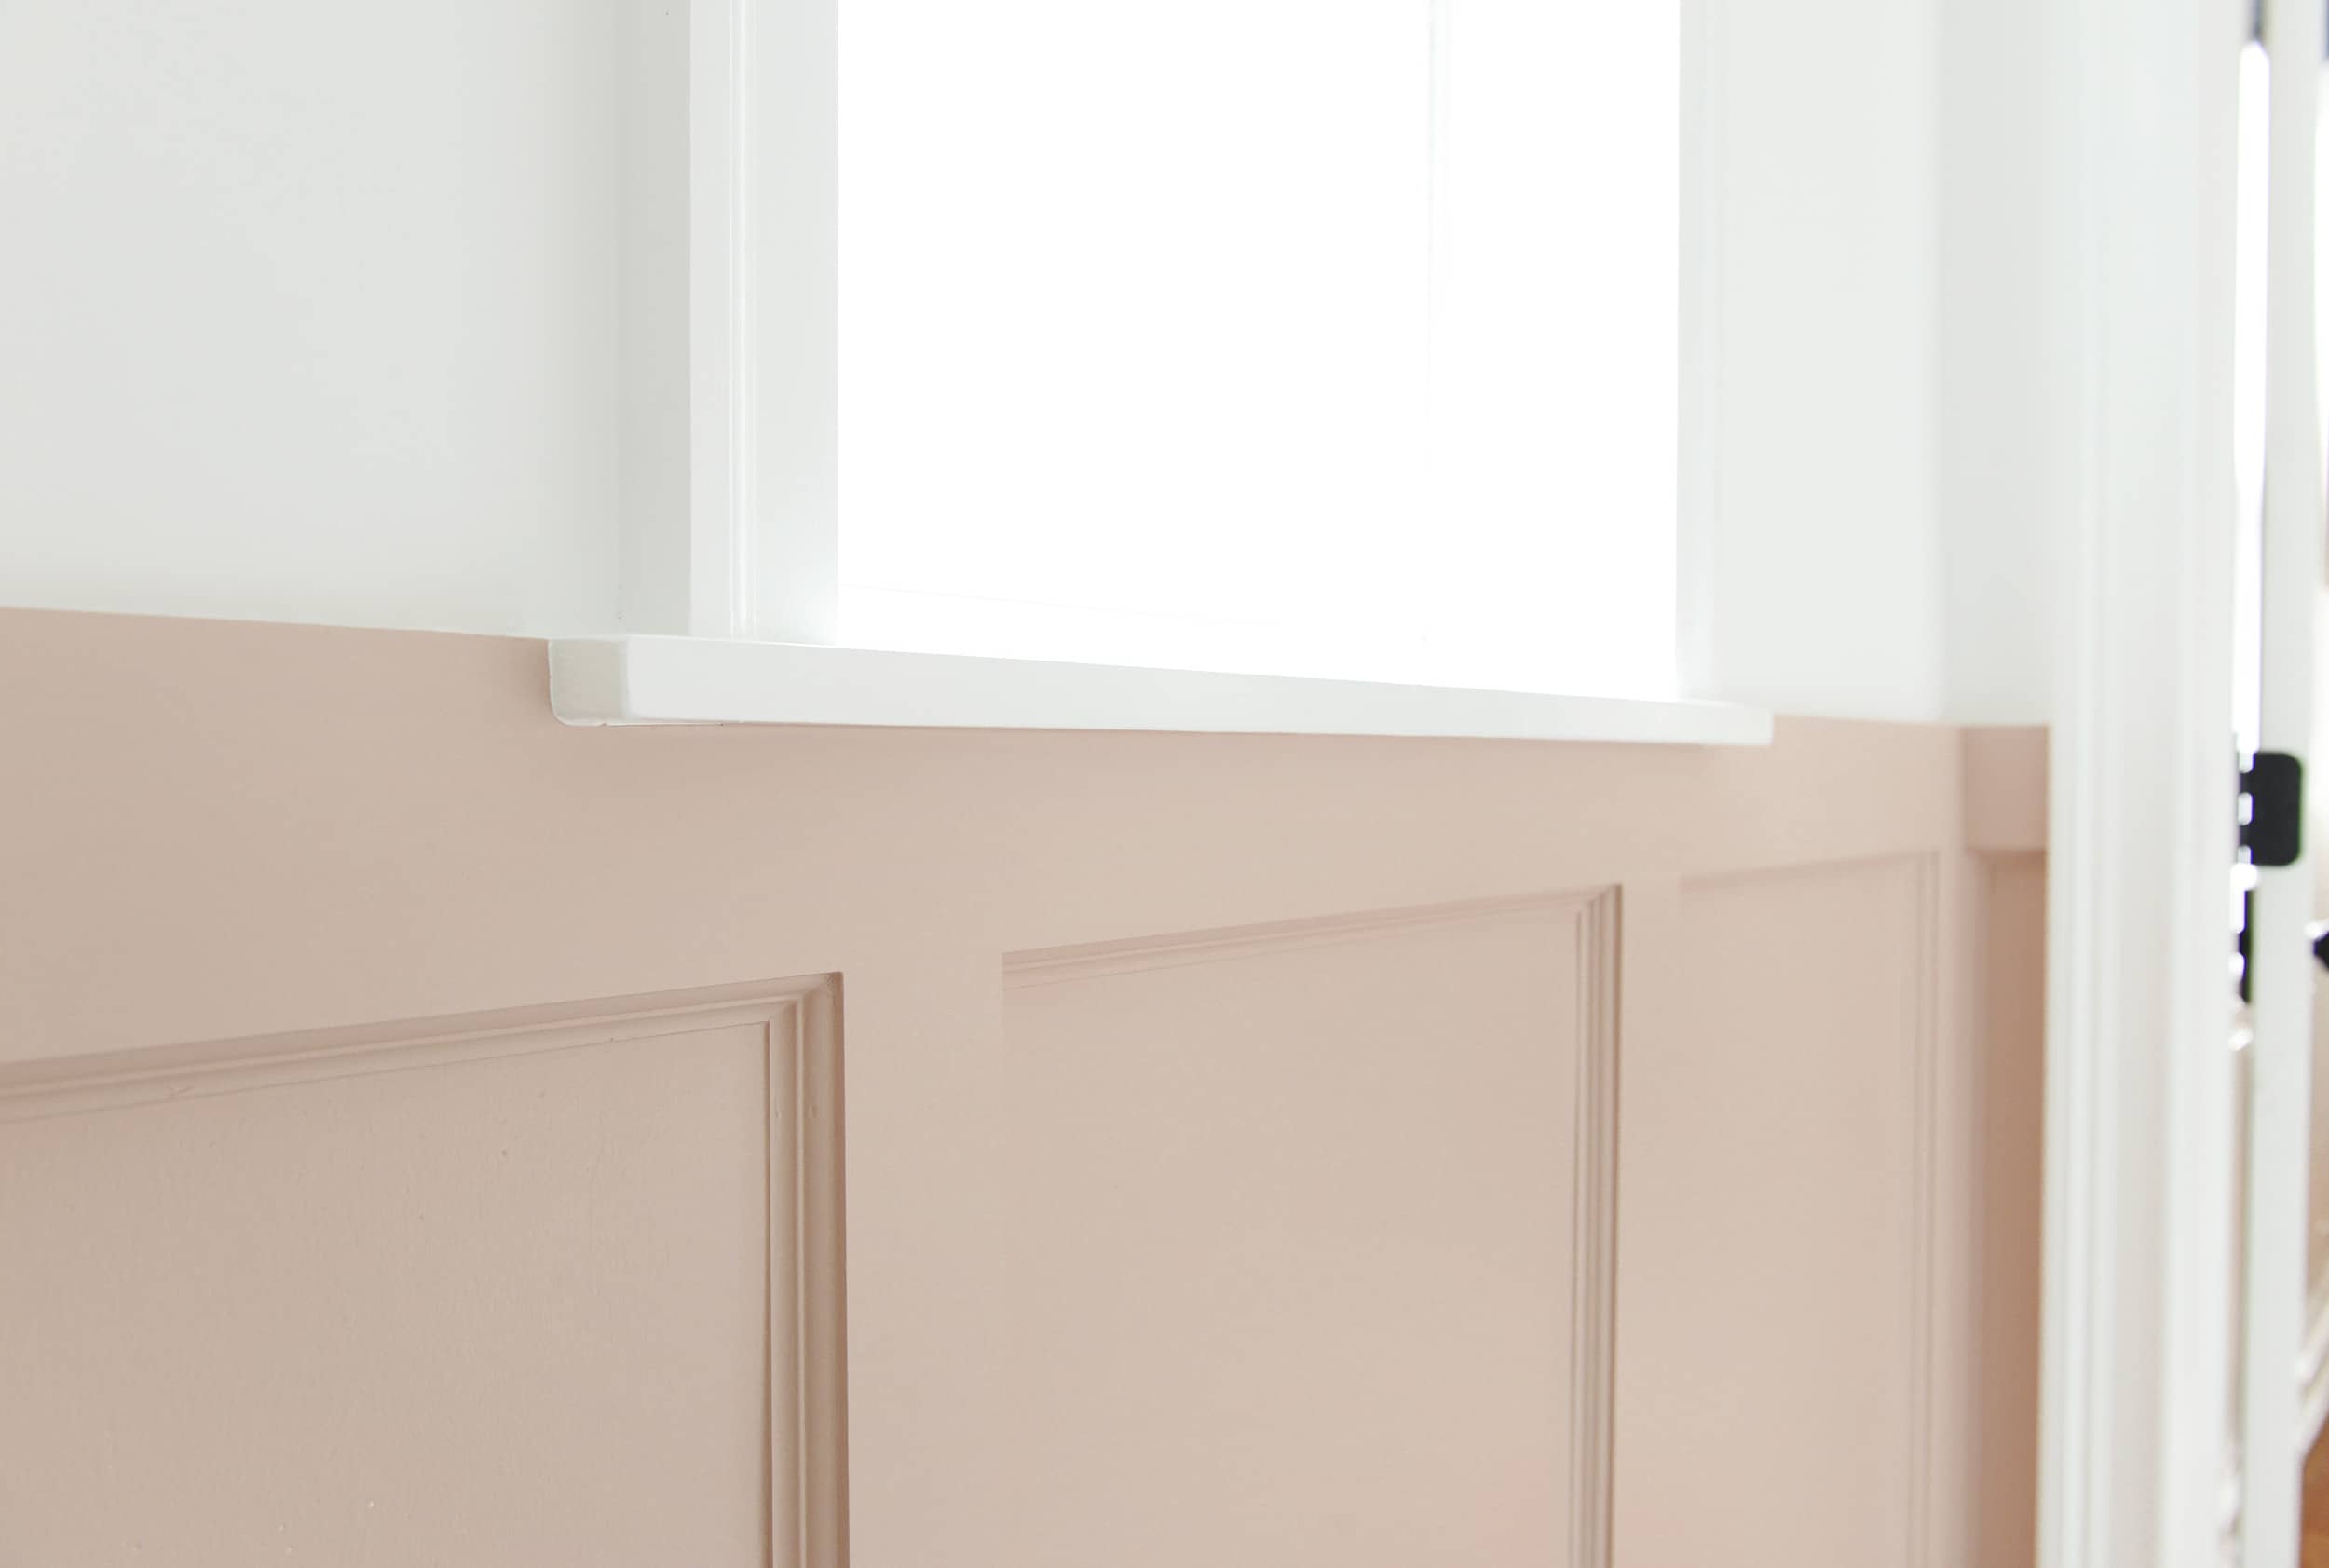
We started with the most complicated cut of the project – the top rail on the window wall. In order to keep the top cap level with window sill, as well as the ledge on the other side of the room, we cut the board to length, then traced the shape of the windowsill. Using a jigsaw, I removed the small section of the board and sanded the cut down until we had a perfect fit. Continuously checking for level along the way, the first board was attached using construction adhesive and 2″ finish nails.
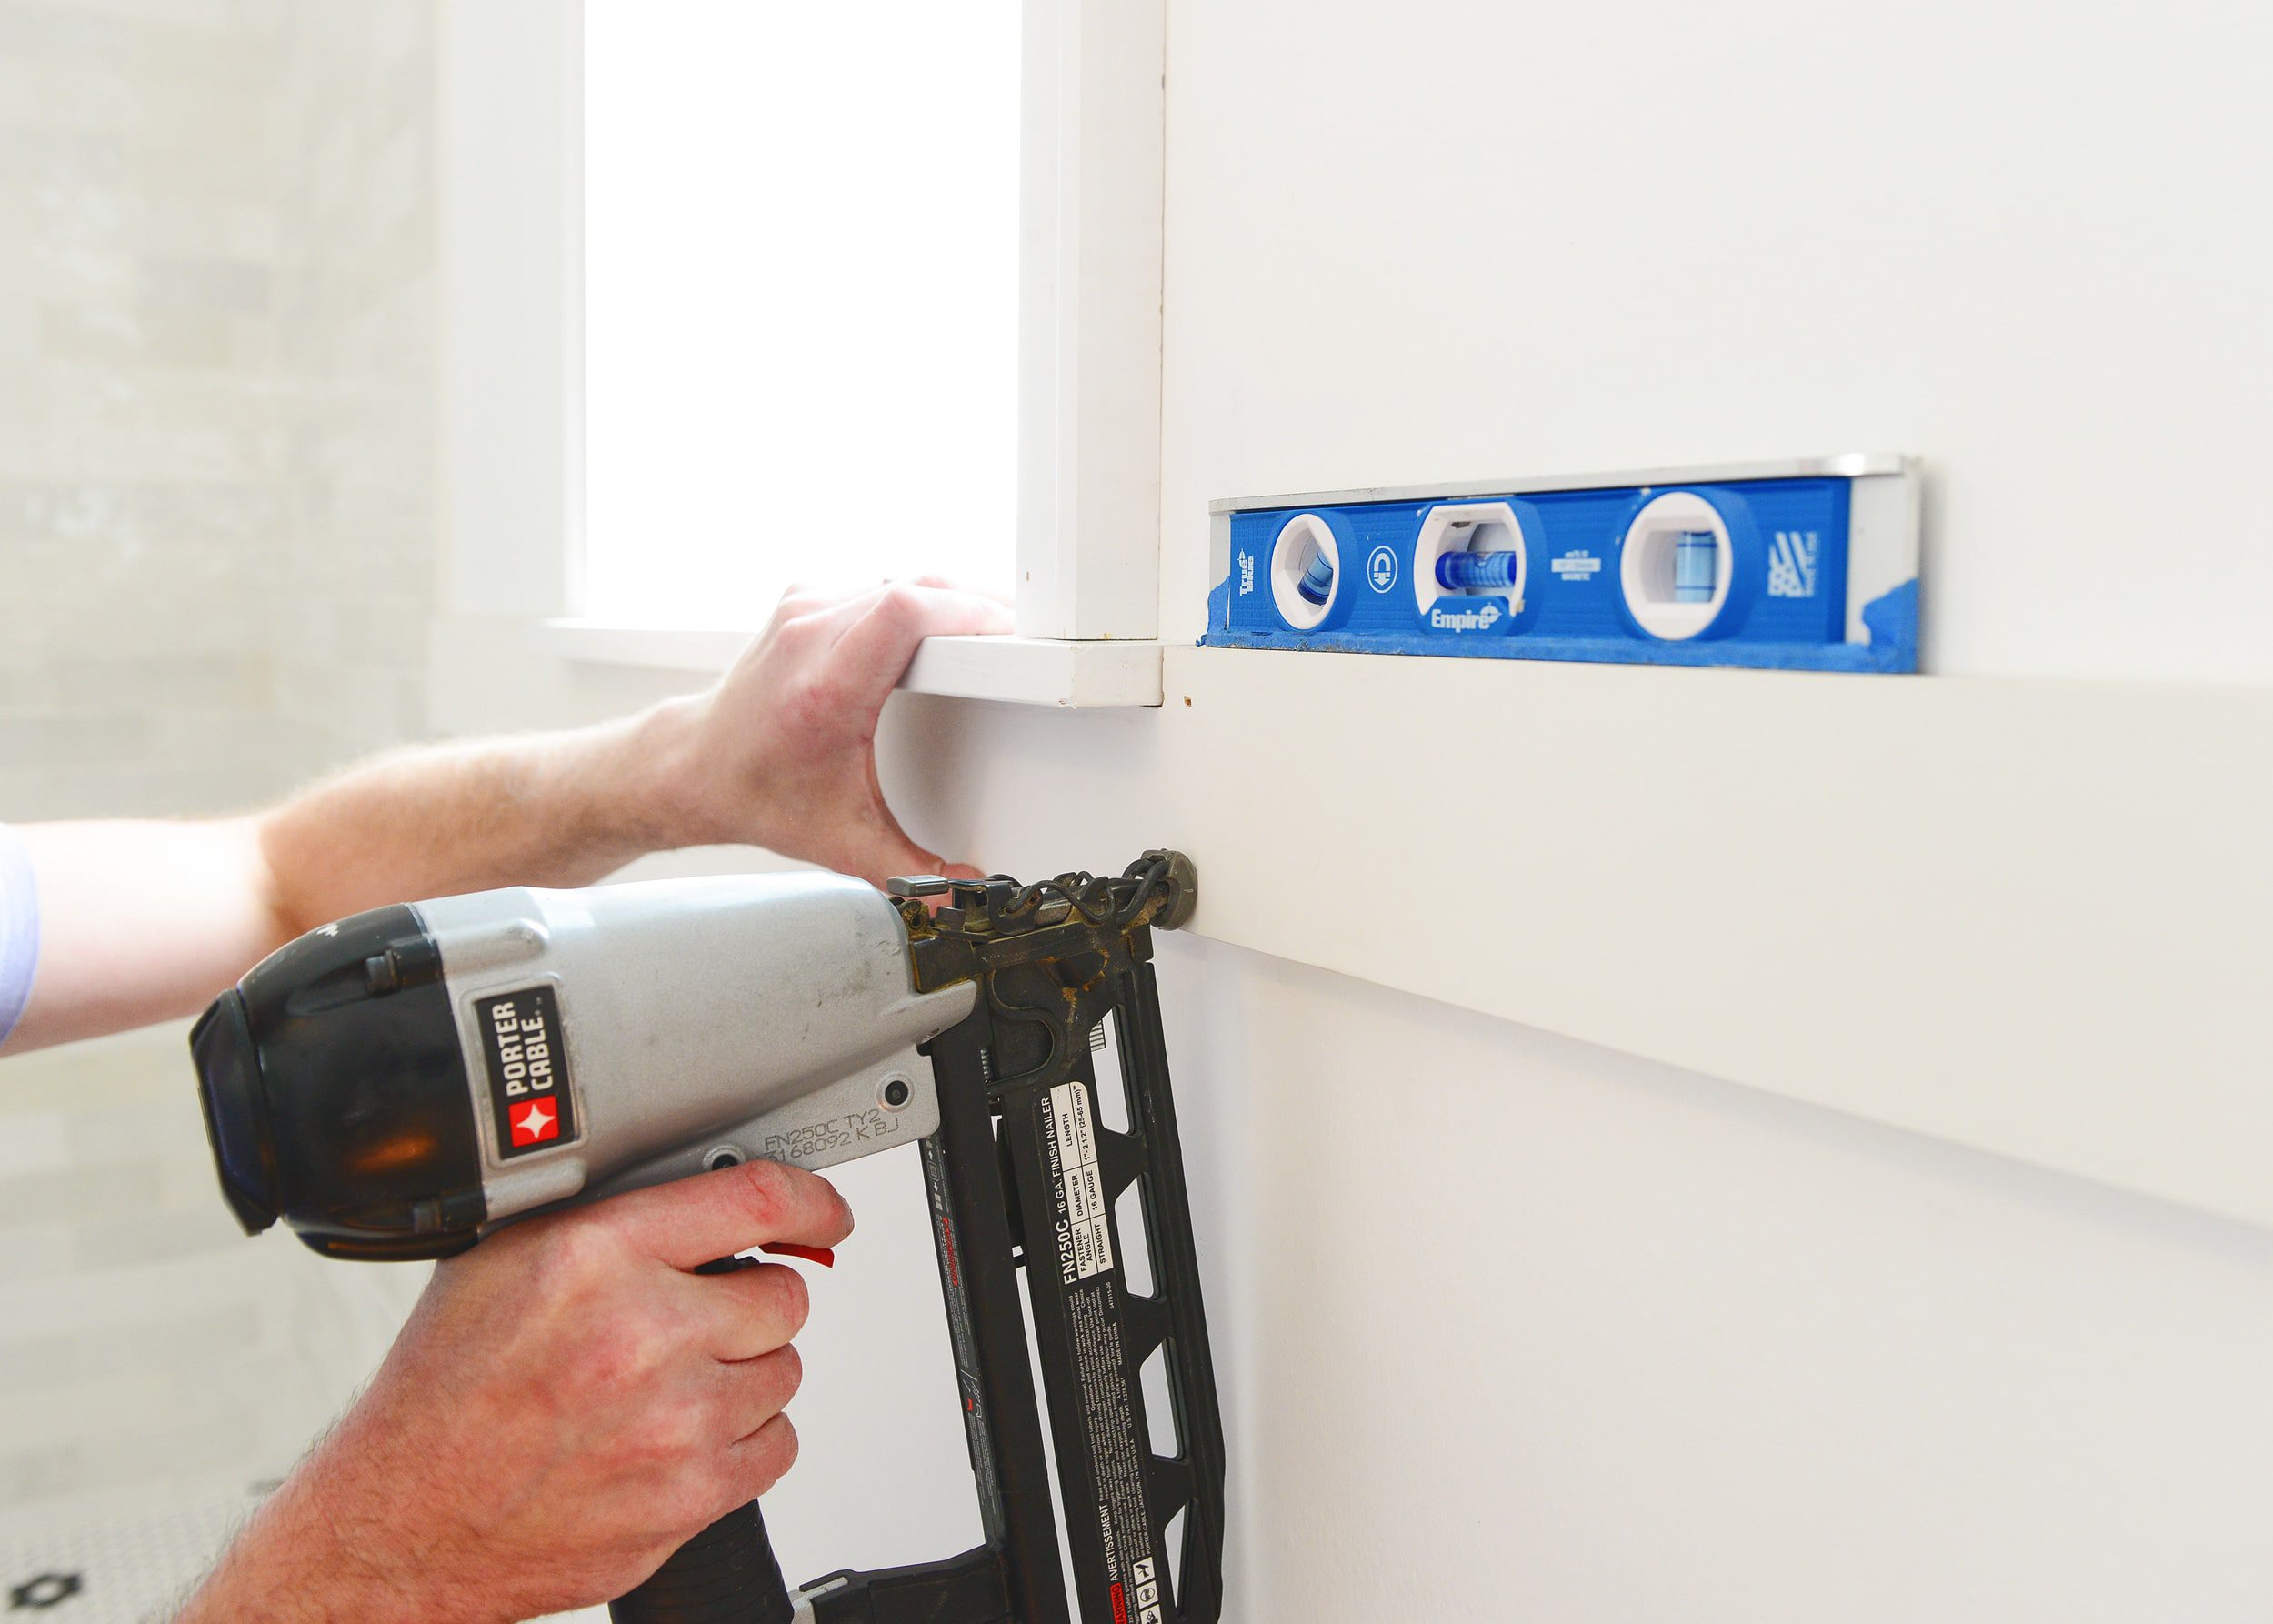
Once our top rails were complete, we moved on to the bottom rails, continuing to check for level. We planned to forego shoe molding for a sleeker look, so we were sure to keep a tight fit to the floor.

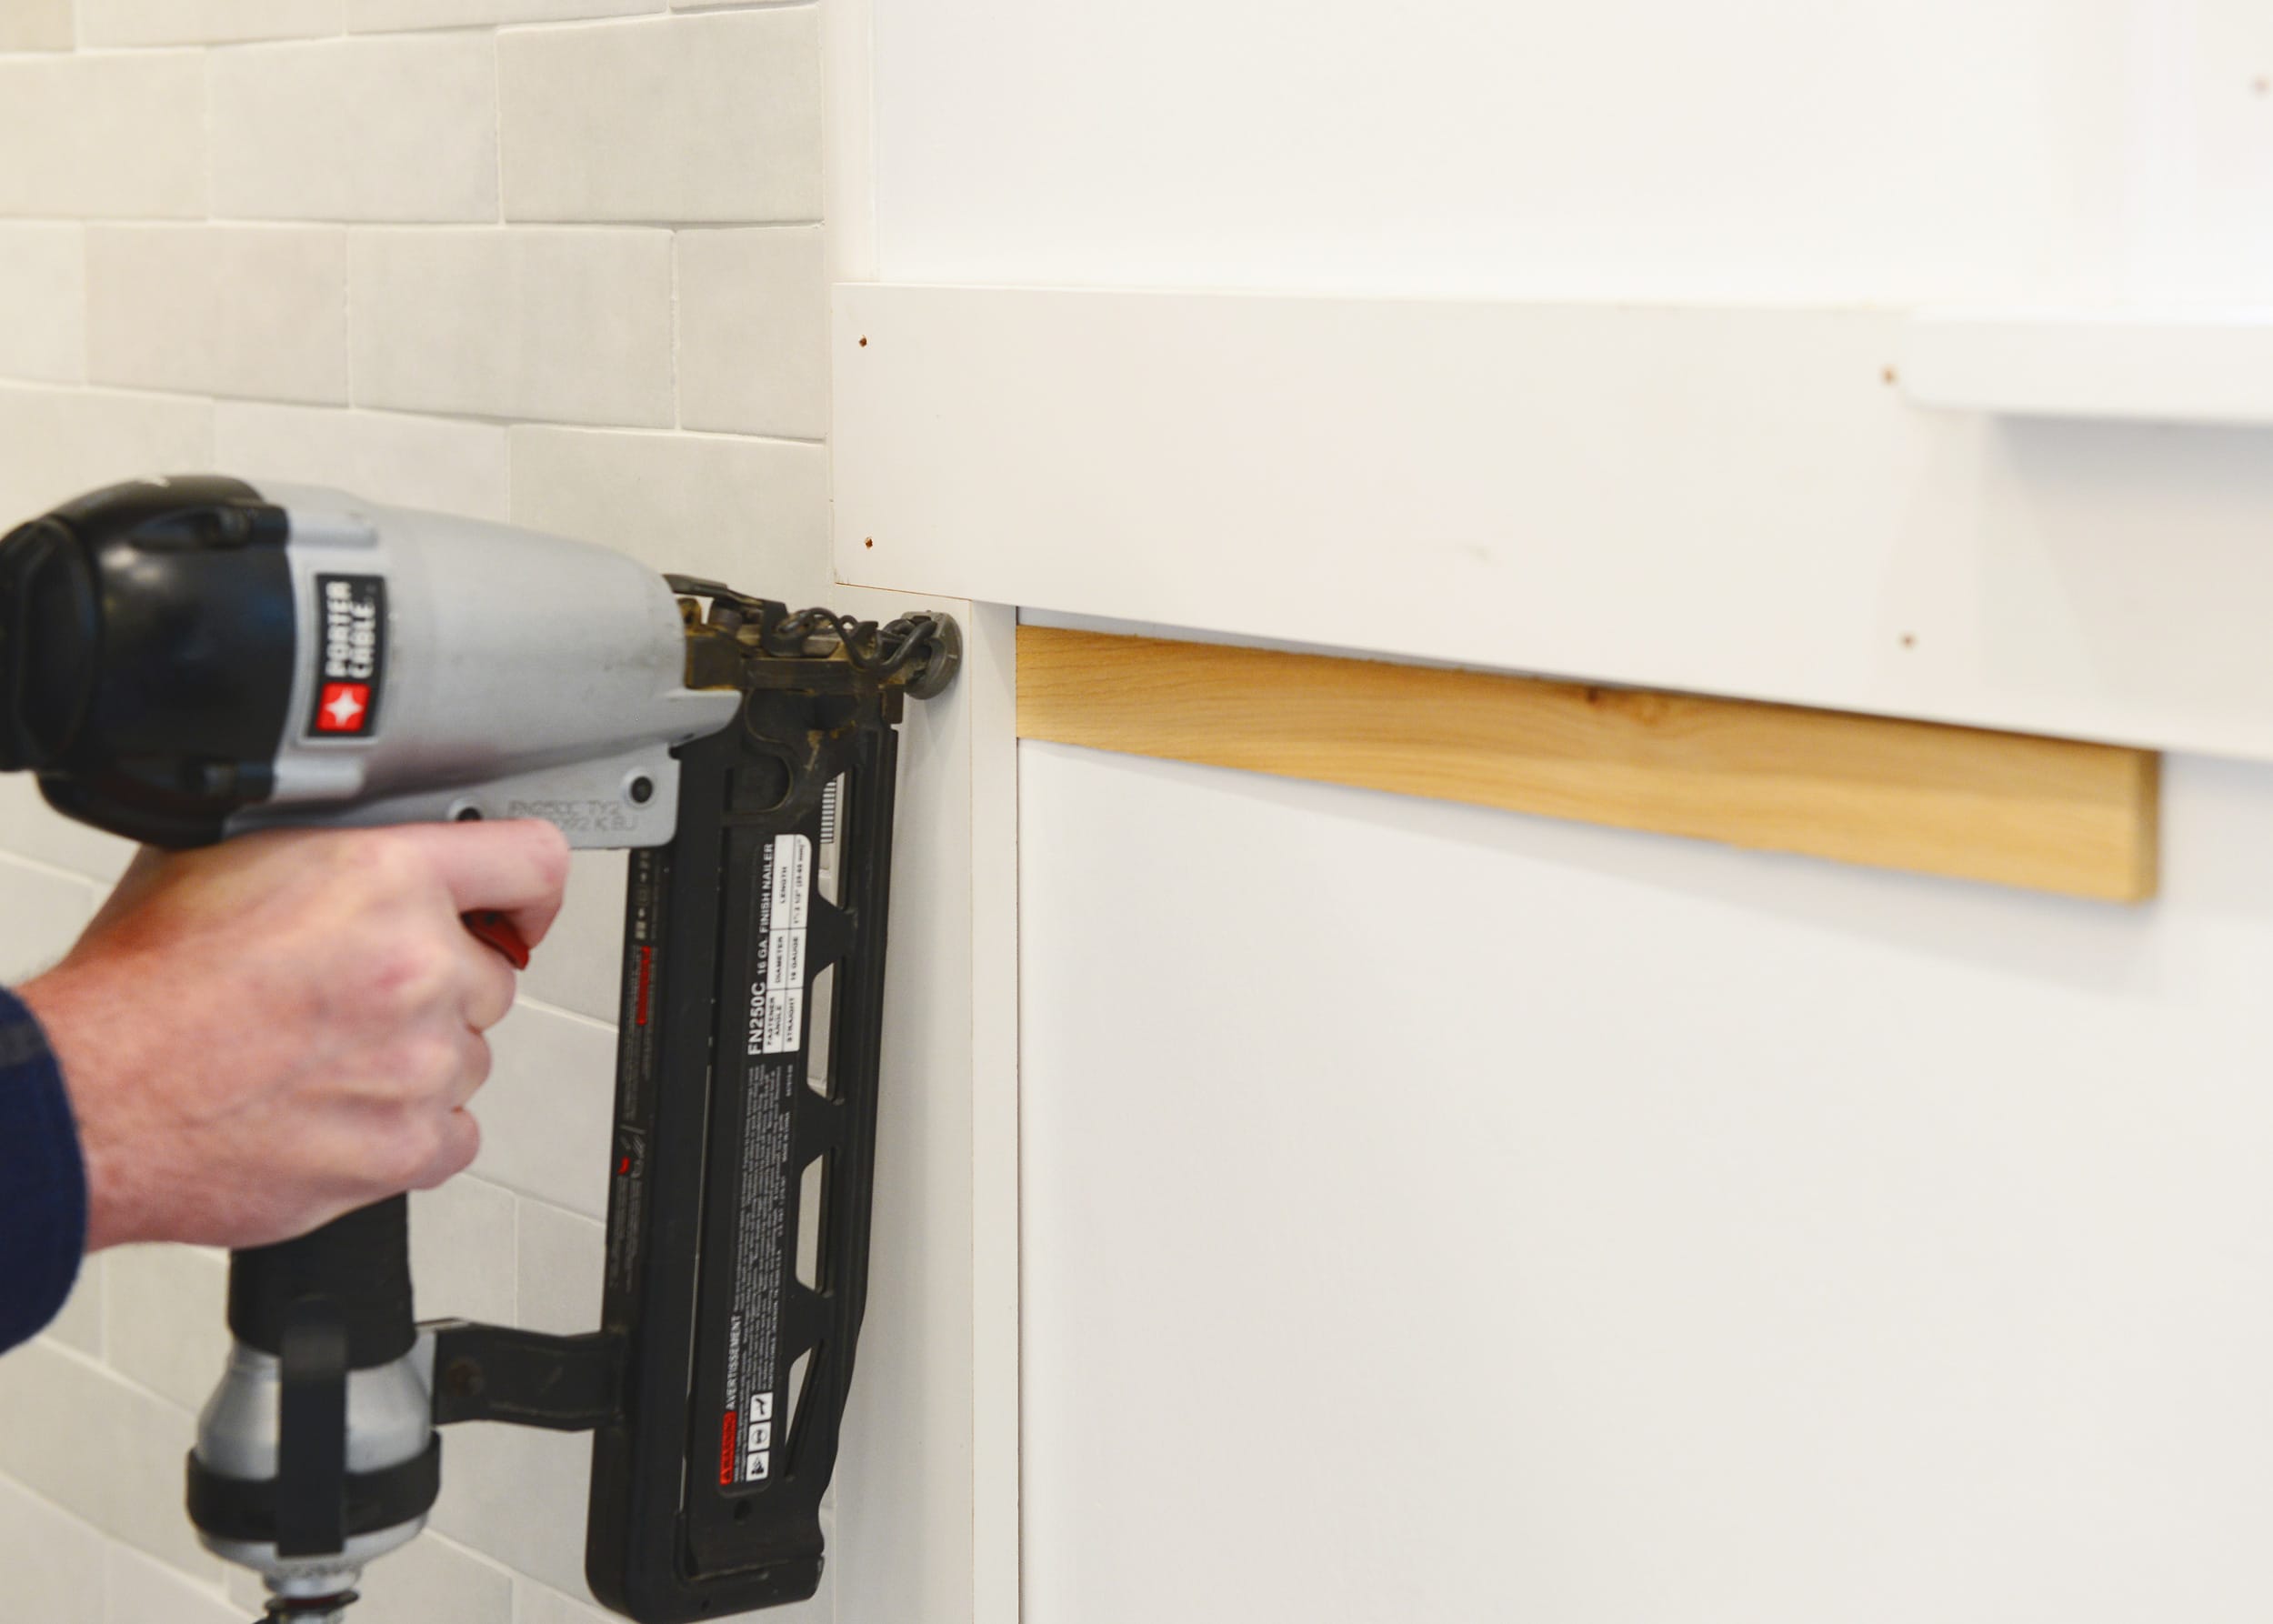
Installing the Vertical Stiles
Once the top and bottom rails were complete, we were able to move on to the outermost vertical stiles. The stiles are the vertical strips (our 1″ x 3″ MDF boards) that create the ‘box.’ Because drywall is rarely – if ever! – perfect, we used the thin tips of shims to ensure that all of our transitions between boards were as seamless as possible. Shims are a necessity to help keep things as flush as possible, which cuts down on the amount of spackle and sanding needed before paint.
At this point, we measured the gap between the stiles on each end and did waaaay too much (incorrect) math until we finally figured out the following formula for perfectly spaced verticals. It was almost comical how many times we incorrectly measured, so we made this cheat for you!
How to Measure the Width Between Stiles
- Measure width of the entire wall.
- Subtract width of all the stiles (ex: for our 4 stiles at 2.5” w, you’d subtract 10″ from the wall measurement).
- Divide that number by the number of ‘boxes’ between the stiles (in our case, we wanted 3).
- That final number will be the space between the stiles!
- Working from one side to the other, install your first vertical stile. Then take your final number from above and measure over to the next stile. Maintain your final number between stiles.
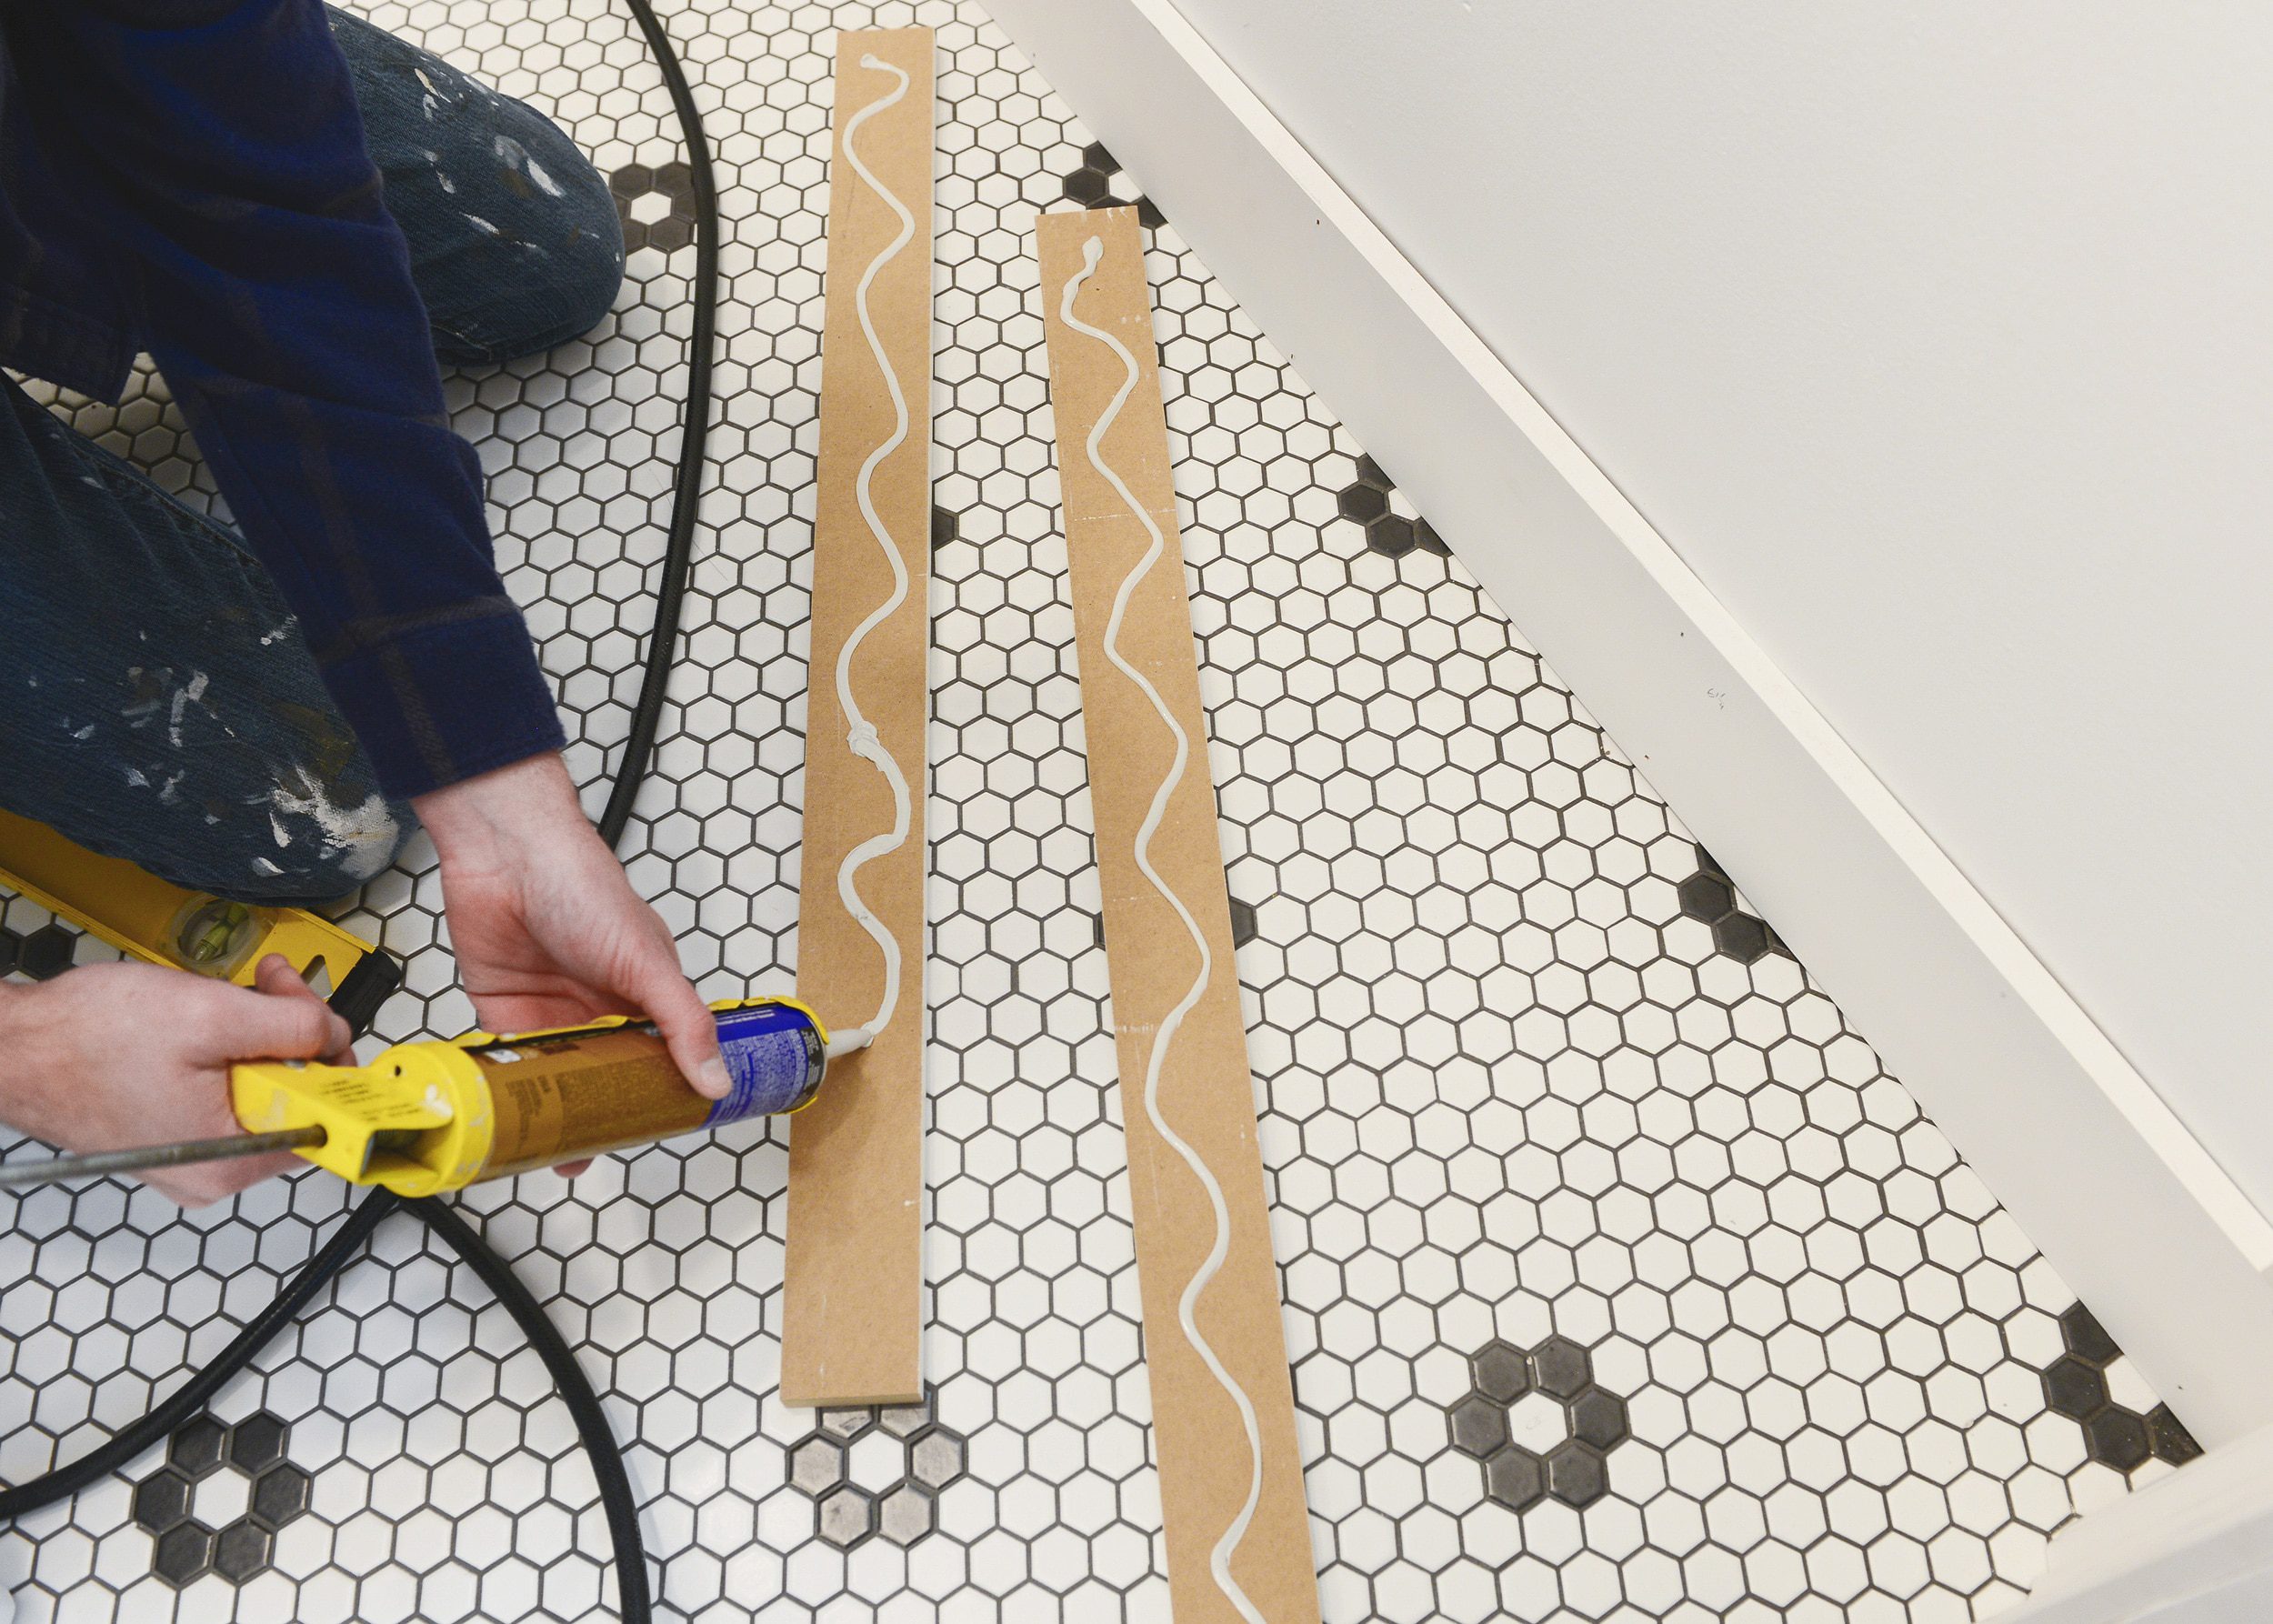
The math checks out, trust us. (We had initially been measuring the gaps ‘on center,’ which led to a comedy of errors. Learn from our mistakes!) Once we had our spacing locked in and marked, we cut all of our stiles to length and gave each one a bead of construction adhesive. Tip: Measure the length of each stile individually, since they may incrementally change, depending on how level your floors are.
Checking for Level (Every Time!)
Checking level constantly along the way, each stile was then nailed into place. In a scenario like this where nailing into studs is unlikely, the adhesive is what will actually hold the boards in place. The nails are simply there to pull the board tight against the wall and hold it in place while the adhesive cures.

With many rounds of flawed math behind us and all of our stiles fastened in place, it was time to move on to detail work!
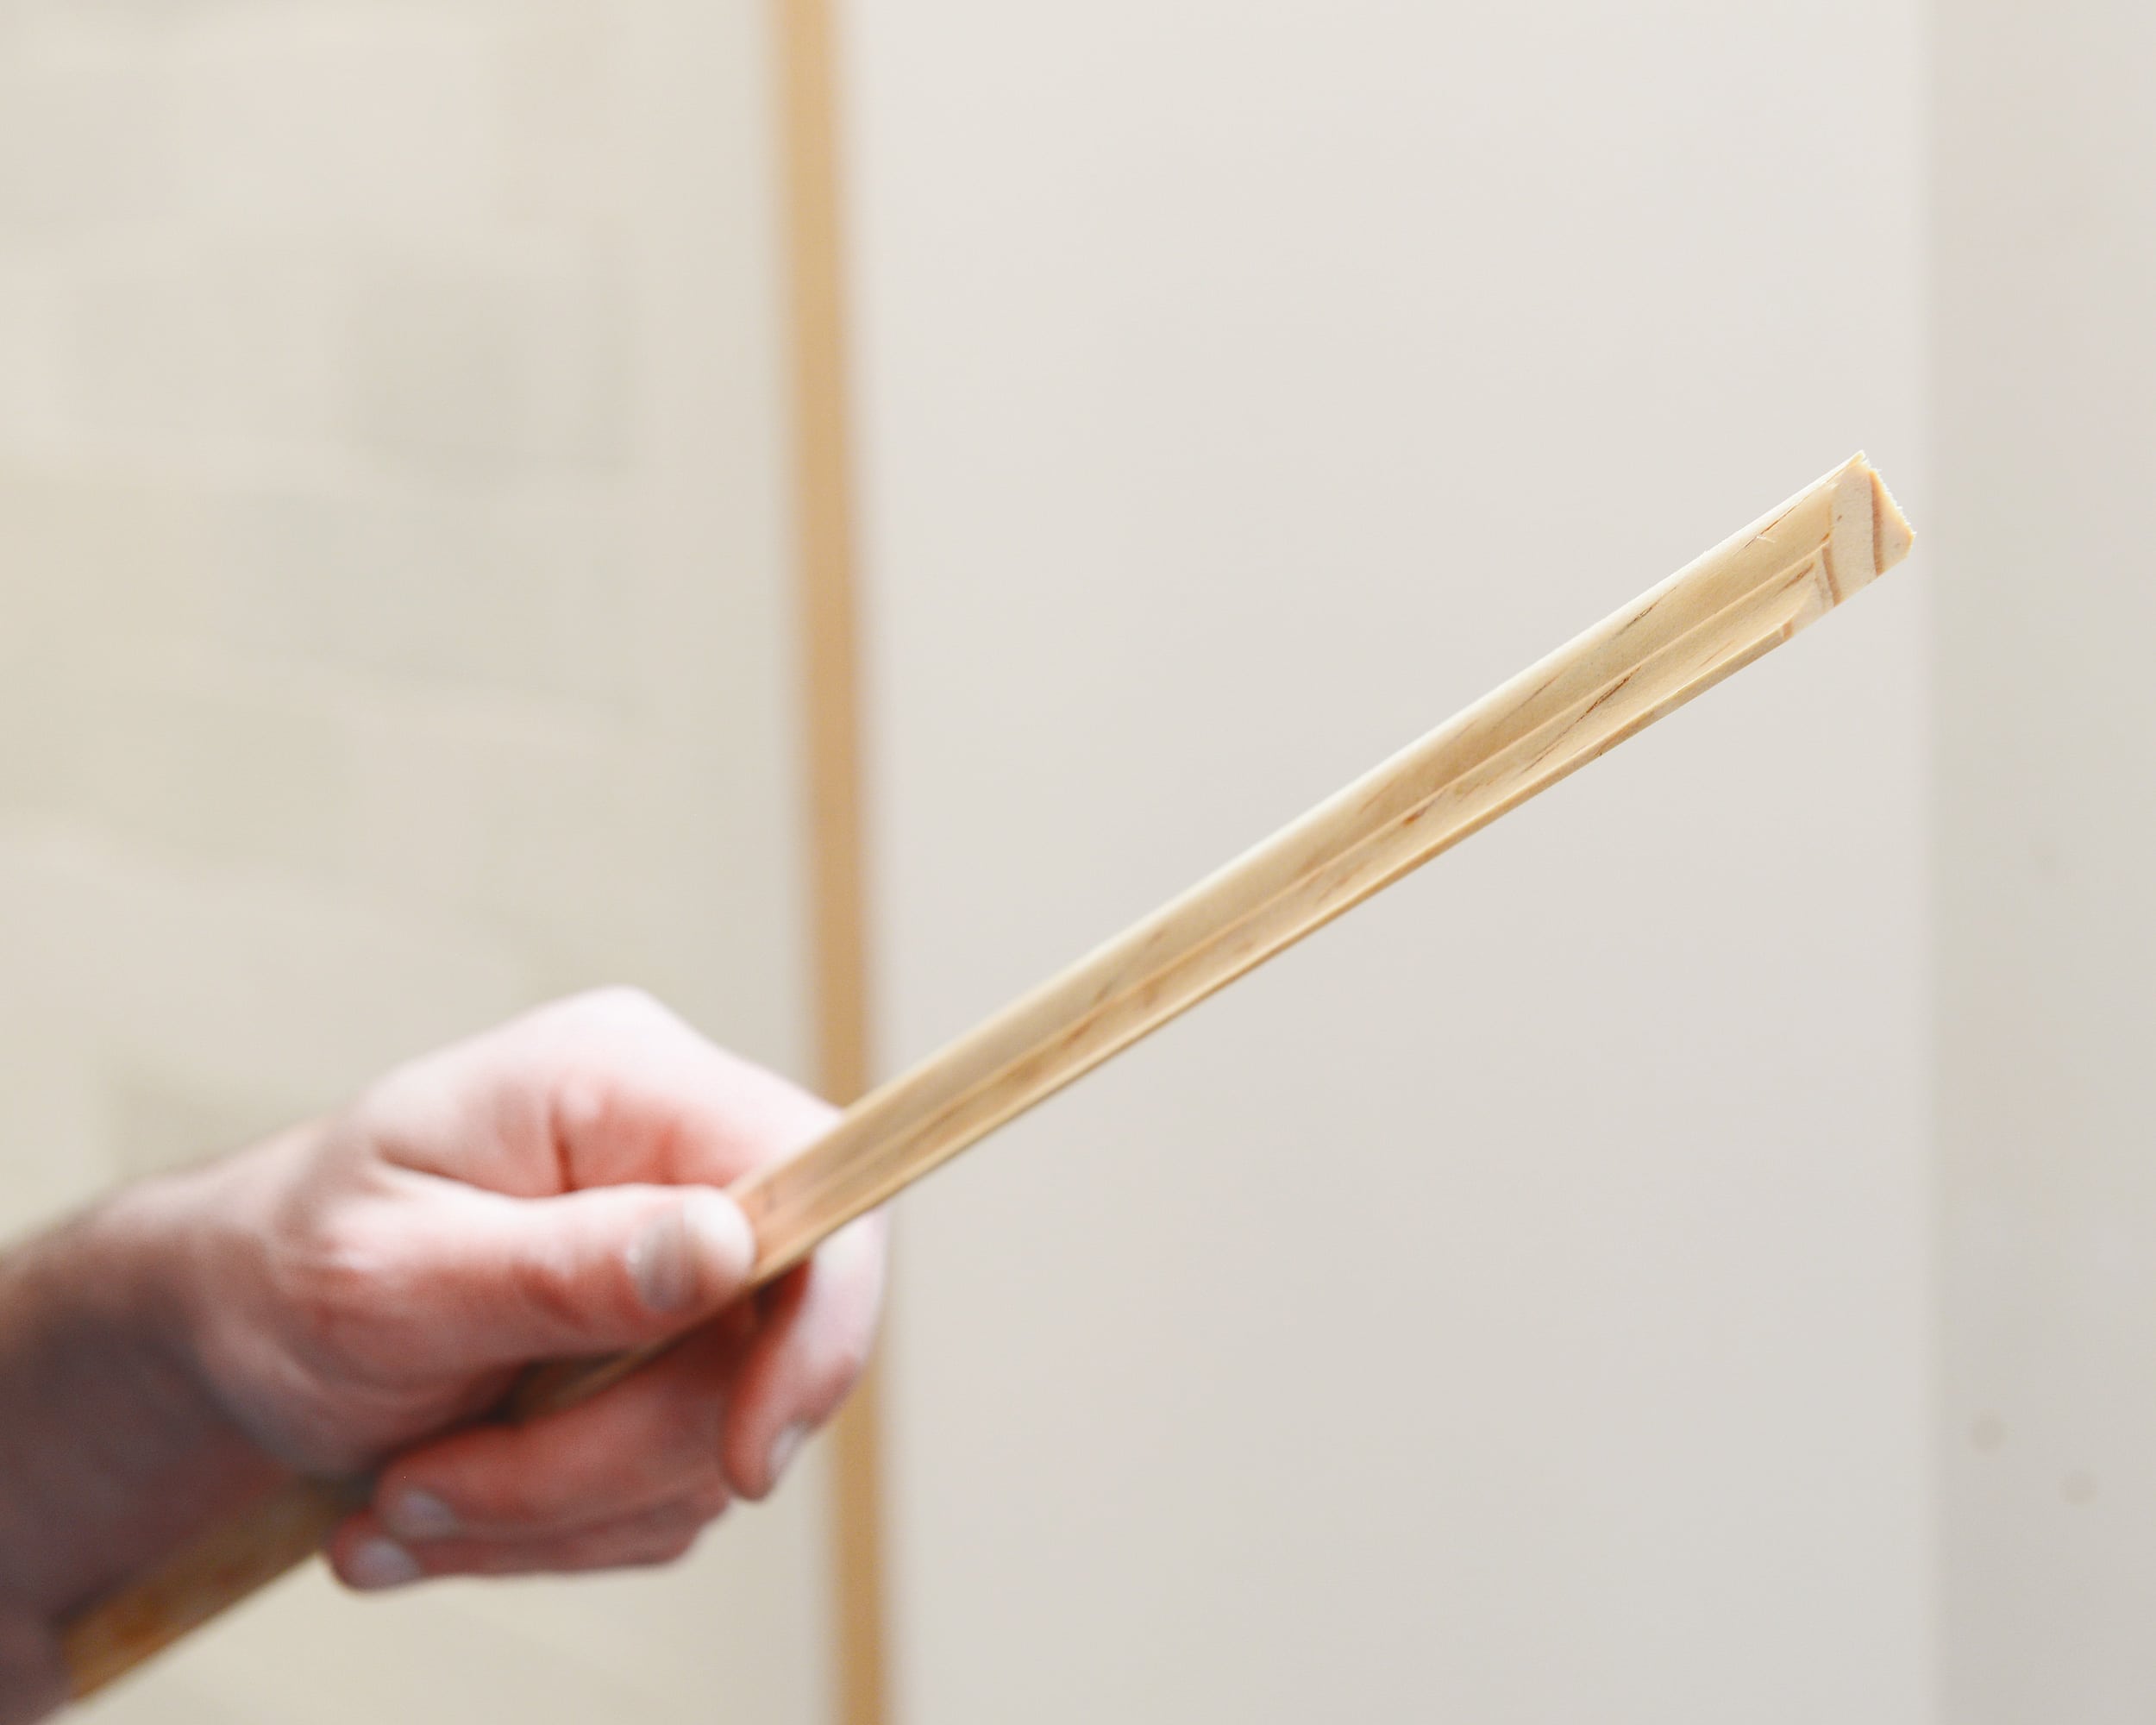
Adding the Detail Trim
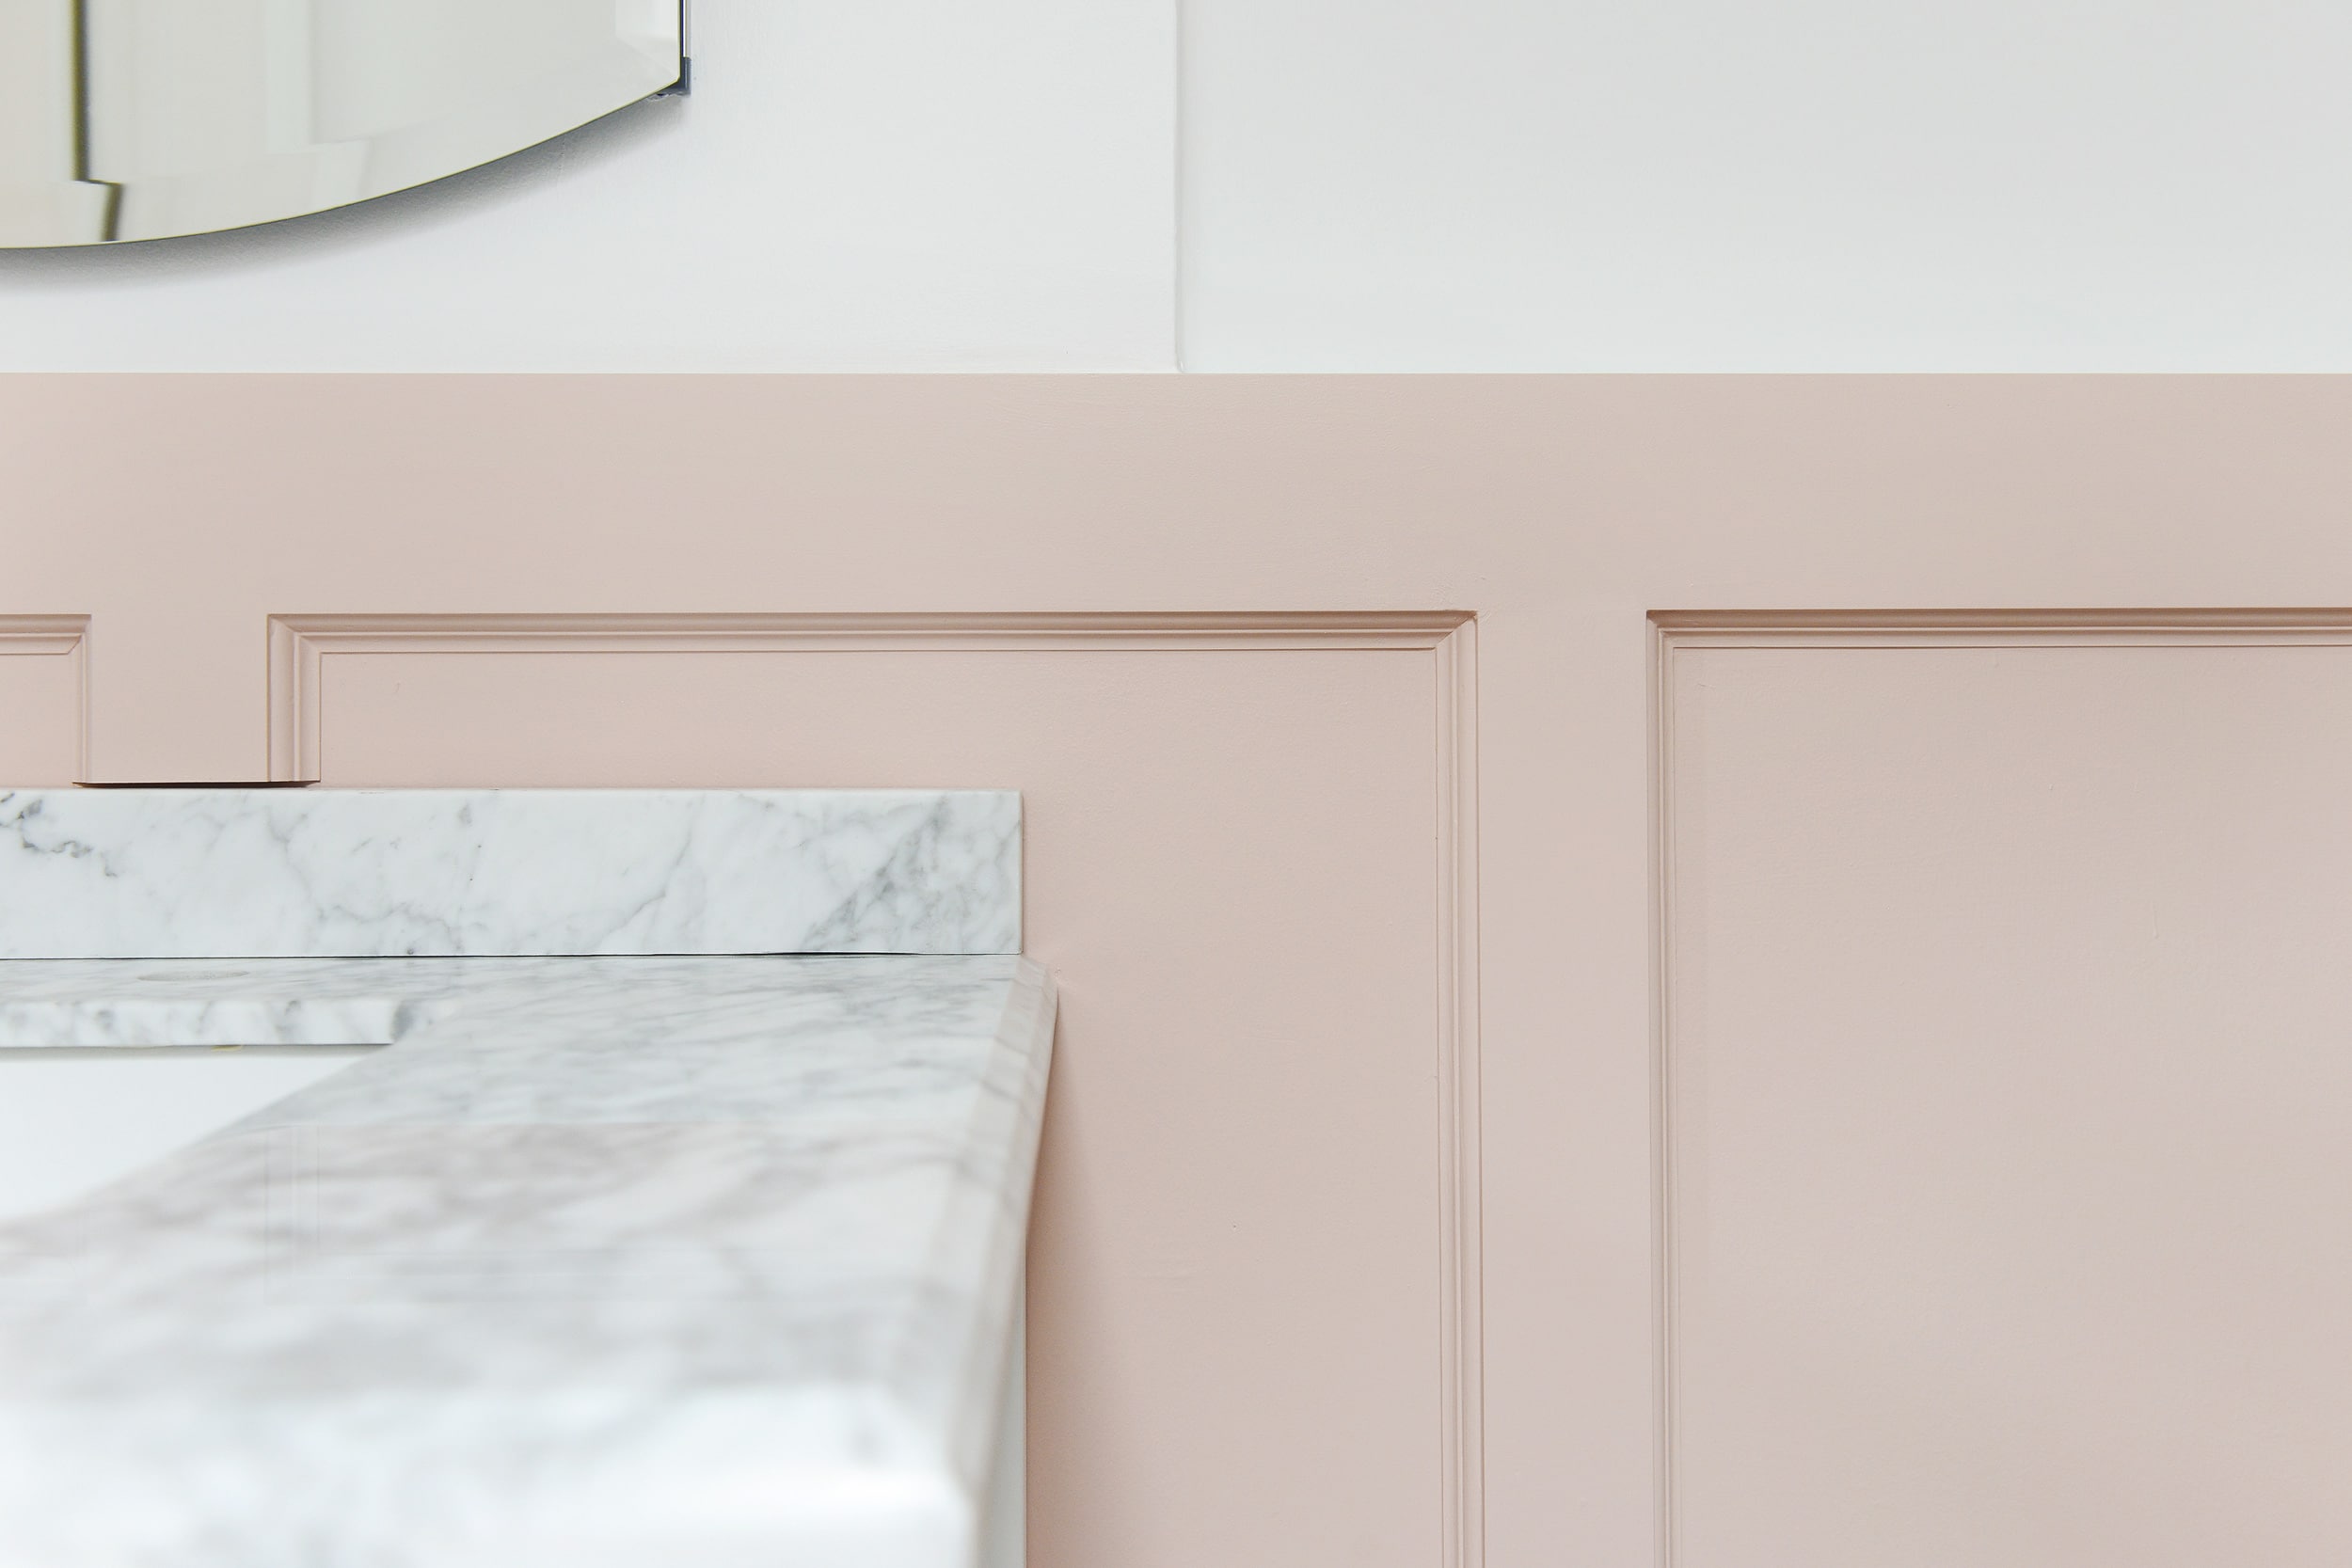
We selected thin pine molding that happened to mimic the edge detail of our marble vanity top beautifully! This step is not necessary, but we think it gave the wall treatment a more classic, slightly traditional feel that we were looking for. These cuts were all very simple and very gratifying! 45 degree inside corner cuts make up the inside of each ‘box’ and voila! Hunkiness ensues.
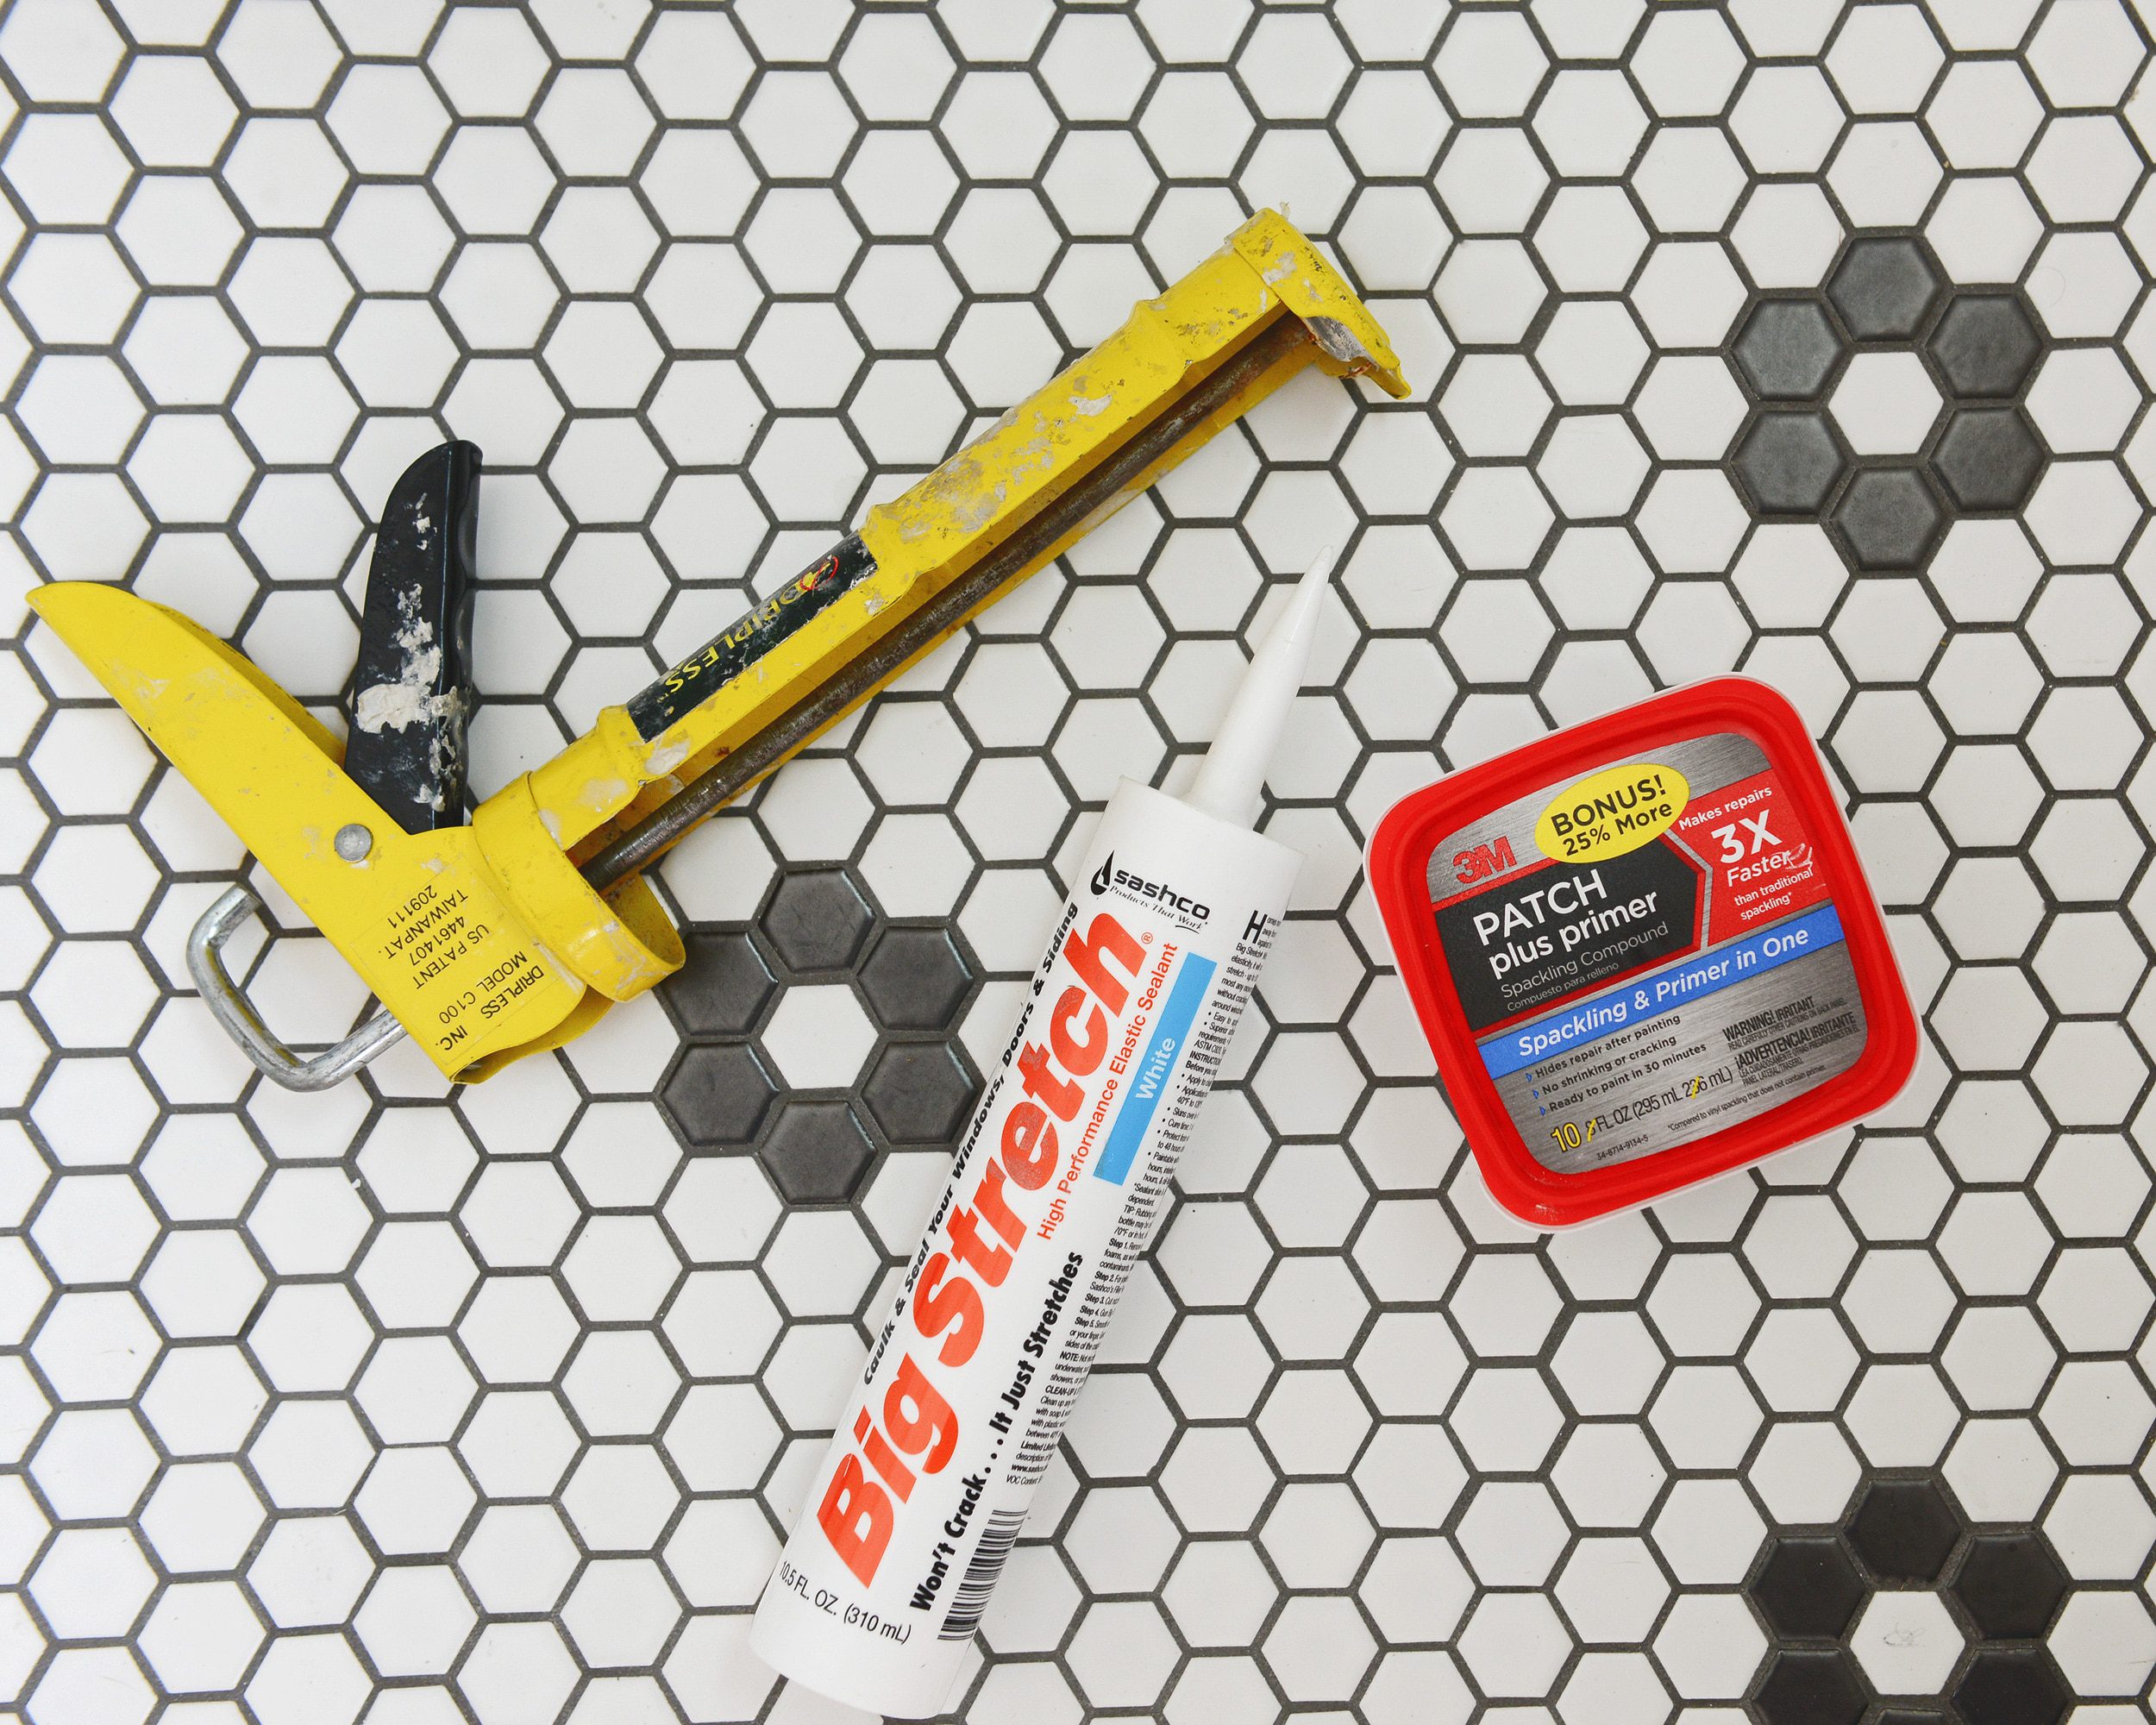
Hiding All the Gaps with Spackle + Caulk
To this point, the results might look a little… less than perfect? A bit messy? That’s okay! This is where spackle and caulk will be your best friends. We used spackle to fill all of the nail holes and seams between boards. Once dry, I used a random orbital sander to get it all smooth, and then after wiping up all the dust, Kim followed up by caulking all the gaps along the top and sides. Tip: This is our favorite spackle, and we used Big Stretch caulk for the first time after hearing so many great reviews!
Here’s how the board and batten was looking after the spackle and caulk:

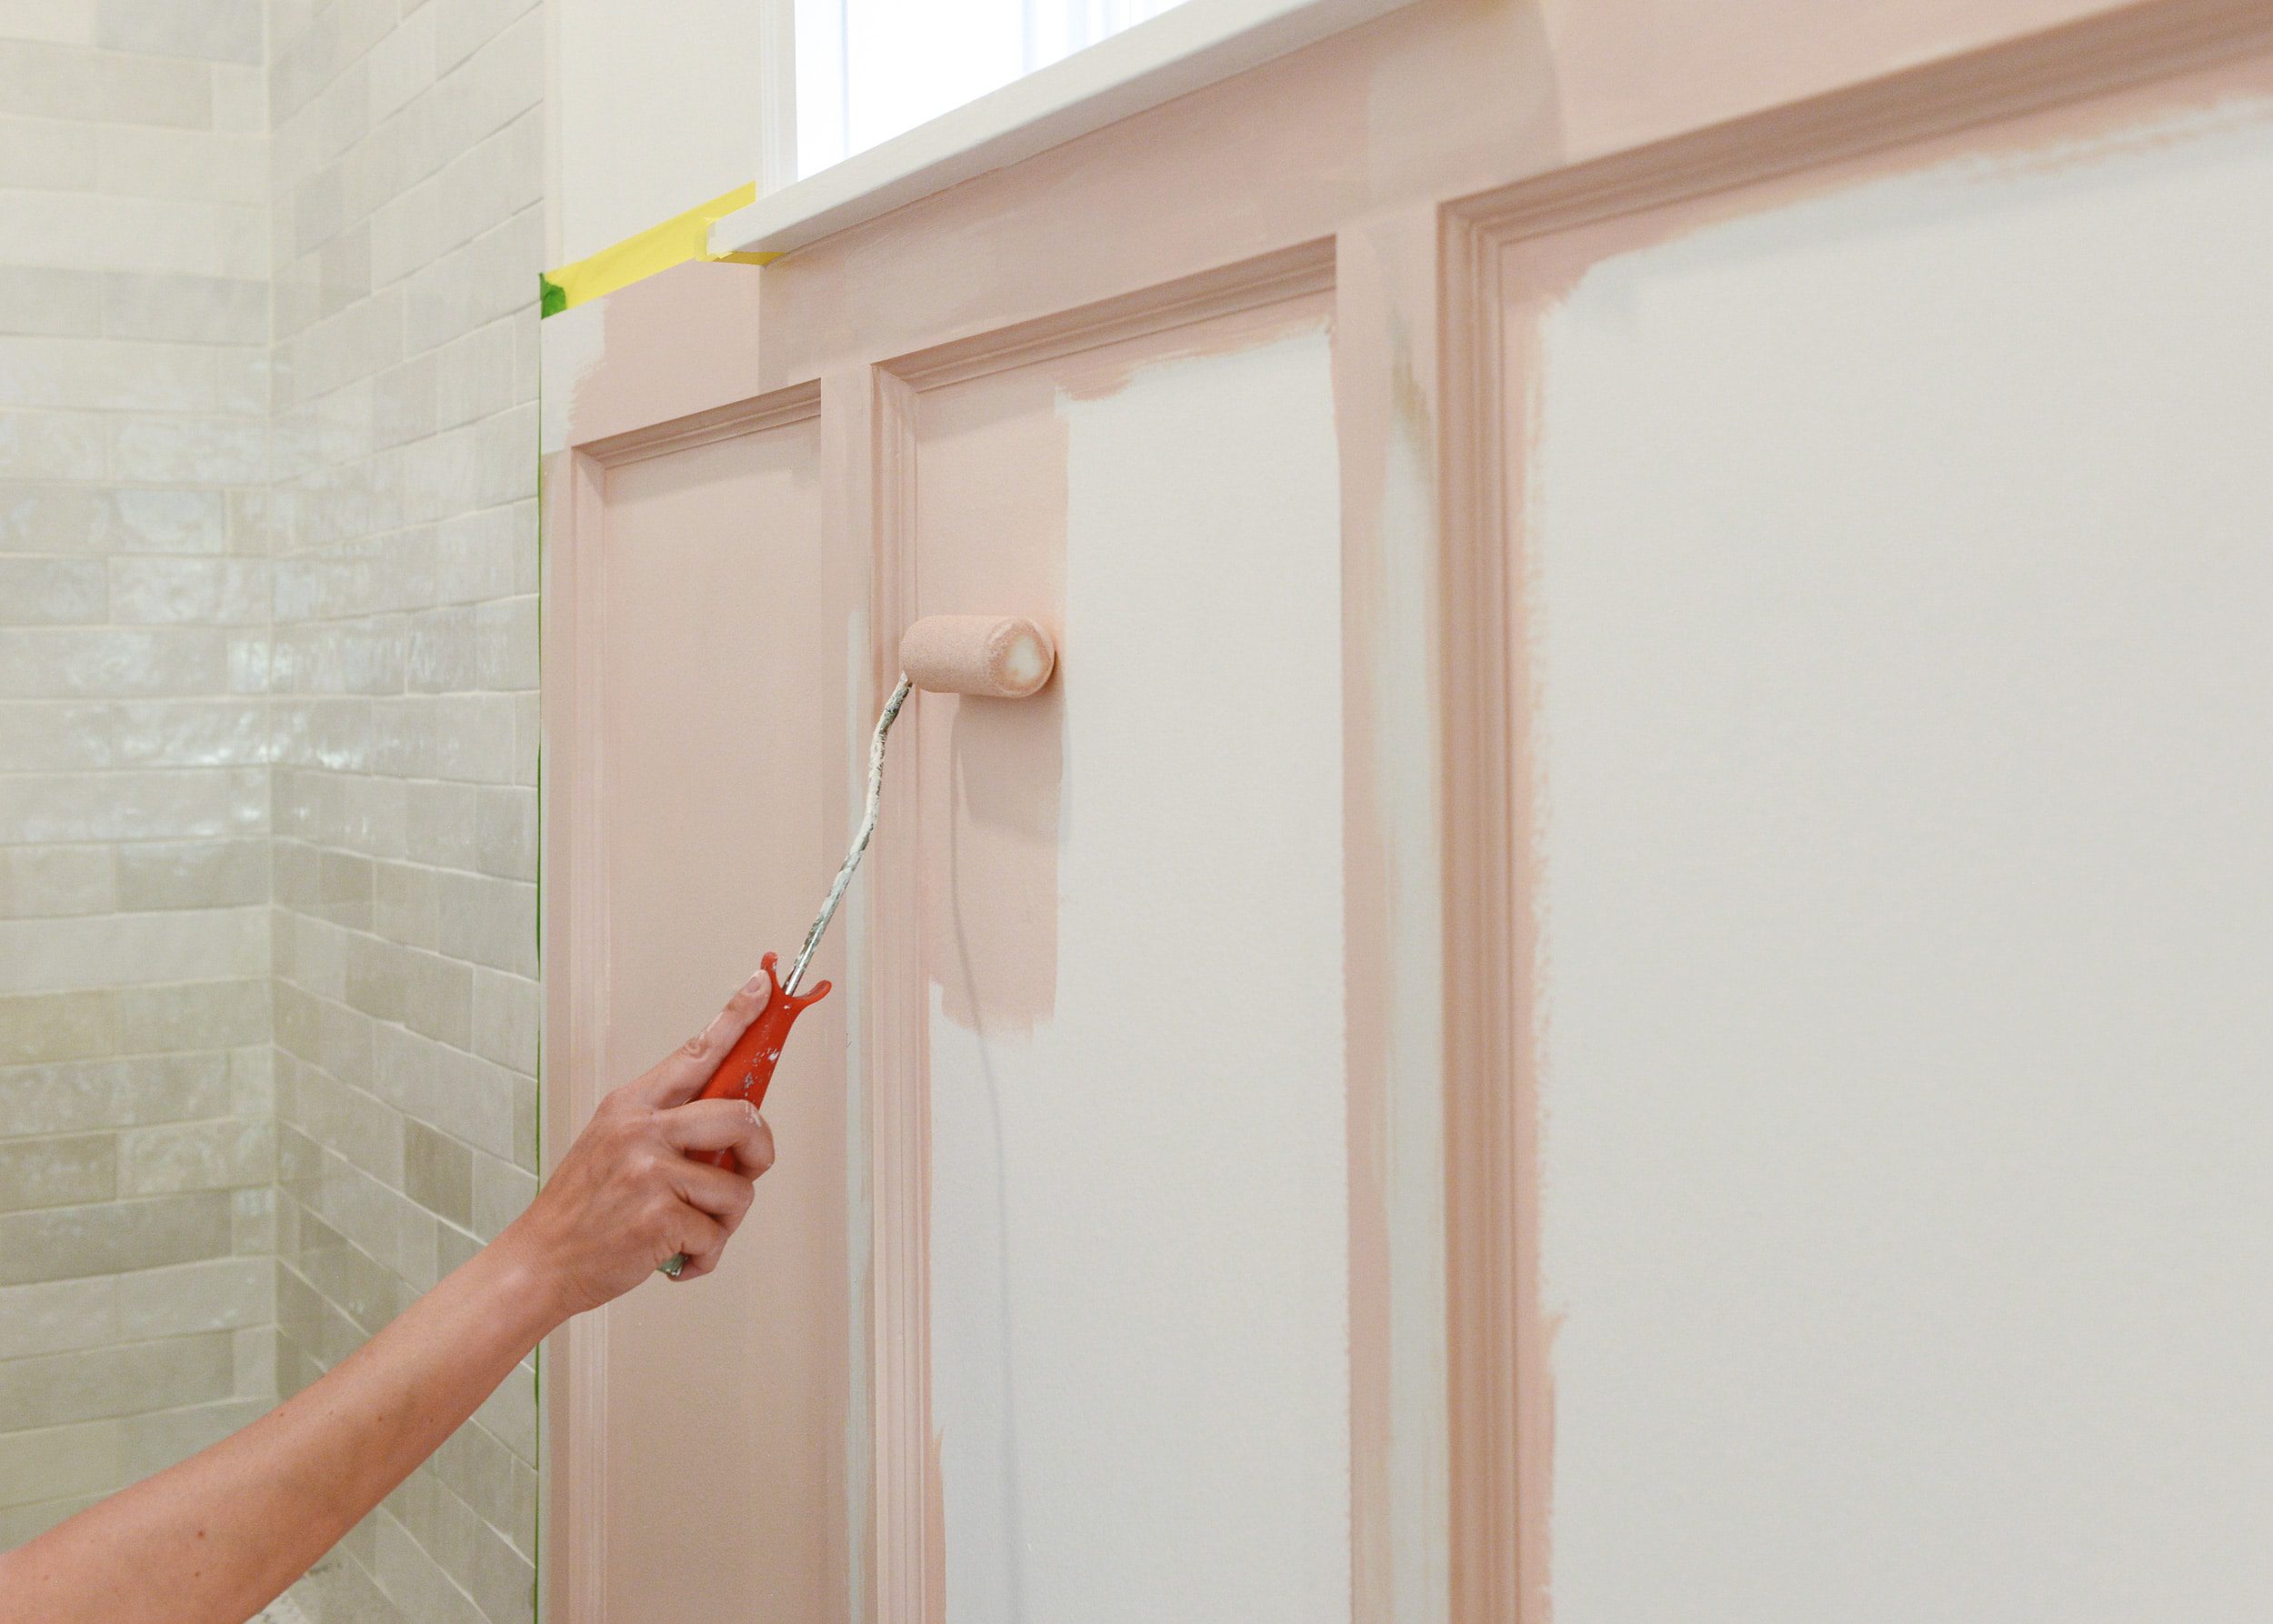
Painting the Board and Batten!
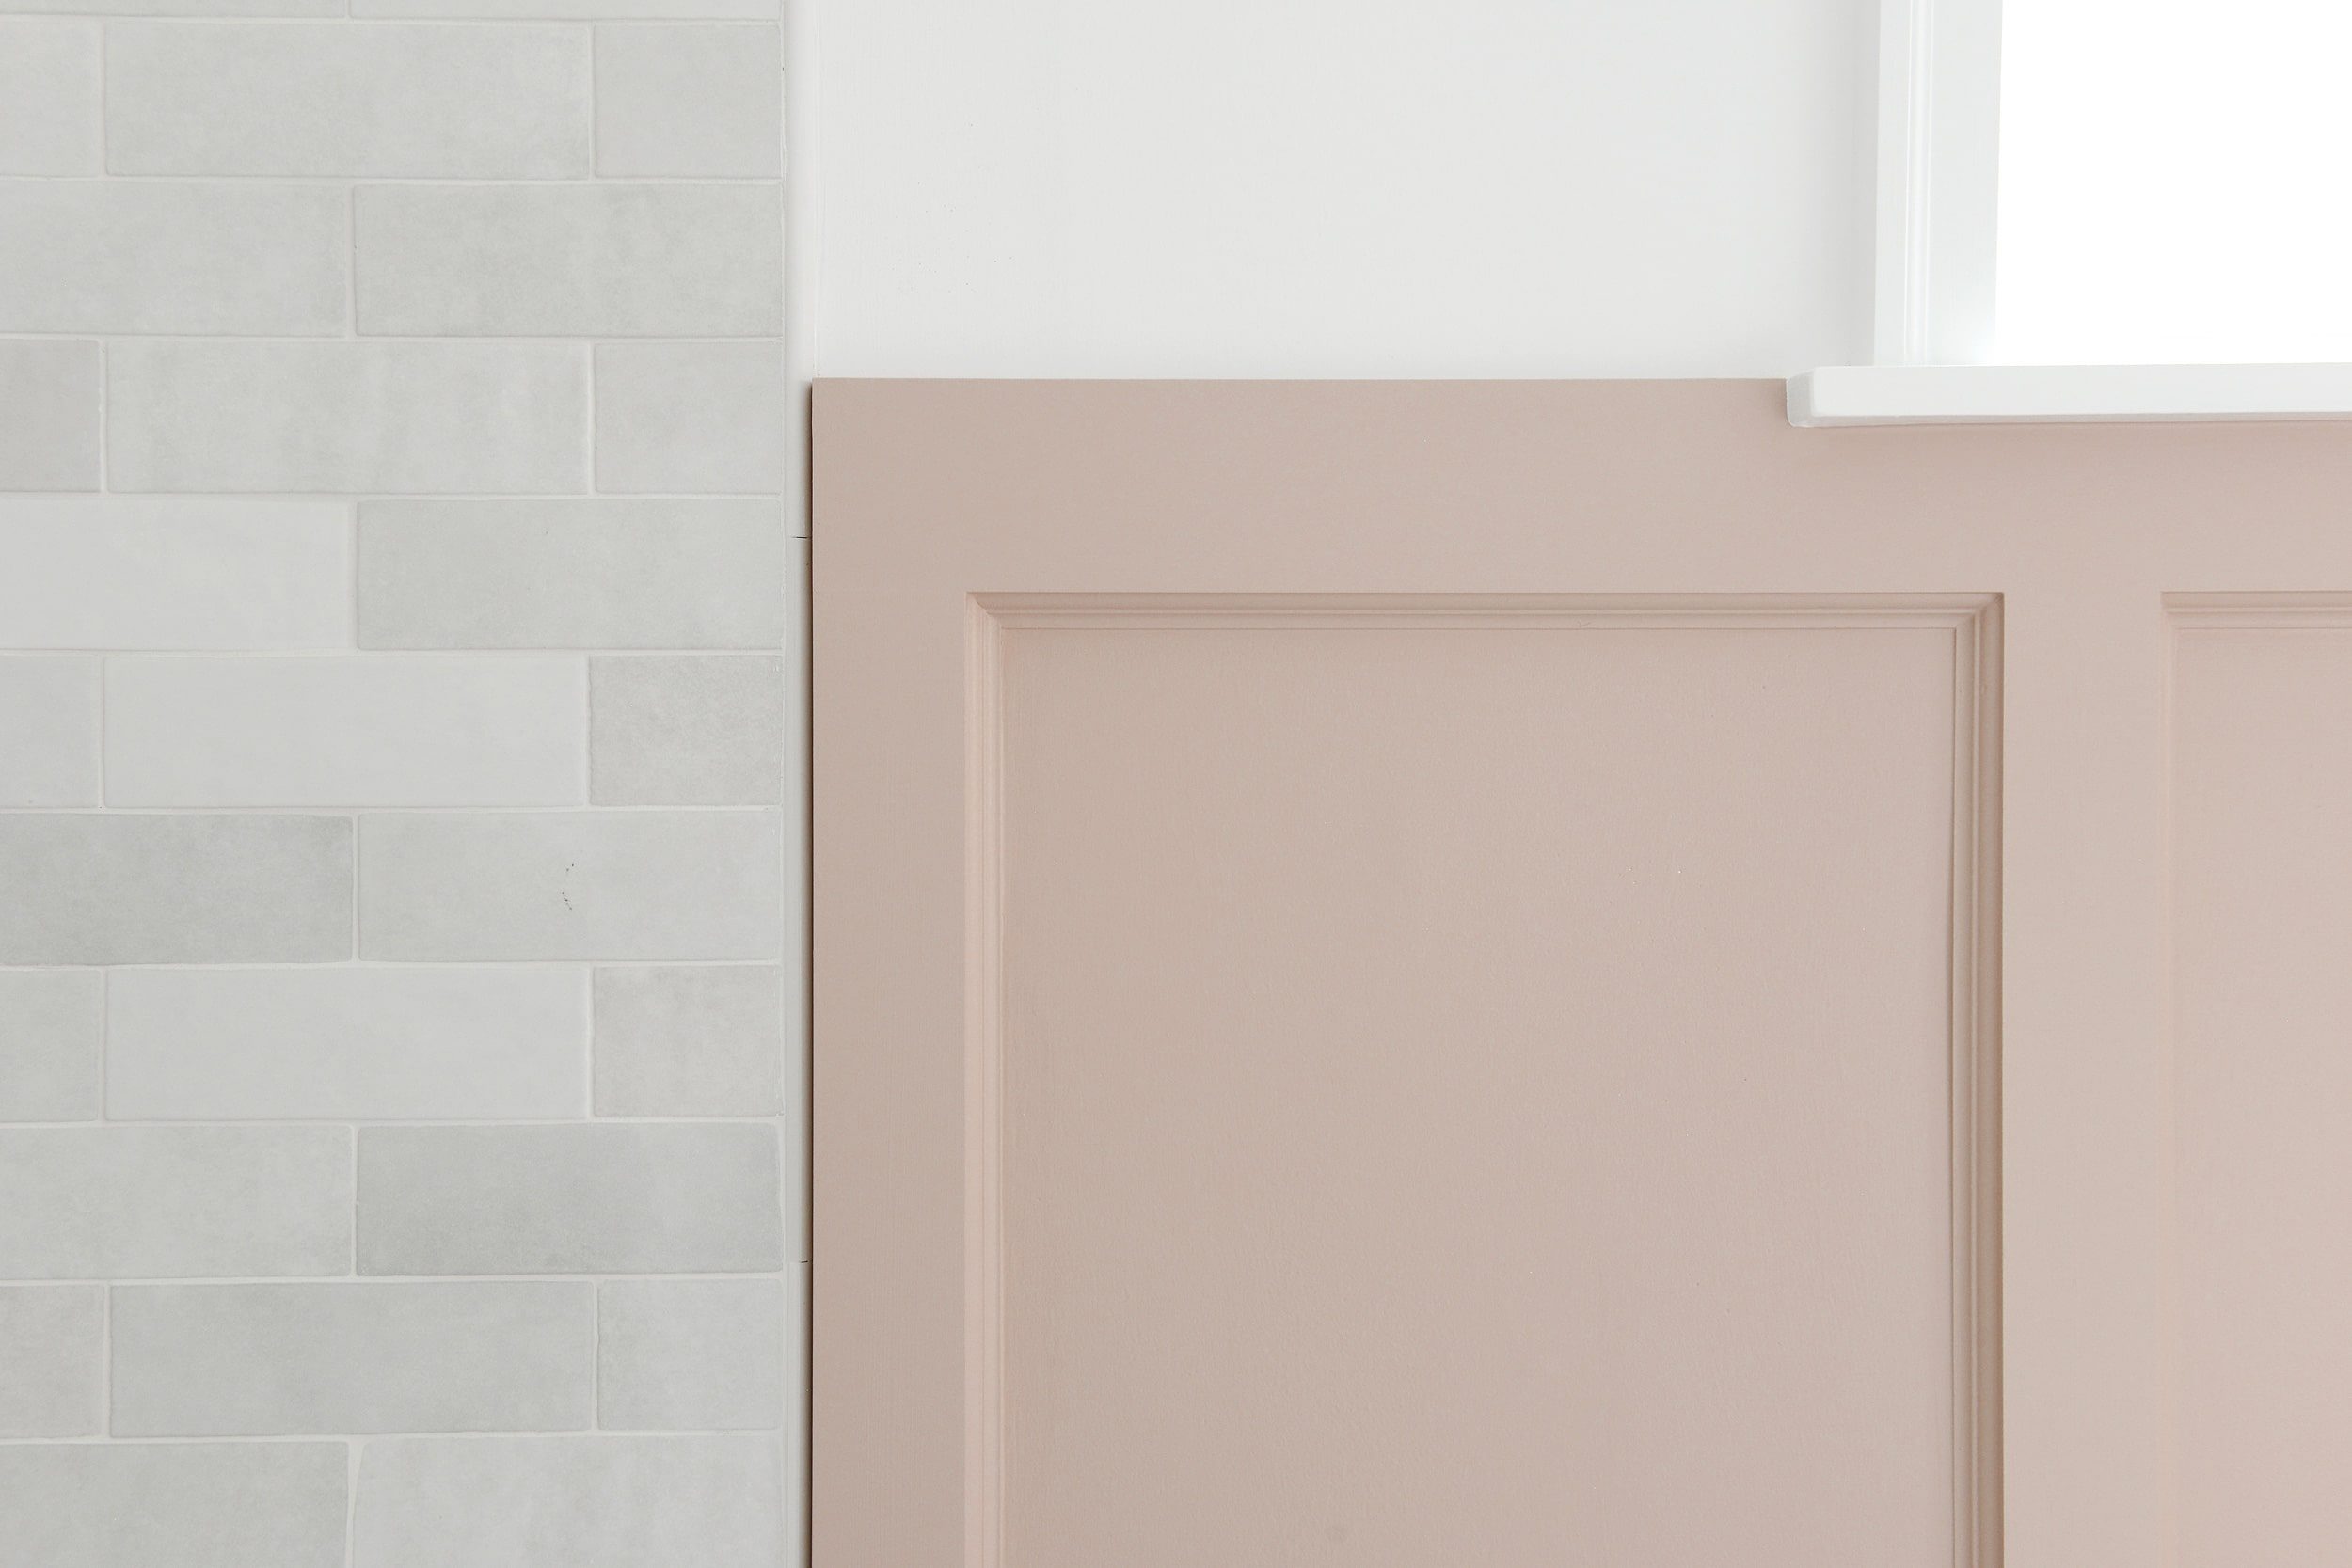
Finally, it was time to paint! After loving it so much in Daniel and Meghan’s living room refresh, we decided on Benjamin Moore’s Odessa Pink, which we had color matched to Valspar paint in a Satin finish. It’s the perfect pink that leans more into a subtle peachy hue than, say, little girl’s bedroom. There’s enough gray in the color to keep it feeling sophisticated, and it dries down to the most beautiful shade of pink. For the best results, Kim used a 2″ angled brush for the detail work and followed that up with a 4″ mini foam roller in the ‘boxes’ and on the stiles. We did two coats overall, plus a third in any areas that needed a touch-up.
The junction between the top rail and the windowsill turned out better than we could have imagined, with the thin white sill dipping just enough into the top rail to add a bit of visual interest!
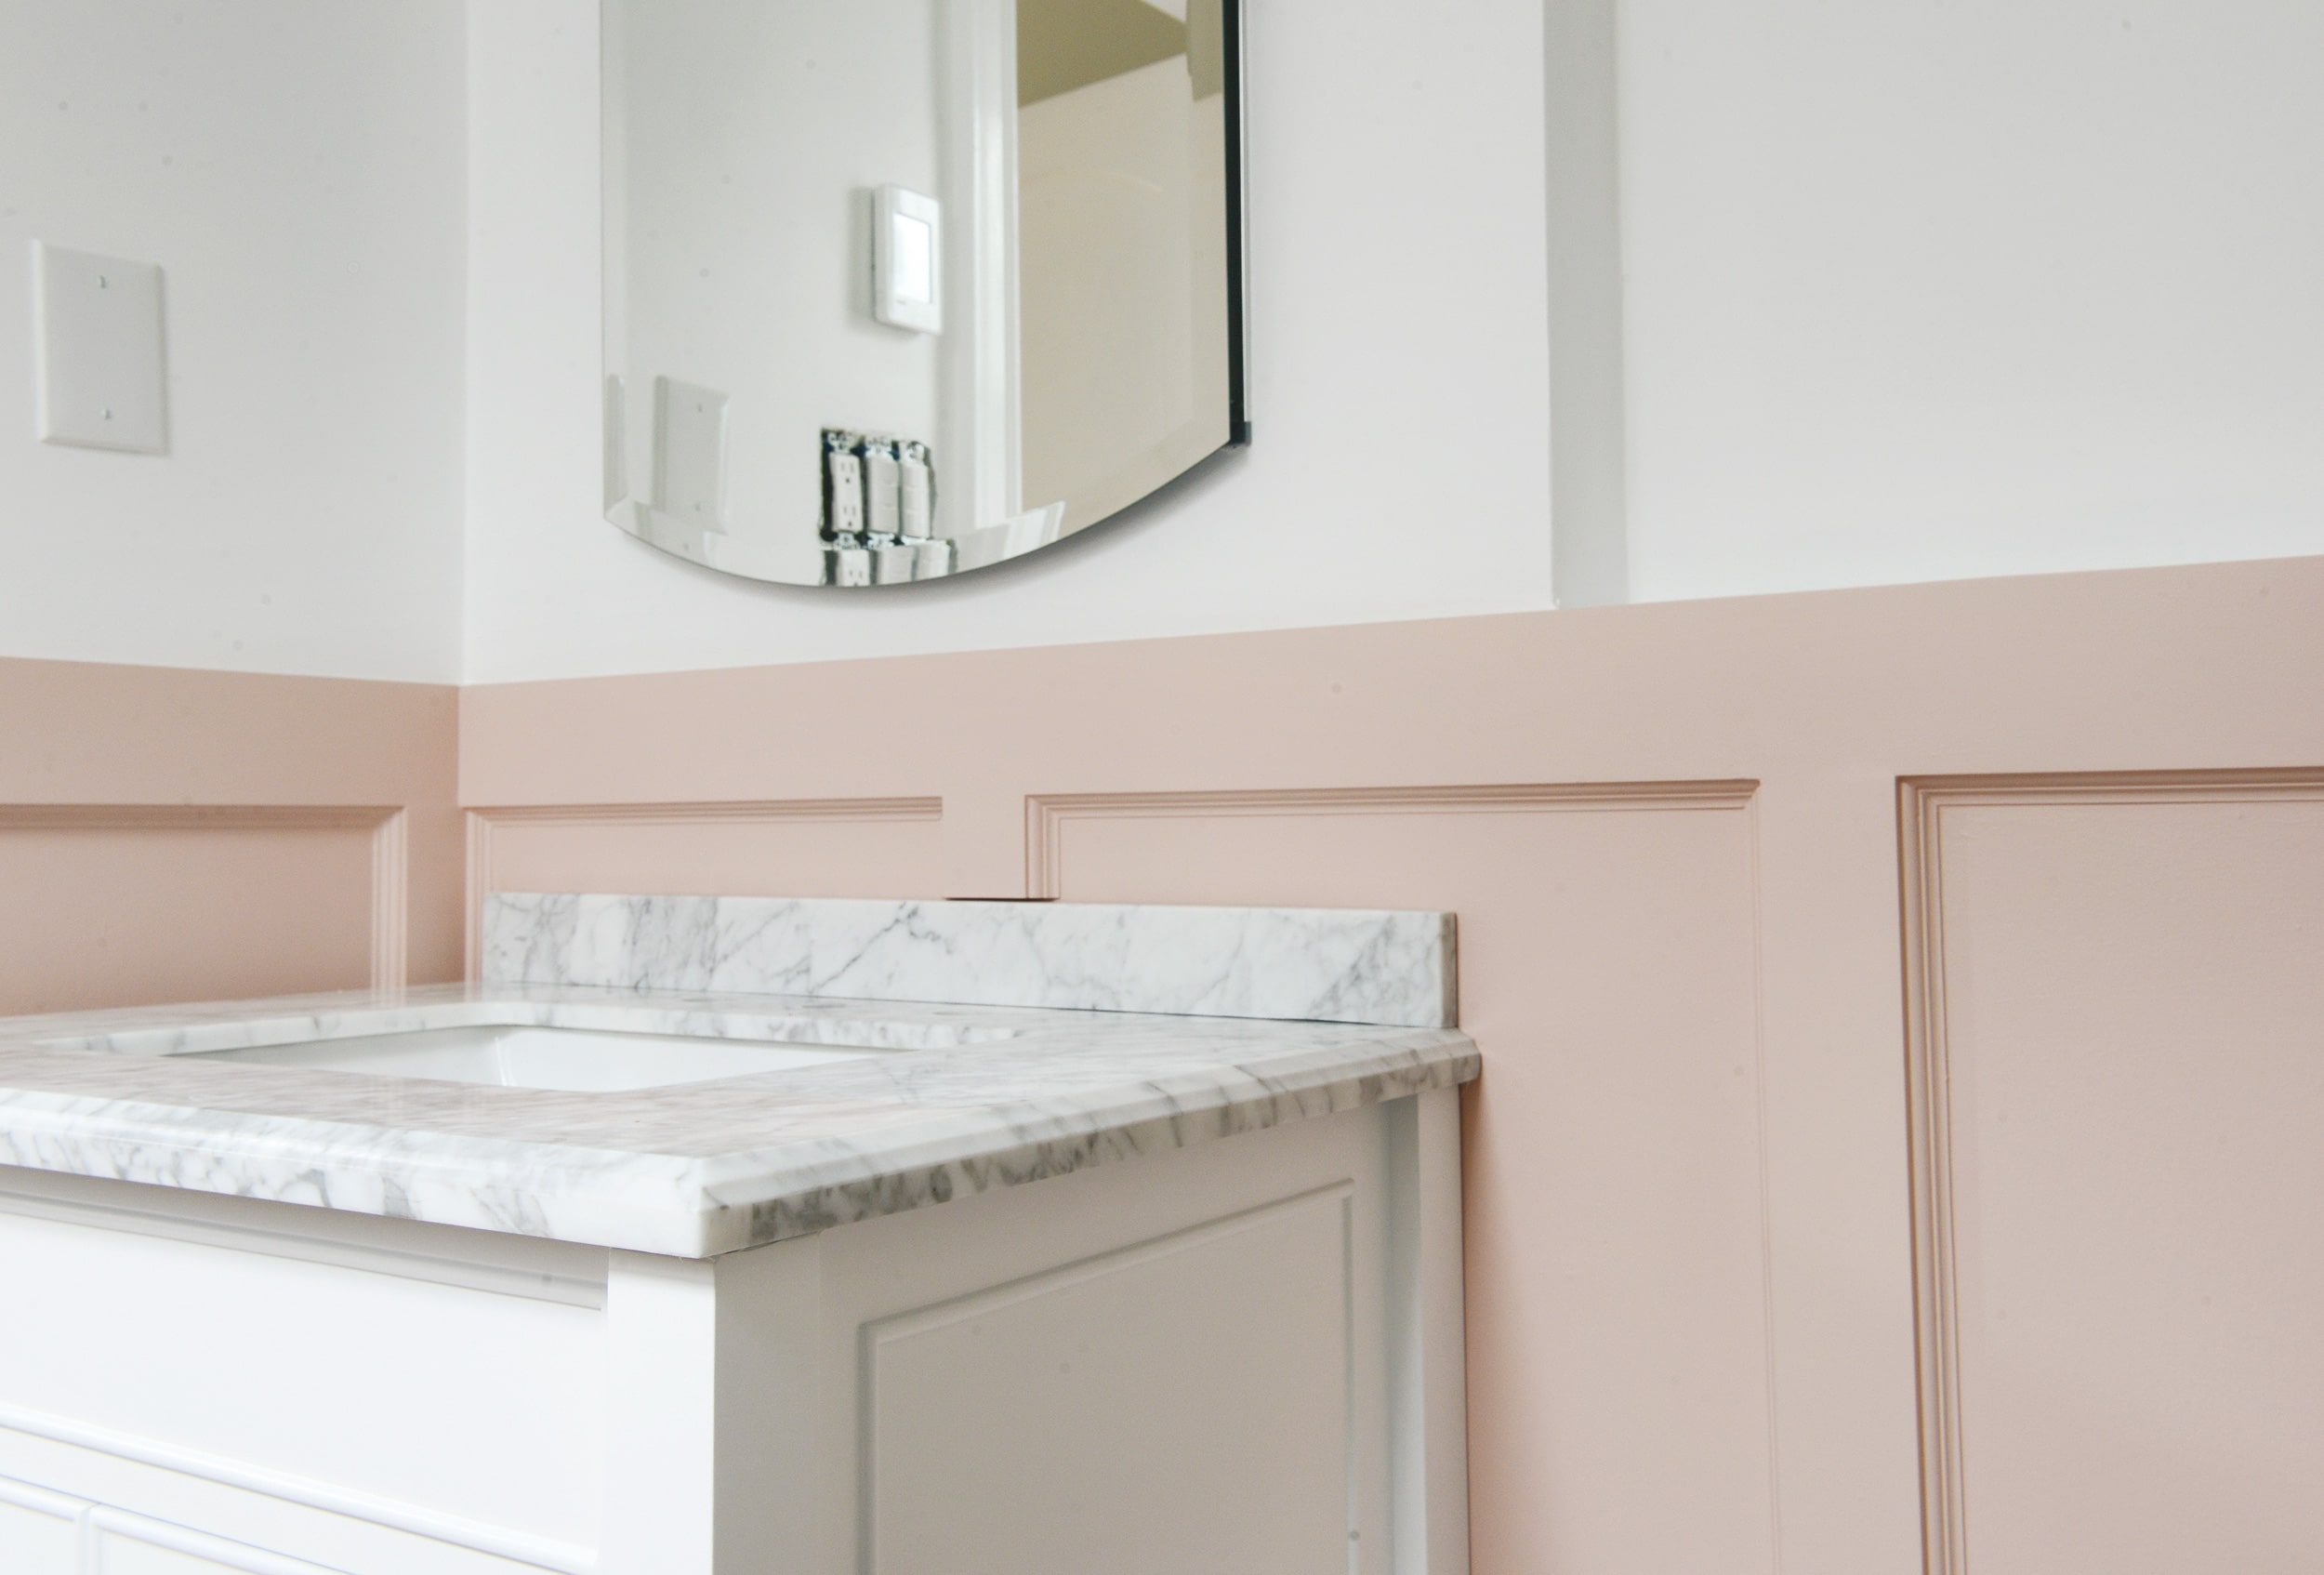
As mentioned before, the detail trim molding ended up mimicking the edge of the marble vanity top nicely! I wish I could say that we planned it that way, but we’re happy all the same. You’ll notice that we left a tiny gap above the backsplash (which we trimmed down on our wet saw to keep the proportions of the wall treatment looking nice) to allow for the vanity to be leveled, but everything will get caulked and finished down the road.
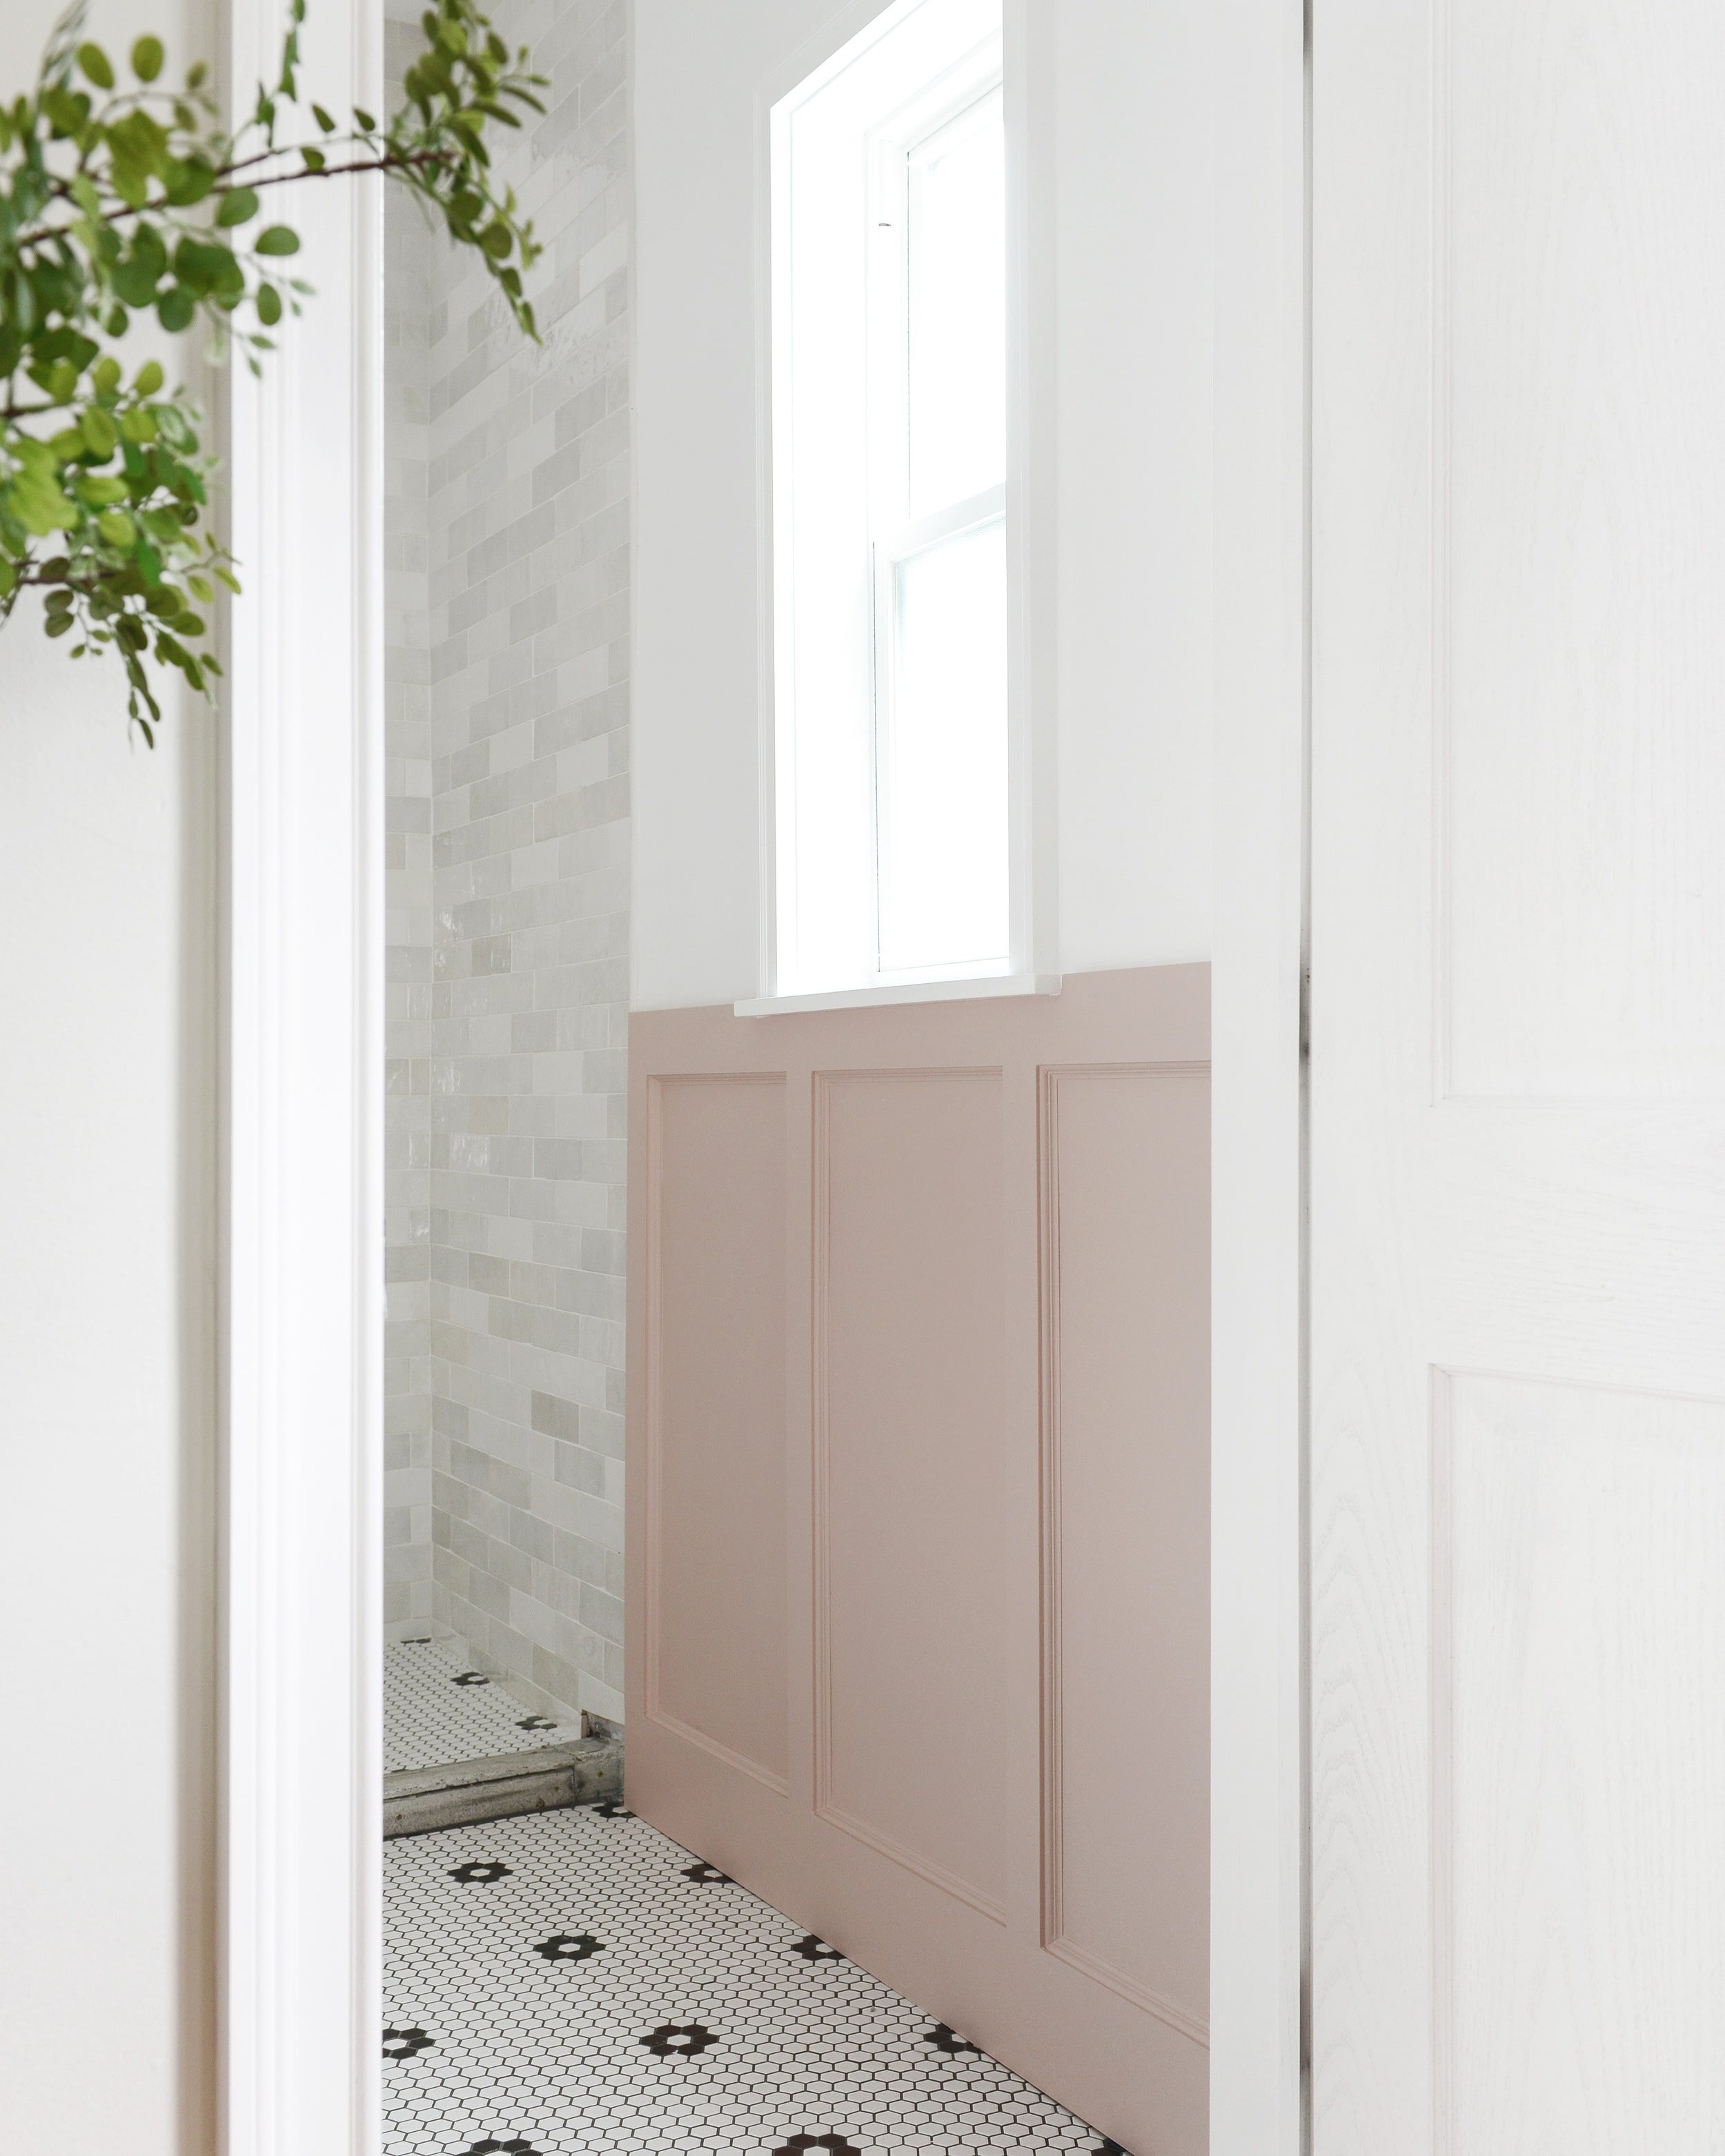
The newly installed subfloor gave us a level base for the new tile, and all of the trim work meets the flooring so well! We love the custom touch of the slightly metallic black flowers set into the white hex tiles. The pink board and batten and the tile pattern pair together like PB + J.
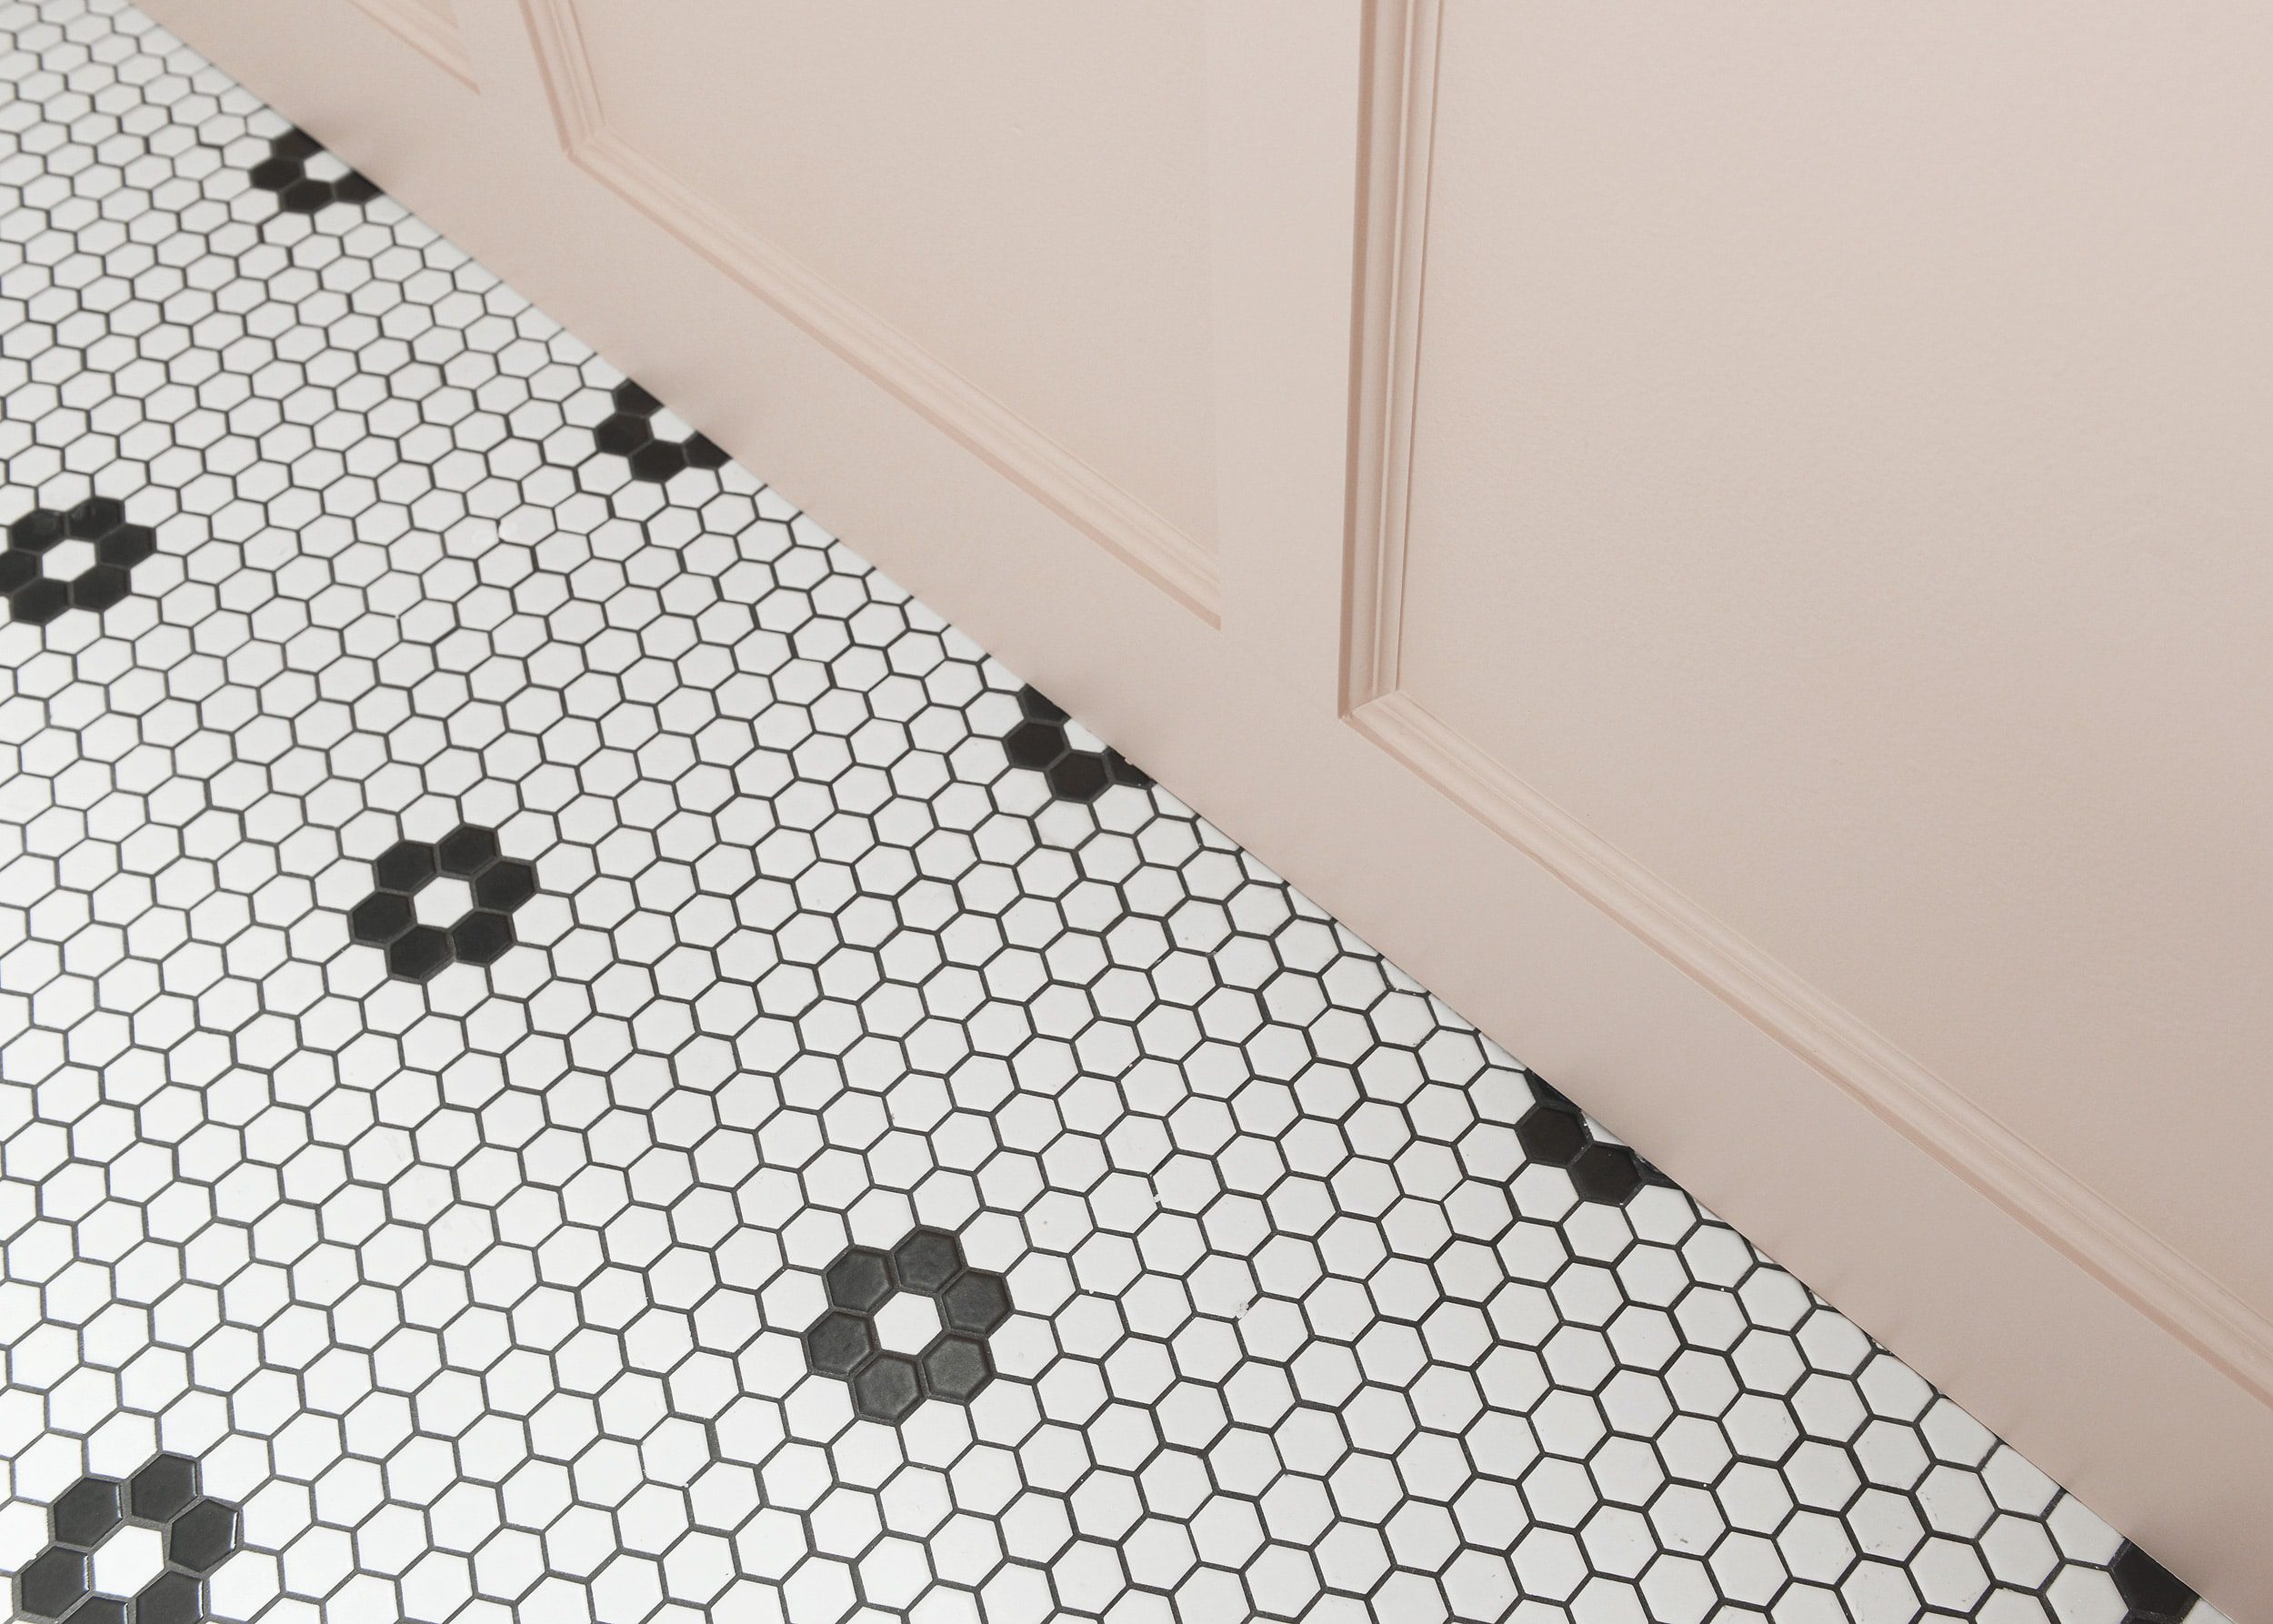
The seam between the tile and the board and batten came together better than we expected as well! The edge of the wall treatments meets right up to the pencil tile that lines the shower tile. We love how the pink pulls some of the warmer tones out of the varied wall tiles and keeps the room feeling inviting.
Now that the board and batten treatment is complete, our contractor will be installing the stone slabs in the niche, transom window, shower curb, and ledge. Once the stone is installed, our glass fabricator will take measurements, and then we’ll be one step closer to a functioning bathroom! We can hardly wait to have a second bathroom again, but it’ll certainly be worth the wait!


Thank you for my new obsession. That pink is everything!
Thanks Tracy! We’re loving it too!
Absolutely gorgeous! And so fun!
Thank you Emmeline!
This is awesome! I love the formula you used on the spacing. We can’t wait to see the finished product in person.
Math is not our strong suit, but we got it done!
Hey! Don’t lump me into that, Vargo. ;p
Beautiful! And, I can see a sliver of mirror that looks exactly like what we need for our bathroom reno. Would you be willing to share pre-reveal? Thank you!
It’s a GOOD mirror – we’re so happy with it! You can see everything we’re using in the mood board here: https://yellowbrickhome.com/black-white-pink-bathroom-mood-board/
Right. In the post. That I read. I apologize, and thank you again!
Tough love time: There is too much going on in this bathroom! Two different tiles, texture on the walls with the B&B, two different paint colors, marble vanity, AHH! It’s too much. Too many textures, colors, design elements for the eye to know where to land. Love you guys, but this one is feeling like a miss to me. It’s hard because there are so many pretty things and the natural inclination is to have them all! But restraint is always a virtue when it comes to design. Just my two cents! Don’t hate me!
No hate! :) We think that small rooms can handle a little more punch (especially behind a closed door), but we completely understand how that won’t be for everyone. We appreciate your feedback!
I think it is jarring not because there are so many pretty things exactly, but because the styles and eras of each of the elements clash with one another. The floor tile is legit old-school original style, but it needed to paired (to my eye) with the very simple plain shower wall tile you’d have seen with this floor 100 years or so ago. The shiny shower tile is pretty in itself, but clashes in era with the floor – I think it needs more modern floor tiles in much larger size matte finish tiles.
The shower hardware design works well with the floor, but clashes with the brass lighting hardware (not only because of the mixed metals, which doesn’t work as well in this small space as it does in a somewhat larger spaces with more places for the eyes to go), but also because the lighting style is so much more modern than the shower hardware. (I can’t yet tell what the sink faucet when installed, and vanity door handles, will add to this.) I usually like the way you guys mix metals and styles, and have learned from your posts on this, but in this case, I don’t think it works.
The vanity style doesn’t work with the floor – which floor is crying out for an old-style pedestal or wall-hung sink anyway, to me – but I’m not sure that vanity has a style that I’d like anywhere. The marble countertop works well with with the floor, and might be OK with the shower tile, too, but the three together are tough on the eyes, making this bath look disjointed in the last post on it, even before the addition of the batten – which doesn’t play well with any of the other major elements in the room, and so much more glaringly so in pink. I usually love color and don’t love the decorating with neutrals, and am not a big fan of the light-grey-paint-everywhere trend, but this room makes me think that a grey paint on the batten might blend some of the disparate elements together a bit.
I tend to like all the things you guys do style-wise, which is why I love reading your posts, but this room seems like a big departure. I can’t help but think that sourcing all the elements at one store might somewhat account for that. So I kind of agree with Kat – but as it is your bath, all that matters is that you love it! (It took me some time to come to embrace mixed metals in a room, and having only open shelving and no upper cabinets on kitchen walls, both designs I really like now, so maybe you guys are just way ahead of me on design here as well.)
We appreciate your thoughtful reply Ann! Our goal was not to make it look like a time capsule of all period-correct pieces, rather, more of a blend of transitional with classic. We feel like this bath is really ‘us,’ but hopefully the bigger picture – once it all comes together in the end – may make more sense! Either way, our different design tastes is what makes this community such a great place to learn from one another.
I love how this turned out! I think the dip in to the top rail from the window is my favorite part of it. Saving this so I’ll always have that formula, I’m pretty sure I would’ve tried the center math you originally tried too haha.
We love that little detail, too!
LOVE this!! Definitely going to give this a go somewhere in my home. Any worries with the MDF along the baseboard with water/cleaning the floor?
So, so, so, wonderful. We need to come back and see it in person!
We’ll be waiting!
Did you use the same formula for spacing the boxes on the vanity wall as the window wall, or carry the window wall spacing the rest of the way around the room- even if one of the final boxes would be a different size?
We measured the vanity wall independently of the window wall, but it was really close to the same measurement!
Hi! Question for you! How textured are your walls. Mine are like that orange peel texture and wondering if it would look as good!!
Thank you!!
Hi, Kate! Our walls are smooth. You could always use a thin sheet of plywood or something similar to start with a completely smooth surface. I think this would depend on how much it would bother you! If you did skin the surface of the wall, you could also put a ‘cap’ on the top of the board and batten – something as simple as a 1 x 3 on its side – to hide the layers seamlessly.
It’s looking so pretty! One question, I recently got talked out of using MDF on a project by the lumber guy at my hardware store. He said the toxicity levels are really concerning, especially since the piece was for my daughter. Do you know if that’s right? Did you have any concerns with using it?
Hmm, we hadn’t heard that before! We’ve used it for a lot of projects, and this is painted over as well.
It looks like there’s a lot of mixed info. The key thing seems to be to wear a really good mask when you’re cutting it. Painting it should reduce the off-gassing, from what I’ve read. I think they’re taking steps to reduce the amount of urea-formaldehyde currently in it. Doesn’t seem ideal though, and I know you guys try to be pretty conscientious and environmentally friendly.
Thank you for this tutorial! It came out gorgeous! What would you recommend for a base/back panel if you don’t have drywall? We live in an old Tudor with heavily textured walls and skim coating isn’t in our future right now. I’d love to do a treatment like this in my dining room but figure I’ll need a base layer of something installed first upon which I can install the b&b detailing. Any recommendations? Thanks!!
Thanks Ilana! You could always use a thin sheet of plywood or something similar to start with a completely smooth surface. I think this would depend on how much it would bother you! If you did skin the surface of the wall, you could also put a ‘cap’ on the top of the board and batten – something as simple as a 1 x 3 on its side – to hide the layers seamlessly.
LOVE IT. The Color is purrrfect
I love, love, love your board and batten. I love the color. I think you guys finished it perfectly. The edge below the window is so perfect. I got so excited, I went online hunting for the corner molding you guys used. I want to save the info for my next project. I could not find it. I would love to get the details…like where did you get it from? I am really looking forward to seeing the final reveal.
We got the corner molding from Lowe’s! We got all the wood at Lowe’s, actually. When you go to start your project, just browse the trim aisle. There will be so many options available, and choose the one your heart desires. :)
loving how this is turning out! Would you mind explaining the shims and how/why they’re used? We’ve had a LOT of problems with uneven drywall so this caught my attention.
What an absolutely beautiful job y’all have all done on this – you& the contractors. Just gorgeous.
It looks like the black flower of the floor tile along the b&b just peaks out of the wall base at the door but by the time it extends the length of the exterior wall there is almost an entire black flower at the back corner of the shower. I’m assuming in a house of this age the walls are not square so how do you pick your control point, does it vary by room type, material? I’m also interested in how you all decide when to let the imperfections of the house show and when do you try to camouflage them?
Oh, yes, we call that Old House Charm! We would go nuts trying to make everything PERFECT, although I do try, haha! These old walls were once plaster that have since been drywalled (before we moved in), and it’s something we’ve learned to accept. We do what we can, but we don’t stress. It’s personal preference, really, but our entire goal is to show our home as much love as possible.
Thank you for sharing your formula, we were able to use it this weekend to add board and batten to our dining room and it turned out amazing!
Yay! Would love to see pics. If you share online, please tag @yellowbrickhome! :)
How did you decide on the height? What is the height of your board and batton?
We wanted it to meet up to our window, which made it about 42” high.
Love this and am thinking about including it in our bathroom update. One question I have though is if you have any concerns about warping or the glue holding up in a damp/steamy environment like a bathroom?
We used a satin finish on the paint, which completely seals the MDF and keeps it safe from steam/moisture!
Do you have a link to the 3/4″ pine corner molding you used – struggling to find that
Hi Megan! We would have likely purchased the inside trim moulding at Home Depot or Lowe’s, but I’m not seeing it listed on either of their sites. You might want to try a specialty trim company like Metrie, or look for a specialty lumber store in your area as they might have more options available. Hope this helps!