

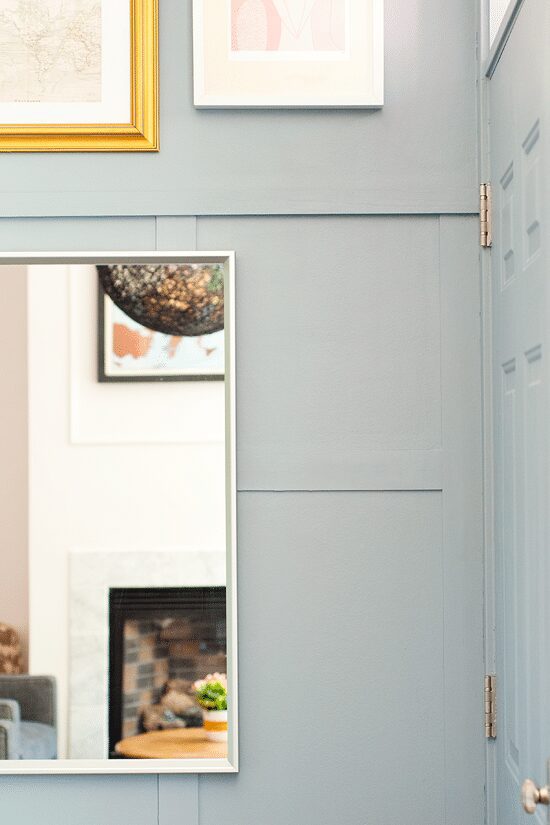
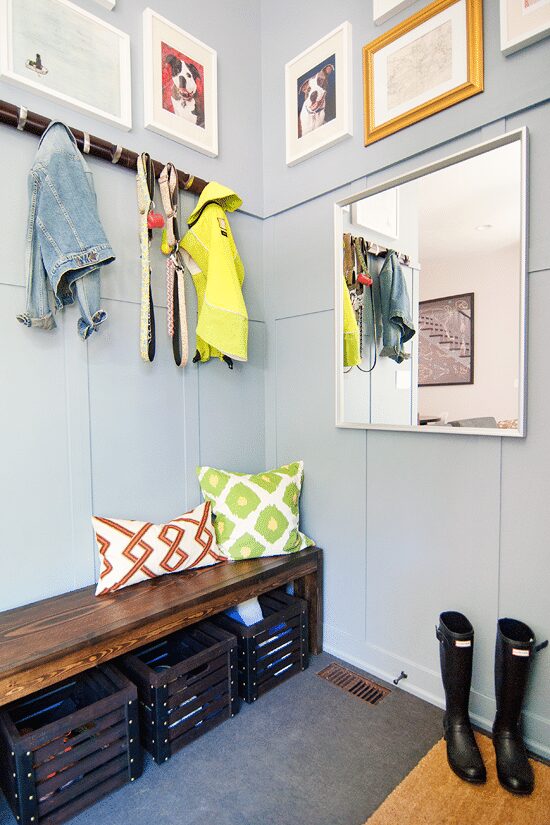
Yesterday we shared our friends’ entryway makeover as a whole (this photo of Miss M checking out her foyer is too much!), and now we’re going to dive into the most simple paneled wall DIY. I suppose this could also qualify as board and batten, although inspiration photo searches pull up B&B as going mid-way up a wall and not quite this tall. In any case – whatever you’d like to call it! – this decorative detail added so much more to the wall than paint would have done alone. I would be amiss not to mention that this was a complete team effort between us and the homeowners, and color us impressed (pun intended?) with their painting skills! Crisp lines for days, I tell you.
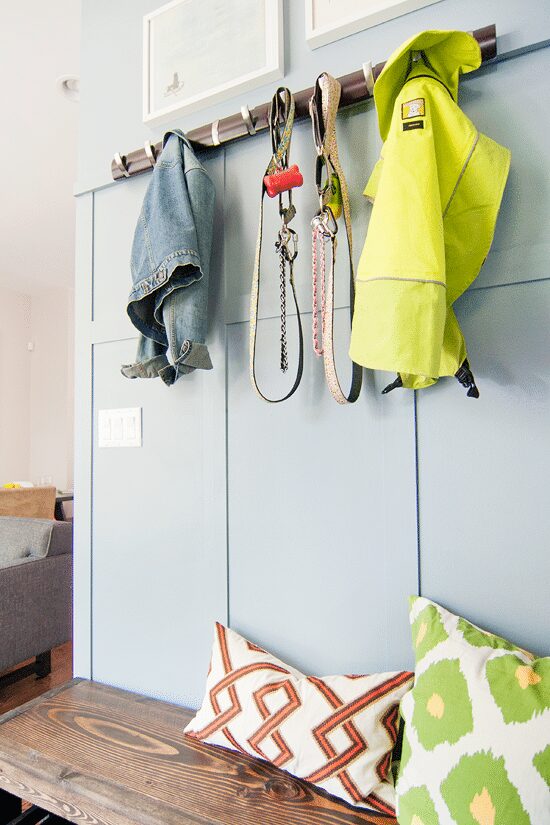
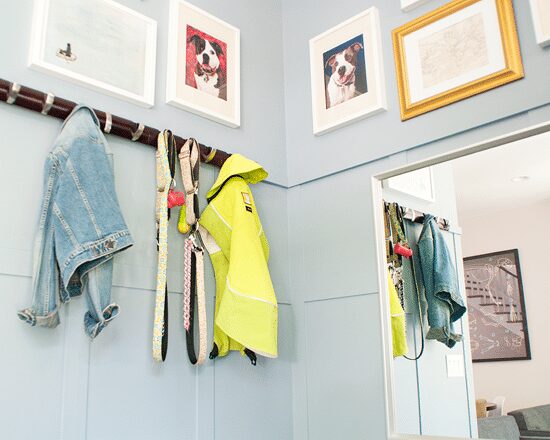
In our case, we were working with two 5′ wide walls, and we chose to bring our molding 6′ high to allow for coats and leashes to hang freely, while still allowing ample room below for bench perching. You’ll also notice that we decided to just go for it – choosing to paint not only our faux panels, but the baseboards, door casing and door itself as well! That little detail felt much more upscale and contemporary, fitting into the overall style of A and E’s home and existing decor.
MATERIALS USED:
1 3/8″w x 1/2″d x 8′ lattice strips
1″ x 2″ x 8′ select pine strips
Drywall spackle
Paintable acrylic caulk
Blue Cashmere (Valspar) paint
TOOLS USED:
Circular saw (for cuts)
Measuring tape
Level
Nail gun
Sandpaper / electric sander
Paint brush and roller
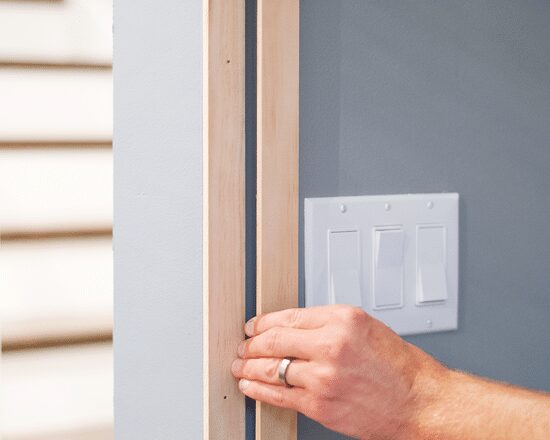
WHAT WE DID. After E painted both walls, Scott and I swooped in to begin installation. Now, here is where their house is very, very different from ours. Their home was recently rebuilt from the ground up, so every surface was completely and beautifully straight. 90-degree angles abound! No warped walls! These are the kind of walls that dreams are made of. (Sigh.) With that said, we opted to start with the vertical panels, but please understand: Most drywall is not straight. In that case, it would be best to start with the horizontal cap and measure your vertical panels independent of each other, ensuring the best fit.
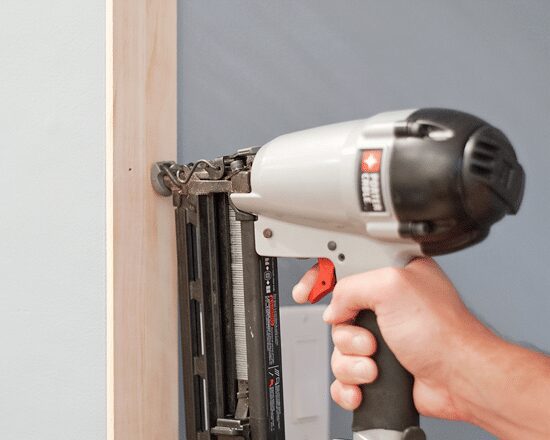
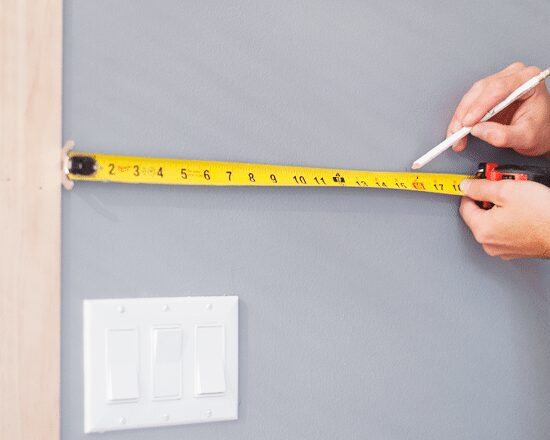
After triple-measuring to ensure that their floors were indeed the move level of all the floors!, again, we opted to begin with the vertical panels. We used 1 3/8″w lattice strips with a 1/2″ depth from Ace, but we decided to make them extra hunky by pairing two side-by-side. The 1/2″ depth allowed them to sit on top of the baseboards below without an overhang – perfect! We cut them down to 6′ in height using a circular saw, then we used our nail gun to put them in place. (Side note: we’ve seen strips of MDF do the job, too!)
We settled on a measurement of approximately 16″ between each of the vertical strips. Not only did we think it looked the best aesthetically, but it allowed the panels to be the most evenly spaced. This will be different for everyone, but it’s best to stick within a range of 12-18″.
As each piece of lattice went up, we obsessively used a level to make sure that everything was pin straight. (It always was. So dreamy.) Using the leftover 2′ from our lattice, we were able to add horizontal molding (about 16″ down from the top of the vertical strips), which was simply personal preference. Each and every horizontal gap was measured, as they were all ever-so-slightly different from one another – even if just by a 1/16″ of an inch.
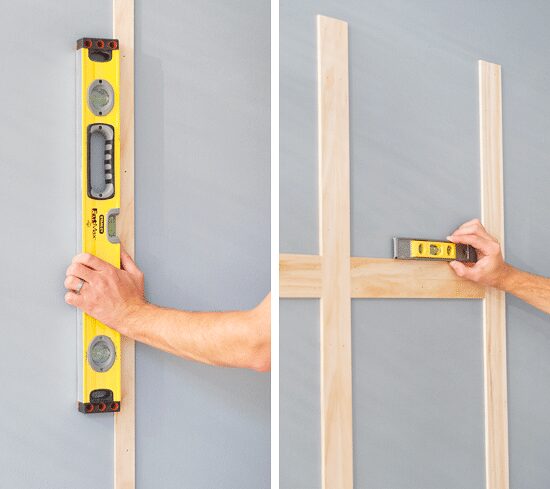
With all of the lattice in place, we cut down our thicker pine 1x2s to the width of the walls and nailed them into place. We purposely chose something that was a bit more hefty, not only for visual interest, but to balance out the taller baseboards below! Using spackle and caulk (where needed – their walls were ridiculously straight!), we patched over the nail holes and seams and filled in any gaps where our boards met the wall.
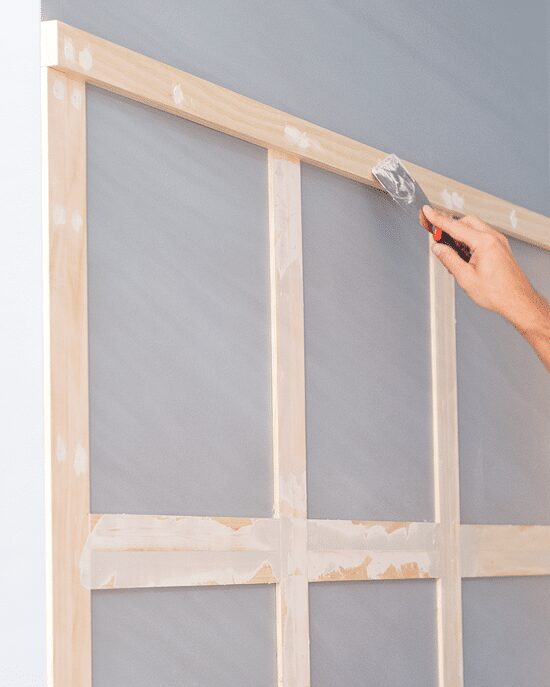
A and E finished up the job by sanding everything smooth and painting the faux-panels the same color as the wall, Blue Cashmere by Valspar. We chose an eggshell finish overall for wipeability – especially since it was also applied to the baseboards and door. The sheen is perfect for this heavy use area!
We completed the paneled detail over the course of 1.5-2 hours one evening, and with that minimal effort, the finished product is absolutely worth it! Scott and I are considering areas in our home to do the same; what do you think?
Psst… See the full, finished space right here!


Really like the look of this, and how relatively easy it is to do! We’ve been considering something like this for our entryway. Of course, our walls are not at all square, so not sure how it would turn out… but it’s a nice way to add a little texture to the walls without overpowering them. Great job!
For walls like yours or ours, caulk would be our best friend!
Sweetest entryway ever! So much character in such a small space. Love the paint color, too.
I am sure you did a great job, but that paint color ruins it for me, and I can’t see the beauty in the wall treatment.
I would be interested to see how your choice of sheen works out for the homeowners after some use, especially in a high traffic area like an entry. I am always a fan of eggshell on walls, but I’m weary of it on woodwork. I had a landlord paint the walls in flat and all of the woodwork in the entire property in eggshell, and it was a nightmare to keep clean, especially the kitchen cabinets and the baseboards. Then again, perhaps your (gorgeous!) color choice will help hide some of the scuffs and dirt. Have you used Valspar’s eggshell finish on woodwork before? Maybe I’ve just had bad luck!
Good call, we were thinking the darker color would be pet friendly in the entryway. I will say that the eggshell sheen in Valspar felt like it would be a good fit – even in that high traffic area, but I’ll check in with A and E in make sure it’s still working! I suppose worst case, we could pick up a quart of the same color in semi-gloss and touch up the baseboards and door. Something to consider, thank you!
we are in the middle of a kitchen renovation! i could def use an extra $200!!
I think this entryway looks just gorgeous now! Love that colour so much and the panelling adds just enough interest. How fabulous does that bench look in here too? Great job!
Thank you!