

fireplace | raised garden beds | trellis | outdoor pillows
Two summers ago, our small backyard went through a large overhaul, one of which was the addition of an outdoor fireplace! Originally, our mid-century was wood burning, but we converted it to propane using this fire pit kit plus a few random parts necessary for our install. While the propane setup usually worked fine, we found many of the connections to be finicky and more temperature sensitive than we’d like. A few cool-weather outdoor hangs with friends were cut short when the propane valves frosted over or our propane tank expired unexpectedly. On top of that, the cheapest propane exchange we’ve found in our area costs $16 and one tank on full blast would usually only last 4 hours or so. Bummer.
Converting the fireplace to its third incarnation by way of natural gas seemed like the perfect solution to our dilemma, so when we had the basement walls open while remodeling the garden apartment’s kitchen last summer, we had our trusted contractor run a natural gas line out to the backyard. We used fortunate timing and open interior walls to our advantage when having this line installed, although many homes with crawlspaces or unfinished basements could very easily have a line run to the outside. If your kitchen is backyard-adjacent, the job might be less costly than anticipated. A local HVAC contractor experienced in natural gas installations should be able to point you in the right direction.
Note: This post is for reference only, and the following is a documentation of what worked for us. Local codes vary, and every setup and connection will be different. Please consult a licensed contractor before tackling work like this if you’re unsure how to safely handle it yourself. We’re literally playing with fire here, folks!
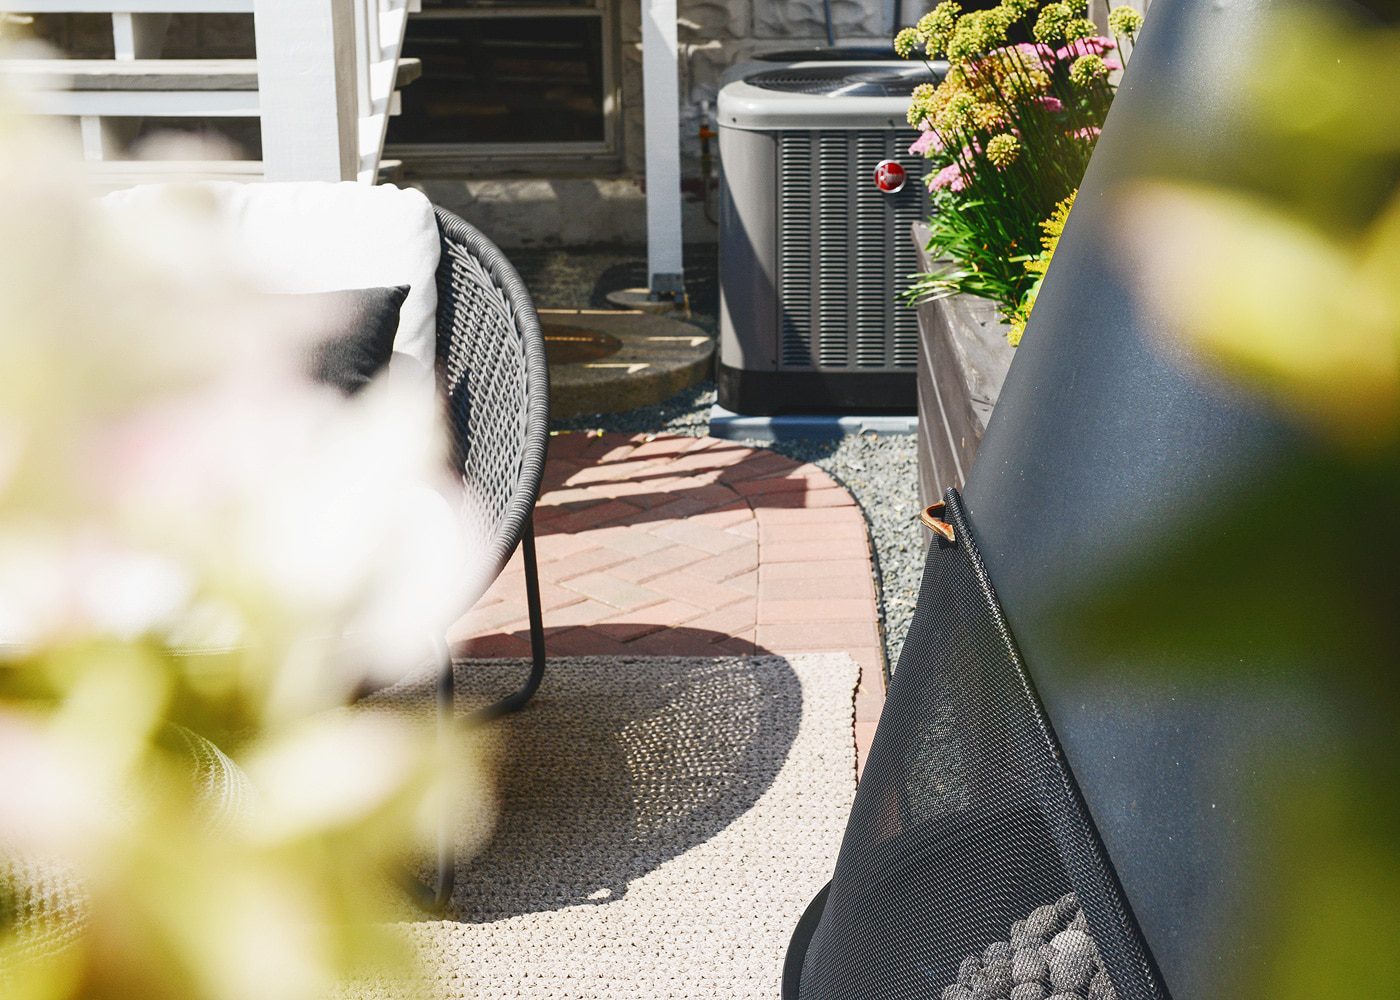
Our newish (and slightly rusty, hang tight) gas line exits the foundation just below the deck and behind our AC units (which, by the way, we finally crossed off of our list!):
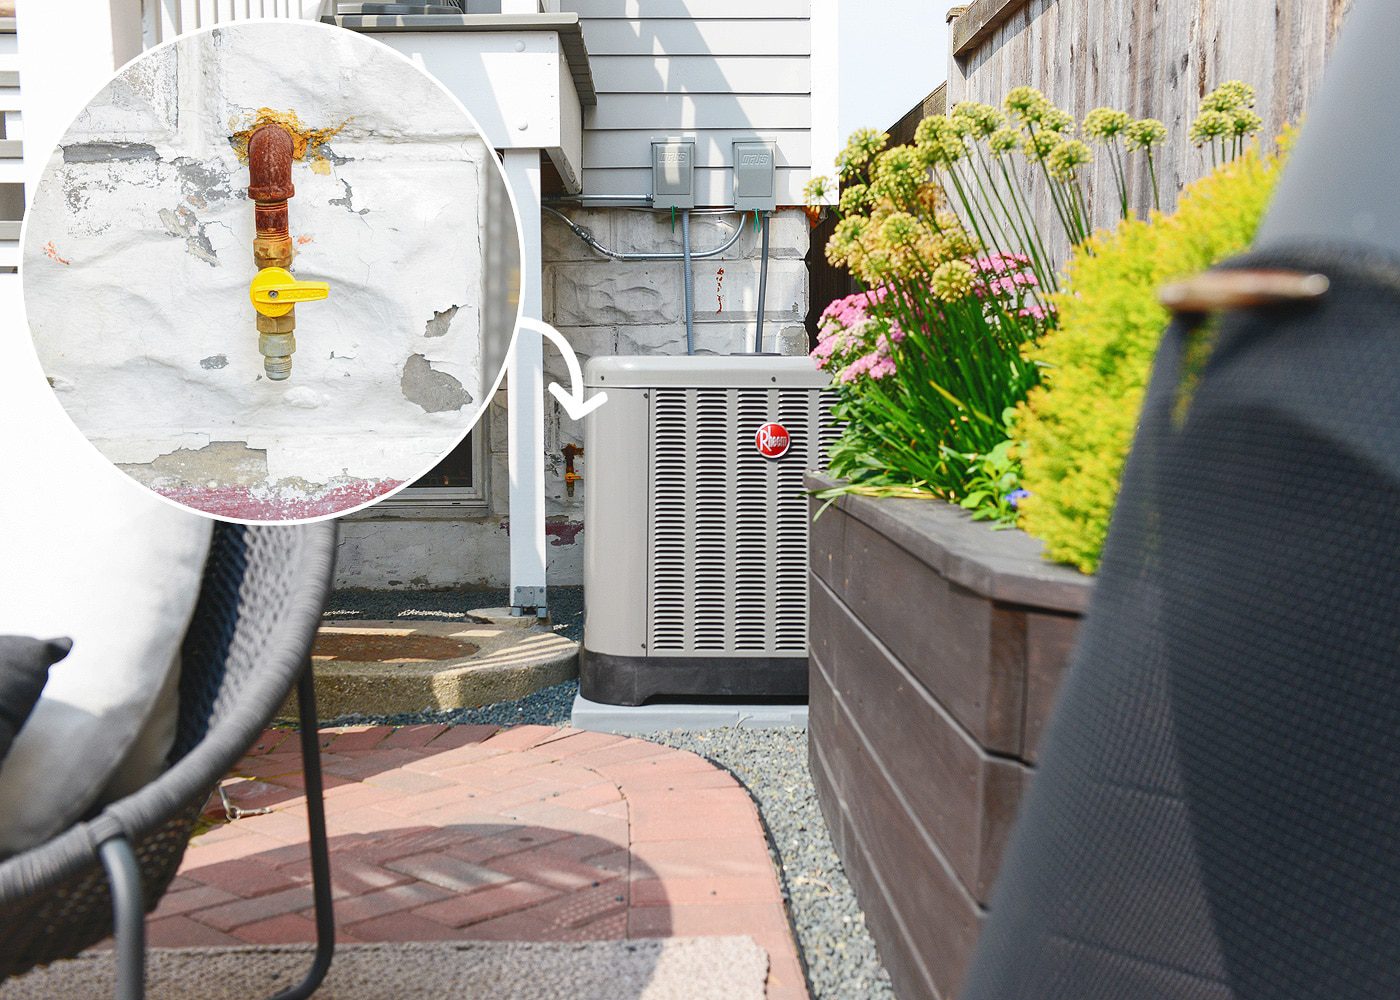
The former propane connection ended just to the left of the planter box you see above, which kept things as visually unobtrusive as possible. This still provided access to the shut-off valve, which remains in place.
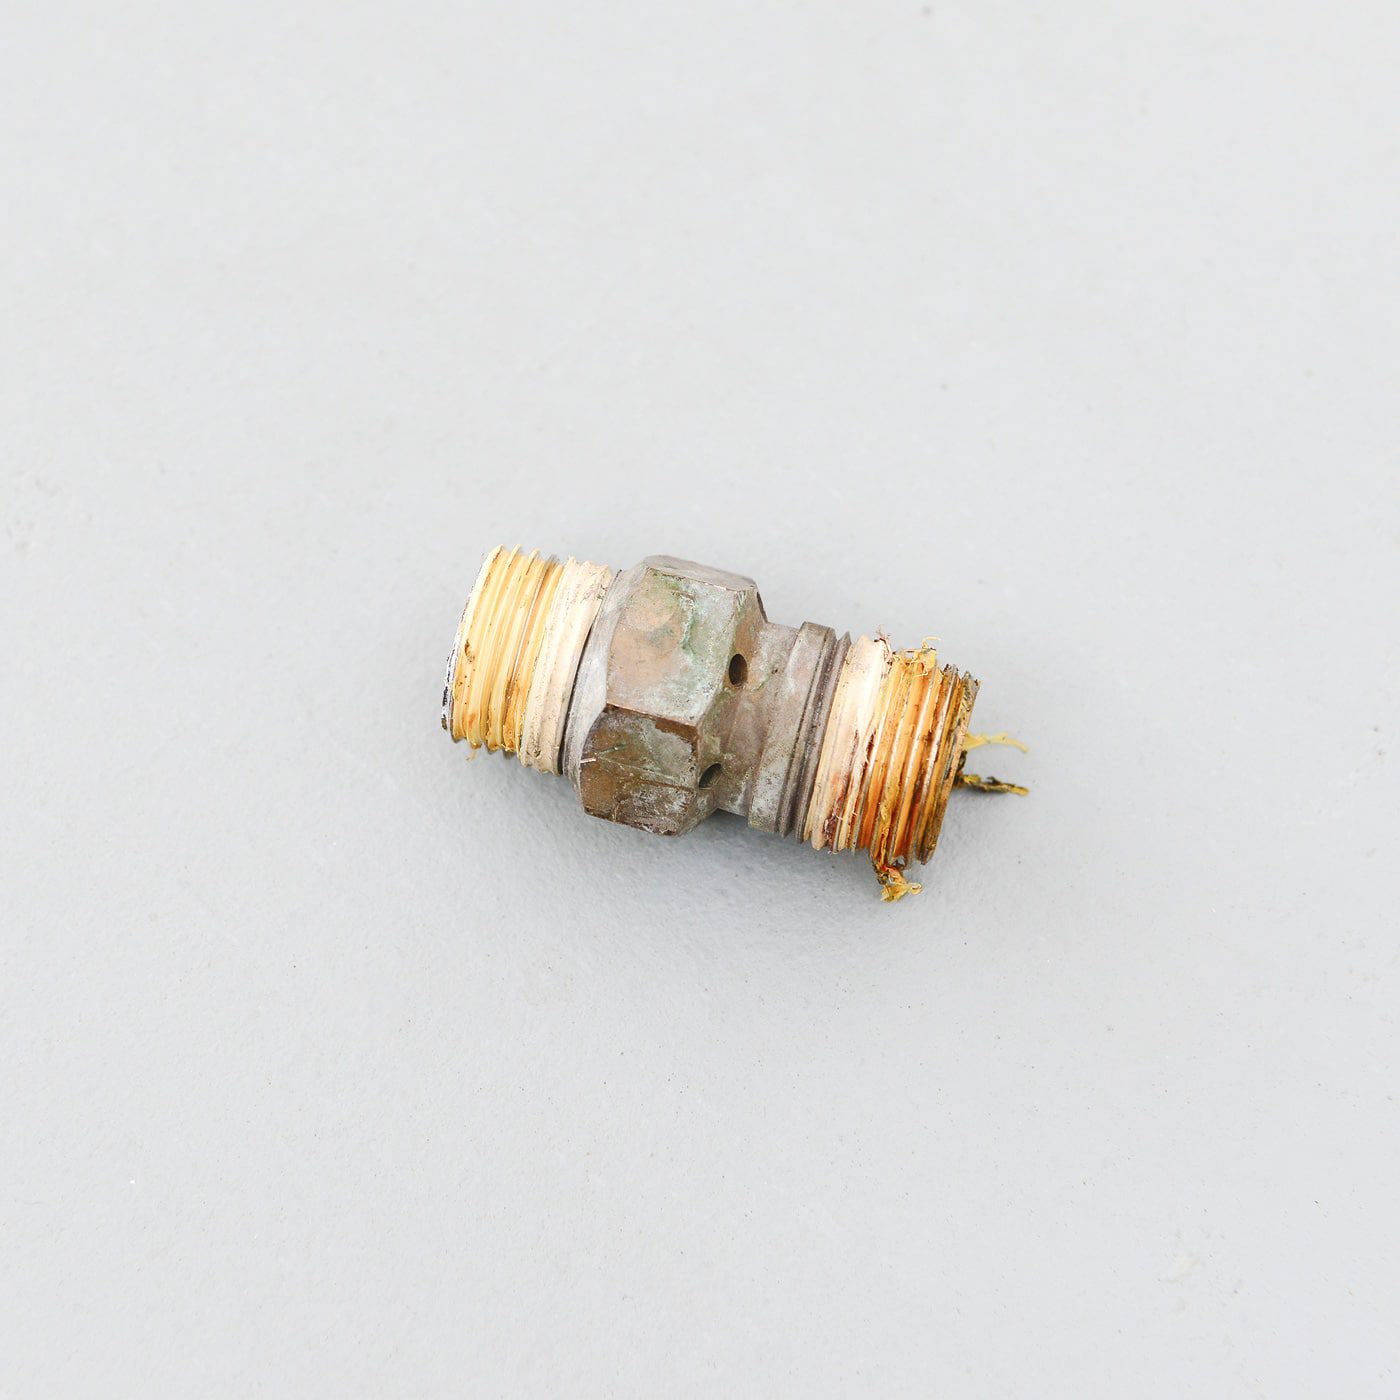
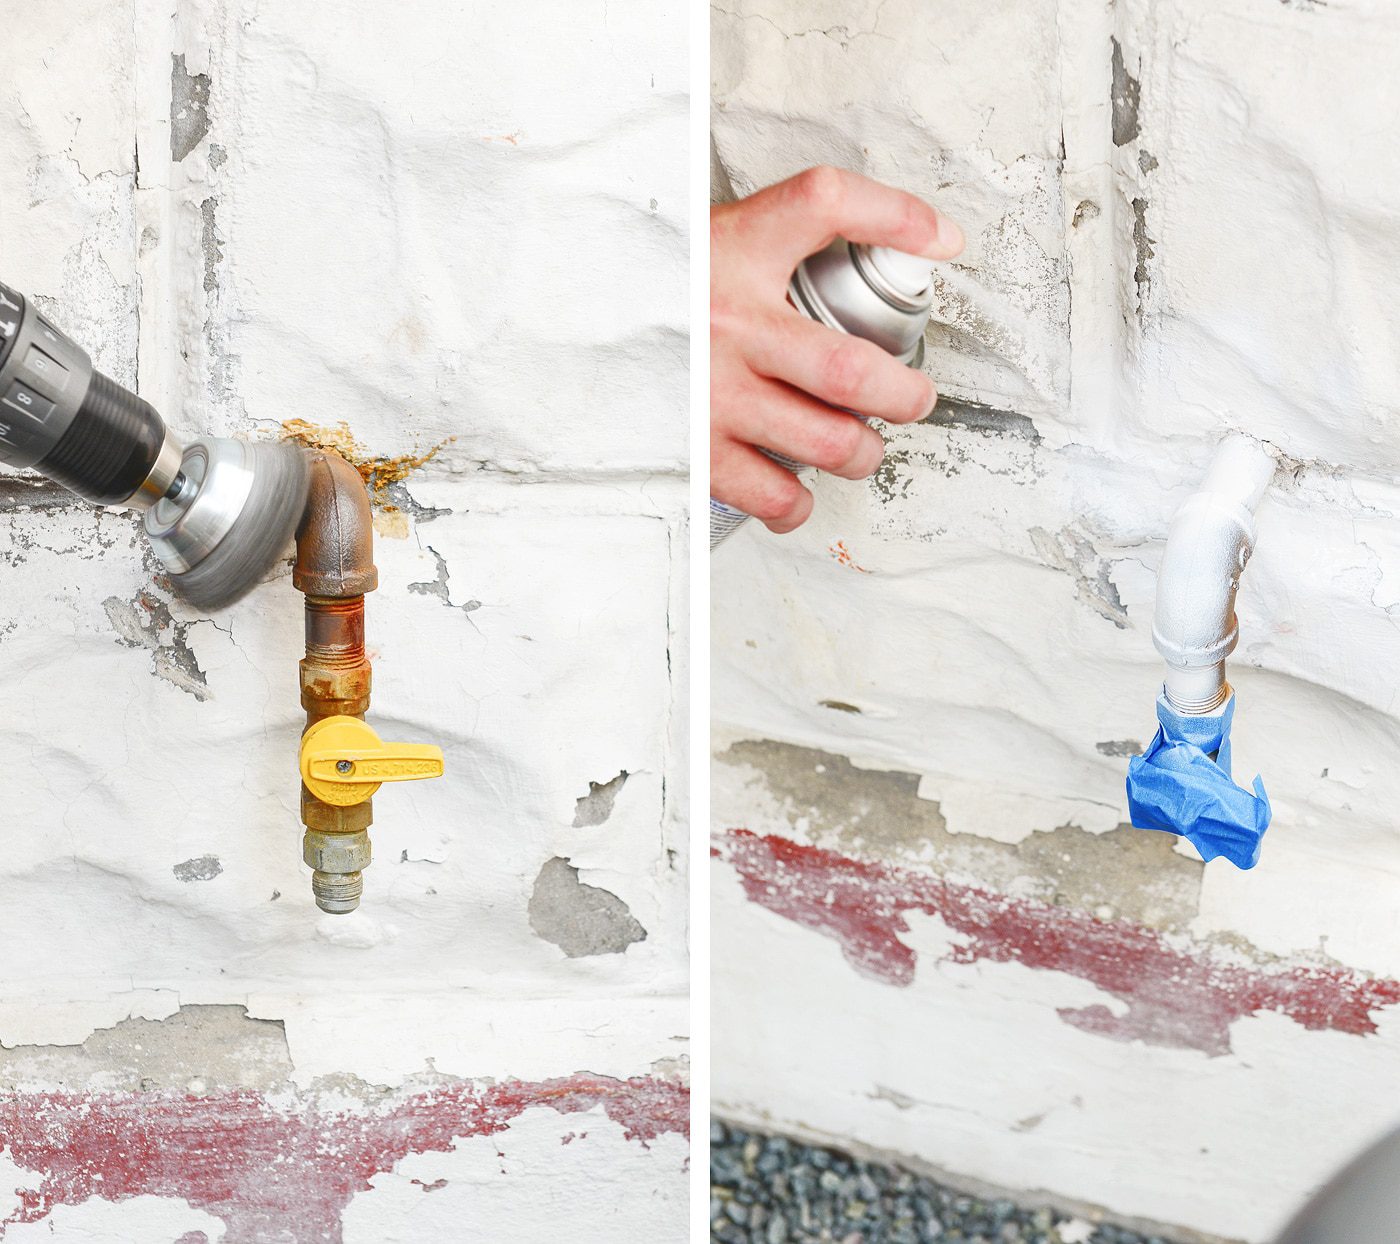
A quick phone call to the manufacturer of our fire pit kit, Spotix,(where a real, live person answered the phone!) confirmed that the only change necessary to move from propane operation to natural gas operation is to remove the air mixer; that’s the piece seen below. As the name suggests, this little guy introduces air into a propane-fueled system for cleaner flames, but it’s not necessary in a natural gas setup. So long!
Since our gas line was plumbed almost a year ago, I used a wire wheel on my drill to knock down the thin layer of surface rust, then hit it with a few coats of white primer for a cleaner look. (Please excuse the peeling foundation paint – it’s on our to-do list. Promise!)
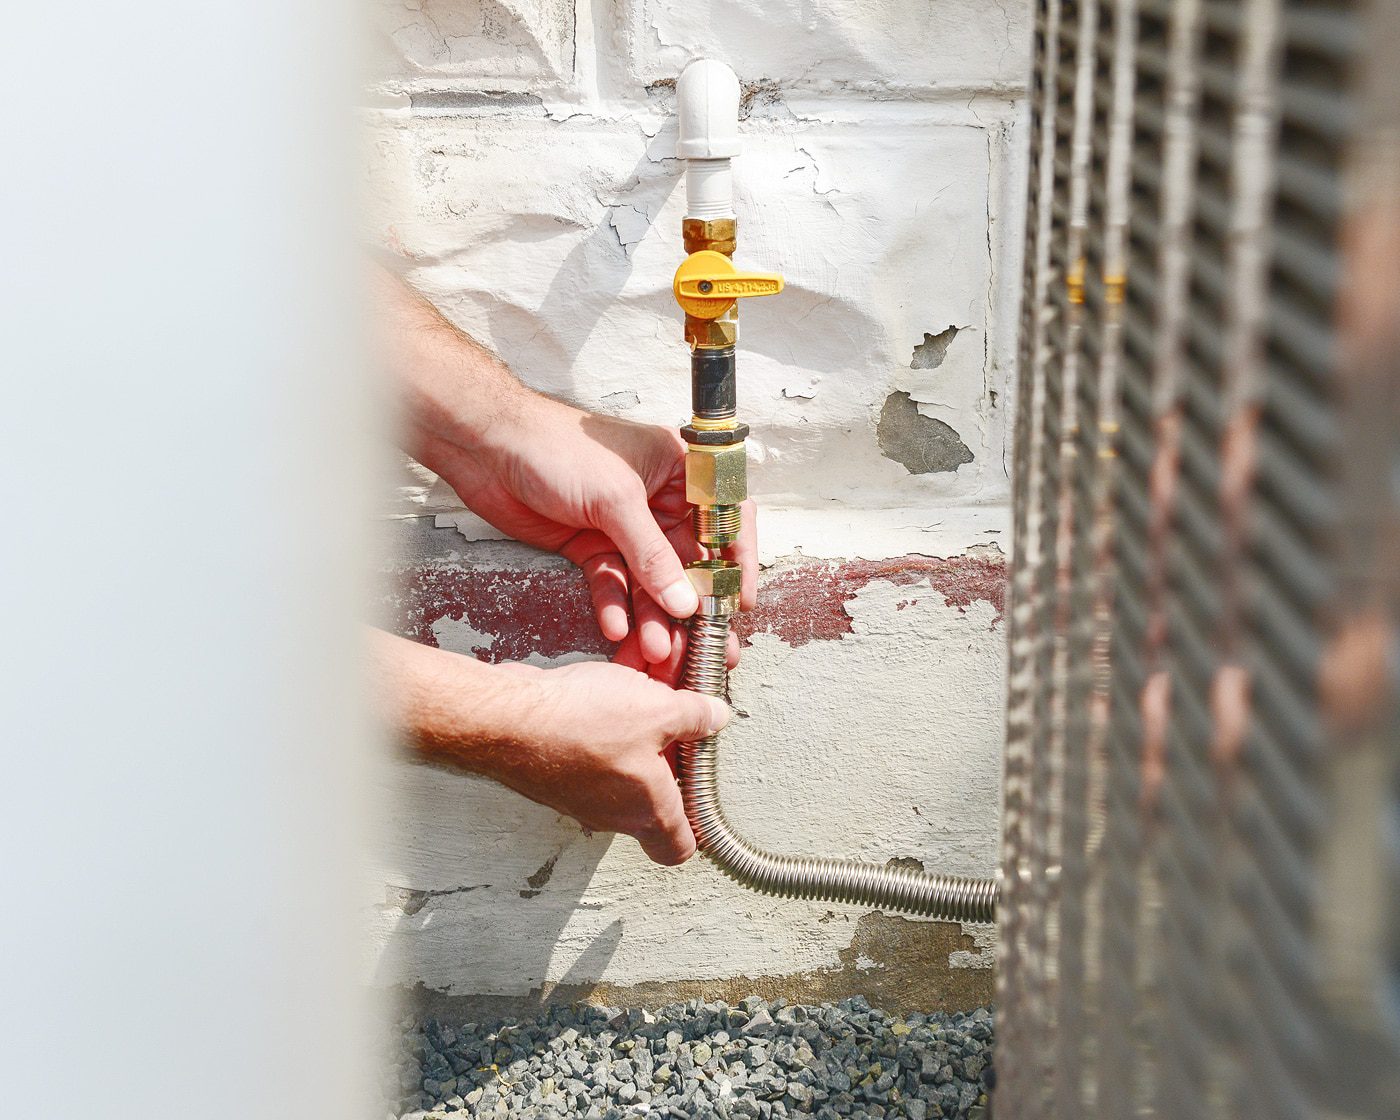
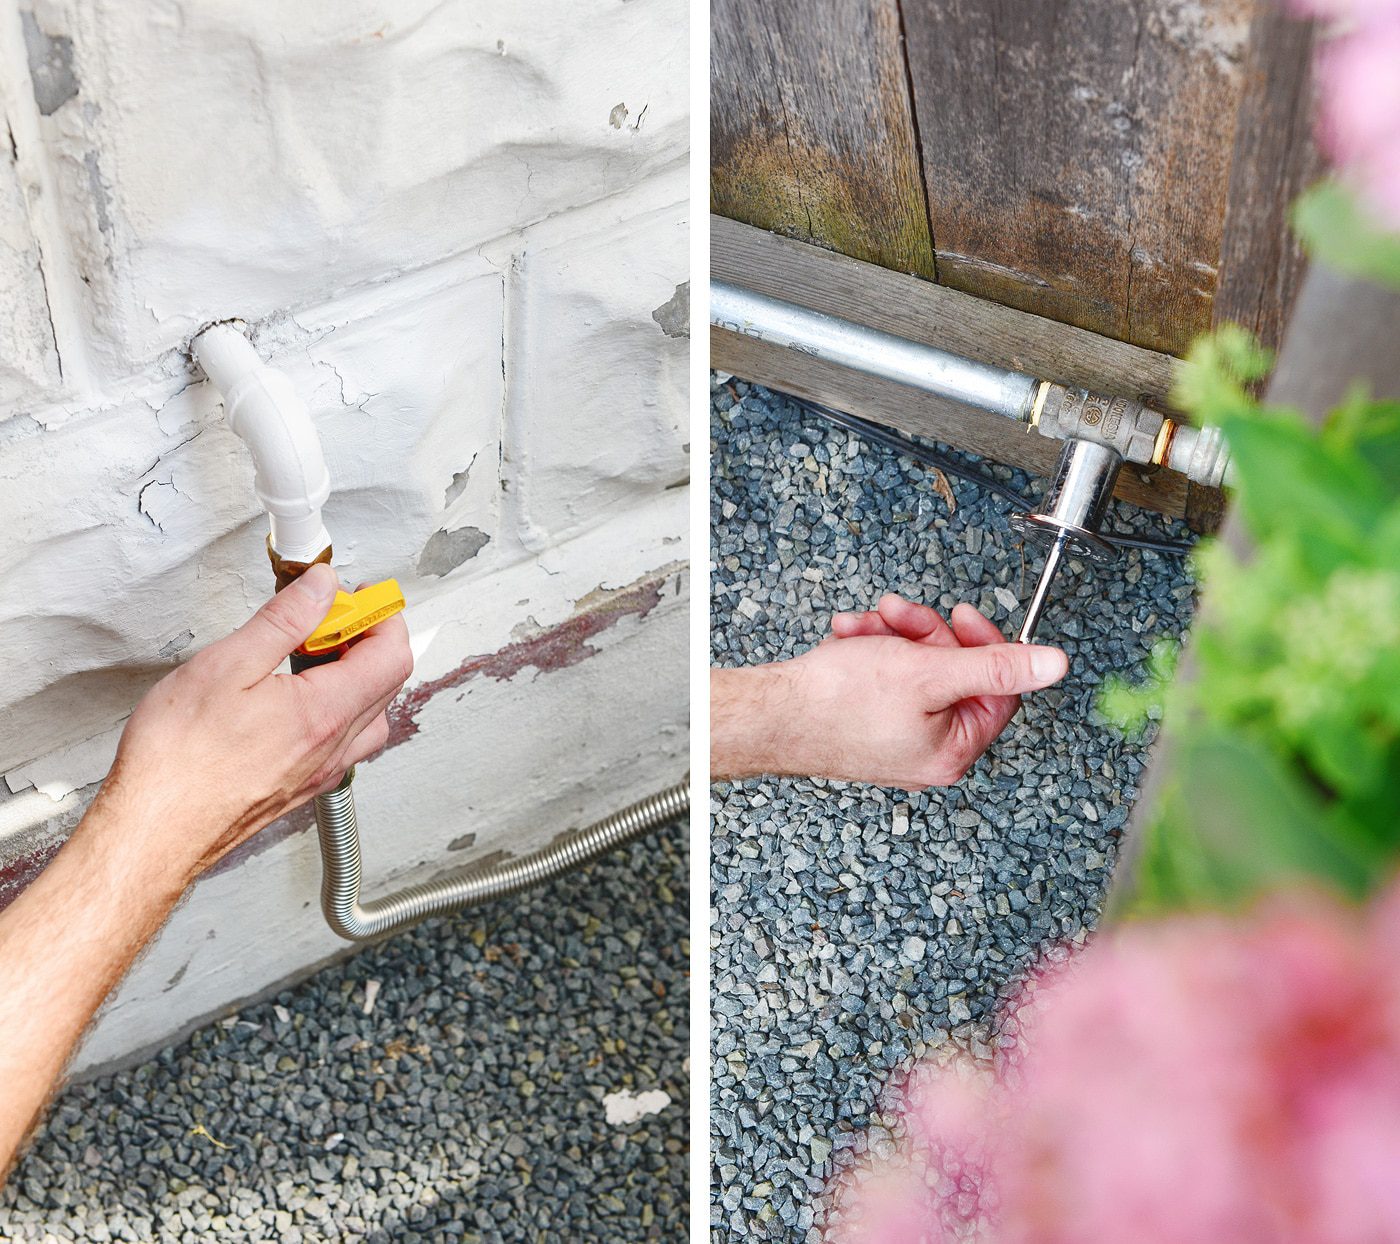
Our retrofit required an added length of custom cut and threaded 1/2″ pipe as well as a couple of bushings to complete the connection, but as mentioned earlier, all setups will be different. Below is the final junction at the house, all set up to accept the new flexible stainless gas line:
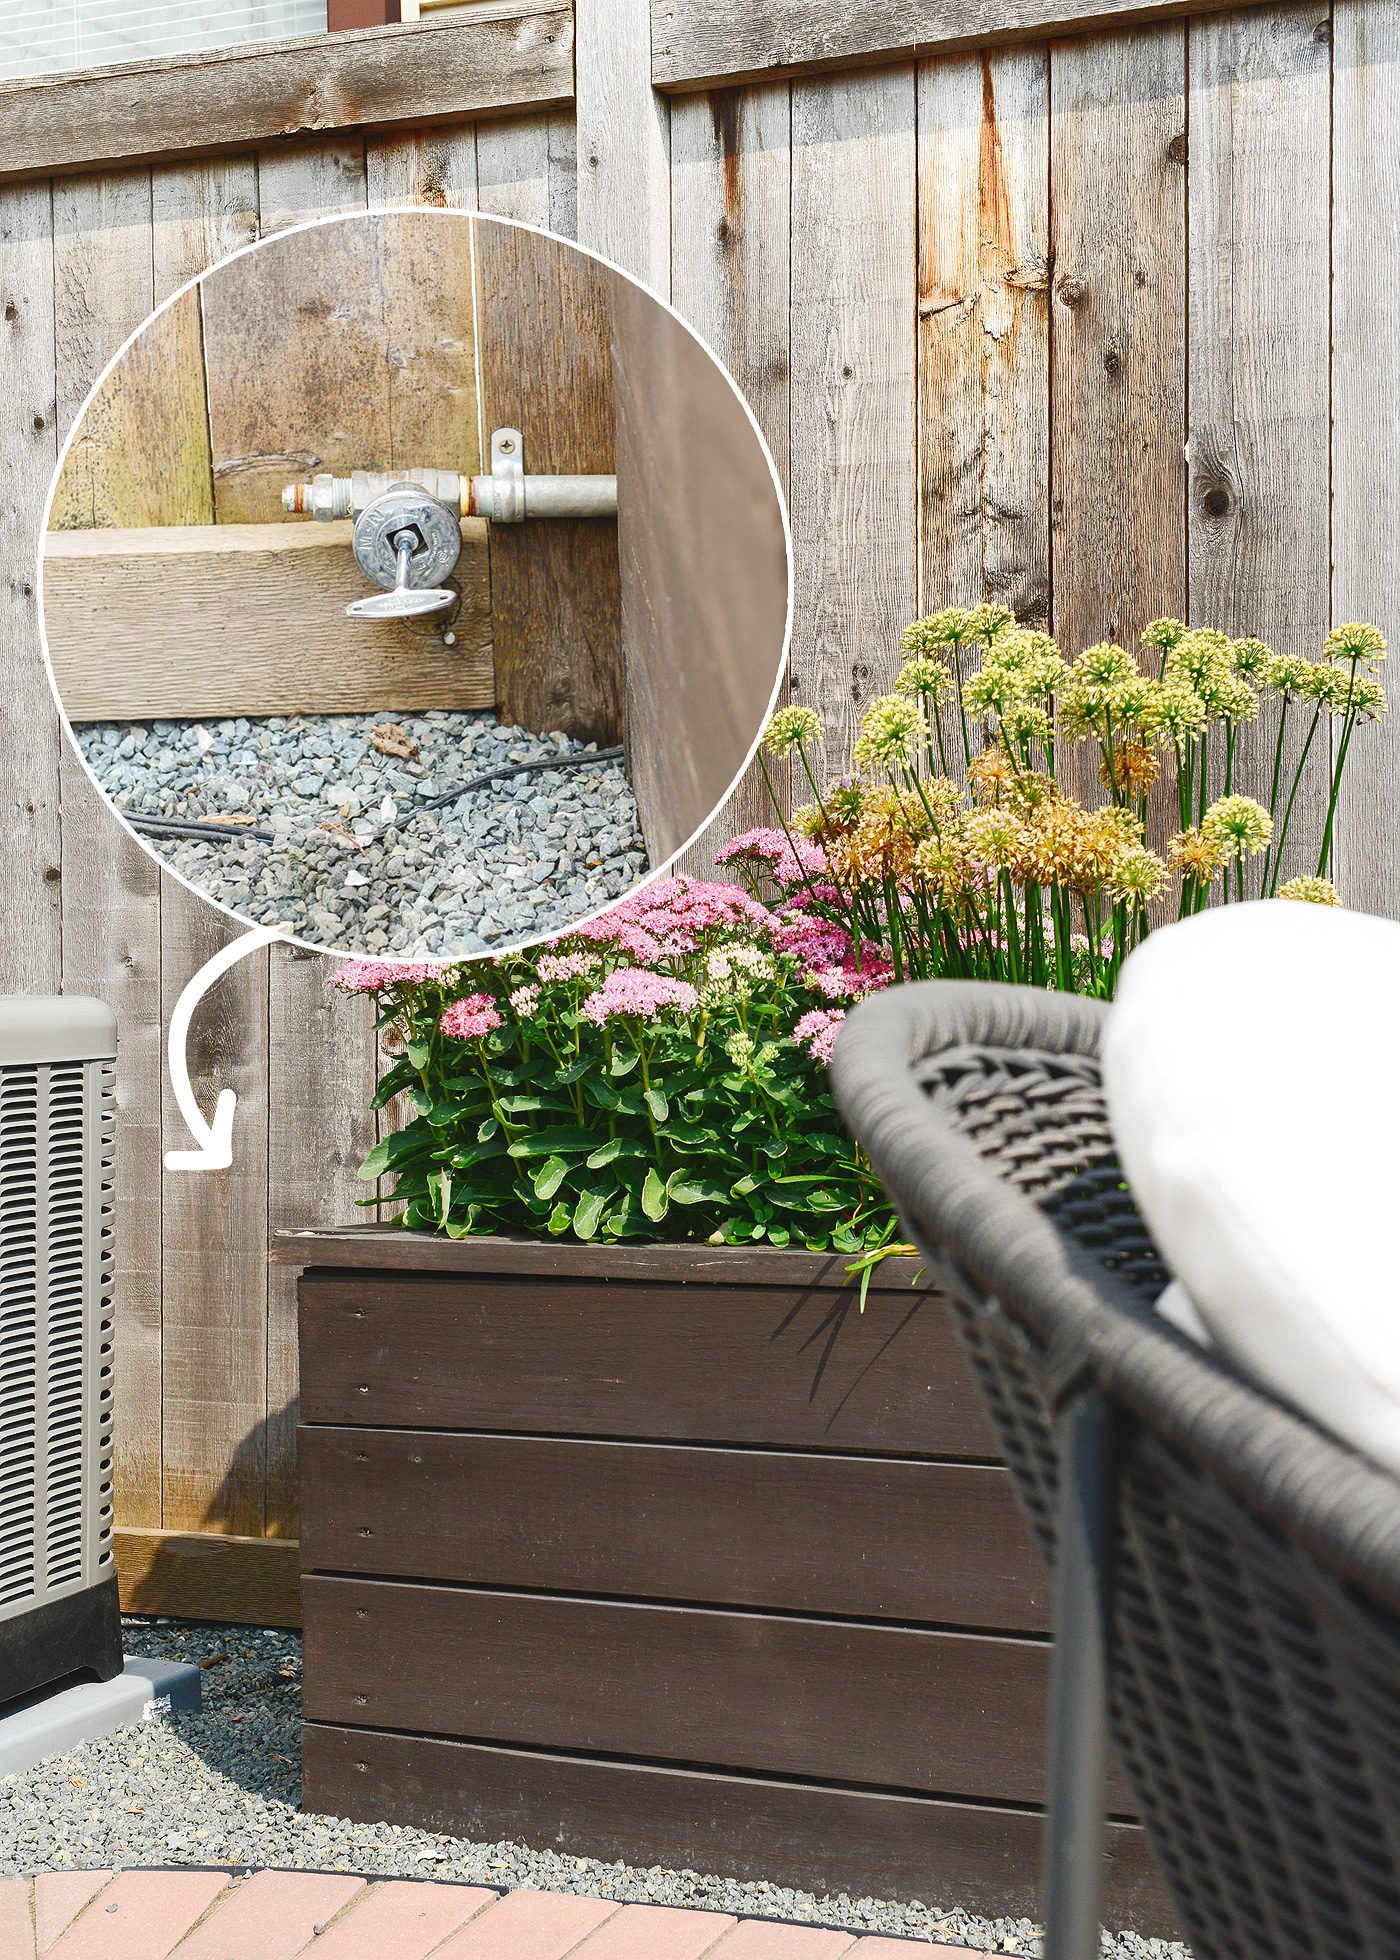
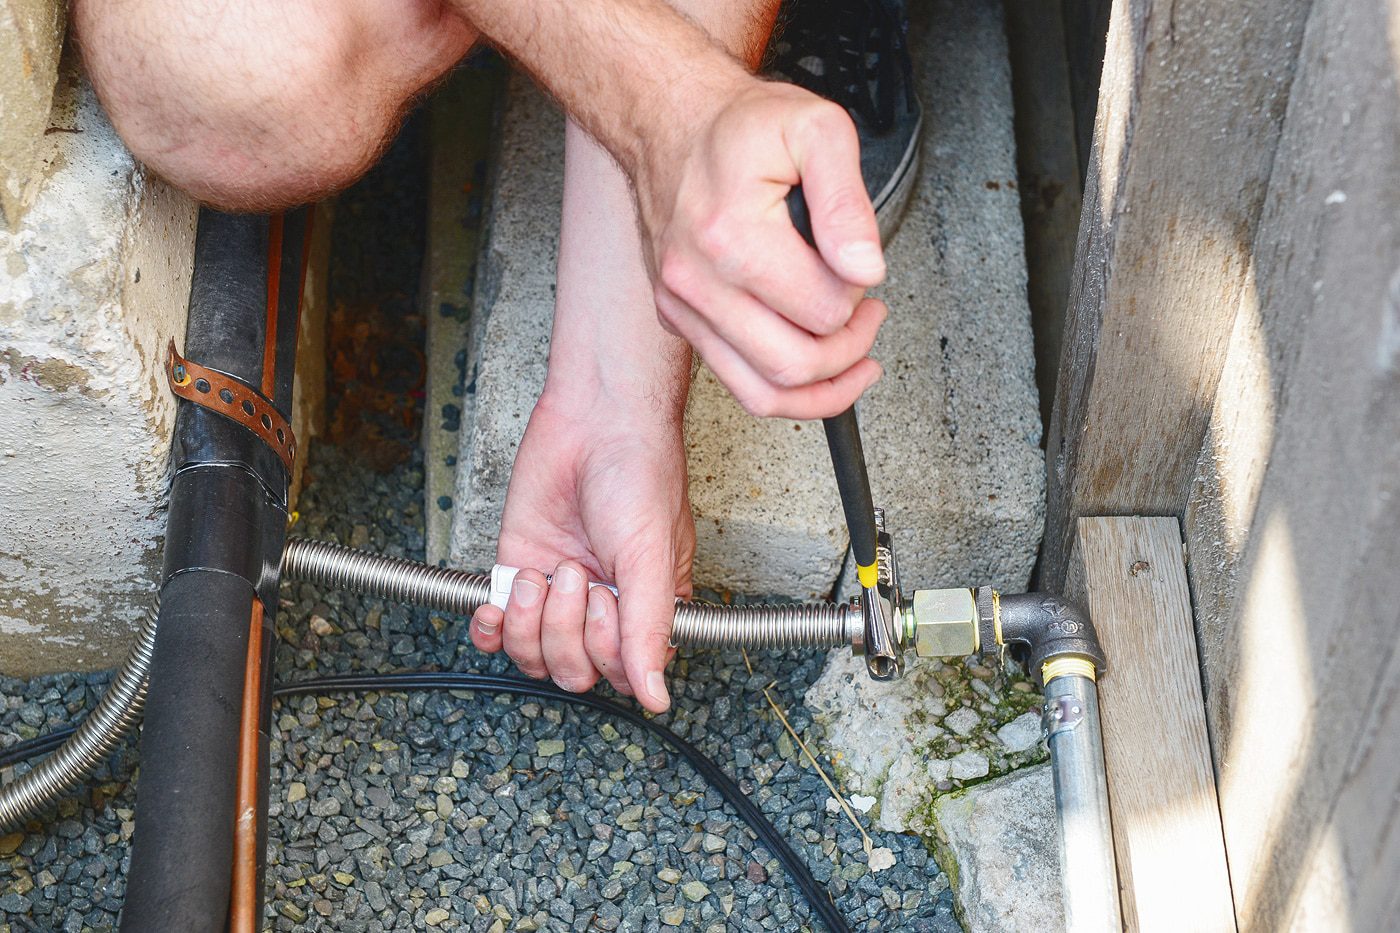
At the junction just past the AC units, a similar connection was created to allow for the attachment of the flexible 60″ stainless steel line. The flexible line eliminates complicated bends around the AC connections and can be removed easily if necessary.
The overhead shot illustrates how it all fits together. The 60″ line is a little longer than I would have liked but the next size down would have been cutting the distance way too close for comfort:
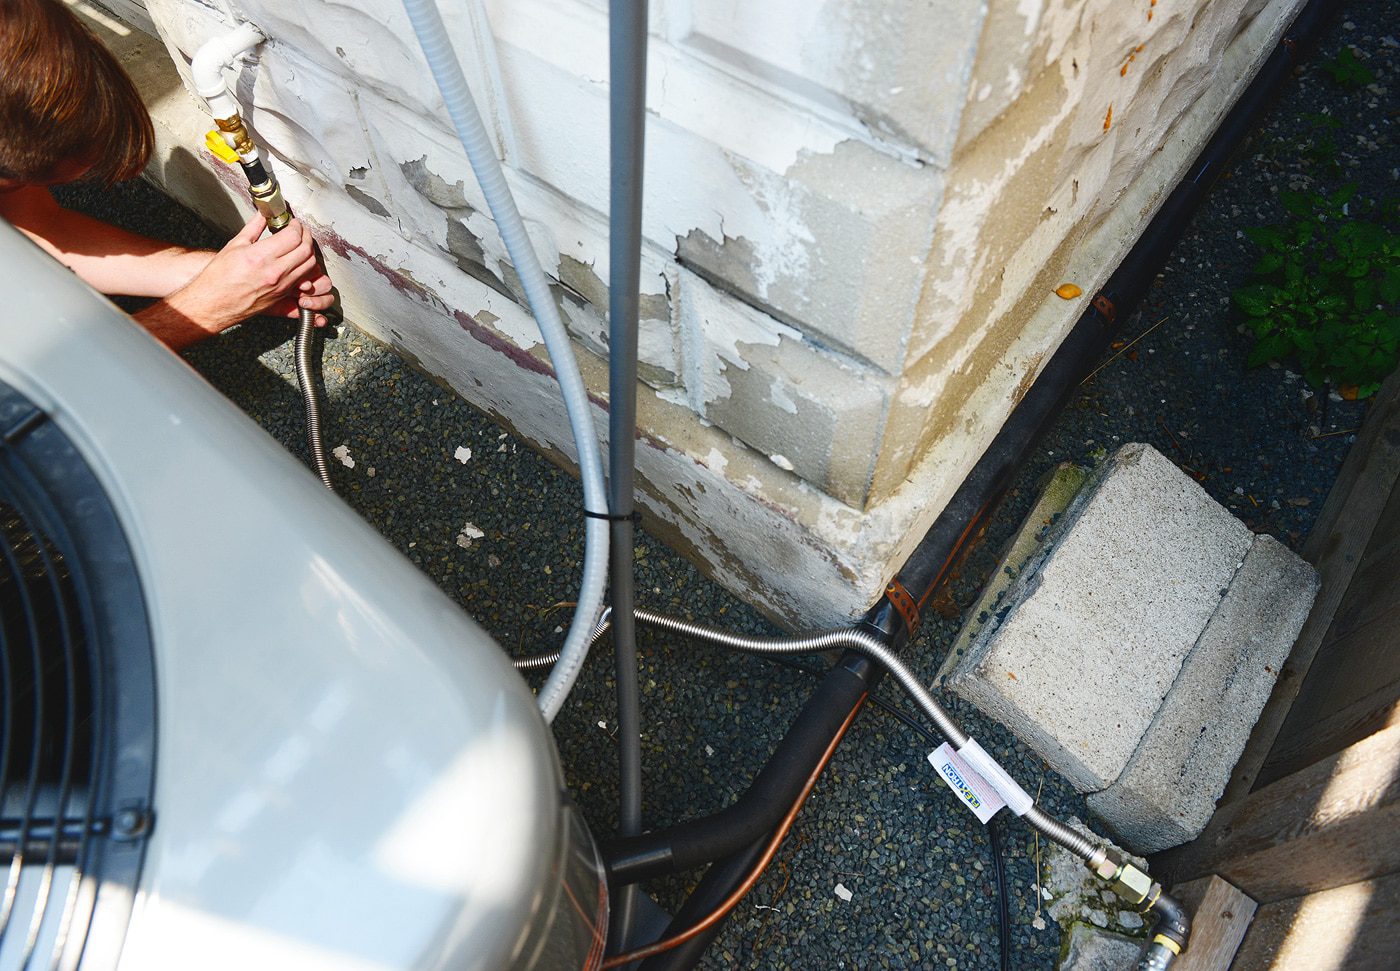
Between the white post and the AC units below, you can juuust see the line exiting the foundation. From there, the flex line flows to the right, where it meets the hard pipe along the fence. The hard pipe then connects to another flexible stainless line, which enters the bottom fo the fire bowl through a 1″ opening.
Operation could not be more simple. We simply turn on the flow of gas by moving the yellow handle vertically in-line with the pipe, and we ease the shutoff valve to the on position. I tend to turn the gas to about 25% and use a safety lighter or wooden match for ignition at the fire ring. The shutoff valve allows for easy flame control and ensures the perfect amount of warmth and ambiance.
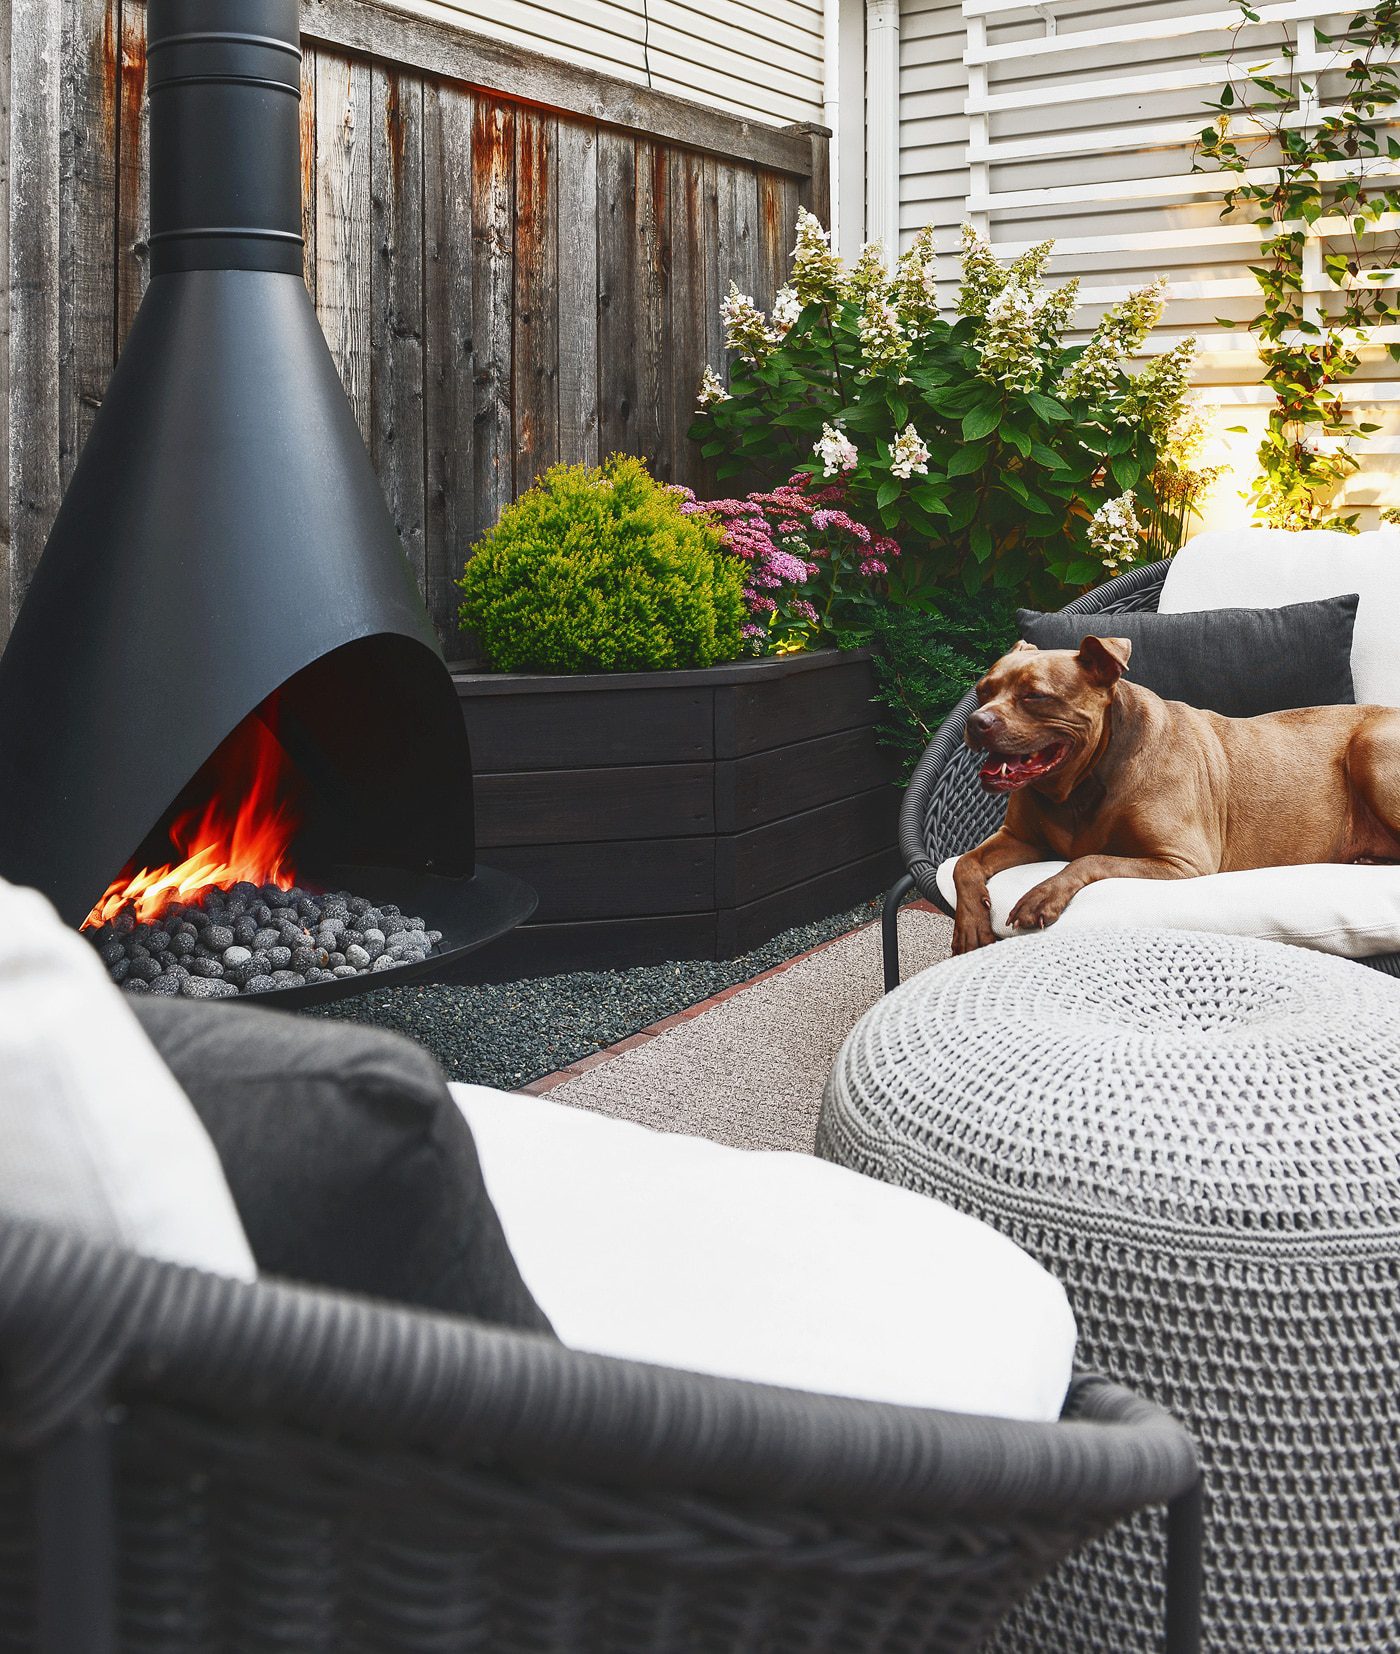
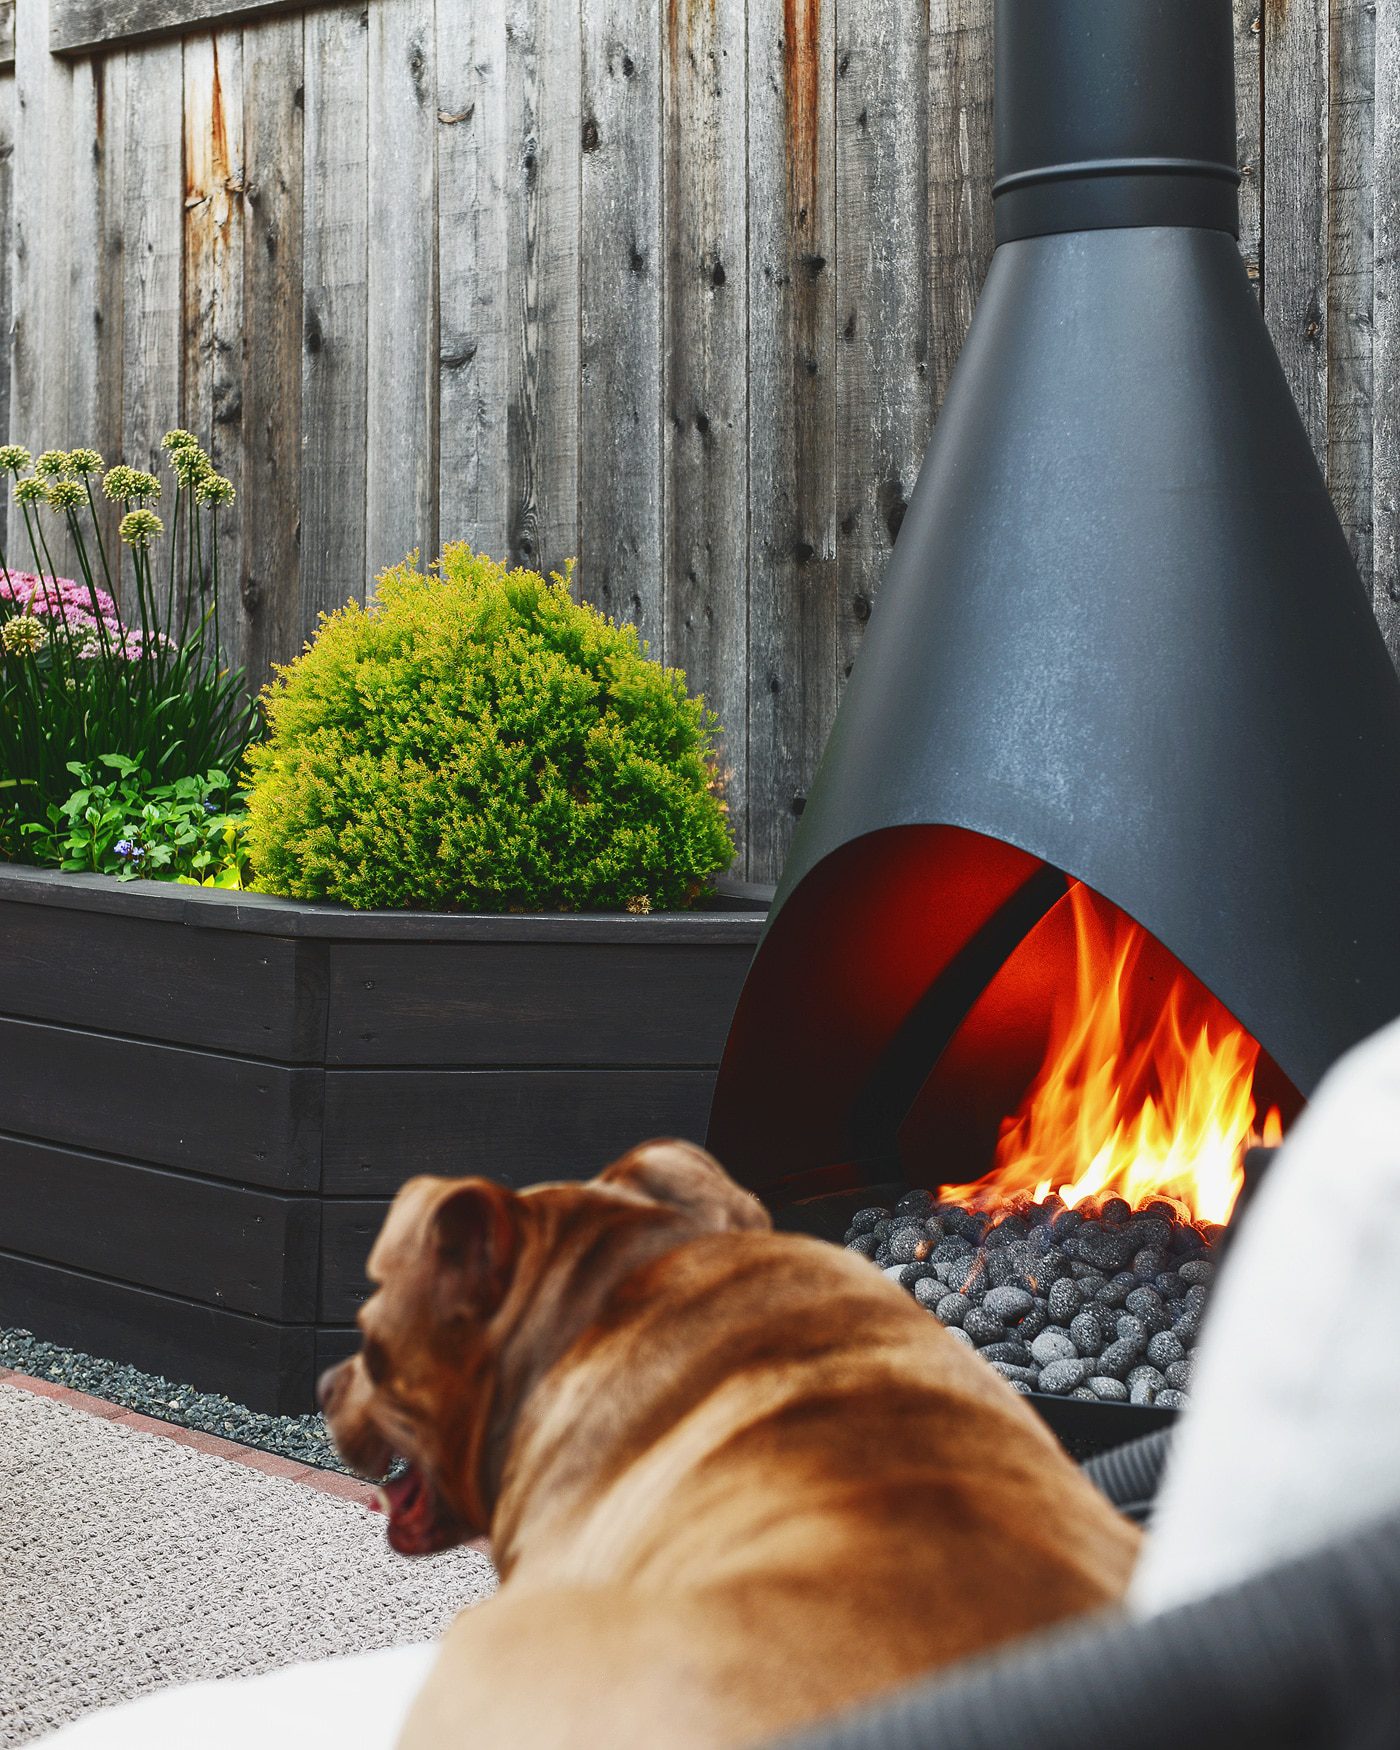
The flame height we were able to achieve (and the resulting heat!) on our test run was simply staggering. Per the norm, CC hopped right up into her favorite chair to bask in the warmth.
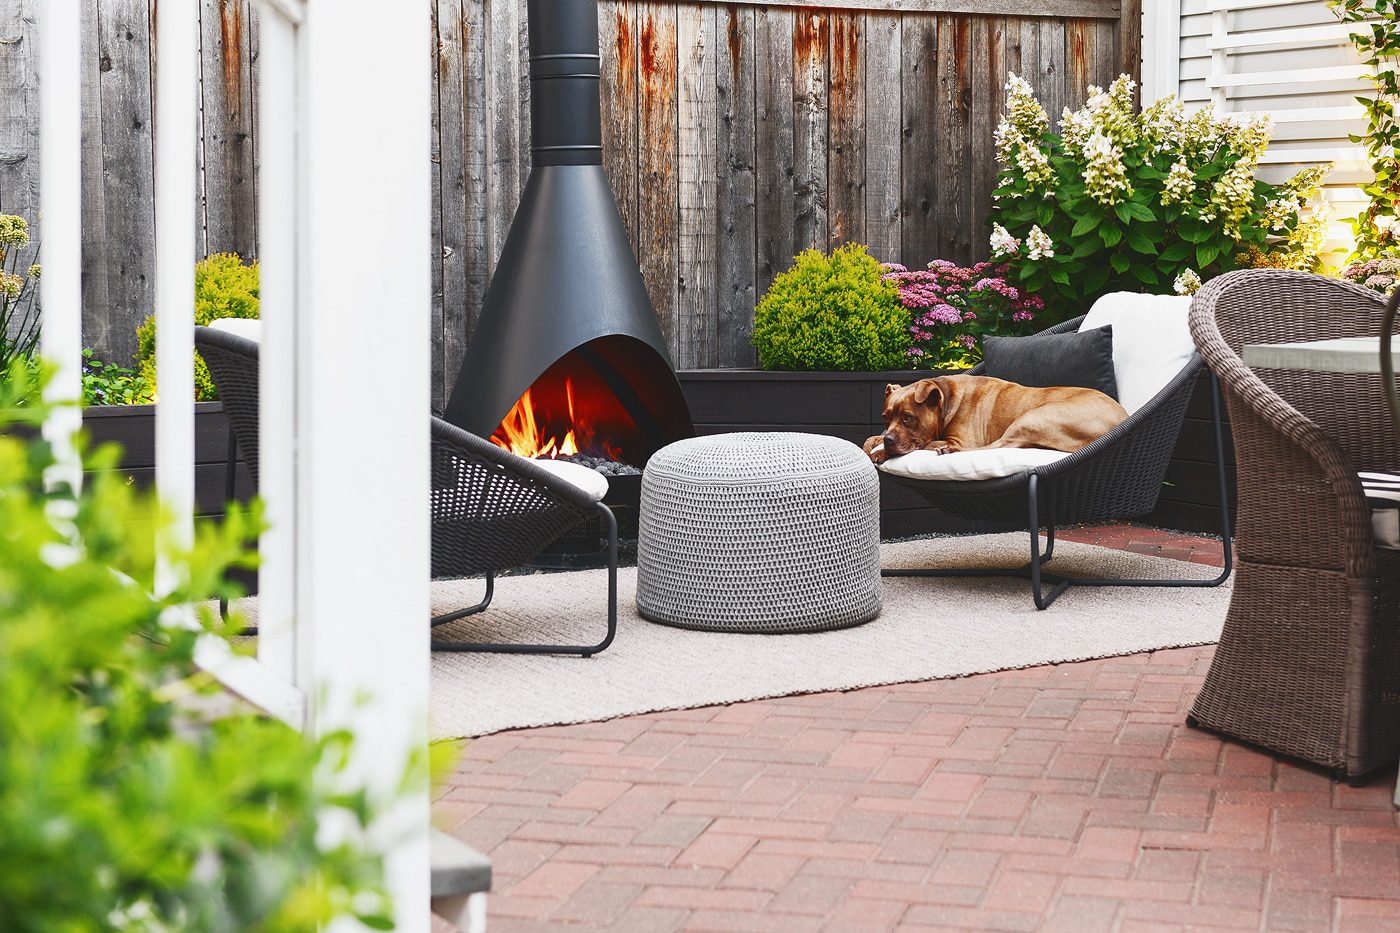
fireplace | raised garden beds | trellis | outdoor pillows | similar rug | similar dining chair
It’s been hot and humid here in Chicago for the last few days, but our initial test of the modified setup has proven promising! Large, consistent, flames seem to put out more heat than the propane tank ever could. We’ve also eliminated the need to store and exchange propane tanks while moving to a more cost-effective fuel source. All in all, this seems like a huge win and should help to extend patio season much further into fall – which, in Chicago, is a huge perk! We take patio season very, very seriously.
In This Post:

PS: This is how our raised garden beds survive the harsh Chicago winters!


Your yard and fireplace look amazing, the plants look so luscious, and that dog has the best seat in the house! Michigander here, we too love to have our fall last as long as possible.
Thank you! The plants are looking their best right about now! :)
This fireplace is gorgeous. It looks like it belongs there perfectly!
Paige
http://thehappyflammily.com
What a cool setup! Best wishes for a successful and lengthy patio season :)
Thank you! We’ll pull out the wool blankets to prolong it as long as possible.
Where are the chairs that CC is sitting on from? Great pictures and such a great backyard. It’s been so hot in Boston the plants are really suffering and I’m actually looking forward to cooler days when being outside is more comfortable! I don’t live here so it can be 100 degrees with dripping humidity, you know? :-) We went from that to 72 today!
The weather is so crazy right now! That’s August for ya.
Chairs are from Crate & Barrel, but they no longer sell them.
That looks so cozy! What a great update for you all & your lucky guests.
How is the powder coating holding up on your fireplace? Can you elaborate on the ‘issues’ you had with the spray painted finish? I imagine it peeled and rusted…but would love to hear about it. I just scored a vintage freestanding fireplace for $40 and I would love to use it outdoors as well. I live in the Northeast, so I know I will have to keep it covered over the winter.
Hi Audrey! Great question. The paint seemed like it was holding up well until we had a huge trmperature swing overnight and we woke up to paint that was crackled and flaking. The high-temp powdercoat has held up incredibly well and we had a custom cover made locally. Sounds like you got a great score for $40!
I Love, love, love what you have done here. We have been in the midst of designing our backyard/patio and have been planning a large covered area with a big fireplace but then everywhere we put it, it was covering something we loved: light, forest, etc. And then I came across your pictures and fell in love with a more minimalist look for the fireplace. But now am in the hard part of finding one. any more tips on what to look for? We are wanting to keep ours wood burning so I really like the large round size of yours vs the flat back that I’m seeing a lot of. Can you give more details about yours as far as size goes and what I should be looking for in my hunt? Basically I want to come steal yours, but don’t think you’d appreciate that too much. Great job, it’s all so beautiful.
Hi Beth! We like our fireplace just where it is, thank you very much. :) Our fireplace is a Preway – identical to this one here. Although we found ours on craigslist in Madison, WI for a tiny fraction of that price and had to drive 6 hours round trip to pick it up. The Preway units feature a round ‘pan’ and are not flat on the back like many of the Malm (and knockoff) units. Our advice is to be patient and keep your eyes open. Craigslist, Facebook Marketplace and eBay are all great resources and they CAN be found for a fair price if you keep looking and jump on new listings quickly. Good luck with your hunt!
Sorry, so many questions, I see that you guys had a cover made for yours to protect it in the winter. We live in KC so pretty similar chilly winters and crazy weather as Chicago. Do you think if your patio was covered you would be able to utilize this fireplace in the winter (when it’s not snowing or icing ;)? OR would that be a no go as it might crack. I do realize you are not an expert, but I thought your opinion would be good.
Hey Beth! We used a high heat powder coat, so I think it might be able to sustain the temperature shift! Make sure that you’re specifying the high heat powder coat, but if you’re having that professionally done (which I assume you would!), make sure to ask them this same question. :)
Wow, what an awesome setup! We have a cone fireplace that we used for a season with wood, but we moved to a new home with a screened in porch area and are planning to convert to gas. We originally were planning on propane, but reading this has made me reconsider – – sounds like a grill tank doesn’t get you too far! How has your gas bill been during peak patio season?
Hi Jen! We generally use the fire pit a once or twice a week for an hour or less, and maybe once a month for 4-5 hours at a time. We don’t notice too much of a spike (since our gas bill is always sooooo much lower through the summer than in the winter months anyway!) We HIGHLY recommend plumbing for gas if possible. The propane tank freeze-ups made it a hassle to utilize in the cooler months.
How did you finish out the top so rain didn’t it? As well as the base? Did you drill holes for drainage? What type of rocks are those? I am converting our outdoor wood burning pre way to the propane burner (we do not have access to NG). I’m just curious about drainage! Thanks!
We have a cap on the chimney and we drilled drainage holes in the bottom before adding the rock!
[…] Source – Yellow brick house […]
[…] Source: Yellow Brick Home […]
[…] Source: Yellow Brick Home […]
Hi,
Very informative. Great results! This may be way too late… wondering if you could share the contractor’s name who helped with the gas line hookup? Thanks so much.
Chris