

I’ve been working from home for several years now, but sometimes, I imagine what it would be like to go back to a bustling office job. When I worked downtown, I loved it. Well, I loved taking the train, grabbing my coffee from the bakery and – for the most part! – I loved the people I worked with. (Not always the work, but you know.) I do enjoy feeding off the energy of others, but over time, I’ve adjusted to home-working, and I’ve got my routine down. I like having a desk and curtains and rug and all the art that I chose, and I like that if I want to, I can take 15 minutes to drink my coffee on the front porch swing. But! I think, if someone offered me a sweet job downtown right now, would I do it? I go back and forth with my secret what if? answer all the time, because doesn’t it always seem like the grass is always greener?
Anyway, all this to say that I tend to start daydreaming more than ever when I’m feeling frazzled. Frazzled, because I start to feel like nothing has a place and the house is a mess (so much pet hair! I think, how long has it been since I’ve vacuumed?), and even though I have my row of paper trays and my desk drawers organized, there are still boxes of camera equipment and paint supplies tucked into closets. That’s not to say we haven’t put any effort into our home studio, but it’s always the first room to become the dumping ground during any renovation, no matter what we’re working on.
I’d like to change that.
We’re in the midst of a big purge as we prep for our annual yard sale, and we’re letting a lot of things go that we’d been saving for different rooms – for example, chairs or benches or ottomans – but as we renovate, sometimes those items don’t make their way in to those rooms, and so, they sit and accumulate dust. We’ve got a big ol’ pile ready to sell, and soon we’ll have a big ol’ mostly empty studio that needs some organization!
Enter our home’s second fauxdenza (but our third overall if you count this one in our old studio). Instead of IKEA’s kitchen cabinets that we’ve used in the past, we found a less expensive option using components from the BESTA line! On our shopping list:
1 – 48″ white BESTA frame
1 – 24″ white BESTA frame
3 – SELSVIKEN high gloss white doors
3 – BESTA suspension rails
1 – 6′ x 20″ pine project panel (found at Lowe’s)
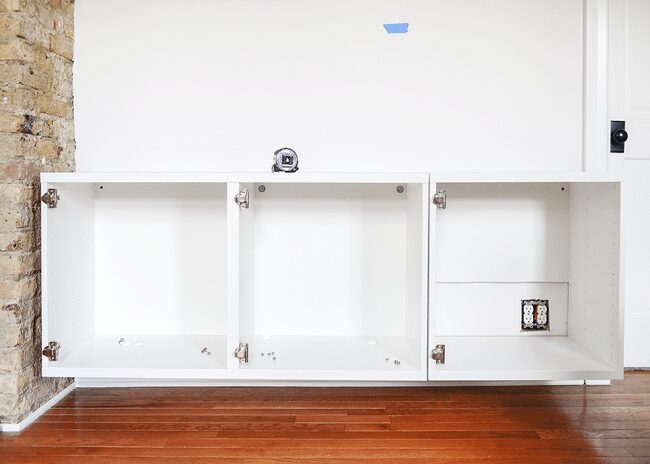
We wanted to create a fauxdenza (fun fact: a term originally coined by Anna so many years ago!) for the insane amount of storage it offers, its pretty looks and its ability to be wall mounted (so good for our hairy home with pets!). Once I had the frames put together, Scott mounted everything to the wall using the suspension rail system. We found it to be a little tricky at first, but once we got the first double-box hung, the single box was a snap. No big secrets here; we just followed the IKEA man’s instructions, but we did use toggle bolts as an extra precaution where we weren’t able to locate a stud.
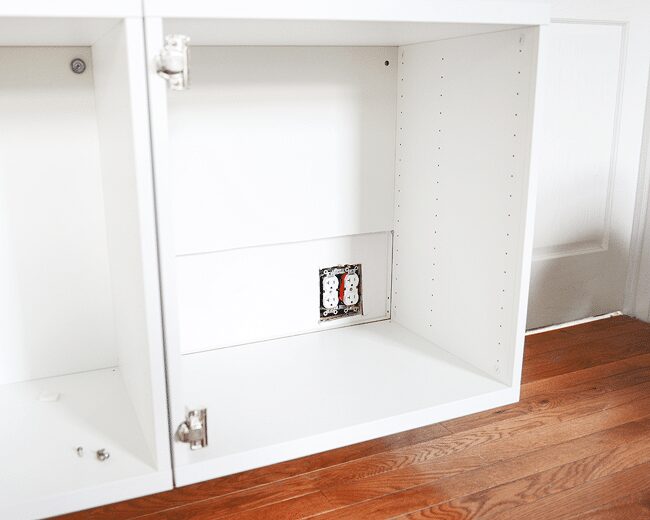
For the 24″ frame, we cut off the bottom half of the back for our electrical outlet, and to prevent it from slipping down in its track, Scott used tiny screws in the track to hold it in place:
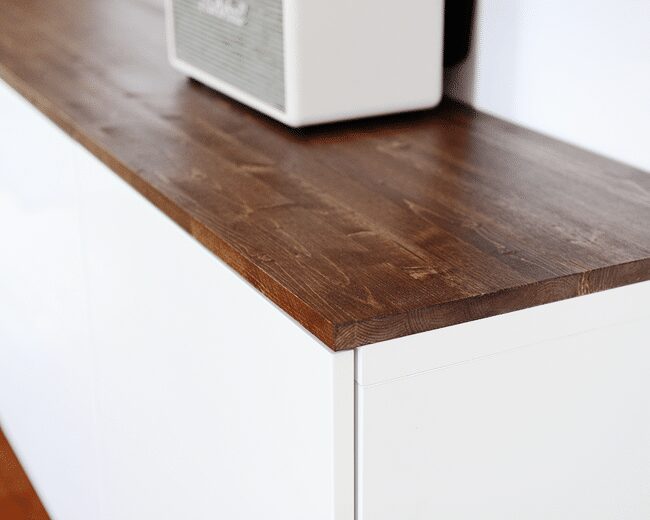
We added the doors next and leveled them up, and once everything looked good, we did a final measurement of the overall depth, doors included. The BESTA is a hair more than 16″ from front to back, so we ripped down our project panel using a circular saw, sanded the edges, and stained it in three steps: one coat of wood conditioner + two coats of Special Walnut + two coats of Polycrylic in a satin finish. Tip: An extra coat of wood conditioner on the ends of the project panel will help keep the stain even in color (where it typically wants to go much darker).

The next day, we attached it to the top of our BESTA units by using wood screws from underneath and inside the cabinets, and for any electronics, Scott used a 1″ paddle bit for cords to pass through the cabinet to access the outlet!
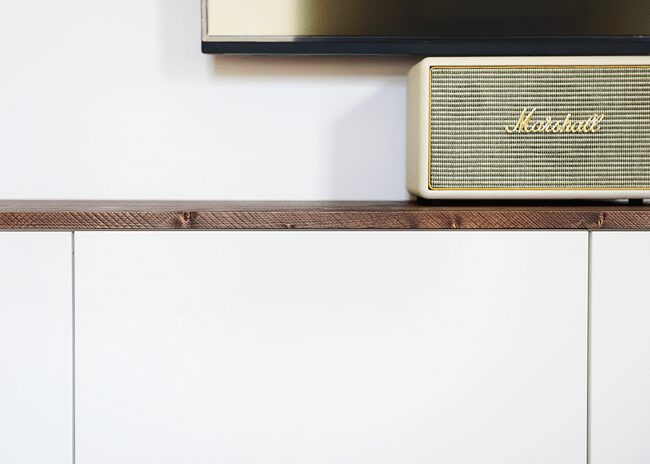
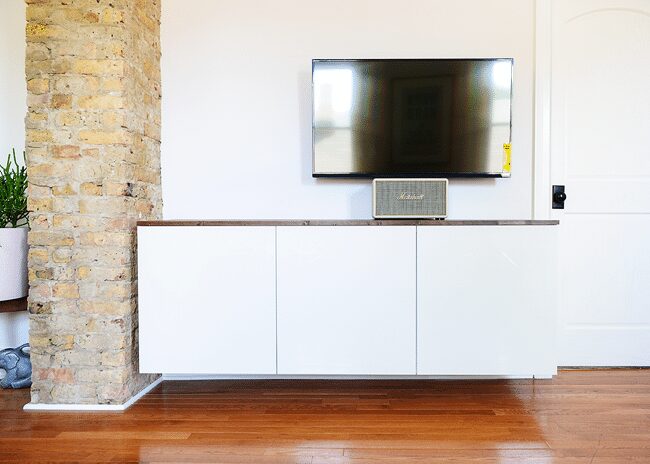
We mounted this smart television above and used a behind-the-wall cord kit to keep things mess-free (John did a great tutorial on how this kit works!). It’s off-centered right now, but we have plans to even it out with art. My favorite little Marshall speaker looks a little silly underneath, so we’ll likely be switching that out to a sound bar at some point. Until we get everything sorted, we’ve kept the protective plastic on the television, too! Consider this our starting point:
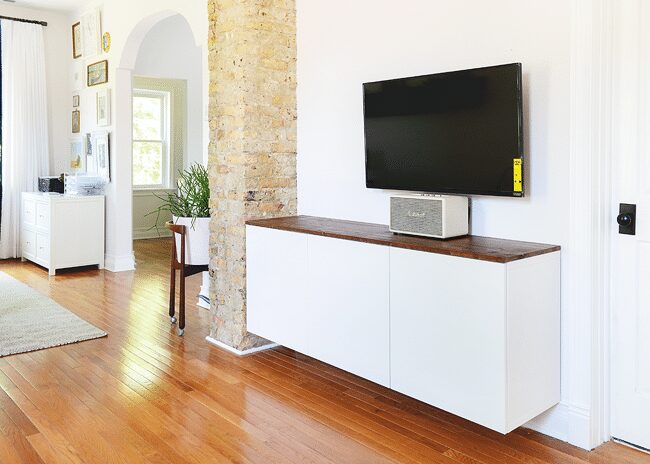
The photos below might give you a better idea of where it is in the room. We’re using the entire open space on the second floor for the studio, so this side of the room will ultimately act as a lounge area. We often use the television downstairs as a giant computer screen when we’re in the idea-gathering stage of projects; it will be so nice to do it up here now! When possible, I prefer to keep work and play separate (a necessity for work-from-home-ers, I think!), but I’d still like this work-slash-lounge area to be comfortable.
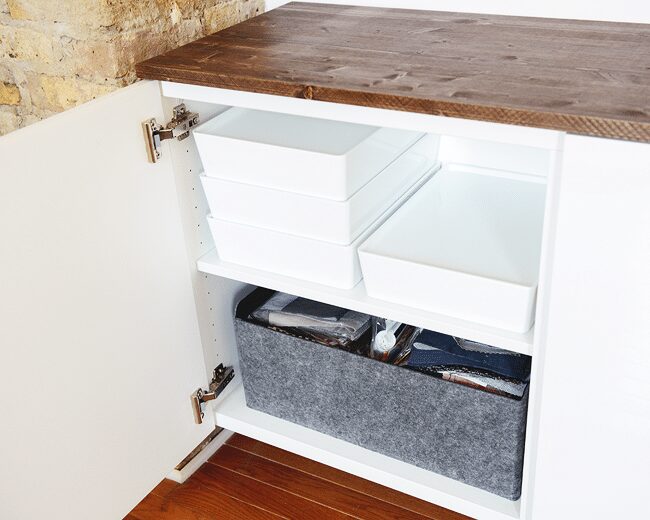
Inside, I’ve started grouping office-y things into little bins, and even after organizing camera gear, fabric scraps and lesser used painting supplies, there is still a lot of room to grow. I love a good, empty cabinet. So many possibilities.
Like I mentioned earlier, we’ve made two floating credenzas in the past using IKEA’s AKURUM (now SEKTION) kitchen cabinets, and while we have no regrets – the functionality and slim design packs a punch! – we wondered why we didn’t gravitate towards the BESTA from the very beginning. Maybe these options weren’t available a few years ago? The BESTA is less expensive ($300 for our dining room fauxdenza vs. $200 for this one) and has in-store top options should you choose to skip the DIY wood panel!
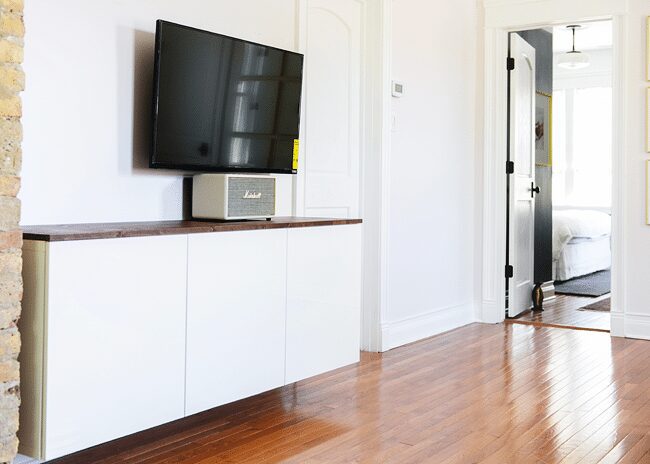
What you don’t see in any of these photos is the massive yard sale pile behind the camera. Once this room is cleared, we’ll have the space we need to start building our laundry cabinets, and then we can really start to plan this space for a proper lounge! That has always been our goal, but it was never a priority. We’re excited to put this room one step closer to the front burner!


First of all, just love you guys. I’m a fellow Chicagoan and it’s fun to watch your house develop!
What really hit me with this post, besides the fact that I really need a fauxdenza in our playroom/tv room, is that you too have a tidy looking house but angst about the stuff piled up in closets. This year, I purged two main closets. After I purged the first one in our playroom I felt light and free – probably because we are now using that area to hold weights/things the kids use to stay active all winter. Interestingly, after I purged the second area, which was three tall Ikea Billy bookcases with glass cabinets, I literally sat on my couch and cried. Anyway, be prepared for the emotion train. :) Can’t wait to see about your garage sale.
P.S. Think of you every day when I walk past OTAT on my way to the gym. What a great place!
Aw, I love this! We cannot WAIT to get rid of so many things that we thought we’d use. The yard sale is our very favorite every year, as our ‘stuff’ finds its way into new homes with new families, we get to hang out with our block, and at the end of the day, our house is that much lighter! Such a relief.
Please wave hello to that blue door for us! We need to go back and visit (and play with adoptable dogs!) soon.
Love this post! I am in the midst of trying to mount our Besta system and have been nervous about the process. This has been super helpful and encouraging! I also was trying to figure out the logistics of controlling any hidden cable boxes or other electronics inside the cabinets in a budget-friendly way so the link to YHL’s methods was super helpful! Thank you!!
Happy to hear! I did just update the post to say that we used toggle bolts to attach to the wall in conjunction with the BESTA suspension rail system. They hold a LOT more weight than a regular wall anchor. Something to keep in mind!
Looks awesome! Is the Besta deeper than the kitchen cabinets?
Oh, good question! I meant to cover that. The BESTA is about 16 1/8″ deep, whereas the SEKTION cabinets are 15″ deep. So the difference is small! I think when we made our first fauxdenza back in the last home, the upper cabinets were about 12-13″ deep (does anyone else remember?), but when IKEA switched to the SEKTION line, it seems they made them a little deeper.
Did the inside shelf come with yours?? We did the same thing but had no shelf. It’s hard to organize without one!
Huh, strange. Yes, each unit came with a shelf!
I had to purchase one separately.
When is the yard sale?! Would LOVE to stop by!
Hi Kelly! Please send us an email if you’d like to know more: team AT yellowbrickhome DOT com
Wow, that’s awesome. We’re planning on doing something similar in our office and I have a dumb question. With all the potential options that are out there (even when you narrow it to Ikea, it’s still a lot), how do you guys determine which units to modify into a fauxdenza? I’ve spent so much time analyzing all sorts of types of cabinets and wall units, but I’m always anxious to make a decision because I feel like I don’t know what qualities are important to look for.
Definitely the beauty of a fauxdenza is in its simplicity. Our wall that it’s on is 73-ish inches, so we knew we had to be just under that. I think in total, ours BESTA unit comes to just about 71, since the units are a little smaller than 48″ and 24″. For us, we took into account what we would be storing: camera stuff, craft supplies, a few work-related binders and books and surplus (pet) painting supplies. On our way to IKEA, we were set on buying kitchen cabinets, but stumbled across the BESTA (in the media cabinet section of the store) and realized that not only was it cheaper, but it was just as customizable! IKEA has a little BESTA planner you can try out on the computer (just like the kitchen cabinets), and we put together the most basic and simple unit – 3 cabinets with one shelf each. They also had stackable options, glass door options, etc, etc! In the end, simple was best. While we were still at IKEA, we picked up those white and gray bins to make organizing super easy.
My biggest tip would be start by listing out what you want to store in the cabinet, and have fun choosing the finishes that YOU like the best!
Do you have a cable box or gaming units in your fauxdenza? I have both I need to deal with. I saw the remarks about the glass door but I hate looking at the mess and would prefer they be behind closed doors… not sure what to do… Do you have any thoughts you could share? Any other solutions.
We don’t. We have an Apple TV that we have on a bracket mounted to the back of the television! Otherwise, you may need to keep the doors open when in use so they don’t get hot, or add vents to the bottom of the fauxdenza?
I’m SOOOOO glad that we’re not the only ones who collect misc bits (furniture, fixtures, etc) for rooms and then they don’t get used. I guess that’s the trick with vintage stuff, right? You have to grab it when you see it lest you suffer buyer’s remorse down the line. We have some stuff that I look at and think “What did we expect to put this.” But I keep reminding myself that we’re not nearly done and time will tell.
The fauxdenza looks awesome, of course. It’s great to have more separation between working and living. That is SO important!
Hold on to those things until you’re done! You’ll regret it if you don’t!
I love this!
How high off the ground did y’all mount it?
It’s 6″ off the ground, and it sits right above our baseboards. :)
Love it, especially next to the exposed chimney. You guys always do such a great job on these projects! Can you tell me where you got those white stackable storage bins inside your fauxdenza? They look really practical and elegant.
Thanks, Sheila! The bins came from IKEA: http://www.ikea.com/us/en/catalog/products/20280207/
Looks so good!! Love how this space is coming together!
This is really nice. Thanks for the information.
Cool! Even I’m thinking of mounting a besta system in our office. I am more encouraged now after reading your post
love the idea :)
[…] building my fauxdenza. I’m working on one like this one (from Yellow Brick […]
Hi there!
Looking to create something like this but to sit directly on the floor. Can I simply add legs or would you say this works only for suspension? Would greatly appreciate any tips!
Thank you,
Lynda
This unit was originally made to sit directly on the floor, so you could always do that! But yes, you could easily add legs as well. IKEA has several leg options, but any short furniture legs from hardware stores, Etsy or elsewhere would work just as well. The beauty of these units is the ability to make them 100% your own!
An update to anyone attempting to build this in 2018: the shelves and door hinges are sold separately when youre buying the besta in sections like this.
Love the result and how well it works in your space, inspired to try it with drawers.
[…] console or “fauxdenza” look (you can Google for TONS of examples like this one and this one). We decided to just go with the simple white legs for now, but still secured each box to the wall […]
[…] a floating console or “fauxdenza” look (you can Google for TONS of examples like this one and this one). We decided to just go with the simple white legs for now, but still secured each box to the wall […]